buttons Lexus GS350 2015 TIPS FOR THE NAVIGATION SYSTEM / LEXUS 2015 GS350 OWNERS MANUAL QUICK GUIDE (OM30E50U)
[x] Cancel search | Manufacturer: LEXUS, Model Year: 2015, Model line: GS350, Model: Lexus GS350 2015Pages: 94, PDF Size: 1.86 MB
Page 5 of 94

5
GS350_QG_OM30E50U_(U)
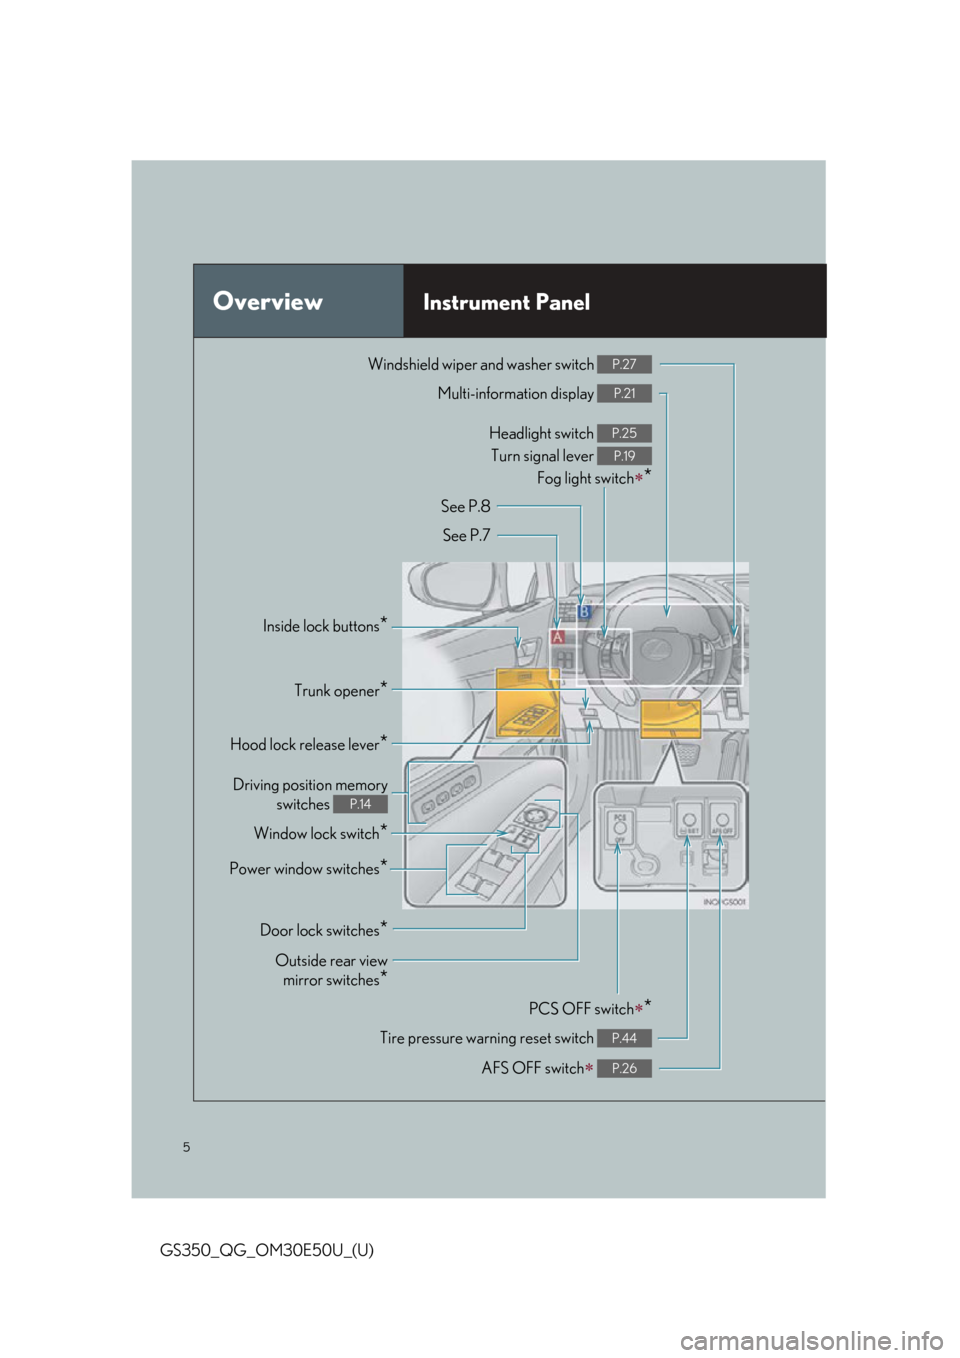
OverviewInstrument Panel
Windshield wiper and washer switch P.27
Multi-information display P.21
Headlight switch Turn signal lever
Fog light switch
*
P.25
P.19
Inside lock buttons*
Trunk opener*
Hood lock release lever*
Driving position memoryswitches
P.14
See P.8
See P.7
Window lock switch*
Outside rear view mirror switches
*
Power window switches*
Door lock switches*
PCS OFF switch*
Tire pressure warning reset switch P.44
AFS OFF switch P.26
Page 14 of 94

14
GS350_QG_OM30E50U_(U)
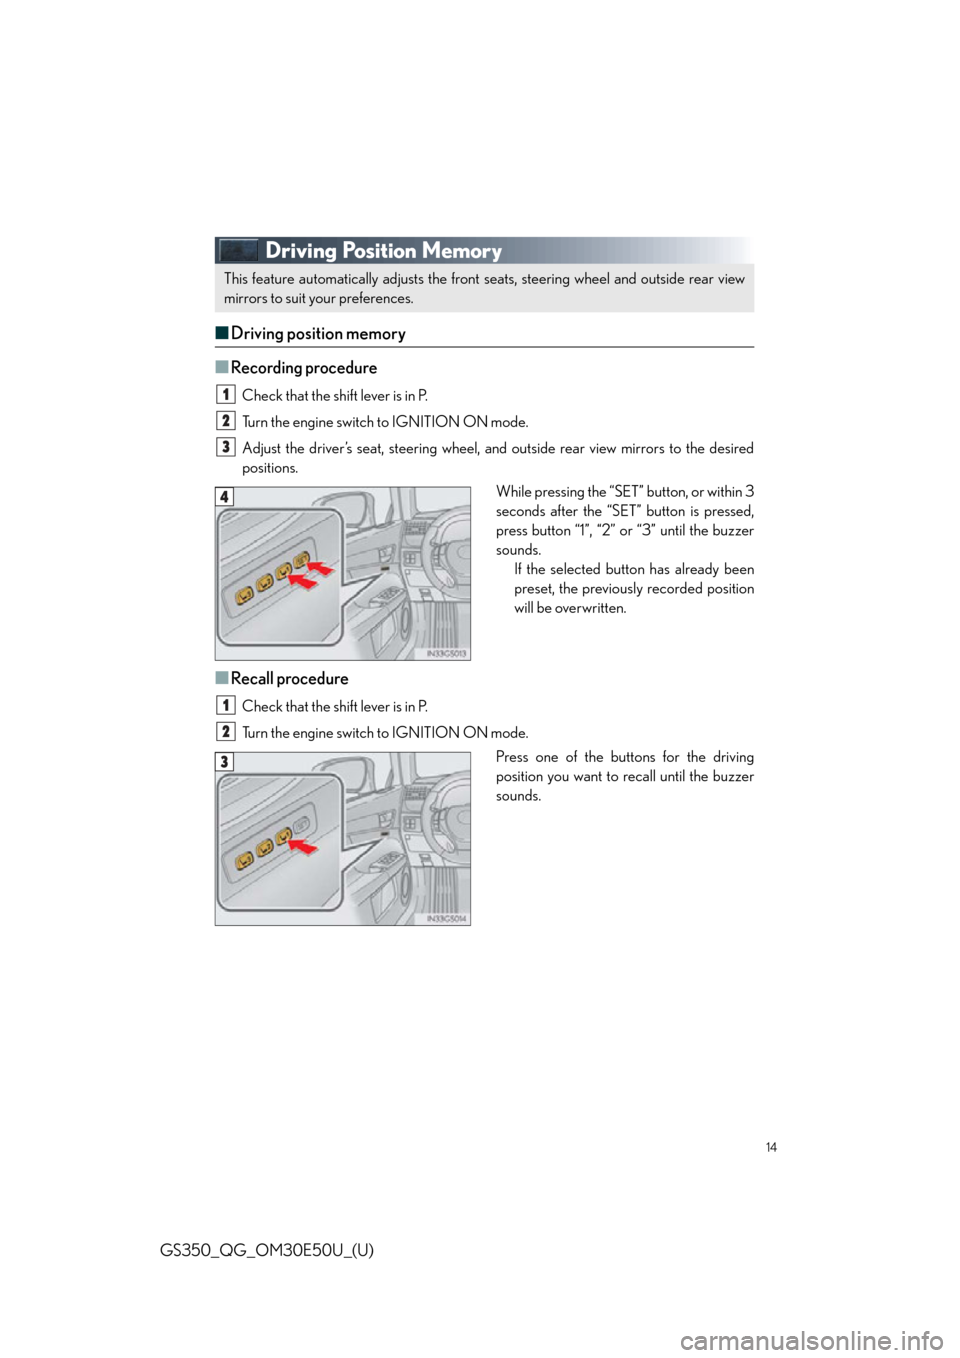
Driving Position Memory
■Driving position memory
■
Recording procedure
Check that the shift lever is in P.
Turn the engine switch to IGNITION ON mode.
Adjust the driver’s seat, steering wheel, and outside rear view mirrors to the desired
positions. While pressing the “SET” button, or within 3
seconds after the “SET” button is pressed,
press button “1”, “2” or “3” until the buzzer
sounds.If the selected button has already been
preset, the previously recorded position
will be overwritten.
■Recall procedure
Check that the shift lever is in P.
Turn the engine switch to IGNITION ON mode.
Press one of the buttons for the driving
position you want to recall until the buzzer
sounds.
This feature automatically adjusts the front seats, steering wheel and outside rear view
mirrors to suit your preferences.
1
2
3
4
1
2
3
Page 64 of 94

64
GS350_QG_OM30E50U_(U)
■Radio
Tuning to preset stations/channels
Scanning for receivable stations
Using HD Radio
TM Te c h n o l o g y ( f o r
U.S.A., if equipped)
Cache radio operation buttons
Press: Selects a preset station
Press and hold: Seeks for a station
Adjusting the frequency
■Entering station presets
Tune in the desired station.
Select “add new”.
Select “Yes” on the confirmation screen.
Select “OK” after settin g the new preset station.
Radio mode has a mix preset function, which ca n store up to 36 stations (6 stations per
page x 6 pages) from any of the AM, FM or SAT bands.
1
2
3
4
5
6
1
2
3
4
Page 81 of 94

81
GS350_QG_OM30E50U_(U)
Portable Audio Device Ports
Open the console box, open the cover and
connect the portable audio device.
Garage Door Opener (if equipped)
The garage door opener (HomeLink® Universal Transceiver) is manufactured under
license from HomeLink
®.
■ Programming the HomeLink® (for U.S.A. owners)
The HomeLink® compatible transceiver in your vehicle has 3 buttons which can be pro-
grammed to operate 3 different devices. Refer to the programming method below appro-
priate for the device.
Indicator light
Buttons
These ports can be used to connect a portable audio device and listen to it through the
vehicle’s speakers.
The garage door opener can be programmed to operate garage doors, gates, entry
doors, door locks, home lighting system s, security systems, and other devices.
1
2
Page 82 of 94

82
GS350_QG_OM30E50U_(U)
■Programming HomeLink®
Hold your hand-held transmitter 1 to 3
in. (25 to 75 mm) of the HomeLink
®
buttons.
Press and hold down the desired
HomeLink
® button.
For U.S.A. owners: While pressing the HomeLink
® but-
ton, press and hold down the button
on the hand-held transmitter until the
indicator light changes from a slow to
a rapid flash.
For Canadian owners: While pressing the HomeLink
® but-
ton, repeatedly press and release
(cycle) the button on the hand-held
transmitter every 2 seconds until the
indicator light changes from a slow to
a rapid flash.
If your garage door is of the rolling code
type: Press the training button on the motor-
head unit in your garage.
Press and hold the vehicle’s pro-
grammed HomeLink
® button for 2
seconds and release it. Repeat this step
once again. If the door does not open, press and
release the same button once again.
1
2
3
4
5