Lexus GS450h 2007 Do-it-yourself maintenance / LEXUS 2007 GS450H FROM JULY 2006 PROD. OWNER'S MANUAL (OM30A05U)
Manufacturer: LEXUS, Model Year: 2007,
Model line: GS450h,
Model: Lexus GS450h 2007
Pages: 548, PDF Size: 16.31 MB
Lexus GS450h 2007 Do-it-yourself maintenance / LEXUS 2007 GS450H FROM JULY 2006 PROD. OWNER'S MANUAL (OM30A05U)
GS450h 2007
Lexus
Lexus
https://www.carmanualsonline.info/img/36/15373/w960_15373-0.png
Lexus GS450h 2007 Do-it-yourself maintenance / LEXUS 2007 GS450H FROM JULY 2006 PROD. OWNER'S MANUAL (OM30A05U)
Trending: radiator, cruise control, instrument panel, height adjustment, wheel, four wheel drive, air filter
Page 341 of 548
321
3-7. Other interior features
3
Interior features
Seat heaters and ventilators (if equipped)
■The seat heaters and ventilators can be used when
The power switch is in “IG-ON” mode.
■When not in use
Set the dial to “0”. The indicator light turns off.
CAUTION
■Burns
●Use caution when seating the following persons in a seat with the seat heater on
to avoid the possibility of burns:
• Babies, small children, the elderly, the sick and the disabled
• Persons with sensitive skin
• Persons who are fatigued
• Persons who have taken alcohol or drugs that induce sleep (sleeping drugs,
cold remedies, etc.)
●Do not cover the seat with anything when using the seat heater.
Using the seat heater with a blanket or cushion increases the temperature of the
seat and may lead to overheating.
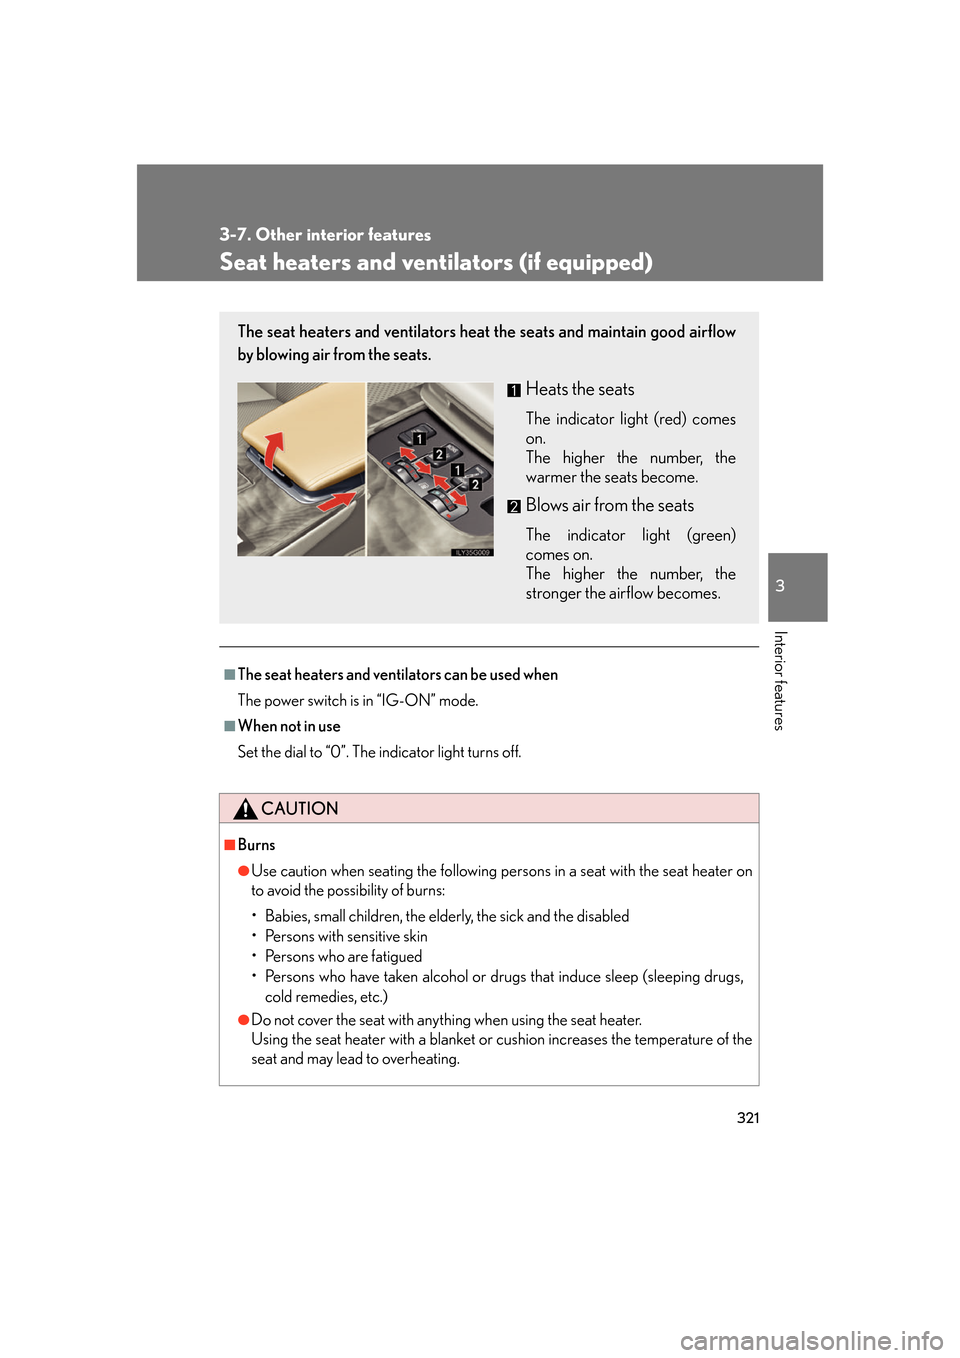
The seat heaters and ventilators heat the seats and maintain good airflow
by blowing air from the seats.
Heats the seats
The indicator light (red) comes
on.
The higher the number, the
warmer the seats become.
Blows air from the seats
The indicator light (green)
comes on.
The higher the number, the
stronger the airflow becomes.
Page 342 of 548
322
3-7. Other interior features
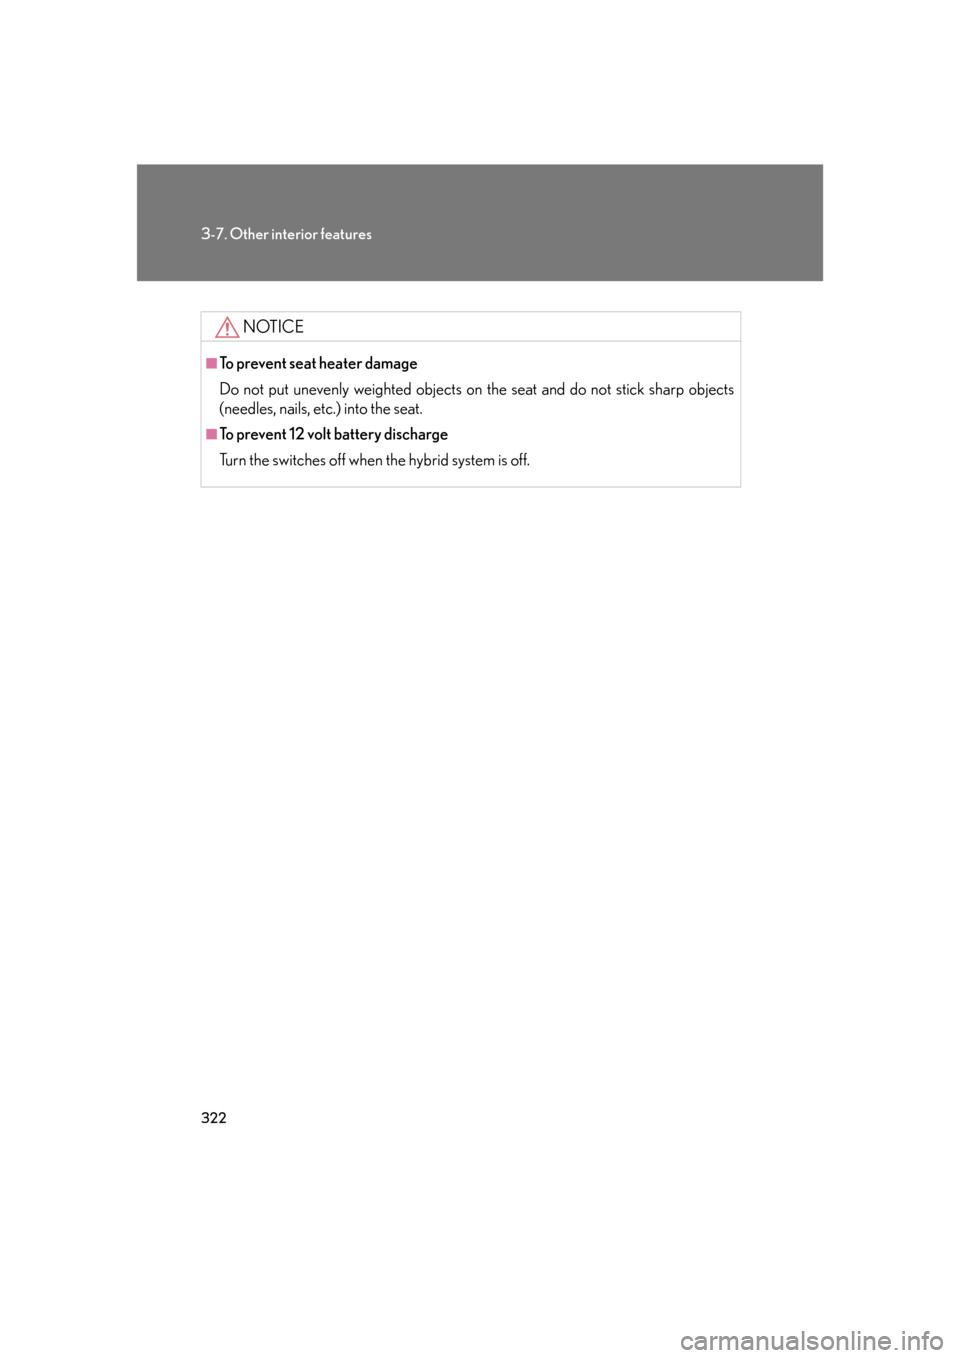
NOTICE
■To prevent seat heater damage
Do not put unevenly weighted objects on the seat and do not stick sharp objects
(needles, nails, etc.) into the seat.
■To prevent 12 volt battery discharge
Turn the switches off when the hybrid system is off.
Page 343 of 548
323
3-7. Other interior features
3
Interior features
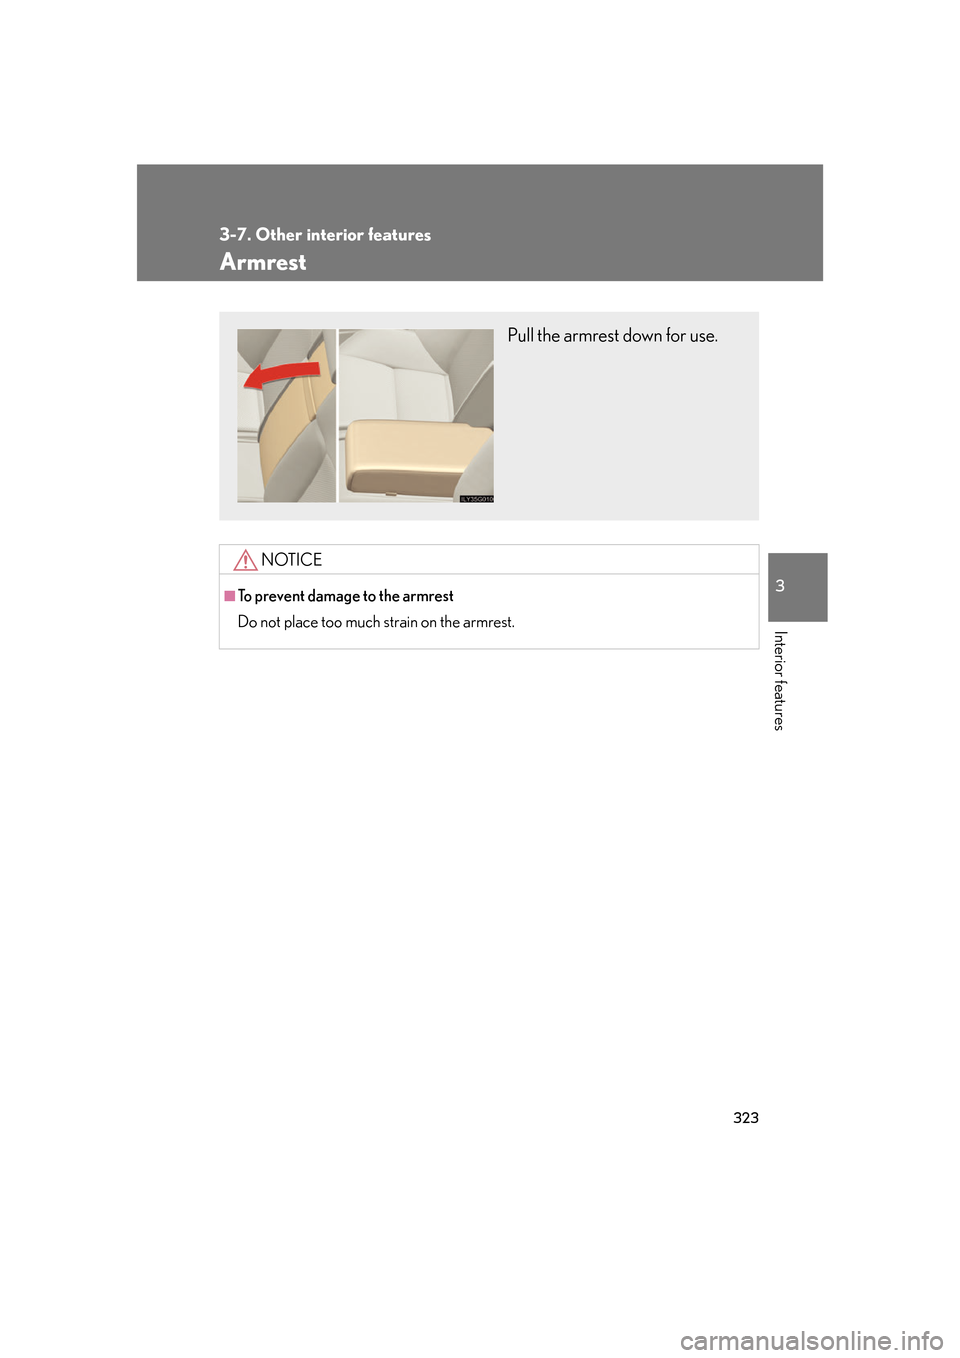
Armrest
NOTICE
■To prevent damage to the armrest
Do not place too much strain on the armrest.
Pull the armrest down for use.
Page 344 of 548
324
3-7. Other interior features
Rear sunshade
■The rear sunshade can be used when
The power switch is in “IG-ON” mode.
■Reverse operation feature
To ensure adequate rear visibility, the sunshade automatically lowers when the shift
lever is shifted to “R”.
However, the rear sunshade is raised again if any of the following occurs:
●Shift the shift lever into “P”.
●The switch is pressed again.
●The shift lever is shifted out of “R”, and the vehicle reaches a speed of 9 mph (15
km/h).
If the hybrid system is turned off when the rear sunshade has been lowered due to
the reverse operation feature, it will not be raised even when the hybrid system is
turned on again and the vehicle reaches a speed of 9 mph (15 km/h). To raise the
sunshade again, press the switch.
■After the power switch is turned “OFF”
The rear sunshade can be raised and lowered for approximately 1 minute.
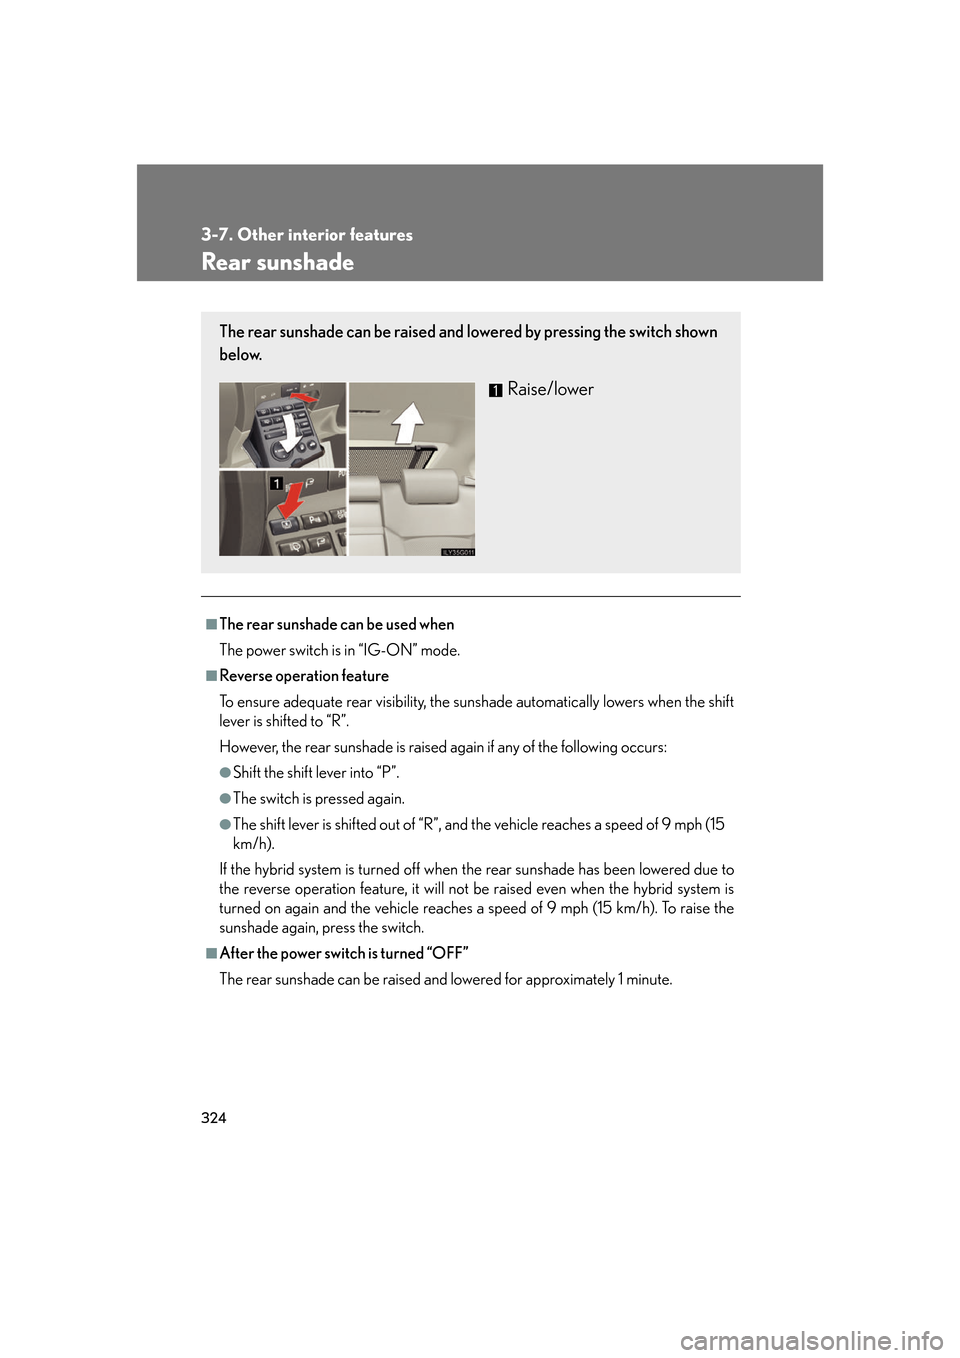
The rear sunshade can be raised and lowered by pressing the switch shown
below.
Raise/lower
Page 345 of 548
325
3-7. Other interior features
3
Interior features
CAUTION
■When the rear sunshade is being raised or lowered
Do not place fingers or other objects in the fastener section or in the opening.
They may get caught, causing injury.
NOTICE
■To prevent 12 volt battery discharge
Do not operate the rear sunshade when the hybrid system is off.
■To ensure normal operation of the sunshade
Observe the following precautions.
●Do not place excessive load on the motor or other components.
●Do not place objects where they may hi nder opening and closing operations.
●Do not attach items to the rear sunshade.
●Keep the opening clean and clear of obstructions.
●Do not operate the rear sunshade continuously over long periods of time.
Page 346 of 548
326
3-7. Other interior features
Floor mats
CAUTION
■When inserting the floor mat
Make sure the floor mat is properly placed on the vehicle carpet. If the floor mat
slips and interferes with the movement of the pedals during driving, it may cause an
accident.
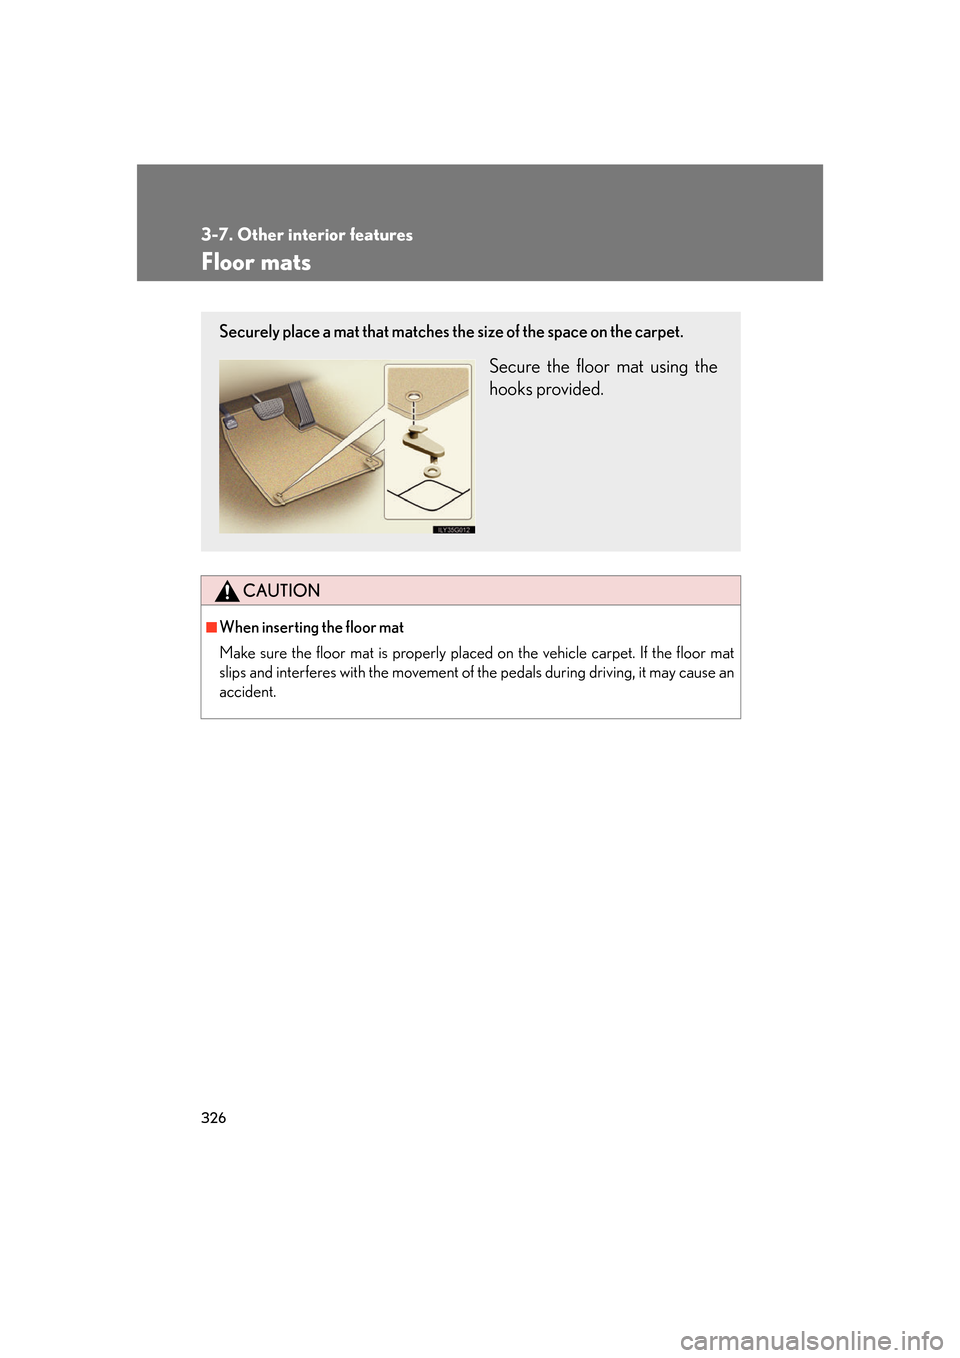
Securely place a mat that matches the size of the space on the carpet.
Secure the floor mat using the
hooks provided.
Page 347 of 548
327
3-7. Other interior features
3
Interior features
Trunk features
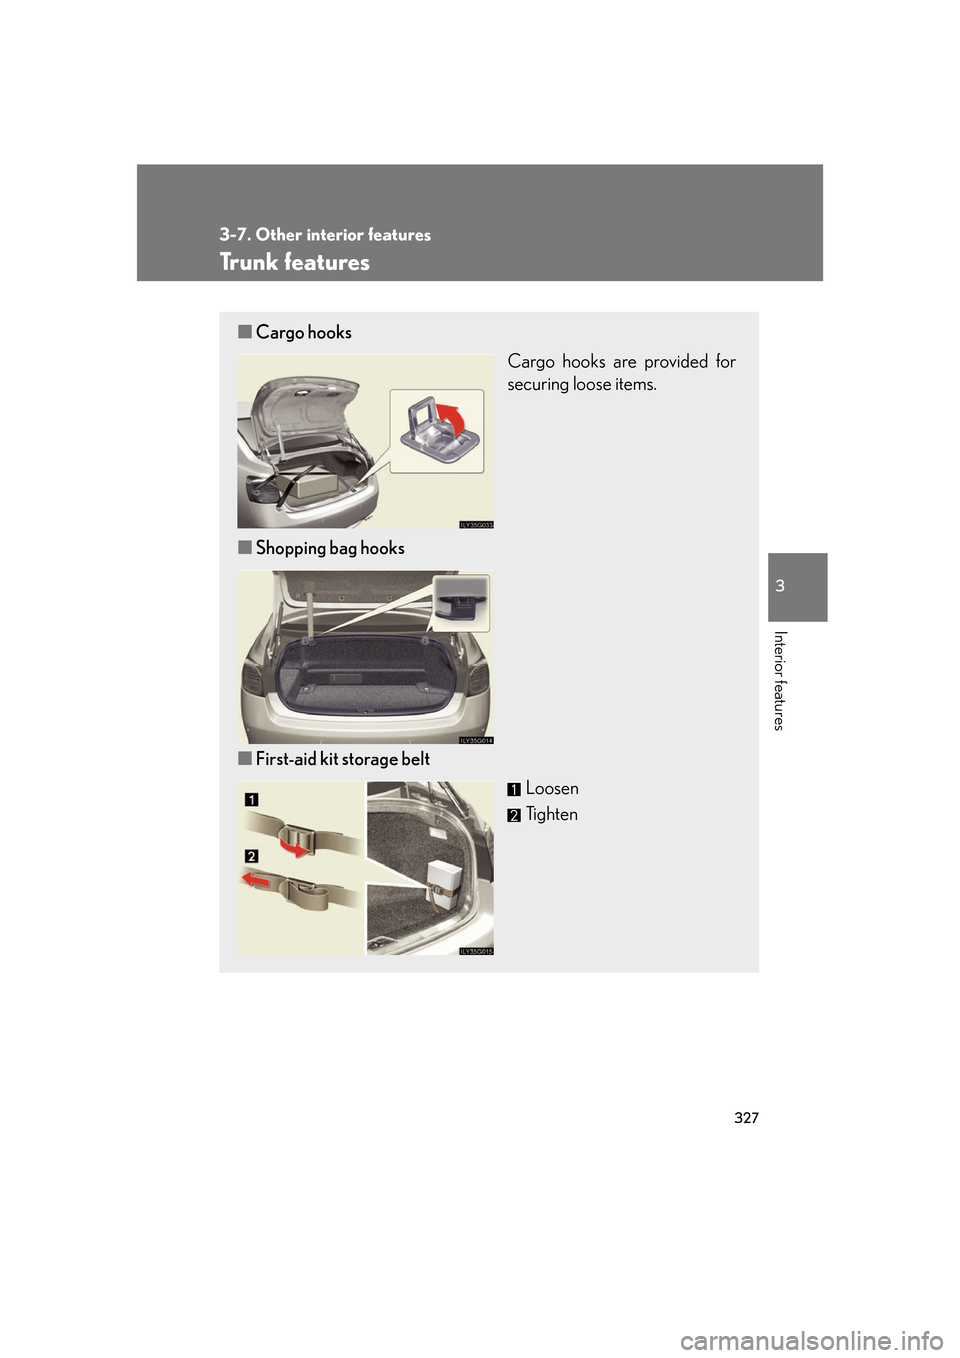
■Cargo hooks
Cargo hooks are provided for
securing loose items.
■ Shopping bag hooks
■ First-aid kit storage belt
Loosen
Tighten
Page 348 of 548
328
3-7. Other interior features
CAUTION
■When the cargo hooks are not in use
To avoid injury, always return the cargo hooks to their positions when they are not in
use.
NOTICE
■When closing the trunk
Do not leave the luggage mat lever hooked on the edge of the trunk.
The luggage mat may get damaged.
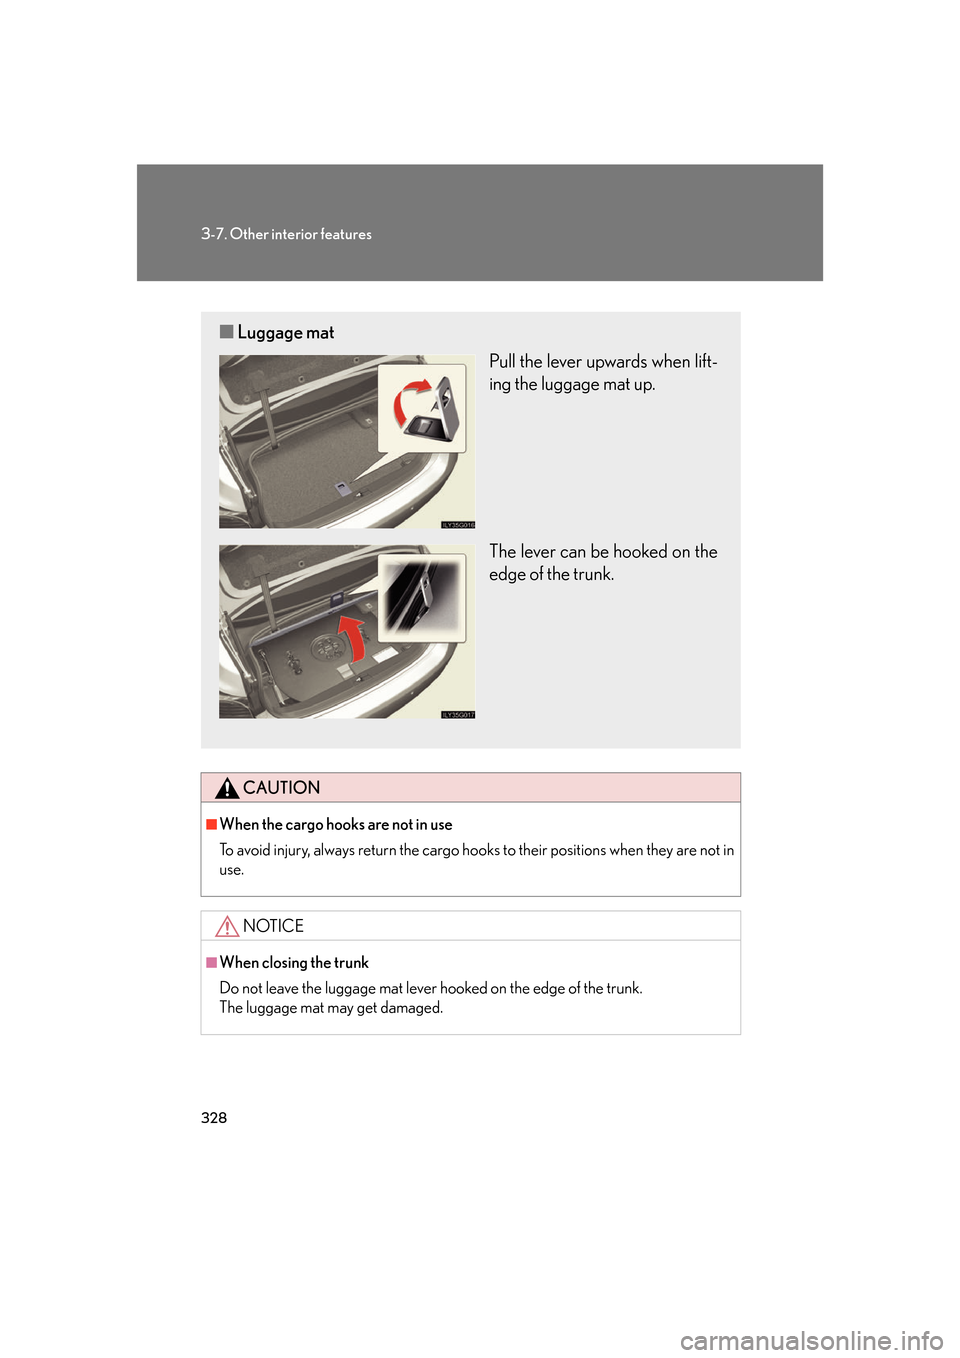
■Luggage mat
Pull the lever upwards when lift-
ing the luggage mat up.
The lever can be hooked on the
edge of the trunk.
Page 349 of 548
329
3-7. Other interior features
3
Interior features
Garage door opener
The garage door opener (HomeLink Universal Transceiver) is manufactured
under license from HomeLink.
Programming the HomeLink (for U.S.A. owners)
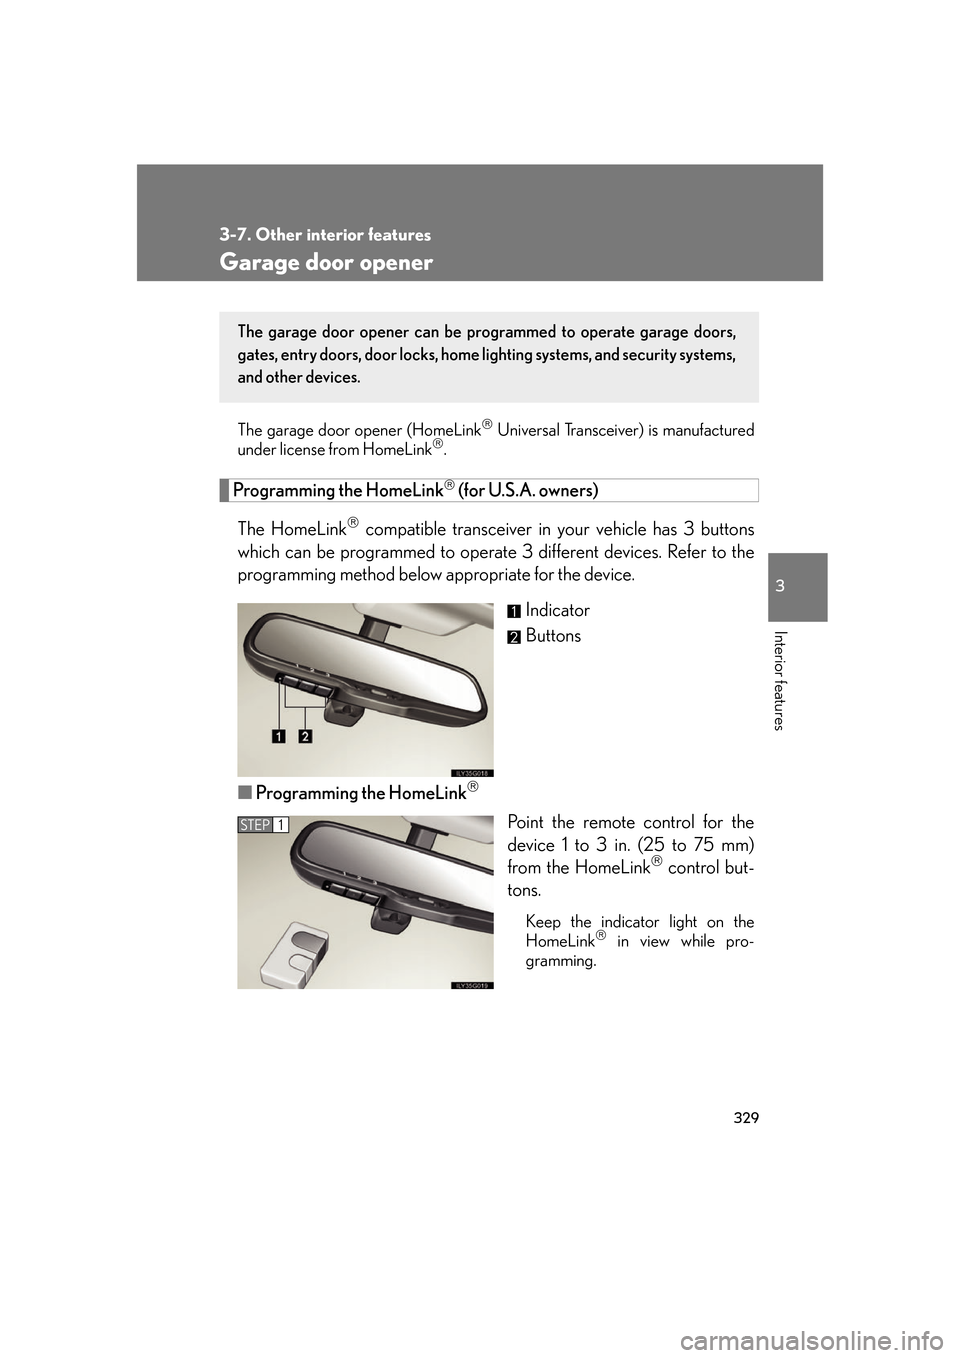
The HomeLink
compatible transceiver in your vehicle has 3 buttons
which can be programmed to operate 3 different devices. Refer to the
programming method below appropriate for the device.
Indicator
Buttons
■ Programming the HomeLink
Point the remote control for the
device 1 to 3 in. (25 to 75 mm)
from the HomeLink
control but-
tons.
Keep the indicator light on the
HomeLink in view while pro-
gramming.
The garage door opener can be pr ogrammed to operate garage doors,
gates, entry doors, door locks, home lighting systems, and security systems,
and other devices.
STEP1
Page 350 of 548
330
3-7. Other interior features
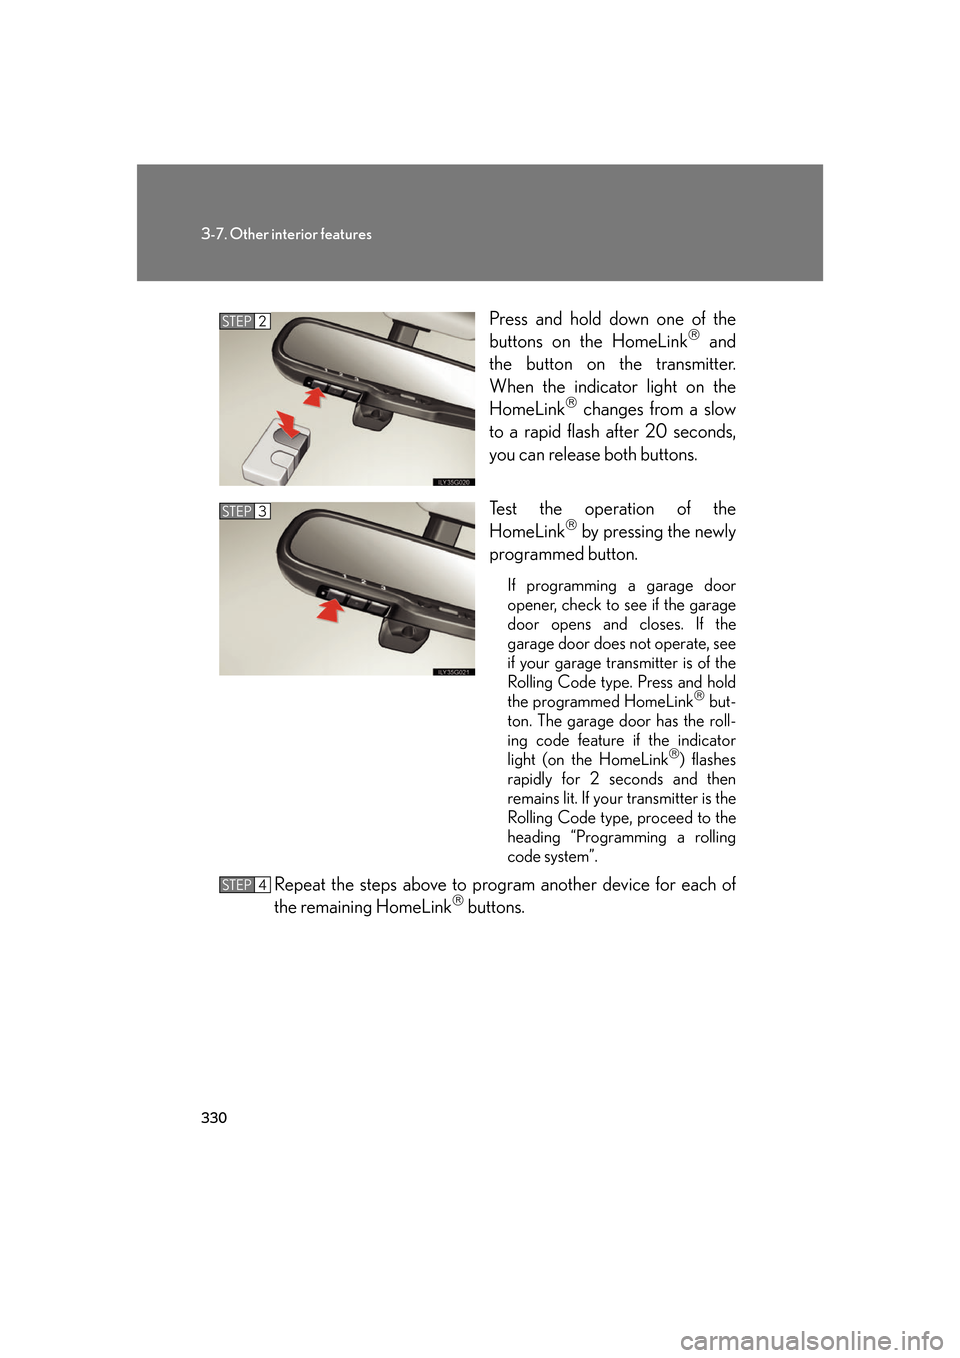
Press and hold down one of the
buttons on the HomeLink and
the button on the transmitter.
When the indicator light on the
HomeLink
changes from a slow
to a rapid flash after 20 seconds,
you can release both buttons.
Test the operation of the
HomeLink
by pressing the newly
programmed button.
If programming a garage door
opener, check to see if the garage
door opens and closes. If the
garage door does not operate, see
if your garage transmitter is of the
Rolling Code type. Press and hold
the programmed HomeLink
but-
ton. The garage door has the roll-
ing code feature if the indicator
light (on the HomeLink
) flashes
rapidly for 2 seconds and then
remains lit. If your transmitter is the
Rolling Code type, proceed to the
heading “Programming a rolling
code system”.
Repeat the steps above to program another device for each of
the remaining HomeLink buttons.
STEP2
STEP3
STEP4
Trending: oil, odometer, reset, height adjustment, seats, steering, lumbar support

