check Lexus GS450h 2007 Instrument cluster / LEXUS 2007 GS450H FROM JULY 2006 PROD. OWNER'S MANUAL (OM30A05U)
[x] Cancel search | Manufacturer: LEXUS, Model Year: 2007, Model line: GS450h, Model: Lexus GS450h 2007Pages: 548, PDF Size: 16.31 MB
Page 4 of 548
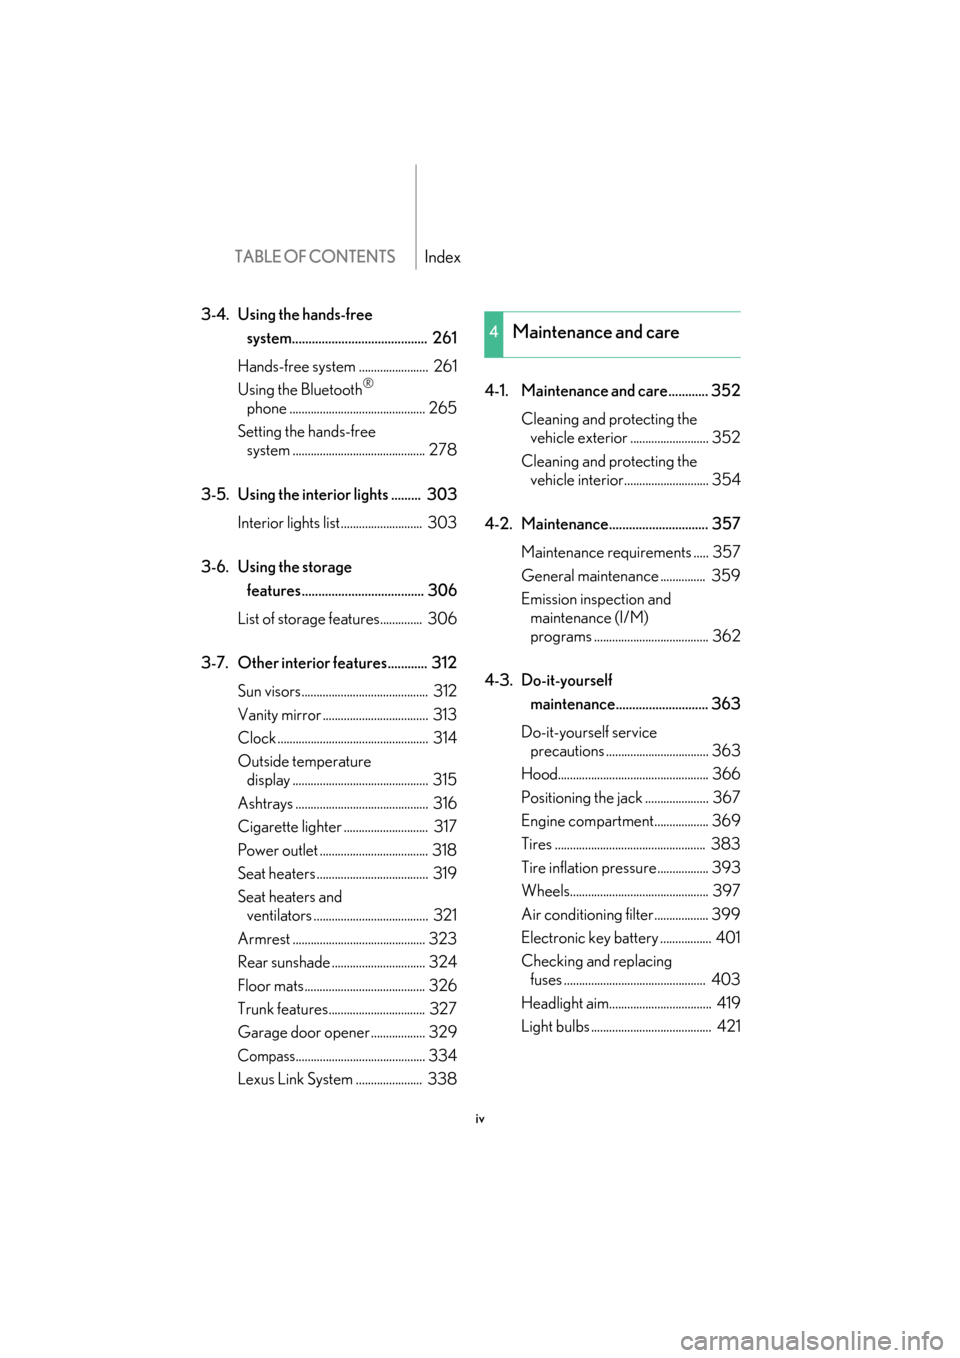
TABLE OF CONTENTSIndex
iv
3-4. Using the hands-free
system......................................... 261
Hands-free system ....................... 261
Using the Bluetooth
®
phone ............................................. 265
Setting the hands-free
system ............................................ 278
3-5. Using the interior lights ......... 303 Interior lights list........................... 303
3-6. Using the storage
features ..................................... 306
List of storage fe atures.............. 306
3-7. Other interior features............ 312 Sun visors.......................................... 312
Vanity mirror ................................... 313
Clock .................................................. 314
Outside temperature
display ............................................. 315
Ashtrays ............................................ 316
Cigarette lighter ............................ 317
Power outlet .................................... 318
Seat heaters ..................................... 319
Seat heaters and
ventilators ...................................... 321
Armrest ............................................ 323
Rear sunshade ............................... 324
Floor mats........................................ 326
Trunk features................................ 327
Garage door opener .................. 329
Compass........................................... 334
Lexus Link System ...................... 338 4-1. Maintenance and care............ 352
Cleaning and protecting the
vehicle exterior .......................... 352
Cleaning and protecting the
vehicle interior............................ 354
4-2. Maintenance.............................. 357 Maintenance requirements ..... 357
General maintena nce ............... 359
Emission inspection and
maintenance (I/M)
programs ...................................... 362
4-3. Do-it-yourself
maintenance............................ 363
Do-it-yourself service
precautions .................................. 363
Hood.................................................. 366
Positioning the jack ..................... 367
Engine compartm ent.................. 369
Tires .................................................. 383
Tire inflation pressure................. 393
Wheels.............................................. 397
Air conditioning filter.................. 399
Electronic key battery ................. 401
Checking and replacing
fuses ............................................... 403
Headlight aim.................................. 419
Light bulbs ........................................ 421
4Maintenance and care
Page 16 of 548
xvi
For your information
Main Owner’s Manual
Please note that this manual applies to all models and explains all equipment, includ-
ing options. Therefore, you may find some explanations for equipment not installed
on your vehicle.
All specifications provided in this manual are current at the time of printing. How-
ever, because of the Lexus policy of continual product improvement, we reserve the
right to make changes at any time without notice.
Depending on specifications, the vehicle show n in the illustration may differ from
your vehicle in terms of color and equipment.
Accessories, spare parts and modification of your Lexus
A wide variety of non-genuine spare parts and accessories for Lexus vehicles are
currently available in the market. You should know that Toyota does not warrant
these products and is not responsible for their performance, repair, or replacement,
or for any damage they may cause to, or adverse effect they may have on, your
Lexus vehicle.
This vehicle should not be modified with non-genuine Lexus products. Modification
with non-genuine Lexus products could affect its performance, safety or durability,
and may even violate governmental regula tions. In addition, damage or perfor-
mance problems resulting from the modi fication may not be covered under war-
ranty.
Installation of a mobile two-way radio system
As the installation of a mobile two-way ra dio system in your vehicle could affect
electronic systems such as the hybrid system, multiport fuel injection system/
sequential multiport fuel injection system , cruise control system, vehicle dynamics
integrated management, SRS airbag system and seat belt pretensioner system, be
sure to check with your Lexus dealer for precautionary measures or special instruc-
tions regarding installation.
High voltage parts and cables on the hybr id vehicles emit approximately the same
amount of electromagnetic waves as the conventional gasoline powered vehicles or
home electronic appliances despite of their electromagnetic shielding.
Unwanted noise may occur in the reception of the mobile two-way radio.
Page 29 of 548
9
1-1. Hybrid system
1
Before driving
■If a warning light comes on or a warning message is displayed, or the 12 volt bat-
tery is disconnected
The hybrid system may not start. In that case, try to start the sy stem again. If the
“READY” light does not come on, contact your Lexus dealer.
CAUTION
■High voltage precautions
The vehicle has high voltage DC and AC systems as well as a 12 volt system. DC
and AC high voltage is very dangerous and can cause severe burns and electric
shock that may result in death or serious injury.
●Never touch, disassemble, remove or replace the high voltage parts, cables and
their connectors.
●The hybrid system will become hot after starting as the system uses high voltage.
Be careful of both the high voltage and the high temperature, and always obey
the caution labels attached to the vehicle.
●Never try to open the service plug acce ss hole located in the luggage compart-
ment. The service plug is used only when the vehicle is serviced and is subject to
high voltage.
■Nickel-metal hydride battery
Your vehicle contains a sealed nickel-metal hydride battery. If disposed of improp-
erly, it is hazardous to the environment and there is a risk of severe burns and elec-
trical shock that may result in death or serious injury.
■Emergency shut off system
●Carefully check to see if there are exposed high voltage parts or cables. Never
touch the parts or cables. (
P. 5 )
●Carefully inspect the ground under the vehicle. If you find that liquid has leaked
onto the ground, the fuel system may have been damaged. Leave the vehicle as
soon as possible.
Page 55 of 548
35
1
1-4. Adjustable components
Before driving
Driving position memory system (if equipped)
Your preferred driving position (the position of the driver's seat, steering
wheel and outside rear view mirrors) can be entered into the computer's
memory and recalled with the touch of a button. It is also possible to set this
function to activate automatically when the doors are unlocked.
Three different driving positions can be entered into memory.
The same buttons are found on the front passenger's side, allowing the
position of the front passenger's seat to be memorized.
■ Entering a position to memory
Check that the shift lever is set in “P”.
Switch to “IG-ON” mode.
Adjust the driver’s seat, steering wheel, and outside rear view
mirrors to the desired positions.
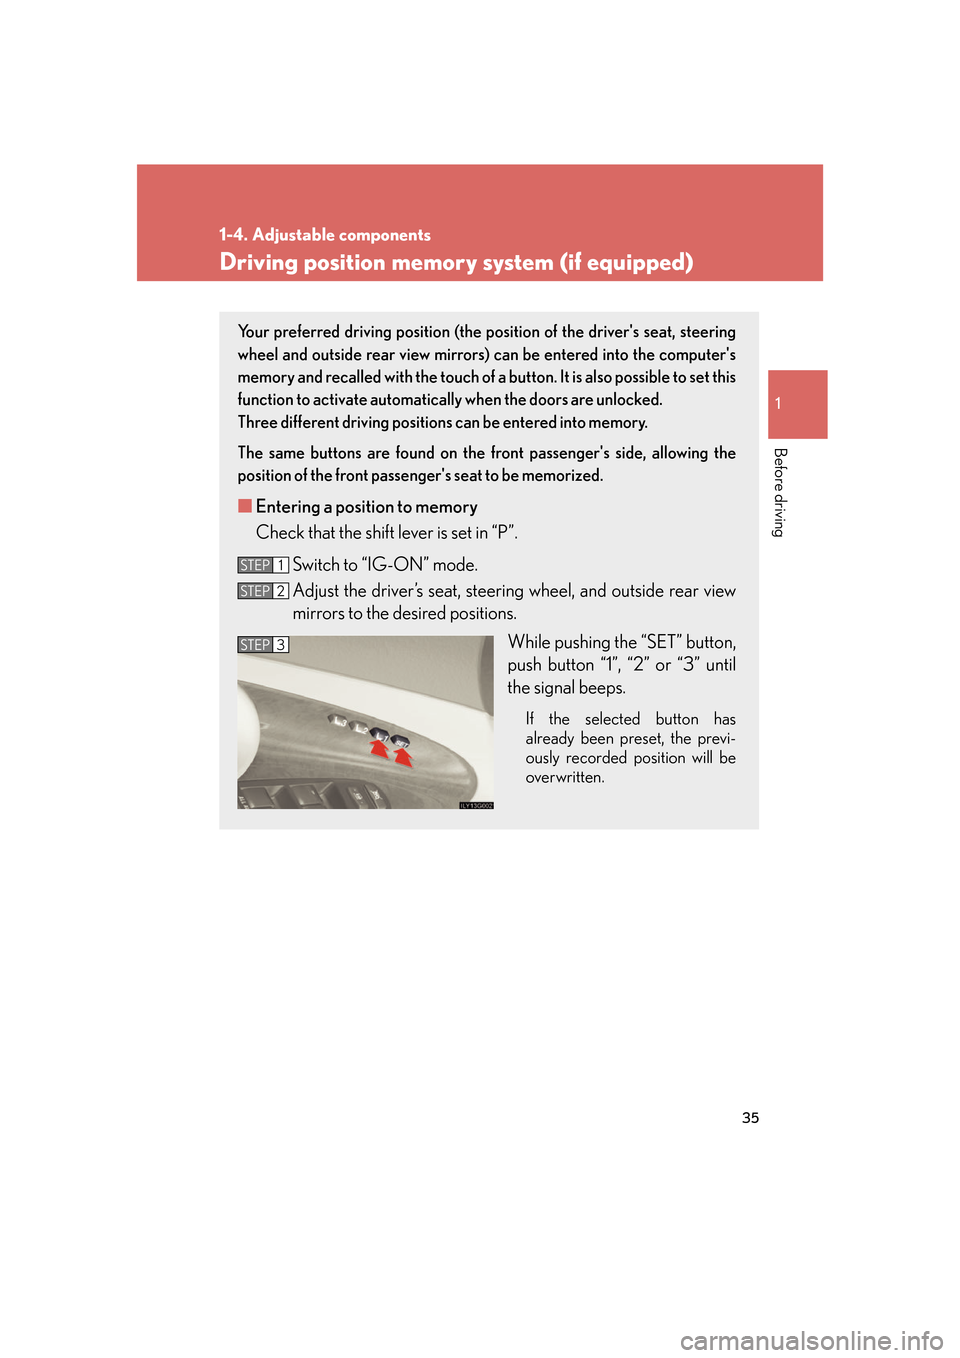
While pushing the “SET” button,
push button “1”, “2” or “3” until
the signal beeps.
If the selected button has
already been preset, the previ-
ously recorded position will be
overwritten.
STEP1
STEP2
STEP3STEP3
Page 56 of 548
36
1-4. Adjustable components
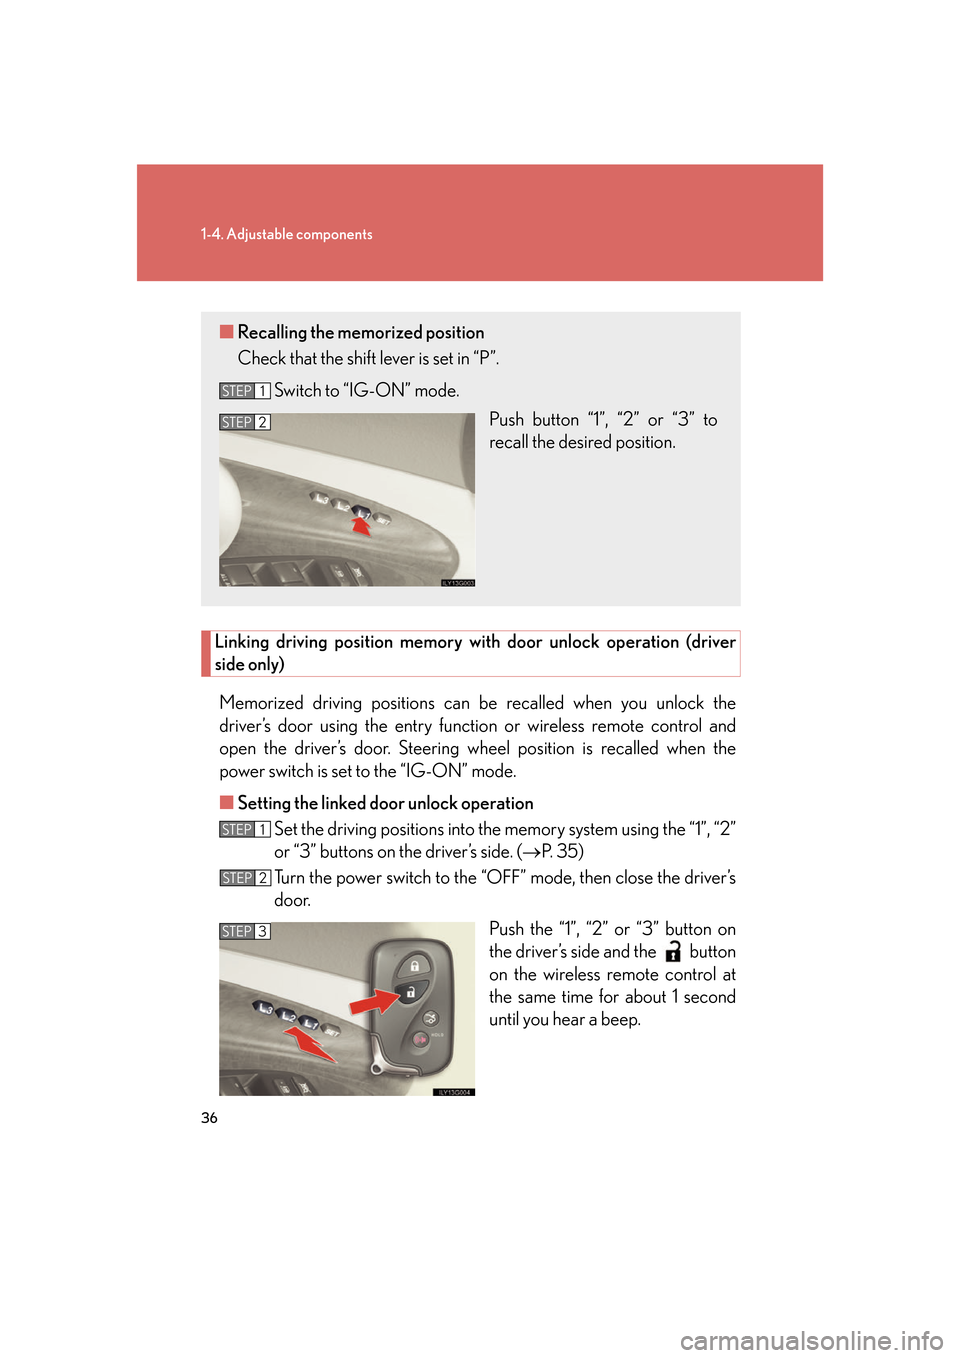
Linking driving position memory with door unlock operation (driver
side only)
Memorized driving positions can be recalled when you unlock the
driver’s door using the entry functi on or wireless remote control and
open the driver’s door. Steering wh eel position is recalled when the
power switch is set to the “IG-ON” mode.
■ Setting the linked door unlock operation
Set the driving positions into the memory system using the “1”, “2”
or “3” buttons on the driver’s side. ( P. 3 5 )
Turn the power switch to the “OFF” mode, then close the driver’s
door.
Push the “1”, “2” or “3” button on
the driver’s side and the button
on the wireless remote control at
the same time for about 1 second
until you hear a beep.
■Recalling the memorized position
Check that the shift lever is set in “P”.
Switch to “IG-ON” mode. Push button “1”, “2” or “3” to
recall the desired position.
STEP1
STEP2
STEP1
STEP2
STEP3
Page 64 of 548
44
1-4. Adjustable components
CAUTION
■Wearing a seat belt
Observe the following precautions to reduce the risk of injury in the event of sud-
den braking or an accident. Failing to do so may cause death or serious injury.
●Ensure that all passengers wear a seat belt.
●Always wear a seat belt properly.
●Each seat belt should be used by one person only. Do not use a seat belt for more
than one person at the same time, including children.
●Children should be seated in the rear se at and always use a seat belt and/or an
appropriate child restraint system.
●Do not recline the seat any more than necessary to achieve a proper seating
position. The seat belt is most effective when the occupants are sitting up straight
and well back in the seats.
●Do not wear the shoulder belt under your arm.
●Always wear your seat belt low and snug across your hips.
■Seat belt damage and wear
●Do not damage the seat belts by allowing the belt, plate or buckle to be jammed
in the door.
●Inspect the seat belt system periodically. Check for cuts, fraying, and loose parts.
Do not use a damaged seat belt until it is replaced. Damaged seat belts cannot
protect an occupant from injury.
●Ensure that the belt and tab are locked and the belt is not twisted. If the seat belt
does not function correctly, immediately contact your Lexus dealer.
●Replace the seat assembly, including the belt s, if your vehicle has been involved in
a serious accident, even if there is no obvious damage.
●Do not attempt to install, remove, modify , disassemble or dispose of a seat belt.
Have any necessary repairs carried out by your Lexus dealer. Inappropriate han-
dling of the pretensioner may cause it to activate or operate improperly and may
cause death or serious injury.
Page 71 of 548
51
1-5. Opening and closing the windows and moon roof
1
Before driving
■Operating the power windows after turning the power switch “OFF”
The power windows can be operated for approximately 45 seconds even after the
power switch is switched to “ACC” mode or turned “OFF”. They cannot, however,
be operated once the driver’s or front passenger’s door is opened.
■Jam protection function
If an object becomes caught between th e window and the window frame, window
travel is stopped and the window is opened slightly.
■When the 12 volt battery is disconnected
The power windows must be initialized in order to ensure proper operation.
(Perform for each window with the switch for each seat.)
Open the window halfway.
Fully close the window by pulling the switch up and continue holding the
switch for 1 second.
The indicator on the switch changes from a flashing pattern to being on when initial-
izing are complete.
■Customization
Settings (e.g. linked door lock operation) can be changed. ( P. 5 1 2 )
CAUTION
■When closing the windows
Observe the following precautions.
Failing to do so may result in death or serious injury.
●Check to make sure that all passengers do not have any part of their body in a
position where it could be caught when a window is being operated.
●Do not allow children to operate the power windows.
Closing a power window on someone can cause death or serious injury.
■Jam protection function
●Never try jamming any part of your body to activate the jam protection function
intentionally.
●The jam protection function may not work if something gets caught just before
the window fully closes.
STEP1
STEP2
Page 74 of 548

54
1-5. Opening and closing the windows and moon roof
CAUTION
■When opening the moon roof
Observe the following precautions.
Failing to do so may cause death or serious injury.
●Do not allow any passengers to put their hands or heads outside the vehicle while
it is moving.
●Do not sit on top of the moon roof.
■When closing the moon roof
Observe the following precautions.
Failing to do so may result in death or serious injury.
●Check to make sure that all passengers do not have any part of their bodies in a
position where they could be caught wh en the moon roof is being operated.
●Do not allow children to operate the moon roof.
Closing the moon roof on someone can cause death or serious injury.
■Jam protection function
●Never try jamming any part of your body to activate the jam protection function
intentionally.
●The jam protection function may not work if something gets caught just before
the moon roof fully closes.
Page 81 of 548
61
1
1-7. Theft deterrent system
Before driving
Alarm
Deactivating or stopping the alarmDo one of the following:
● Unlock the doors or trunk using the smart access system with push-
button start or the wireless remote control.
● Start the hybrid system. (The alarm wi ll be deactivated or stopped after
a few seconds.)
■Items to check before locking the vehicle
To prevent unintended triggering of the alar m, check that there is no one in the vehi-
cle, and that all windows and moon roof are closed before locking the vehicle.
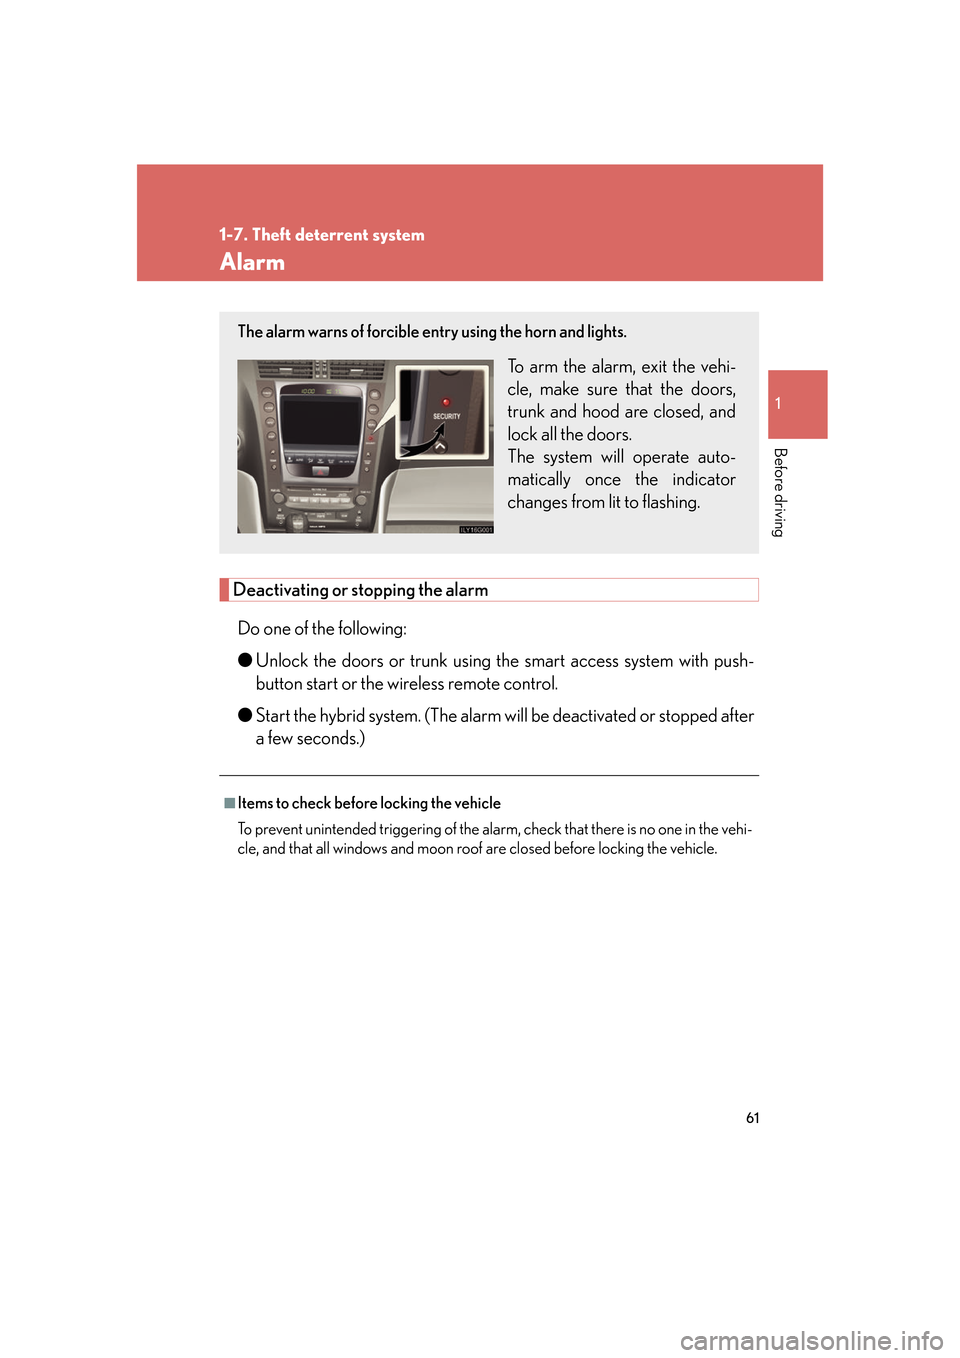
The alarm warns of forcible entry using the horn and lights.
To arm the alarm, exit the vehi-
cle, make sure that the doors,
trunk and hood are closed, and
lock all the doors.
The system will operate auto-
matically once the indicator
changes from lit to flashing.
Page 107 of 548

87
1-8. Safety information
1
Before driving
While pushing the child seat down
into the rear seat, allow the shoul-
der belt to retract until the child
seat is securely in place.
After the shoulder belt has
retracted to a point where there is
no slack in the belt, pull the belt to
check that it cannot be extended.
■Forward facing Convertible child seat
Place the child seat on the seat
facing the front of the vehicle.
Run the seat belt through the child
seat and insert the plate into the
buckle. Make sure that the belt is
not twisted.
Fully extend the shoulder strap and
then allow it to retract slightly into
the ALR lock mode.
Lock mode allows the seat belt to
retract only.
STEP4
STEP1
STEP2
STEP3