clock Lexus GS450h 2007 Instrument cluster /
[x] Cancel search | Manufacturer: LEXUS, Model Year: 2007, Model line: GS450h, Model: Lexus GS450h 2007Pages: 548, PDF Size: 16.31 MB
Page 4 of 548
TABLE OF CONTENTSIndex
iv
3-4. Using the hands-free
system......................................... 261
Hands-free system ....................... 261
Using the Bluetooth
®
phone ............................................. 265
Setting the hands-free
system ............................................ 278
3-5. Using the interior lights ......... 303 Interior lights list........................... 303
3-6. Using the storage
features ..................................... 306
List of storage fe atures.............. 306
3-7. Other interior features............ 312 Sun visors.......................................... 312
Vanity mirror ................................... 313
Clock .................................................. 314
Outside temperature
display ............................................. 315
Ashtrays ............................................ 316
Cigarette lighter ............................ 317
Power outlet .................................... 318
Seat heaters ..................................... 319
Seat heaters and
ventilators ...................................... 321
Armrest ............................................ 323
Rear sunshade ............................... 324
Floor mats........................................ 326
Trunk features................................ 327
Garage door opener .................. 329
Compass........................................... 334
Lexus Link System ...................... 338 4-1. Maintenance and care............ 352
Cleaning and protecting the
vehicle exterior .......................... 352
Cleaning and protecting the
vehicle interior............................ 354
4-2. Maintenance.............................. 357 Maintenance requirements ..... 357
General maintena nce ............... 359
Emission inspection and
maintenance (I/M)
programs ...................................... 362
4-3. Do-it-yourself
maintenance............................ 363
Do-it-yourself service
precautions .................................. 363
Hood.................................................. 366
Positioning the jack ..................... 367
Engine compartm ent.................. 369
Tires .................................................. 383
Tire inflation pressure................. 393
Wheels.............................................. 397
Air conditioning filter.................. 399
Electronic key battery ................. 401
Checking and replacing
fuses ............................................... 403
Headlight aim.................................. 419
Light bulbs ........................................ 421
4Maintenance and care
Page 14 of 548
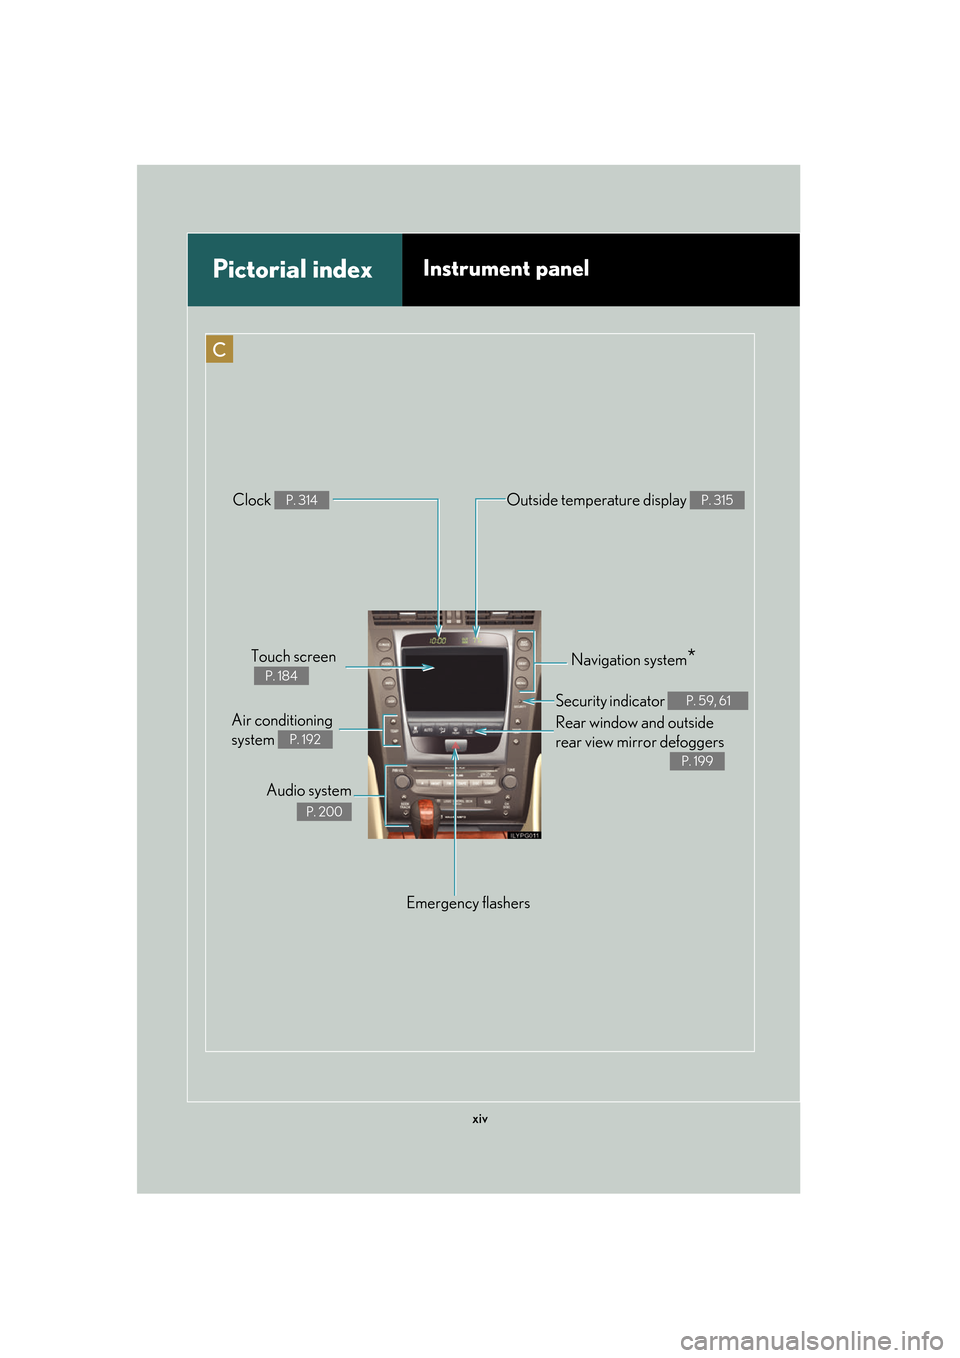
xiv
C
Pictorial indexInstrument panel
Security indicator P. 59, 61
Rear window and outside
rear view mirror defoggers
P. 199
Emergency flashers
Clock
P. 314Outside temper
ature display P. 315
Air conditioning
system
P. 192
Audio system
P. 200
Navigation system*Touch screen
P. 184
Page 76 of 548
56
1-6. Refueling
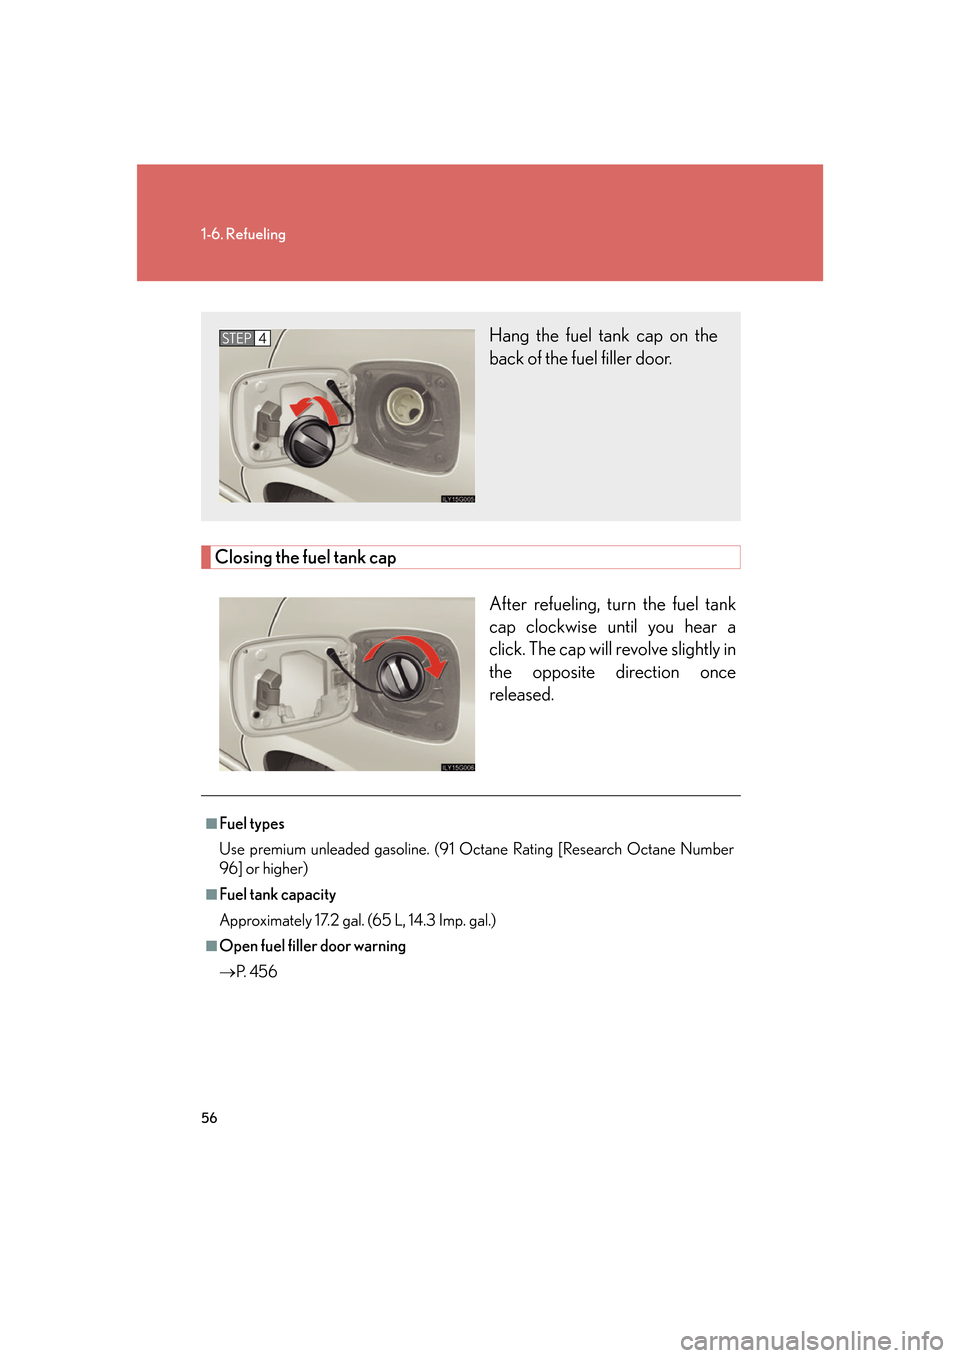
Closing the fuel tank capAfter refueling, turn the fuel tank
cap clockwise until you hear a
click. The cap will revolve slightly in
the opposite direction once
released.
Hang the fuel tank cap on the
back of the fuel filler door.STEP4
■Fuel types
Use premium unleaded gasoline. (91 Octane Rating [Research Octane Number
96] or higher)
■Fuel tank capacity
Approximately 17.2 gal. (65 L, 14.3 Imp. gal.)
■Open fuel filler door warning
P. 4 5 6
Page 133 of 548
113
2-2. Instrument cluster
2
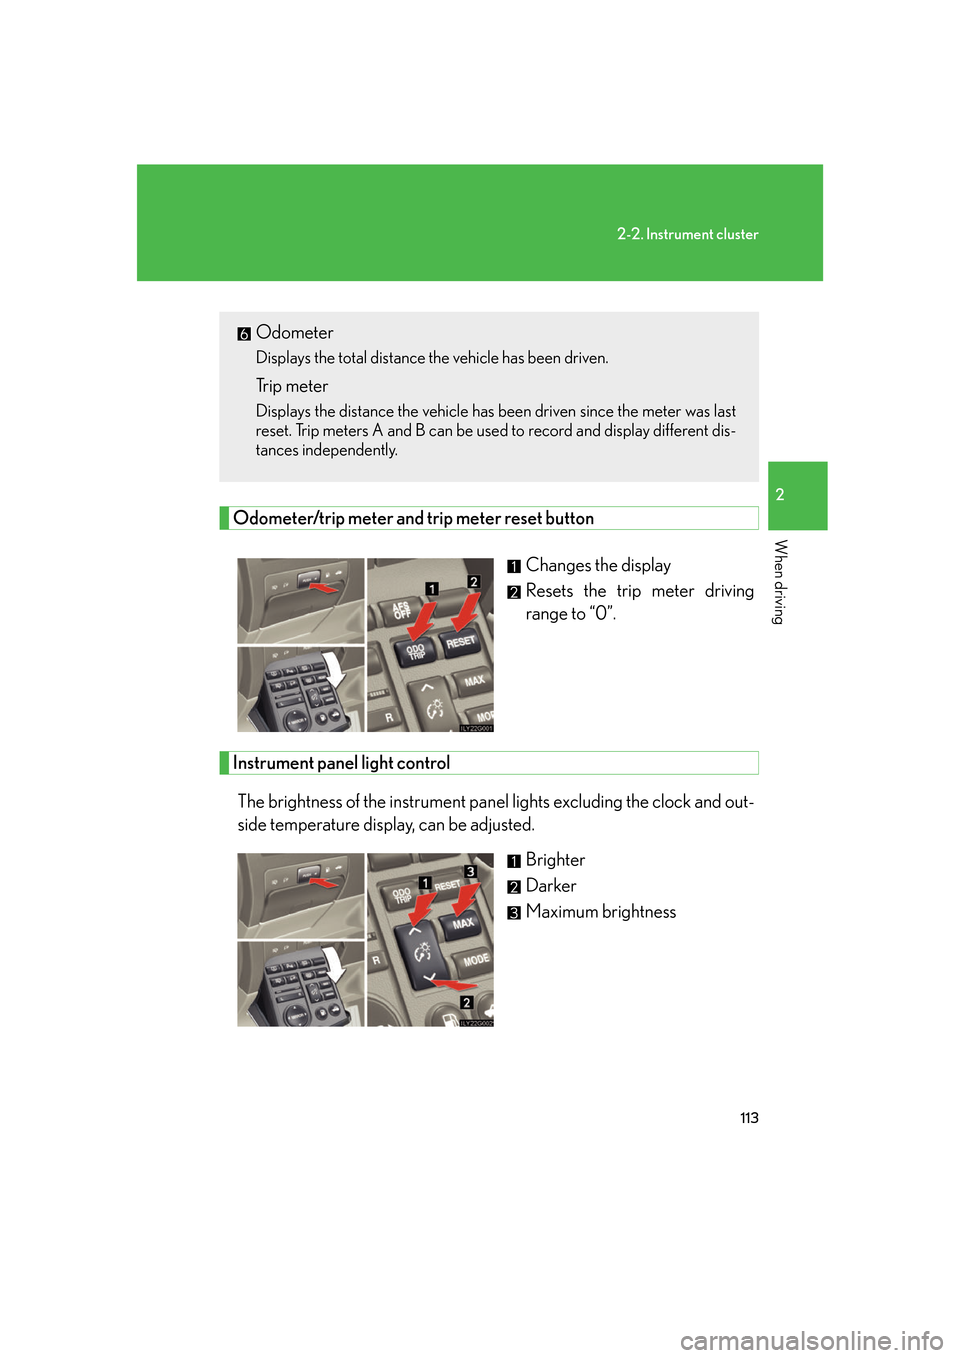
When drivingOdometer/trip meter and trip meter reset buttonChanges the display
Resets the trip meter driving
range to “0”.
Instrument panel light controlThe brightness of the instrument panel lights excluding the clock and out-
side temperature display, can be adjusted. Brighter
Darker
Maximum brightness
Odometer
Displays the total distance the vehicle has been driven.
Trip meter
Displays the distance the vehicle has been driven since the meter was last
reset. Trip meters A and B can be used to record and display different dis-
tances independently.
Page 203 of 548
Interior features3
183
3-1. Using the touch screen ......... 184Touch screen ................................ 184
Setting the touch screen ......... 187
3-2. Using the air conditioning
system and defogger ........... 192
Automatic air conditioning
system .......................................... 192
Rear window and outside rear
view mirror defoggers........... 199
3-3. Using the audio system ....... 200 Audio system type ................... 200
Using the radio ........................... 203
Using the cassette player........ 212
Using the CD player ................. 216
Playing MP3 and WMA
discs ............................................. 224
Using the DVD player............. 232
Playing DVD video/audio ...... 235
Playing video CD ...................... 247
DVD player and DVD video
disc information ....................... 251
Optimal use of the audio/
video system............................. 255
Using the steering
switches ...................................... 259
3-4. Using the hands-free
system ...................................... 261
Hands-free system...................... 261 Using the Bluetooth®
phone .......................................... 265
Setting the hands-free
system ......................................... 278
3-5. Using the interior lights ....... 303 Interior lights list ........................ 303
3-6. Using the storage
features .................................. 306
List of storage features ........... 306
3-7. Other interior features......... 312 Sun visors ...................................... 312
Vanity mirror ................................ 313
Clock............................................... 314
Outside temperature display .......................................... 315
Ashtrays ......................................... 316
Cigarette lighter .......................... 317
Power outlet ................................. 318
Seat heaters ................................. 319
Seat heaters and
ventilators ................................... 321
Armrest ......................................... 323
Rear sunshade............................ 324
Floor mats .................................... 326
Trunk features ............................. 327
Garage door opener............... 329
Compass....................................... 334
Lexus Link System .................... 338
Page 205 of 548
185
3-1. Using the touch screen
3
Interior features
The initial screen
If the power switch is set to “ACC” or
“IG-ON” mode, the initializing screen
will be displayed for a few seconds as
the system starts up.
SwitchesPa g e
“CLIMATE”P. 1 9 2
“A U D I O ”P. 2 0 0
“INFO” (Displaying the “Informa-
tion” screen)P. 1 8 4
“DISP” (Adjusting the display)P. 1 8 8
Trip Information. (Displaying the
“Trip Information” screen)P. 6
MaintenanceNavigation System Owner's Manual
Te l e p h o n eP. 2 6 5
CalendarNavigation System Owner's Manual
“LEXUS Park Assist”P. 1 5 5
LanguageP. 1 8 7
Screen SettingP. 1 9 0
Adjust ClockP. 3 1 4 /
Navigation System Owner's Manual
Page 334 of 548
314
3-7. Other interior features
Clock
■The clock is displayed when
The power switch is in “ACC” or “IG-ON” mode.
■When the 12 volt battery is disconnected
The time display will automatically be set to 1:00.
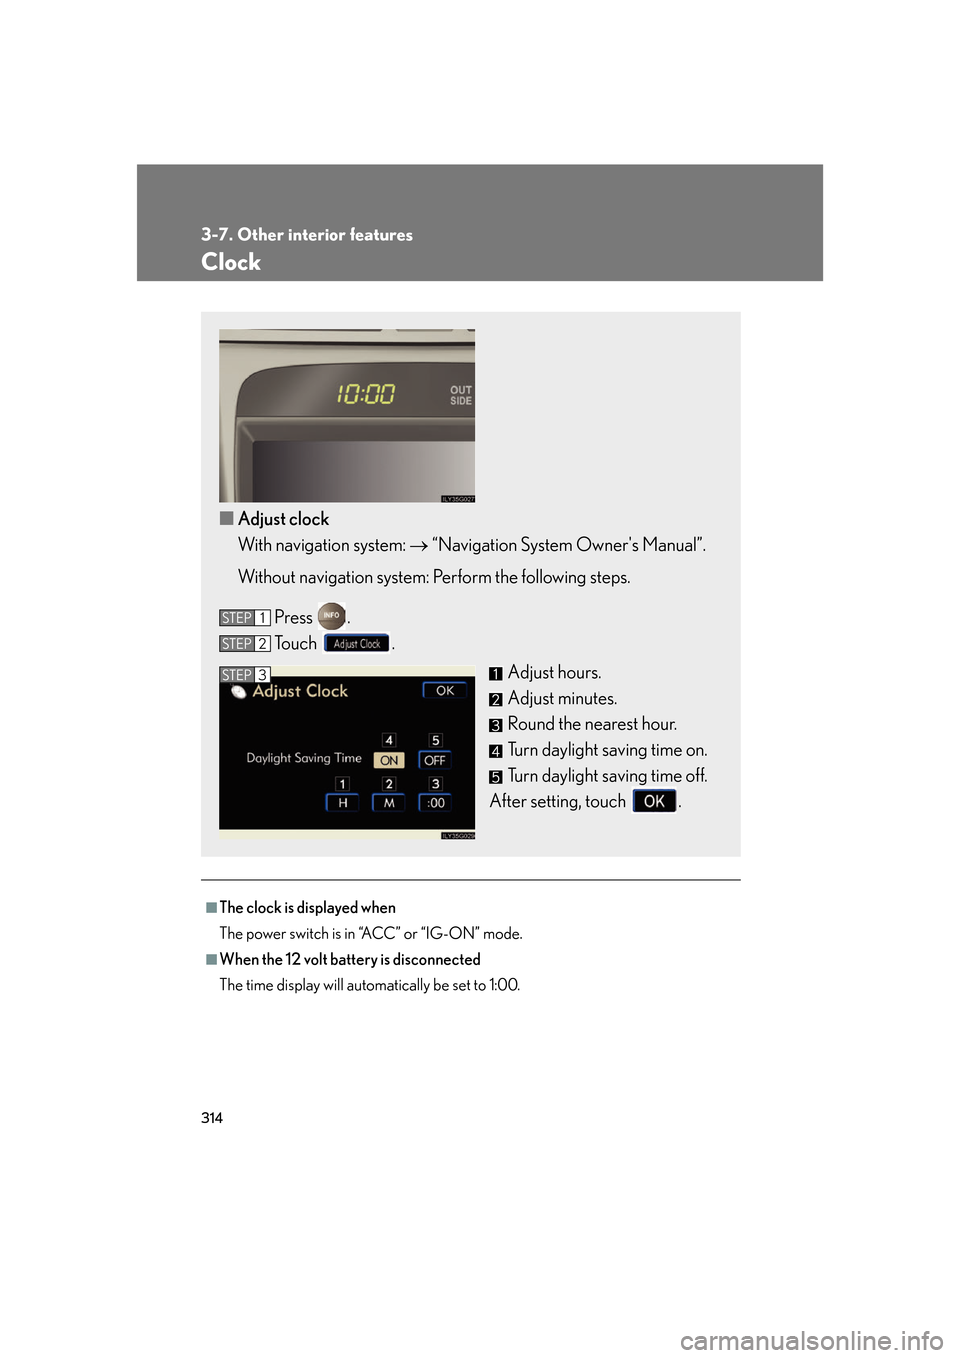
■Adjust clock
With navigation system: “Navigation System Owner's Manual”.
Without navigation system: Perform the following steps.
Press .
To u c h . Adjust hours.
Adjust minutes.
Round the nearest hour.
Turn daylight saving time on.
Turn daylight saving time off.
After setting, touch .
STEP1
STEP2
STEP3
Page 392 of 548
372
4-3. Do-it-yourself maintenance
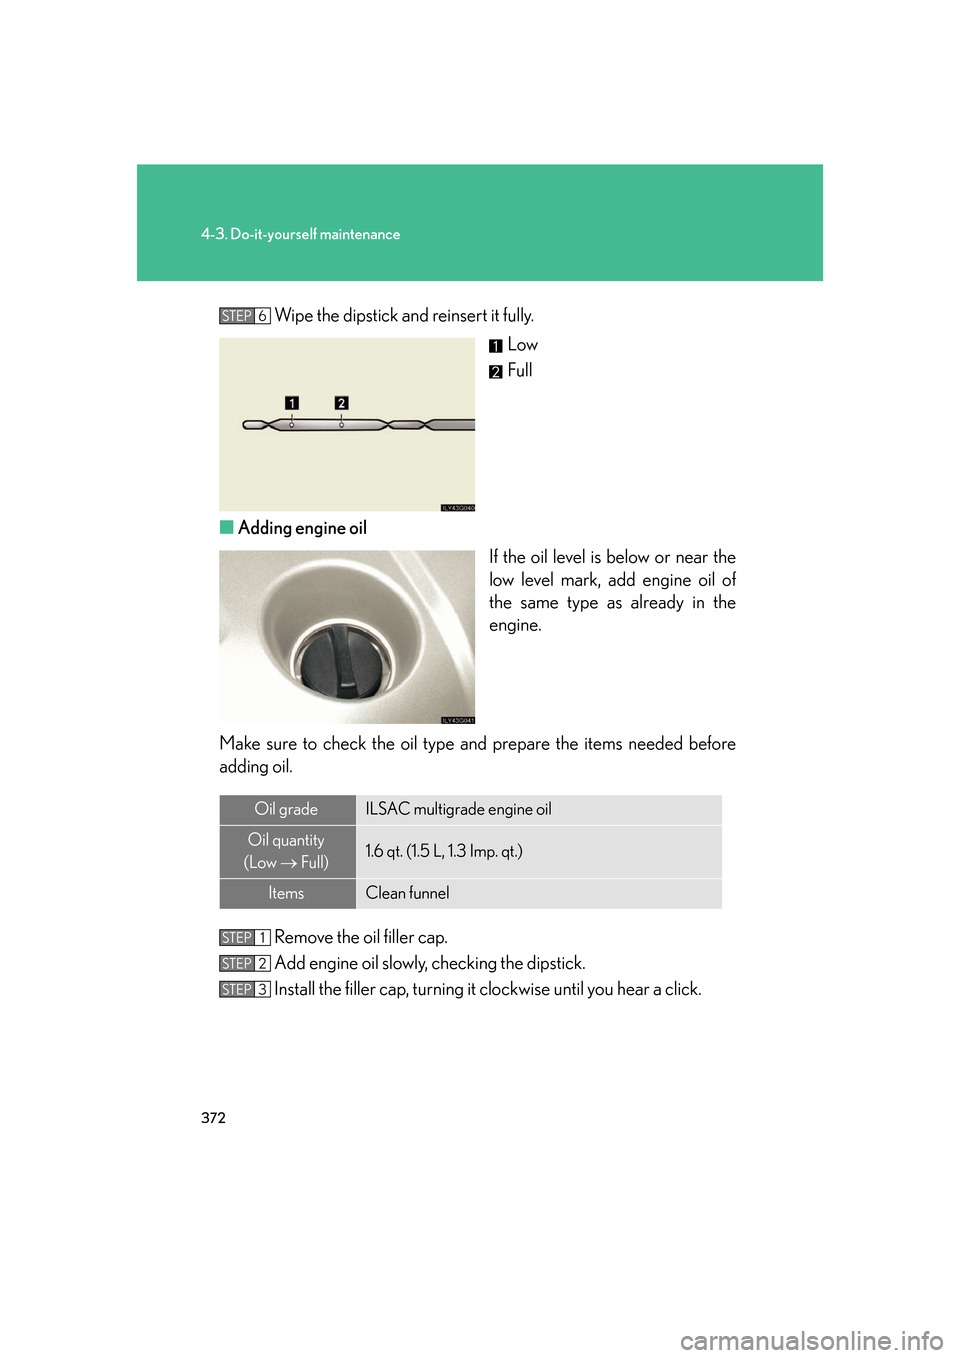
Wipe the dipstick and reinsert it fully.Low
Full
■ Adding engine oil
If the oil level is below or near the
low level mark, add engine oil of
the same type as already in the
engine.
Make sure to check the oil type and prepare the items needed before
adding oil.
Remove the oil filler cap.
Add engine oil slowly, checking the dipstick.
Install the filler cap, turning it clockwise until you hear a click.STEP6
Oil gradeILSAC multigrade engine oil
Oil quantity
(Low Full)1.6 qt. (1.5 L, 1.3 Imp. qt.)
ItemsClean funnel
STEP1
STEP2
STEP3
Page 442 of 548
422
4-3. Do-it-yourself maintenance
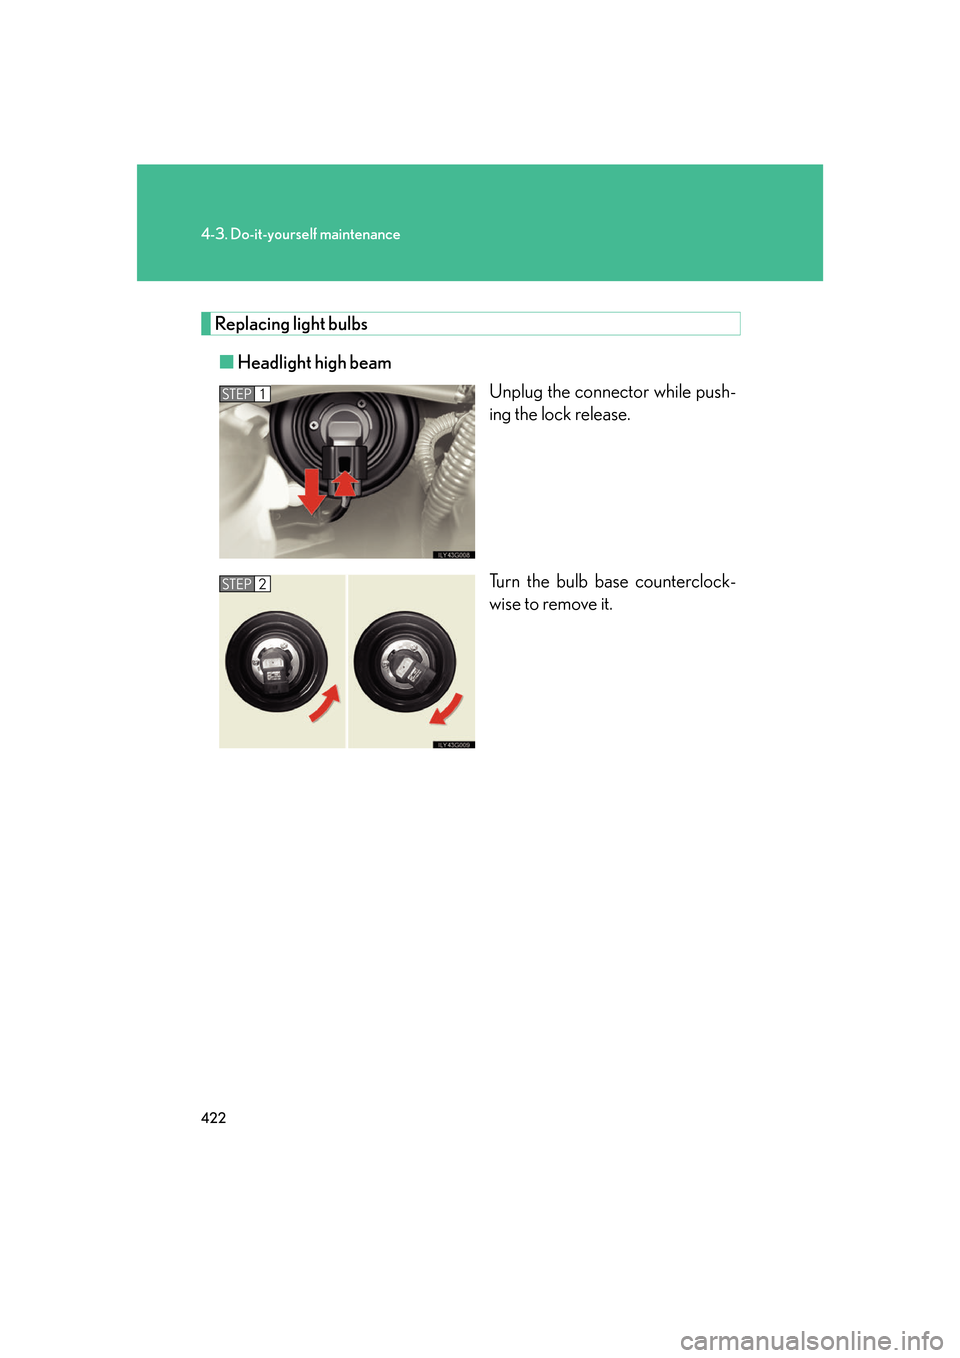
Replacing light bulbs■ Headlight high beam
Unplug the connector while push-
ing the lock release.
Turn the bulb base counterclock-
wise to remove it.
STEP1
STEP2
Page 443 of 548
423
4-3. Do-it-yourself maintenance
4
Maintenance and care
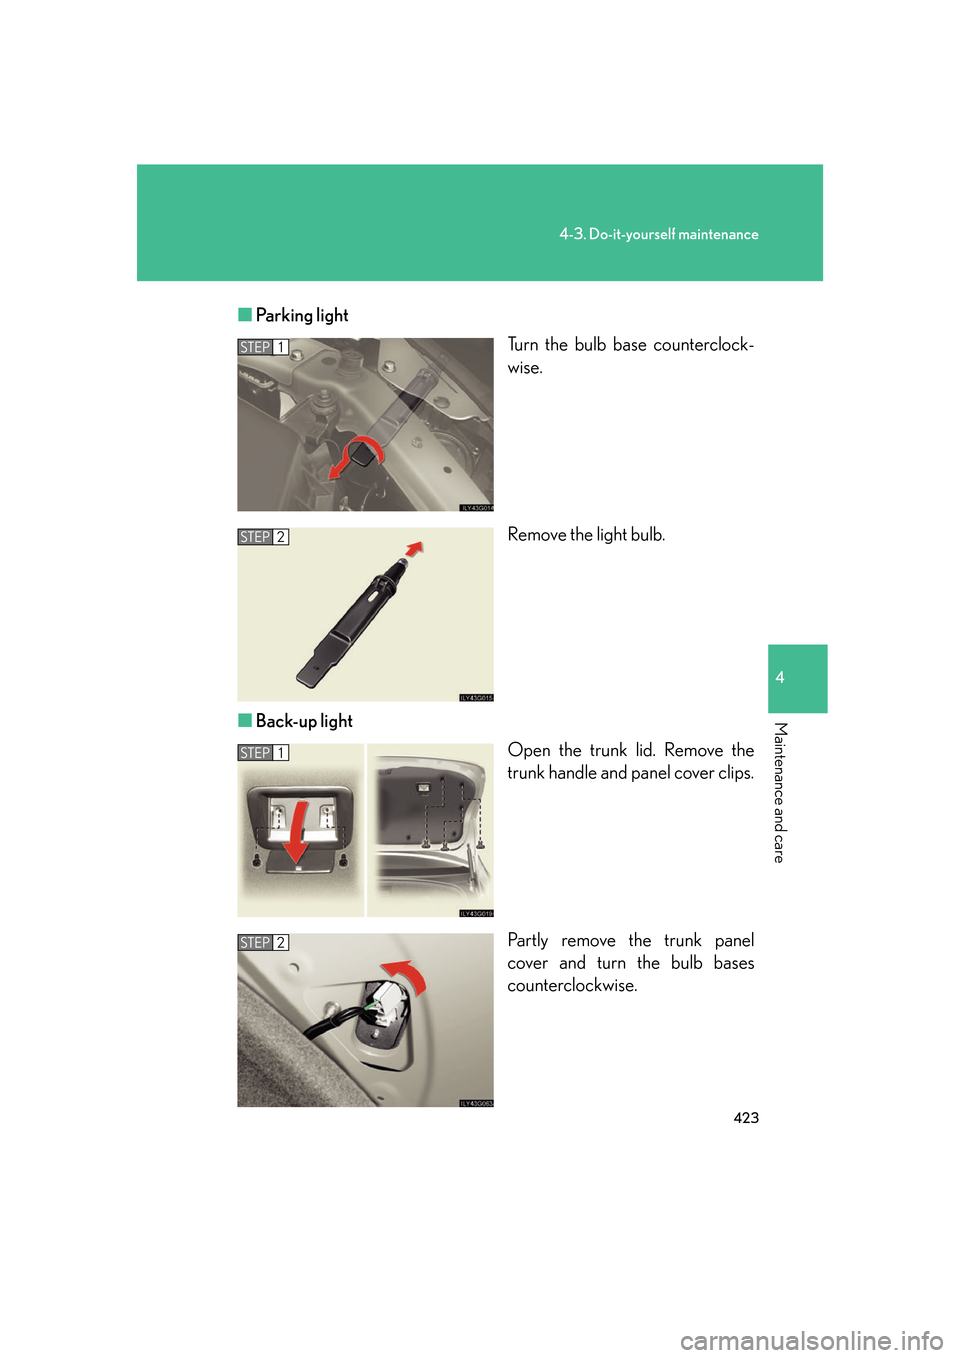
■Parking light
Turn the bulb base counterclock-
wise.
Remove the light bulb.
■ Back-up light
Open the trunk lid. Remove the
trunk handle and panel cover clips.
Partly remove the trunk panel
cover and turn the bulb bases
counterclockwise.
STEP1
STEP2
STEP1
STEP2