lock Lexus GS450h 2007 Using the hands-free system (for cellular phone) / LEXUS 2007 GS450H FROM JULY 2006 PROD. (OM30A05U) Repair Manual
[x] Cancel search | Manufacturer: LEXUS, Model Year: 2007, Model line: GS450h, Model: Lexus GS450h 2007Pages: 548, PDF Size: 16.31 MB
Page 218 of 548

198
3-2. Using the air conditioning system and defogger
■Automatic mode for air intake control
In automatic mode, the system detects exhaust gas and other pollutants and auto-
matically switches between outside air and recirculated air modes.
When the air conditioning is OFF, and th e fan is operating, turning the “AUTO”
mode ON will activate the air conditioning system.
■Micro dust and pollen removal mode
●When the outside air is cold, the following may occur.
• Outside air mode does not switch to .
• The air conditioning syst em operates automatically.
• The operation cancels after 1 minute.
●In rainy weather, the windows may fog up. Press .
CAUTION
■To prevent the windshield from fogging up
Do not use during cool air operation in extremely humid weather. The differ-
ence between the temperature of the outside air and that of the windshield can
cause the outer surface of the windshield to fog up, blocking your vision.
NOTICE
■To prevent 12 volt battery discharge
Do not leave the automatic air conditioning system on longer than necessary when
the hybrid system is off.
Page 263 of 548

243
3-3. Using the audio system
3
Interior features
■Setting angle mark ON or OFF
If the DVD has angle options, you can turn the angle mark on or off.
Touch . Each time you touch the button, the multi angle
mark on the screen turns on or off alternately.
■ Parental lock
To u c h .
Input the 4-digit password and
then touch .
If you enter wrong numbers, touch to delete the numbers.
Touch 10 times to initialize
the personal code.
Select a parental level (1 - 8).
: returns to previous screen.
■ Entering a language code
If you touch on the “Select Audio Language” screen, “Select
Subtitle Language” screen or “Sel ect DVD Language” screen, you can
select a language by entering the 4-digit language code if that lan-
guage is available.
Input the 4-digit language code
and then touch .
: deletes the last input digit.
: returns to previous screen.
STEP1
STEP2
STEP3
Page 317 of 548

297
3-4. Using the hands-free system
3
Interior features
■Enabling security
Press .
Touch on the “Information” screen.
Touch on the “Telephone” screen.
Touch on the “S ettings” screen.
Touch in the “Phone Book Lock” section of the “Phone
Book Lock” screen.
Input the security code, and touch .
■ Setting the security code to default
Press .
Touch on the “Information” screen.
Touch on the “Telephone” screen.
Touch on the “S ettings” screen.
Touch on the “Phone Book Lock” screen.
Input the security code on the “Security Code” screen, then
touch .
A confirmation message will appear . If everything is correct,
touch .
STEP1
STEP2
STEP3
STEP4
STEP5
STEP6
STEP1
STEP2
STEP3
STEP4
STEP5
STEP6
STEP7
Page 318 of 548

298
3-4. Using the hands-free system
■If the “Phone Book Lock” is set
If the security code is input and the “Phone Book Lock” set, the following functions
are locked.
●Display of the phone book screen and transferring, registering, editing, deleting
the phone book data.
●Display of speed dial screen, registering, deleting the speed dial and speed dial-
ing.
●Display of the other party's name for calls being received or made.
●Displayed of dialed numbers screen and received calls screen, deleting dialed
numbers and received numbers.
●Display of phone information screen.
●Changing the security code.
The speed dial screen is not displayed while driving.
■When changing the security code
●Be sure to choose a number difficult for strangers to guess.
●Do not forget the security code. Even your Lexus dealer will be unable to dis-
able the security. If you do forget the code, initialize all personal data. ( P. 1 9 0 )
Page 323 of 548

303
3
Interior features
3-5. Using the interior lights
Interior lights list
Illuminated entry system: The various lights automatically turn on/off
according to the presence of the electronic key, whether the doors are
locked/unlocked, whether the doors are open/closed, and the power
switch mode.
Outer foot light
Steering spot light
Front personal lights ( P. 305)
Shift lever light
Front interior lights ( P. 304)
Page 327 of 548

307
3-6. Using the storage features
3
Interior features
Glove boxOpen (push button)
Lock with the mechanical key
Unlock with the mechanical key
Console boxPull up the lever to release the
lock.
Slide armrest.
Lift the armrest to open.
■Glove box light
The glove box light turns on when the headlight switch is on.
■Trunk opener main switch
The trunk opener main switch is located in the glove box. ( P. 3 0 )
CAUTION
■Caution while driving
Keep the glove box closed.
Injuries may result in the event of an accident or sudden braking.
Page 329 of 548

309
3-6. Using the storage features
3
Interior features
Storage compartment
Coin holderPull up lever to release the lock.
Slide armrest.
CAUTION
■Caution while driving
Do not leave the storage compartment open.
The opened compartment many hit your bo dy or items may be thrown out of the
compartment in the event of an accident or sudden braking and cause injury.
Page 334 of 548

314
3-7. Other interior features
Clock
■The clock is displayed when
The power switch is in “ACC” or “IG-ON” mode.
■When the 12 volt battery is disconnected
The time display will automatically be set to 1:00.
■Adjust clock
With navigation system: “Navigation System Owner's Manual”.
Without navigation system: Perform the following steps.
Press .
To u c h . Adjust hours.
Adjust minutes.
Round the nearest hour.
Turn daylight saving time on.
Turn daylight saving time off.
After setting, touch .
STEP1
STEP2
STEP3
Page 349 of 548

329
3-7. Other interior features
3
Interior features
Garage door opener
The garage door opener (HomeLink Universal Transceiver) is manufactured
under license from HomeLink.
Programming the HomeLink (for U.S.A. owners)
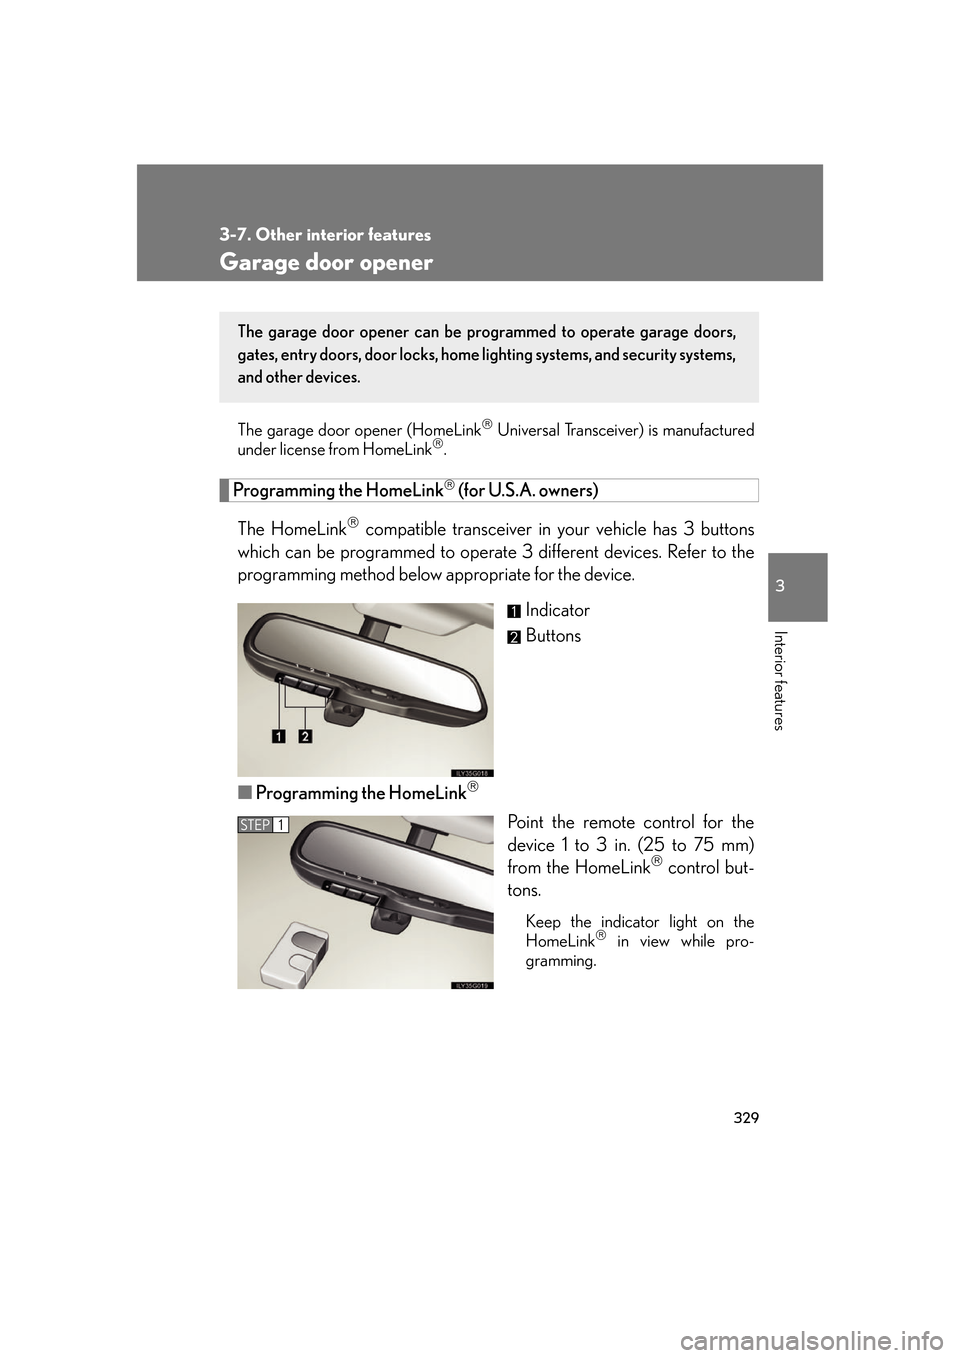
The HomeLink
compatible transceiver in your vehicle has 3 buttons
which can be programmed to operate 3 different devices. Refer to the
programming method below appropriate for the device.
Indicator
Buttons
■ Programming the HomeLink
Point the remote control for the
device 1 to 3 in. (25 to 75 mm)
from the HomeLink
control but-
tons.
Keep the indicator light on the
HomeLink in view while pro-
gramming.
The garage door opener can be pr ogrammed to operate garage doors,
gates, entry doors, door locks, home lighting systems, and security systems,
and other devices.
STEP1
Page 352 of 548

332
3-7. Other interior features
Test the operation of the HomeLink by pressing the newly pro-
grammed button. Check to see if the gate/device operates cor-
rectly.
Repeat the steps above to program another device for each of
the remaining HomeLink
buttons.
■ Programming other devices
To program other devices such as home security systems, home door
locks or lighting, contact your au thorized Lexus dealer for assistance.
■ Reprogramming a button
The individual HomeLink
buttons cannot be erased but can be
reprogrammed. To reprogram a button, follow the “Basic program-
ming” instructions.
Operating the HomeLink
Press the appropriate HomeLink button. The HomeLink indicator
light on the HomeLink transceiver should turn on.
The HomeLink continues to send a signal for up to 20 seconds as long as
the button is pressed.
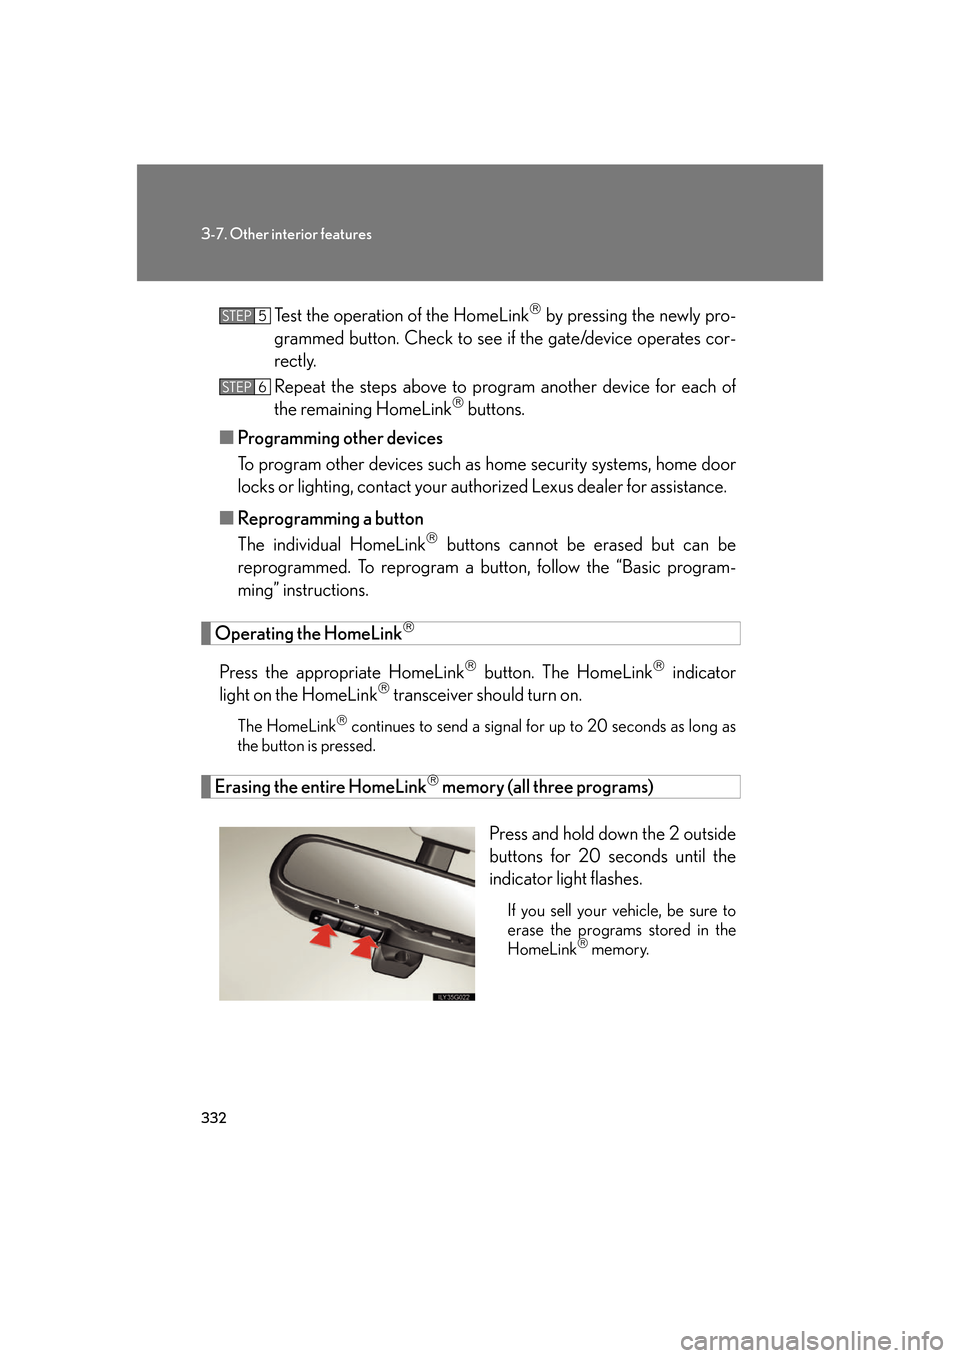
Erasing the entire HomeLink memory (all three programs)
Press and hold down the 2 outside
buttons for 20 seconds until the
indicator light flashes.
If you sell your vehicle, be sure to
erase the programs stored in the
HomeLink
memory.
STEP5
STEP6