USB Lexus GX460 2010 Navigation Manual
[x] Cancel search | Manufacturer: LEXUS, Model Year: 2010, Model line: GX460, Model: Lexus GX460 2010Pages: 428, PDF Size: 6.27 MB
Page 9 of 428
8
7 Audio/video System
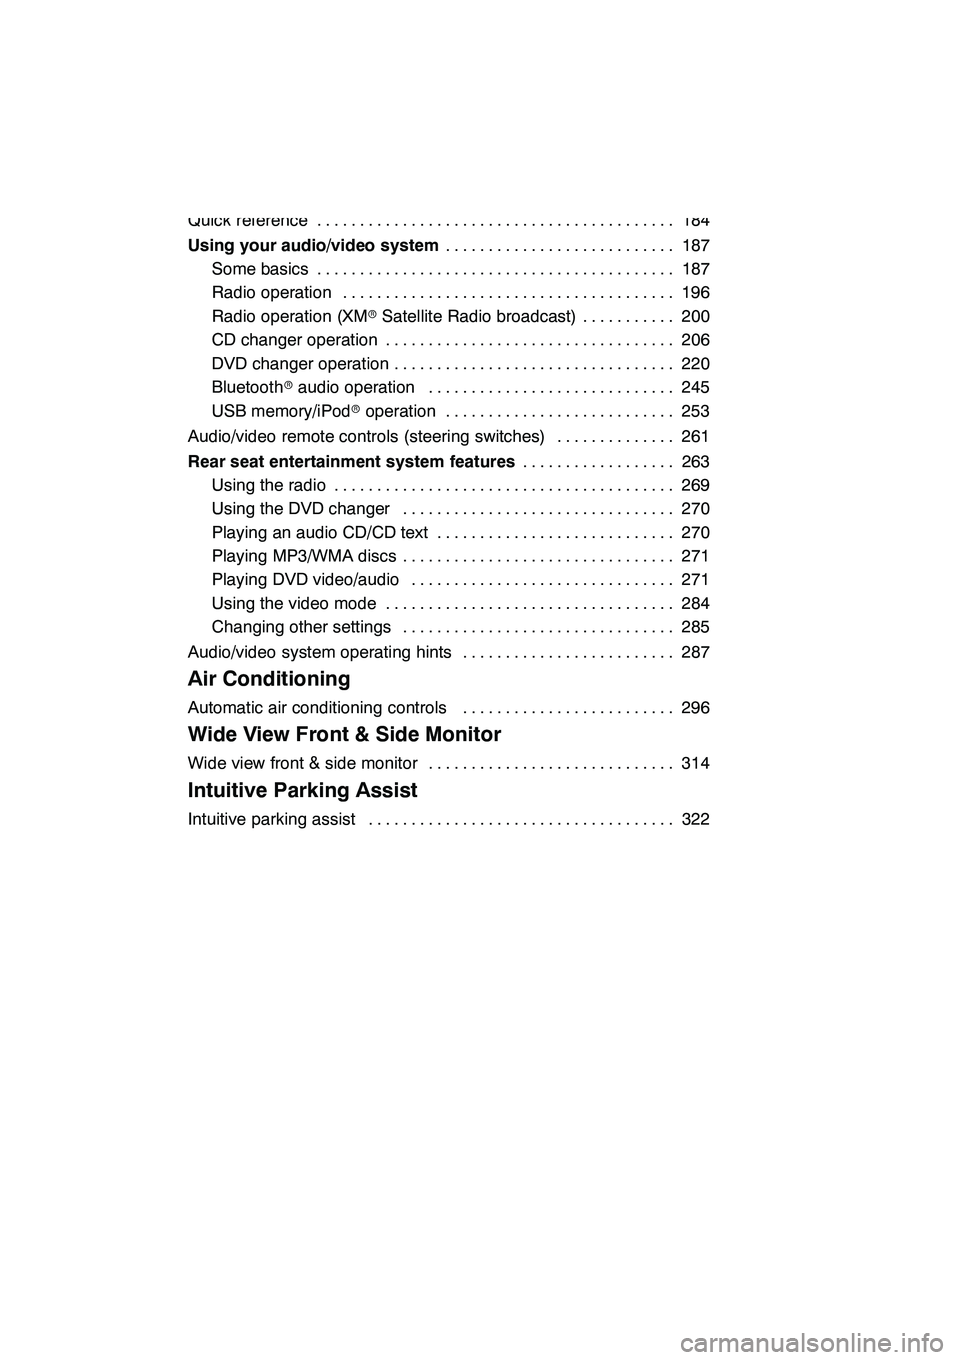
Quick reference184
..........................................
Using your audio/video system 187
...........................
Some basics 187 ..........................................
Radio operation 196 .......................................
Radio operation (XM rSatellite Radio broadcast) 200 ...........
CD changer operation 206 ..................................
DVD changer operation 220 .................................
Bluetooth raudio operation 245 .............................
USB memory/iPod roperation 253 ...........................
Audio/video remote controls (steering switches) 261 ..............
Rear seat entertainment system features 263
..................
Using the radio 269 ........................................
Using the DVD changer 270 ................................
Playing an audio CD/CD text 270 ............................
Playing MP3/WMA discs 271 ................................
Playing DVD video/audio 271 ...............................
Using the video mode 284 ..................................
Changing other settings 285 ................................
Audio/video system operating hints 287 .........................
8 Air Conditioning
Automatic air conditioning controls 296
.........................
9 Wide View Front & Side Monitor
Wide view front & side monitor 314
.............................
10 Intuitive Parking Assist
Intuitive parking assist 322
....................................
GX460 Navi (U)
OM60E73U
09.09.24
Page 58 of 428
NAVIGATION SYSTEM: BASIC FUNCTIONS
57
Show POI icons
CommandAction
SHOW SHIPPING AND COPIESDisplays SHIPPING & COPY icons.
SHOW POST OFFICESDisplays POST OFFICE icons.
SHOW OTHER SERVICESDisplays OTHER SERVICE icons.
Delete POI icons
CommandAction
Clear all iconsDeletes all POI icons.
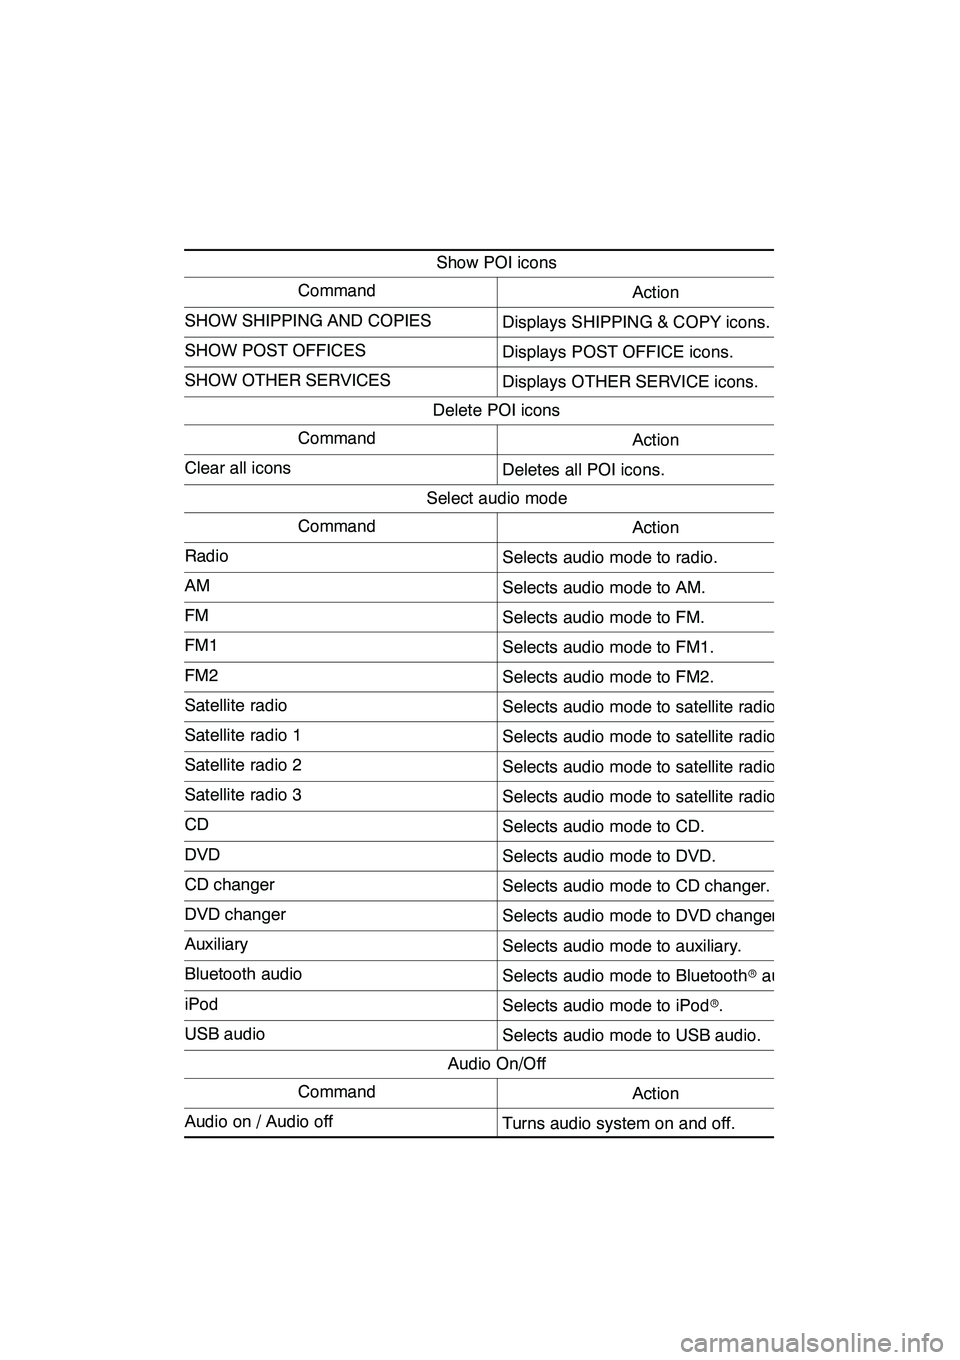
Select audio mode
CommandAction
RadioSelects audio mode to radio.
AMSelects audio mode to AM.
FMSelects audio mode to FM.
FM1Selects audio mode to FM1.
FM2Selects audio mode to FM2.
Satellite radioSelects audio mode to satellite radio.
Satellite radio 1Selects audio mode to satellite radio 1.
Satellite radio 2Selects audio mode to satellite radio 2.
Satellite radio 3Selects audio mode to satellite radio 3.
CDSelects audio mode to CD.
DVDSelects audio mode to DVD.
CD changerSelects audio mode to CD changer.
DVD changerSelects audio mode to DVD changer.
AuxiliarySelects audio mode to auxiliary.
Bluetooth audioSelects audio mode to Bluetoothraudio.
iPodSelects audio mode to iPod r.
USB audioSelects audio mode to USB audio.
Audio On/Off
CommandAction
Audio on / Audio offTurns audio system on and off.
GX460 Navi (U)
OM60E73U
Finish
09.09.24
1
Page 177 of 428
LEXUS ENFORM WITH SAFETY CONNECT
176 D
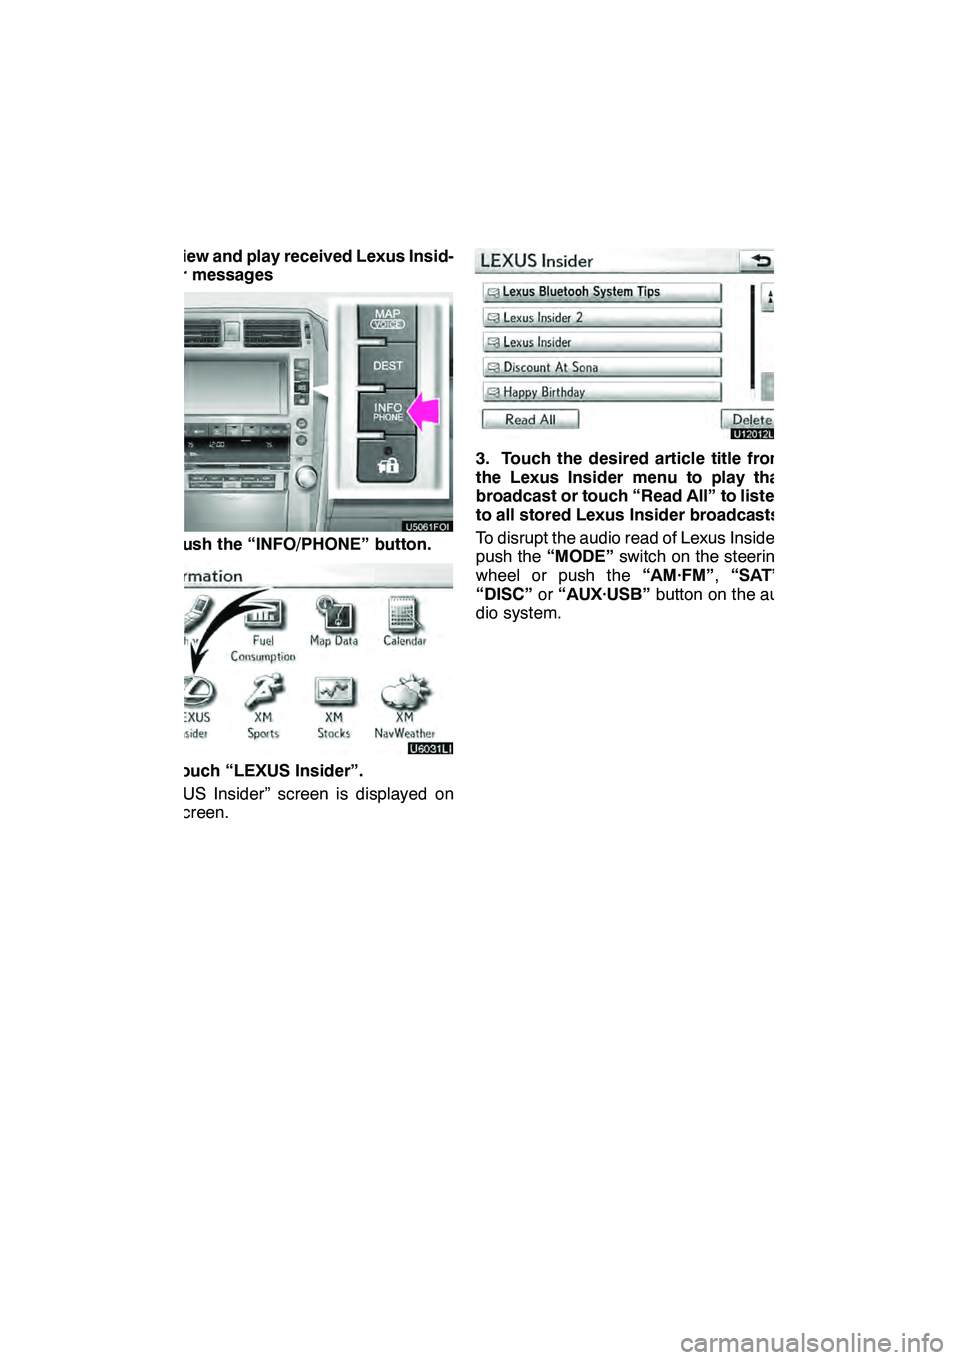
View and play received Lexus Insid-
er messages
1. Push the “INFO/PHONE” button.
2. Touch “LEXUS Insider”.
“LEXUS Insider” screen is displayed on
the screen.
U12012LS
3. Touch the desired article title from
the Lexus Insider menu to play that
broadcast or touch “Read All” to listen
to all stored Lexus Insider broadcasts.
To disrupt the audio read of Lexus Insider,
push the“MODE” switch on the steering
wheel or push the “AM·FM”,“SAT” ,
“DISC” or“AUX·USB” button on the au-
dio system.
GX460 Navi (U)
OM60E73U
Finish
09.09.30
Page 184 of 428
SECTION7
AUDIO/VIDEO SYSTEM
183
AUDIO/VIDEO SYSTEM
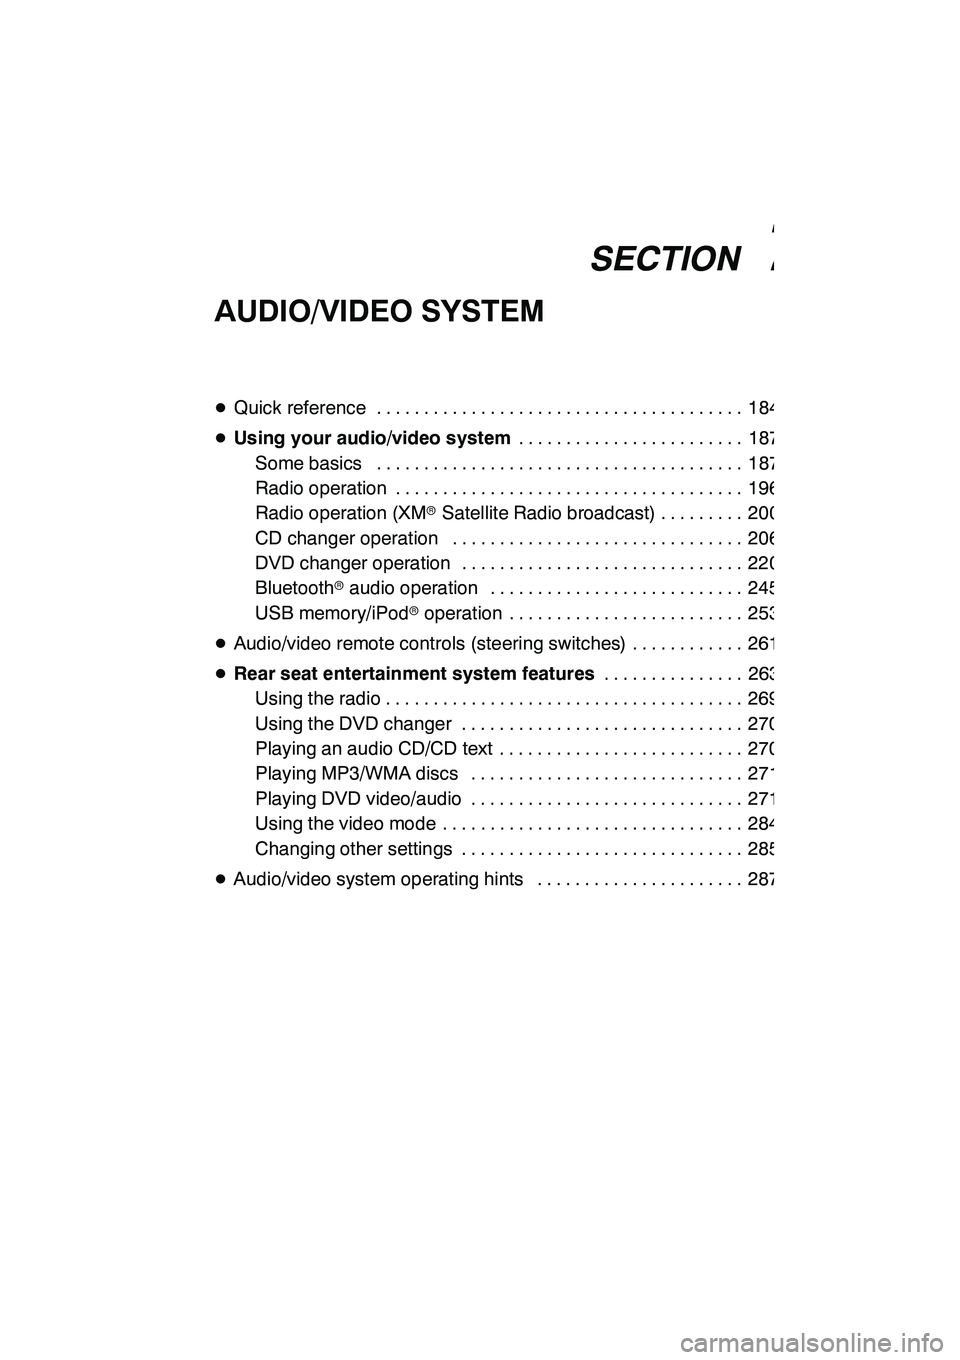
DQuick reference 184 .......................................
D Using your audio/video system 187
........................
Some basics 187 .......................................
Radio operation 196 .....................................
Radio operation (XMr Satellite Radio broadcast) 200 .........
CD changer operation 206 ...............................
DVD changer operation 220 ..............................
Bluetooth raudio operation 245 ...........................
USB memory/iPod roperation 253 .........................
D Audio/video remote controls (steering switches) 261 ............
D Rear seat entertainment system features 263
...............
Using the radio 269 ......................................
Using the DVD changer 270 ..............................
Playing an audio CD/CD text 270 ..........................
Playing MP3/WMA discs 271 .............................
Playing DVD video/audio 271 .............................
Using the video mode 284 ................................
Changing other settings 285 ..............................
D Audio/video system operating hints 287 ......................
GX460 Navi (U)
OM60E73U
Finish
09.09.24
7
Page 185 of 428
AUDIO/VIDEO SYSTEM
184
Operations such as selecting a preset station and adjusting the sound balance are car-
ried out on the screen. To display the audio screen, push the“AUDIO”button.
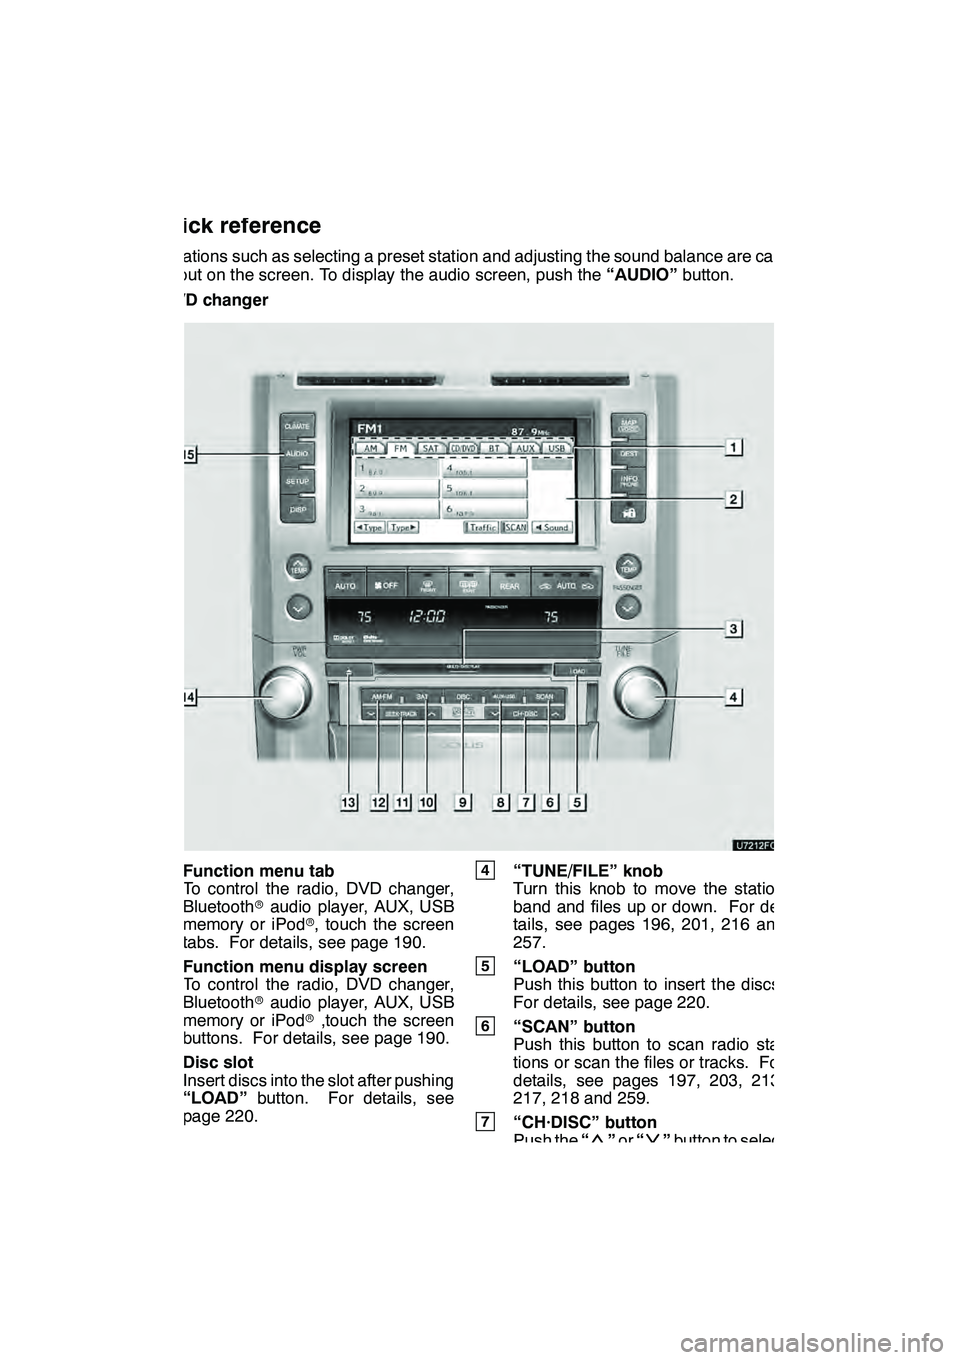
" DVD changer
1Function menu tab
To control the radio, DVD changer,
Bluetooth raudio player, AUX, USB
memory or iPod r, touch the screen
tabs. For details, see page 190.
2Function menu display screen
To control the radio, DVD changer,
Bluetooth raudio player, AUX, USB
memory or iPod r,touch the screen
buttons. For details, see page 190.
3Disc slot
Insert discs into the slot after pushing
“LOAD” button. For details, see
page 220.
4“TUNE/FILE” knob
Turn this knob to move the station
band and files up or down. For de-
tails, see pages 196, 201, 216 and
257.
5“LOAD” button
Push this button to insert the discs.
For details, see page 220.
6“SCAN” button
Push this button to scan radio sta-
tions or scan the files or tracks. For
details, see pages 197, 203, 213,
217, 218 and 259.
7“CH·DISC” button
Push the “”or “”button to select
a preset turning or a selected disc.
For details, see pages 197, 203, 223
and 225.
GX460 Navi (U)
OM60E73U
Finish
09.09.24
Quick reference
Page 186 of 428
AUDIO/VIDEO SYSTEM
185
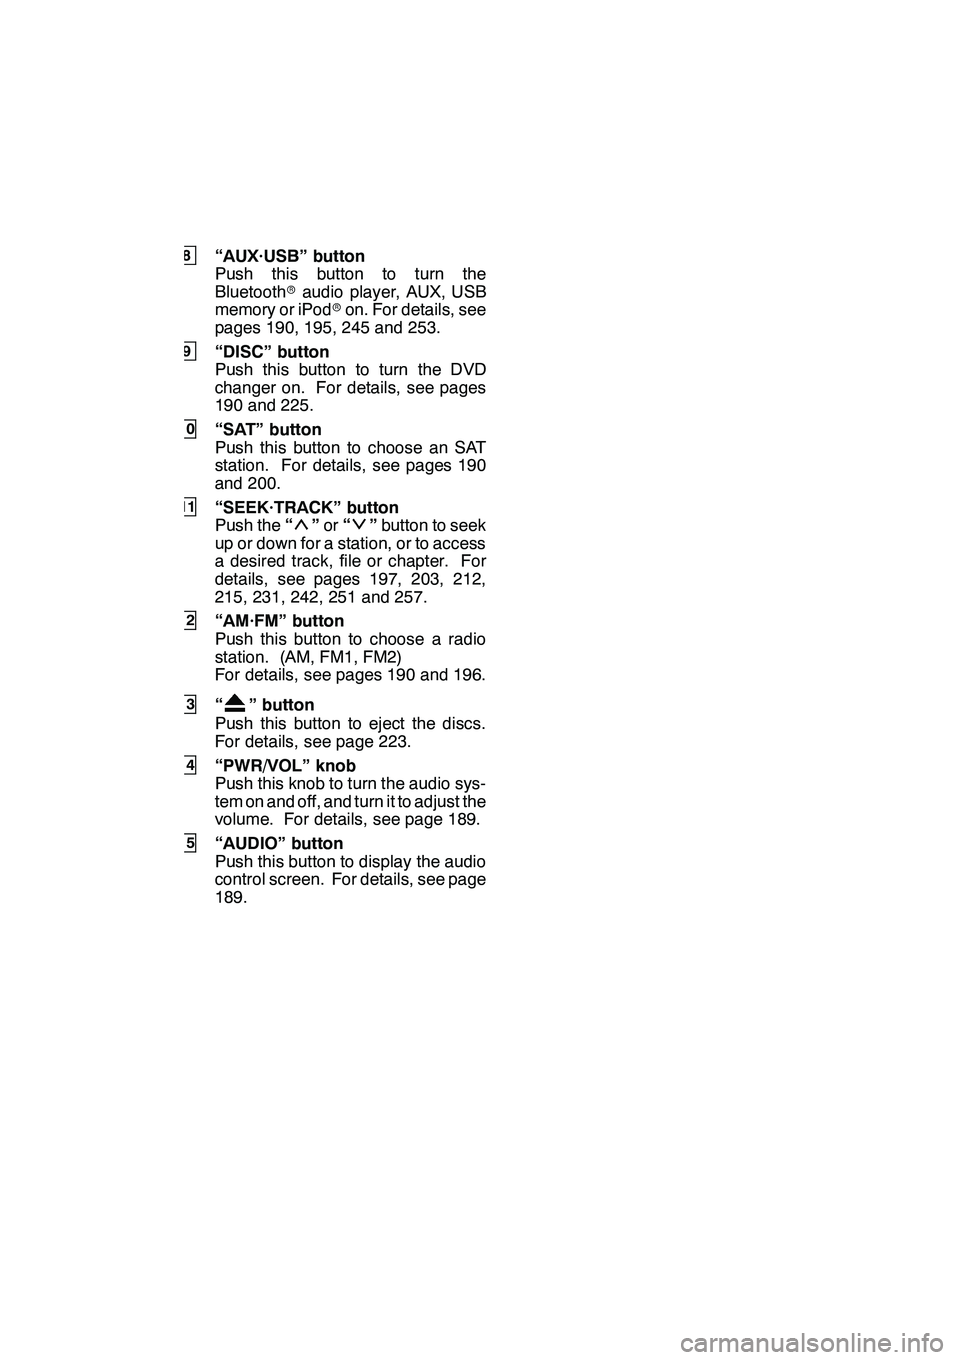
8“AUX·USB” button
Push this button to turn the
Bluetoothraudio player, AUX, USB
memory or iPod ron. For details, see
pages 190, 195, 245 and 253.
9“DISC” button
Push this button to turn the DVD
changer on. For details, see pages
190 and 225.
10“SAT” button
Push this button to choose an SAT
station. For details, see pages 190
and 200.
11“SEEK·TRACK” button
Push the “”or “”button to seek
up or down for a station, or to access
a desired track, file or chapter. For
details, see pages 197, 203, 212,
215, 231, 242, 251 and 257.
12“AM·FM” button
Push this button to choose a radio
station. (AM, FM1, FM2)
For details, see pages 190 and 196.
13“” button
Push this button to eject the discs.
For details, see page 223.
14“PWR/VOL” knob
Push this knob to turn the audio sys-
tem on and off, and turn it to adjust the
volume. For details, see page 189.
15“AUDIO” button
Push this button to display the audio
control screen. For details, see page
189.
GX460 Navi (U)
OM60E73U
Finish
09.09.24
7
Page 187 of 428
AUDIO/VIDEO SYSTEM
186
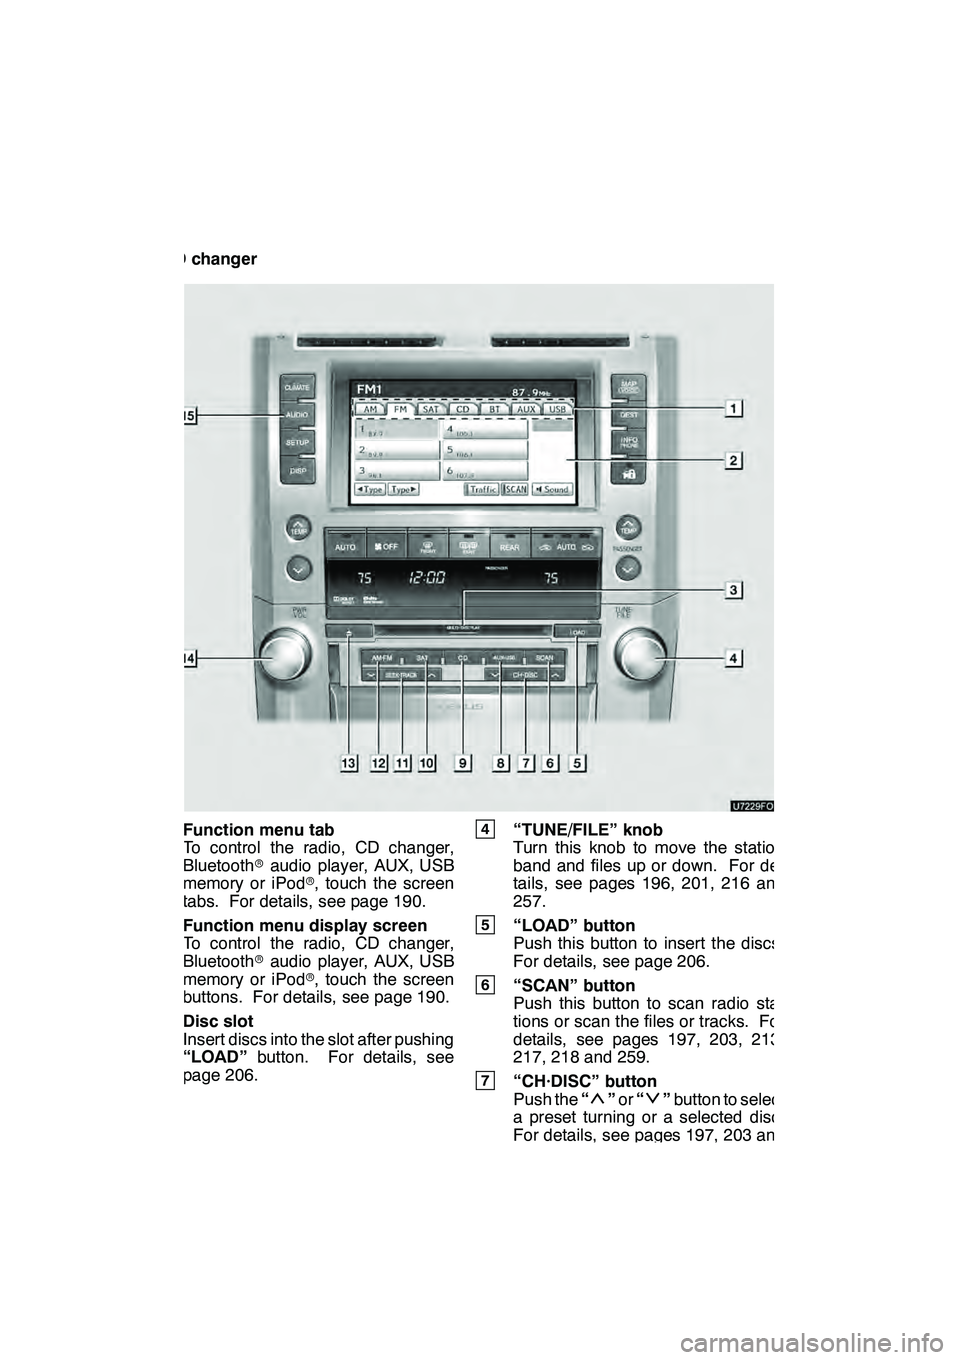
"CD changer
1Function menu tab
To control the radio, CD changer,
Bluetooth raudio player, AUX, USB
memory or iPod r, touch the screen
tabs. For details, see page 190.
2Function menu display screen
To control the radio, CD changer,
Bluetooth raudio player, AUX, USB
memory or iPod r, touch the screen
buttons. For details, see page 190.
3Disc slot
Insert discs into the slot after pushing
“LOAD” button. For details, see
page 206.
4“TUNE/FILE” knob
Turn this knob to move the station
band and files up or down. For de-
tails, see pages 196, 201, 216 and
257.
5“LOAD” button
Push this button to insert the discs.
For details, see page 206.
6“SCAN” button
Push this button to scan radio sta-
tions or scan the files or tracks. For
details, see pages 197, 203, 213,
217, 218 and 259.
7“CH·DISC” button
Push the “”or “”button to select
a preset turning or a selected disc.
For details, see pages 197, 203 and
208.
GX460 Navi (U)
OM60E73U
Finish
09.09.24
Page 188 of 428
AUDIO/VIDEO SYSTEM
187
8“AUX·USB” button
Push this button to turn the
Bluetoothraudio player, AUX, USB
memory or iPod ron. For details, see
pages 190, 195, 245 and 253.
9“CD” button
Push this button to turn the CD
changer on. For details, see pages
190 and 210.
10“SAT” button
Push this button to choose an SAT
station. For details, see pages 190
and 200.
11“SEEK·TRACK” button
Push the “”or “”button to seek
up or down for a station, or to access
a desired track or file. For details, see
pages 197, 203, 212, 215, 251 and
257.
12“AM·FM” button
Push this button to choose a radio
station. (AM, FM1, FM2)
For details, see pages 190 and 196.
13“” button
Push this button to eject the discs.
For details, see page 208.
14“PWR/VOL” knob
Push this knob to turn the audio sys-
tem on and off, and turn it to adjust the
volume. For details, see page 189.
15“AUDIO” button
Push this button to display the audio
control screen. For details, see page
189. This section describes some of the basic
features of your audio/video system.
Some information may not pertain to your
system.
Your audio/video system works when the
“ENGINE START STOP” switch is turned
to ACCESSORY or IGNITION ON mode.
FCCID:AJDK021
IC ID : 775E
−K021
This device complies with Part 15 of the
FCC Rules and RSS −Gen and
RSS− 210 of IC Rules. Operation is sub-
ject to the following two conditions : (1)
This device may not cause harmful inter-
ference, and (2) this device must accept
any interference received, including in-
terference that may cause undesired
operation.
CAUTION
FCC WARNING: Changes or modifi-
cations not expressly approved by
the party responsible for compliance
could void the user’s authority to op-
erate the equipment.
CAUTION: Radio Frequency Radi-
ation Exposure
This equipment complies with FCC
radiation exposure limits set forth for
uncontrolled equipment and meets
the FCC radio frequency (RF) Expo-
sure Guidelines in Supplement C to
OET65. This equipment has very low
levels of RF energy that it deemed to
comply without maximum permis-
sive exposure evaluation (MPE). But
it is desirable that it should be
installed and operated with at least 20
cm and more between the radiator
and person’s body (excluding ex-
tremities: hands, wrists, feet and
ankles).
GX460 Navi (U)
OM60E73U
Finish
09.09.24
7
Using your audio/video
system —
— Some basics
Page 191 of 428
AUDIO/VIDEO SYSTEM
190
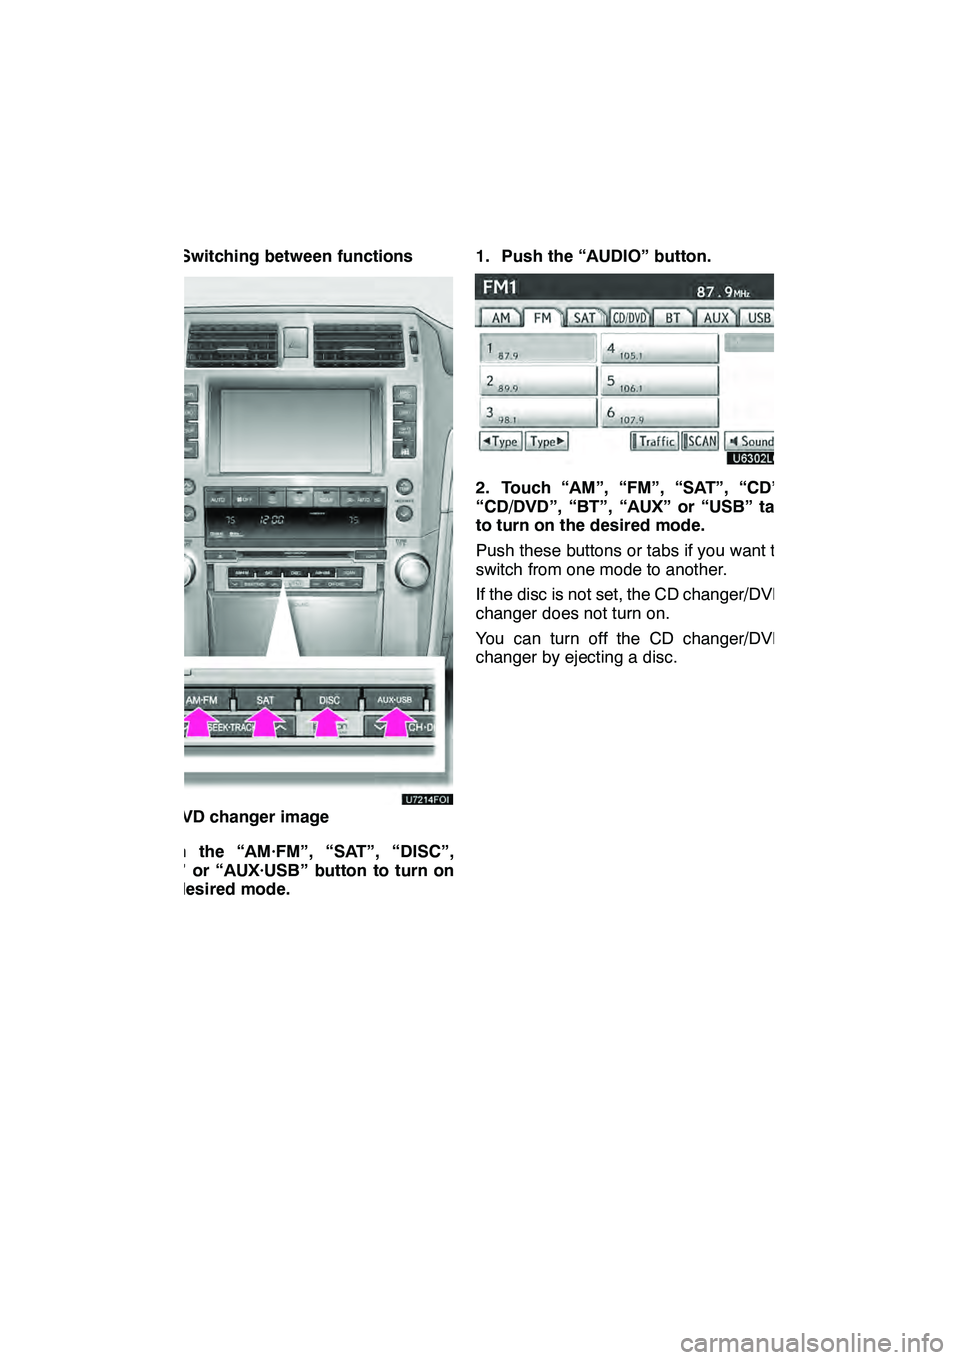
(d) Switching between functions
"DVD changer image
Push the “AM·FM”, “SAT”, “DISC”,
“CD” or “AUX·USB” button to turn on
the desired mode. 1. Push the “AUDIO” button.
2. Touch “AM”, “FM”, “SAT”, “CD”,
“CD/DVD”, “BT”, “AUX” or “USB” tab
to turn on the desired mode.
Push these buttons or tabs if you want to
switch from one mode to another.
If the disc is not set, the CD changer/DVD
changer does not turn on.
You can turn off the CD changer/DVD
changer by ejecting a disc.
GX460 Navi (U)
OM60E73U
Finish
09.09.24
Page 193 of 428
AUDIO/VIDEO SYSTEM
192
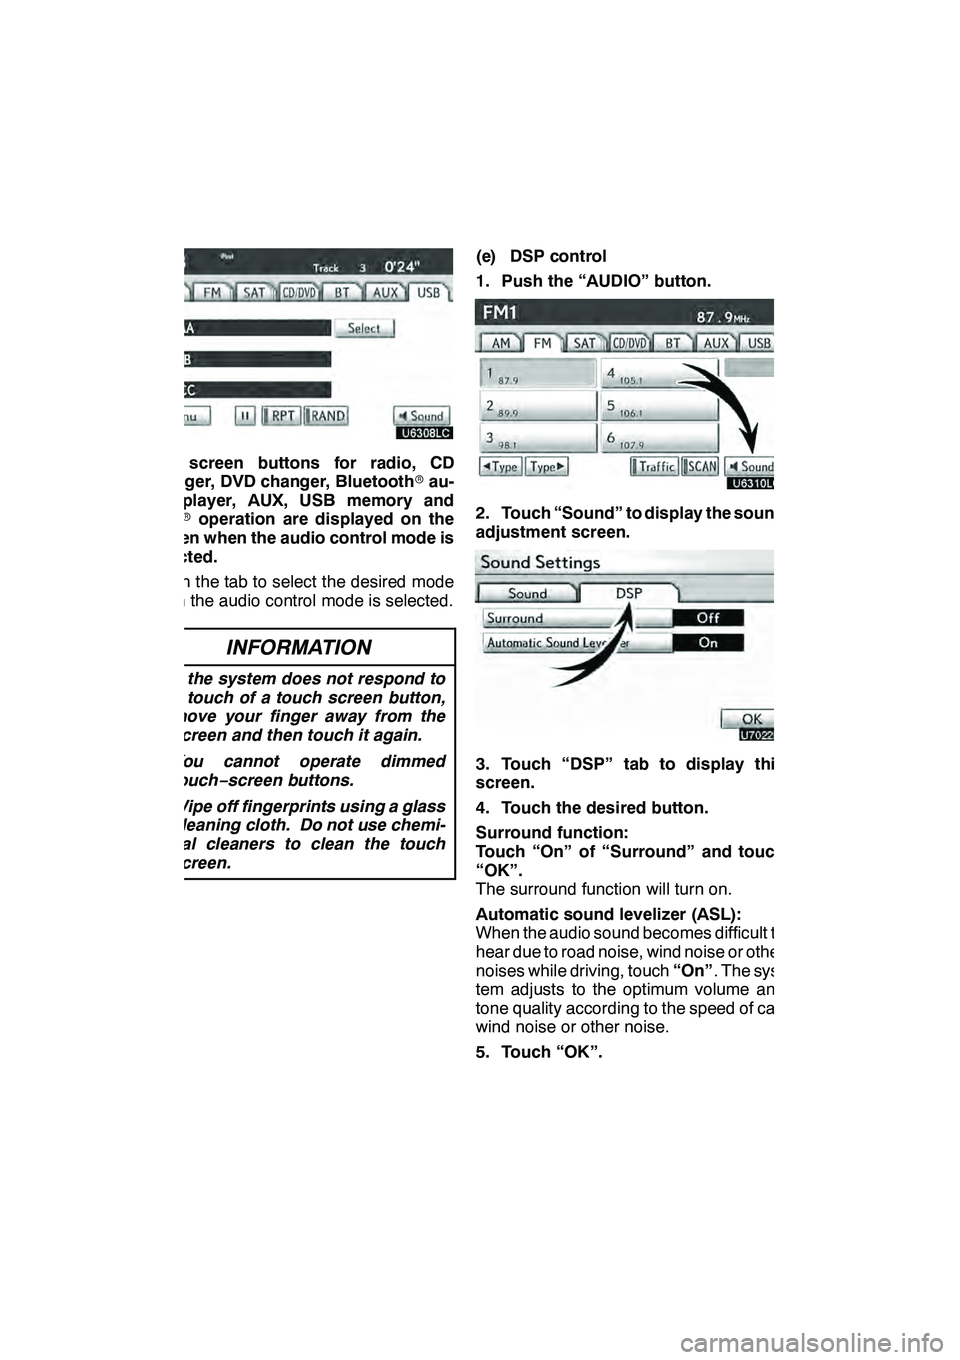
The screen buttons for radio, CD
changer, DVD changer, Bluetoothrau-
dio player, AUX, USB memory and
iPod roperation are displayed on the
screen when the audio control mode is
selected.
Touch the tab to select the desired mode
when the audio control mode is selected.
INFORMATION
D If the system does not respond to
a touch of a touch screen button,
move your finger away from the
screen and then touch it again.
D You cannot operate dimmed
touch− screen buttons.
D Wipe off fingerprints using a glass
cleaning cloth. Do not use chemi-
cal cleaners to clean the touch
screen.
(e) DSP control
1. Push the “AUDIO” button.
2. Touch “Sound” to display the sound
adjustment screen.
3. Touch “DSP” tab to display this
screen.
4. Touch the desired button.
Surround function:
Touch “On” of “Surround” and touch
“OK”.
The surround function will turn on.
Automatic sound levelizer (ASL):
When the audio sound becomes difficult to
hear due to road noise, wind noise or other
noises while driving, touch “On”. The sys-
tem adjusts to the optimum volume and
tone quality according to the speed of car,
wind noise or other noise.
5. Touch “OK”.
GX460 Navi (U)
OM60E73U
Finish
09.09.24