clock Lexus GX460 2010 Using The Bluetooth Audio System /
[x] Cancel search | Manufacturer: LEXUS, Model Year: 2010, Model line: GX460, Model: Lexus GX460 2010Pages: 825, PDF Size: 9.27 MB
Page 5 of 825

1
2
3
4
5
6
7
5
GX460_U.S.A. (OM60E69U)
3-6. Using the storage featuresList of storage fe atures................ 515
• Glove box ..................................... 516
• Console box ................................. 517
• Coin holder................................... 519
• Bottle holders/
door pockets .............................. 520
• Cup holders................................. 522
• Auxiliary boxes........................... 525
3-7. Other interior features Cool box ......................................... 528
Sun visors.......................................... 531
Vanity mirror .................................. 532
Clock ................................................ 533
Conversation mirror ................... 534
Power outlet (12 V DC) .................................... 535
Power outlet (120 V AC [type A]) ................ 537
Power outlet (120 V AC [type B]) ................ 542
Heated steering wheel............... 549
Seat heaters and
ventilators ...................................... 551
Armrest ............................................ 554
Coat hooks .................................... 555
Floor mats........................................ 556
Luggage compartment
features.......................................... 557
Garage door opener.................. 567
Compass.......................................... 575
Safety Connect ............................ 580 4-1. Maintenance and care
Cleaning and protecting
the vehicle exterior.................. 588
Cleaning and protecting
the vehicle interior .................... 592
4-2. Maintenance Maintenance requirements.............................. 595
General maintenance ................ 597
Emission inspection and
maintenance (I/M)
programs ....................................... 601
4-3. Do-it-yourself maintenance Do-it-yourself service
precautions .................................. 602
Hood ................................................. 607
Engine compartment................. 608
Tires ................................................... 627
Tire inflation pressure................. 634
Wheels ............................................ 638
Air conditioning filter.................. 640
Electronic key battery ................ 642
Checking and replacing
fuses ................................................ 645
Headlight aim (vehicles with low
beam halogen bulbs) ............. 658
Light bulbs ....................................... 660
4Maintenance and care
Page 212 of 825

212
2-2. Instrument cluster
GX460_U.S.A. (OM60E69U)
Multi-information display (Accessory meters)
: If equipped
The multi-information display presents the driver with a variety of driving-
related data including the current outside air temperature.
● Clock ( P. 533)
Indicates the time.
●Outside temperature
Indicates the outside temperature.
The temperature range that can be displayed is from -40 F (-40 C) to
122 F (50 C).
● Air conditioning system display ( P. 384)
● Rear view monitor ( P. 2 74 )
Automatically displayed when the shift lever is moved into R.
●Multi-terrain Monitor (if equipped) ( P. 2 9 8 )
● Wide view front & side monitor (if equipped) ( P. 279)
Page 384 of 825

Interior features3
383
GX460_U.S.A. (OM60E69U)
3-4. Using the hands-free system
(for cellular phone)
Hands-free system for
cellular phones..................... 477
Using the hands-free system
(for cellular phones) ............ 481
Making a phone call .............. 489
Setting a cellular phone ....... 494
Security and system
setup ........................................ 499
Using the phone book.......... 503
3-5. Using the interior lights Interior lights list ....................... 511
• Personal/interior light main switch ................................ 512
• Personal/interior lights ......... 513
3-6. Using the storage features List of storage features .......... 515
• Glove box .................................. 516
• Console box .............................. 517
• Coin holder................................ 519
• Bottle holders/
door pockets ........................... 520
• Cup holders.............................. 522
• Auxiliary boxes........................ 525 3-7. Other interior features
Cool box ................................... 528
Sun visors .................................. 531
Vanity mirror ........................... 532
Clock ......................................... 533
Conversation mirror............. 534
Power outlet (12 V DC)........ 535
Power outlet
(120 V AC [type A]) ........... 537
Power outlet
(120 V AC [type B]) ........... 542
Heated steering wheel ........ 549
Seat heaters and
ventilators .............................. 551
Armrest .................................... 554
Coat hooks .............................. 555
Floor mats ................................ 556
Luggage compartment features .................................. 557
Garage door opener ............. 567
Compass ................................... 575
Safety Connect ...................... 580
Page 451 of 825

450
3-2. Using the audio system
GX460_U.S.A. (OM60E69U)■
Adjusting sound quality
Turning the “TUNE/SEL” knob adjusts the level.
*: The sound quality level is adjusted individually in each audio mode.
Turning the Automatic Sound Levelizer (ASL) on/off
Turning the “TUNE/SEL” knob clockw ise turns on the ASL, and turning
the “TUNE/SEL” knob counterclockwise turns off the ASL.
ASL automatically adjusts the volume an d tone quality according to the noise
level as you drive your vehicle.
Mode
displayedSound
quality modeLevelTurn counter- clockwiseTu r n
clockwise
“BAS”Bass*-5 to 5
LowHigh“MID”Mid-range*-5 to 5
“TRE”Tr e b l e*-5 to 5
“FAD”
Front/rear volume
balance
F7 to R7Shifts to rearShifts to front
“BAL”
Left/right volume
balance
L7 to R7Shifts to leftShifts to right
Page 502 of 825

501
3-4. Using the hands-free system (for cellular phone)
3
Interior features
GX460_U.S.A. (OM60E69U)
Setting voice guidance volumeSelect “Guidance Vol” using the “TUNE/SEL” knob.
Change the voice guidance volume.
To decrease the volume: Turn the “TUNE/SEL” knob counterclockwise.
To increase the volume: Turn the “TUNE/SEL” knob clockwise.
Displaying the Bluetooth® device address and name
Select “Device Name” using the “TUNE/SEL” knob.
Turn the “TUNE/SEL” knob to display the Bluetooth
® device
address and name.
Select “Go Back” using the “TUNE/SEL” knob to return to “Sys-
tem Setup”.
Initializing the system
Select “Initialize” and then “Confirm” using the “TUNE/SEL”
knob.
Select “Confirm” again using the “TUNE/SEL” knob.
STEP1
STEP2
STEP1
STEP2
STEP3
STEP1
STEP2
Page 534 of 825

533
3-7. Other interior features
3
Interior features
GX460_U.S.A. (OM60E69U)
Clock
■The clock is displayed when
The “ENGINE START STOP” switch is in IGNITION ON mode.
■When disconnecting and reconnecting battery terminals
The clock data will be reset.
Vehicles with a navigation system
Refer to the “Navigation System Owner’s Manual”.
Vehicles without a navigation systemAdjusts the hours
Adjusts the minutes
Page 559 of 825

558
3-7. Other interior features
GX460_U.S.A. (OM60E69U)
■Warning reflector holder
Turn the knob clockwise.
Open the lid.
Secure the warning reflector.
The warning reflector itself is not
included as an original equip-
ment.
STEP1
STEP2
Page 612 of 825

611
4-3. Do-it-yourself maintenance
4
Maintenance and care
GX460_U.S.A. (OM60E69U)■
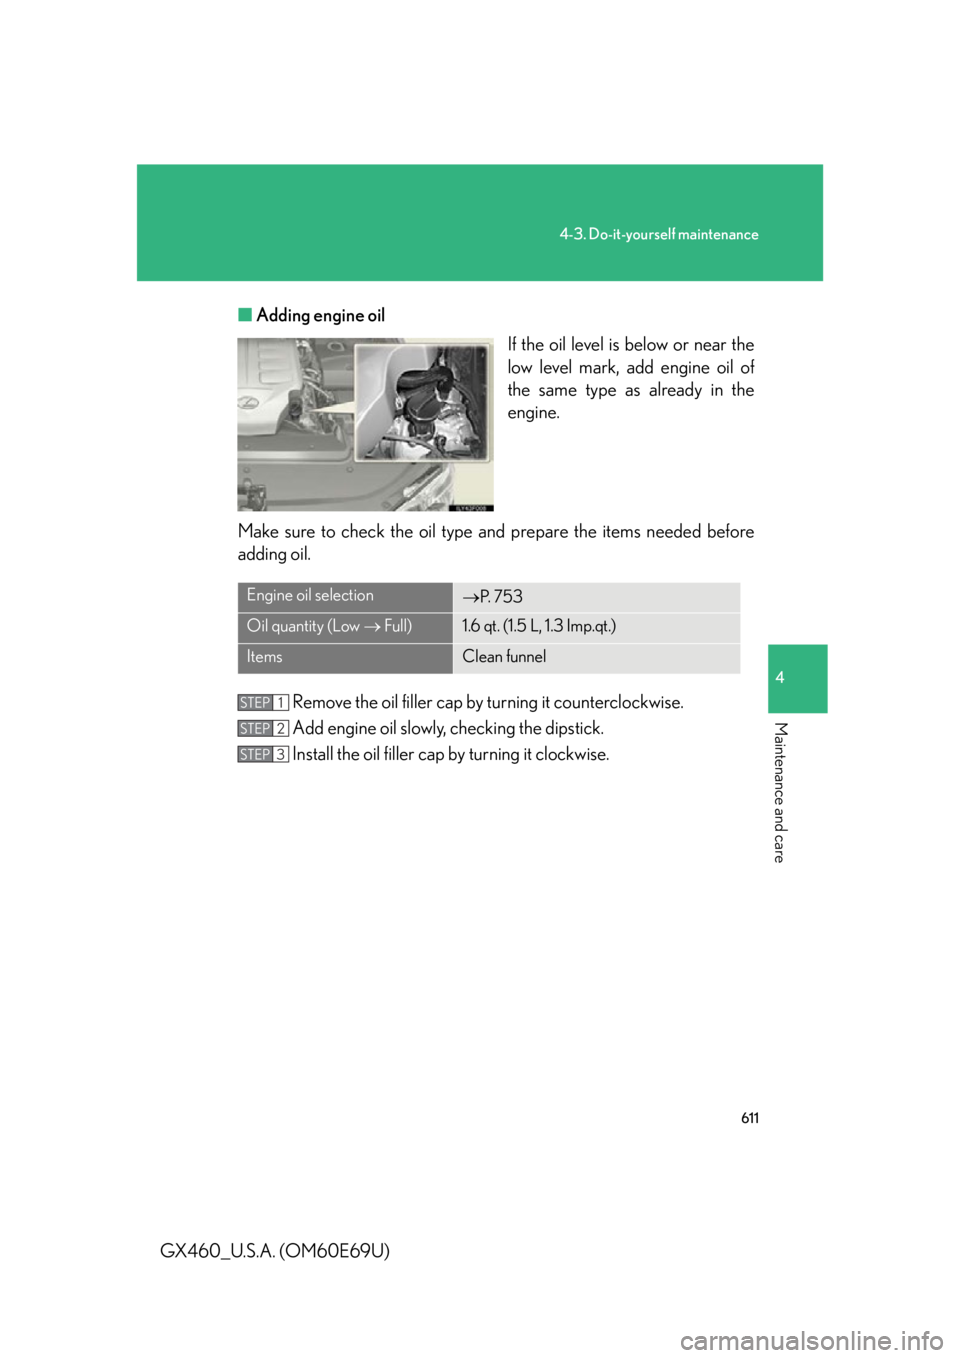
Adding engine oil
If the oil level is below or near the
low level mark, add engine oil of
the same type as already in the
engine.
Make sure to check the oil type and prepare the items needed before
adding oil.
Remove the oil filler cap by turning it counterclockwise.
Add engine oil slowly, checking the dipstick.
Install the oil filler cap by turning it clockwise.
Engine oil selectionP. 7 5 3
Oil quantity (Low Full)1.6 qt. (1.5 L, 1.3 Imp.qt.)
ItemsClean funnel
STEP1
STEP2
STEP3
Page 622 of 825

621
4-3. Do-it-yourself maintenance
4
Maintenance and care
GX460_U.S.A. (OM60E69U)■
Checking the fluid level
Make sure to check the fluid type and prepare the necessary items.
Clean all dirt off the reservoir.
Remove the cap by turning it counterclockwise.
Wipe the dipstick clean.
Reinstall the cap an d remove it again.
Check the fluid level.
Fluid typeAutomatic transmission fluid DEXRON® II or III
ItemsRag or paper, clean funnel (only for adding fluid)
CAUTION
■When checking the reservoir
Take care as the reservoir may be hot.
NOTICE
■When adding fluid
Avoid overfilling, or the po wer steering may be damaged.
■After replacing the reservoir cap
Check the steering box case, vane pump and hose connections for leaks or dam-
age.
STEP1
STEP2
STEP3
STEP4
STEP5
Page 662 of 825

661
4-3. Do-it-yourself maintenance
4
Maintenance and care
GX460_U.S.A. (OM60E69U)
Replacing light bulbs■ Headlight low beams (vehicles with halogen bulbs)
Turn the cover counterclockwise
and remove it.
■Rear bulb locations
Rear turn signal light
Back-up light
Rear side marker light
STEP1