ignition Lexus GX460 2014 Using the air conditioning system and defogger / LEXUS 2014 GX460 OWNERS MANUAL (OM60K80U)
[x] Cancel search | Manufacturer: LEXUS, Model Year: 2014, Model line: GX460, Model: Lexus GX460 2014Pages: 622, PDF Size: 8.61 MB
Page 66 of 622
661-2. Theft deterrent system
GX460_OM_OM60K80U_(U)
Engine immobilizer system
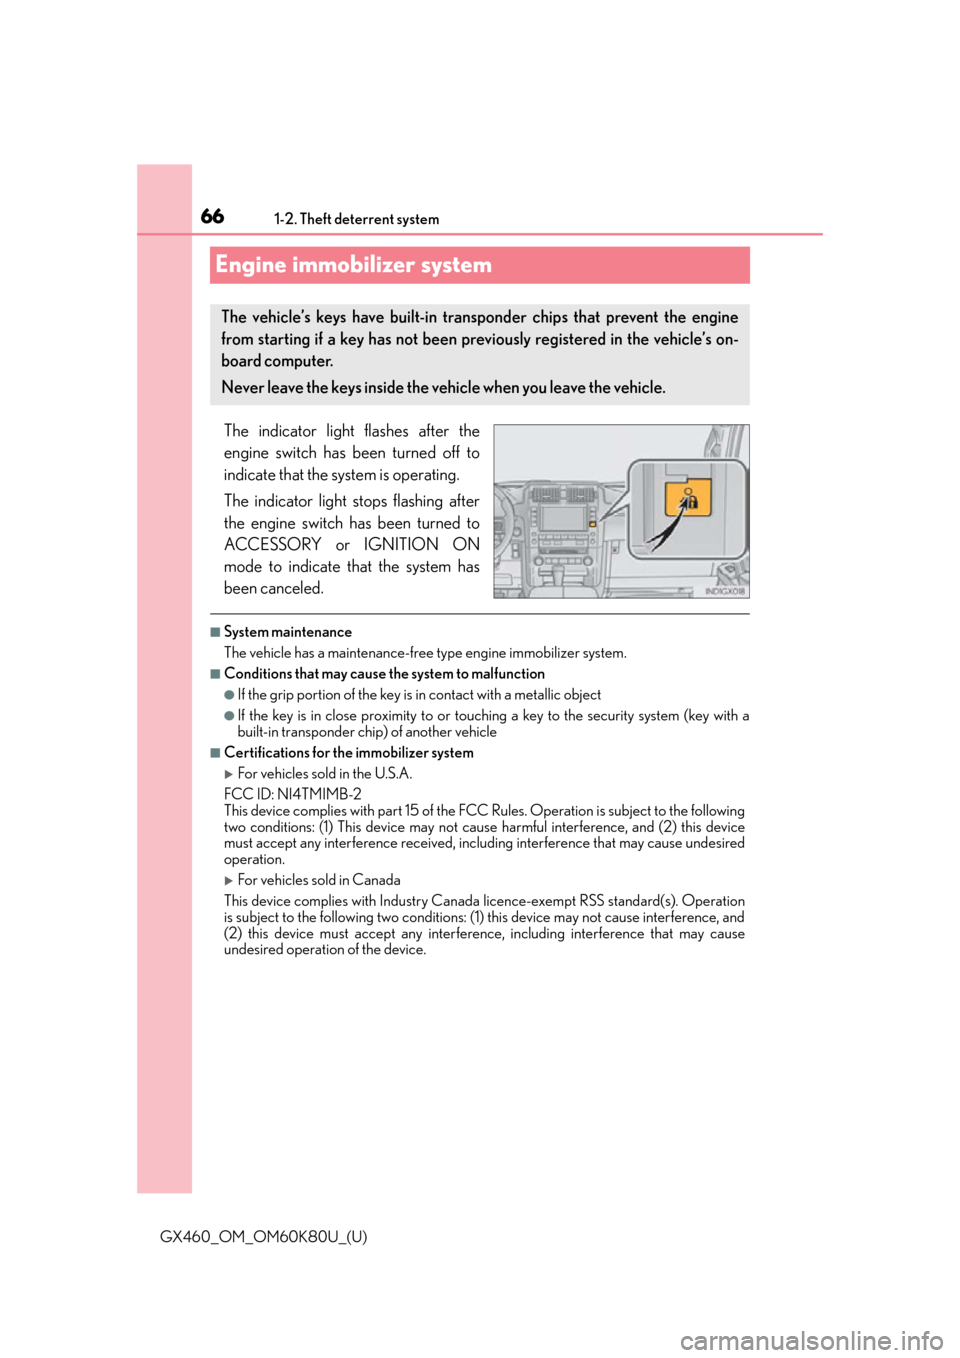
The indicator light flashes after the
engine switch has been turned off to
indicate that the system is operating.
The indicator light stops flashing after
the engine switch has been turned to
ACCESSORY or IGNITION ON
mode to indicate that the system has
been canceled.
■System maintenance
The vehicle has a maintenance-free type engine immobilizer system.
■Conditions that may cause the system to malfunction
●If the grip portion of the key is in contact with a metallic object
●If the key is in close proximity to or touching a key to the security system (key with a
built-in transponder chip) of another vehicle
■Certifications for the immobilizer system
For vehicles sold in the U.S.A.
FCC ID: NI4TMIMB-2
This device complies with part 15 of the FC C Rules. Operation is subject to the following
two conditions: (1) This device may not caus e harmful interference, and (2) this device
must accept any interference received, incl uding interference that may cause undesired
operation.
For vehicles sold in Canada
This device complies with Industry Canada licence-exempt RSS standard(s). Operation
is subject to the following two conditions: (1) this device may not cause interference, and
(2) this device must accept any interference, including interference that may cause
undesired operation of the device.
The vehicle’s keys have built-in transponder chips that prevent the engine
from starting if a key has not been prev iously registered in the vehicle’s on-
board computer.
Never leave the keys inside the vehicle when you leave the vehicle.
Page 74 of 622
74
GX460_OM_OM60K80U_(U)2. Instrument cluster
*1: These lights turn on when the engine switch is turned to IGNITION ON mode to
indicate that a system check is being perfor med. They will turn off after the engine is
on, or after a few seconds. There may be a malfunction in a system if the lights do not
turn on, or turn off. Have the vehicle inspected by your Lexus dealer.
*2: The light flashes to indicate a malfunction.
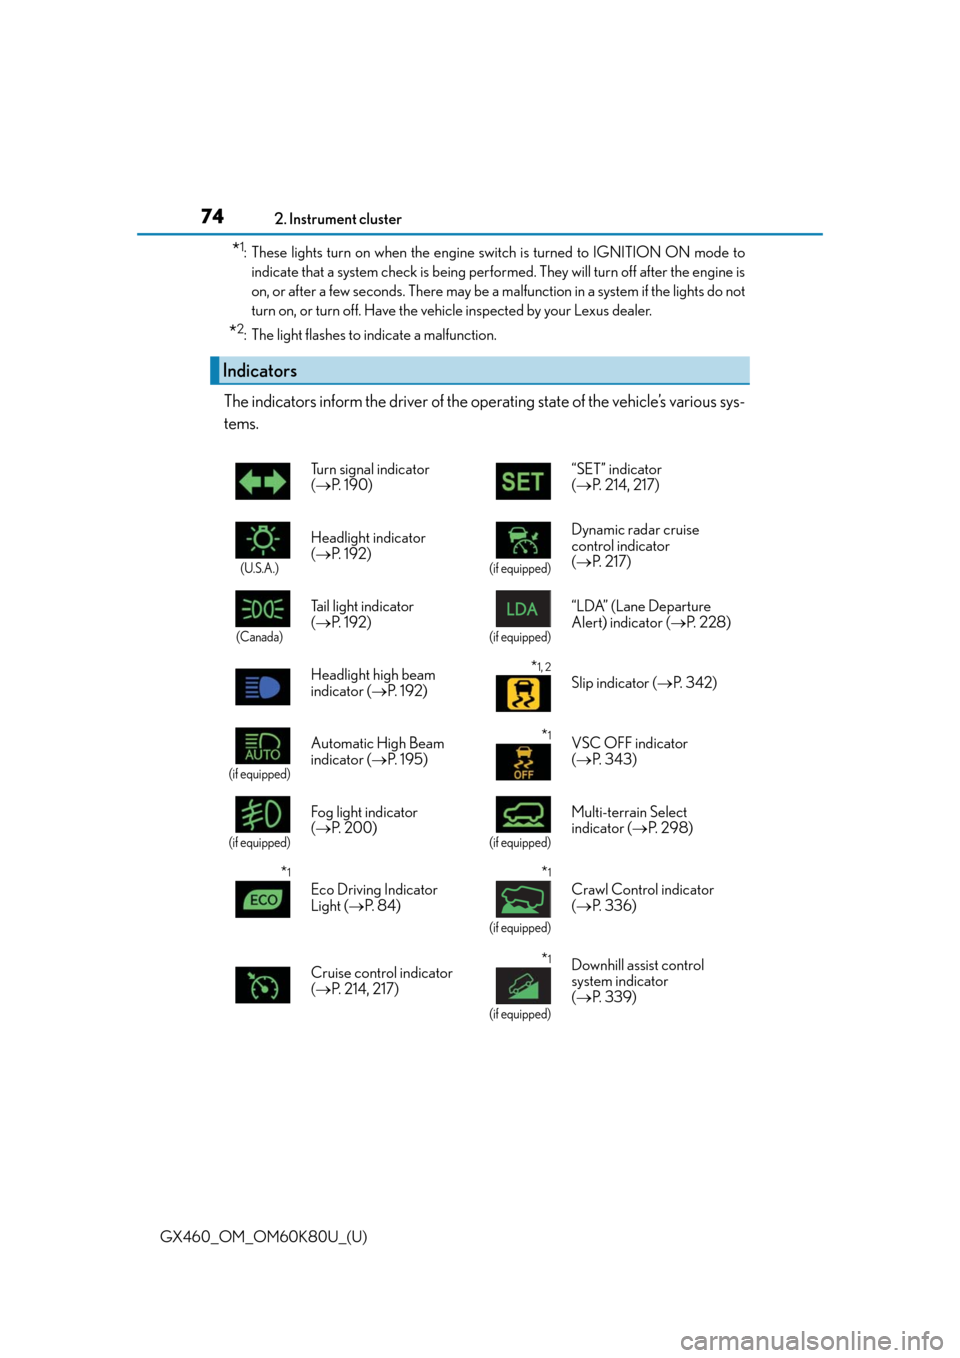
The indicators inform the driver of the operating state of the vehicle’s various sys-
tems.
Indicators
Turn signal indicator
( P. 1 9 0 ) “SET” indicator
(
P. 214, 217)
(U.S.A.)
Headlight indicator
( P. 1 9 2 )
(if equipped)
Dynamic radar cruise
control indicator
( P. 2 1 7 )
(Canada)
Tail light indicator
( P. 1 9 2 )
(if equipped)
“LDA” (Lane Departure
Alert) indicator ( P. 2 2 8 )
Headlight high beam
indicator ( P. 1 9 2 )
*1, 2
Slip indicator ( P. 3 4 2 )
(if equipped)
Automatic High Beam
indicator ( P. 1 9 5 )*1VSC OFF indicator
( P. 3 4 3 )
(if equipped)
Fog light indicator
( P. 2 0 0 )
(if equipped)
Multi-terrain Select
indicator ( P. 2 9 8 )
*1
Eco Driving Indicator
Light ( P. 8 4 )
*1
(if equipped)
Crawl Control indicator
( P. 3 3 6 )
Cruise control indicator
( P. 214, 217)
*1
(if equipped)
Downhill assist control
system indicator
( P. 3 3 9 )
Page 75 of 622
GX460_OM_OM60K80U_(U)
752. Instrument cluster
2
Instrument cluster
*1: These lights turn on when the engine switch is turned to IGNITION ON mode toindicate that a system check is being perfor med. They will turn off after the engine is
on, or after a few seconds. There may be a malfunction in a system if the lights do not
turn on, or turn off. Have the vehicle inspected by your Lexus dealer.
*2: The light flashes to indicate that the system is operating.
*3: The light turns on when the system is turn ed off. The light flashes quickly to indicate
that the system is operating.
*4: In order to confirm operation, the BSM outs ide rear view mirror indicators illumi-
nate in the following situations:
• When the engine switch is turned to IGNITION ON mode while the system is set to on.
• When the system is set to on while the engine switch is in IGNITION ON mode.
If the system is functioning correctly, the BSM outside rear view mirror indicators
will turn off after a few seconds.
If the BSM outside rear view mirror indicat ors do not illuminate or do not turn off,
there may be a malfunction with the system.
If this occurs, have the vehicle inspected by your Lexus dealer.
*5: This light illuminates on the outside rear view mirrors.
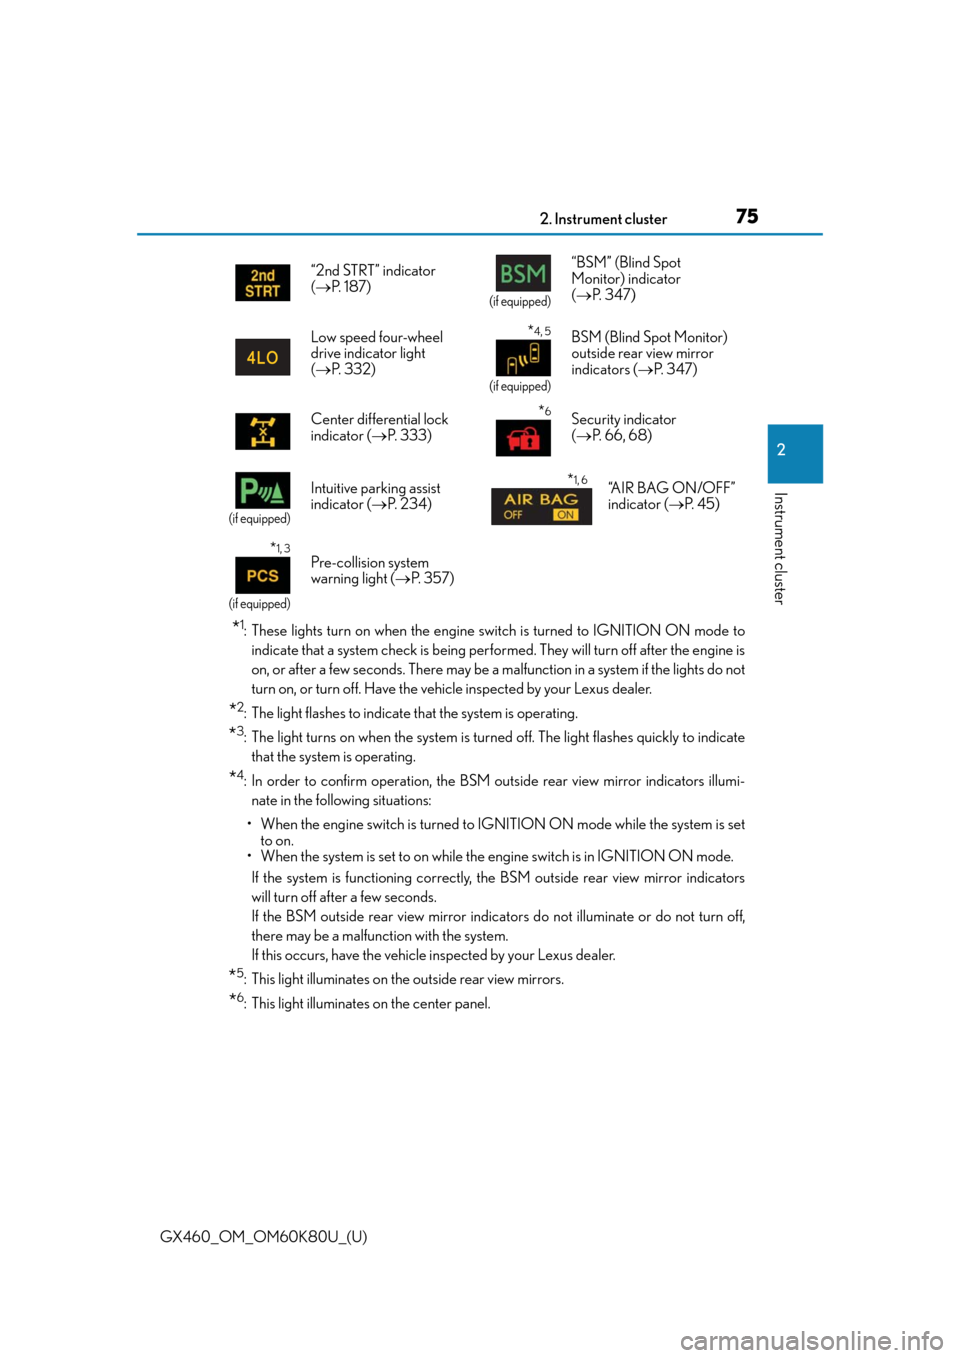
*6: This light illuminates on the center panel. “2nd STRT” indicator
(
P. 1 8 7 )
(if equipped)
“BSM” (Blind Spot
Monitor) indicator
( P. 3 4 7 )
Low speed four-wheel
drive indicator light
( P. 3 3 2 )
*4, 5
(if equipped)
BSM (Blind Spot Monitor)
outside rear view mirror
indicators ( P. 3 4 7 )
Center differential lock
indicator ( P. 3 3 3 )
*6Security indicator
( P. 66, 68)
(if equipped)
Intuitive parking assist
indicator ( P. 2 3 4 )*1, 6“A I R B A G O N / O F F ”
indicator ( P. 4 5 )
*1, 3
(if equipped)
Pre-collision system
warning light ( P. 3 5 7 )
Page 79 of 622
GX460_OM_OM60K80U_(U)
792. Instrument cluster
2
Instrument cluster
■The meters and display illuminate when
The engine switch is in IGNITION ON mode.
■Instrument cluster brightness adjustment
The instrument cluster brightness levels when the tail lights are on and off can be
adjusted.
■The brightness of the in strument cluster lights
When the tail lights are on, the brightness will change. However, when the surroundings
are bright (daytime, etc.) turn ing on the tail lights will not change the instrument cluster
brightness.
In addition, the brightness of the instrument cluster lights is automatically adjusted based
on the light sensor detecting ho w bright the surroundings are.
■When disconnecting and reconnecting battery terminals
The trip meter data will be reset.
If the trip meter was displayed last, the odometer will be displayed after resetting.
■Customization
Setting of sensitivity of the ambient light sensor used for dimming the meter lights can be
changed. (Customizable features P. 5 7 8 )
NOTICE
■To prevent damage to the engine and its components
●Do not let the indicator needle of the tachometer enter the red zone, which indicates
the maximum engine speed.
●The engine may be overheating if the engine coolant temperature gauge is in the red
zone (H). In this case, immediately stop the vehicle in a safe place, and check the
engine after it has cooled completely. ( P. 5 4 8 )
Page 83 of 622
GX460_OM_OM60K80U_(U)
832. Instrument cluster
2
Instrument cluster
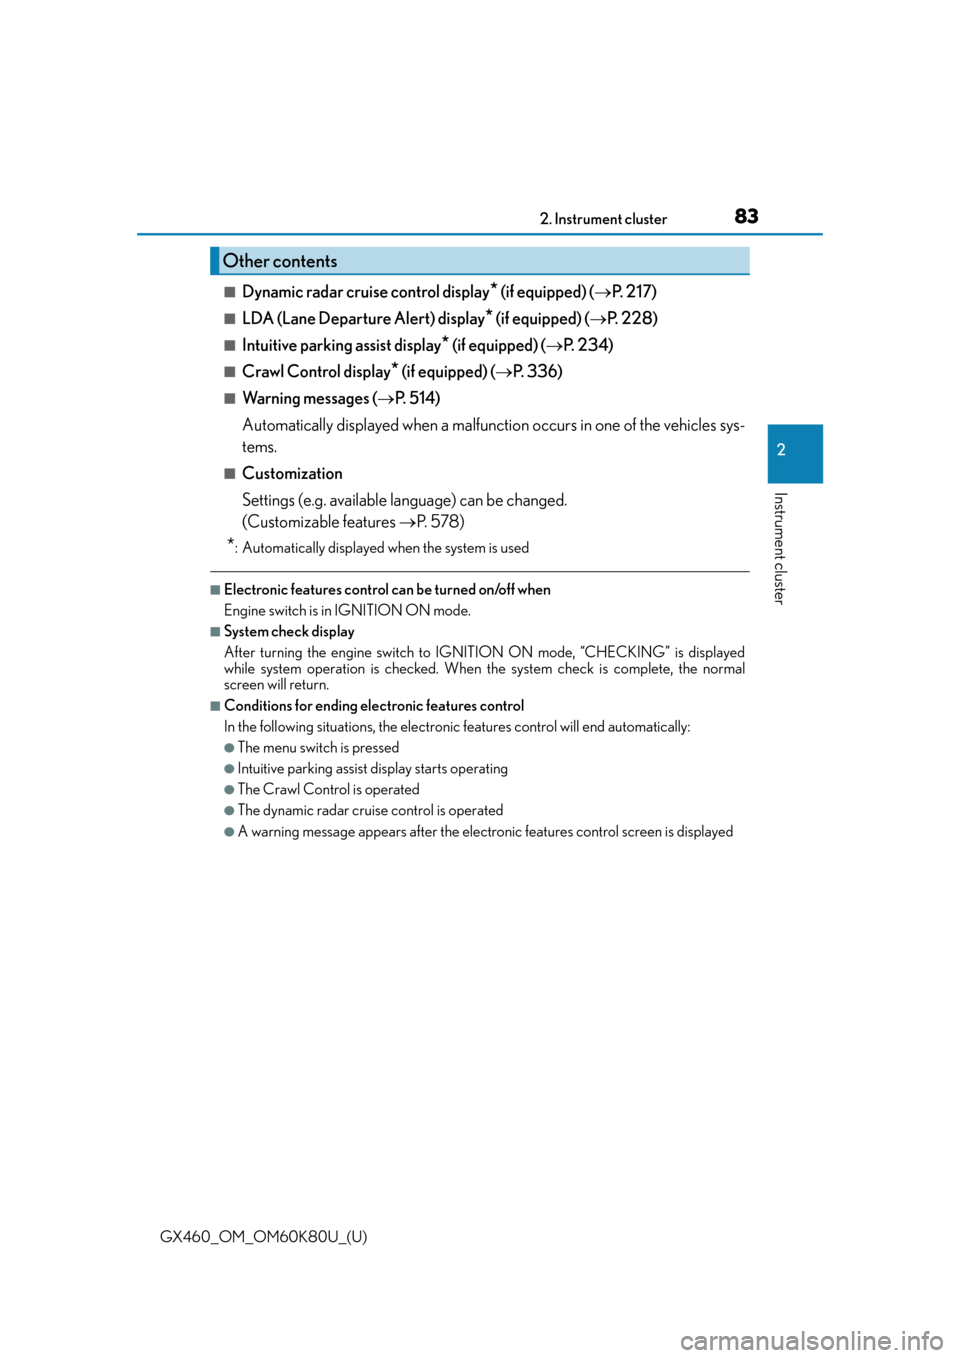
■Dynamic radar cruise control display* (if equipped) (P. 2 1 7 )
■LDA (Lane Departure Alert) display* (if equipped) ( P. 228)
■Intuitive parking assist display* (if equipped) ( P. 2 3 4 )
■Crawl Control display* (if equipped) ( P. 3 3 6 )
■Wa r n i n g m e s s a g e s ( P. 5 1 4 )
Automatically displayed when a malfunctio n occurs in one of the vehicles sys-
tems.
■Customization
Settings (e.g. available language) can be changed.
(Customizable features P. 5 7 8 )
*: Automatically displayed when the system is used
■Electronic features control can be turned on/off when
Engine switch is in IGNITION ON mode.
■System check display
After turning the engine switch to IGNI TION ON mode, “CHECKING” is displayed
while system operation is checked. When the system check is complete, the normal
screen will return.
■Conditions for ending electronic features control
In the following situations, the electronic features control will end automatically:
●The menu switch is pressed
●Intuitive parking assist display starts operating
●The Crawl Control is operated
●The dynamic radar cruise control is operated
●A warning message appears after the electronic features control screen is displayed
Other contents
Page 86 of 622

86
GX460_OM_OM60K80U_(U)2. Instrument cluster
Fuel consumption information
Press the “INFO”/“APPS” button, and then
select “Fuel consumption”/“Eco” on
the screen.
Resetting the consumption data
Fuel consumption in the past 30
minutes
Cruising range
Average fuel consumption for the past 30 minutes is divided by color into past
averages and averages attained since the engine switch was last turned to
IGNITION ON mode. Use the displayed average fuel consumption as a refer-
ence.
The image is an example only.
■Resetting the data
The data can be deleted by selecting “Clear”.
■Cruising range
Displays the estimated maximum distance that can be driven with the quantity of fuel
remaining.
This distance is computed based on your average fuel consumption. As a result, the
actual distance that can be driven may differ from that displayed.
: If equipped
Fuel consumption information can be displayed on the multimedia screen or
navigation system screen.
1
2
3
Page 95 of 622

GX460_OM_OM60K80U_(U)
953-2. Opening, closing and locking the doors and trunk
3
Operation of each component
Move the inside lock button to the lock position.
Close the door.
The door cannot be locked if the engine switch is in ACCESSORY or IGNITION
ON mode, or the electronic key is left inside the vehicle. However, the key may not be
detected correctly and the door may be locked.
The door cannot be opened from inside
the vehicle when the lock is set.
Unlock
Lock
These locks can be set to prevent chil-
dren from opening the rear doors. Push
down on each rear door switch to lock
both rear doors.
The following functions can be set or canceled:
Locking the front doors from the outside without a key
Rear door child-protector lock
1
2
1
2
Automatic door locking and unlocking systems
FunctionOperation
Shift position linked door lock-
ing functionShifting the shift lever out of P locks all the doors.
Shift position linked door
unlocking functionShifting the shift lever to P unlocks all the doors.
Speed linked door locking
functionAll the doors are locked when the vehicle speed is
approximately 12 mph (20 km/h) or higher.
Driver’s door linked door
unlocking functionAll the doors are unlocked when the driver’s door is
opened within 43 seconds after turning the engine
switch off.
Page 96 of 622

96
GX460_OM_OM60K80U_(U)3-2. Opening, closing and locking the doors and trunk
■Setting and canceling the functions
To switch between setting and canceling, follow the procedure below.
Close all the doors and turn the engi ne switch to IGNITION ON mode.
(Perform step 2 within 20 seconds.)
Shift the shift lever to P or N, and
press and hold the driver’s door
lock switch ( or )
for approximately 5 seconds and
then release.
The shift lever and switch positions
corresponding to the desired func-
tion to be set are shown in the follow-
ing table.
Use the same procedure to cancel
the function.
When the setting or canceling operation is complete, all the doors are locked
and then unlocked.
1
2
FunctionShift lever positionDriver’s door lock switch position
Shift position linked door locking
function
PShift position linked door unlock-
ing function
Speed linked door locking func-
tion
NDriver’s door linked door unlock-
ing function
Page 125 of 622
GX460_OM_OM60K80U_(U)
1253-3. Adjusting the seats
3
Operation of each component
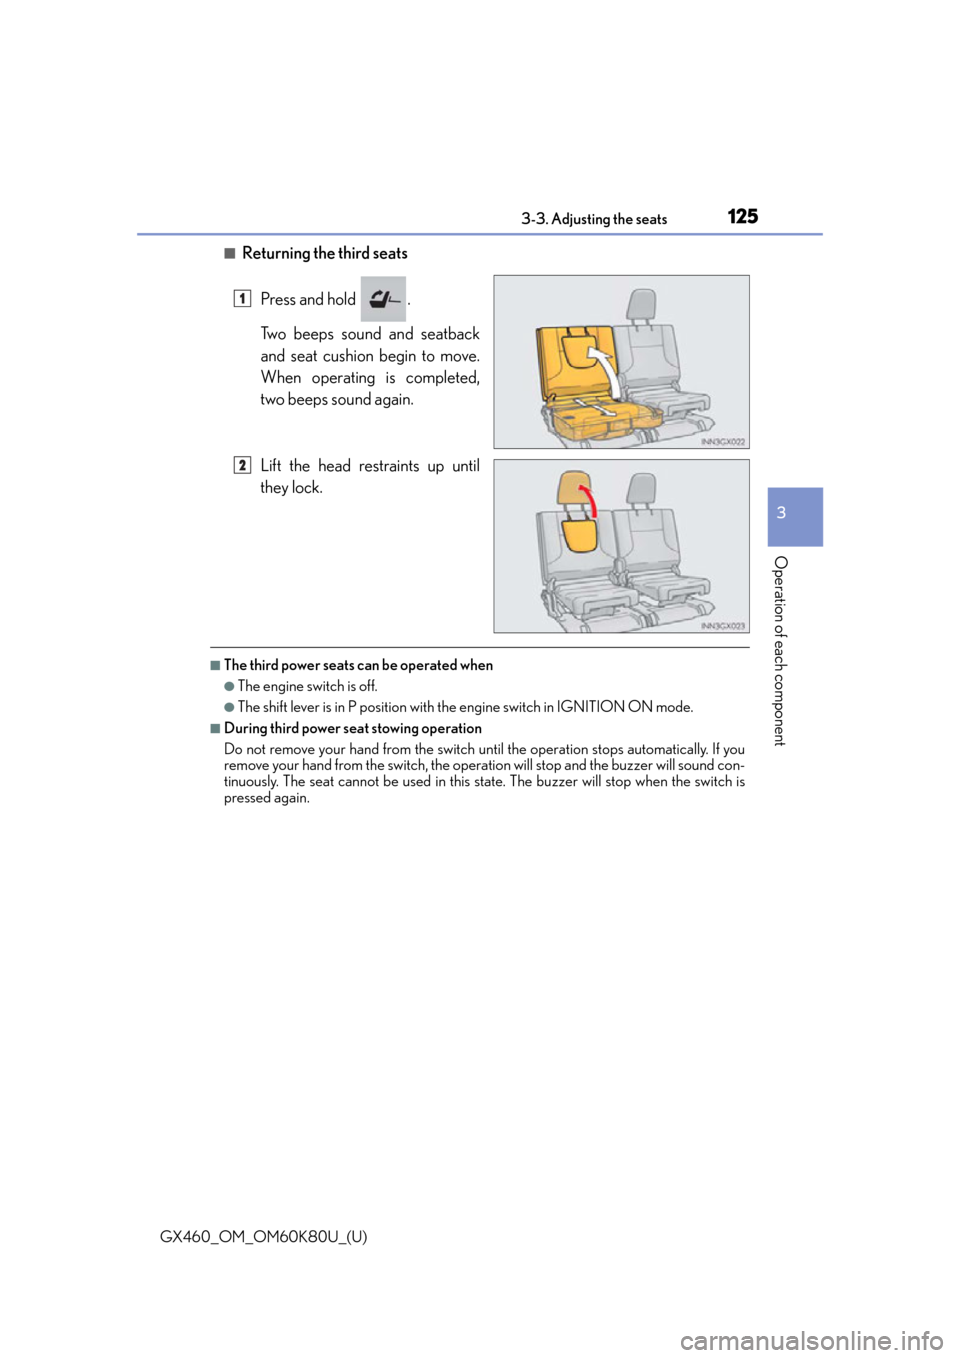
■Returning the third seatsPress and hold .
Two beeps sound and seatback
and seat cushion begin to move.
When operating is completed,
two beeps sound again.
Lift the head restraints up until
they lock.
■The third power seats can be operated when
●The engine switch is off.
●The shift lever is in P position with th e engine switch in IGNITION ON mode.
■During third power seat stowing operation
Do not remove your hand from the switch un til the operation stops automatically. If you
remove your hand from the switch, the operat ion will stop and the buzzer will sound con-
tinuously. The seat cannot be used in this state. The buzzer will stop when the switch is
pressed again.
1
2
Page 126 of 622

126
GX460_OM_OM60K80U_(U)3-3. Adjusting the seats
■Enlarging the luggage compartment
The third seat can be used for sitting when it is in the position shown in step of the fold-
ing down the third seats. (
P. 1 2 3 )
This can be convenient for enlarging the lu ggage compartment, for instance when the
luggage is against the back of the seatback.
■If the warning buzzer sounds continuously
If there is an abnormality in the system, the warning buzzer will sound continuously while
the engine switch is in IGNITION ON mode. In this case, take the following operations:
Press and hold .
Press and hold to stow the seat.
For each step, wait until the seat movement stops automatically and the two beeps sound
twice before removing your hand from the switch.
If the warning buzzer does not stop even after performing the above procedure cor-
rectly, perform the following operations:
Press and hold on the rear door side.
While holding , press forward on 5 times within 10 seconds and keep
holding until 3 beeps sound. The beep will then sound continuously again.
Repeat step and .
2
1
2
3
4
512