display Lexus GX470 2008 Operating the lights and windshield wipers / LEXUS 2008 GX470 (OM60D82U) Owner's Guide
[x] Cancel search | Manufacturer: LEXUS, Model Year: 2008, Model line: GX470, Model: Lexus GX470 2008Pages: 458, PDF Size: 7.3 MB
Page 225 of 458
225
3-2. Using the audio system
3
Interior features
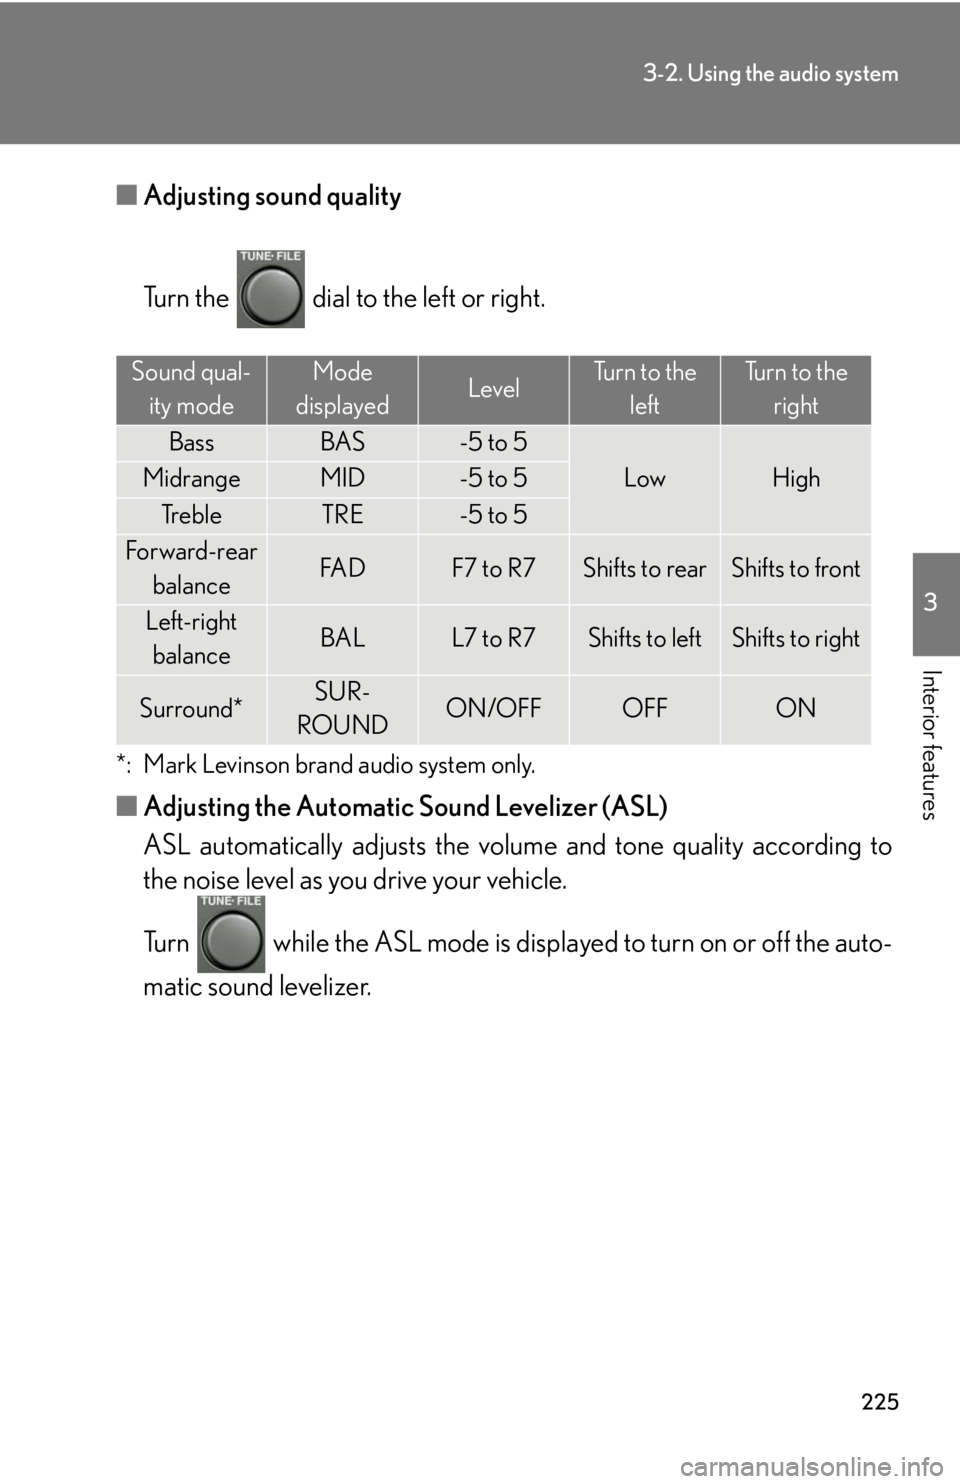
■Adjusting sound quality
Turn the dial to the left or right.
*: Mark Levinson brand audio system only.
■Adjusting the Automatic Sound Levelizer (ASL)
ASL automatically adjusts the volu me and tone quality according to
the noise level as you drive your vehicle.
Turn while the ASL mode is displayed to turn on or off the auto-
matic sound levelizer.
Sound qual-
ity modeMode
displayedLevelTurn to the leftTurn to the right
BassBAS-5 to 5
LowHighMidrangeMID-5 to 5
Tr e b l eTRE-5 to 5
Forward-rear
balanceFA DF7 to R7Shifts to rearShifts to front
Left-right balanceBALL7 to R7Shifts to leftShifts to right
Surround*SUR-
ROUNDON/OFFOFFON
Page 226 of 458
226
3-2. Using the audio system
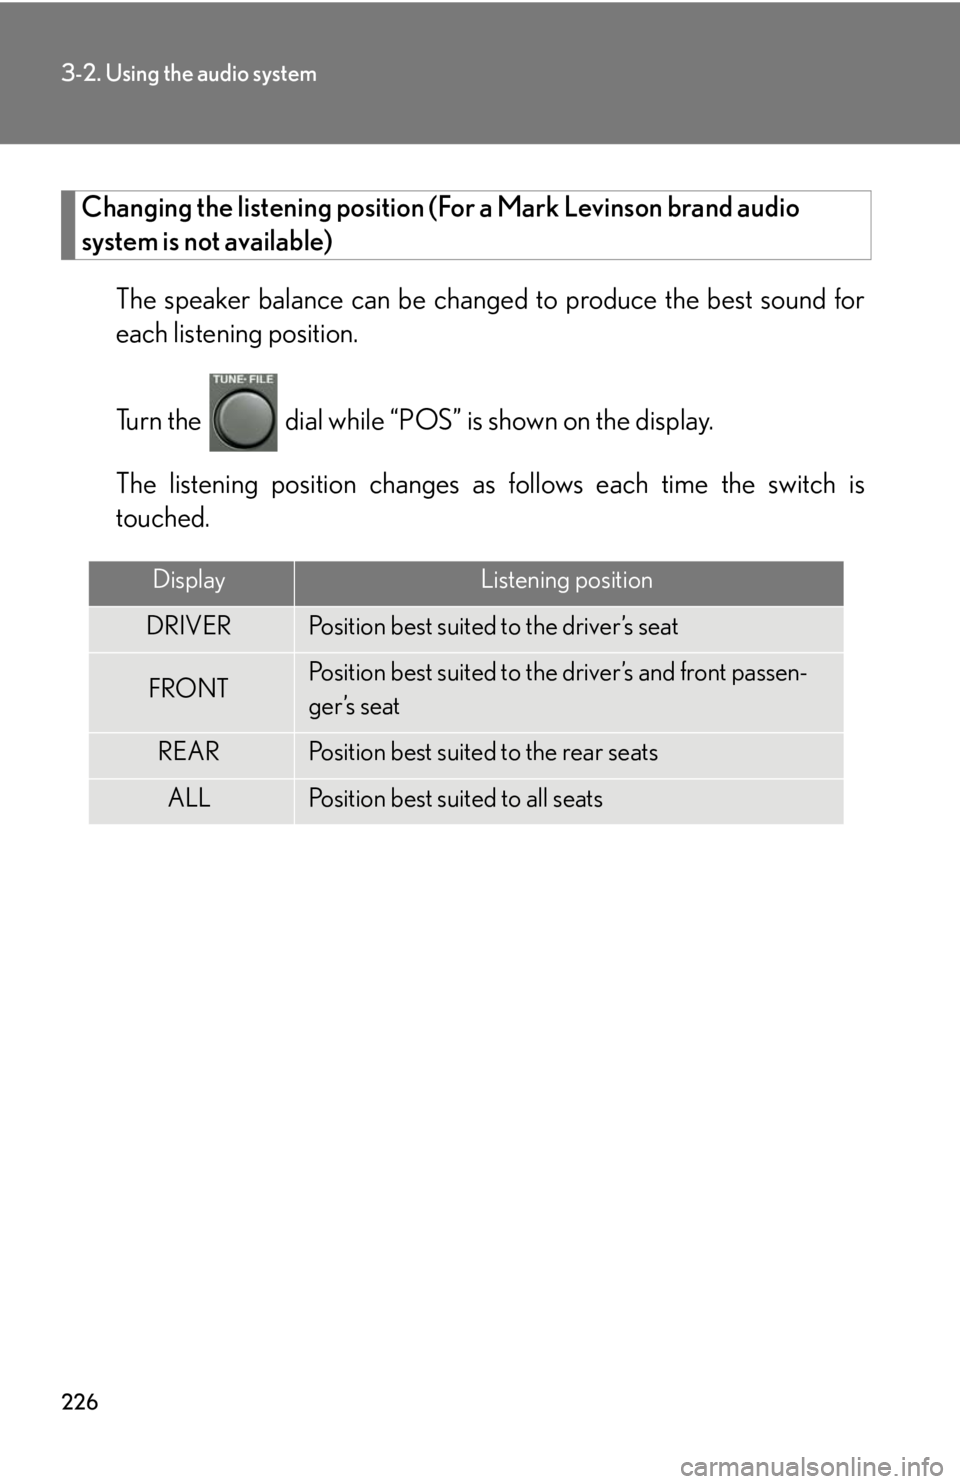
Changing the listening position (For a Mark Levinson brand audio
system is not available)
The speaker balance can be change d to produce the best sound for
each listening position.
Turn the dial while “POS” is shown on the display.
The listening position changes as follows each time the switch is
touched.
DisplayListening position
DRIVERPosition best suited to the driver’s seat
FRONTPosition best suited to the driver’s and front passen-
ger’s seat
REARPosition best suited to the rear seats
ALLPosition best suited to all seats
Page 231 of 458
231
3
Interior features
3-3. Using the rear audio system
Rear seat entertainment system features (if equipped)
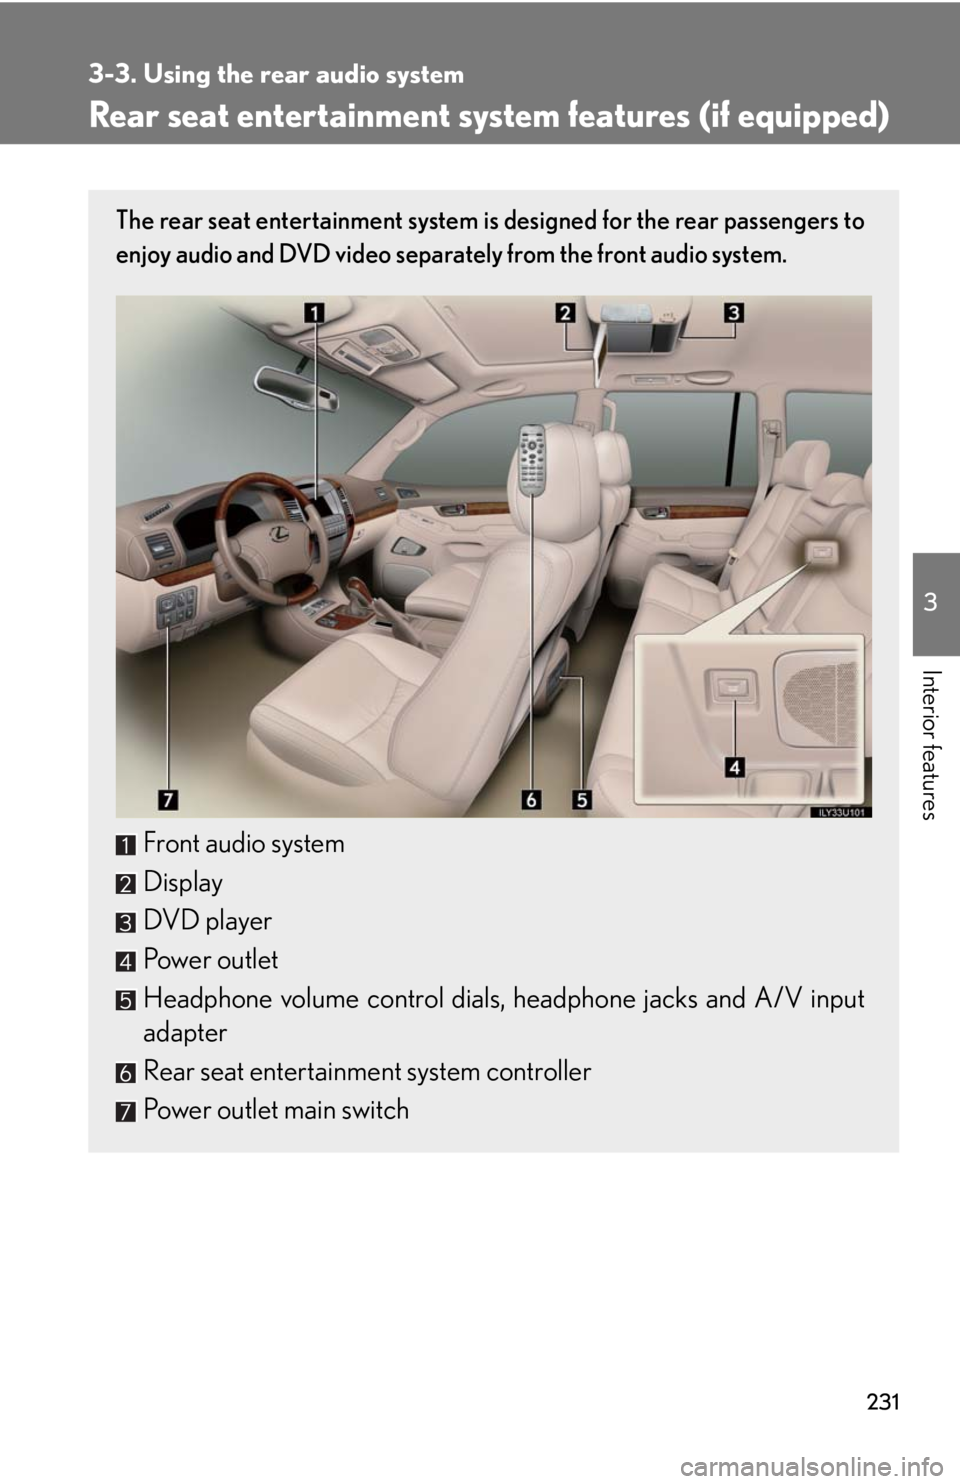
The rear seat entertainment system is designed for the rear passengers to
enjoy audio and DVD video separately from the front audio system.
Front audio system
Display
DVD player
Power outlet
Headphone volume control dials, headphone jacks and A/V input
adapter
Rear seat entertainment system controller
Power outlet main switch
Page 232 of 458
232
3-3. Using the rear audio system
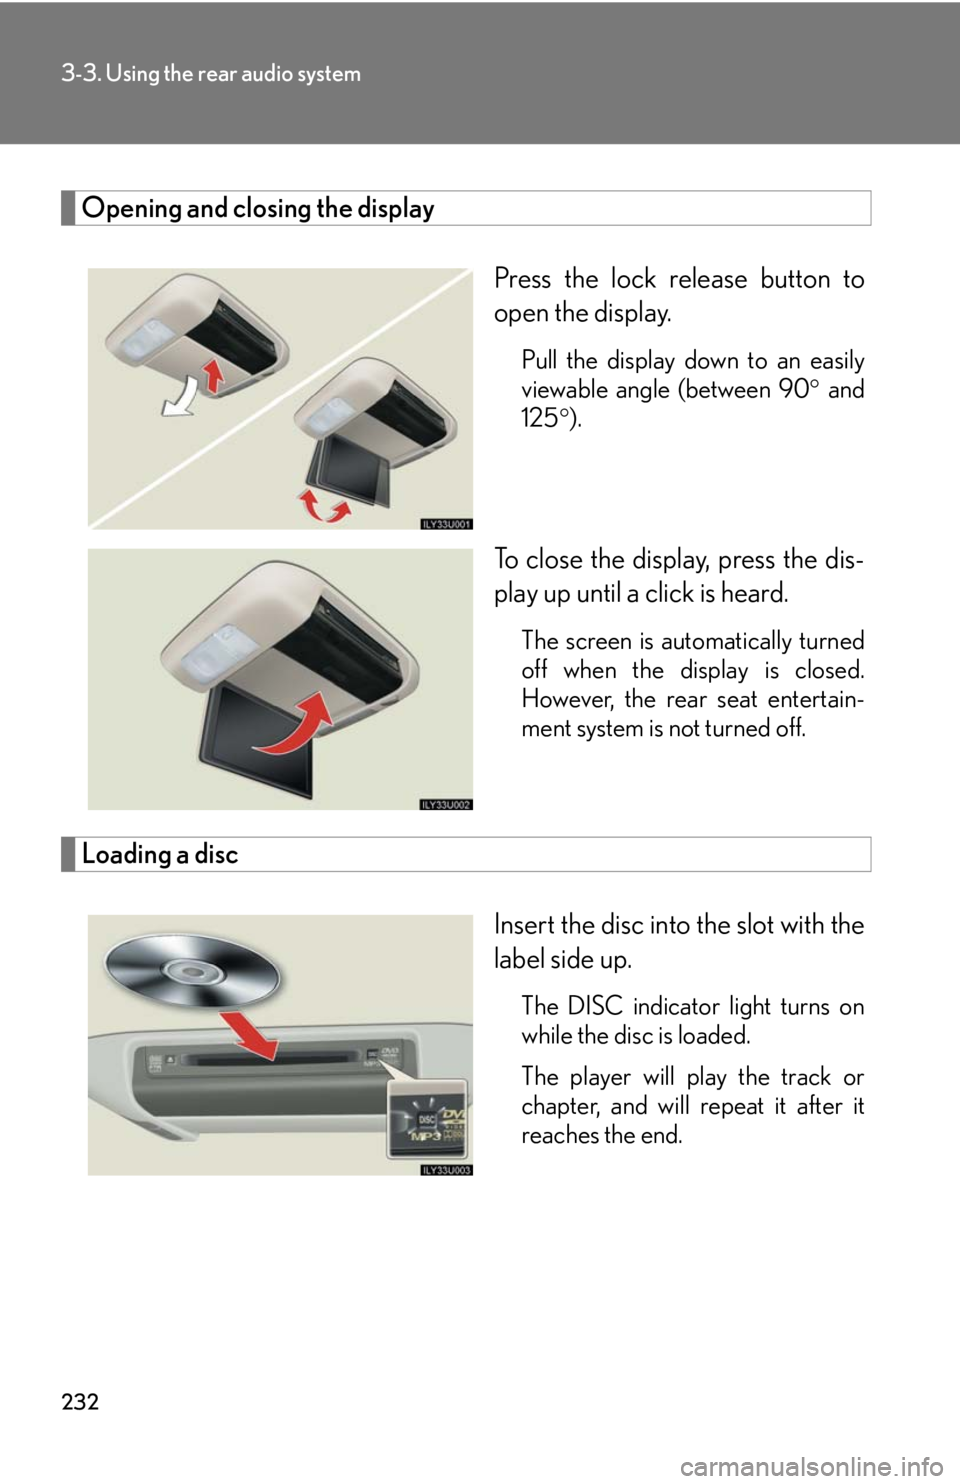
Opening and closing the displayPress the lock release button to
open the display.
Pull the display down to an easily
viewable angle (between 90 and
125 ).
To close the display, press the dis-
play up until a click is heard.
The screen is automatically turned
off when the display is closed.
However, the rear seat entertain-
ment system is not turned off.
Loading a disc
Insert the disc into the slot with the
label side up.
The DISC indicator light turns on
while the disc is loaded.
The player will play the track or
chapter, and will repeat it after it
reaches the end.
Page 235 of 458
235
3-3. Using the rear audio system
3
Interior features
■Headphones
Some headphones may not receive signals from the system clearly. Lexus recom-
mends the use of Lexus genuine wireless headphones.
Please contact your Lexus dealer for further details.
■Vo l u m e
●Adjust the volume when you connect the headphones to the jack. Loud sounds
may have a significant impact on the human body.
●Conversational speech on some DVDs is recorded at a low volume to emphasize
the impact of sound effects. If you adjust the volume assuming that the conversa-
tions represent the maximum volume level that the DVD will play, you may be
startled by louder sound effects or when you change to a different audio source.
Be sure to adjust the volume with this in mind.
CAUTION
■While driving
Do not use headphones.
Doing so may cause an accident, resulting in death or serious injury.
■When the rear seat entertainment system is not used
Keep the display closed.
In the event of an accident or sudden braking, the opened display may hit an occu-
pant’s body, resulting in injury.
■To prevent accidents and electric shock
Do not disassemble or modify the remote control.
■When the remote control is not used
Stow the remote control to the remote control case.
Injuries may result in the event of an accident or sudden braking.
Page 237 of 458
237
3-3. Using the rear audio system
3
Interior features
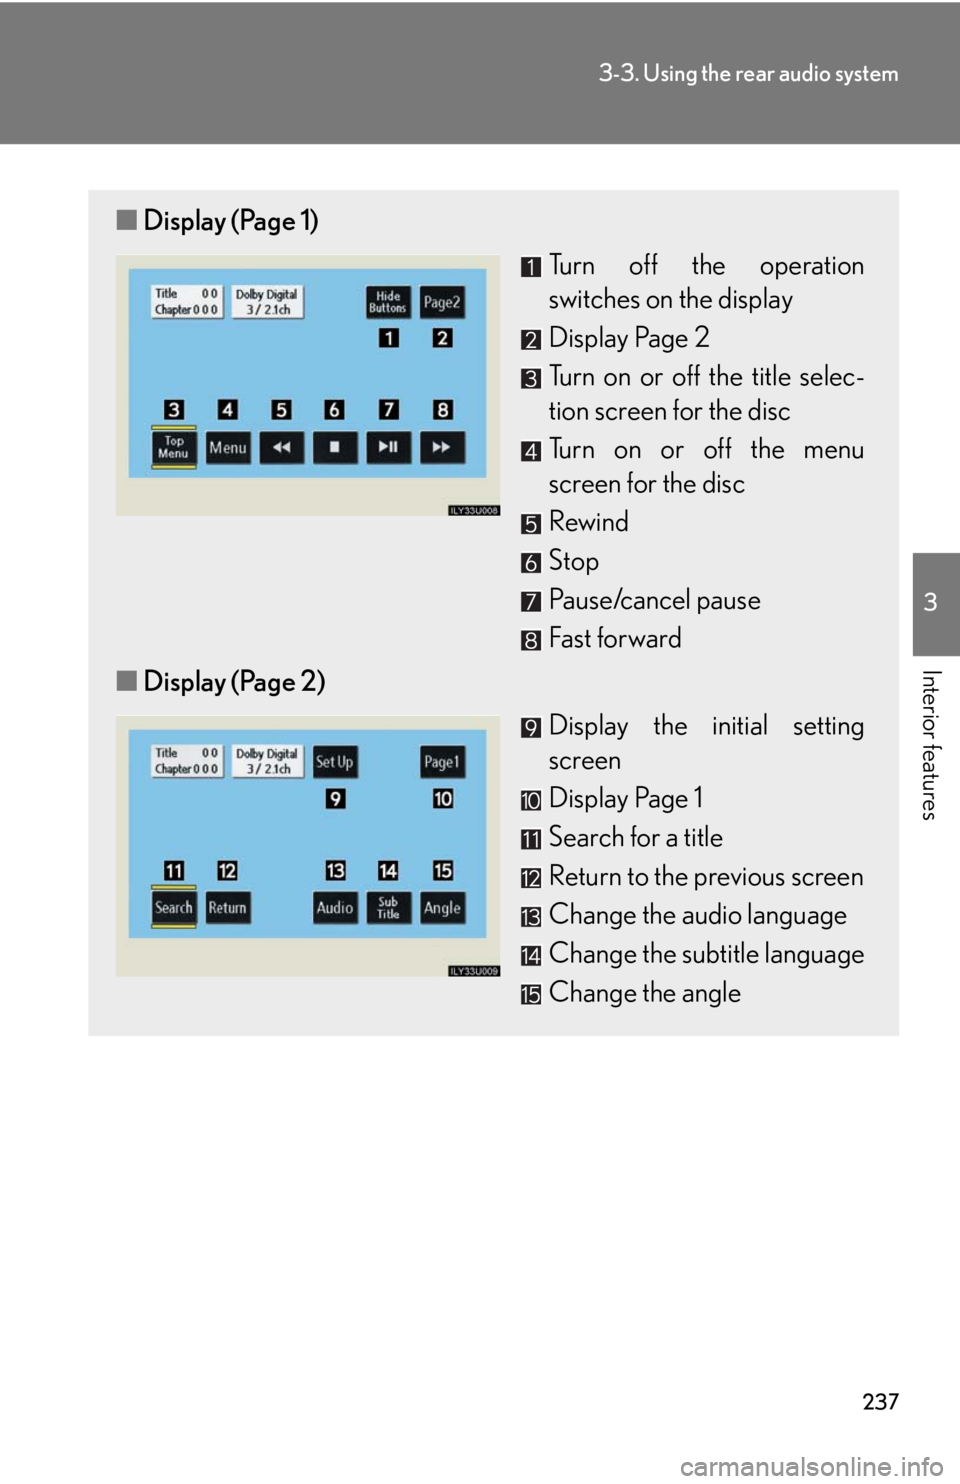
■Display (Page 1)
Turn off the operation
switches on the display
Display Page 2
Turn on or off the title selec-
tion screen for the disc
Turn on or off the menu
screen for the disc
Rewind
Stop
Pause/cancel pause
Fast forward
■ Display (Page 2)
Display the initial setting
screen
Display Page 1
Search for a title
Return to the previous screen
Change the audio language
Change the subtitle language
Change the angle
Page 238 of 458
238
3-3. Using the rear audio system
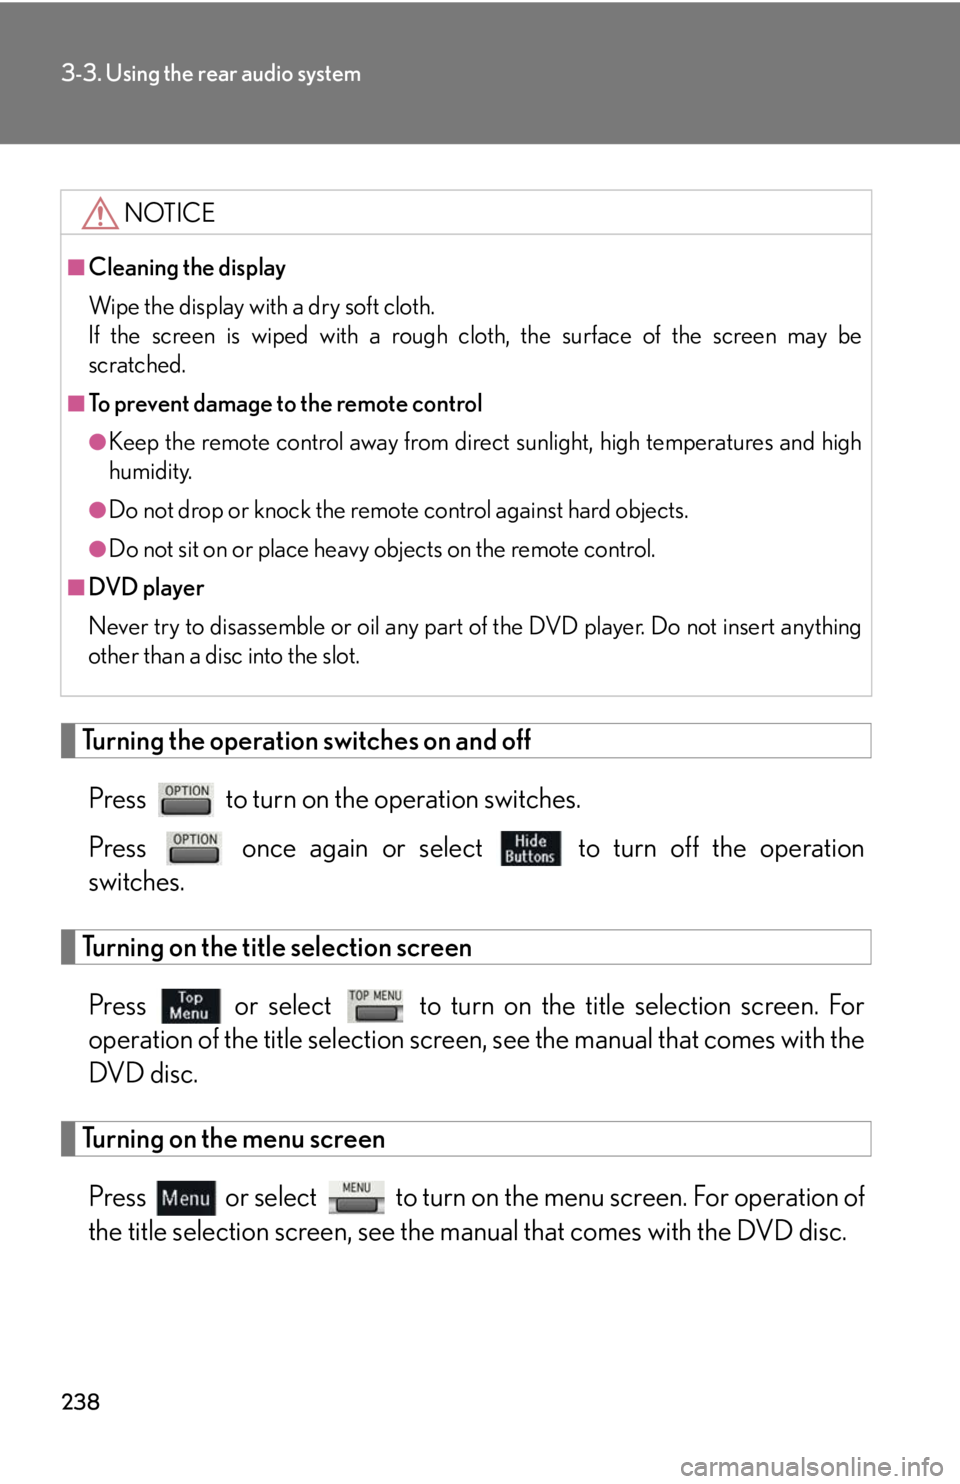
Turning the operation switches on and offPress to turn on the operation switches.
Press once again or select to turn off the operation
switches.
Turning on the title selection screen
Press or select to turn on the title selection screen. For
operation of the title selection screen , see the manual that comes with the
DVD disc.
Turning on the menu screen
Press or select to turn on the menu screen. For operation of
the title selection screen, see the manual that comes with the DVD disc.
NOTICE
■Cleaning the display
Wipe the display with a dry soft cloth.
If the screen is wiped with a rough cloth, the surface of the screen may be
scratched.
■To prevent damage to the remote control
●Keep the remote control away from direct sunlight, high temperatures and high
humidity.
●Do not drop or knock the remote control against hard objects.
●Do not sit on or place heavy objects on the remote control.
■DVD player
Never try to disassemble or oil any part of the DVD player. Do not insert anything
other than a disc into the slot.
Page 239 of 458
239
3-3. Using the rear audio system
3
Interior features
Returning to the previous screenPress to return to the previous screen. For operation of the title
selection screen, see the manual that comes with the DVD disc.
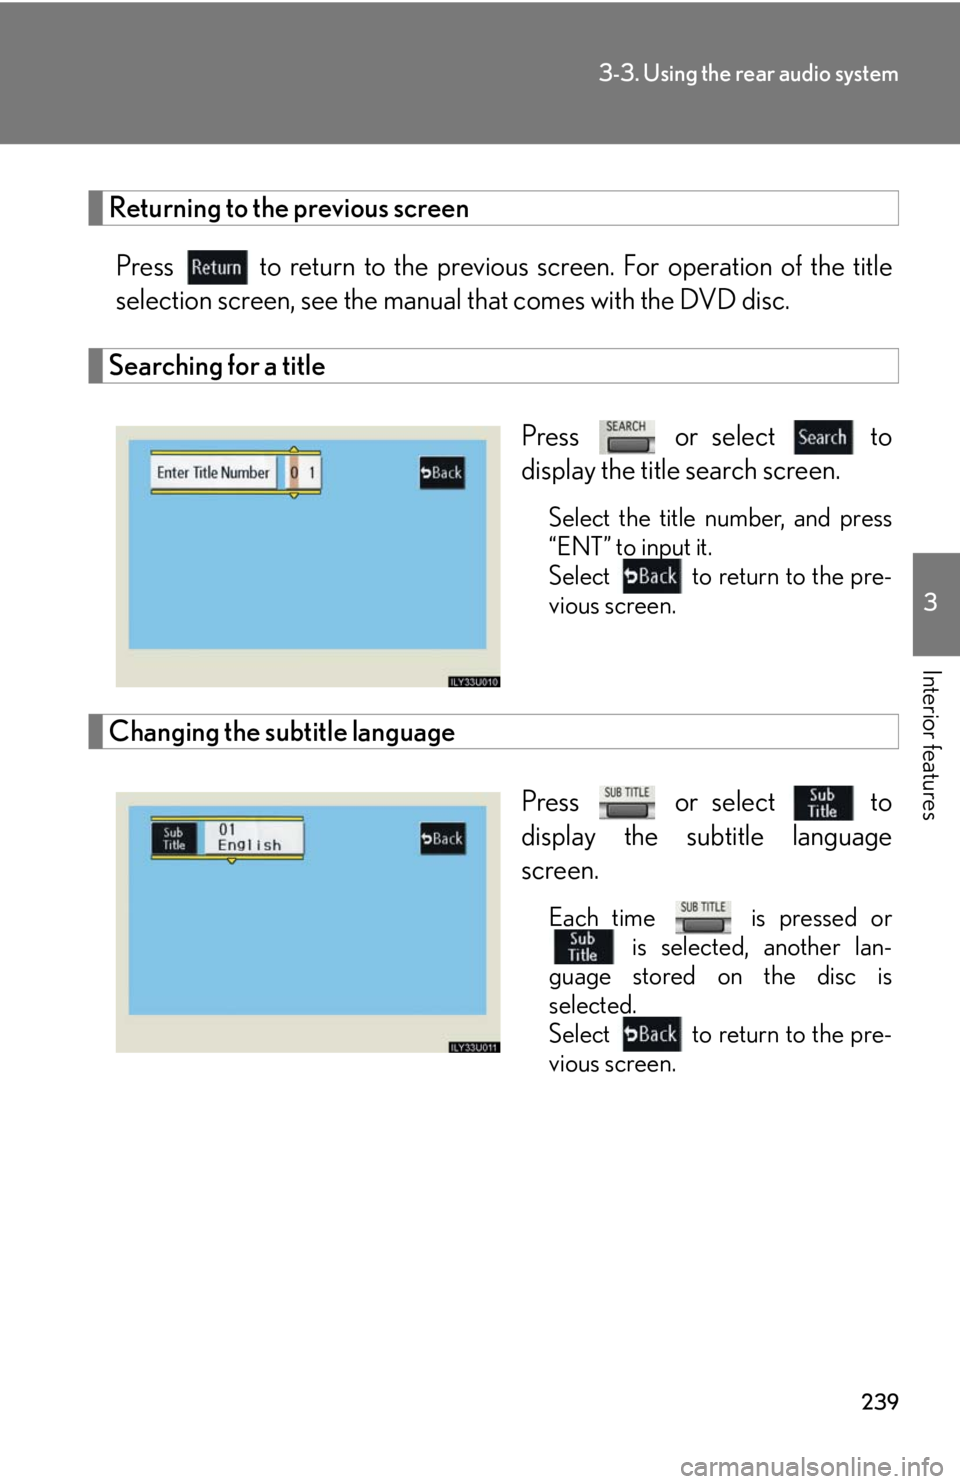
Searching for a title
Press or select to
display the title search screen.
Select the title number, and press
“ENT” to input it.
Select to return to the pre-
vious screen.
Changing the subtitle languagePress or select to
display the subtitle language
screen.
Each time is pressed or is selected, another lan-
guage stored on the disc is
selected.
Select to return to the pre-
vious screen.
Page 240 of 458
240
3-3. Using the rear audio system
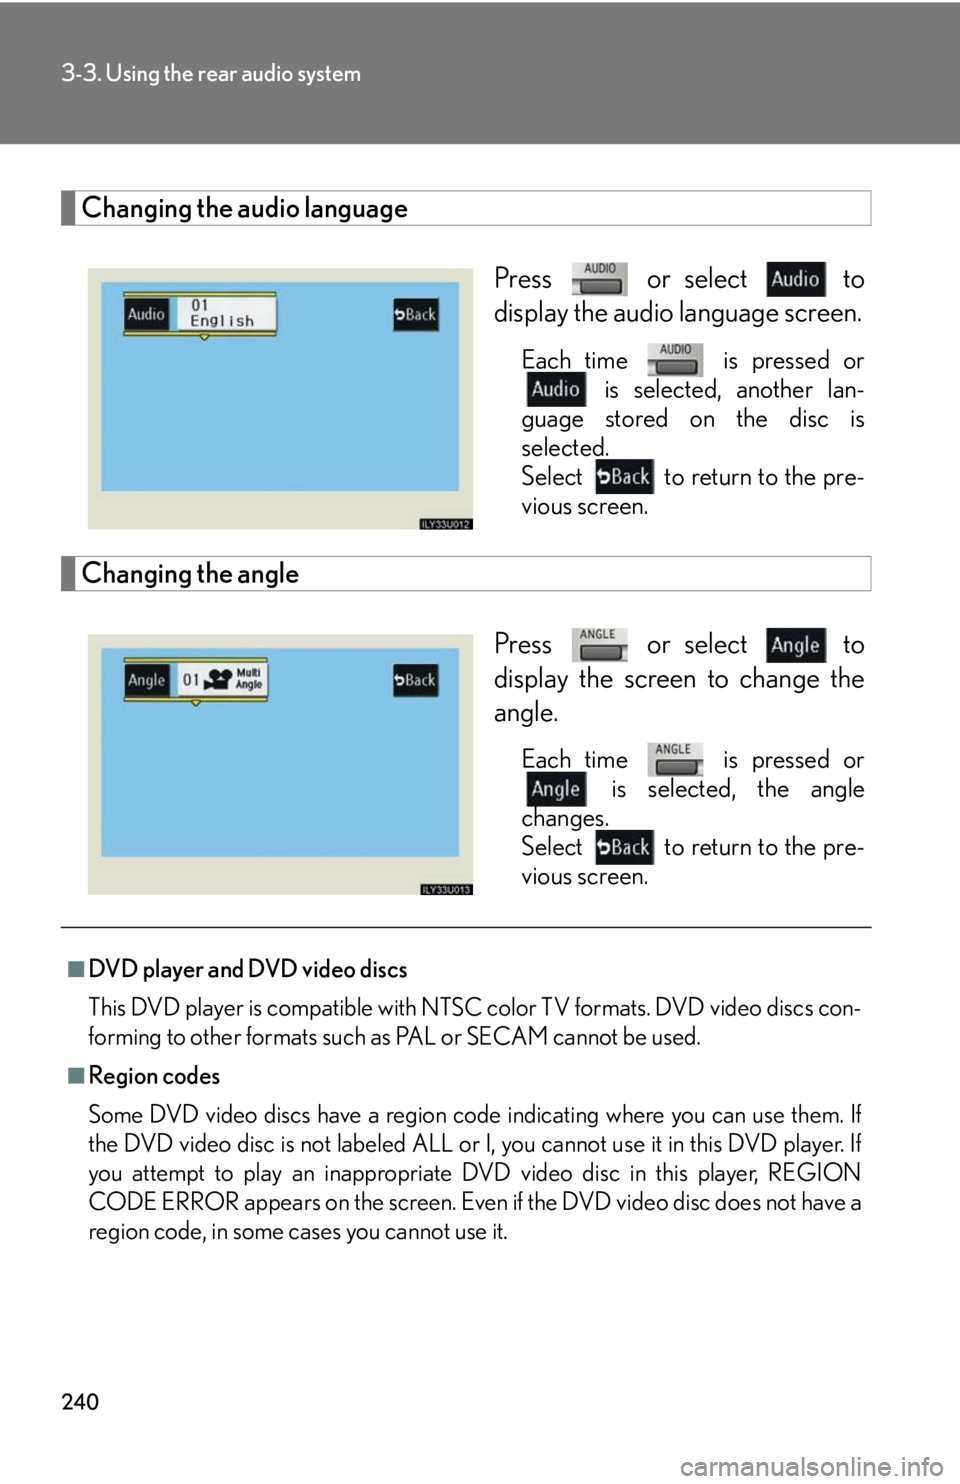
Changing the audio languagePress or select to
display the audio language screen.
Each time is pressed or is selected, another lan-
guage stored on the disc is
selected.
Select to return to the pre-
vious screen.
Changing the angle
Press or select to
display the screen to change the
angle.
Each time is pressed or is selected, the angle
changes.
Select to return to the pre-
vious screen.
■DVD player and DVD video discs
This DVD player is compatible with NTSC color TV formats. DVD video discs con-
forming to other formats such as PAL or SECAM cannot be used.
■Region codes
Some DVD video discs have a region code indicating where you can use them. If
the DVD video disc is not labeled ALL or I, you cannot use it in this DVD player. If
you attempt to play an inappropriate DVD video disc in this player, REGION
CODE ERROR appears on the screen. Even if the DVD video disc does not have a
region code, in some cases you cannot use it.
Page 241 of 458
241
3-3. Using the rear audio system
3
Interior features
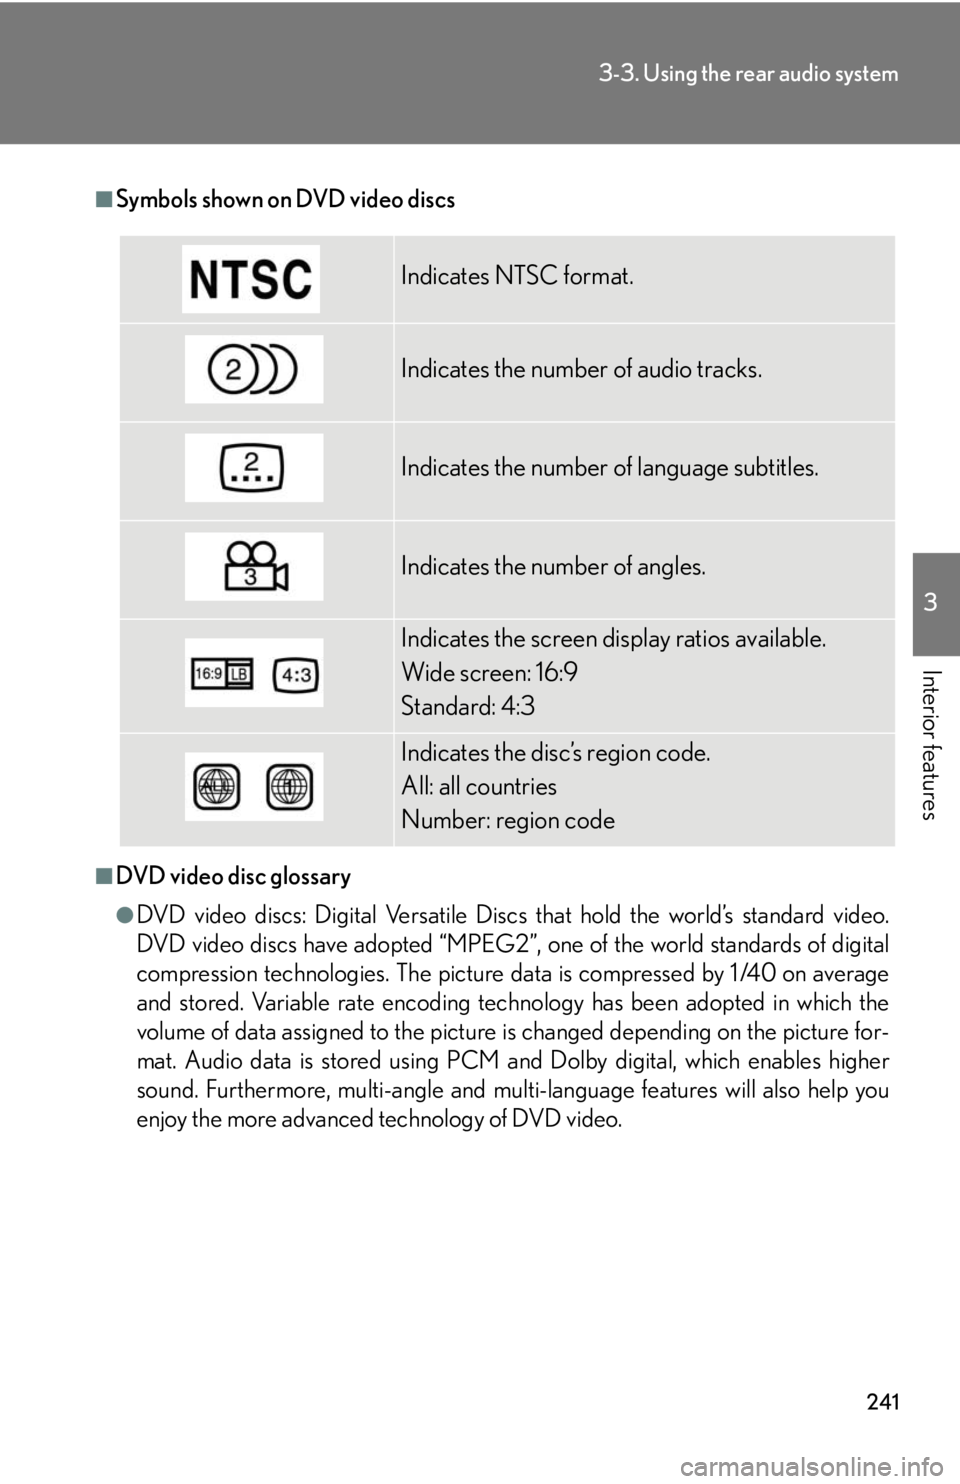
■Symbols shown on DVD video discs
■DVD video disc glossary
●DVD video discs: Digital Versatile Discs that hold the world’s standard video.
DVD video discs have adopted “MPEG2”, one of the world standards of digital
compression technologies. The picture data is compressed by 1 /40 on average
and stored. Variable rate encoding tech nology has been adopted in which the
volume of data assigned to the picture is changed depending on the picture for-
mat. Audio data is stored using PCM and Dolby digital, which enables higher
sound. Furthermore, multi-angle and multi-language features will also help you
enjoy the more advanced technology of DVD video.
Indicates NTSC format.
Indicates the number of audio tracks.
Indicates the number of language subtitles.
Indicates the number of angles.
Indicates the screen display ratios available.
Wide screen: 16:9
Standard: 4:3
Indicates the disc’s region code.
All: all countries
Number: region code