ECO mode Lexus GX470 2008 Using other driving systems / LEXUS 2008 GX470 QUICK GUIDE OWNER'S MANUAL (OM60D81U)
[x] Cancel search | Manufacturer: LEXUS, Model Year: 2008, Model line: GX470, Model: Lexus GX470 2008Pages: 58, PDF Size: 2.25 MB
Page 1 of 58

1
When Driving
Topic 3
Overview
Contents
Entering and Exiting
Topic 1
Before Driving
Topic 2
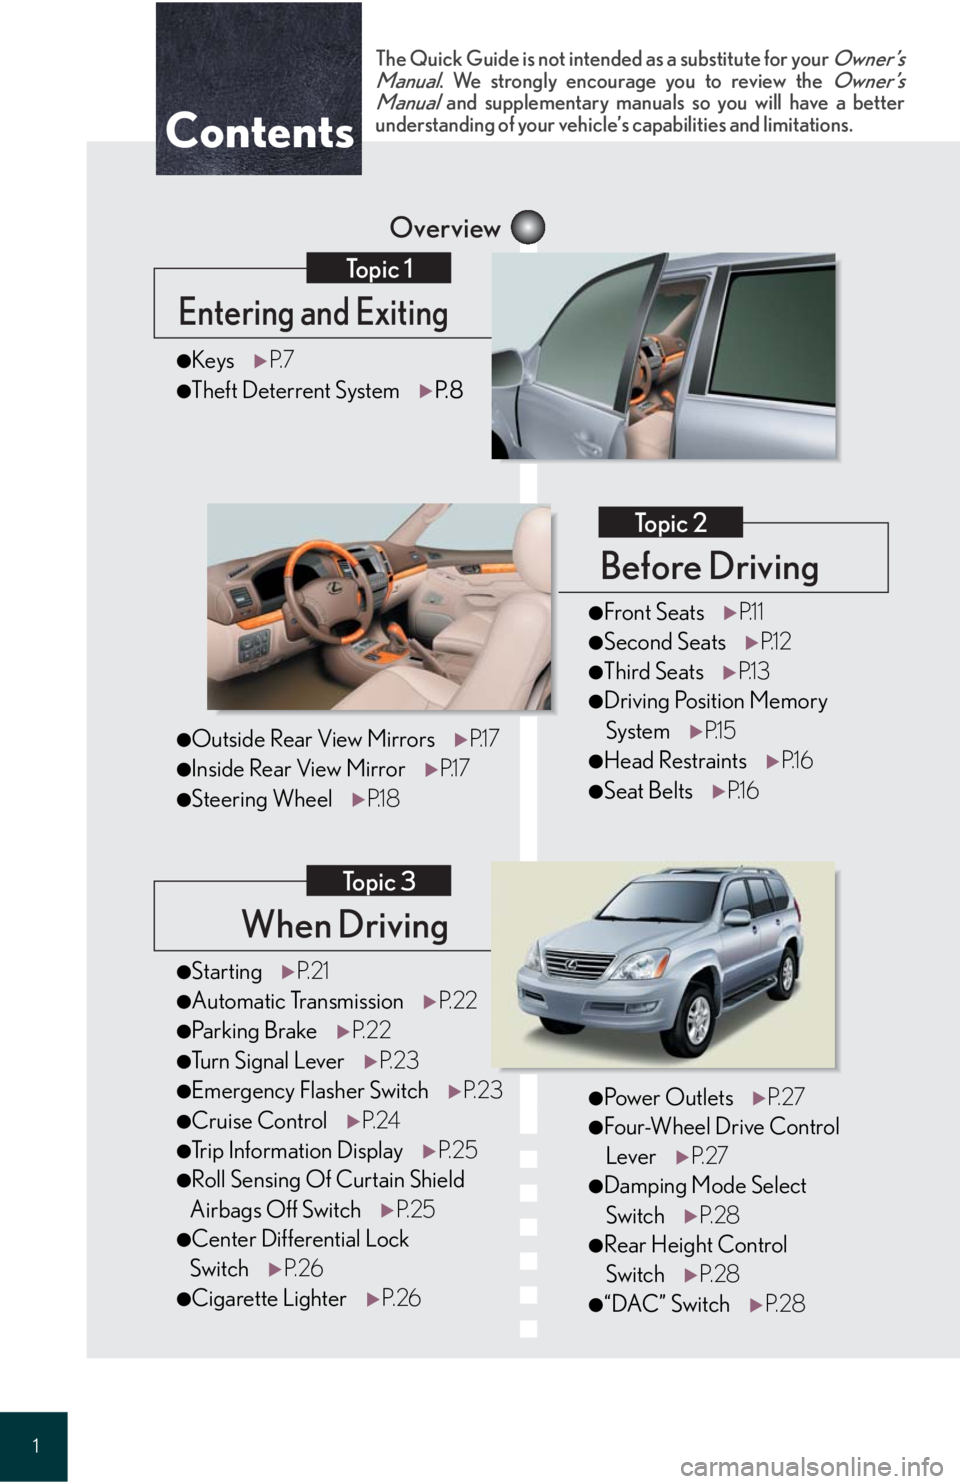
●StartingP. 2 1
●Automatic Transmission P. 2 2
●Parking BrakeP. 2 2
●Tu r n S i g n a l L e v e r P. 2 3
●Emergency Flasher Switch P. 2 3
●Cruise ControlP. 2 4
●Trip Information Display P. 2 5
●Roll Sensing Of Curtain Shield
Airbags Off Switch P. 2 5
●Center Differential Lock
Switch P. 2 6
●Cigarette Lighter P. 2 6
●KeysP. 7
●Theft Deterrent System P.8
The Quick Guide is not intended as a substitute for your Owner’s
Manual. We strongly encourage you to review the Owner’s
Manual and supplementary manuals so you will have a better
understanding of your vehicle’ s capabilities and limitations.
●Pow e r O u t l e t sP. 2 7
●Four-Wheel Drive Control
Lever P. 2 7
●Damping Mode Select
Switch P. 2 8
●Rear Height Control
Switch P. 2 8
●“DAC” Switch P. 2 8
●Front SeatsP.1 1
●Second Seats P.1 2
●Third SeatsP.1 3
●Driving Position Memory
System P.1 5
●Head Restraints P.1 6
●Seat BeltsP.1 6
●Outside Rear View Mirrors P.1 7
●Inside Rear View MirrorP.1 7
●Steering WheelP.1 8
Page 17 of 58

Topic 2
Before Driving
17
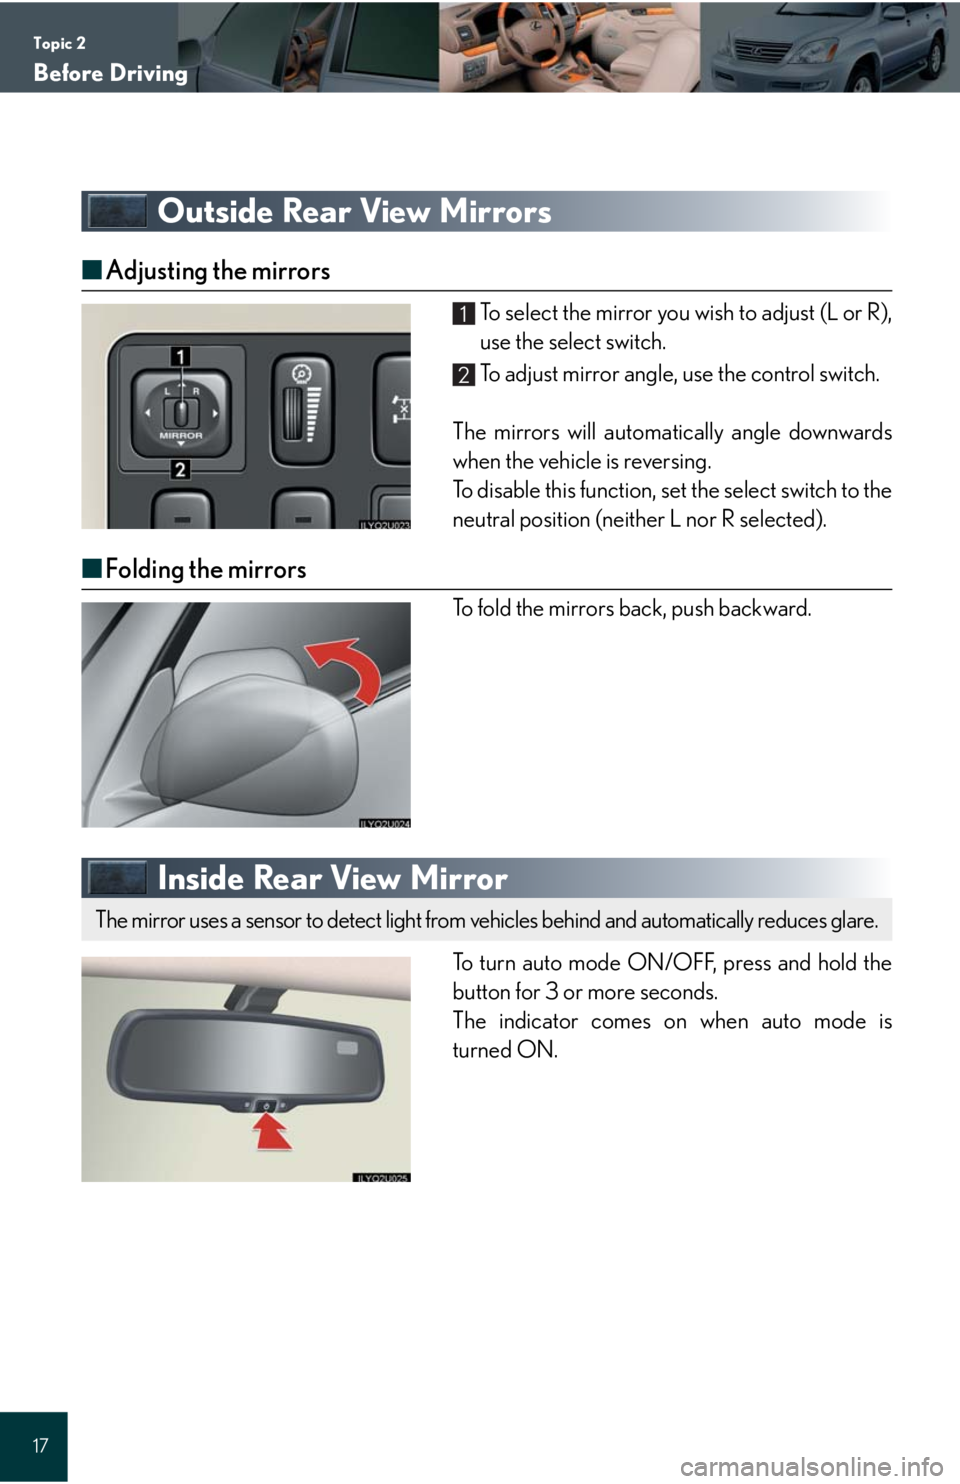
Outside Rear View Mirrors
■Adjusting the mirrors
To select the mirror you wish to adjust (L or R),
use the select switch.
To adjust mirror angle, use the control switch.
The mirrors will automatically angle downwards
when the vehicle is reversing.
To disable this function, set the select switch to the
neutral position (neither L nor R selected).
■Folding the mirrors
To fold the mirrors back, push backward.
Inside Rear View Mirror
To turn auto mode ON/OFF, press and hold the
button for 3 or more seconds.
The indicator comes on when auto mode is
turned ON.
1
2
The mirror uses a sensor to detect light from vehicles behind and automatically reduces glare.
Page 22 of 58

Topic 3
When Driving
22
Entering and Exiting
Before DrivingBefore Driving
When DrivingWhen Driving
Rain and
Night Driving
Driving Comfort
Opening and Closing
What to do if ...
Customizing
Yo u r L e x u s
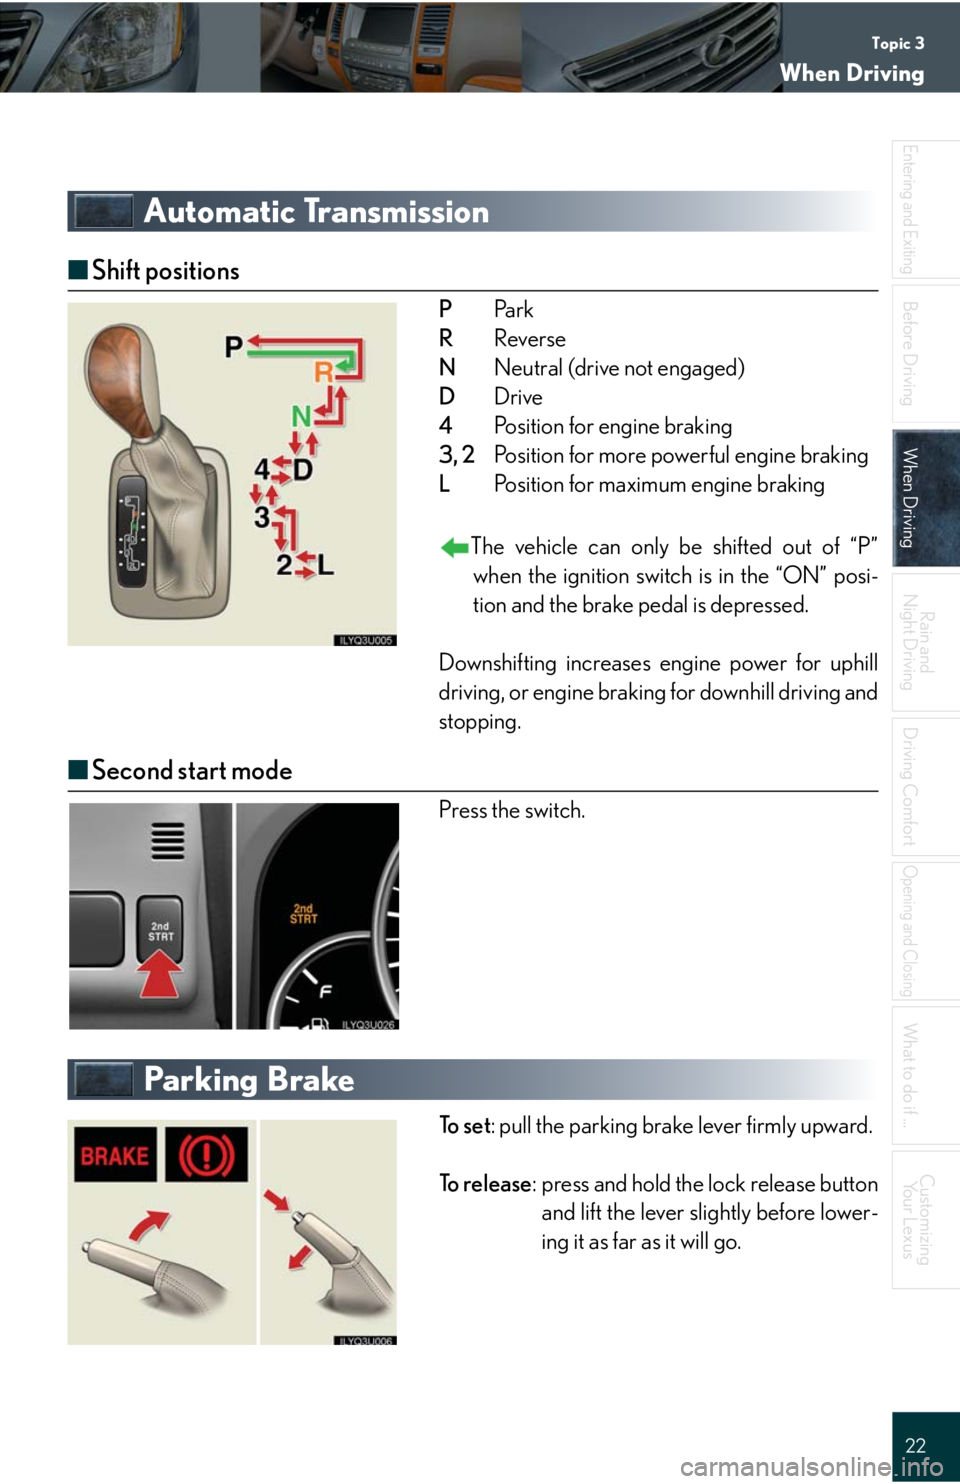
Automatic Transmission
■Shift positions
PPa r k
RReverse
NNeutral (drive not engaged)
DDrive
4Position for engine braking
3, 2Position for more powerful engine braking
LPosition for maximum engine braking
The vehicle can only be shifted out of “P”
when the ignition switch is in the “ON” posi-
tion and the brake pedal is depressed.
Downshifting increases engine power for uphill
driving, or engine braking for downhill driving and
stopping.
■Second start mode
Press the switch.
Parking Brake
To s e t: pull the parking brake lever firmly upward.
To r e l e a s e: press and hold the lock release button
and lift the lever slightly before lower-
ing it as far as it will go.
Page 25 of 58

Topic 3
When Driving
25
Trip Information Display
■Display information
●Outside temperature (shown)
●Average fuel consumption
●Current fuel consumption
●Driving range
●Average vehicle speed
●Barometer
●Altimeter
●Elapsed time
■Changing the trip information display
The display changes sequentially each time the
“MODE” button is pressed.
Roll Sensing Of Curtain Shield Airbags
Off Switch
Push the “RSCA OFF” switch for a few seconds
with the ignition switch in the “ON” position.
The “RSCA OFF” indicator light will come on,
and the curtain shield airbags and seat belt
pretensioners will not activate in the event of a
vehicle rollover.
Push the switch again to turn roll sensing back on.
The following information concerning your vehicle is displayed.
This switch should only be used in situations where airbag inflation is not desired (such as
extreme off-road driving).
Page 28 of 58

Topic 3
When Driving
28
Entering and Exiting
Before DrivingBefore Driving
When DrivingWhen Driving
Rain and
Night Driving
Driving Comfort
Opening and Closing
What to do if ...
Customizing
Yo u r L e x u s
Damping Mode Select Switch
For driving on bumpy roads
For ordinary driving (city traffic etc.)
For moderate high speed driving
For high speed driving and sporty driving such
as on winding mountain roads.
Rear Height Control Switch
Steps up one mode.
Steps down one mode.
“H” (high) mode:For driving on bumpy roads or
through water.
“N” (normal) mode:For ordinary driving.
“L” (low) mode:Allows easy access to the vehi-
cle.
“DAC” Switch
●Shift the four-wheel drive control lever to the
“L” position.
●Push the “DAC” switch to turn the system on.
●If traveling at 15 mph (25 km/h) or less,
release the accelerator or brake pedal to acti-
vate the system.
To make full use of the engine brake, putting the
transmission in “L” or “2” is recommended.
Push the “DAC” switch again to turn the system
off.
Adjusts the damping effect on the shock absorbers.
Soft Hard
1
2
3
4
Switches between high, normal and low rear height air suspension control modes.
1
2
The Downhill Assist Control system helps to control vehicle speed when driving down
steep slopes.