mirror Lexus HS250h 2010 Using the Bluetooth audio system / LEXUS 2010 HS250H (OM75006U) Service Manual
[x] Cancel search | Manufacturer: LEXUS, Model Year: 2010, Model line: HS250h, Model: Lexus HS250h 2010Pages: 608, PDF Size: 9.89 MB
Page 385 of 608

385
3-7. Other interior features
3
Interior features
Inside rear view mirror typePress and hold one of the
HomeLink
buttons and the trans-
mitter button. When the
HomeLink
indicator light
changes from a slow to a rapid
flash after 20 seconds, release
both buttons.
Overhead console type Test the HomeLink
operation by
pressing the newly programmed
button.
If a HomeLink button has been
programmed for a garage door,
check to see if the garage door
opens and closes. If the garage
door does not operate, see if your
garage transmitter is of the rolling
code type. Press and hold the pro-
grammed HomeLink
button. The
remote control transmitter is of the
rolling code type if the HomeLink
indicator light flashes rapidly for 2
seconds and then remains lit. If
your transmitter is the rolling code
type, proceed to the heading “Pro-
gramming a rolling code system”.
Page 386 of 608

386
3-7. Other interior features
Inside rear view mirror typeTest the HomeLink
operation by
pressing the newly programmed
button.
If a HomeLink button has been
programmed for a garage door,
check to see if the garage door
opens and closes. If the garage
door does not operate, see if your
garage transmitter is of the rolling
code type. Press and hold the pro-
grammed HomeLink
button. The
remote control transmitter is of the
rolling code type if the HomeLink
indicator light flashes rapidly for 2
seconds and then remains lit. If
your transmitter is the rolling code
type, proceed to the heading “Pro-
gramming a rolling code system”.
Repeat the steps above to progra m another device for any of the
remaining HomeLink buttons.
■ Programming a rolling code system (for U.S.A. owners)
If your device is rolling code eq uipped, follow the steps under the
heading “Programming HomeLink
” before proceeding with the
steps listed below.
Locate the training button on th e ceiling mounted garage door
opener motor. The exact location and color of the button may
vary by brand of garage door opener motor.
Refer to the operation manual supplied with the garage door opener
for the location of the training button.
Press the training button.
Following this step, you have 30 se conds in which to initiate step 3
below.
Page 388 of 608

388
3-7. Other interior features
Operating HomeLink
Press the appropriate HomeLink button. The HomeLink indicator
light should come on.
The HomeLink compatible transceiver in your vehicle continues to send a
signal for up to 20 seconds as long as the button is pressed.
Reprogramming a HomeLink button
Press and hold the desired HomeLink
button. After 20 seconds, the
HomeLink indicator light will start flashing slowly. Next, while still press-
ing and holding the HomeLink button, press and hold the button on the
transmitter until the HomeLink indicator light chan ges from a slow to a
rapid flash.
Erasing the entire HomeLink memory (all three programs)
Overhead console type Press and hold the 2 outside but-
tons for 10 seconds until the indi-
cator light flashes.
If you sell your vehicle, be sure to
erase the programs stored in the
HomeLink
memory.
Inside rear view mirror typePress and hold the 2 outside but-
tons for 20 seconds until the indi-
cator light flashes.
If you sell your vehicle, be sure to
erase the programs stored in the
HomeLink
memory.
Page 389 of 608

389
3-7. Other interior features
3
Interior features
■Before programming
●Install a new battery in the remote control transmitter.
●The battery side of the remote control transmitter must be pointed away from
the HomeLink button.
■Certification for the garage door opener
For vehicles sold in the U.S.A.
Overhead console type
FCC ID: CB2070AHL4
Inside rear view mirror type
FCC ID: NZLZTVHL3
NOTE:
This device complies with Part 15 of the FCC Rules.
Operation is subject to the following two conditions: (1) this device may not cause
harmful interference, and (2) this device must accept any interference received,
including interference that may cause undesired operation.
FCC WARNING:
Changes or modifications not expressly approved by the party responsible for
compliance could void the user’s authority to operate the equipment
For vehicles sold in Canada
NOTE:
Operation is subject to the following two conditions: (1) this device may not cause
interference, and (2) this device must a ccept any interference, including interfer-
ence that may cause undesired operation of the device.
■When support is necessary
Visit on the web at www.homelink.com
or call 1-800-355-3515.
Page 391 of 608

391
3-7. Other interior features
3
Interior features
Compass
: If equipped
The compass on the inside rear view mirror indicates the direction in which
the vehicle is heading.
■ Operation
To turn the compass on or off,
press the button for more than 3
seconds.
■ Displays and directions
DisplayDirection
“N”North
“NE”Northeast
“E”East
“SE”Southeast
“S”South
“SW”Southwest
“W”We s t
“NW”Northwest
Page 394 of 608

394
3-7. Other interior features
■Conditions unfavorable to correct operation
The compass may not show the correct direction in the following conditions:
●The vehicle is stopped immediately after turning.
●The vehicle is on an inclined surface.
●The vehicle is in a place where the earth’s magnetic field is subject to interfer-
ence by artificial magnetic fields (underground car park/parking lot, under a
steel tower, between buildings, roof car park/parking lot, near an intersection,
near a large vehicle, etc.).
●The vehicle has become magnetized. (There is a magnet or metal object near
the inside rear view mirror.)
●The battery has been disconnected.
●A door is open.
CAUTION
■While driving the vehicle
Do not adjust the display. Adjust the di splay only when the vehicle is stopped.
■When doing the circling calibration
Secure a wide space, and watch out for people and vehicles in the vicinity. Do not
violate any local traffic rules while performing circling calibration.
NOTICE
■To avoid compass malfunctions
Do not place magnets or any metal objects near the inside rear view mirror.
Doing this may cause the compass sensor to malfunction.
■To ensure normal operation of the compass
●Do not perform a circling calibration of the compass in a place where the earth’s
magnetic field is subject to interference by artificial magnetic fields.
●During calibration, do not operate elec tric systems (moon roof, power windows,
etc.) as they may interfere with the calibration.
Page 402 of 608

402
4-1. Maintenance and care
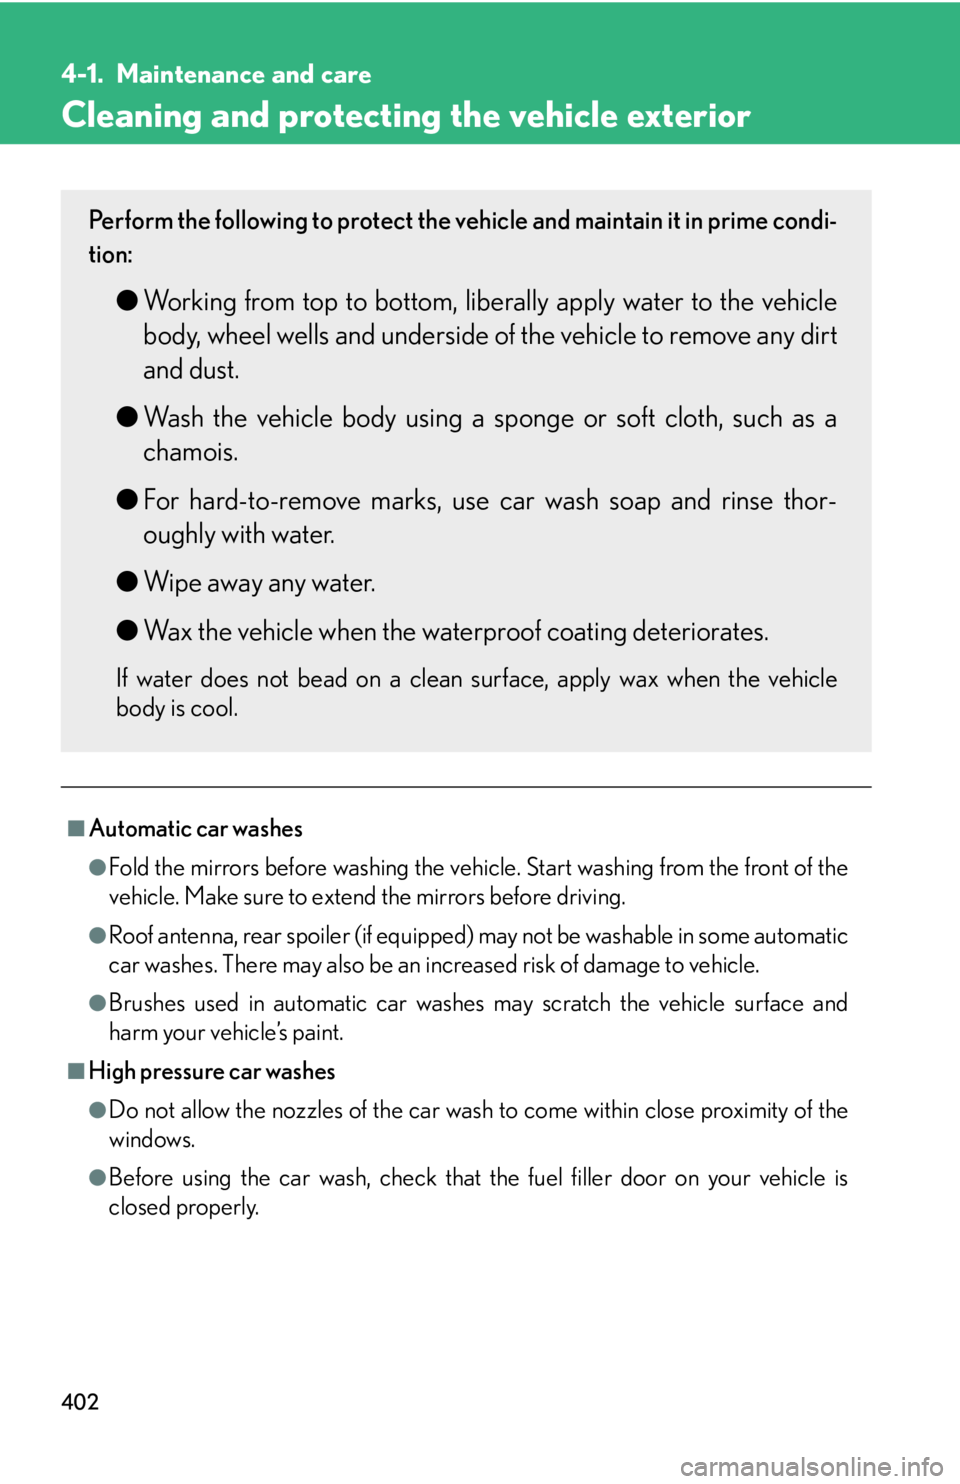
Cleaning and protecting the vehicle exterior
■Automatic car washes
●Fold the mirrors before washing the vehicle. Start washing from the front of the
vehicle. Make sure to extend the mirrors before driving.
●Roof antenna, rear spoiler (if equipped) may not be washable in some automatic
car washes. There may also be an increased risk of damage to vehicle.
●Brushes used in automatic car washes may scratch the vehicle surface and
harm your vehicle’s paint.
■High pressure car washes
●Do not allow the nozzles of the car wash to come within close proximity of the
windows.
●Before using the car wash, check that the fuel filler door on your vehicle is
closed properly.
Perform the following to protect the vehicle and maintain it in prime condi-
tion:
● Working from top to bottom, liber ally apply water to the vehicle
body, wheel wells and underside of the vehicle to remove any dirt
and dust.
● W
ash the vehicle body using a sponge or soft cloth, such as a
chamois.
● F
or hard-to-remove marks, use car wash soap and rinse thor-
oughly with water.
● W
ipe away any water.
●W
ax the vehicle when the waterproof coating deteriorates.
If water does not bead on a clean surface, apply wax when the vehicle
body is cool.
Page 403 of 608

403
4-1. Maintenance and care
4
Maintenance and care
■When using a car wash
If the door handle becomes wet while the electronic key is within the effective
range, the door may lock and unlock repeatedly. Place the key in a position 6 ft. (2
m) or more separate from the vehicle while the vehicle is being washed. (Take care
to ensure that the key is not stolen.)
■Aluminum wheels
Remove any dirt immediately by using a neutral detergent. Do not use hard brushes
or abrasive cleaners. Do not use strong or harsh chemical cleaners. Use the same
mild detergent and wax as used on the paint.
■Bumpers and side moldings
Do not scrub with abrasive cleaners.
■Side windows water-repellent coating
●The following precautions can extend the effectiveness of the water-repellent
coating.
• Remove any dirt, etc. from the side windows regularly.
• Do not allow dirt and dust to accumulate on the windows for a long period.
Clean the windows with a soft, damp cloth as soon as possible.
• Do not use wax or glass cleaners that contain abrasives when cleaning the windows.
• Do not use any metallic objects to remove condensation build up.
●When the water-repellent performance has become insufficient, the coating
can be repaired. Contact your Lexus dealer.
■Outside rear view mirror rain -clearing coating (if equipped)
Observe the following precautions in order to retain the rain-clearing properties of
the mirrors:
●Clean the mirrors using a car shampoo or glass cleaner that does not contain
silicone or an abrasive compound, and rinse thoroughly with water.
●Allow the mirrors to be exposed to direct sunlight for 1 to 2 days.
Page 459 of 608

459
4-3. Do-it-yourself maintenance
4
Maintenance and care
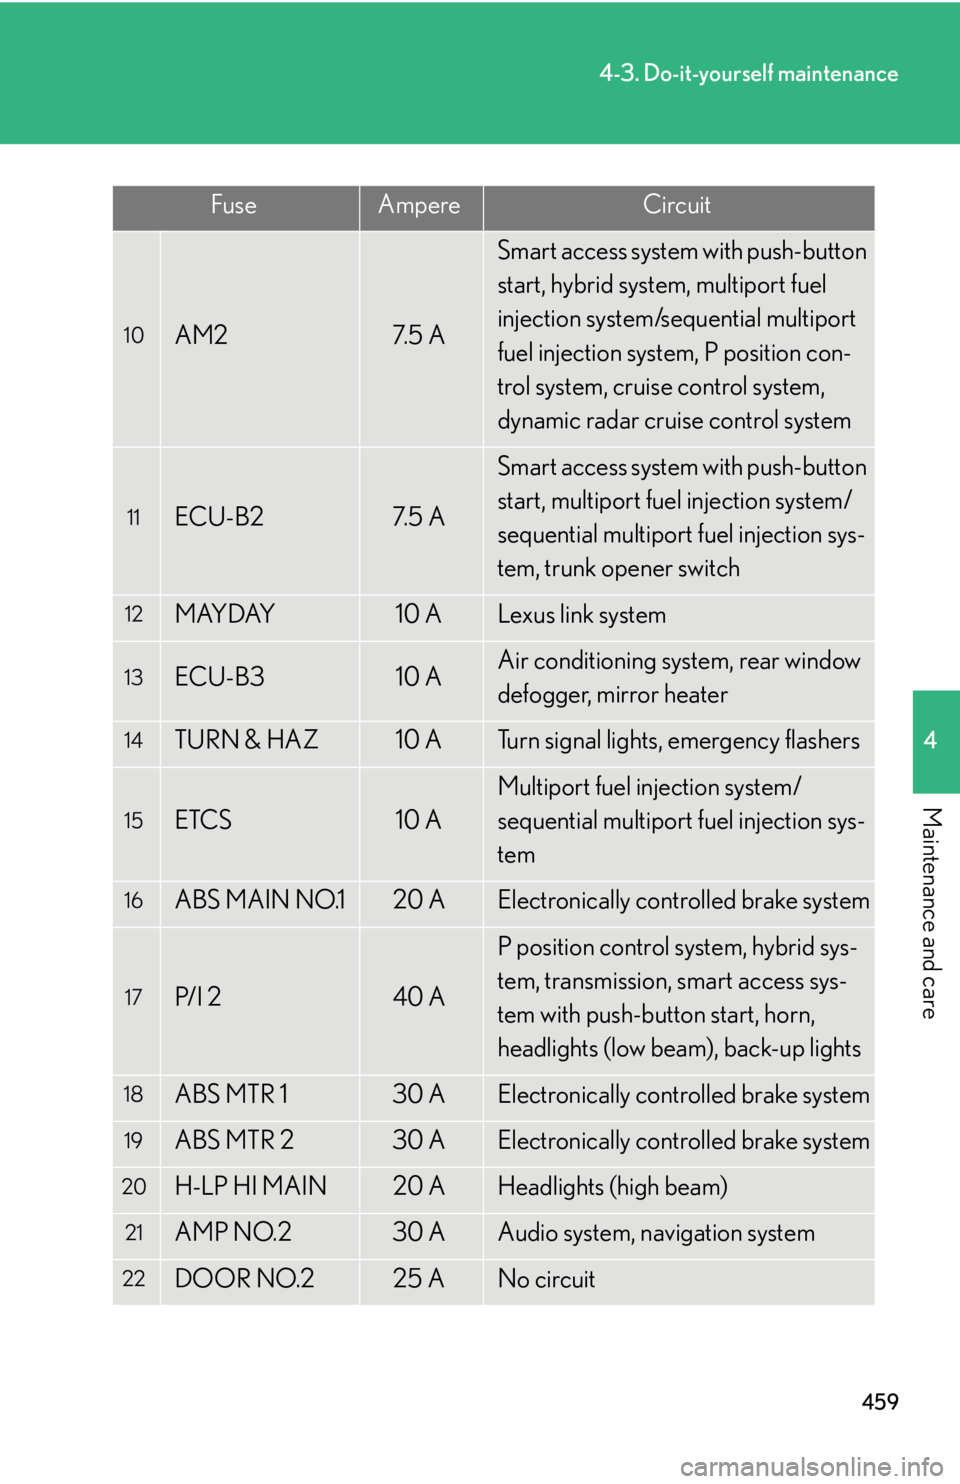
10AM27. 5 A
Smart access system with push-button
start, hybrid system, multiport fuel
injection system/sequential multiport
fuel injection system, P position con-
trol system, cruise control system,
dynamic radar cruise control system
11ECU-B27. 5 A
Smart access system with push-button
start, multiport fuel injection system/
sequential multiport fuel injection sys-
tem, trunk opener switch
12MAYDAY10 ALexus link system
13ECU-B310 AAir conditioning system, rear window
defogger, mirror heater
14TURN & HAZ10 ATurn signal lights, emergency flashers
15ETCS10 A
Multiport fuel injection system/
sequential multiport fuel injection sys-
tem
16ABS MAIN NO.120 AElectronically controlled brake system
17P/I 240 A
P position control system, hybrid sys-
tem, transmission, smart access sys-
tem with push-button start, horn,
headlights (low beam), back-up lights
18ABS MTR 130 AElectronically controlled brake system
19ABS MTR 230 AElectronically controlled brake system
20H-LP HI MAIN20 AHeadlights (high beam)
21AMP NO.230 AAudio system, navigation system
22DOOR NO.225 ANo circuit
FuseAmpereCircuit
Page 460 of 608

460
4-3. Do-it-yourself maintenance
23P/I 160 AIG2, EFI MAIN, BATT FAN
24EPS60 AElectric power steering system
25PCU10 AHybrid system
26IGCT NO.210 A
Smart access system with push-button
start, hybrid system, P position control
system, multiport fuel injection sys-
tem/sequential multiport fuel injection
system
27MIR HTR10 ARear window defogger, mirror heater
28RAD NO.115 AAudio system, navigation system
29DOME10 A
Interior lights, antiglare inside rear
view mirror, audio system, navigation
system, garage door opener
30ECU-B7. 5 A
Smart access system with push-button
start, air conditioning system, gauges
and meters, outside rear view mirror,
clock, seats position memory, electric
tilt & telescopic steering wheel
31H-LP LH HI10 ALeft-hand headlight (high beam)
32H-LP RH HI10 ARight-hand headlight (high beam)
33EFI NO. 210 A
Multiport fuel injection system/
sequential multiport fuel injection sys-
tem
34IGCT NO.310 AHybrid system
FuseAmpereCircuit