remote control Lexus IS F 2008 Audio/video System / LEXUS 2008 IS F (OM53714U) User Guide
[x] Cancel search | Manufacturer: LEXUS, Model Year: 2008, Model line: IS F, Model: Lexus IS F 2008Pages: 452, PDF Size: 6.49 MB
Page 37 of 452
37
1
1-2. Opening, closing and locking the doors and trunk
Before driving
Doors
The vehicle can be locked and unlocked using the entry function, wireless
remote control or door lock switch.
■Entry function
P. 2 3
■ Wireless remote control
P. 3 4
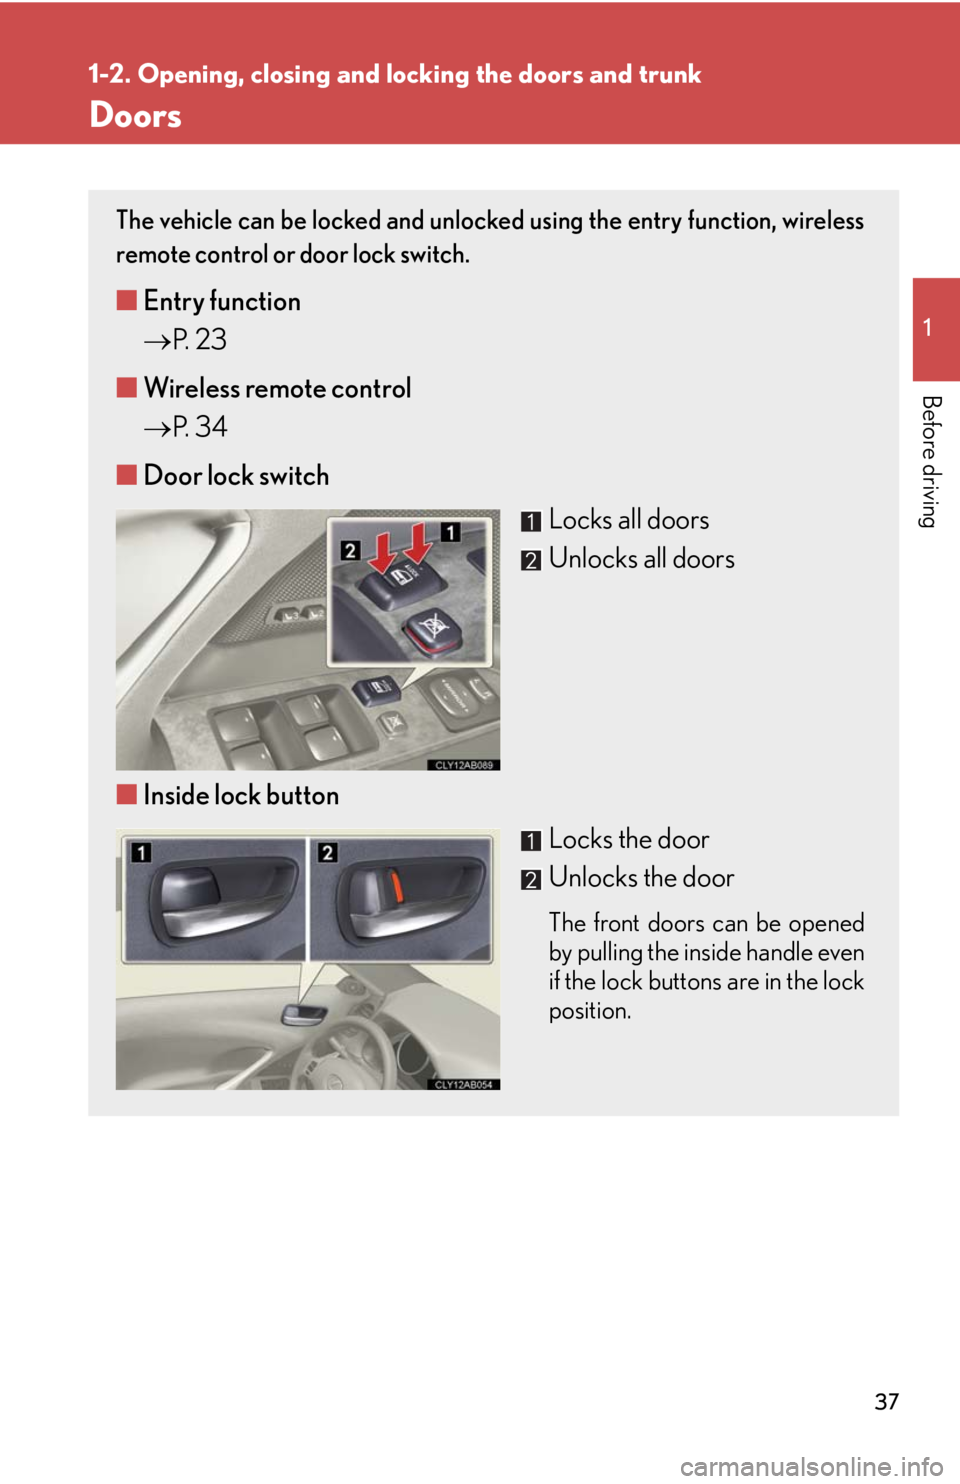
■ Door lock switch
Locks all doors
Unlocks all doors
■ Inside lock button
Locks the door
Unlocks the door
The front doors can be opened
by pulling the inside handle even
if the lock buttons are in the lock
position.
Page 41 of 452
41
1
1-2. Opening, closing and locking the doors and trunk
Before driving
Tr u n k
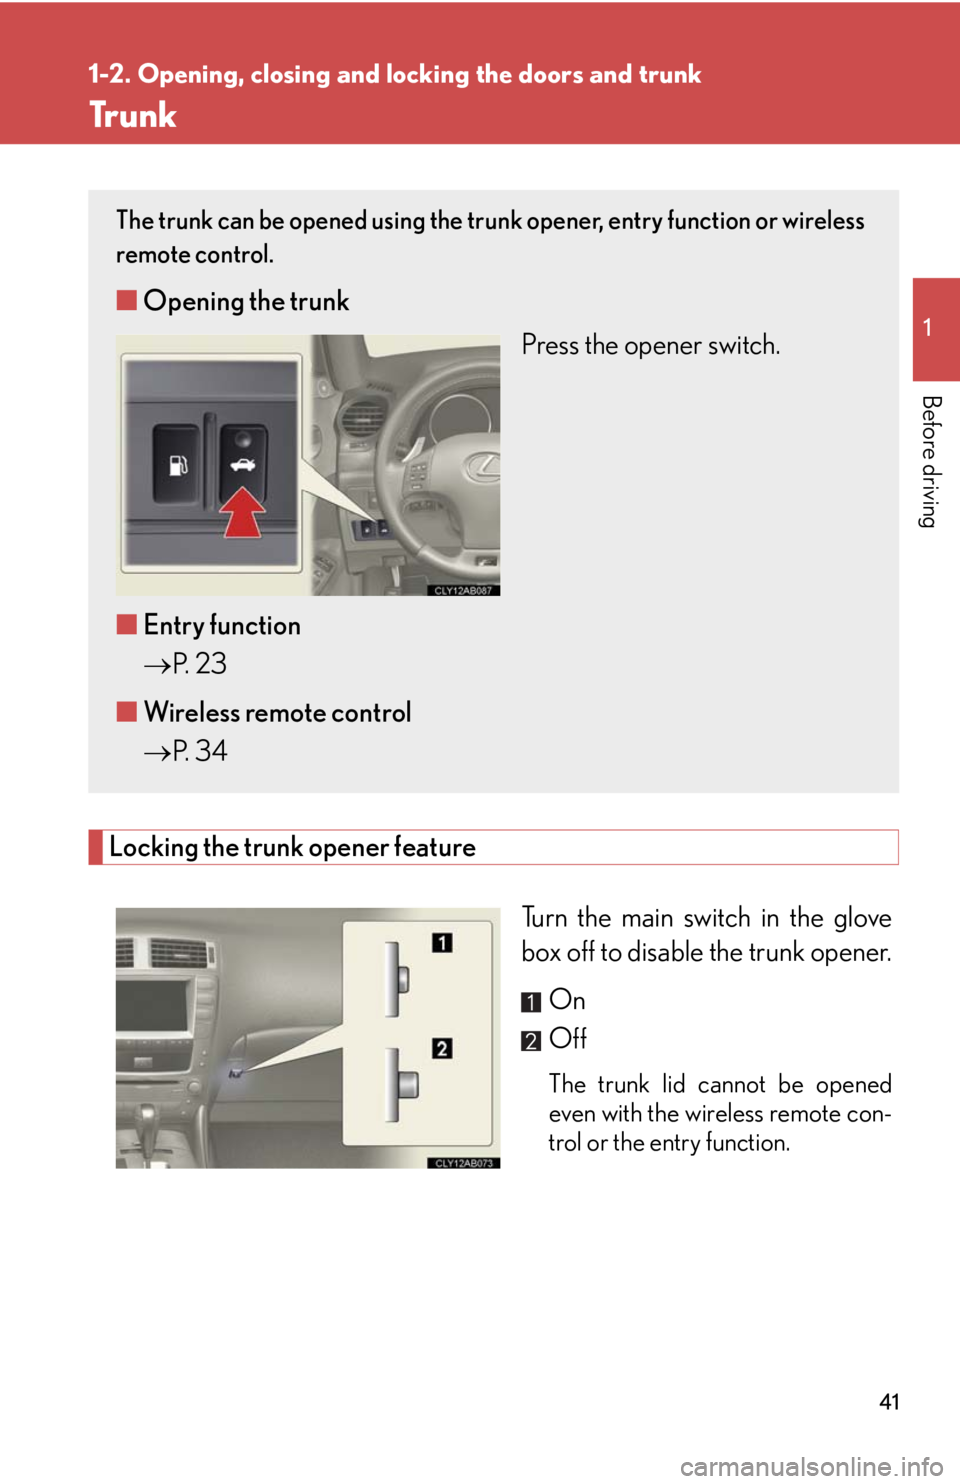
Locking the trunk opener feature
Turn the main switch in the glove
box off to disable the trunk opener.On
Off
The trunk lid cannot be opened
even with the wireless remote con-
trol or the entry function.
The trunk can be opened using the trun k opener, entry function or wireless
remote control.
■ Opening the trunk
Press the opener switch.
■ Entry function
P. 2 3
■ Wireless remote control
P. 3 4
Page 46 of 452
46
1-3. Adjustable components (seats, mirrors, steering wheel)
Linking driving position memory with door unlock operation
Record your driving position to butto n “1”, “2” or “3” before performing
the following.
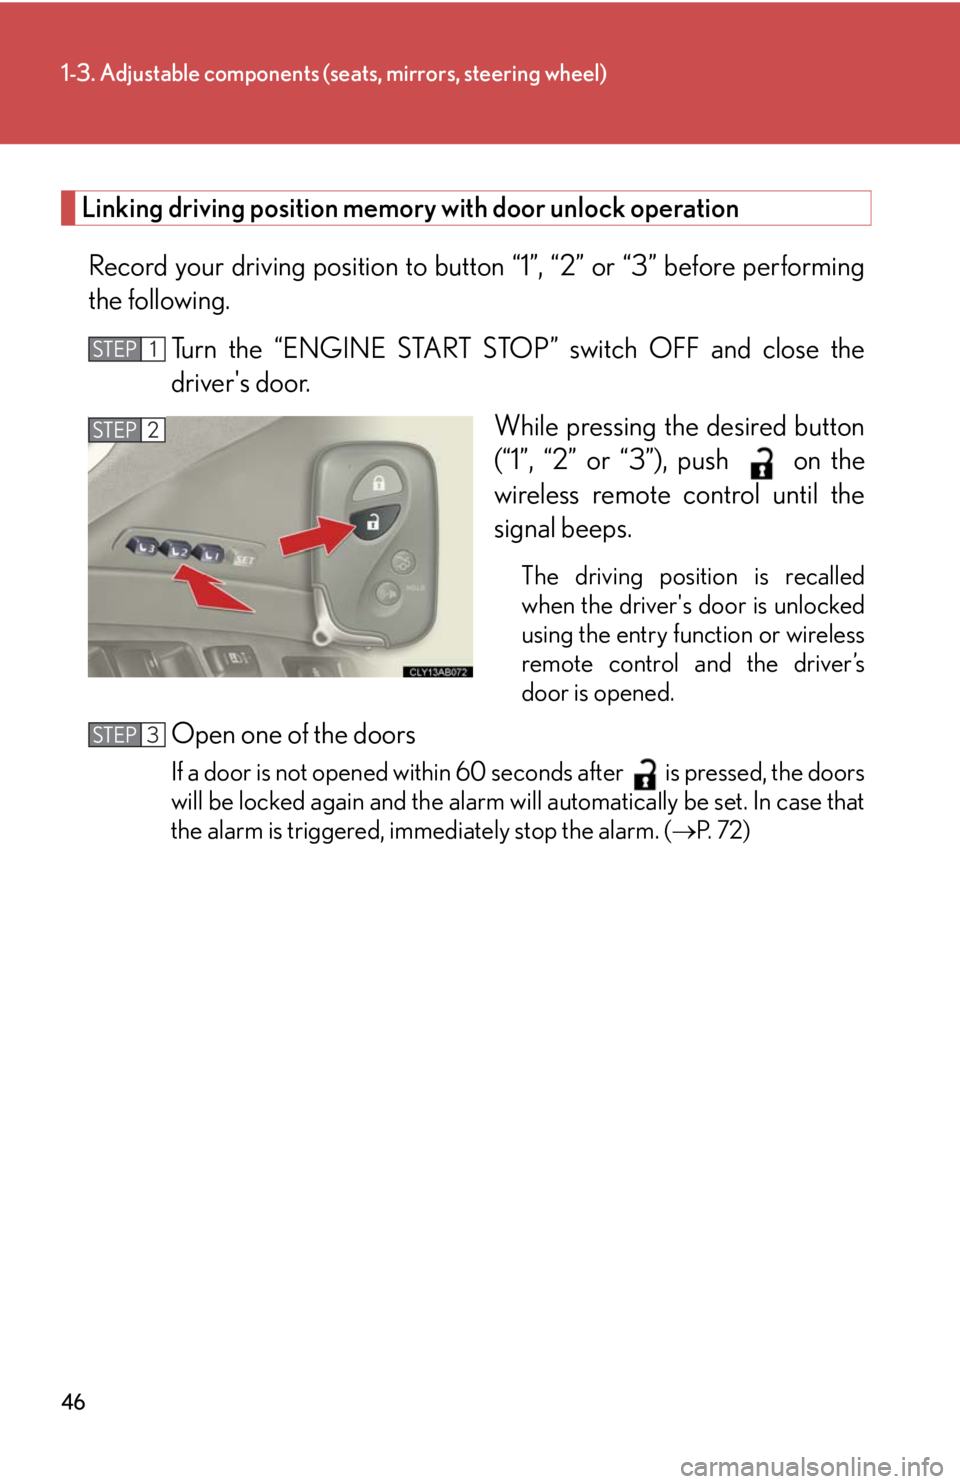
Turn the “ENGINE START STOP” switch OFF and close the
driver's door. While pressing the desired button
(“1”, “2” or “3”), push on the
wireless remote control until the
signal beeps.
The driving position is recalled
when the driver's door is unlocked
using the entry function or wireless
remote control and the driver’s
door is opened.
Open one of the doors
If a door is not opened within 60 seconds after is pressed, the doors
will be locked again and the alarm will automatically be set. In case that
the alarm is triggered, immediately stop the alarm.
( P. 7 2 )
STEP1
STEP2
STEP3
Page 62 of 452
62
1-4. Opening and closing the windows and moon roof
Power windows
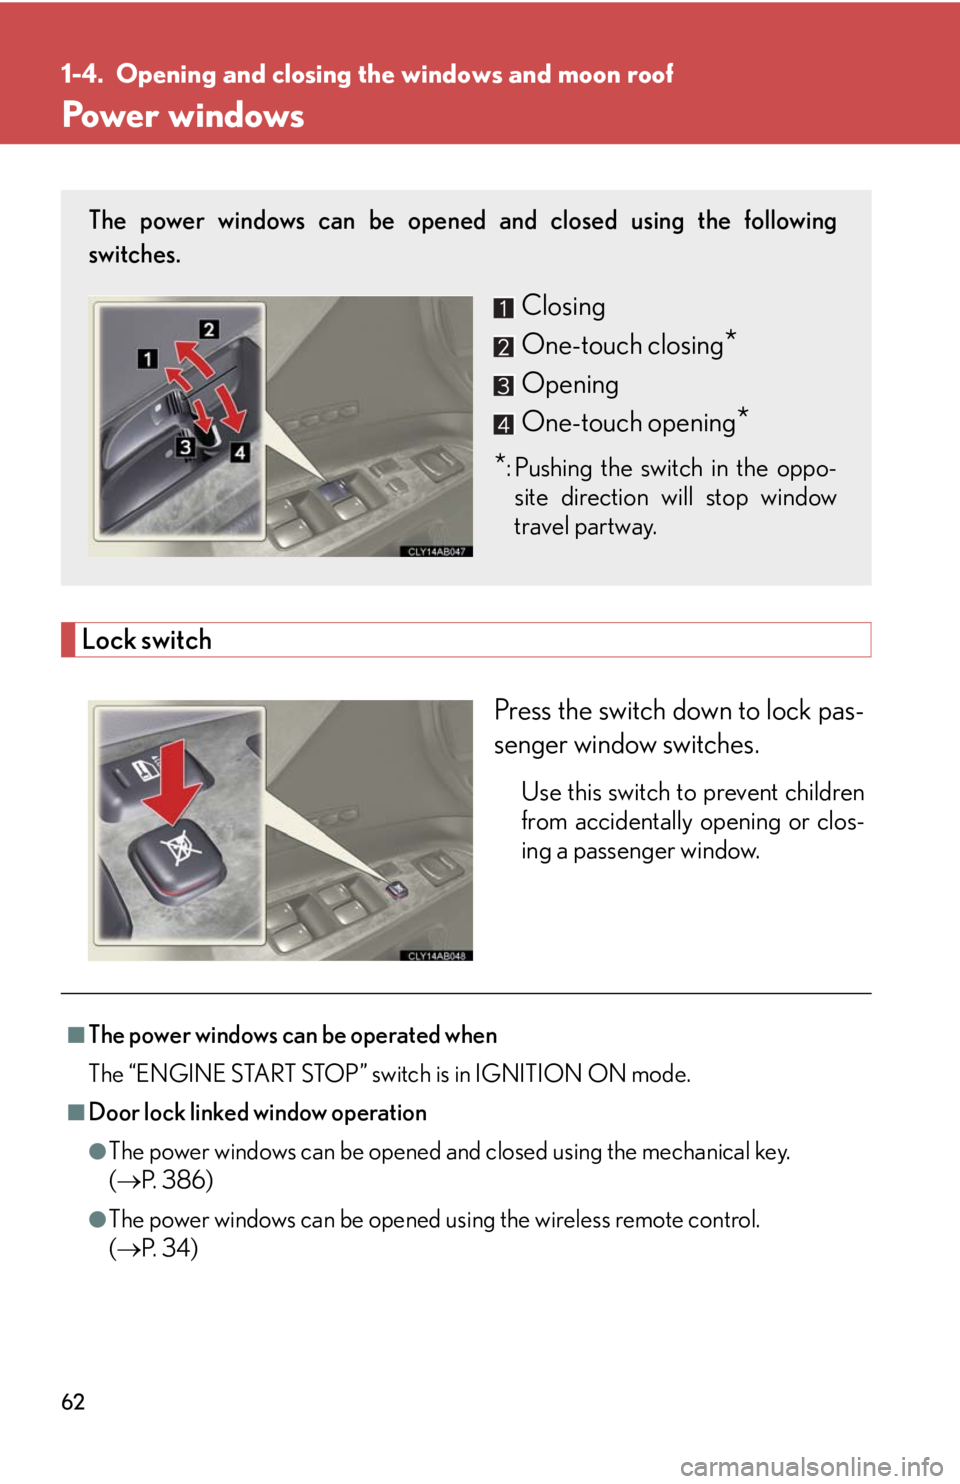
Lock switch
Press the switch down to lock pas-
senger window switches.
Use this switch to prevent children
from accidentally opening or clos-
ing a passenger window.
The power windows can be opened and closed using the following
switches.
Closing
One-touch closing
*
Opening
One-touch opening
*
*: Pushing the switch in the oppo-site direction will stop window
travel partway.
■The power windows can be operated when
The “ENGINE START STOP” switch is in IGNITION ON mode.
■Door lock linked window operation
●The power windows can be opened and closed using the mechanical key.
( P. 3 8 6 )
●The power windows can be opened using the wireless remote control.
( P. 3 4 )
Page 65 of 452
65
1-4. Opening and closing the windows and moon roof
1
Before driving
■The moon roof can be operated when
The “ENGINE START STOP” switch is in IGNITION ON mode.
■Door lock linked moon roof operation
●The moon roof can be opened and closed using the mechanical key. (P. 3 8 6 )
●The moon roof can be opened using the wireless remote control. ( P. 3 4 )
■Operating the moon roof after turning the “ENGINE START STOP” switch OFF
The moon roof can be operated for ap proximately 45 seconds even after the
“ENGINE START STOP” switch is switched to ACCESSORY mode or turned
OFF. It cannot, however, be operated once either front door is opened.
■Jam protection function
If an object is detected between the moon roof and the frame while closing or tilting
down, travel is stopped and the moon roof opens slightly.
■To reduce moon roof wind noise
●Manual opening: Drive with the moon roof switch in .
●One-touch opening: Drive with the moon roof where it has stopped.
■Sunshade
The sunshade can be opened and closed manually. However, the sunshade will
open automatically when the moon roof is opened.
■If the moon roof cannot be closed
Perform the following procedure:
Tu r n t h e s w i t c h t o .
The moon roof closes and then re-opens.
When the moon roof stops, pr ess and hold down the switch.
●The moon roof will close and open again.
●The operation is complete when the moon roof closes completely.
The switch must be held down throughout the procedure. If the switch is released
part-way through, you will have to start the procedure again from the beginning.
If the moon roof does not fully close even after performing the above operation,
have the vehicle inspected by your Lexus dealer.
STEP1
STEP2
Page 73 of 452
73
1-6. Theft deterrent system
1
Before driving
■Items to check before locking the vehicle
To prevent unexpected triggering of the alarm and vehicle theft, make sure of the
following.
●Nobody is in the vehicle.
●The windows and moon roof are closed before the alarm is set.
●No valuables or other personal items are left in the vehicle.
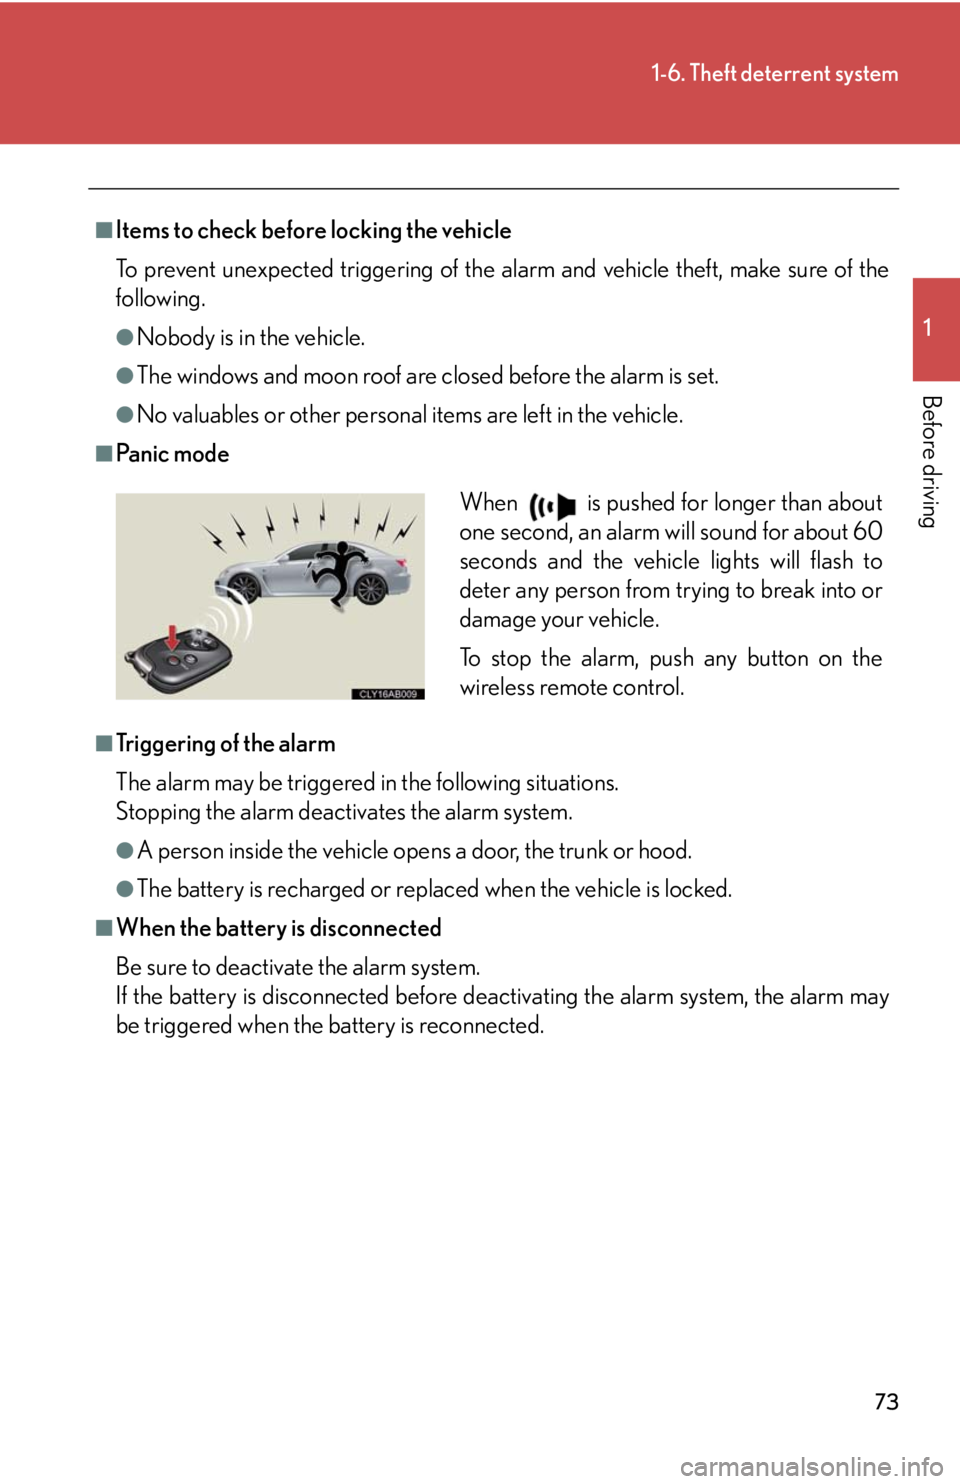
■Pa n i c m o d e
■Tr i g g e r i n g o f t h e a l a r m
The alarm may be triggered in the following situations.
Stopping the alarm deactiv ates the alarm system.
●A person inside the vehicle opens a door, the trunk or hood.
●The battery is recharged or replaced when the vehicle is locked.
■When the battery is disconnected
Be sure to deactivate the alarm system.
If the battery is disconnected before de activating the alarm system, the alarm may
be triggered when the battery is reconnected.
When is pushed for longer than about
one second, an alarm will sound for about 60
seconds and the vehicle lights will flash to
deter any person from trying to break into or
damage your vehicle.
To stop the alarm, push any button on the
wireless remote control.
Page 254 of 452
254
3-5. Other interior features
Garage door opener
The garage door opener (HomeLink Universal Transceiver) is manufactured
under license from HomeLink.
Programming the HomeLink (for U.S.A. owners)
The HomeLink
compatible transceiver in your vehicle has 3 buttons
which can be programmed to operate 3 different devices. Refer to the
programming method below appropriate for the device.
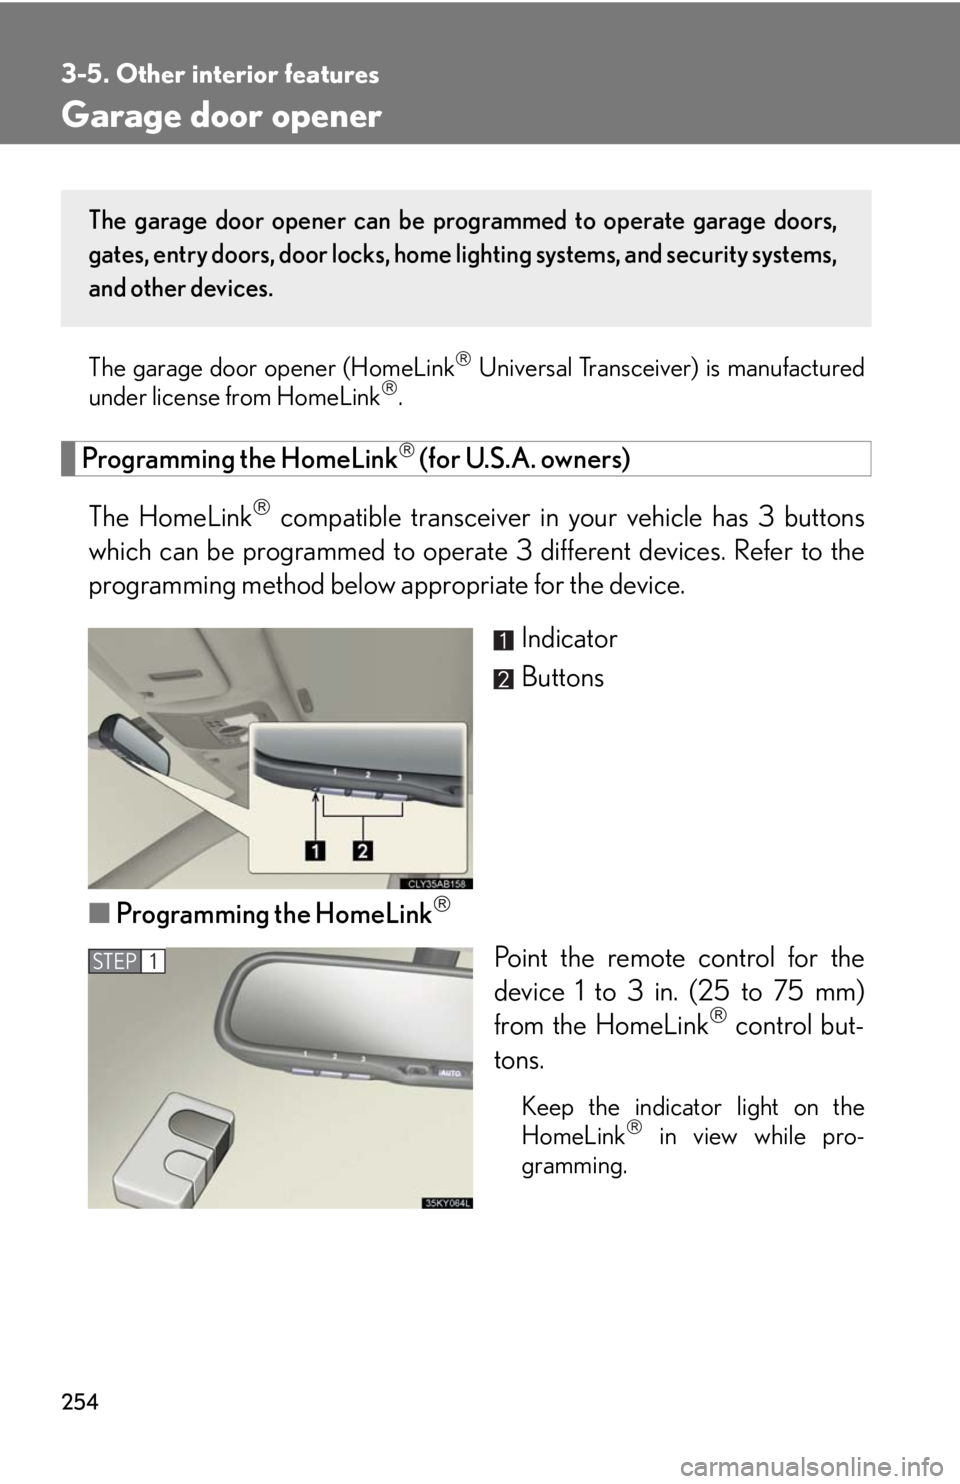
Indicator
Buttons
■ Programming the HomeLink
Point the remote control for the
device 1 to 3 in. (25 to 75 mm)
from the HomeLink
control but-
tons.
Keep the indicator light on the
HomeLink in view while pro-
gramming.
The garage door opener can be pr ogrammed to operate garage doors,
gates, entry doors, door locks, home lighting systems, and security systems,
and other devices.
STEP1
Page 256 of 452

256
3-5. Other interior features
■Programming a Rolling Code system (for U.S.A. owners)
If your device is Rolling Code eq uipped, follow the steps under the
heading “Programming the HomeLink
” before proceeding with the
steps listed below.
Locate the training button on th e ceiling mounted garage door
opener motor. The exact location and color of the button may
vary by brand of garage door opener.
Refer to the operation manual supplied with the garage door opener
for the location of the training button.
Press the training button.
Press and release the vehi cle’s programmed HomeLink
button
twice. The garage door may open.
If the garage door opens, the programming process is complete. If the
door does not open, press and release the button a third time. This third
press and release will complete the programming process by opening
the garage door.
The ceiling mounted garage door op ener motor should now recognize
the HomeLink
transceiver and operate the garage door.
Repeat the steps above to prog ram another rolling code system
for any of the remaining HomeLink buttons.
■ Programming an entry gate (for U .S.A. owners)/Programming all
devices in the Canadian market
Place your transmitter 1 to 3 in. (25 to 75 mm) away from the sur-
face of the HomeLink
.
Keep the indicator light on the HomeLink in view while programming.
Press and hold the selected HomeLink button.
Repeatedly press and release (cyc le) the device’s remote control
button for two seconds each until step 4 is complete.
When the indicator light on the HomeLink
compatible trans-
ceiver starts to flash rapidly, release the buttons.
STEP1
STEP2
STEP3
STEP4
STEP1
STEP2
STEP3
STEP4
Page 258 of 452

258
3-5. Other interior features
■Before programming
●Install a new battery in the transmitter.
●The battery side of the transmitter must be pointed away from the HomeLink.
■Certification for the garage door opener
This device complies with Part 15 of the FCC Rules and with RSS-210 of the IC
Rules.
Operation is subject to the following two conditions: (1) This device may not cause
harmful interference, and (2) this device must accept any interference received,
including interference that may cause undesired operation.
WARNING: This transmitter has been tested and complies with FCC and IC rules.
Changes or modifications not expressly approved by the party responsible for
compliance could void the user's authority to operate the device.
CAUTION
■When programming a garage door or other remote control device
The garage door may operate, so ensure people and objects are out of danger to
prevent potential harm.
■Conforming to federal safety standards
Do not use the HomeLink
Compatible Transceiver with any garage door opener
or device that lacks safety stop and reverse features as required by federal safety
standards.
This includes any garage door that canno t detect an obstruction object. A door or
device without these featur es increases the risk of death or serious injury.
Page 317 of 452
317
4-3. Do-it-yourself maintenance
4
Maintenance and care
■If the electronic key battery is discharged
The following symptoms may occur.
●The smart access system with push-button start and wireless remote control will
not function properly.
●The operational range is reduced.
■Use a CR1632 lithium battery
●Batteries can be purchased at your Lexus dealer, jewelers, or camera stores.
●Replace only with the same or equivalent type recommended by a Lexus dealer.
●Dispose of used batteries according to the local laws.
CAUTION
■Removed battery and other parts
Keep away from children.
These parts are small and if swallowed by a child they can cause choking.
NOTICE
■For normal operation after replacing the battery
Observe the following precautions to prevent accidents.
●Always work with dry hands.
Moisture may cause the battery to rust.
●Do not touch or move any other components inside the remote control.
●Do not bend either of the battery terminals.