oil Lexus IS220d 2012 Navigation manual
[x] Cancel search | Manufacturer: LEXUS, Model Year: 2012, Model line: IS220d, Model: Lexus IS220d 2012Pages: 407, PDF Size: 23.8 MB
Page 134 of 407

131
4. SETUP
3
NAVIGATION SYSTEM
ISF_IS_ISC_Navi_EE
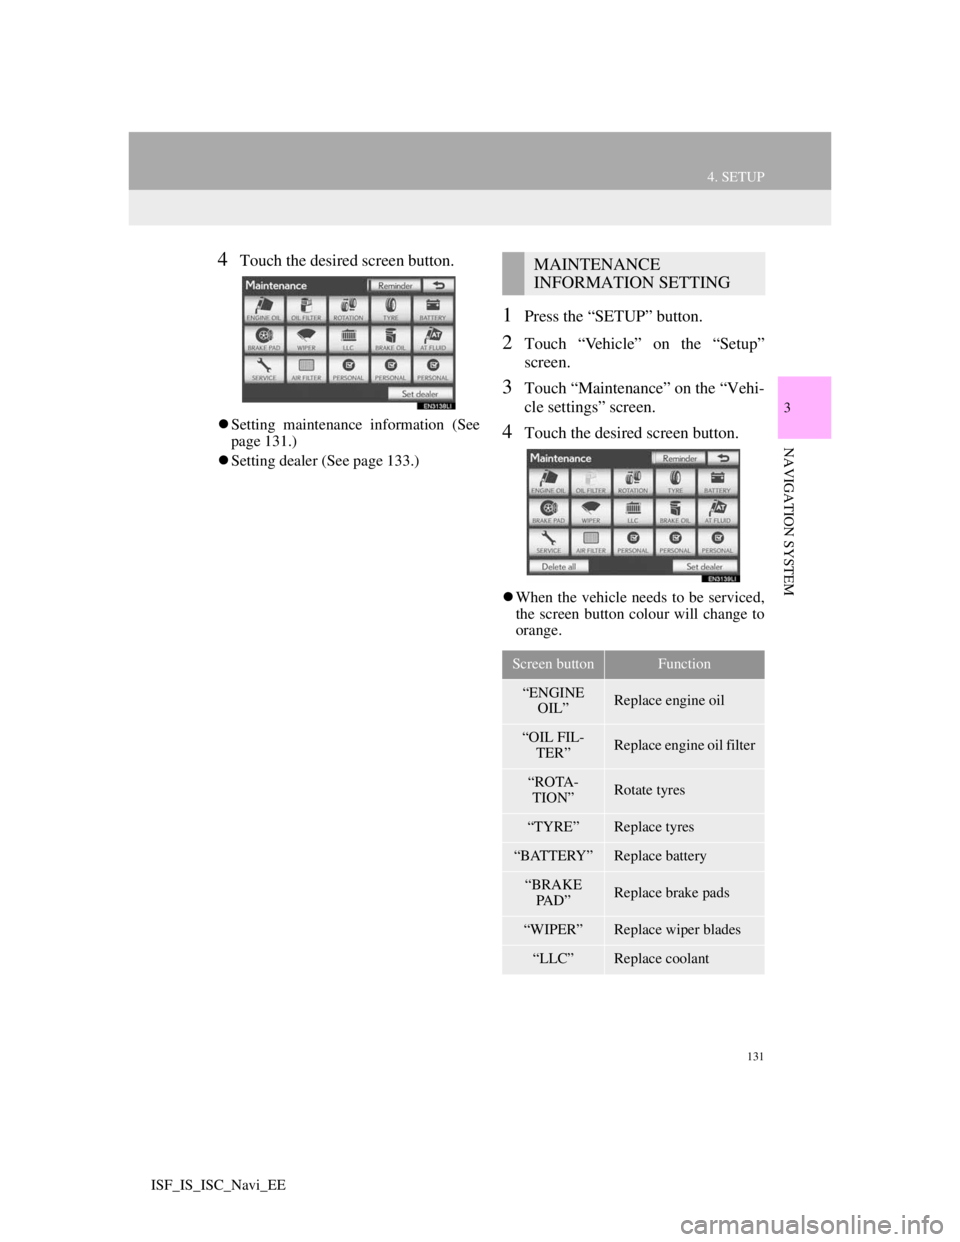
4Touch the desired screen button.
Setting maintenance information (See
page 131.)
Setting dealer (See page 133.)
1Press the “SETUP” button.
2Touch “Vehicle” on the “Setup”
screen.
3Touch “Maintenance” on the “Vehi-
cle settings” screen.
4Touch the desired screen button.
When the vehicle needs to be serviced,
the screen button colour will change to
orange.
MAINTENANCE
INFORMATION SETTING
Screen buttonFunction
“ENGINE
OIL”Replace engine oil
“OIL FIL-
TER”Replace engine oil filter
“ROTA-
TION”Rotate tyres
“TYRE”Replace tyres
“BATTERY”Replace battery
“BRAKE
PAD”Replace brake pads
“WIPER”Replace wiper blades
“LLC”Replace coolant
Page 135 of 407

132
4. SETUP
ISF_IS_ISC_Navi_EE
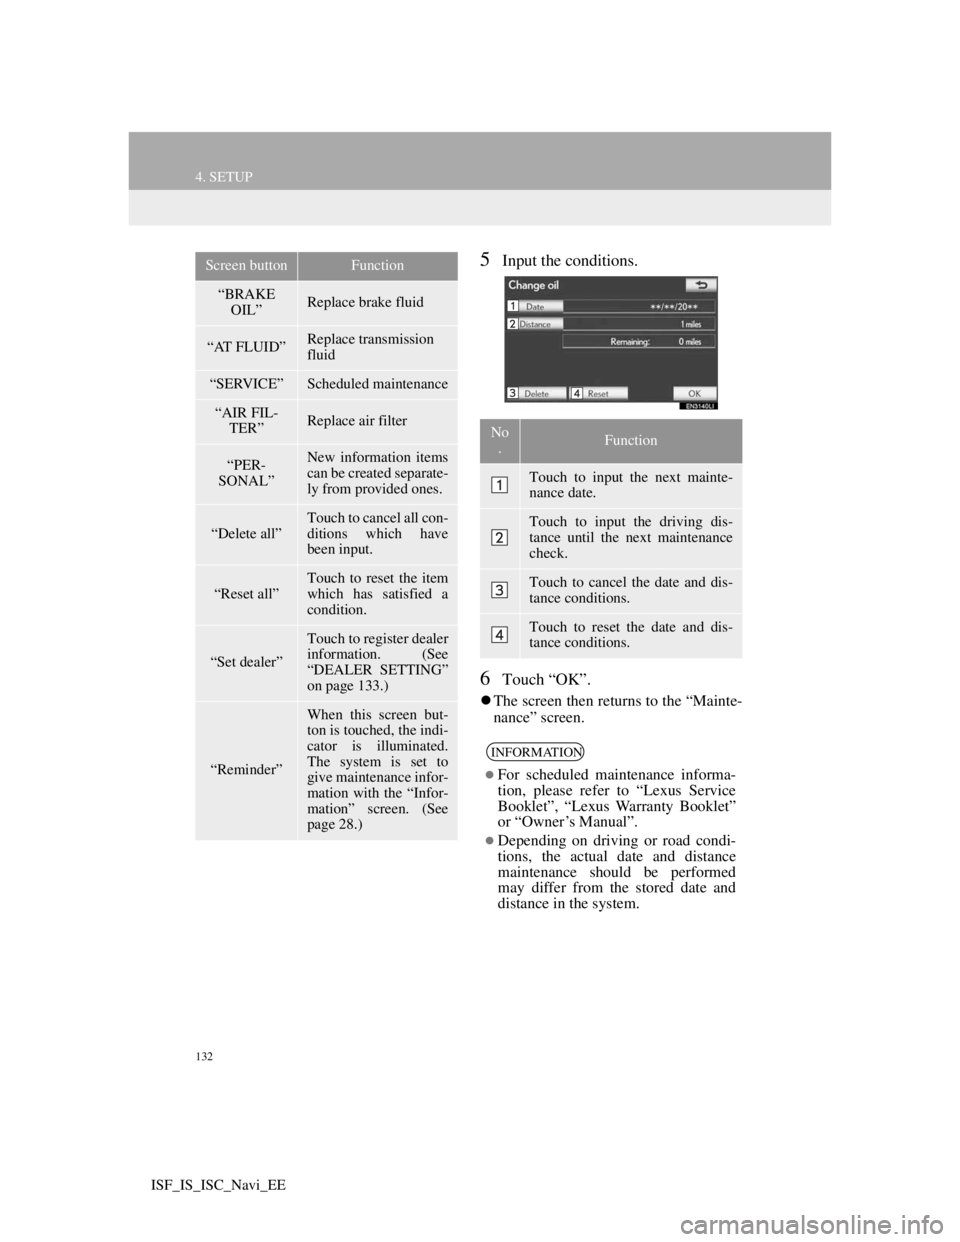
5Input the conditions.
6Touch “OK”.
The screen then returns to the “Mainte-
nance” screen.
“BRAKE
OIL”Replace brake fluid
“AT FLUID”Replace transmission
fluid
“SERVICE”Scheduled maintenance
“AIR FIL-
TER”Replace air filter
“PER-
SONAL”New information items
can be created separate-
ly from provided ones.
“Delete all”
Touch to cancel all con-
ditions which have
been input.
“Reset all”Touch to reset the item
which has satisfied a
condition.
“Set dealer”
Touch to register dealer
information. (See
“DEALER SETTING”
on page 133.)
“Reminder”
When this screen but-
ton is touched, the indi-
cator is illuminated.
The system is set to
give maintenance infor-
mation with the “Infor-
mation” screen. (See
page 28.)
Screen buttonFunction
No
.Function
Touch to input the next mainte-
nance date.
Touch to input the driving dis-
tance until the next maintenance
check.
Touch to cancel the date and dis-
tance conditions.
Touch to reset the date and dis-
tance conditions.
INFORMATION
For scheduled maintenance informa-
tion, please refer to “Lexus Service
Booklet”, “Lexus Warranty Booklet”
or “Owner’s Manual”.
Depending on driving or road condi-
tions, the actual date and distance
maintenance should be performed
may differ from the stored date and
distance in the system.
Page 212 of 407

205
1. AUDIO/VIDEO SYSTEM OPERATION
5
AUDIO/VIDEO SYSTEM
ISF_IS_ISC_Navi_EE
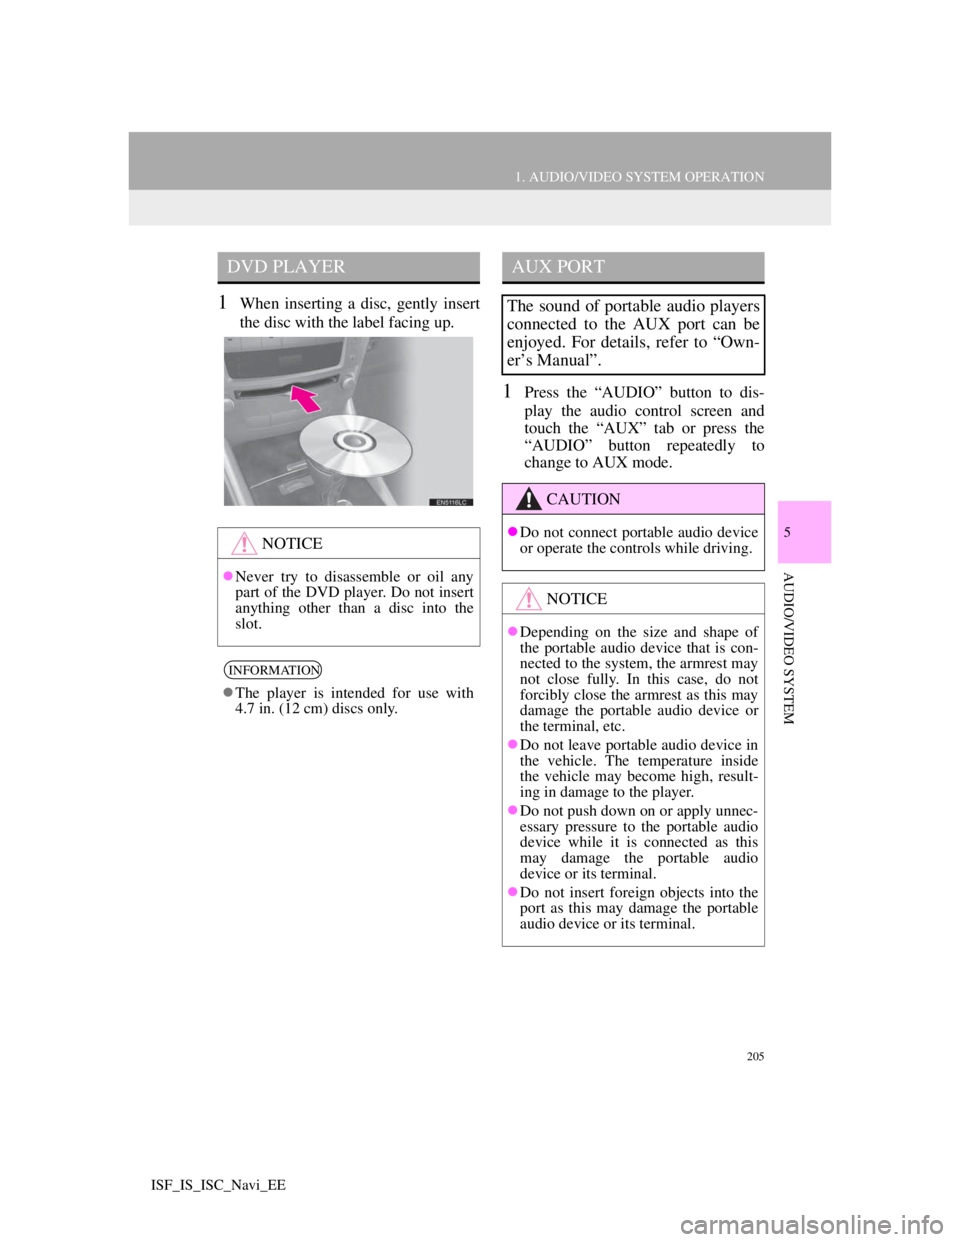
1When inserting a disc, gently insert
the disc with the label facing up.
1Press the “AUDIO” button to dis-
play the audio control screen and
touch the “AUX” tab or press the
“AUDIO” button repeatedly to
change to AUX mode.
DVD PLAYER
NOTICE
Never try to disassemble or oil any
part of the DVD player. Do not insert
anything other than a disc into the
slot.
INFORMATION
The player is intended for use with
4.7 in. (12 cm) discs only.
AUX PORT
The sound of portable audio players
connected to the AUX port can be
enjoyed. For details, refer to “Own-
er’s Manual”.
CAUTION
Do not connect portable audio device
or operate the controls while driving.
NOTICE
Depending on the size and shape of
the portable audio device that is con-
nected to the system, the armrest may
not close fully. In this case, do not
forcibly close the armrest as this may
damage the portable audio device or
the terminal, etc.
Do not leave portable audio device in
the vehicle. The temperature inside
the vehicle may become high, result-
ing in damage to the player.
Do not push down on or apply unnec-
essary pressure to the portable audio
device while it is connected as this
may damage the portable audio
device or its terminal.
Do not insert foreign objects into the
port as this may damage the portable
audio device or its terminal.