manual Lexus IS250 2006 Audio/video System / LEXUS 2006 IS350/250 QUICK REFERENCE GUIDE
[x] Cancel search | Manufacturer: LEXUS, Model Year: 2006, Model line: IS250, Model: Lexus IS250 2006Pages: 54, PDF Size: 3.36 MB
Page 1 of 54
1
When Driving
Topic 3
Entering and Exiting
Topic 1
Before Driving
Topic 2
Overview
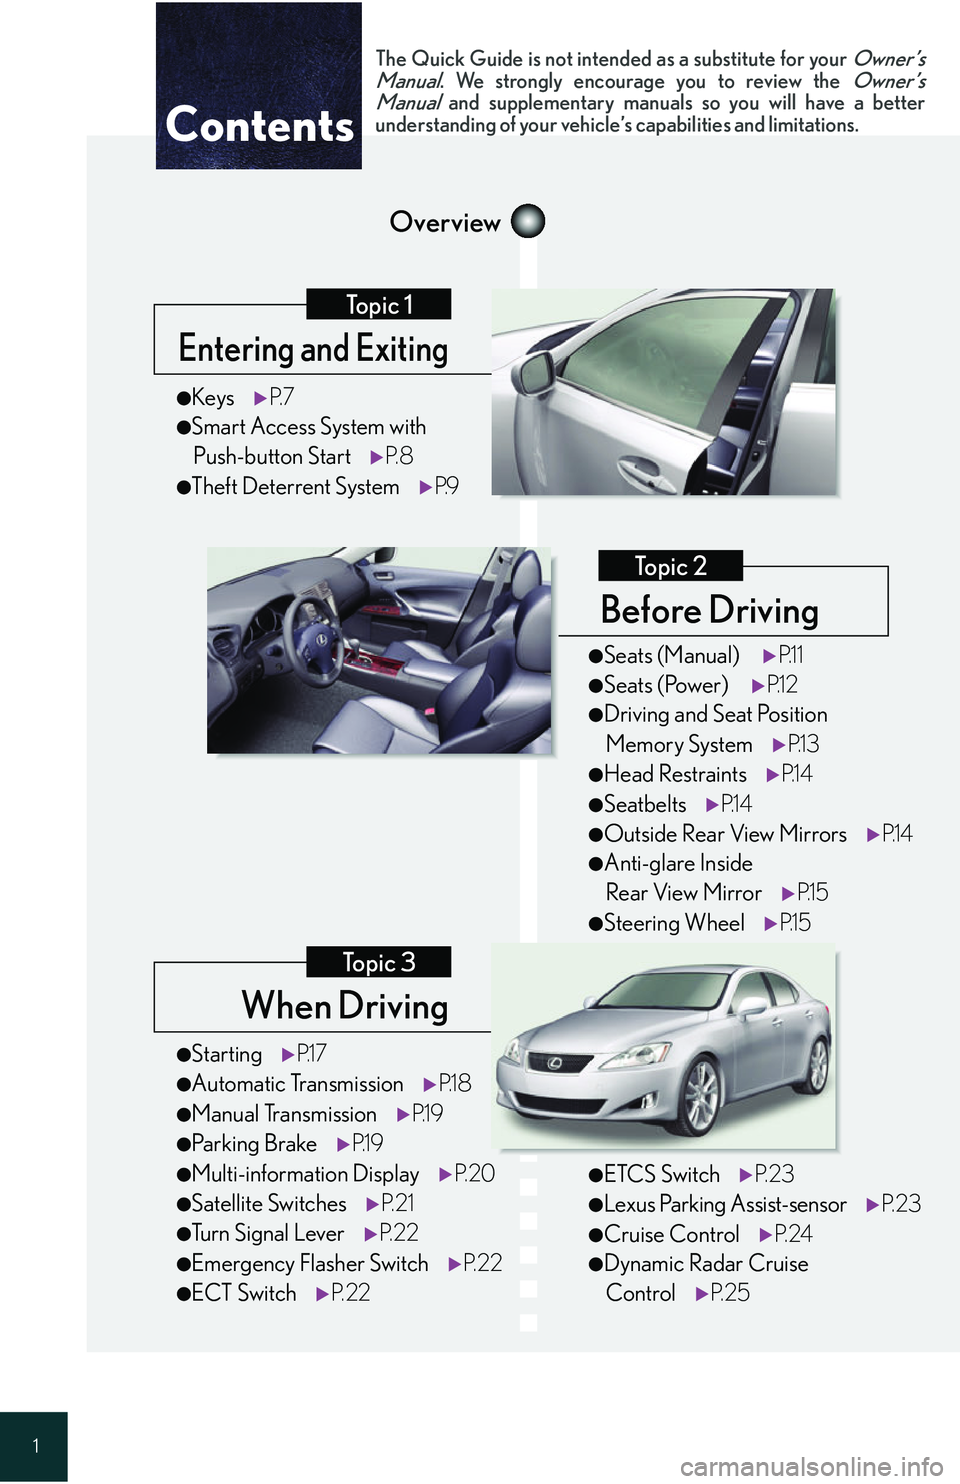
Contents
●StartingP.1 7
●Automatic Transmission P.1 8
●Manual TransmissionP.1 9
●Parking BrakeP.1 9
●Multi-information Display P. 2 0
●Satellite SwitchesP. 2 1
●Tu r n S i g n a l L e v e rP. 2 2
●Emergency Flasher Switch P. 2 2
●ECT SwitchP. 2 2
●KeysP. 7
●Smart Access System with
Push-button Start P. 8
●Theft Deterrent System P.9
The Quick Guide is not intended as a substitute for your Owner’s
Manual. We strongly encourage you to review the Owner’s
Manual and supplementary manuals so you will have a better
understanding of your vehicle’s capabilities and limitations.
●ETCS Switch P. 2 3
●Lexus Parking Assist-sensor P. 2 3
●Cruise ControlP. 2 4
●Dynamic Radar Cruise
Control P. 2 5
●Seats (Manual) P.1 1
●Seats (Power) P.1 2
●Driving and Seat Position
Memory System P.1 3
●Head RestraintsP.1 4
●SeatbeltsP.1 4
●Outside Rear View Mirrors P.1 4
●Anti-glare Inside
Rear View Mirror P.1 5
●Steering WheelP.1 5
Page 4 of 54
4
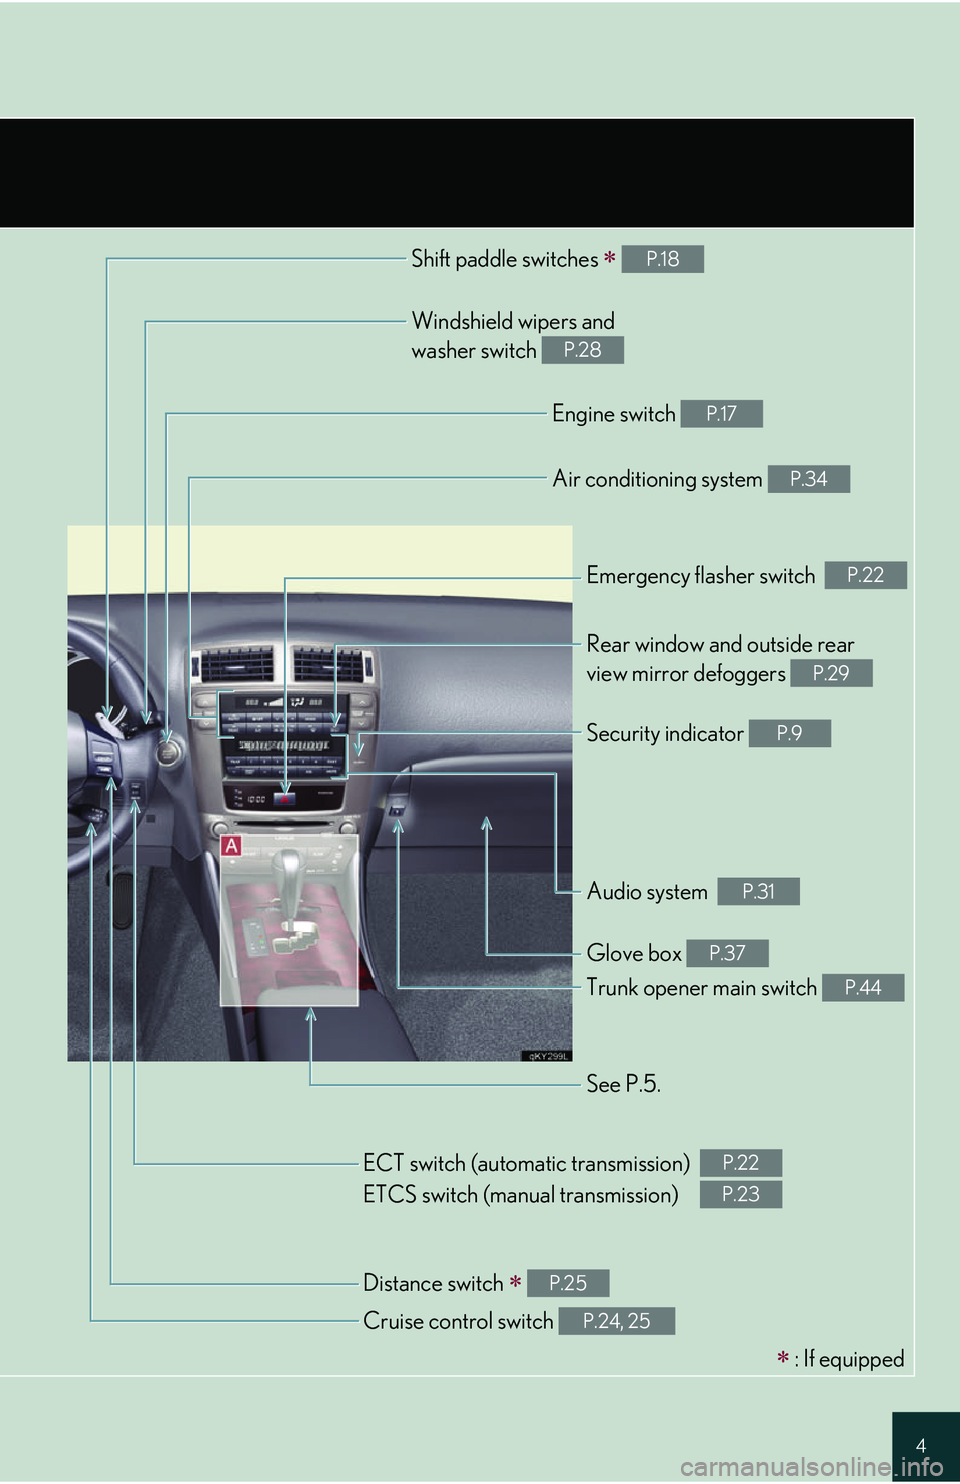
Shift paddle switches P.18
Windshield wipers and
washer switch
P.28
Engine switch P.17
Air conditioning system P.34
Emergency flasher switch P.22
Rear window and outside rear
view mirror defoggers
P.29
Security indicator P.9
Audio system P.31
Glove box P.37
Trunk opener main switch P.44
See P.5.
Cruise control switch
P.24, 25
Distance switch P.25
ECT switch (automatic transmission)
ETCS switch (manual transmission)P.22
P.23
: If equipped
Page 5 of 54
5
OverviewInstrument Panel
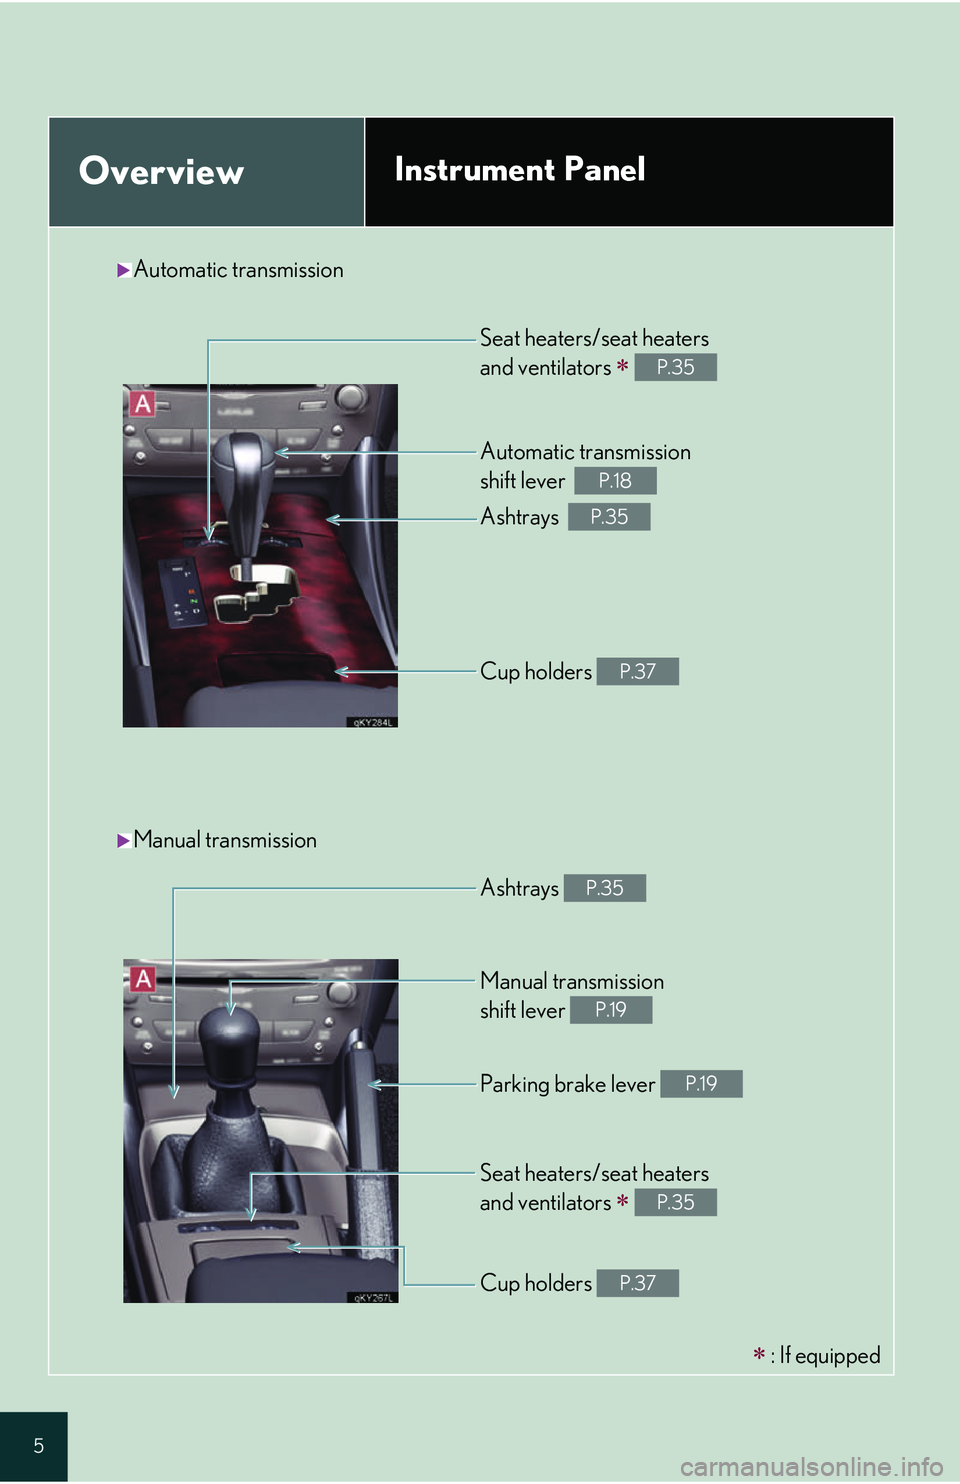
Seat heaters/seat heaters
and ventilators
P.35
Automatic transmission
shift lever
P.18
Ashtrays P.35
Cup holders P.37
Ashtrays P.35
Manual transmission
shift lever
P.19
Parking brake lever P.19
Seat heaters/seat heaters
and ventilators
P.35
Cup holders P.37
Automatic transmission
Manual transmission
: If equipped
Page 10 of 54
Before DrivingTopic 2
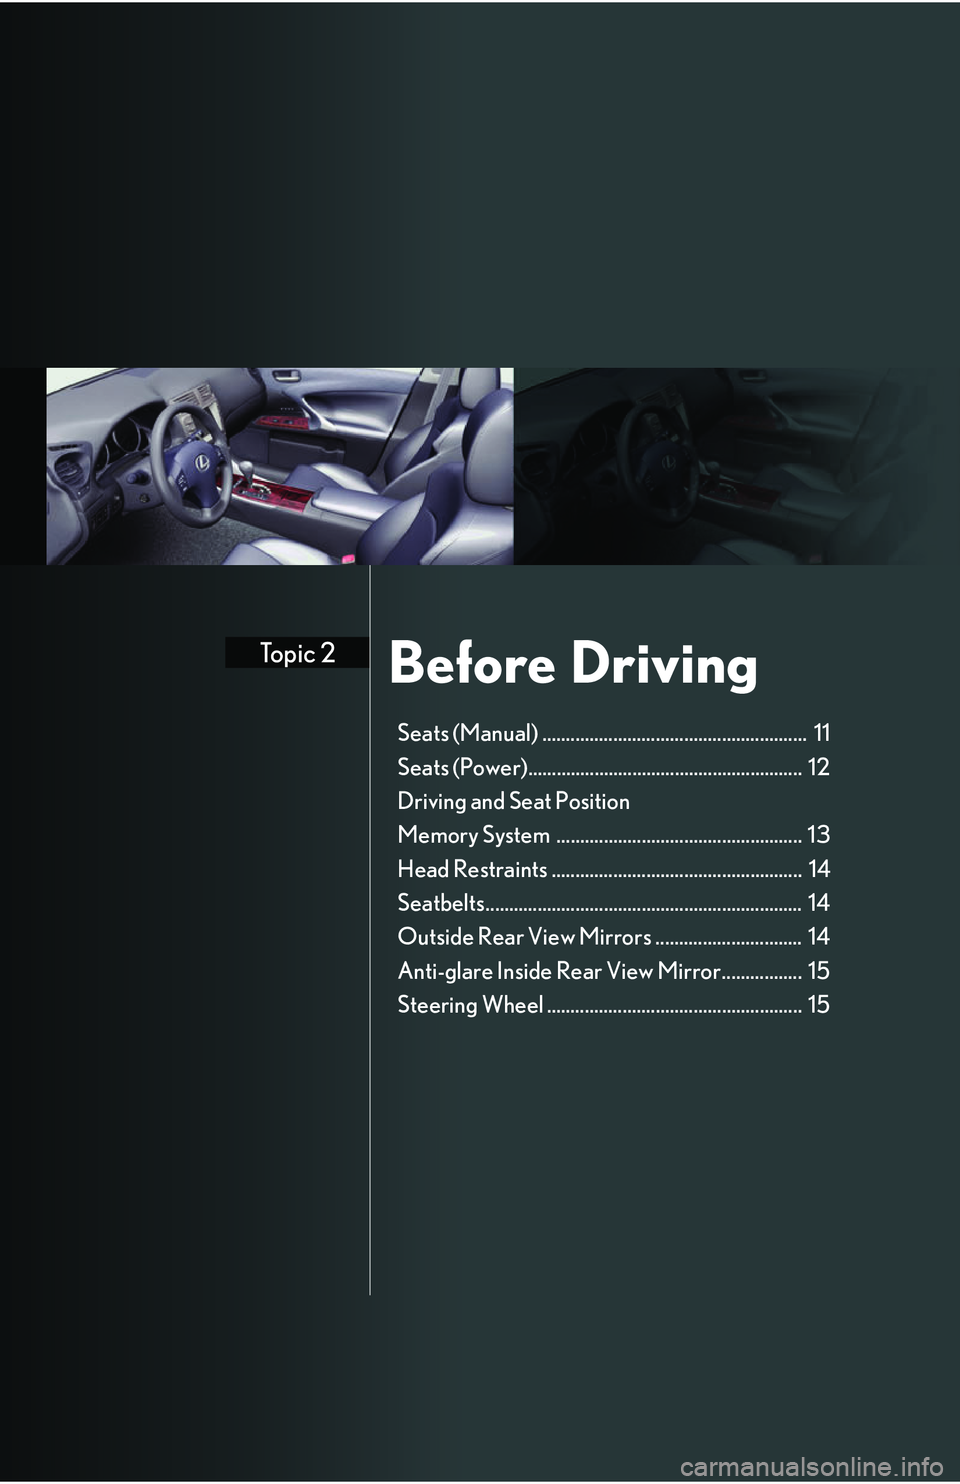
Seats (Manual) ........................................................ 11
Seats (Power).......................................................... 12
Driving and Seat Position
Memory System .................................................... 13
Head Restraints ..................................................... 14
Seatbelts................................................................... 14
Outside Rear View Mirrors ............................... 14
Anti-glare Inside Rear View Mirror................. 15
Steering Wheel ...................................................... 15
Page 11 of 54

Topic 2
Before Driving
11
Seats (Manual)
■Adjusting seat position
With the lever raised, slide the seat forward or
backward.
■Adjusting seatback angle
With the lever raised, tilt the seatback forward or
backward.
■ Adjusting seat height
Raises the seat
Lowers the seat
■Adjusting the front of the seat cushion
Raises the front of the seat cushion
Lowers the front of the seat cushion
1
2
1
2
Page 13 of 54
Topic 2
Before Driving
13
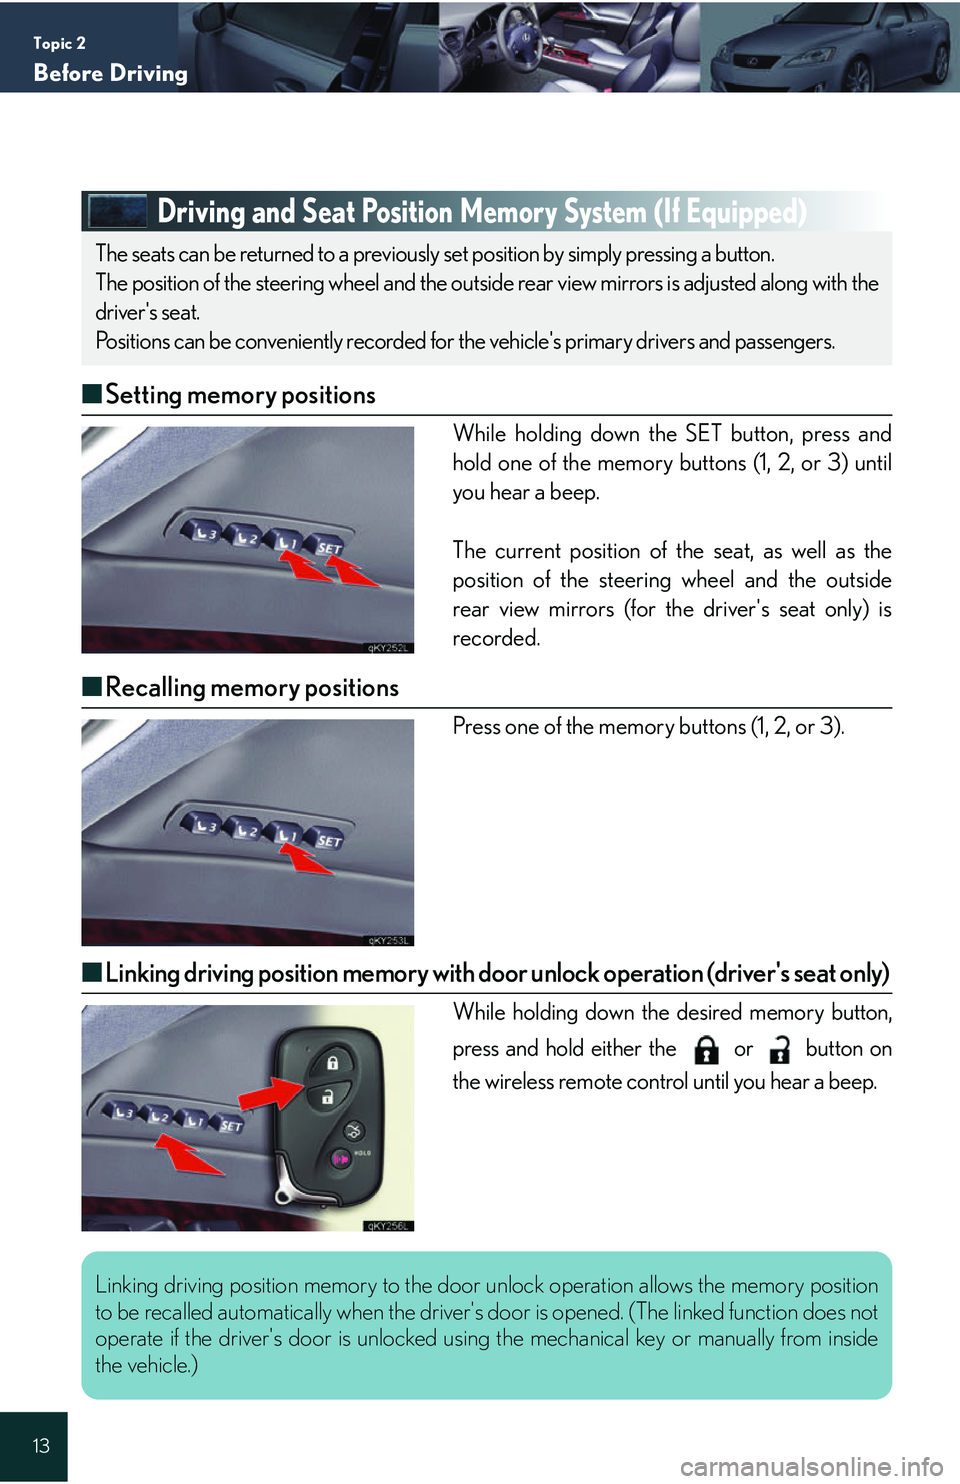
Driving and Seat Position Memory System (If Equipped)
■Setting memory positions
While holding down the SET button, press and
hold one of the memory buttons (1, 2, or 3) until
you hear a beep.
The current position of the seat, as well as the
position of the steering wheel and the outside
rear view mirrors (for the driver's seat only) is
recorded.
■Recalling memory positions
Press one of the memory buttons (1, 2, or 3).
■Linking driving position memory with door unlock operation (driver's seat only)
While holding down the desired memory button,
press and hold either the or button on
the wireless remote control until you hear a beep.
The seats can be returned to a previously set position by simply pressing a button.
The position of the steering wheel and the outside rear view mirrors is adjusted along with the
driver's seat.
Positions can be conveniently recorded for the vehicle's primary drivers and passengers.
Linking driving position memory to the door unlock operation allows the memory position
to be recalled automatically when the driver's door is opened. (The linked function does not
operate if the driver's door is unlocked us ing the mechanical key or manually from inside
the vehicle.)
Page 15 of 54
Topic 2
Before Driving
15
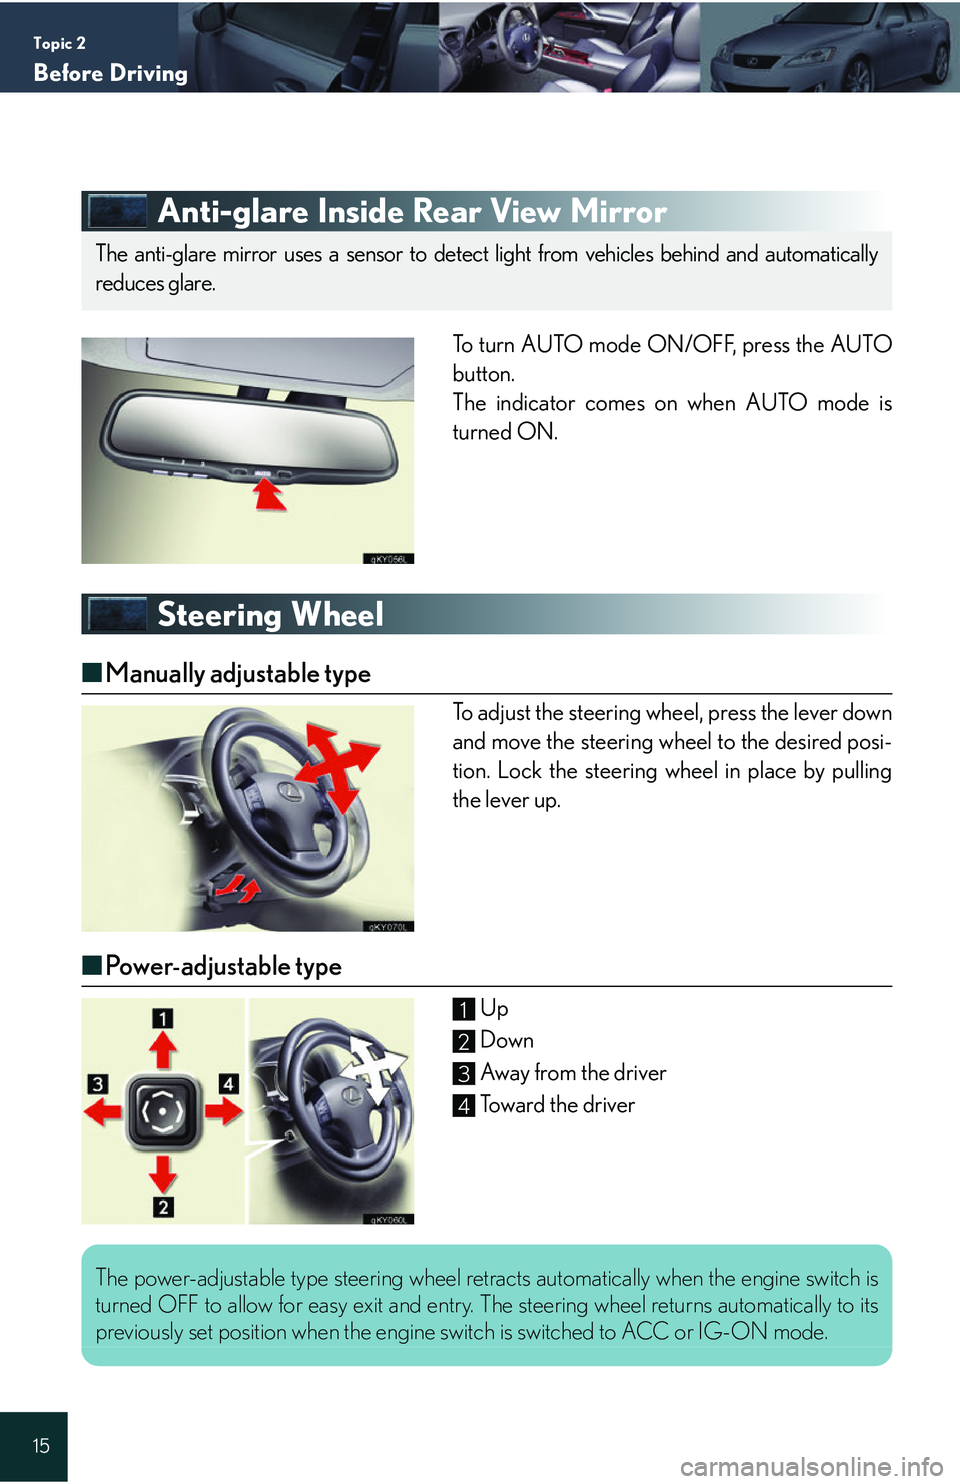
Anti-glare Inside Rear View Mirror
To turn AUTO mode ON/OFF, press the AUTO
button.
The indicator comes on when AUTO mode is
turned ON.
Steering Wheel
■Manually adjustable type
To adjust the steering wheel, press the lever down
and move the steering wheel to the desired posi-
tion. Lock the steering wheel in place by pulling
the lever up.
■Power-adjustable type
Up
Down
Away from the driver
Toward the driver
The anti-glare mirror uses a sensor to detect light from vehicles behind and automatically
reduces glare.
1
2
3
4
The power-adjustable type steering wheel retracts automatically when the engine switch is
turned OFF to allow for easy exit and entry. The steering wheel returns automatically to its
previously set position when the engine switch is switched to ACC or IG-ON mode.
Page 16 of 54
When DrivingTopic 3
Starting ..................................................................... 17
Automatic Transmission ...................................... 18
Manual Transmission............................................ 19
Parking Brake ......................................................... 19
Multi-information Display.................................. 20
Satellite Switches .................................................. 21
Turn Signal Lever .................................................. 22
Emergency Flasher Switch ................................ 22
ECT Switch ............................................................. 22
ETCS Switch .......................................................... 23
Lexus Parking Assist-sensor ............................. 23
Cruise Control ...................................................... 24
Dynamic Radar Cruise Control....................... 25
Page 17 of 54
Topic 3
When Driving
17
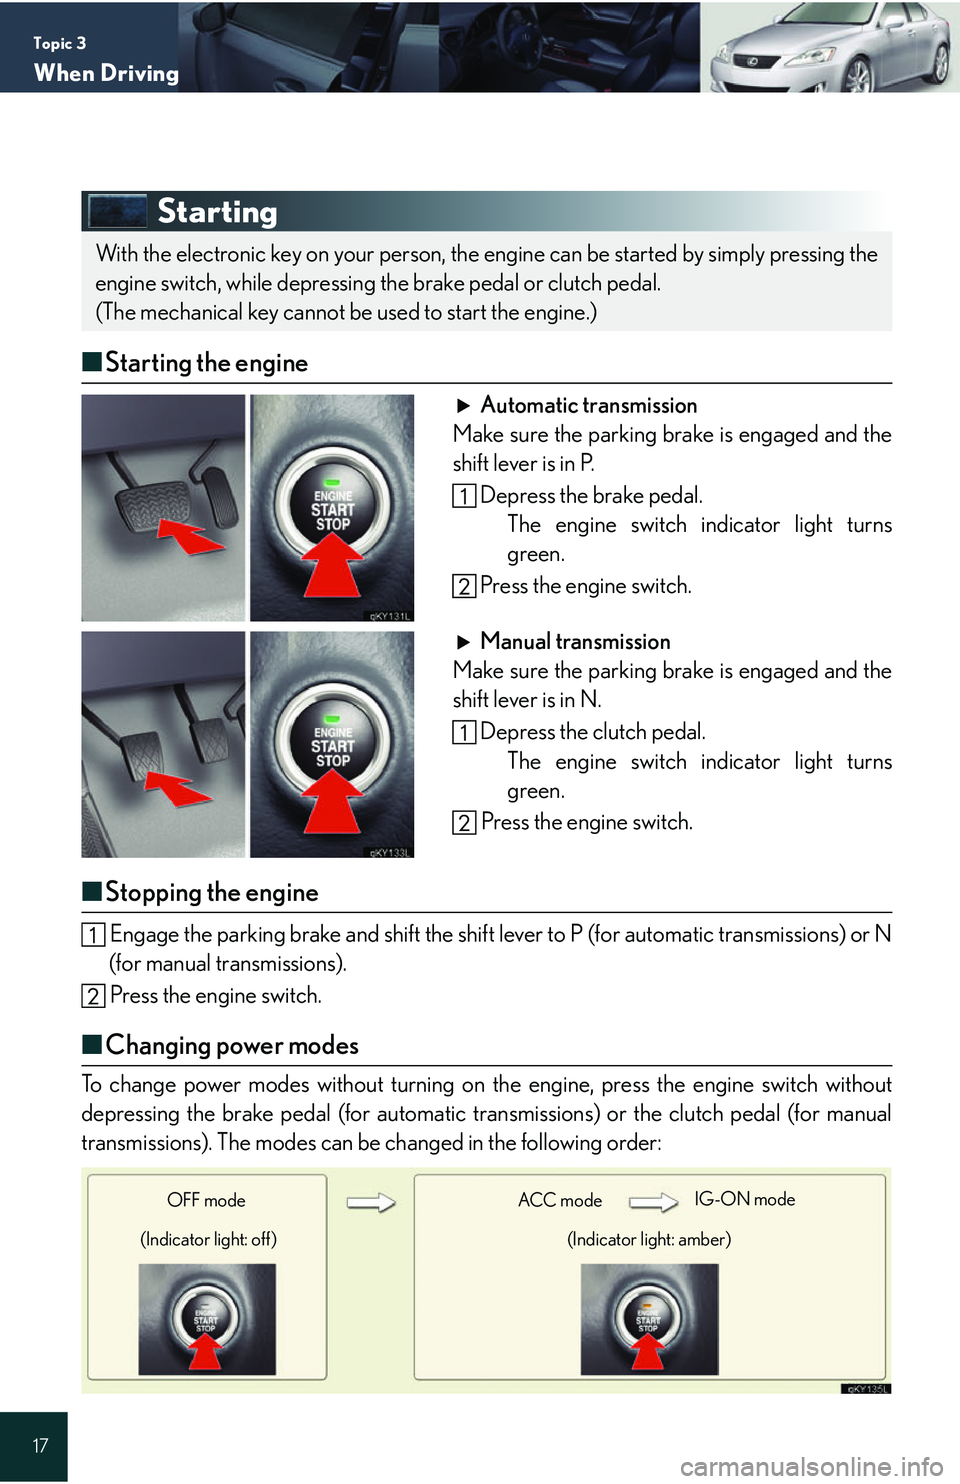
Starting
■Starting the engine
Automatic transmission
Make sure the parking brake is engaged and the
shift lever is in P.
Depress the brake pedal.The engine switch indicator light turns
green.
Press the engine switch.
Manual transmission
Make sure the parking brake is engaged and the
shift lever is in N.
Depress the clutch pedal.The engine switch indicator light turns
green.
Press the engine switch.
■ Stopping the engine
Engage the parking brake and shift the shift lever to P (for automatic transmissions) or N
(for manual transmissions).
Press the engine switch.
■ Changing power modes
To change power modes without turning on the engine, press the engine switch without
depressing the brake pedal (for automatic tran smissions) or the clutch pedal (for manual
transmissions). The modes can be changed in the following order:
With the electronic key on your person, the engine can be started by simply pressing the
engine switch, while depressing the brake pedal or clutch pedal.
(The mechanical key cannot be used to start the engine.)
ACC mode IG-ON mode
(Indicator light: amber)
OFF mode
(Indicator light: off)
Page 18 of 54

Topic 3
When Driving
18
Entering and Exiting
Before DrivingBefore Driving
When DrivingWhen Driving
Rain and
Night Driving
Driving Comfort
Opening and Closing
What to do if ...
Customizing Yo u r L e x u s
Automatic Transmission
■ Shift positions
P Pa r k *
R Reverse
N Neutral (drive not engaged)
D Drive
S S mode
* : The engine can only be started in P.
The vehicle can only be shifted out of P whenthe engine switch is in IG-ON mode and the
brake pedal is depressed.
■ S mode
S mode allows the driver to select the shift range manually based on driving conditions.
Shift the shift lever to S.
To u p s h i f t : shift the shift lever toward "+", or
press the "+" shift paddle switch on the steering
wheel.
To d o w n s h i f t : shift the shift lever toward "-", or
press the "-" shift paddle switch on the steering
wheel.
The selected shift range is displayed on the
instrument cluster.