Lexus IS250 2006 Opening, closing and locking the doors and trunk / LEXUS 2006 IS350/250 THROUGH APRIL 2006 PROD. OWNER'S MANUAL (OM53508U)
Manufacturer: LEXUS, Model Year: 2006,
Model line: IS250,
Model: Lexus IS250 2006
Pages: 433, PDF Size: 10.9 MB
Lexus IS250 2006 Opening, closing and locking the doors and trunk / LEXUS 2006 IS350/250 THROUGH APRIL 2006 PROD. OWNER'S MANUAL (OM53508U)
IS250 2006
Lexus
Lexus
https://www.carmanualsonline.info/img/36/29941/w960_29941-0.png
Lexus IS250 2006 Opening, closing and locking the doors and trunk / LEXUS 2006 IS350/250 THROUGH APRIL 2006 PROD. OWNER'S MANUAL (OM53508U)
Trending: ABS, radio controls, fuses, cooling, light, child restraint, hood open
Page 171 of 433
153
2-5. Driving information
2
When driving
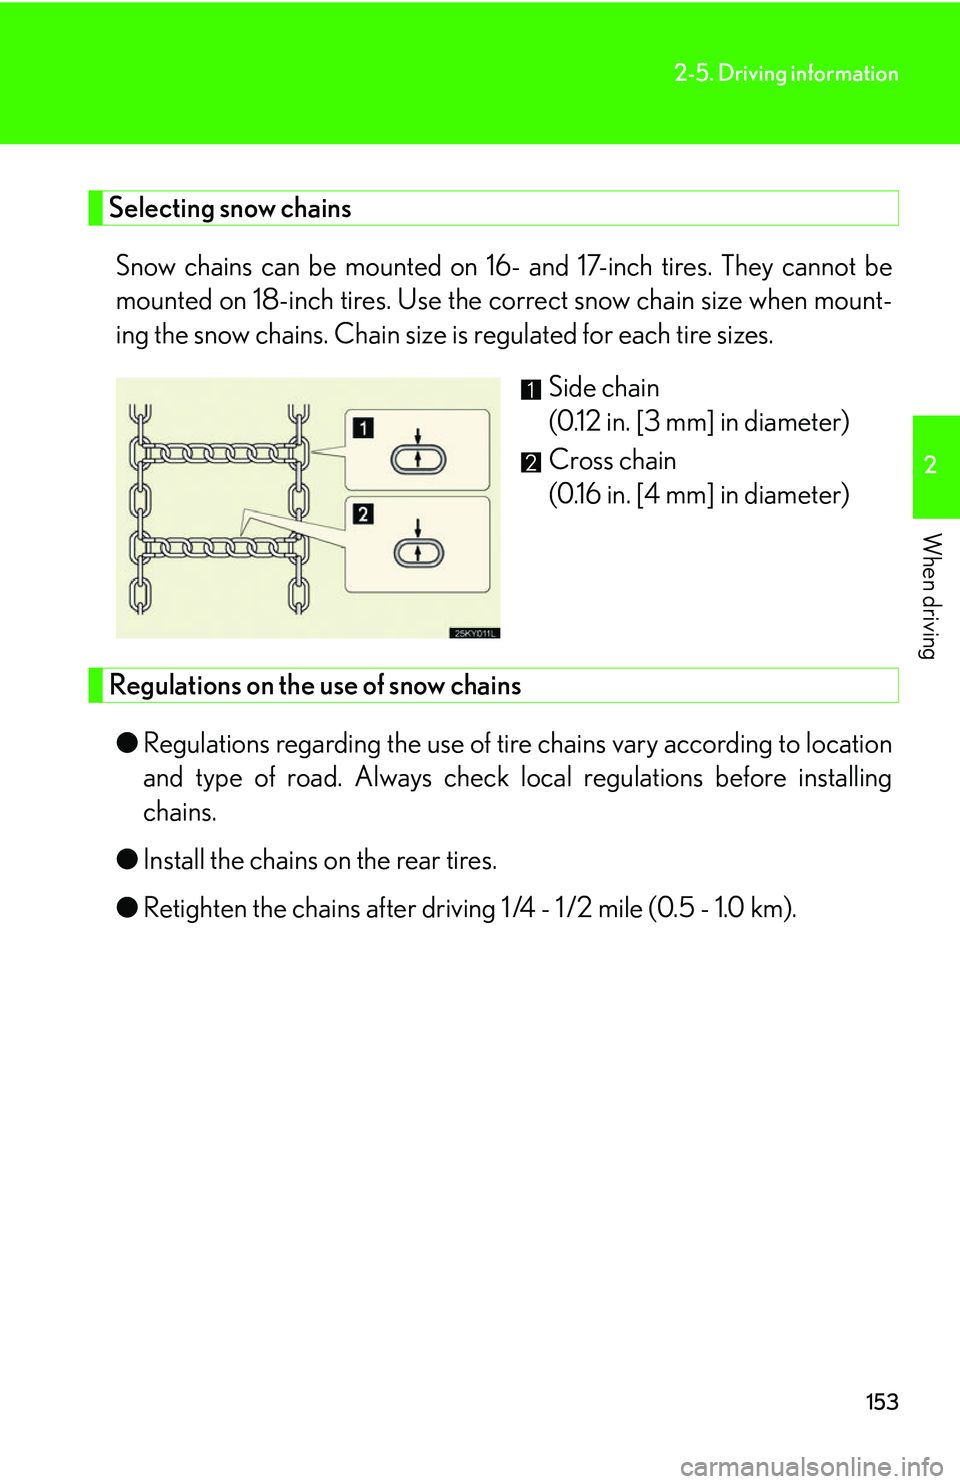
Selecting snow chainsSnow chains can be mounted on 16- and 17-inch tires. They cannot be
mounted on 18-inch tires. Use the correct snow chain size when mount-
ing the snow chains. Chain size is regulated for each tire sizes.
Side chain
(0.12 in. [3 mm] in diameter)
Cross chain
(0.16 in. [4 mm] in diameter)
Regulations on the use of snow chains
● Regulations regarding the use of tire chains vary according to location
and type of road. Always check local regulations before installing
chains.
● Install the chains on the rear tires.
● Retighten the chains after driving 1 /4 - 1 /2 mile (0.5 - 1.0 km).
Page 172 of 433
154
2-5. Driving information
■Snow chain installation
Observe the following precautions when installing and removing chains.
●Install and remove tire chains in a safe location.
●Install tire chains on the rear tires only. Do not install tire chains on front tires.
●Install the tire chains on rear tires as tightly as possible. Retighten chains after
driving 1 /4 - 1 /2 mile (0.5 - 1.0 km).
●Install tire chains following the instructions provided in the accompanying
instructions.
CAUTION
■Driving with snow tires
Observe the following precautions to reduce the risk of accidents.
Failing to do so may result in a loss of vehicle control and cause death or serious
injury.
●Use tires of the size specified for your vehicle.
●Maintain the recommended level of air pressure.
●Do not drive in excess of 75 mph (120 km/h ), regardless of the type of snow tires
being used.
●Use snow tires on all, not just some wheels.
■Driving with snow chains
Observe the following precautions to reduce the risk of accidents.
Failing to do so may result in the vehicle being unable to be driven safely, and may
cause death or serious injury.
●Do not drive in excess of the speed limit specified for the tire chains being used,
or 30 mph (50 km/h), whichever is lower.
●Avoid driving on bumpy road surfaces or over potholes.
●Avoid sudden turns and braking, as use of chains may adversely affect vehicle
handling.
●Slow down sufficiently before entering a curve to ensure that vehicle control is
maintained.
Page 173 of 433
155
2-5. Driving information
2
When driving
NOTICE
■Repairing or replacing snow tires
Request repairs of and obtain replacement snow tires from Lexus dealers or legiti-
mate tire retailers.
This is because the removal and attachment of snow tires affects the operation of
the tire air pressure sensor.
■Fitting tire chains
The tire air pressure sensor may not functi on correctly when tire chains are fitted.
Page 174 of 433
156
2-5. Driving information
Trailer towing
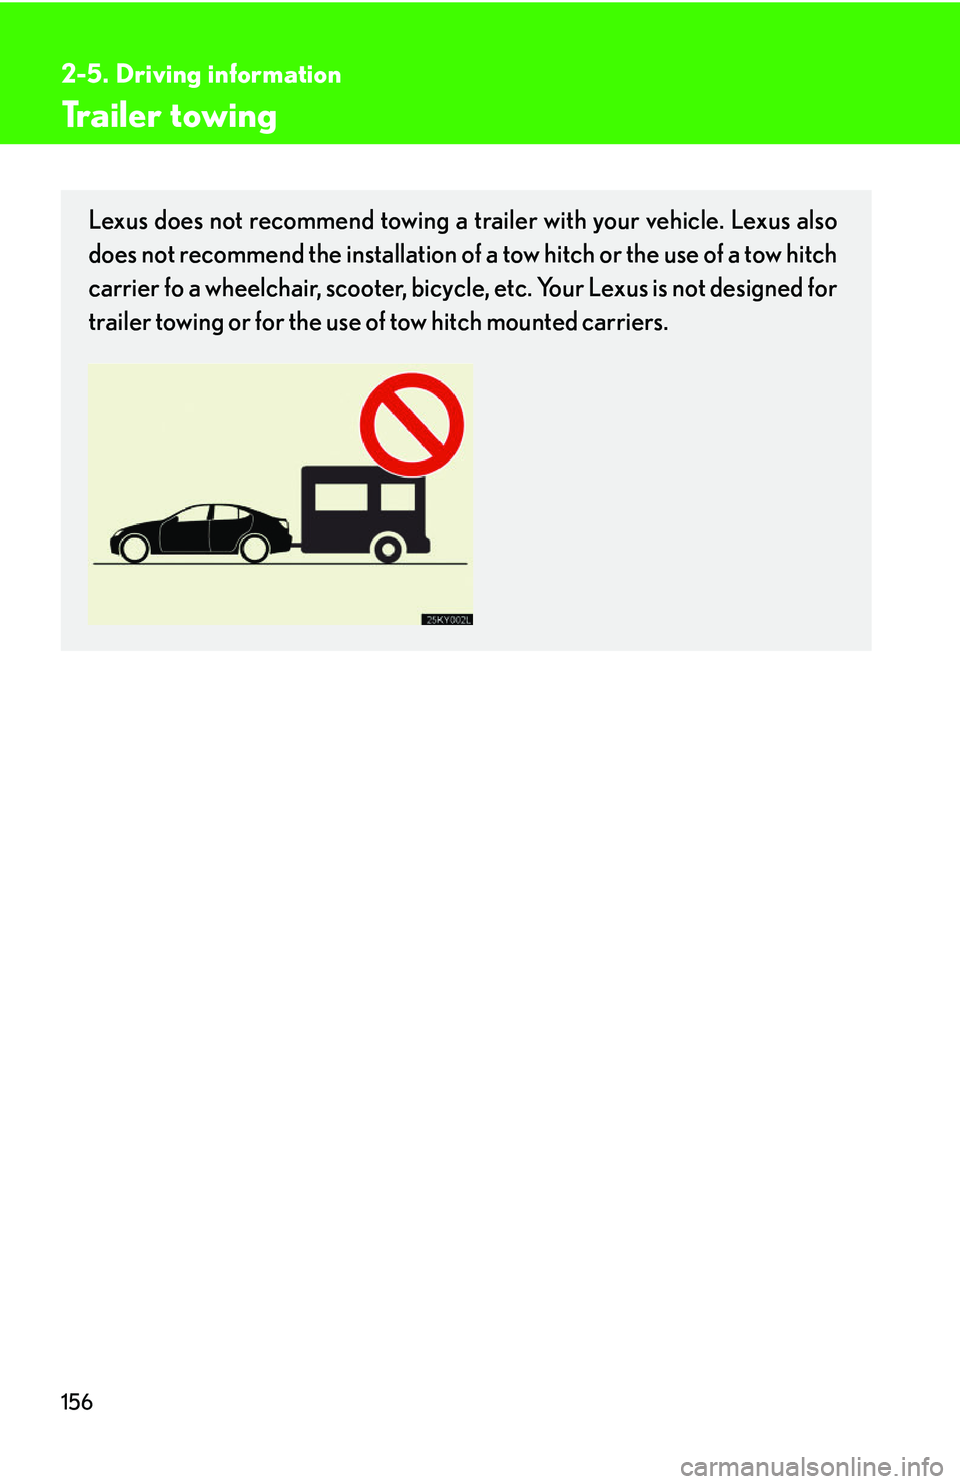
Lexus does not recommend towing a trailer with your vehicle. Lexus also
does not recommend the installation of a tow hitch or the use of a tow hitch
carrier fo a wheelchair, scooter, bicycle, etc. Your Lexus is not designed for
trailer towing or for the use of tow hitch mounted carriers.
Page 175 of 433
157
2-5. Driving information
2
When driving
Dinghy towing (vehicles with an automatic transmission)
NOTICE
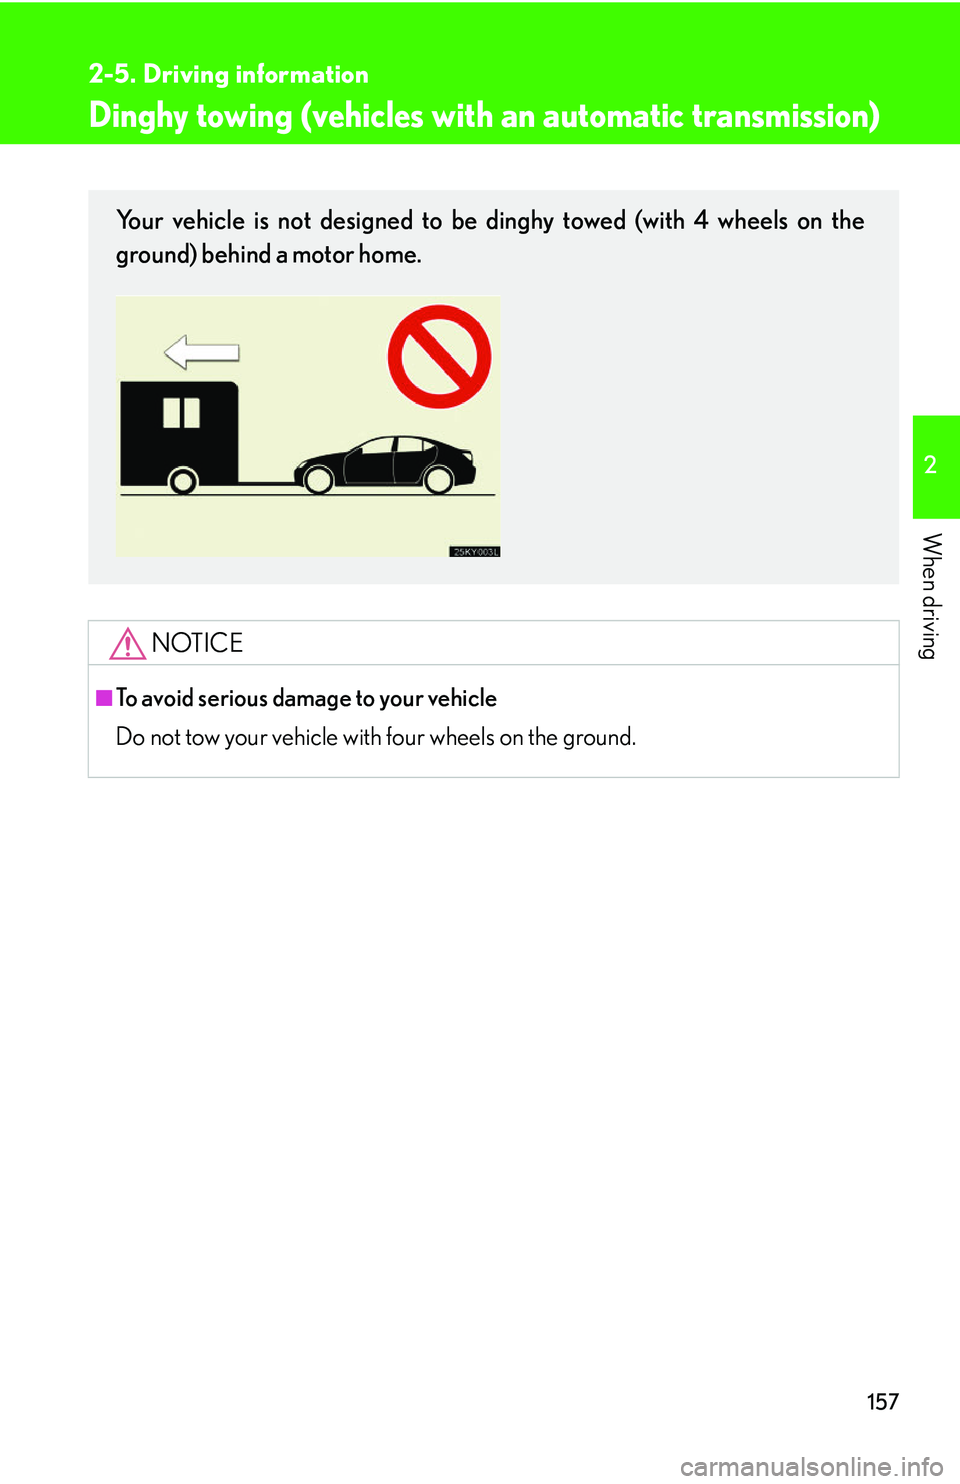
■To avoid serious damage to your vehicle
Do not tow your vehicle with four wheels on the ground.
Your vehicle is not designed to be dinghy towed (with 4 wheels on the
ground) behind a motor home.
Page 176 of 433
158
2-5. Driving information
Dinghy towing (vehicles with a manual transmission)
Towing your vehicle with 4 wheels on the groundTo prevent damage to your vehicle, perform the following procedures
before towing. Shift the shift lever to neutral.
Switch to ACC mode. ( P. 8 9 )
Ensure that the audio system and other powered devices have been
turned OFF.
Release the parking brake.
After towing, leave the engine in idle for at least 3 minutes before driv-
ing the vehicle.
■Necessary equipment and accessories
Specialized equipment and accessories are required for dinghy towing. Contact
the service branch of the motor home manufacturer regarding recommended
equipment.
Your vehicle can be dinghy towed in a forward direction (with 4 wheels on
the ground) behind a motor home.
STEP1
STEP2
STEP3
Page 177 of 433
159
2-5. Driving information
2
When driving
NOTICE
■Dinghy towing direction
■To prevent the steering from locking
Ensure the engine switch is in ACC mode.
Do not tow the vehicle backwards.
Doing so may cause serious damage.
Page 178 of 433
160
2-5. Driving information
Page 179 of 433
Interior features3
161
3-1. Using the air conditioning system and defogger ........... 162
Automatic air conditioning system .......................................... 162
Rear window and outside rear view mirror defoggers........... 170
3-2. Using the audio system .......... 171 Audio system type ....................... 171
Using the radio ............................. 174
Using the CD player .................. 181
Playing back MP3 and WMA discs................................ 187
Optimal use of the audio system .......................................... 195
Using the AUX adapter .......... 198
Using the steering wheel audio switches .......................... 199
3-3. Using the interi or lights ......... 201
Interior lights list.......................... 201
• Interior lights and personal lights......................... 203
3-4. Using the storage features ................................. 205
List of storage features........... 205
• Glove box ................................ 205 • Console boxes ........................ 206
• Overhead console ................ 207
• Cup holders ............................. 208
• Bottle holders/door
pockets ....................................... 209
3-5. Other interior features.......... 211 Sun visors ........................................ 211
Vanity mirror ................................. 212
Clock............................................... 213
Satellite switch es ......................... 214
Ashtrays .......................................... 217
Cigarette lighter ......................... 218
Power outlet ................................. 219
Seat heaters ................................ 220
Seat heaters and ventilators .................................. 222
Armrest ......................................... 224
Rear sunshade............................ 225
Extended trunk .......................... 227
Coat hooks .................................. 228
Floor mat ...................................... 229
Trunk features ............................. 230
Garage door opener............... 233
Compass ...................................... 238
Page 180 of 433
162
3-1. Using the air conditioning system and defogger
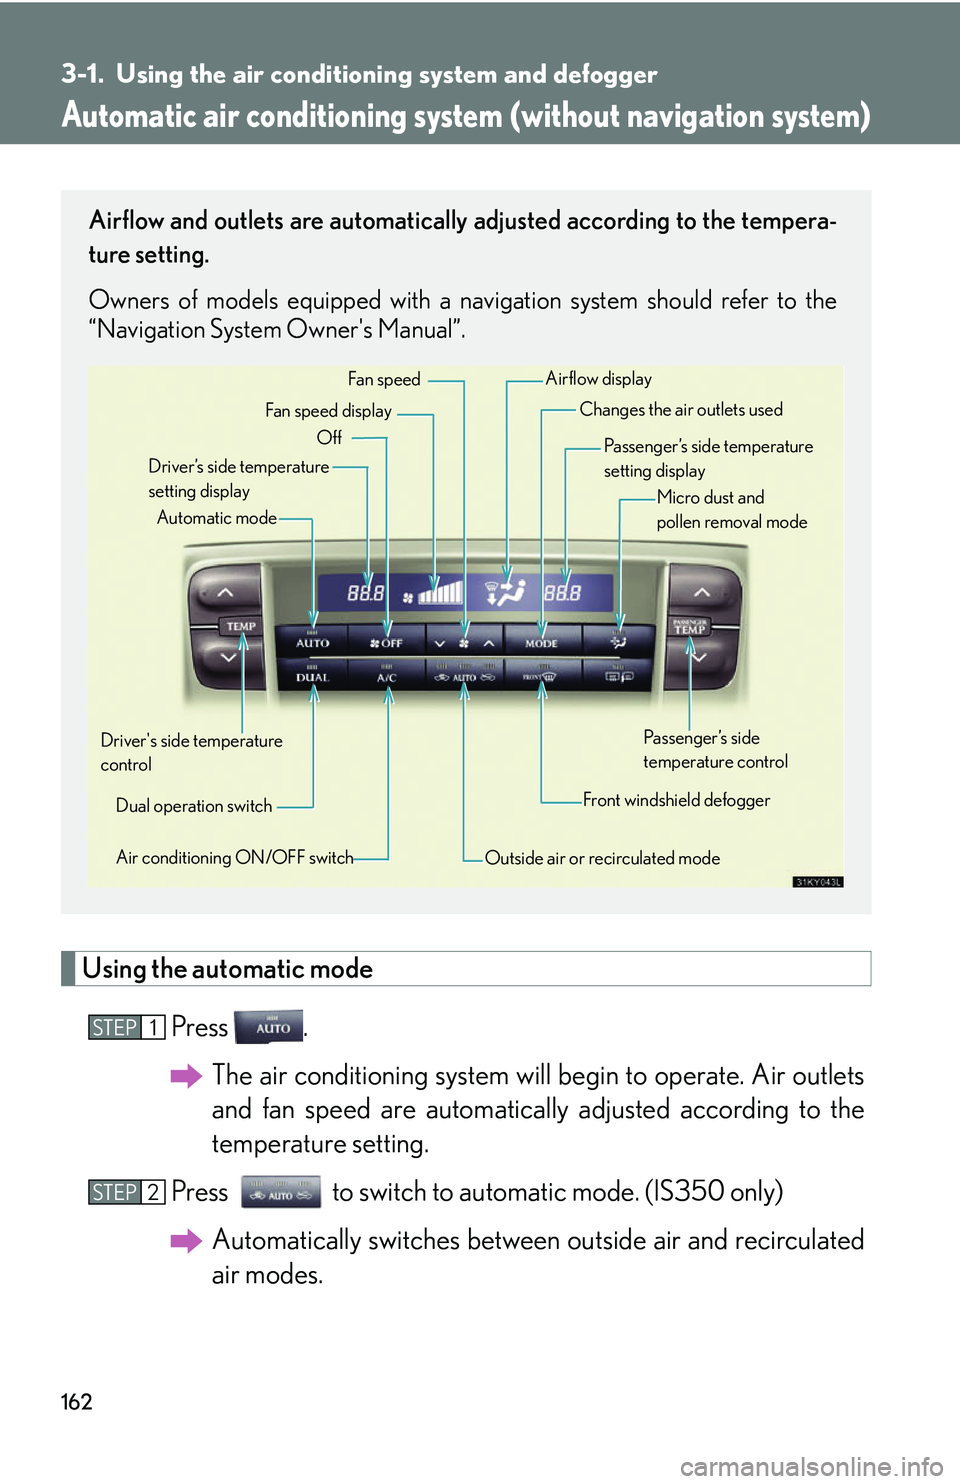
Automatic air conditioning system (without navigation system)
Using the automatic mode
Press .The air conditioning system will begin to operate. Air outlets
and fan speed are automatically adjusted according to the
temperature setting.
Press to switch to automatic mode. (IS350 only) Automatically switches between outside air and recirculated
air modes.
Airflow and outlets are automatically adjusted according to the tempera-
ture setting.
Owners of models equipped with a navigation system should refer to the
“Navigation System Owner's Manual”.
Automatic mode
Driver’s side temperature
setting display Changes the air outlets used
Off Fan speed
Airflow display
Fan speed display
Passenger’s side temperature
setting displayMicro dust and
pollen removal mode
Driver's side temperature
control Air conditioning ON/OFF switch Outside air or recirculated modeFront windshield defoggerPassenger’s side
temperature control
Dual operation switch
STEP1
STEP2
Trending: stop start, child lock, power steering fluid, steering wheel, tire pressure reset, manual transmission, jacking
