ECO mode Lexus IS250 2006 Using the audio system / LEXUS 2006 IS350/250 THROUGH APRIL 2006 PROD. (OM53508U) User Guide
[x] Cancel search | Manufacturer: LEXUS, Model Year: 2006, Model line: IS250, Model: Lexus IS250 2006Pages: 433, PDF Size: 10.9 MB
Page 121 of 433

103
2-2. Instrument cluster
2
When driving
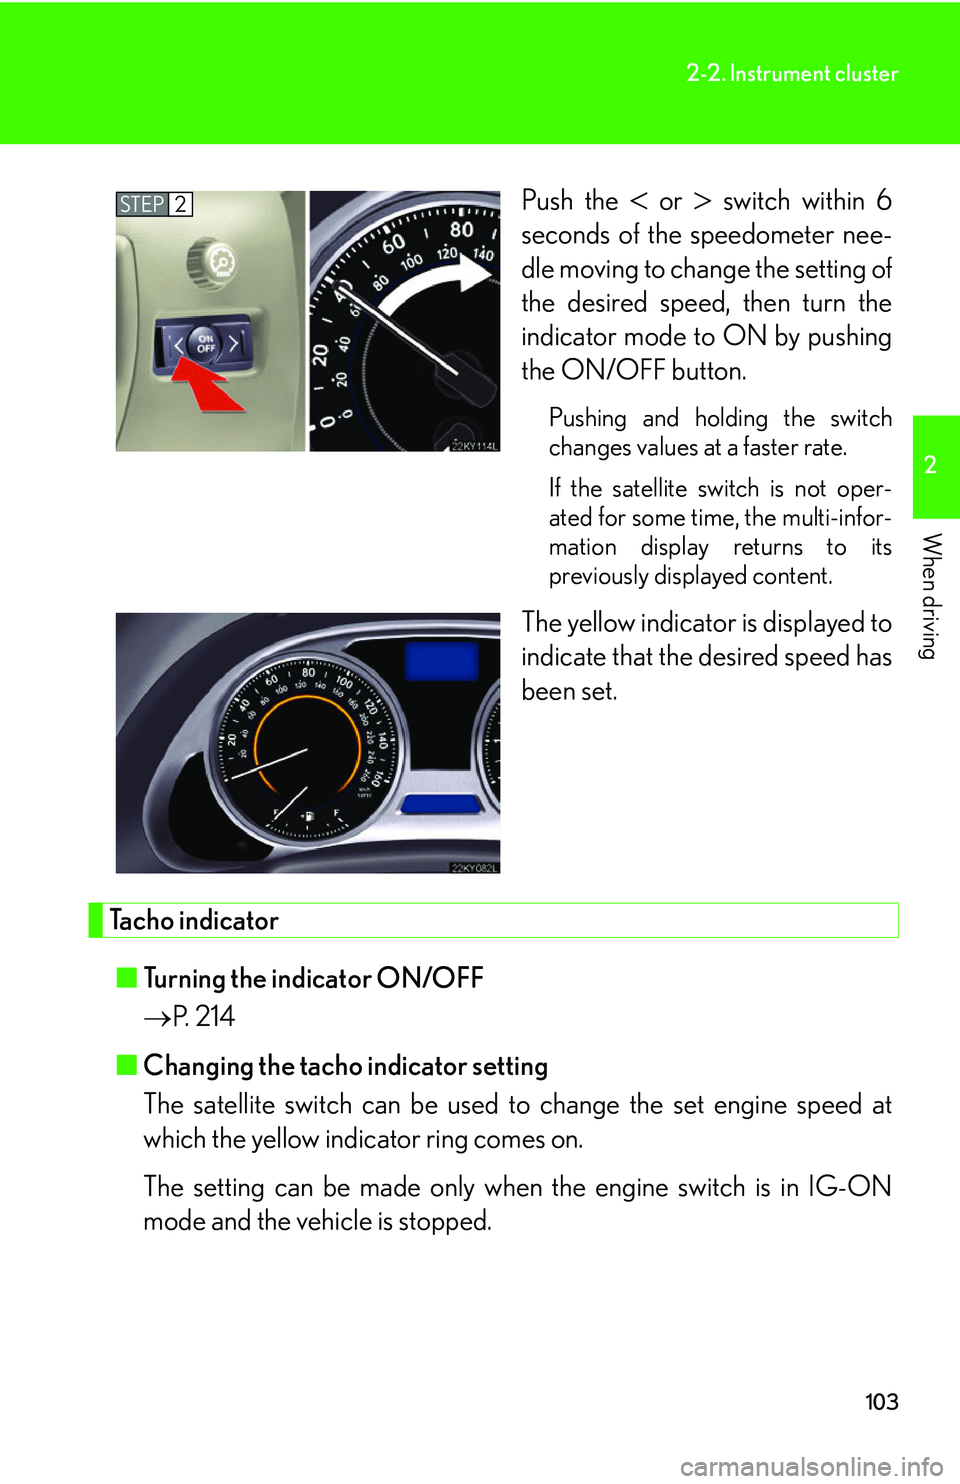
Push the or switch within 6
seconds of the speedometer nee-
dle moving to change the setting of
the desired speed, then turn the
indicator mode to ON by pushing
the ON/OFF button.
Pushing and holding the switch
changes values at a faster rate.
If the satellite switch is not oper-
ated for some time, the multi-infor-
mation display returns to its
previously displayed content.
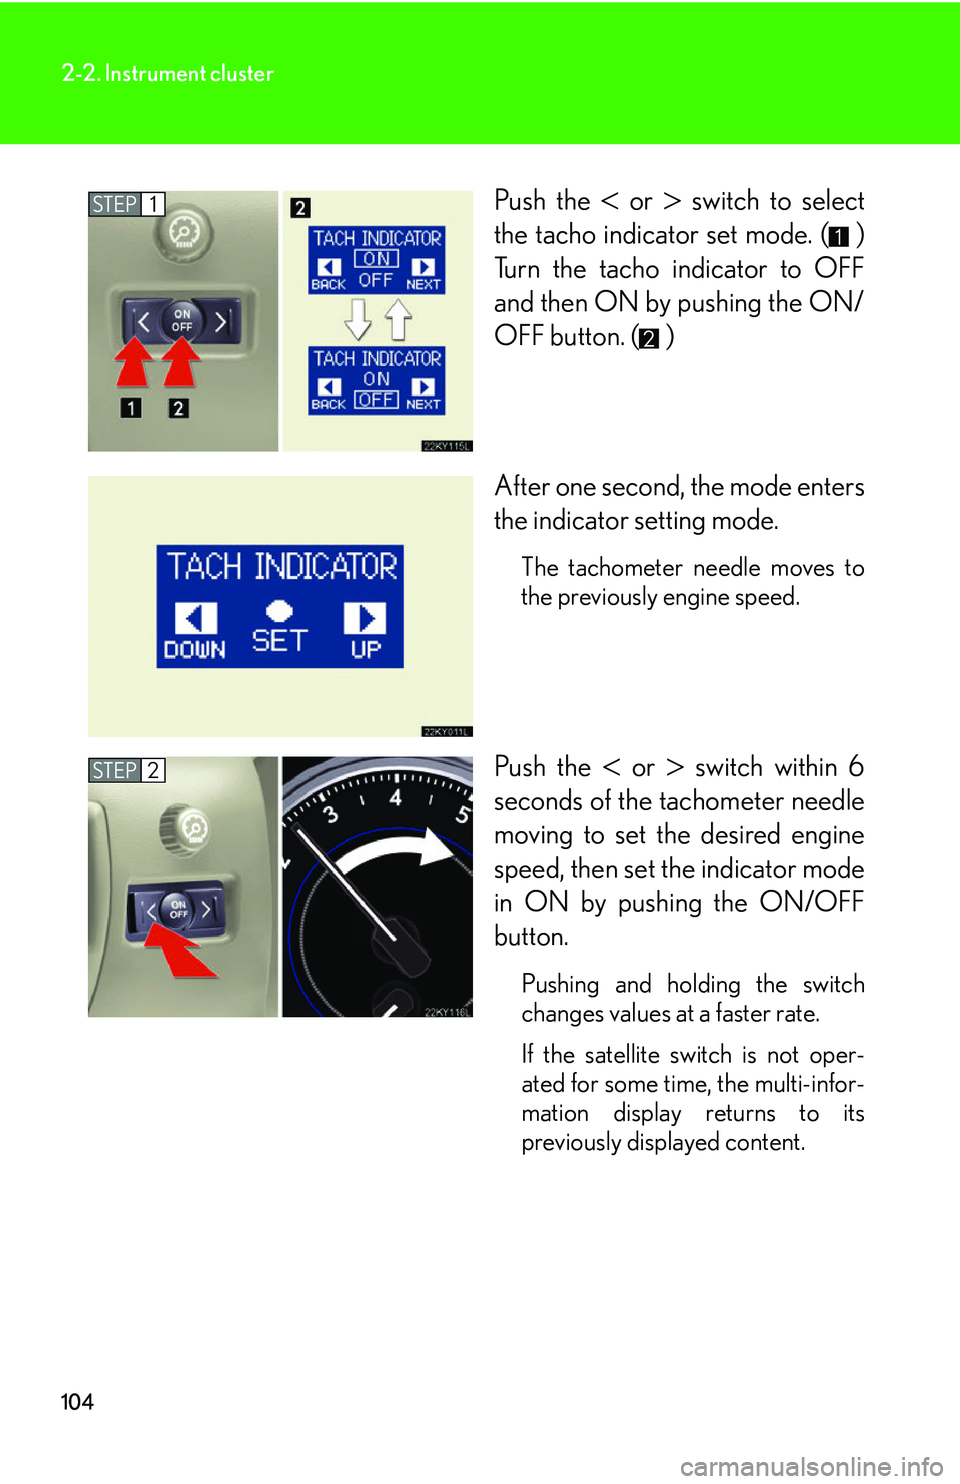
The yellow indicator is displayed to
indicate that the desired speed has
been set.
Tacho indicator
■ Turning the indicator ON/OFF
P. 214
■ Changing the tacho indicator setting
The satellite switch can be used to change the set engine speed at
which the yellow indic ator ring comes on.
The setting can be made only when the engine switch is in IG-ON
mode and the vehicle is stopped.
STEP2
Page 122 of 433

104
2-2. Instrument cluster
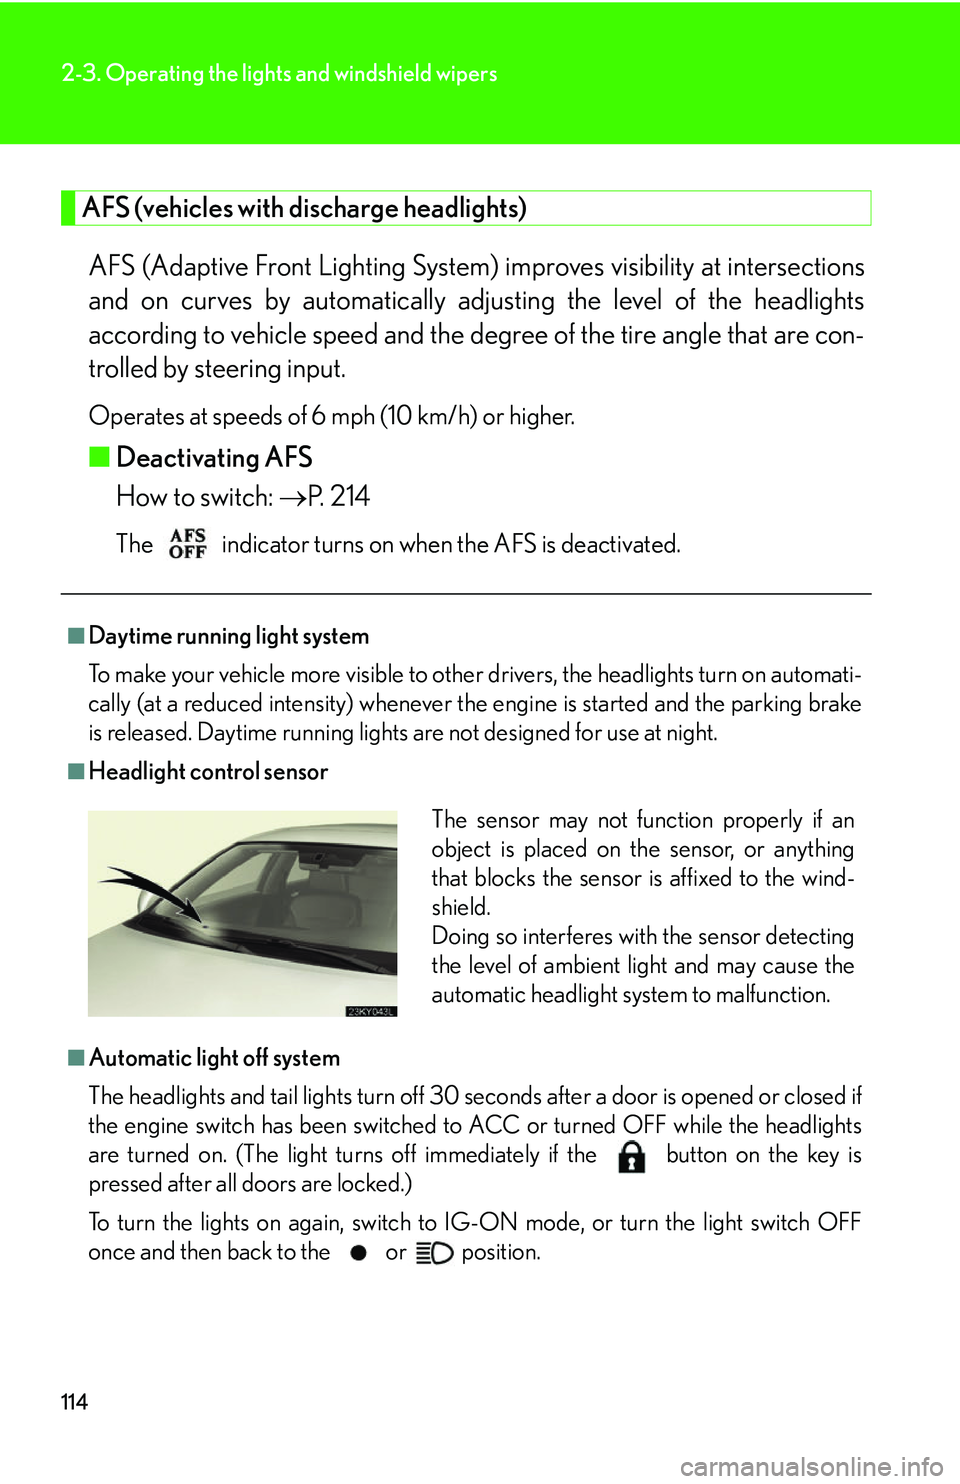
Push the or switch to select
the tacho indicator set mode. ( )
Turn the tacho indicator to OFF
and then ON by pushing the ON/
OFF button. ( )
After one second, the mode enters
the indicator setting mode.
The tachometer needle moves to
the previously engine speed.
Push the or switch within 6
seconds of the tachometer needle
moving to set the desired engine
speed, then set the indicator mode
in ON by pushing the ON/OFF
button.
Pushing and holding the switch
changes values at a faster rate.
If the satellite switch is not oper-
ated for some time, the multi-infor-
mation display returns to its
previously displayed content.
STEP1
STEP2
Page 126 of 433

108
2-2. Instrument cluster
CAUTION
■If a safety system warning light does not come on
Should a safety system light such as ABS and the SRS airbag warning light not
come on when you start the engine, this could mean that these systems are not
available to help protect you in an accident, which could result in death or serious
injury. Have the vehicle inspected by your Lexus dealer immediately if this occurs.
■ Warning lights
Warning lights inform the driver of malfunctions in any of the vehi-
cle’s systems. ( P. 329)
*: These lights turn on when the engi ne switch is turned to IG-ON mode
to indicate that a system check is being performed. They will turn off
after the engine is started, or after a few seconds.There may be a mal-
function in a system if a light does no t come on, or if the lights do not turn
off. Have the vehicle inspected by your Lexus dealer.
(U.S.A.)(Canada)(Canada)(U.S.A.)
(Canada)(U.S.A.)(if equipped)
******
******
Page 132 of 433

114
2-3. Operating the lights and windshield wipers
AFS (vehicles with discharge headlights)AFS (Adaptive Front Lighting System) im proves visibility at intersections
and on curves by automatically adjusting the level of the headlights
according to vehicle speed and the degree of the tire angle that are con-
trolled by steering input.
Operates at speeds of 6 mph (10 km/h) or higher.
■ Deactivating AFS
How to switch: P. 214
The indicator turns on when the AFS is deactivated.
■Daytime running light system
To make your vehicle more visible to other drivers, the headlights turn on automati-
cally (at a reduced intensity) whenever the engine is started and the parking brake
is released. Daytime running lights are not designed for use at night.
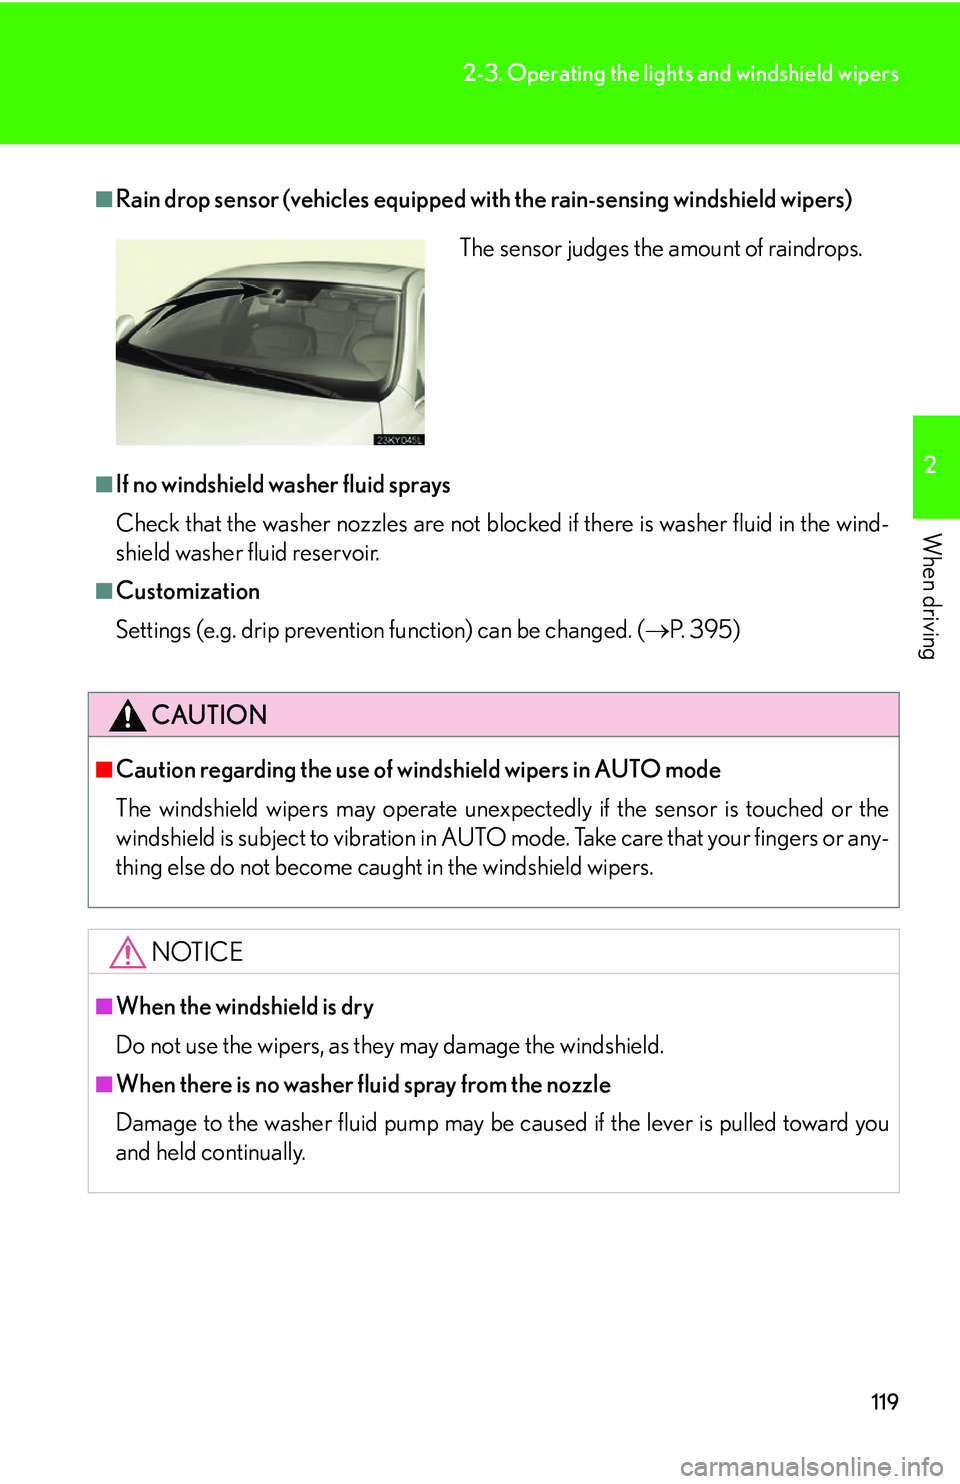
■Headlight control sensor
■Automatic light off system
The headlights and tail lights turn off 30 seconds after a door is opened or closed if
the engine switch has been switched to ACC or turned OFF while the headlights
are turned on. (The light turns off i mmediately if the button on the key is
pressed after all doors are locked.)
To turn the lights on again, switch to IG-ON mode, or turn the light switch OFF
once and then back to the or position.
The sensor may not function properly if an
object is placed on the sensor, or anything
that blocks the sensor is affixed to the wind-
shield.
Doing so interferes with the sensor detecting
the level of ambient light and may cause the
automatic headlight system to malfunction.
Page 137 of 433

119
2-3. Operating the lights and windshield wipers
2
When driving
■Rain drop sensor (vehicles equipped with the rain-sensing windshield wipers)
■If no windshield washer fluid sprays
Check that the washer nozzles are not blocked if there is washer fluid in the wind-
shield washer fluid reservoir.
■Customization
Settings (e.g. drip prevention function) can be changed. ( P. 3 9 5 )
CAUTION
■Caution regarding the use of windshield wipers in AUTO mode
The windshield wipers may operate unexpectedly if the sensor is touched or the
windshield is subject to vibration in AUTO mode. Take care that your fingers or any-
thing else do not become caugh t in the windshield wipers.
NOTICE
■When the windshield is dry
Do not use the wipers, as they may damage the windshield.
■When there is no washer fluid spray from the nozzle
Damage to the washer fluid pump may be caused if the lever is pulled toward you
and held continually.
The sensor judges the amount of raindrops.
Page 142 of 433

124
2-4. Using other driving systems
Dynamic radar cruise control (if equipped)
Dynamic radar cruise control supplements conventional cruise control
with a vehicle-to-vehicle distance co ntrol. In the vehicle-to-vehicle dis-
tance control mode, the vehicle automa tically accelerates or decelerates
in order to maintain a set following distance from vehicles ahead.
■ Select cruise mode
Selecting vehicle-to-vehicle dis-
tance control modeTurn the ON-OFF button
ON.
Push the button once more to
deactivate.
Selecting conventional con-
stant speed control mode Turn the ON-OFF button
ON.
Push the button once more to
deactivate.
Vehicle-to-vehicle distance con-
trol mode is always reset when
the engine switch is switched to
IG-ON mode.
Switch to constant speed
control mode.
(push and hold for approxi-
mately one second)
Page 176 of 433

158
2-5. Driving information
Dinghy towing (vehicles with a manual transmission)
Towing your vehicle with 4 wheels on the groundTo prevent damage to your vehicle, perform the following procedures
before towing. Shift the shift lever to neutral.
Switch to ACC mode. ( P. 8 9 )
Ensure that the audio system and other powered devices have been
turned OFF.
Release the parking brake.
After towing, leave the engine in idle for at least 3 minutes before driv-
ing the vehicle.
■Necessary equipment and accessories
Specialized equipment and accessories are required for dinghy towing. Contact
the service branch of the motor home manufacturer regarding recommended
equipment.
Your vehicle can be dinghy towed in a forward direction (with 4 wheels on
the ground) behind a motor home.
STEP1
STEP2
STEP3
Page 192 of 433

174
3-2. Using the audio system
Using the radio
Setting station presets (excluding XM satellite radio)Search for desired st ations by turning the
dial or pressing
or on .
Press and hold the button (from to ) the station is to
be set to, and you hear a beep.
Scanning radio stations (excluding XM satellite radio) ■ Scanning the preset radio stations
Press and hold until you hear a beep.
Preset stations will be played for 5 seconds each.
When the desired station is reach ed, press the button once again.
Seeking any traffic
program stationStation
selector Displays radio text messages
Pow e r Vo l u m e
Scans for receivable stations
Seeking the
frequency
Changing the program typesAdjusting the frequency
(AM, FM mode) or
channel (SAT mode)
AM SAT/FM
mode buttons
STEP1
STEP2
STEP1
STEP2
Page 208 of 433

190
3-2. Using the audio system
■MP3 and WMA files
MP3 (MPEG Audio LAYER 3) is a standard audio compression format.
Files can be compressed to approximately 1 /10 of their original size by using MP3
compression.
WMA (Windows Media
TMAudio) is a Microsoft audio compression format.
This format compresses audio data to a size smaller than that of the MP3 format.
There is a limit to the MP3 and WMA file standards and to the media/formats
recorded by them that can be used.
●MP3 file compatibility
• Compatible standards MP3 (MPEG1 LAYER3, MPEG2 LSF LAYER3)
• Compatible sampling frequencies MPEG1 LAYER3: 32, 44.1, 48 (kHz)
MPEG2 LSF LAYER3: 16, 22.05, 24 (kHz)
• Compatible bit rates MPEG1 LAYER3: 64, 80, 96, 112, 128, 160, 192, 224, 256, 320 (kbps)
• MPEG2 LSF LAYER3: 64, 80, 96 , 112, 128, 144, 160 (kbps)
* Compatible with VBR
• Compatible channel modes: stereo, joint stereo, dual channel and monaural
●WMA file compatibility
• Compatible standards WMA Ver. 7, 8, 9
• Compatible sampling frequencies
32, 44.1, 48 (kHz)
• Compatible bit rates Ver . 7, 8: CBR 48, 64, 80, 96, 128, 160, 192 (kbps)
Ver. 9: CBR 48, 64, 80, 96, 128, 160, 192, 256, 320 (kbps)
*Only compatible with 2-channel playback
●Compatible media
Media that can be used for MP3 and WMA playback are CD-Rs and CD-RWs.
Playback in some instances may not be po ssible, depending on the status of the
CD-R or CD-RW. Playback may not be po ssible or the audio may jump if the disc
is scratched or marked with fingerprints.
Page 209 of 433

191
3-2. Using the audio system
3
Interior features
●Compatible disc formats
The following disc formats can be used.
• Disc formats: CD-ROM Mode 1 and Mode 2CD-ROM XA Mode 2, Form 1 and Form 2
• File formats: ISO9660 level 1, level 2, (Romeo, Joliet) MP3 and WMA files written in any format other than those listed above may
not play correctly, and their file names and folder names may not be dis-
played correctly.
Items related to standards and limitations are as follows.
• Maximum directory hierarchy: 8 levels
• Maximum length of folder names/file names: 32 characters
• Maximum number of folders: 192 (including the root)
• Maximum number of files per disc: 255
●File names
The only files that can be recognized as MP3/WMA and played are those with
the extension .mp3 or .wma.
●Multi-sessions
As the audio system is compatible with multi-sessions, it is possible to play discs
that contain MP3 and WMA files. However, only the first session can be played.
●ID3 and WMA tags
ID3 tags can be added to MP3 files, making it possible to record the track title
and artist name, etc.
The system is compatible with ID3 Ver. 1. 0, 1.1, and Ver. 2.2, 2.3 ID3 tags. (The
number of characters is based on ID3 Ver. 1.0 and 1.1.)
WMA tags can be added to WMA files, ma king it possible to record the track
title and artist name in the same way as with ID3 tags.