door lock Lexus IS250 2008 Using the air conditioning system and defogger / LEXUS 2008 IS250 (OM53699U) Owner's Guide
[x] Cancel search | Manufacturer: LEXUS, Model Year: 2008, Model line: IS250, Model: Lexus IS250 2008Pages: 464, PDF Size: 6.61 MB
Page 37 of 464

37
1
1-2. Opening, closing and locking the doors and trunk
Before driving
Doors
The vehicle can be locked and unlocked using the entry function, wireless
remote control or door lock switch.
■Entry function
P. 2 3
■ Wireless remote control
P. 3 4
■ Door lock switch
Locks all doors
Unlocks all doors
■ Inside lock button
Locks the door
Unlocks the door
The front doors can be opened
by pulling the inside handle even
if the lock buttons are in the lock
position.
Page 38 of 464

38
1-2. Opening, closing and locking the doors and trunk
Locking the front doors from the outside without a key
The door cannot be locked if the “ENGINE START STOP” switch is in
ACCESSORY or IGNITION ON mode, or the electronic key is left
inside the vehicle.
Depending on the position of the electr onic key, the key may not be detected
correctly and the door may be locked.
Rear door child-protector lock
The door cannot be opened
from inside the vehicle when the
locks are set.
These locks can be set to prevent
children from opening the rear
doors. Push down on each rear
door switch to lock both rear
doors.
Automatic door locking and unlocking systemsThe following functions can be set or cancelled:
*: Vehicles with an automatic transmission only
FunctionOperation
Shift position linked door
locking function
*Shifting the shift lever out of P locks all doors.
Shift position linked door
unlocking function
*Shifting the shift lever to P unlocks all doors.
Speed linked door locking
functionAll doors are locked when the vehicle speed is
approximately 12 mph (20 km/h) or higher.
Driver's door linked door
unlocking functionAll doors are unlocked when the driver's door is
opened within 10 seconds after turning the
“ENGINE START STOP” switch OFF.
Page 39 of 464

39
1-2. Opening, closing and locking the doors and trunk
1
Before driving
■Setting and canceling the functions
To switch between setting and canceling, follow the procedure below:
Close all the doors and switch the “ENGINE START STOP”
switch to IGNITION ON mode. (Perform the step 2 within 10
seconds.)
Shift the shift lever to P or N, and press and hold the driver's door
lock switch (
or ) for approximately 5 seconds and then
release.
The shift lever and switch positions corresponding to the desired func-
tion to be set or canceled are shown as follows.
When the setting or canceling operat ion is complete, all doors are locked
and then unlocked.
STEP1
STEP2
FunctionShift lever positionSwitch position
Shift position linked door locking
function
PShift position linked door unlock-
ing function
Speed linked door locking function
NDriver's door linked door unlocking
function
Page 40 of 464

40
1-2. Opening, closing and locking the doors and trunk
■Impact detection door lock release system
In the event that the vehicle is subject to a strong impact, all the doors are unlocked.
Depending on the force of the impact or the type of accident, however, the system
may not operate.
■Using the mechanical key
The doors can also be locked and unlocked with the mechanical key. (P. 3 9 4 )
■Customization that can be configured at Lexus dealer
Settings (e.g. unlocking function using a key) can be changed. (Customizable fea-
tures P. 4 3 6 )
CAUTION
■To prevent an accident
Observe the following precautions while driving the vehicle.
Failing to do so may result in a door open ing and an occupant falling out, resulting in
death or serious injury.
●Always use a seat belt.
●Always lock all doors.
●Ensure that all doors are properly closed.
●Do not pull the inside handle of the front door while driving.
●Set the rear door child protector locks when children are seated in the rear seat.
Page 41 of 464

41
1
1-2. Opening, closing and locking the doors and trunk
Before driving
Tr u n k
Locking the trunk opener feature
Turn the main switch in the glove
box off to disable the trunk opener.On
Off
The trunk lid cannot be opened
even with the wireless remote con-
trol or the entry function.
The trunk can be opened using the trun k opener, entry function or wireless
remote control.
■ Trunk opener
Release the trunk lid.
■ Entry function
P. 2 3
■ Wireless remote control
P. 3 4
Page 42 of 464

42
1-2. Opening, closing and locking the doors and trunk
■Tr u n k l i g h t
When the trunk light switch is set to on, the trunk light turns on when the trunk is
opened.
■Tr u n k h a n d l e
■Internal trunk release lever
■Using the mechanical key
The trunk can be also opened using the mechanical key. ( P. 3 9 4 )
On
Off
Use the trunk handle when closing the trunk.
The trunk lid can be opened by pulling down
on the glow-in-the-dark lever located on the
inside of trunk lid.
The lever will continue to glow for some time
after the trunk lid is closed.
Page 43 of 464

43
1-2. Opening, closing and locking the doors and trunk
1
Before driving
CAUTION
■Caution while driving
Keep the trunk lid closed.
This not only keeps personal belongings from being thrown out, but also prevents
exhaust gases from entering the vehicle.
■When children are in the vehicle
Never leave children unattended in the vehicle as they may lock themselves in the
vehicle or trunk, which could cause the child to overheat or suffocate, resulting in
death or serious injury.
Page 46 of 464

46
1-3. Adjustable components (seats, mirrors, steering wheel)
Driving position memory (if equipped)
Your preferred driving position (the position of the driver's seat, steering
wheel and outside rear view mirrors) can be memorized and recalled with
the touch of a button. It is also possible to set this function to activate auto-
matically when the doors are unlocked.
Three different driving positions can be entered into memory.
■ Entering a position to memory
Vehicles with an automatic transmis sion: Check that the shift lever is
set in P.
Vehicles with a manual transmissi on: Check that the parking brake is
set.
Switch to IGNITION ON mode.
Adjust the driver’s seat, steeri ng wheel, and outside rear view
mirrors to the desired positions.
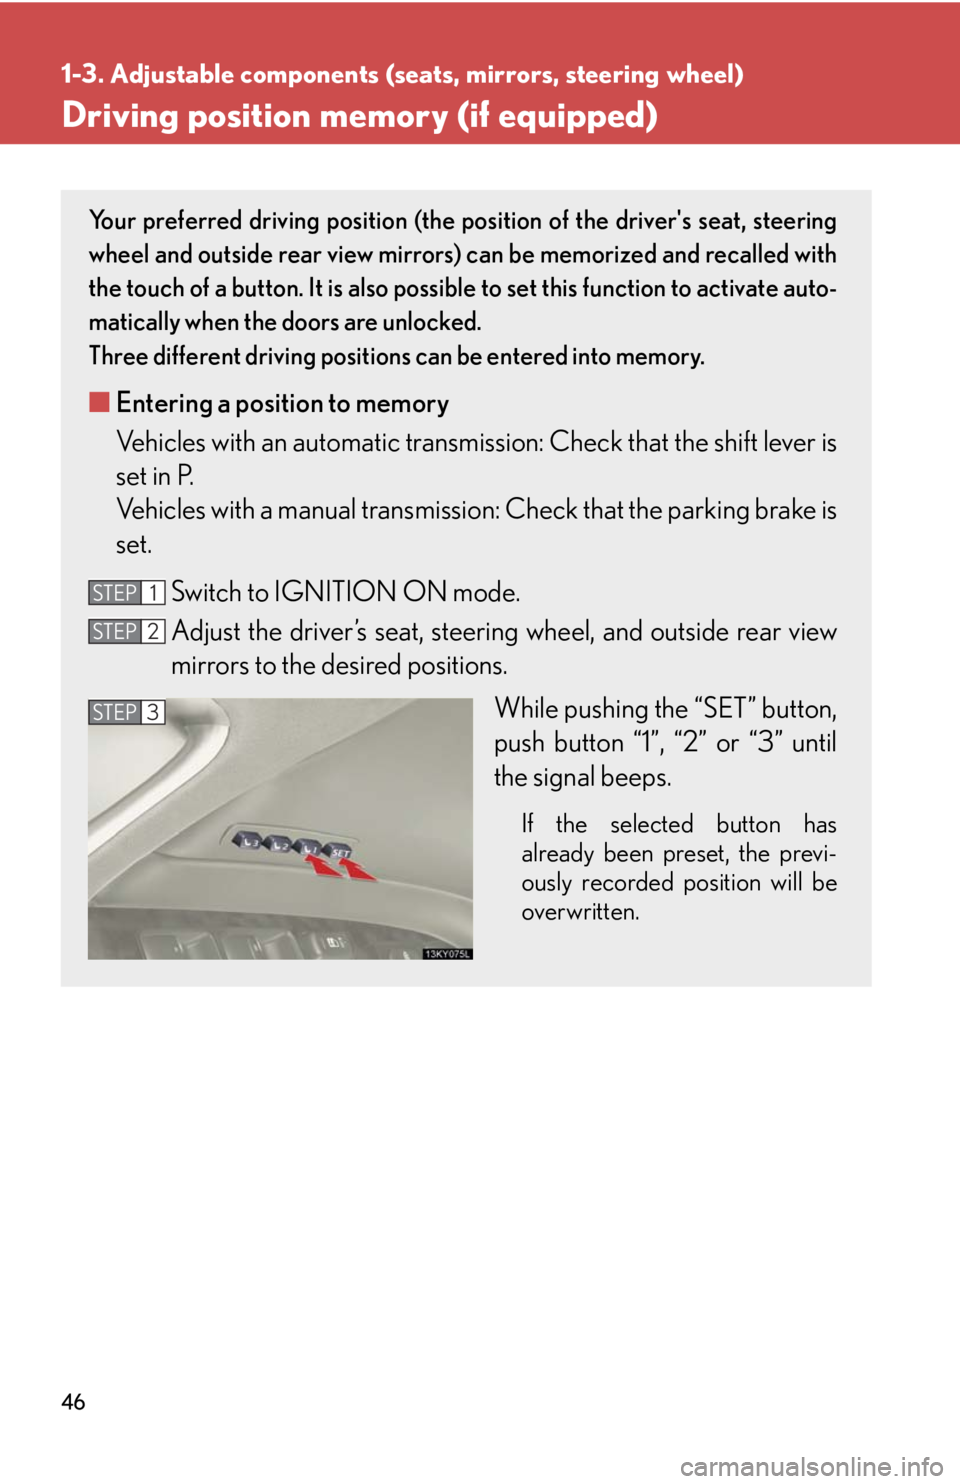
While pushing the “SET” button,
push button “1”, “2” or “3” until
the signal beeps.
If the selected button has
already been preset, the previ-
ously recorded position will be
overwritten.
STEP1
STEP2
STEP3
Page 47 of 464

47
1-3. Adjustable components (seats, mirrors, steering wheel)
1
Before driving
Linking driving position memory with door unlock operationRecord your driving position to butto n “1”, “2” or “3” before performing
the following.
Turn the “ENGINE START STOP” switch OFF and close the
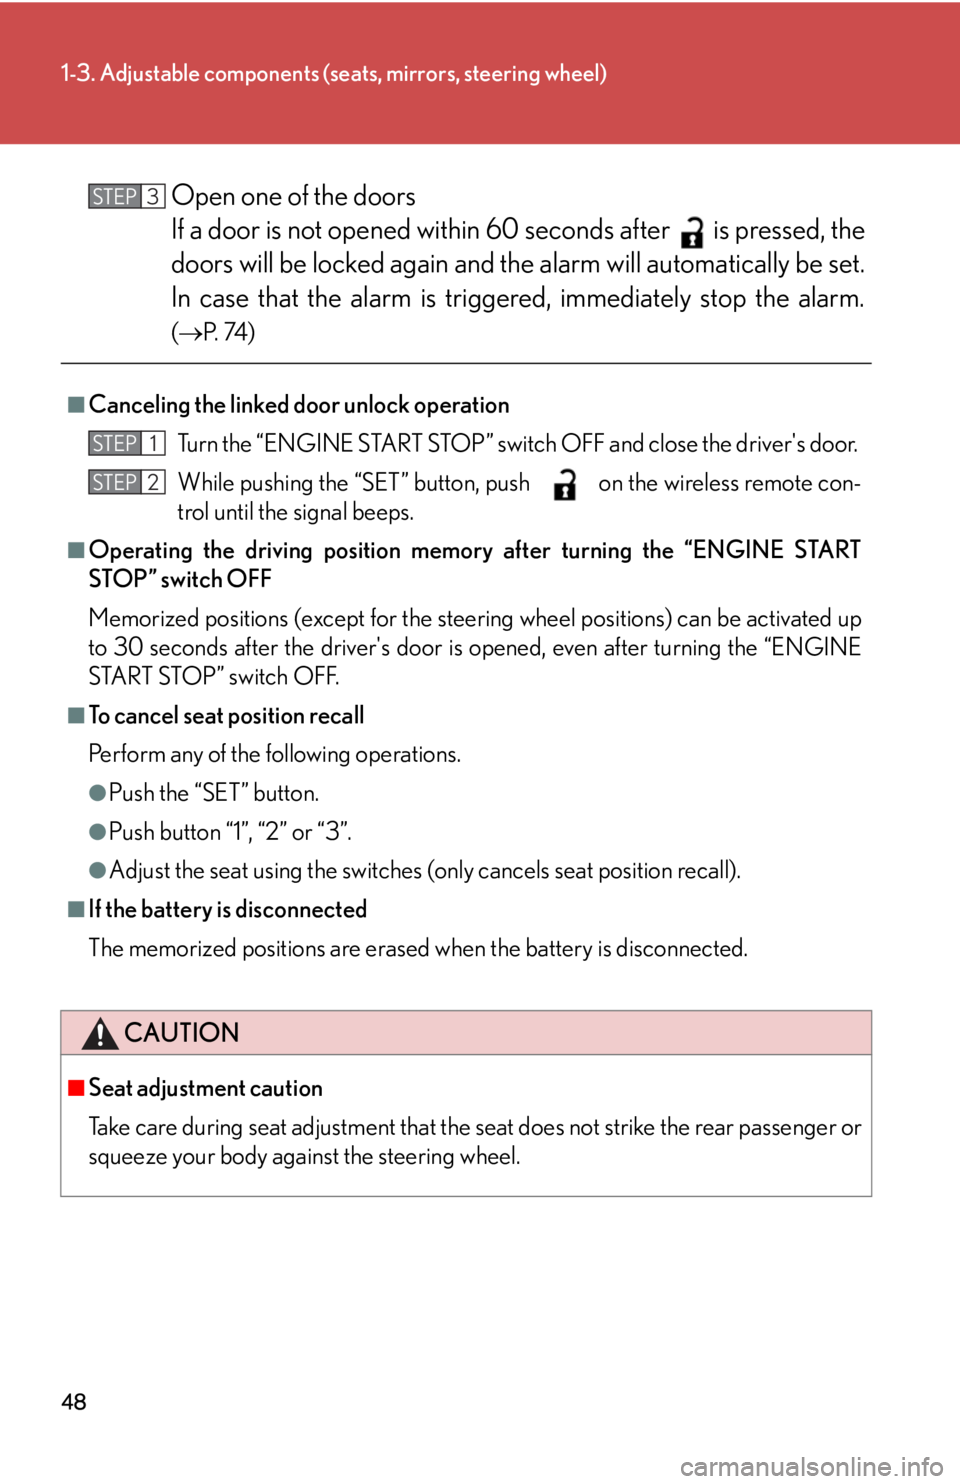
driver's door. While the desired button (“1”, “2”
or “3”) press on the wireless
remote control until the signal
beeps.
The driving position is recalled
when the driver's door is unlocked
using the entry function or wireless
remote control and the driver’s
door is opened.
■Recalling the memorized position
Vehicles with an automatic transmis sion: Check that the shift lever is
set in P.
Vehicles with a manual transmissi on: Check that the parking brake is
set.
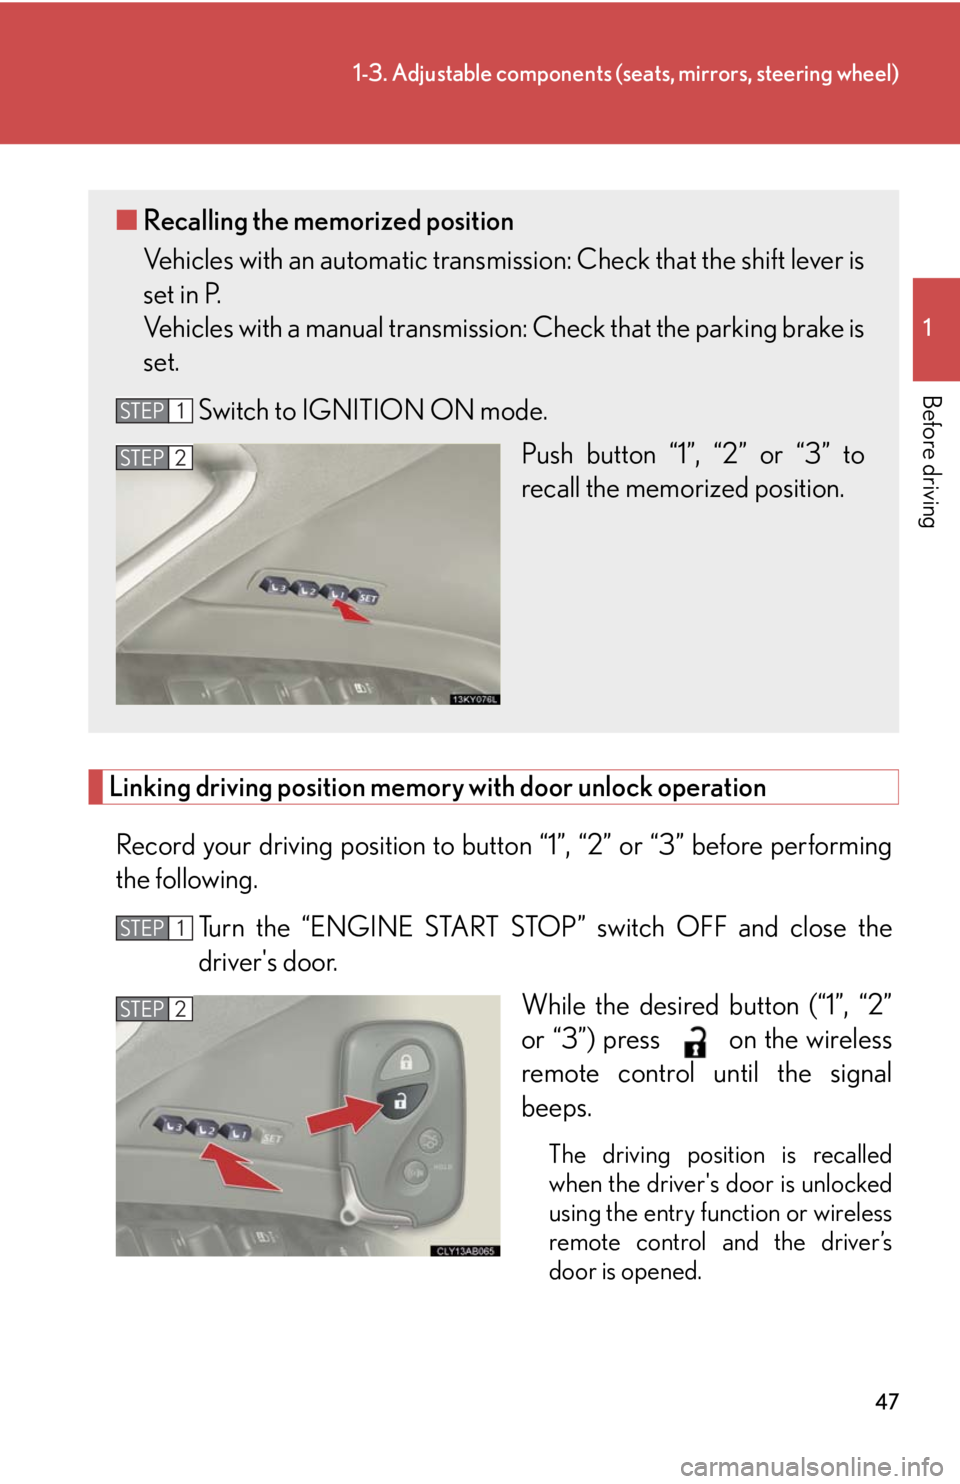
Switch to IGNITION ON mode. Push button “1”, “2” or “3” to
recall the memorized position.
STEP1
STEP2
STEP1
STEP2
Page 48 of 464

48
1-3. Adjustable components (seats, mirrors, steering wheel)
Open one of the doors
If a door is not opened within 60 seconds after is pressed, the
doors will be locked again and th e alarm will automatically be set.
In case that the alarm is trigger ed, immediately stop the alarm.
( P. 74 )
■Canceling the linked do or unlock operation
Turn the “ENGINE START STOP” switch OFF and close the driver's door.
While pushing the “SET” button, push on the wireless remote con-
trol until the signal beeps.
■Operating the driving position memory after turning the “ENGINE START
STOP” switch OFF
Memorized positions (except for the steering wheel positions) can be activated up
to 30 seconds after the driver's door is opened, even after turning the “ENGINE
START STOP” switch OFF.
■To cancel seat position recall
Perform any of the following operations.
●Push the “SET” button.
●Push button “1”, “2” or “3”.
●Adjust the seat using the switches (only cancels seat position recall).
■If the battery is disconnected
The memorized positions are erased when the battery is disconnected.
CAUTION
■Seat adjustment caution
Take care during seat adjustment that the seat does not strike the rear passenger or
squeeze your body against the steering wheel.
STEP3
STEP1
STEP2