light Lexus IS250 2009 Do-it-yourself maintenance / LEXUS 2009 IS350/250 (OM53669U) User Guide
[x] Cancel search | Manufacturer: LEXUS, Model Year: 2009, Model line: IS250, Model: Lexus IS250 2009Pages: 488, PDF Size: 6.24 MB
Page 23 of 488
23
1-1. Key information
1
Before driving
NOTICE
■Precautions for handling the card keys
●Do not apply excess force when inserting the mechanical key to the card key.
Doing so may damage the card key.
●If the battery or card key terminals get wet, the battery may corrode.
If the key is dropped into water, or if drinking water etc. is spilled on the key,
immediately remove the battery cover and wipe the battery and terminals. (To
remove the battery cover, lightly grasp it and pull.) If the battery is corroded, have
your Lexus dealer replace the battery.
●Do not crush the battery cover or use a screwdriver to remove the battery cover.
Forcibly removing the battery co ver may bend or damage the key.
●If the battery cover is frequently removed, the battery cover may become loose.
●When installing the battery, make sure to check the direction of the battery.
Installing the battery in the wrong direct ion may cause the battery to deplete rap-
idly.
●The surface of the card key may be damage d, or its coating may peel off in the
following situations.
• The card key is carried together with hard objects, such as coins or keys.
• The card key is scraped with a sharp object, such as a tip of mechanical pencil.
• The surface of the card key is wiped with thinners or benzene.
Page 37 of 488
37
1-2. Opening, closing and locking the doors and trunk
1
Before driving
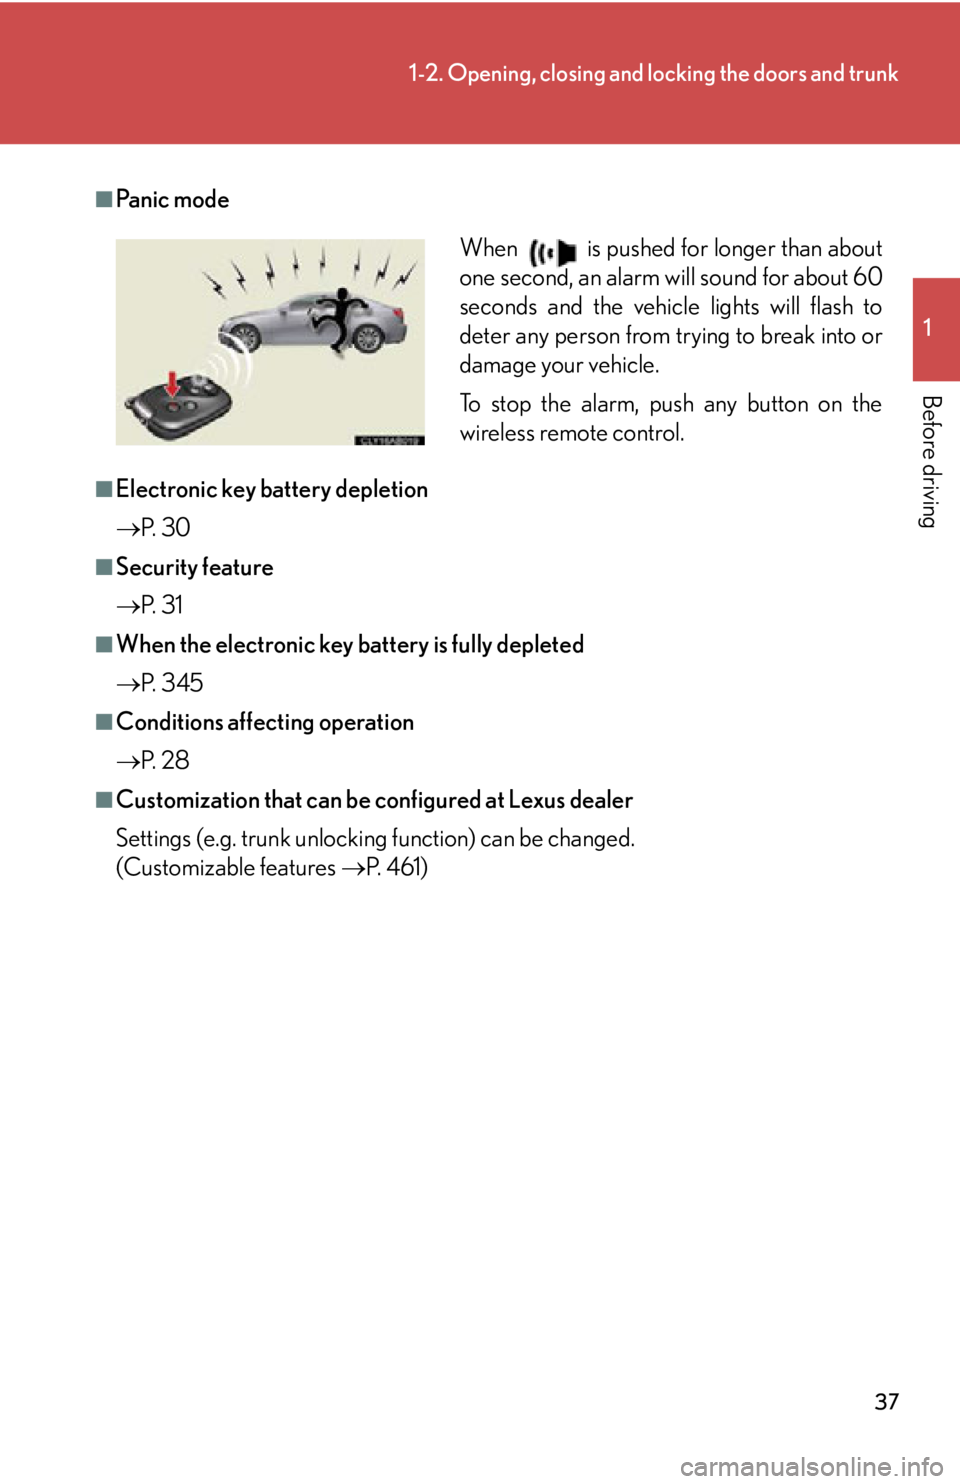
■Pa n i c m o d e
■Electronic key battery depletion
P. 3 0
■Security feature
P. 3 1
■When the electronic key battery is fully depleted
P. 3 4 5
■Conditions affecting operation
P. 2 8
■Customization that can be configured at Lexus dealer
Settings (e.g. trunk unlocking function) can be changed.
(Customizable features P. 4 6 1 )
When is pushed for longer than about
one second, an alarm will sound for about 60
seconds and the vehicle lights will flash to
deter any person from trying to break into or
damage your vehicle.
To stop the alarm, push any button on the
wireless remote control.
Page 44 of 488
44
1-2. Opening, closing and locking the doors and trunk
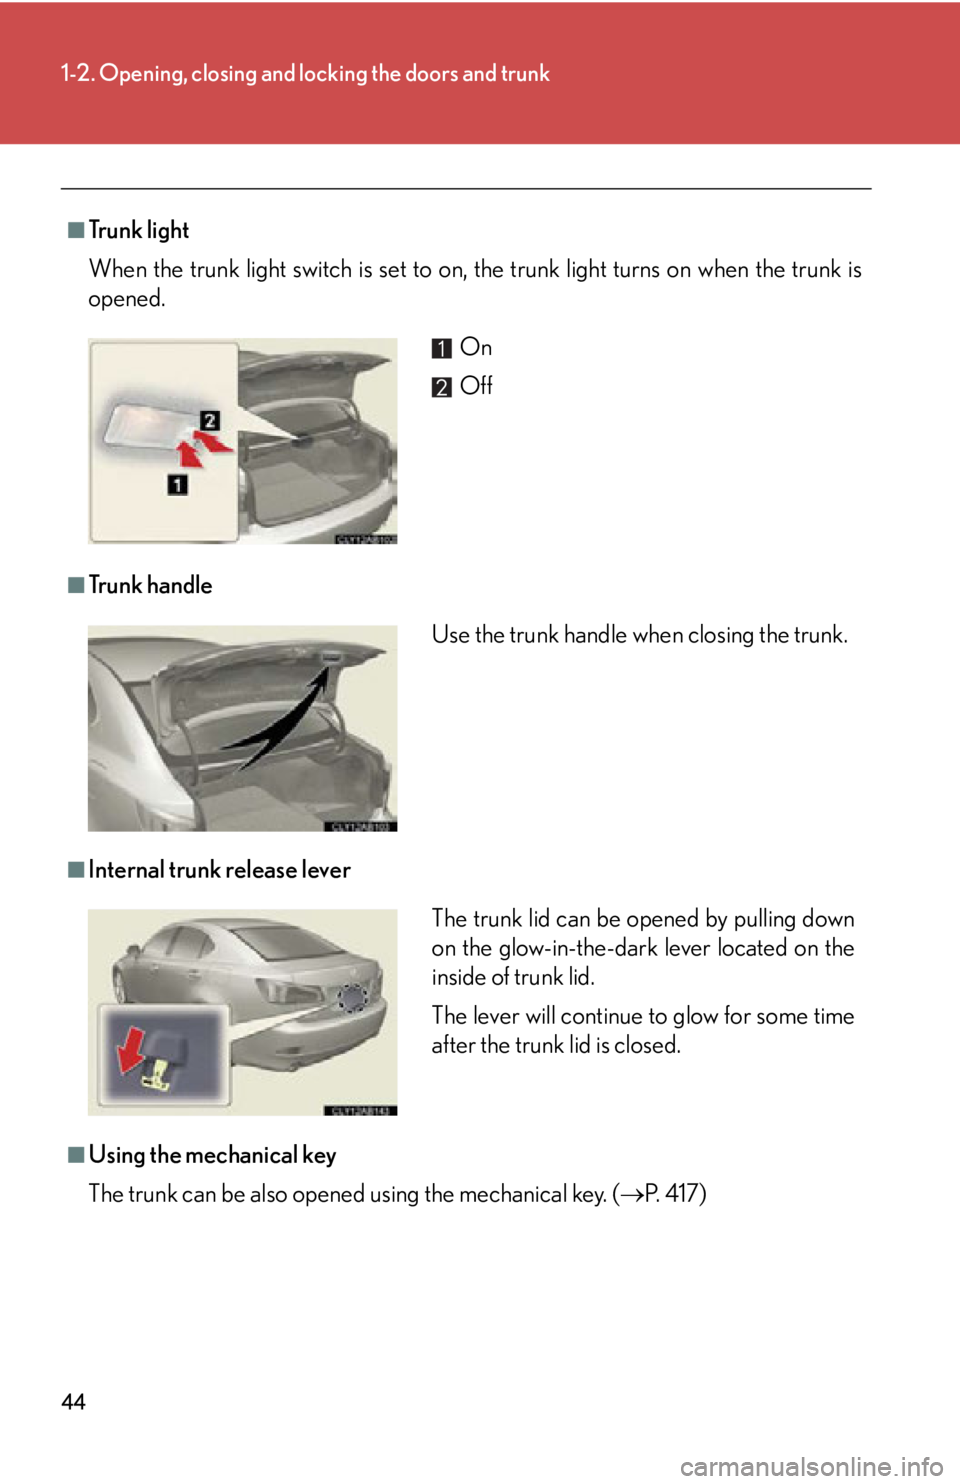
■Tr u n k l i g h t
When the trunk light switch is set to on, the trunk light turns on when the trunk is
opened.
■Tr u n k h a n d l e
■Internal trunk release lever
■Using the mechanical key
The trunk can be also opened using the mechanical key. ( P. 4 1 7 )
On
Off
Use the trunk handle when closing the trunk.
The trunk lid can be opened by pulling down
on the glow-in-the-dark lever located on the
inside of trunk lid.
The lever will continue to glow for some time
after the trunk lid is closed.
Page 58 of 488
58
1-3. Adjustable components (seats, mirrors, steering wheel)
Pre-collision seat belts (front seats of vehicles with pre-collision system)When the pre-collision sensor detects an obstacle and determines that a
collision is unavoidable, the seat belt s lessen collision injury by retracting
the slack in the front seat belts befo re the collision, thus restraining the
driver and passenger at an earlier stage.
The seat belts will also operate in the event of sudden braking. ( P. 1 9 2 )
■Emergency locking retractor (ELR)
The retractor will lock the belt during a sudd en stop or on impact. It may also lock if
you lean forward too quickly. A slow, easy motion will allow the belt to extend so that
you can move around fully.
■Automatic locking retractor (ALR)
When a passenger's shoulder belt is completely extended and then retracted even
slightly, the belt is locked in that position and cannot be extended. This feature is
used to hold the child restraint system (CRS) firmly. To free the belt again, fully
retract the belt and then pull the belt out once more. ( P. 1 0 4 )
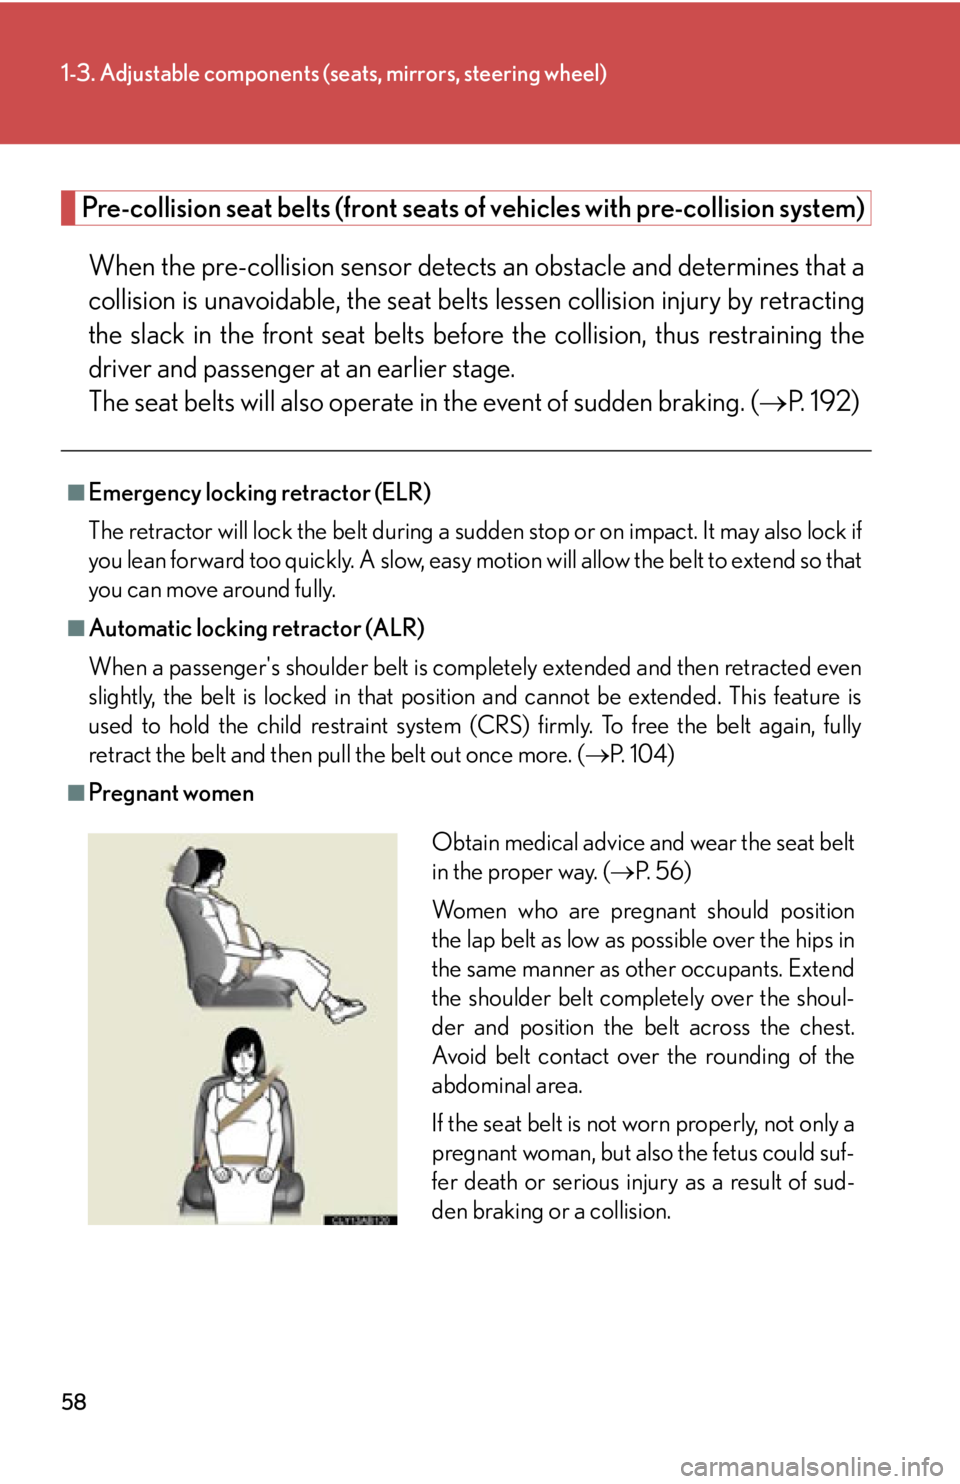
■Pregnant women
Obtain medical advice and wear the seat belt
in the proper way. ( P. 5 6 )
Women who are pregnant should position
the lap belt as low as possible over the hips in
the same manner as other occupants. Extend
the shoulder belt completely over the shoul-
der and position the belt across the chest.
Avoid belt contact over the rounding of the
abdominal area.
If the seat belt is not worn properly, not only a
pregnant woman, but also the fetus could suf-
fer death or serious injury as a result of sud-
den braking or a collision.
Page 65 of 488
65
1
1-3. Adjustable components (seats, mirrors, steering wheel)
Before driving
Anti-glare inside rear view mirror
■To prevent sensor error
CAUTION
■Caution while driving
Do not adjust the position of the mirror while driving.
Doing so may lead to mishandling of the vehicle and an accident, resulting in death
or serious injury.
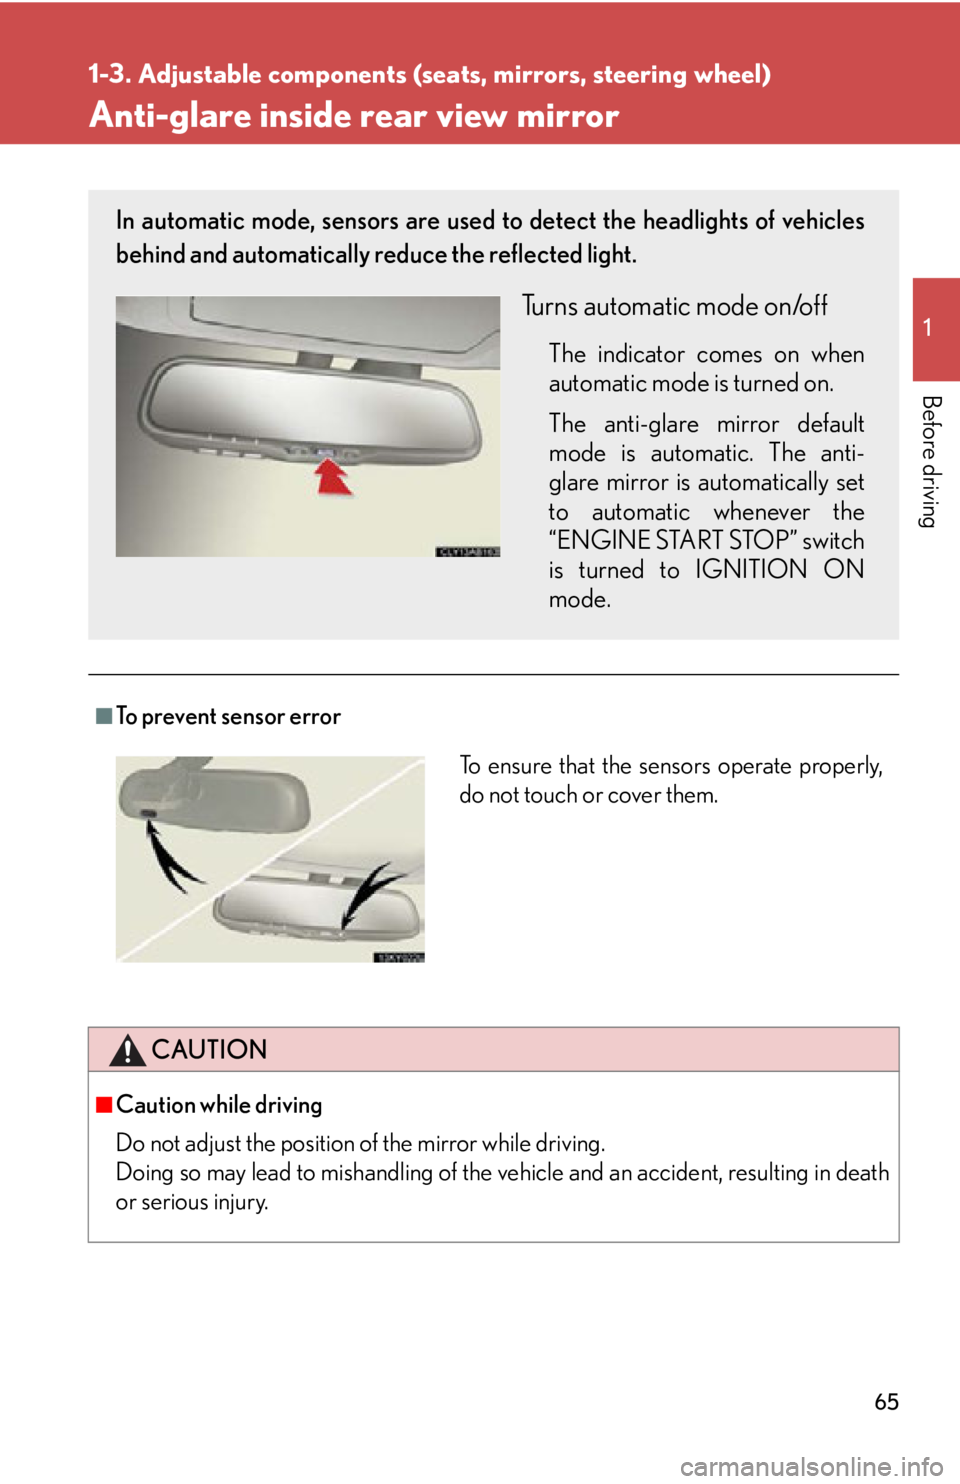
In automatic mode, sensors are used to detect the headlights of vehicles
behind and automatically reduce the reflected light.
Turns automatic mode on/off
The indicator comes on when
automatic mode is turned on.
The anti-glare mirror default
mode is automatic. The anti-
glare mirror is automatically set
to automatic whenever the
“ENGINE START STOP” switch
is turned to IGNITION ON
mode.
To ensure that the sensors operate properly,
do not touch or cover them.
Page 67 of 488

67
1-3. Adjustable components (seats, mirrors, steering wheel)
1
Before driving
■Linked mirror function when reversing (vehicles with driving position memory)
The outside rear view mirrors will automatically angle downwards when the vehicle
is reversing in order to give a better view of the ground. However, this function will
not operate when the mirror select switch is in the neutral position (between “L” and
“R”).
■Auto anti-glare function (vehicles with sports or luxury package)
When the anti-glare inside rear view mirr or is set to automatic mode, the outside
rear view mirrors will activate in conjunction with the anti-glare inside rear view mir-
ror to reduce reflected light. ( P. 6 5 )
■Rain clearing mirrors (if equipped)
When water droplets collects on the mirror surface, for example when it rains, the
rain clearing (hydrophilic) effect of the mirrors causes the droplets to be spread out
into a film making the rear view clearer.In the following cases, the rain clearing
effect will be reduced temporarily, but w ill return after 1 or 2 days' exposure to
direct sunlight.
●After wiping dirt off the mirrors
●When the mirrors fog up
●After waxing your vehicle in an automatic car wash
●After your vehicle has been parked for a long period in underground parking
lots, etc. where there is no direct sunlight.
Page 70 of 488
70
1-4. Opening and closing the windows and moon roof
■The power windows can be operated when
The “ENGINE START STOP” switch is in IGNITION ON mode.
■Door lock linked window operation
●The power windows can be opened and closed using the mechanical key.
( P. 4 1 7 )
●The power windows can be opened using the wireless remote control. ( P. 3 6 )
■Operating the power windows after turning the “ENGINE START STOP” switch
OFF
The power windows can be operated for ap proximately 45 seconds even after the
“ENGINE START STOP” switch is switched to ACCESSORY mode or turned
OFF. They cannot, however, be operated once either front door is opened.
■Jam protection function
If an object becomes caught between th e window and the window frame, window
travel is stopped and the window is opened slightly.
■Customization that can be configured at Lexus dealer
Settings (e.g. linked door lock operation) can be changed.
(Customizable features P. 4 6 1 )
CAUTION
■Closing the windows
Observe the following precautions.
Failing to do so may result in death or serious injury.
●Check to make sure that all passengers do not have any part of their body in a
position where it could be caught when a window is being operated.
●Do not allow children to operate the power windows.
Closing a power window on someone can cause serious injury, and in some
instances, even death.
■Jam protection function
●Never try jamming any part of your body to activate the jam protection function
intentionally.
●The jam protection function may not work if something gets caught just before
the window fully closes.
Page 71 of 488
71
1
1-4. Opening and closing the windows and moon roof
Before driving
Moon roof
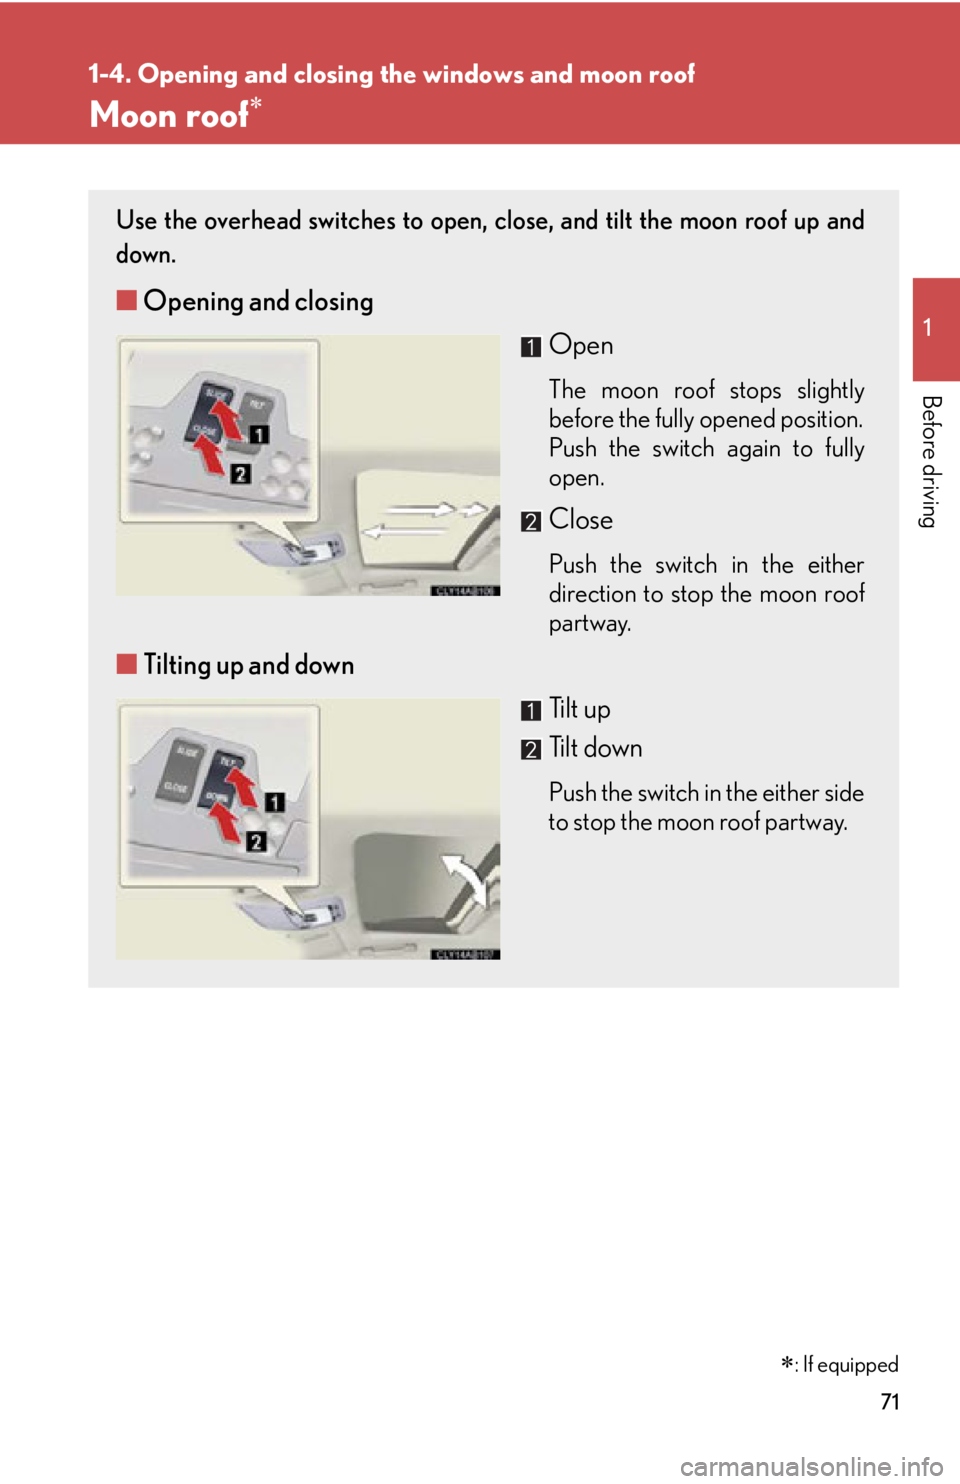
Use the overhead switches to open, close, and tilt the moon roof up and
down.
■ Opening and closing
Open
The moon roof stops slightly
before the fully opened position.
Push the switch again to fully
open.
Close
Push the switch in the either
direction to stop the moon roof
partway.
■Tilting up and down
Ti l t u p
Tilt down
Push the switch in the either side
to stop the moon roof partway.
�
: If equipped
Page 72 of 488

72
1-4. Opening and closing the windows and moon roof
■The moon roof can be operated when
The “ENGINE START STOP” switch is in IGNITION ON mode.
■Moon roof open warning buzzer
The buzzer sounds and a message is shown on the multi-information display in the
instrument panel when the “ENGINE START STOP” switch is turned OFF and the
driver's door is opened with the moon roof open.
■Linked door lock moon roof operation
●The moon roof can be opened and closed using the mechanical key. ( P. 4 1 7 )
●The moon roof can be opened using the wireless remote control. ( P. 3 6 )
●The moon roof can be closed using the entry function. ( P. 2 5 )
■Operating the moon roof after turning the “ENGINE START STOP” switch OFF
The moon roof can be operated for ap proximately 45 seconds even after the
“ENGINE START STOP” switch is switched to ACCESSORY mode or turned
OFF. It cannot, however, be operated once either front door is opened.
■Jam protection function
If an object is detected between the moon roof and the frame while closing or tilting
down, travel is stopped and the moon roof opens slightly.
■When the moon roof does not close normally
Pressing and holding the “CLOSE” switch will close the moon roof.
■To reduce moon roof wind noise
Drive with the moon roof opened to slightly before the fully open position as driving
with the moon roof opened fully will cause wind noise.
■Sunshade
The sunshade can be opened and closed manually. However, the sunshade will
open automatically when the moon roof is opened.
■Customization that can be configured at Lexus dealer
Settings (e.g. linked door lock operation) can be changed.
(Customizable features P. 4 6 1 )
Page 75 of 488
75
1-5. Refueling
1
Before driving
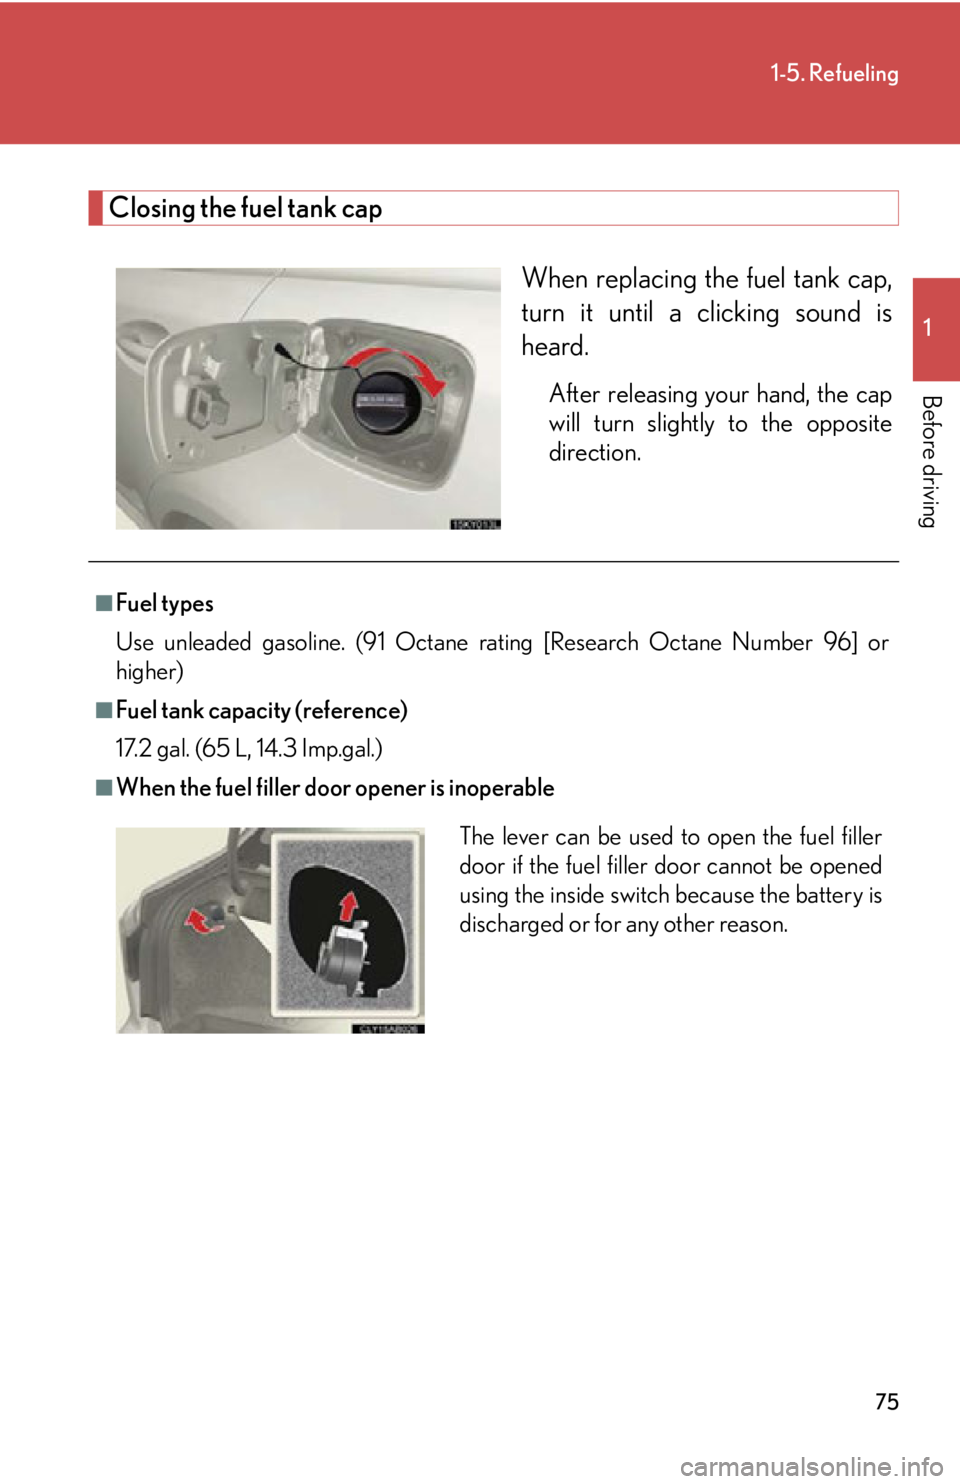
Closing the fuel tank capWhen replacing the fuel tank cap,
turn it until a clicking sound is
heard.
After releasing your hand, the cap
will turn slightly to the opposite
direction.
■Fuel types
Use unleaded gasoline. (91 Octane rating [Research Octane Number 96] or
higher)
■Fuel tank capacity (reference)
17.2 gal. (65 L, 14.3 Imp.gal.)
■When the fuel filler door opener is inoperable
The lever can be used to open the fuel filler
door if the fuel filler door cannot be opened
using the inside switch because the battery is
discharged or for any other reason.