wheel Lexus IS250 2009 Using the audio system / LEXUS 2009 IS350/250 (OM53669U) Workshop Manual
[x] Cancel search | Manufacturer: LEXUS, Model Year: 2009, Model line: IS250, Model: Lexus IS250 2009Pages: 488, PDF Size: 6.24 MB
Page 209 of 488

Interior features3
209
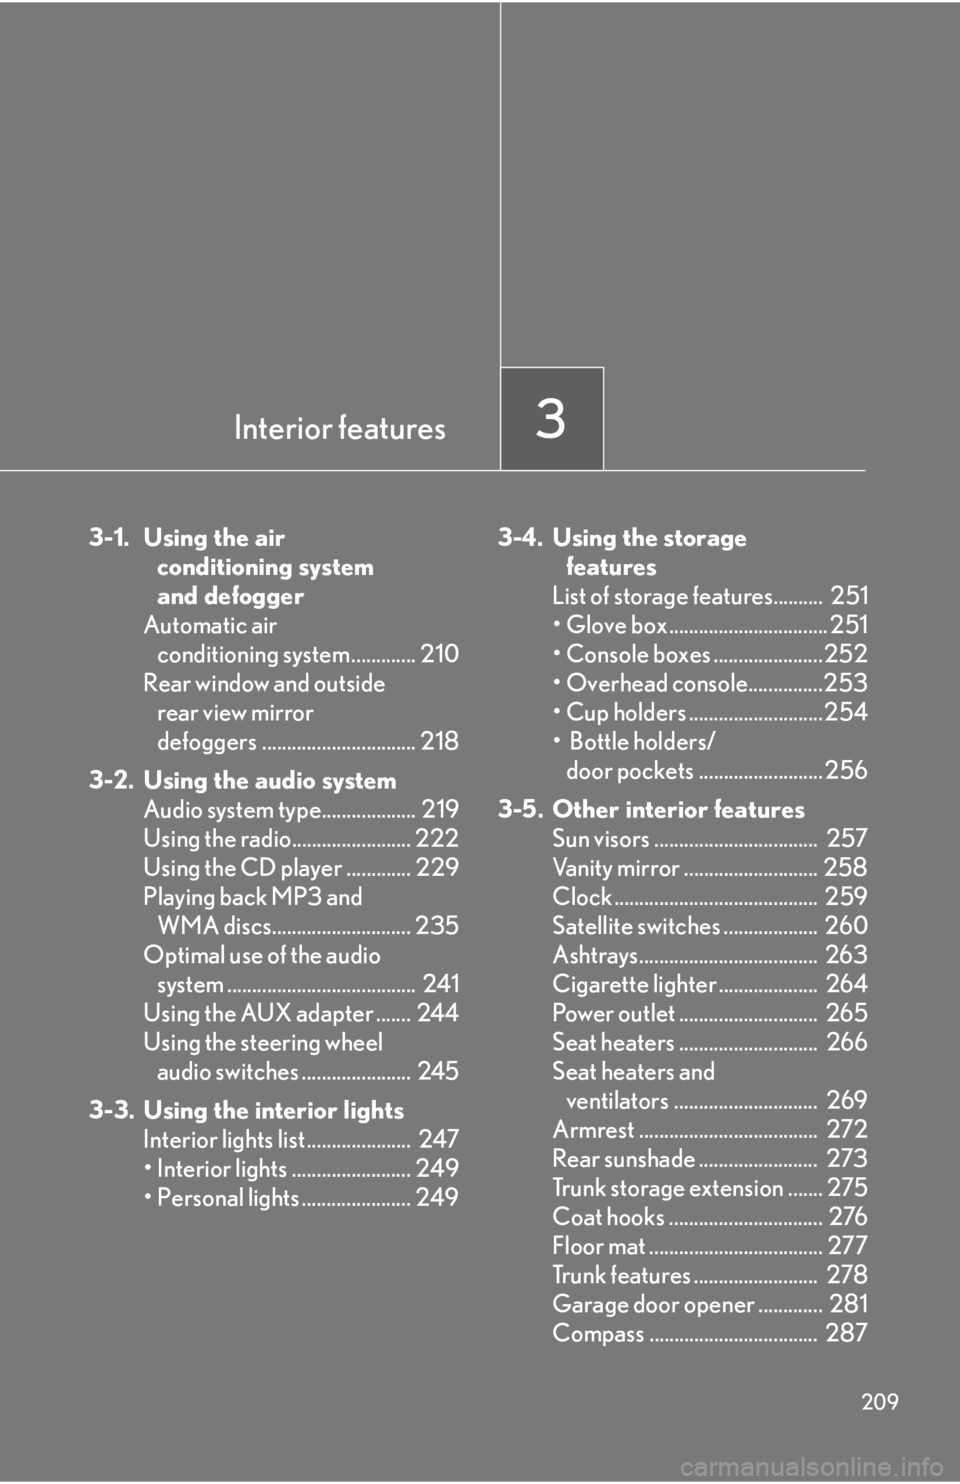
3-1. Using the airconditioning system
and defogger
Automatic air conditioning system............. 210
Rear window and outside rear view mirror
defoggers ............................... 218
3-2. Using the audio system Audio system type................... 219
Using the radio........................ 222
Using the CD player ............. 229
Playing back MP3 and WMA discs............................ 235
Optimal use of the audio system ...................................... 241
Using the AUX adapter ....... 244
Using the steering wheel audio switches ...................... 245
3-3. Using the interior lights Interior lights list ..................... 247
• Interior lights ........................ 249
• Personal lights ...................... 249 3-4. Using the storage
features
List of storage features.......... 251
• Glove box ................................ 251
• Console boxes ......................252
• Overhead console...............253
• Cup holders ...........................254
• Bottle holders/ door pockets ......................... 256
3-5. Other interior features Sun visors ................................. 257
Vanity mirror ........................... 258
Clock ......................................... 259
Satellite switches ................... 260
Ashtrays.................................... 263
Cigarette lighter .................... 264
Power outlet ............................ 265
Seat heaters ............................ 266
Seat heaters and ventilators ............................. 269
Armrest .................................... 272
Rear sunshade ........................ 273
Trunk storage extension ....... 275
Coat hooks ............................... 276
Floor mat ................................... 277
Trunk features ......................... 278
Garage door opener ............. 281
Compass .................................. 287
Page 220 of 488

220
3-2. Using the audio system
■Using cellular phones
Interference may be heard through the audio system’s speakers if a cellular phone is
being used inside or close to the vehicle while the audio system is operating.
CAUTION
■For vehicles sold in U.S.A. and Canada
●Pa r t 1 5 o f t h e F CC Ru l e s
FCC Warning:
Any unauthorized changes or modifications to this equipment will void the user’s
authority to operate this device.
●Laser products
• Do not take this unit apart or attempt to make any changes yourself.
This is an intricate unit that uses a lase r pickup to retrieve information from the
surface of compact discs. The laser is carefully shielded so that its rays remain
inside the cabinet. Therefore, never try to disassemble the player or alter any
of its parts since you may be exposed to laser rays and dangerous voltages.
• This product utilizes a laser. Use of controls or adjustments or performance of procedures other than
those specified herein may result in hazardous radiation exposure.
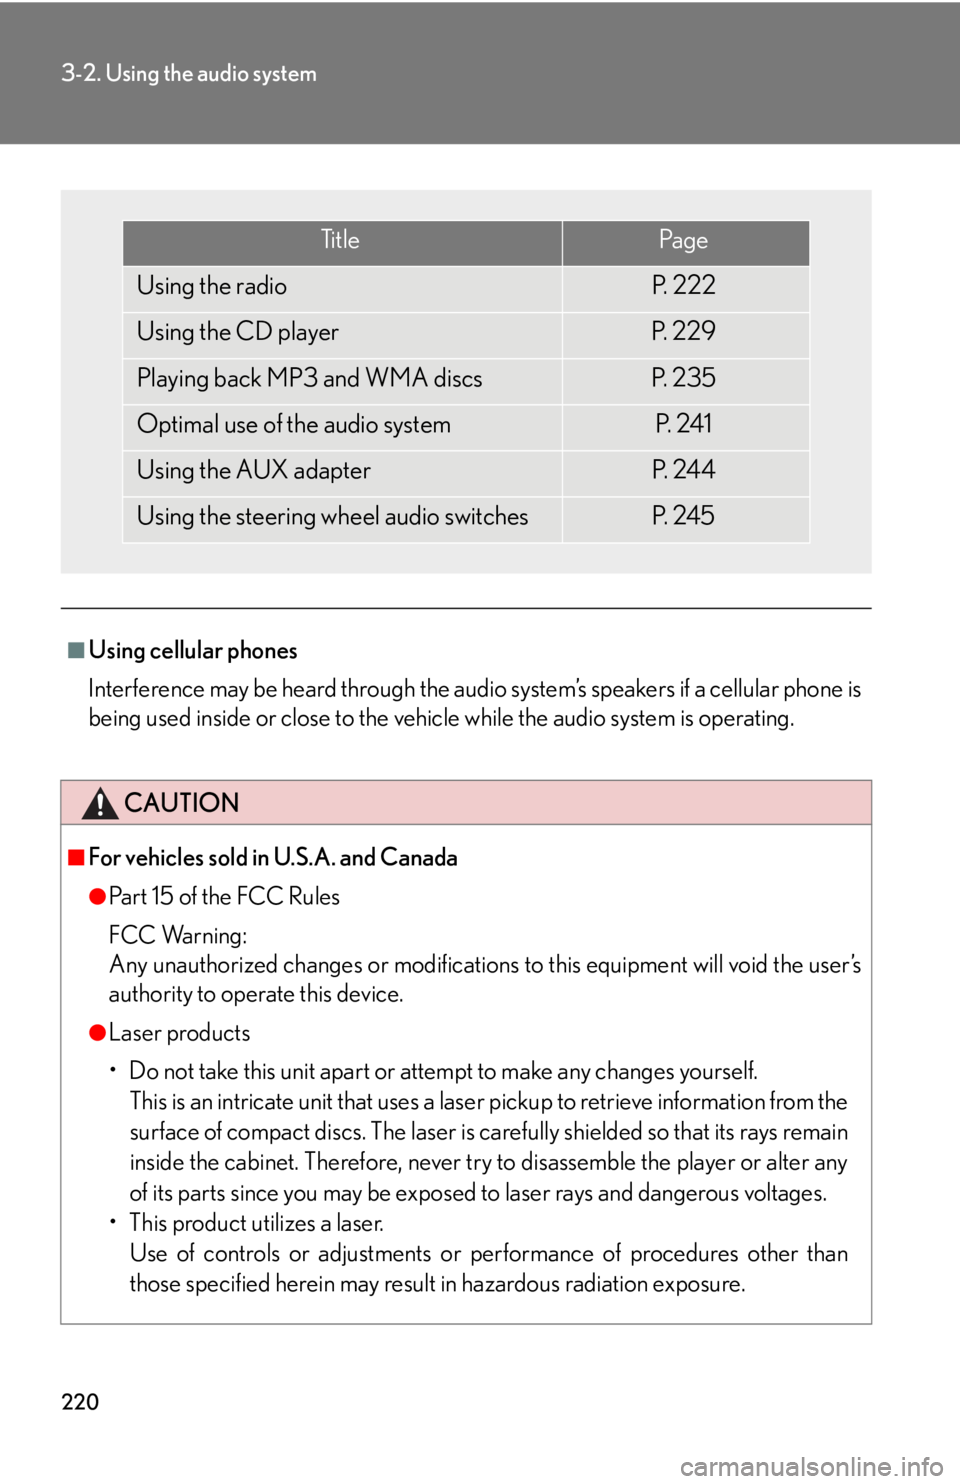
Ti t l ePa g e
Using the radioP. 222
Using the CD playerP. 2 2 9
Playing back MP3 and WMA discsP. 2 3 5
Optimal use of the audio systemP. 2 4 1
Using the AUX adapterP. 2 4 4
Using the steering wheel audio switchesP. 2 4 5
Page 245 of 488

245
3-2. Using the audio system
3
Interior features
Using the steering wheel audio switches
Turning on the power
Press when the audio system is turned off.
The audio system can be turned off by holding down for 1 second or
more.
Changing the audio source
Press when the audio system is turned on. The audio source
changes as follows each time is pressed. If no discs are inserted in
the player, that mode will be skipped.
FM1 FM2 CD changer AUXAM SAT1 SAT2 SAT3
Adjusting the volume
Press “+” on to increase the volu me and “-” to decrease the vol-
ume.
Hold down to continue increa sing or decreasing the volume.
Some audio features can be controlled using the switches on the steering
wheel.
Turns the power on, select
audio source
Vo l u m e
Radio: Select radio stations
CD: Select tracks, files (MP3
and WMA) and discs
Page 246 of 488

246
3-2. Using the audio system
Selecting a radio stationPress to select the radio mode.
Press “ ”or “ ” on to select a radio station.
To scan for receivable stations, press and hold until you hear a
beep.
Selecting a track/file
Press to select the CD mode.
Press “ ” or “” on to select the desired track/file.
Selecting a disc in the CD player
Press to select the CD mode.
Press and hold “ ” or “ ” on until a beep is heard.
CAUTION
■To reduce the risk of an accident
Exercise care when operating the audio switches on the steering wheel.
STEP1
STEP2
STEP1
STEP2
STEP1
STEP2
Page 262 of 488

262
3-5. Other interior features
■Changing the settings
Each item is displayed and its setting can be changed only in the following condi-
tions:
●Intuitive parking assist: When the “ENGINE START STOP” switch is in IGNI-
TION ON mode.
●Items other than the above: When the “ENGINE START STOP” switch is in
IGNITION ON mode and the vehicle is stopped.
■Display
The display will return to the original display if the satellite switches are not oper-
ated for an extended period.
Even if the display is in satellite switch mode, it will switch in the event of a warning
or when the radar cruise control (if equipped) is used. If this occurs, press any of the
satellite switches or “DISP” switch on the steering wheel to return the display to sat-
ellite switch mode.
Page 291 of 488

Maintenance and care4
291
4-1. Maintenance and careCleaning and protecting the vehicle exterior............. 292
Cleaning and protecting the vehicle interior .............. 295
4-2. Maintenance Maintenance requirements ....................... 298
General maintenance ......... 300
Emission inspection and maintenance (I/M)
programs............................... 303 4-3. Do-it-yourself
maintenance
Do-it-yourself service precautions ........................... 304
Hood .......................................... 307
Positioning a floor jack ......... 308
Engine compartment ............ 310
Tires............................................ 325
Tire inflation pressure........... 336
Wheels ...................................... 340
Air conditioning filter ........... 342
Electronic key battery.......... 345
Checking and replacing fuses ........................................ 347
Headlight aim .......................... 361
Light bulbs ................................ 363
Page 292 of 488

292
4-1. Maintenance and care
Cleaning and protecting the vehicle exterior
■Automatic car washes
●Fold the mirrors back before washing the vehicle.
●Brushes used in automatic car washes may scratch the vehicle surface and
harm your vehicle’s paint.
■High pressure car washes
●Do not allow the nozzles of the car wash to come within close proximity of the
windows.
●Before car wash, check that the fuel filler door on your vehicle is closed prop-
erly.
■Aluminum wheels
Remove any dirt immediately by using a neutral detergent. Do not use hard brushes
or abrasive cleaners. Do not use strong or harsh chemical cleaners. Use the same
mild detergent and wax as used on the paint.
■Bumpers
Do not scrub with abrasive cleaners.
Perform the following to protect the vehicle and maintain it in prime condi-
tion.
● Working from top to bottom, liber ally apply water to the vehicle
body, wheel wells and underside of the vehicle to remove any dirt
and dust.
● Wash the vehicle body using a sponge or soft cloth, such as a
chamois.
● For hard-to-remove marks, use car wash soap and rinse thor-
oughly with water.
● Wipe away any water.
● Wax the vehicle when the waterproof coating deteriorates.
If water does not bead on a clean surface, apply wax when the vehicle
body is cool.
Page 302 of 488

302
4-2. Maintenance
Vehicle exterior
ItemsCheck points
Steering wheel
• Moves smoothly?
• Has correct free play?
• No strange noises?
ItemsCheck points
Door/trunk• Operate smoothly?
Engine hood• The lock system works properly?
Fluid leaks• Is there any leakage after parking?
Ti r e
• Inflation pressure is correct?
• Tire surfaces not worn or dam-aged?
• Tires rotated according to the maintenance schedule?
• Wheel nuts are not loose?
CAUTION
■If the engine is running
Turn the engine off and ensure that there is adequate ventilation before performing
maintenance checks.
Page 327 of 488

327
4-3. Do-it-yourself maintenance
4
Maintenance and care
Installing tire pressure warning valves and transmittersWhen replacing tires or wheels, tire pressure warning valves and trans-
mitters must also be installed.
When new tire pressure warning va lves and transmitters are installed,
new tire pressure warning valve and transmitter ID codes must be regis-
tered in the tire pressure warning computer and tire pressure warning
system must be initialized. Have tire pressure warning valve and transmit-
ter ID codes registered by your Lexus dealer. ( P. 329)
Initializing the tire pressure warning system
■ The tire pressure warning system must be initialized in the following
circumstances:
●When rotating the tires on vehicles differing with fr ont and rear tire
inflation pressures.
● When changing the ti re inflation pressure by changing traveling
speed.
● When changing the tire size.
When the tire pressure warning sy stem is initialized, the current tire
inflation pressure is set as the pressure benchmark.
Page 331 of 488

331
4-3. Do-it-yourself maintenance
4
Maintenance and care
■When to replace your vehicle’s tires
Tires should be replaced if:
●You have tire damage such as cuts, splits, cracks deep enough to expose the
fabric or bulges indicating internal damage
●A tire goes flat repeatedly or cannot be properly repaired due to the size or
location of a cut or other damage
If you are not sure, consult with your Lexus dealer.
■Replacing tires and wheels
If the ID code of the tire pressure warn ing valve and transmitter is not registered,
the tire pressure warning system will not work properly. After driving for about 20
minutes, the tire pressure warning light comes on after blinking for 1 minute to indi-
cate a system malfunction.
■Tire life
Any tire over 6 years old must be checked by a qualified technician even if they
have seldom or never been used or damage is not obvious.
■If the tread wears down below 0.16 in. (4 mm) on snow tires
The effectiveness of snow tires is lost.
■Low profile tires (models not equipped with 16-inch tires)
Generally, low profile tires will wear more rapidly and tire grip performance will be
reduced on snowy and/or icy roads when co mpared to standard tires. Be sure to
use snow tires or tire chains
* on snowy and/or icy roads and drive carefully at a
speed appropriate for road and weather conditions.
*: Tire chains cannot be mounted on 18-inch tires.
■Maximum load of tire
Check that the maximum load of the replaced tire is greater than 1 /2 of the Gross
Axle Weight Ratings (GAWR) of either the front axle or the rear axle, whichever is
greater.
As for the maximum load of the tire, see the load limit at maximum cold tire inflation
pressure mentioned on the sidewall of the tire, and as for the Gross Axle Weight
Ratings (GAWR), see the Certification Label. (
P. 3 3 6 , 4 4 9 ) .