display Lexus IS250 2009 Using the audio system / LEXUS 2009 IS350/250 QUICK GUIDE OWNER'S MANUAL (OM53689U)
[x] Cancel search | Manufacturer: LEXUS, Model Year: 2009, Model line: IS250, Model: Lexus IS250 2009Pages: 66, PDF Size: 2.47 MB
Page 1 of 66

1
When Driving
Topic 3
Entering and Exiting
Topic 1
Before Driving
Topic 2
Overview
Contents
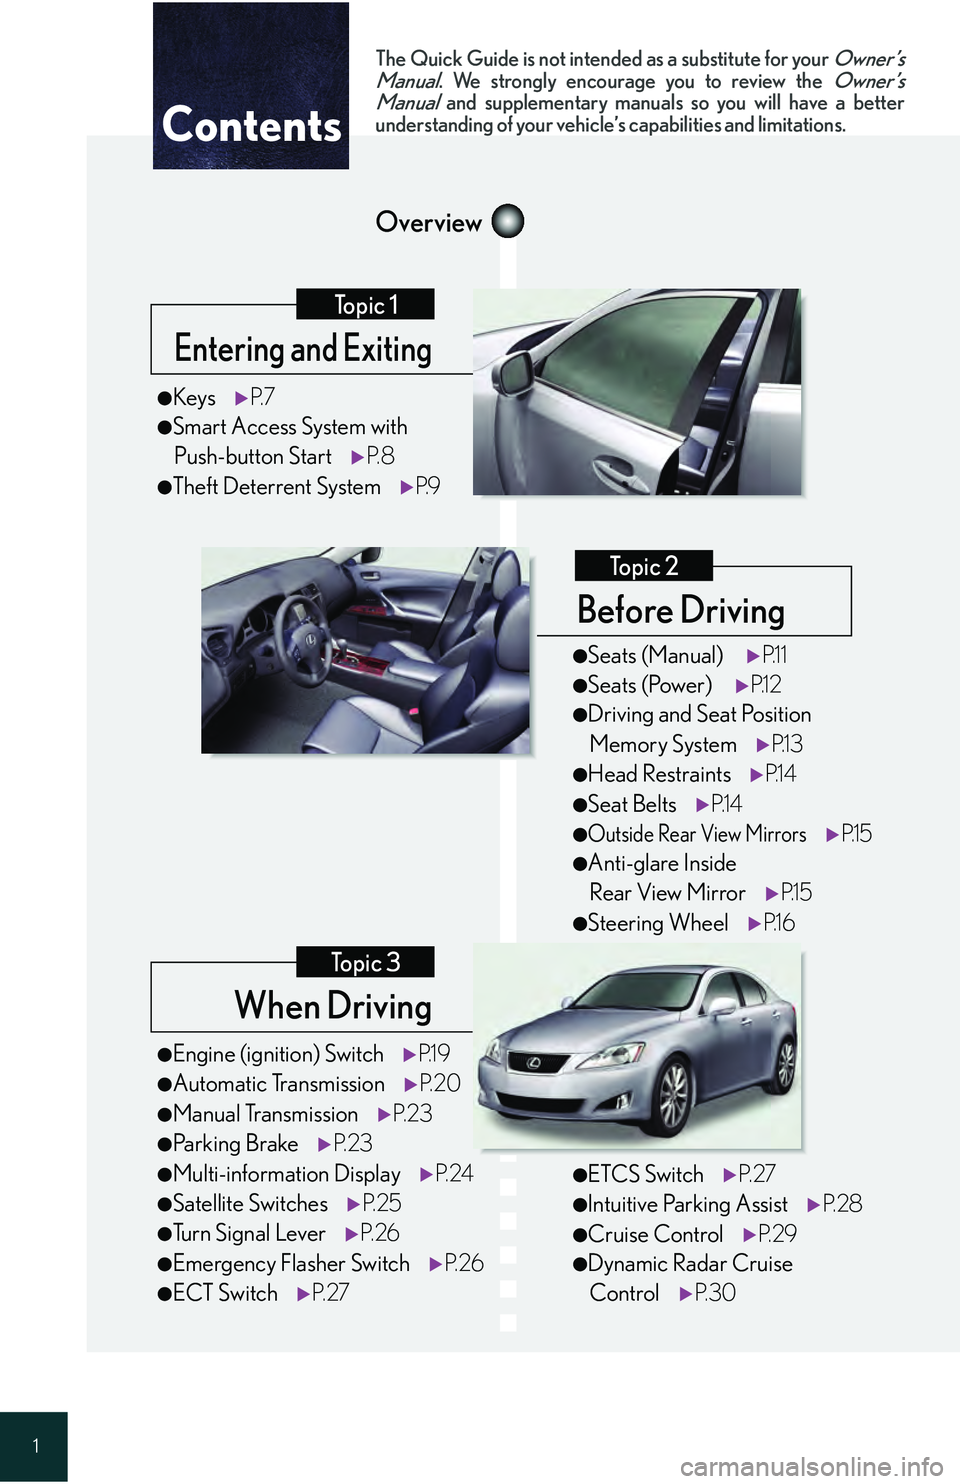
â—ŹEngine (ignition) SwitchP.1 9
â—ŹAutomatic Transmission P. 2 0
â—ŹManual TransmissionP. 2 3
â—ŹParking BrakeP. 2 3
â—ŹMulti-information Display P. 2 4
â—ŹSatellite SwitchesP. 2 5
â—ŹTu r n S i g n a l L e v e rP. 2 6
â—ŹEmergency Flasher Switch P. 2 6
â—ŹECT SwitchP. 2 7
â—ŹKeysP. 7
â—ŹSmart Access System with
Push-button Start P. 8
â—ŹTheft Deterrent System P.9
The Quick Guide is not intended as a substitute for your Owner’s
Manual. We strongly encourage you to review the Owner’s
Manual and supplementary manuals so you will have a better
understanding of your vehicle’ s capabilities and limitations.
â—ŹETCS SwitchP. 2 7
â—ŹIntuitive Parking Assist P. 2 8
â—ŹCruise ControlP. 2 9
â—ŹDynamic Radar Cruise
Control P. 3 0
â—ŹSeats (Manual) P.1 1
â—ŹSeats (Power) P.1 2
â—ŹDriving and Seat Position
Memory System P.1 3
â—ŹHead RestraintsP.1 4
â—ŹSeat BeltsP.1 4
â—ŹOutside Rear View MirrorsP.1 5
â—ŹAnti-glare Inside
Rear View Mirror P.1 5
â—ŹSteering WheelP.1 6
Page 3 of 66

3
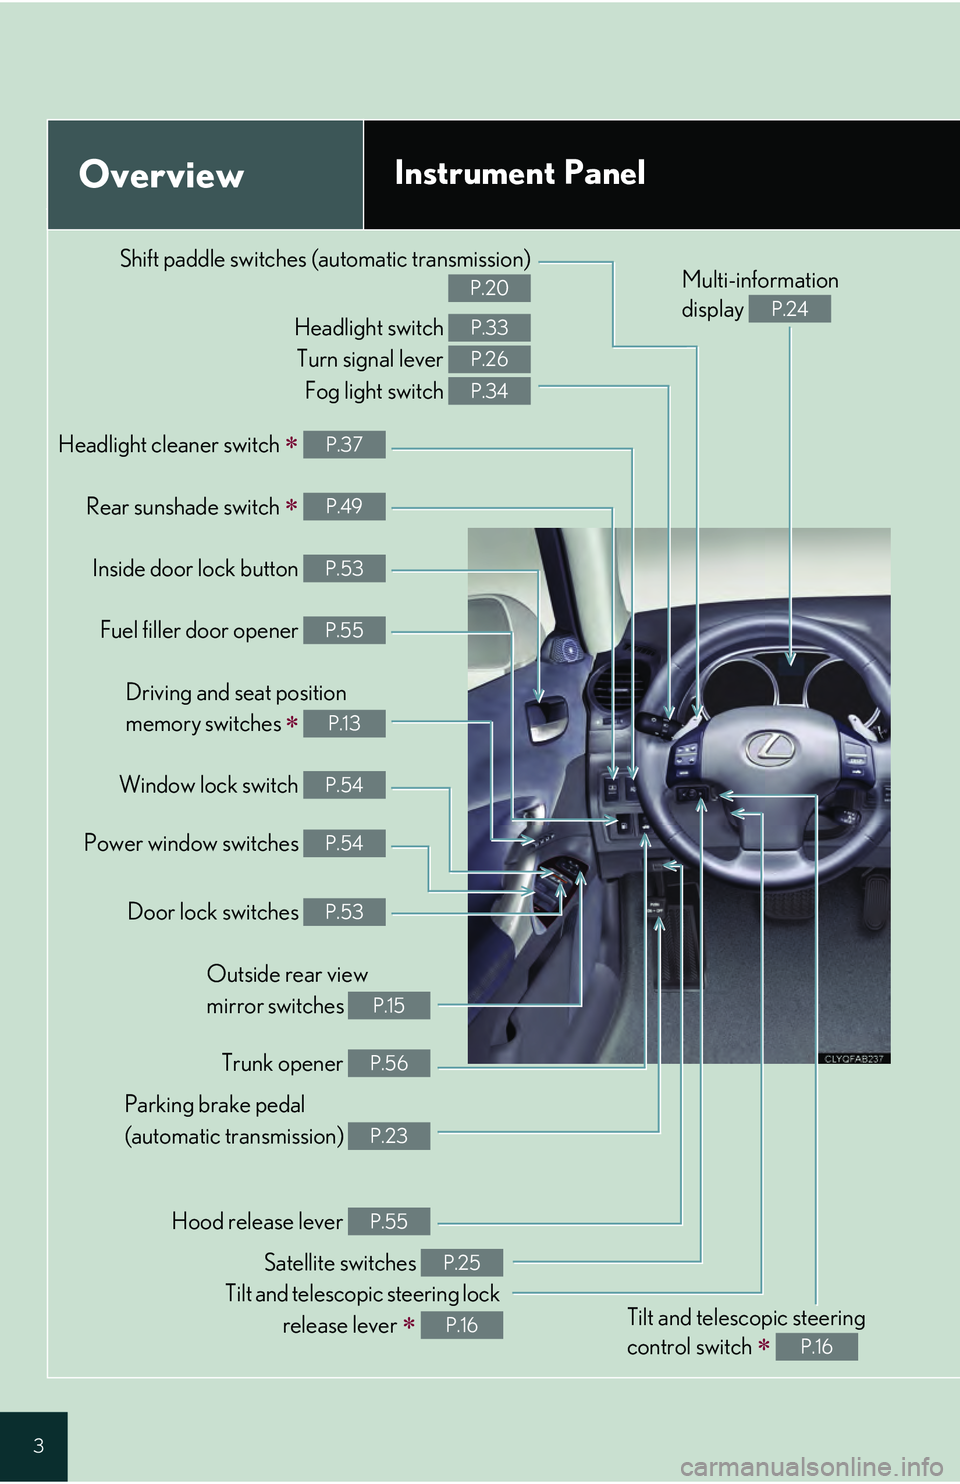
OverviewInstrument Panel
Shift paddle switches (automatic transmission)
P.20
Headlight switch
Turn signal lever Fog light switch P.33
P.26
P.34
Headlight cleaner switch  P.37
Rear sunshade switch  P.49
Inside door lock button P.53
Fuel filler door opener P.55
Driving and seat position
memory switches
 P.13
Power window switches P.54
Window lock switch P.54
Outside rear view
mirror switches
P.15
Trunk opener P.56
Hood release lever P.55
Parking brake pedal
(automatic transmission)
P.23
Satellite switches P.25
Tilt and telescopic steering lock release lever
 P.16Tilt and telesc opic steering
control switch
 P.16
Multi-information
display
P.24
Door lock switches P.53
Page 9 of 66

Topic 1
Entering and Exiting
9
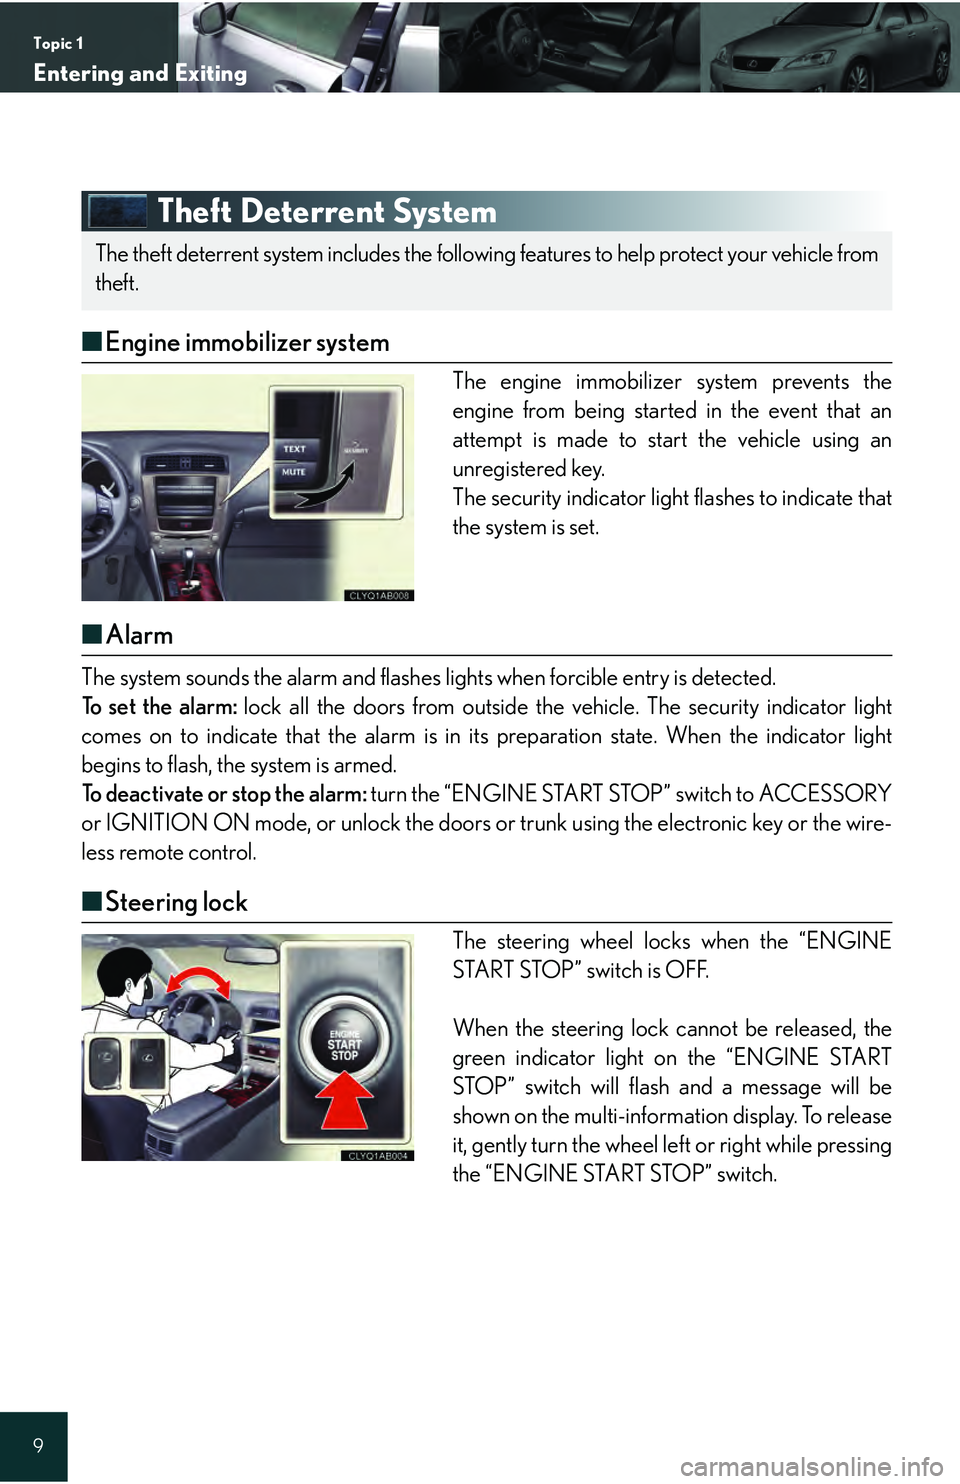
Theft Deterrent System
â– Engine immobilizer system
The engine immobilizer system prevents the
engine from being started in the event that an
attempt is made to start the vehicle using an
unregistered key.
The security indicator light flashes to indicate that
the system is set.
â– Alarm
The system sounds the alarm and flashes lights when forcible entry is detected.
To set the alarm: lock all the doors from outside the ve hicle. The security indicator light
comes on to indicate that the alarm is in it s preparation state. When the indicator light
begins to flash, the system is armed.
To deactivate or stop the alarm: turn the “ENGINE START STOP” switch to ACCESSORY
or IGNITION ON mode, or unlock the doors or trunk using the electronic key or the wire-
less remote control.
â– Steering lock
The steering wheel locks when the “ENGINE
START STOP” switch is OFF.
When the steering lock cannot be released, the
green indicator light on the “ENGINE START
STOP” switch will flash and a message will be
shown on the multi-information display. To release
it, gently turn the wheel left or right while pressing
the “ENGINE START STOP” switch.
The theft deterrent system includes the followi ng features to help protect your vehicle from
theft.
Page 18 of 66

When DrivingTopic 3
Engine (ignition) Switch ....................................... 19
Automatic Transmission ..................................... 20
Manual Transmission........................................... 23
Parking Brake ........................................................ 23
Multi-information Display.................................. 24
Satellite Switches ................................................. 25
Turn Signal Lever .................................................. 26
Emergency Flasher Switch ................................ 26
ECT Switch ............................................................. 27
ETCS Switch .......................................................... 27
Intuitive Parking Assist ....................................... 28
Cruise Control ...................................................... 29
Dynamic Radar Cruise Control....................... 30
Page 21 of 66

Topic 3
When Driving
21
â– Changing shift ranges in the D position
Operating the shift paddle switches allows shift ranges to be selected to suit the driving con-
ditions.
Pull the “-” shift paddle switch toward you.The indicator in the meter cluster will
change to display the selected shift range.
Higher shift range:
Pull the “+” shift paddle switch toward you.
Lower shift range:
Pull the “-” shift paddle switch toward you.
Pulling and holding the “+” shif t paddle switch for a certain period of time allows you to
return to normal D position dr iving. If the accelerator pedal is depressed for more than a
certain period of time in one range, shift range selection in the D position will be automati-
cally deactivated.
Page 22 of 66

Topic 3
When Driving
22
Entering and Exiting
Before DrivingBefore Driving
When DrivingWhen Driving
Rain and
Night Driving
Driving Comfort
Opening and Closing
What to do if ...
Customizing Yo u r L e x u s
â– Changing shift ranges in the S position
Operating the shift lever or shift paddle switches allows shift ranges to be selected to suit the
driving conditions.
Shift the shift lever to S.The indicator in the meter cluster will
change to display the selected shift range.
Higher shift range:
Move the shift lever in the “+” direction, or
pull the “+” shift paddle switch toward you.
Lower shift range:
Move the shift lever in the “-” direction, or
pull the “-” shift paddle switch toward you.
Page 24 of 66

Topic 3
When Driving
24
Entering and Exiting
Before DrivingBefore Driving
When DrivingWhen Driving
Rain and
Night Driving
Driving Comfort
Opening and Closing
What to do if ...
Customizing Yo u r L e x u s
Multi-information Display
â– Display information
â—Ź Trip information
ď‚·Outside temperature
ď‚· Driving range
ď‚· Average fuel consumption
ď‚· Average fuel consumption after refueling
ď‚· Current fuel consumption
ď‚· Average vehicle speed
ď‚· Gear position (automatic transmission only)
â—Ź Satellite switch mode
â—Ź Dynamic radar cruise control settings
(if equipped)
â—Ź Intuitive parking assist information
(if equipped)
â—Ź Wa r n i n g m e s s a g e s
â– Changing the display of trip information
Trip information items can be switched by press-
ing the DISP switch.
The multi-information display shows information about your vehicle, including the items
shown below.
Ty p e ATy p e B
â– When using intuitive parking assist or dynami c radar cruise control, the appropriate dis-
play is shown on the screen.
â– In the event that a problem is detected in any of the vehicle's systems, a warning message is
shown on the multi-information display.
Page 25 of 66

Topic 3
When Driving
25
Satellite Switches
The satellite switches can be used to change the
settings of the following items.
â—Ź Intuitive parking assist (if equipped)
â—Ź Tire inflation pressure warning system initial-
ization
â—Ź ID code selection for tire inflation pressure
warning system
â—Ź AFS (Adaptive Front-lighting System)
(if equipped)
â—Ź Speed indicator
â—Ź Tacho indicator
â– Changing the ON/OFF settings
To cycle through the functions, press either the
left or right selector switch.
To change the settings, press the ON/OFF
button.
The satellite switches can be used to change the settings of various functions. Settings
are shown on the multi-information display.
For detailed information of changing the settings, see the Owner’s Manual.
Page 28 of 66

Topic 3
When Driving
28
Entering and Exiting
Before DrivingBefore Driving
When DrivingWhen Driving
Rain and
Night Driving
Driving Comfort
Opening and Closing
What to do if ...
Customizing Yo u r L e x u s
Intuitive Parking Assist (If Equipped)
â– Turning the system on and off
The system can be turned on and off using the satellite switch. ( ď‚®P. 2 5 )
â– Screen display
Sensors are used to detect obstacles near the
vehicle. The distance to a detected obstacle is
shown by the number of indicator bars.
Indicates obstacles de tected by the corner
sensors
Indicates obstacles dete cted by the back sen-
sors
The system uses a screen display and buzzer to inform the driver of obstacles near the
vehicle when parking or driving at low speed.
1
2
Page 30 of 66

Topic 3
When Driving
30
Entering and Exiting
Before DrivingBefore Driving
When DrivingWhen Driving
Rain and
Night Driving
Driving Comfort
Opening and Closing
What to do if ...
Customizing Yo u r L e x u s
Dynamic Radar Cruise Control (If Equipped)
Indicator
Display
Distance switch
Cruise control switch
â– Cruise control display
Cruise control settings are shown on the multi-
information display.
Vehicle ahead indicator
Vehicle-to-vehicle distance
Preset speed
â– Vehicle-to-vehicle distance control mode
Press the ON-OFF button.
Accelerate or decelerate to the desired
speed, and then push the lever down.
Vehicle-to-vehicle distance can be adjusted using
the distance switch.
â– Constant speed control mode
Press the ON-OFF button.
Push the lever forward and hold for at least
one second.
Accelerate or decelerate to the desired
speed, and then push the lever down.
Dynamic radar cruise control su pplements conventional cruise control with a vehicle-to-
vehicle distance control mode.
1
2
3
4
1
2
3