Signal Lexus IS250 2010 User Guide
[x] Cancel search | Manufacturer: LEXUS, Model Year: 2010, Model line: IS250, Model: Lexus IS250 2010Pages: 578, PDF Size: 30.78 MB
Page 57 of 578
56
1-3. Adjustable components (seats, mirrors, steering wheel)
IS350/250_U
■Canceling the linked door unlock operation
Turn the “ENGINE START STOP” switch OFF and close the driver's door.
Using the wireless remote control: While pushing the “SET” button, press on the wireless remote control until the signal beeps.
Using the door lock switch: While pr essing the “SET” button, press the
lock or unlock side on the door lock switch until the signal beeps.
■Operating the driving position memory after turning the “ENGINE START
STOP” switch OFF
Memorized positions (except for the steering wheel position) can be activated up
to 180 seconds after the driver's door is opened and another 60 seconds after it is
closed again, even after turning the “ENGINE START STOP” switch OFF.
■To cancel seat position recall
Perform any of the following operations.
●Push the “SET” button.
●Push button “1”, “2” or “3”.
●Adjust the seat using the switches (only cancels seat position recall).
■If the battery is disconnected
The memorized positions are erased when the battery is disconnected.
CAUTION
■Seat adjustment caution
Take care during seat adjustment that the seat does not strike the rear passenger or
squeeze your body against the steering wheel.
STEP1
STEP2
Page 58 of 578
57
1
1-3. Adjustable components (seats, mirrors, steering wheel)
Before driving
IS350/250_U
Seat position memory (front passenger’s seat)∗
Your preferred front passenger seat position can be memorized and
recalled with the touch of a button.
Three different seat positions can be entered into memory.
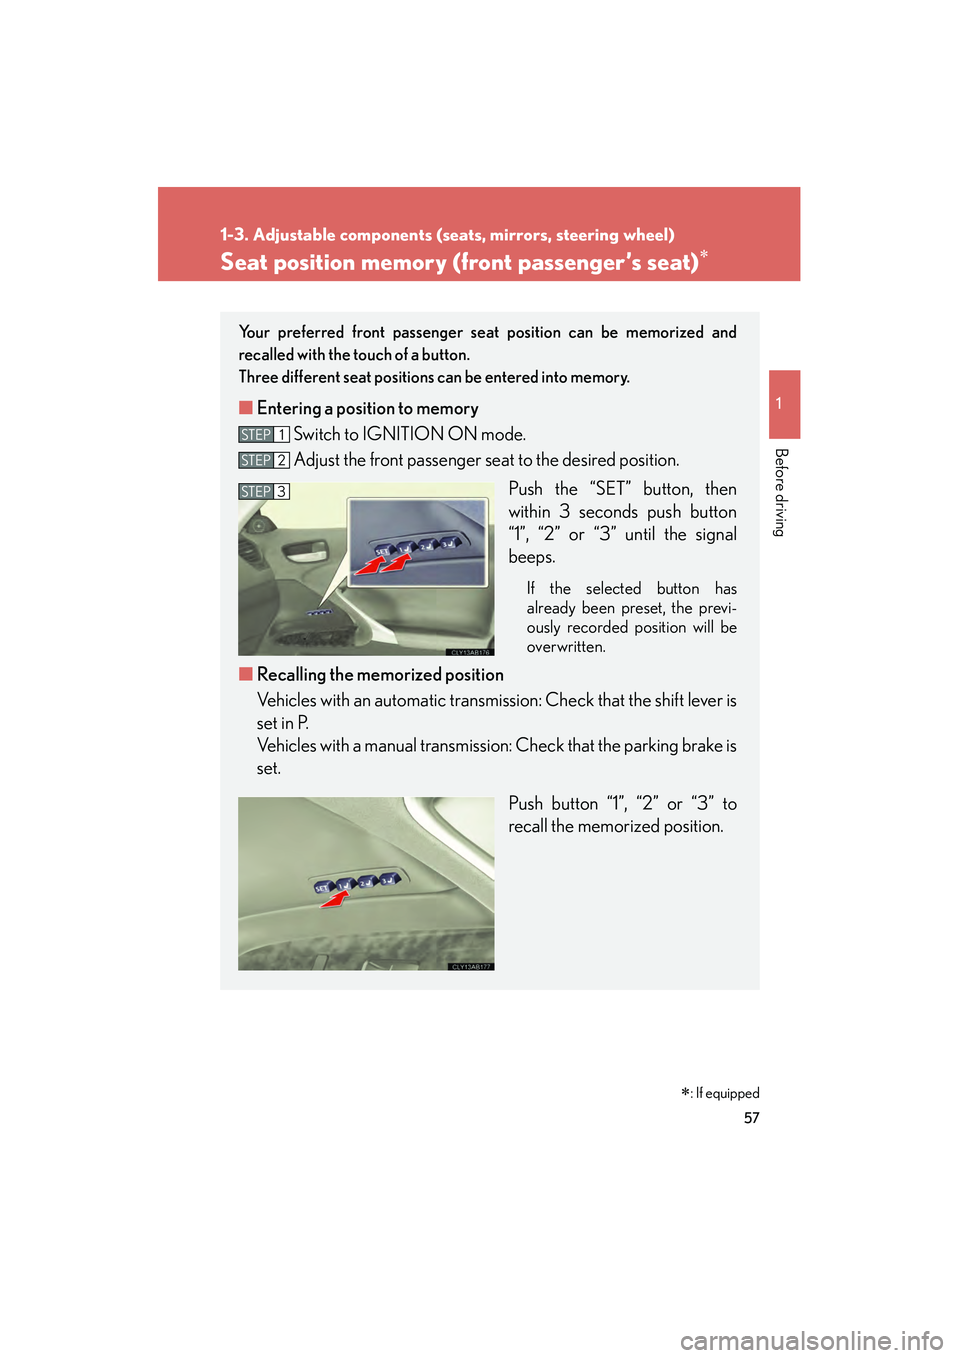
■ Entering a position to memory
Switch to IGNITION ON mode.
Adjust the front passenger seat to the desired position.
Push the “SET” button, then
within 3 seconds push button
“1”, “2” or “3” until the signal
beeps.
If the selected button has
already been preset, the previ-
ously recorded position will be
overwritten.
■Recalling the memorized position
Vehicles with an automatic transmission: Check that the shift lever is
set in P.
Vehicles with a manual transmission: Check that the parking brake is
set.
Push button “1”, “2” or “3” to
recall the memorized position.
STEP1
STEP2
STEP3
∗: If equipped
Page 124 of 578
When driving2
123
IS350/250_U
2-1. Driving proceduresDriving the vehicle.................. 124
Engine (ignition) switch ......... 134
Automatic transmission ........ 139
Manual transmission .............. 145
Turn signal lever ....................... 147
Parking brake ........................... 148
Horn ............................................ 150
2-2. Instrument cluster Gauges and meters ................. 151
Indicators and warning lights ......................................... 157
Multi-information display ..... 160
2-3. Operating the lights and windshield wipers
Headlight switch...................... 165
Fog light switch ........................ 168
Windshield wipers and washer ..................................... 169
Headlight cleaner switch....... 174 2-4. Using other driving
systems
Cruise control........................... 175
Dynamic radar cruise control ...................................... 179
Intuitive parking assist ........... 190
Driving assist systems ............ 196
PCS (Pre-Collision System) ...... 202
2-5. Driving information Cargo and luggage ............... 206
Vehicle load limits .................. 209
Winter driving tips .................. 210
Trailer towing ........................... 214
Dinghy towing (vehicles with an
automatic transmission)..... 215
Dinghy towing (vehicles with a
manual transmission) .......... 216
Page 148 of 578
147
2-1. Driving procedures
2
When driving
IS350/250_U
Turn signal lever
■Turn signals can be operated when
The “ENGINE START STOP” switch is in IGNITION ON mode.
■If the indicators flash faster than usual
Check that a light bulb in the turn signal lights has not burned out.
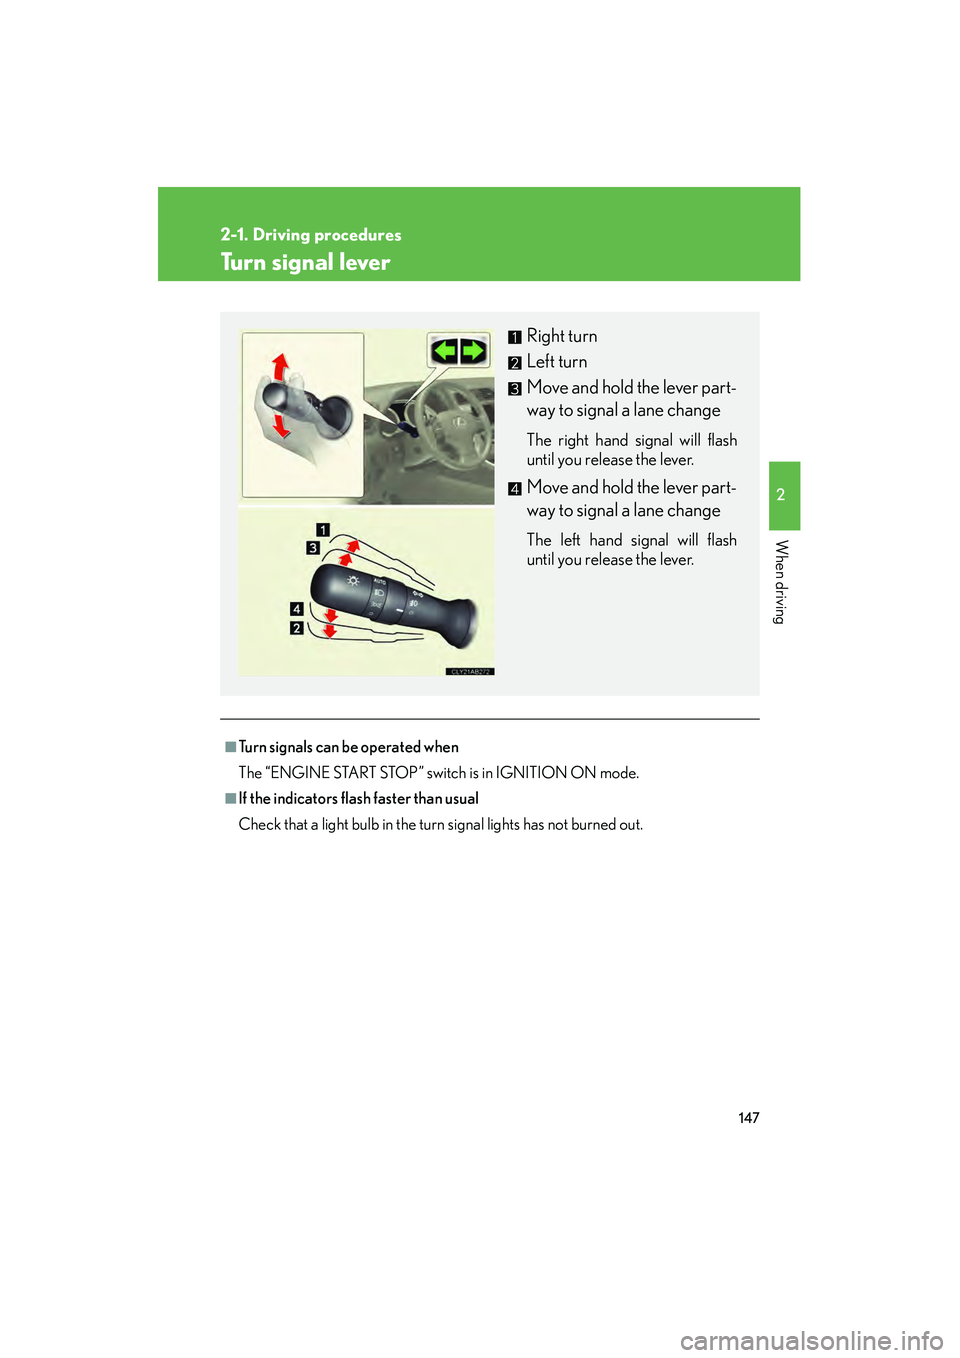
Right turn
Left turn
Move and hold the lever part-
way to signal a lane change
The right hand signal will flash
until you release the lever.
Move and hold the lever part-
way to signal a lane change
The left hand signal will flash
until you release the lever.
Page 159 of 578
158
2-2. Instrument cluster
IS350/250_U
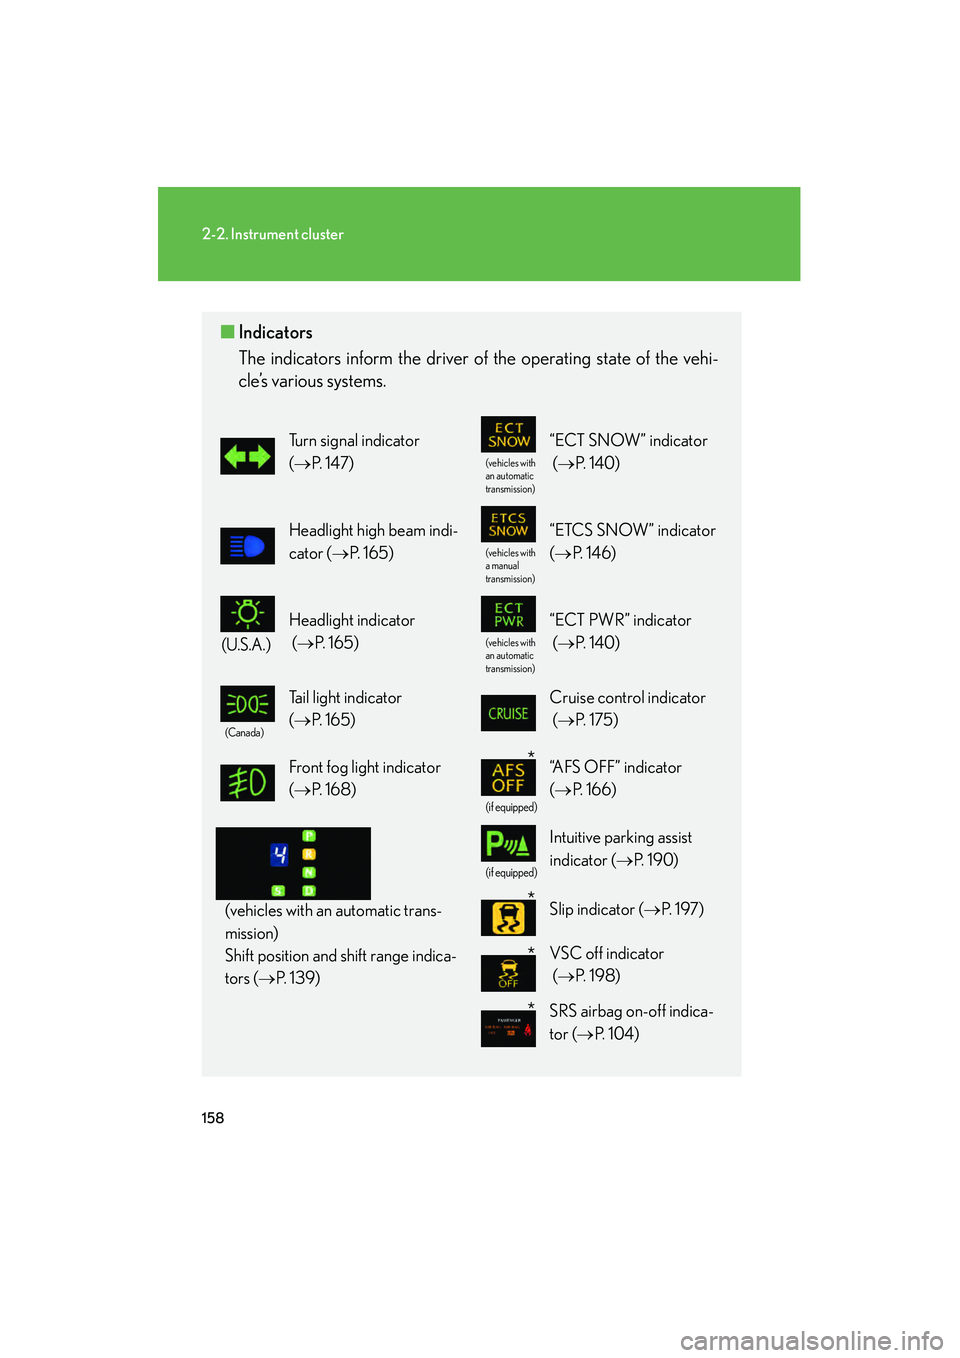
■Indicators
The indicators inform the driver of the operating state of the vehi-
cle’s various systems.
Turn signal indicator
(→ P. 1 4 7 )
(vehicles with
an automatic
transmission)
“ECT SNOW” indicator
(→ P. 1 4 0 )
Headlight high beam indi-
cator ( →P. 1 6 5 )
(vehicles with
a manual
transmission)
“ETCS SNOW” indicator
(→ P. 1 4 6 )
(U.S.A.)
Headlight indicator
(→ P. 1 6 5 )
(vehicles with
an automatic
transmission)
“ECT PWR” indicator
(→ P. 1 4 0 )
(Canada)
Tail light indicator
(→ P. 1 6 5 ) Cruise control indicator
(→ P. 1 7 5 )
Front fog light indicator
(→ P. 1 6 8 )
(if equipped)
“AFS OFF” indicator
(→ P. 1 6 6 )
(vehicles with an automatic trans-
mission)
Shift position and shift range indica-
tors ( →P. 1 3 9 )
(if equipped)
Intuitive parking assist
indicator ( →P. 1 9 0 )
Slip indicator ( →P. 1 9 7 )
VSC off indicator
(→ P. 1 9 8 )
SRS airbag on-off indica-
tor (→ P. 1 0 4 )
*
*
*
*
Page 239 of 578
238
3-2. Using the audio system
IS350/250_U
■When the battery is disconnected
Station presets are erased.
■Reception sensitivity
●Maintaining perfect radio reception at all times is difficult due to the continually
changing position of the antenna, differences in signal strength and surrounding
objects, such as trains, transmitters, etc.
●The radio antenna is mounted inside the rear window. To maintain clear radio
reception, do not attach metallic window tinting or other metallic objects to the
antenna wire mounted inside the rear window.
■XM® Satellite Radio
An XM
® Satellite Radio is a tuner designed exclusively to receive broadcasts pro-
vided under a separate subscription. Availability is limited to the 48 contiguous
states and 10 Canadian provinces.
●XM® subscriptions
For detailed information about XM® Satellite Radio or to subscribe:
U. S .A .
Visit on the web at www.xmradio.com
or call 1-877-515-3987.
Canada
Visit on the web at www.xmradio.ca
or call 1-877-515-3987.
●Radio ID
You will need the radio ID when activating XM
® service or reporting a prob-
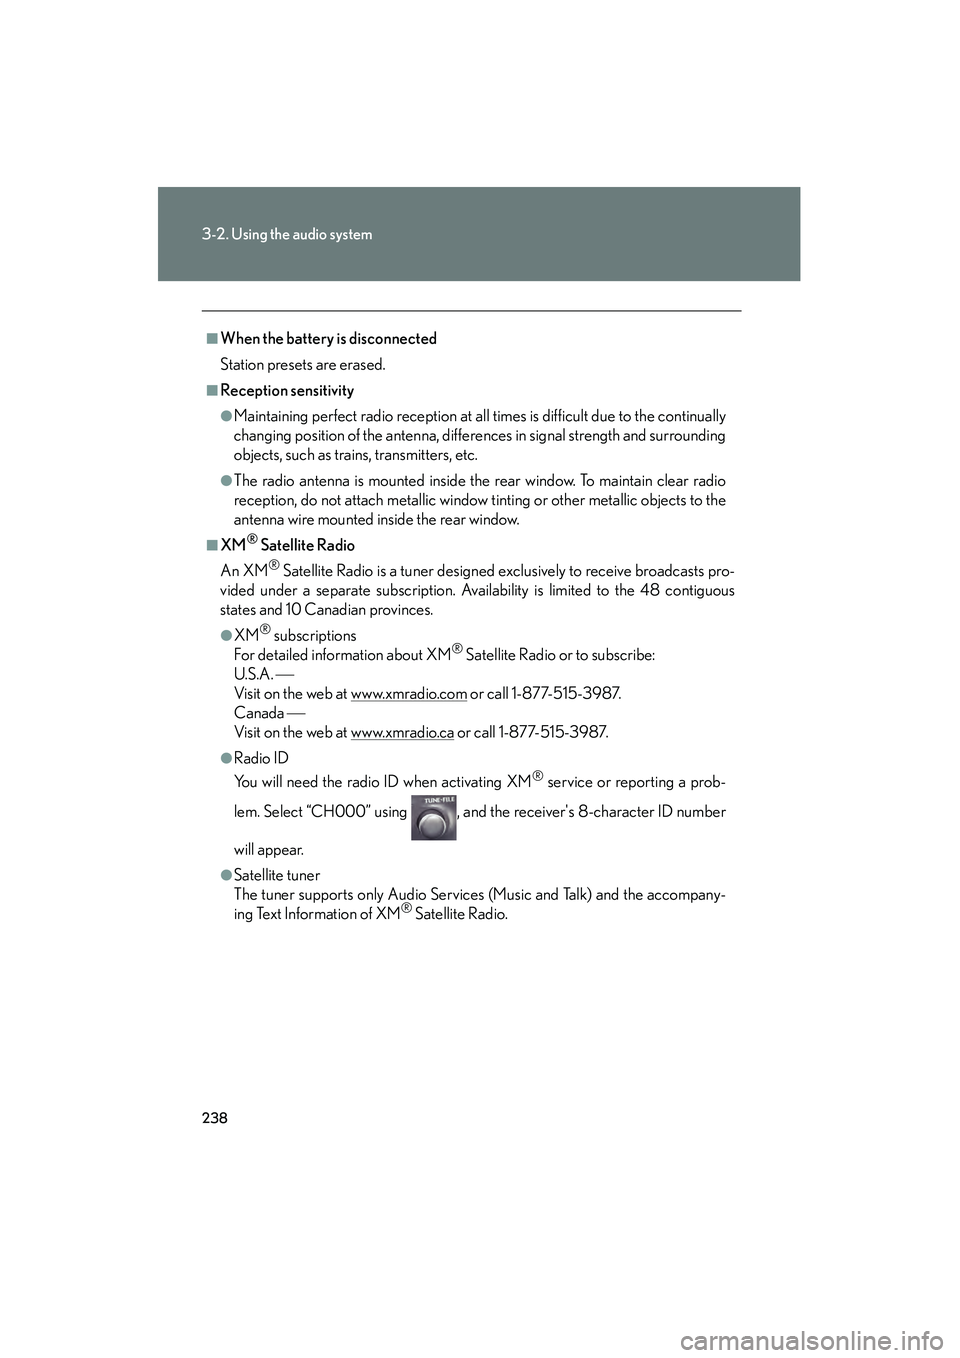
lem. Select “CH000” using , and the receiver's 8-character ID number
will appear.
●Satellite tuner
The tuner supports only Audio Services (Music and Talk) and the accompany-
ing Text Information of XM
® Satellite Radio.
Page 240 of 578
239
3-2. Using the audio system
3
Interior features
IS350/250_U
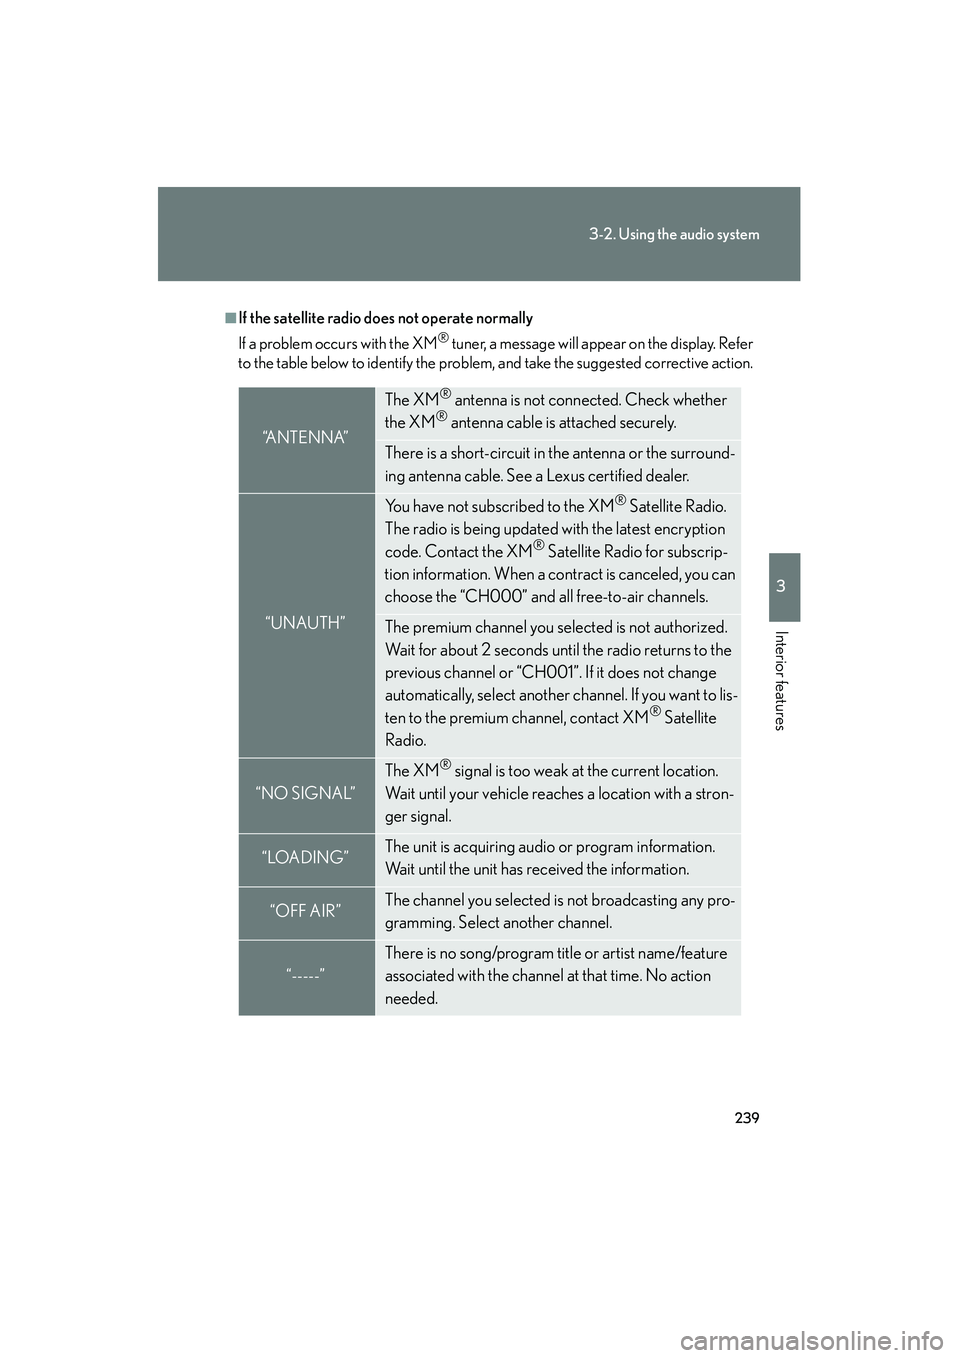
■If the satellite radio does not operate normally
If a problem occurs with the XM
® tuner, a message will appear on the display. Refer
to the table below to identify the problem, and take the suggested corrective action.
“A N T E N N A”
The XM® antenna is not connected. Check whether
the XM® antenna cable is attached securely.
There is a short-circuit in the antenna or the surround-
ing antenna cable. See a Lexus certified dealer.
“UNAUTH”
You have not subscribed to the XM® Satellite Radio.
The radio is being updated with the latest encryption
code. Contact the XM
® Satellite Radio for subscrip-
tion information. When a contract is canceled, you can
choose the “CH000” and all free-to-air channels.
The premium channel you selected is not authorized.
Wait for about 2 seconds until the radio returns to the
previous channel or “CH001”. If it does not change
automatically, select another channel. If you want to lis-
ten to the premium channel, contact XM
® Satellite
Radio.
“NO SIGNAL”
The XM® signal is too weak at the current location.
Wait until your vehicle reaches a location with a stron-
ger signal.
“LOADING”The unit is acquiring audio or program information.
Wait until the unit has received the information.
“OFF AIR”The channel you selected is not broadcasting any pro-
gramming. Select another channel.
“-----”
There is no song/program title or artist name/feature
associated with the channel at that time. No action
needed.
Page 366 of 578
365
3-7. Other interior features
3
Interior features
IS350/250_U■
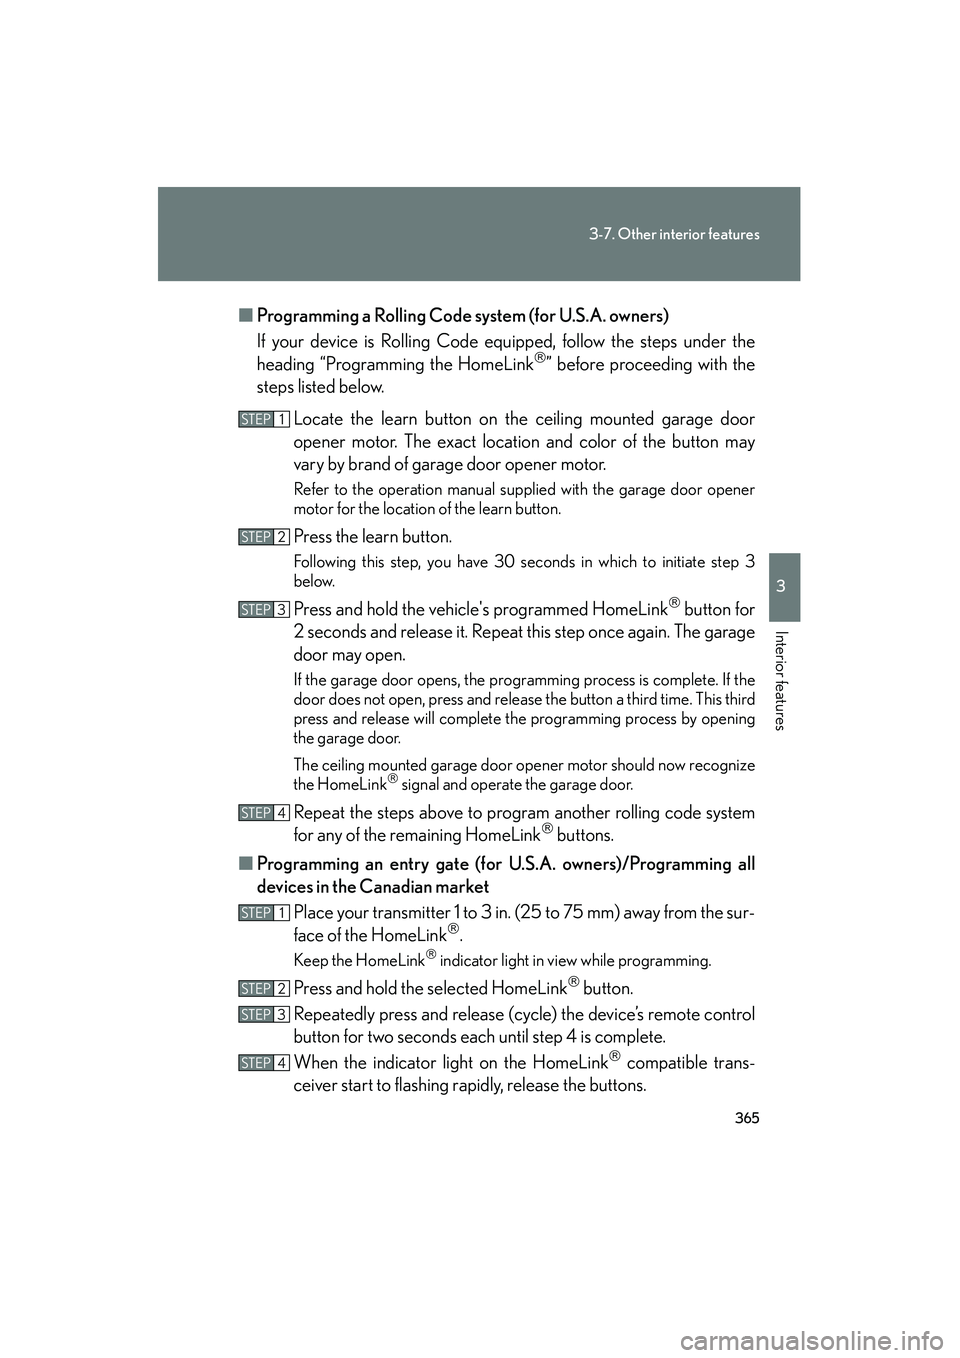
Programming a Rolling Code sy stem (for U.S.A. owners)
If your device is Rolling Code equipped, follow the steps under the
heading “Programming the HomeLink
” before proceeding with the
steps listed below.
Locate the learn button on the ceiling mounted garage door
opener motor. The exact location and color of the button may
vary by brand of garage door opener motor.
Refer to the operation manual supplied with the garage door opener
motor for the location of the learn button.
Press the learn button.
Following this step, you have 30 seconds in which to initiate step 3
below.
Press and hold the vehicle's programmed HomeLink button for
2 seconds and release it. Repeat this step once again. The garage
door may open.
If the garage door opens, the programming process is complete. If the
door does not open, press and release the button a third time. This third
press and release will complete the programming process by opening
the garage door.
The ceiling mounted garage door op ener motor should now recognize
the HomeLink
signal and operate the garage door.
Repeat the steps above to program another rolling code system
for any of the remaining HomeLink buttons.
■ Programming an entry gate (for U.S.A. owners)/Programming all
devices in the Canadian market
Place your transmit ter 1 to 3 in. (25 to 75 mm) away from the sur-
face of the HomeLink
.
Keep the HomeLink indicator light in view while programming.
Press and hold the selected HomeLink button.
Repeatedly press and release (cycle) the device’s remote control
button for two seconds each until step 4 is complete.
When the indicator light on the HomeLink
compatible trans-
ceiver start to flashing rapidly, release the buttons.
STEP1
STEP2
STEP3
STEP4
STEP1
STEP2
STEP3
STEP4
Page 367 of 578
366
3-7. Other interior features
IS350/250_UTest the operation of the HomeLink
by pressing the newly pro-
grammed button. Check to see if the gate/device operates cor-
rectly.
Repeat the steps above to program another device for each of
the remaining HomeLink
buttons.
■ Programming other devices
To program other devices such as home security systems, home door
locks or lighting, contact your authorized Lexus dealer for assistance.
■ Reprogramming a button
The individual HomeLink
buttons cannot be erased but can be
reprogrammed. To reprogram a button, follow the “Reprogramming a
HomeLink
button” instructions.
Operating the HomeLink
Press the appropriate HomeLink button. The HomeLink indicator
light should come on.
The HomeLink compatible transceiver in your vehicle continues to send a
signal for up to 20 seconds as long as the button is pressed.
Reprogramming a HomeLink button
Press and hold the desired HomeLink
button. After 20 seconds, the
HomeLink indicator light will start flashing slowly. Next, while still press-
ing and holding the HomeLink button, press and hold the button on the
transmitter until the HomeLink indicator light changes from a slow to a
rapid flash.
STEP5
STEP6
Page 376 of 578

375
3-7. Other interior features
3
Interior features
IS350/250_U
■Safety Connect Services Information
●Phone calls using the vehicles Bluetooth® technology will not be possible dur-
ing Safety Connect.
●Safety Connect is available beginning Fall 2009 on select Lexus models. Con-
tact with the Safety Connect response center is dependent upon the telematics
device being in operative condition, cellular connection availability, and GPS
satellite signal reception, which can limit the ability to reach the response center
or receive emergency service support. Enrollment and Telematics Subscription
Service Agreement required. A variety of subscription terms is available;
charges vary by subscription term selected.
●Safety Connect services will function in the United States, including Hawaii and
Alaska, and in Canada. The services will not function outside of the United
States in countries other than Canada. For details about the service, contact
your Lexus dealer.
●Safety Connect services are not subject to section 255 of the Telecommunica-
tions Act and the device is not TTY compatible.
■Languages
The Safety Connect response center will offer support in multiple languages. The
Safety Connect system will offer voice prompts in English and Spanish. Please indi-
cate your language of choice when enrolling.
■When contacting the response center
You may be unable to contact the response center if the network is busy.