brake Lexus IS250 2012 Using the air conditioning system and defogger / LEXUS 2012 IS250,IS350 OWNERS MANUAL (OM53A87U)
[x] Cancel search | Manufacturer: LEXUS, Model Year: 2012, Model line: IS250, Model: Lexus IS250 2012Pages: 592, PDF Size: 6.2 MB
Page 3 of 592

1
2
3
4
5
6
7
3
2-1. Driving proceduresDriving the vehicle ........................ 130
Engine (ignition) switch ................ 141
Automatic transmission.............. 146
Manual transmission .................... 152
Turn signal lever ............................ 154
Parking brake ................................. 155
Horn.................................................... 157
2-2. Instrument cluster Gauges and meters ..................... 158
Indicators and warning lights................................................. 164
Multi-information display........... 167
2-3. Operating the lights and windshield wipers
Headlight switch ............................. 172
Fog light switch .............................. 176
Windshield wipers and washer............................................. 178
Headlight cleaner switch ........... 185 2-4. Using other driving systems
Cruise control ................................ 186
Intuitive parking assist ................. 190
Driving assist systems.................. 196
2-5. Driving information Cargo and luggage ..................... 202
Vehicle load limits ....................... 205
Winter driving tips ....................... 206
Trailer towing .................................. 210
Dinghy towing (vehicles with an automatic
transmission) .................................. 211
Dinghy towing (vehicles with a manual
transmission) ................................ 212
2When driving
Page 13 of 592
13
C
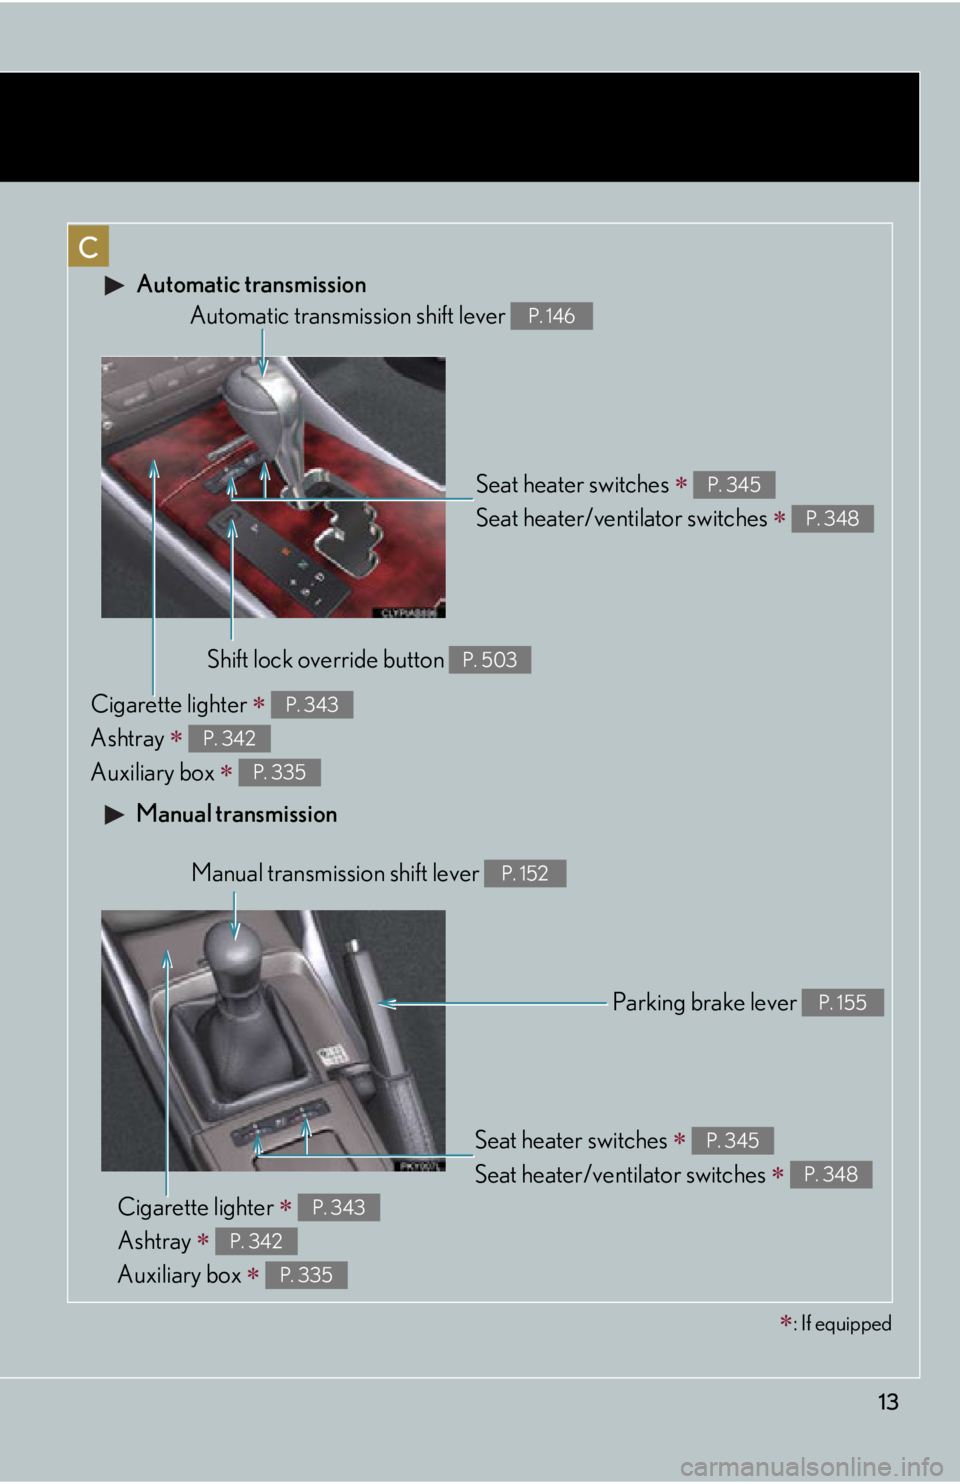
Automatic transmission
Manual transmission
Seat heater switches
Seat heater/ventilator switches
P. 345
P. 348
Automatic transmission shift lever P. 146
Shift lock override button P. 503
Cigarette lighter
Ashtray
Auxiliary box
P. 343
P. 342
P. 335
Manual transmission shift lever P. 152
Parking brake lever P. 155
Cigarette lighter
Ashtray
Auxiliary box
P. 343
P. 342
P. 335
Seat heater switches
Seat heater/ventilator switches
P. 345
P. 348
: If equipped
Page 14 of 592
14
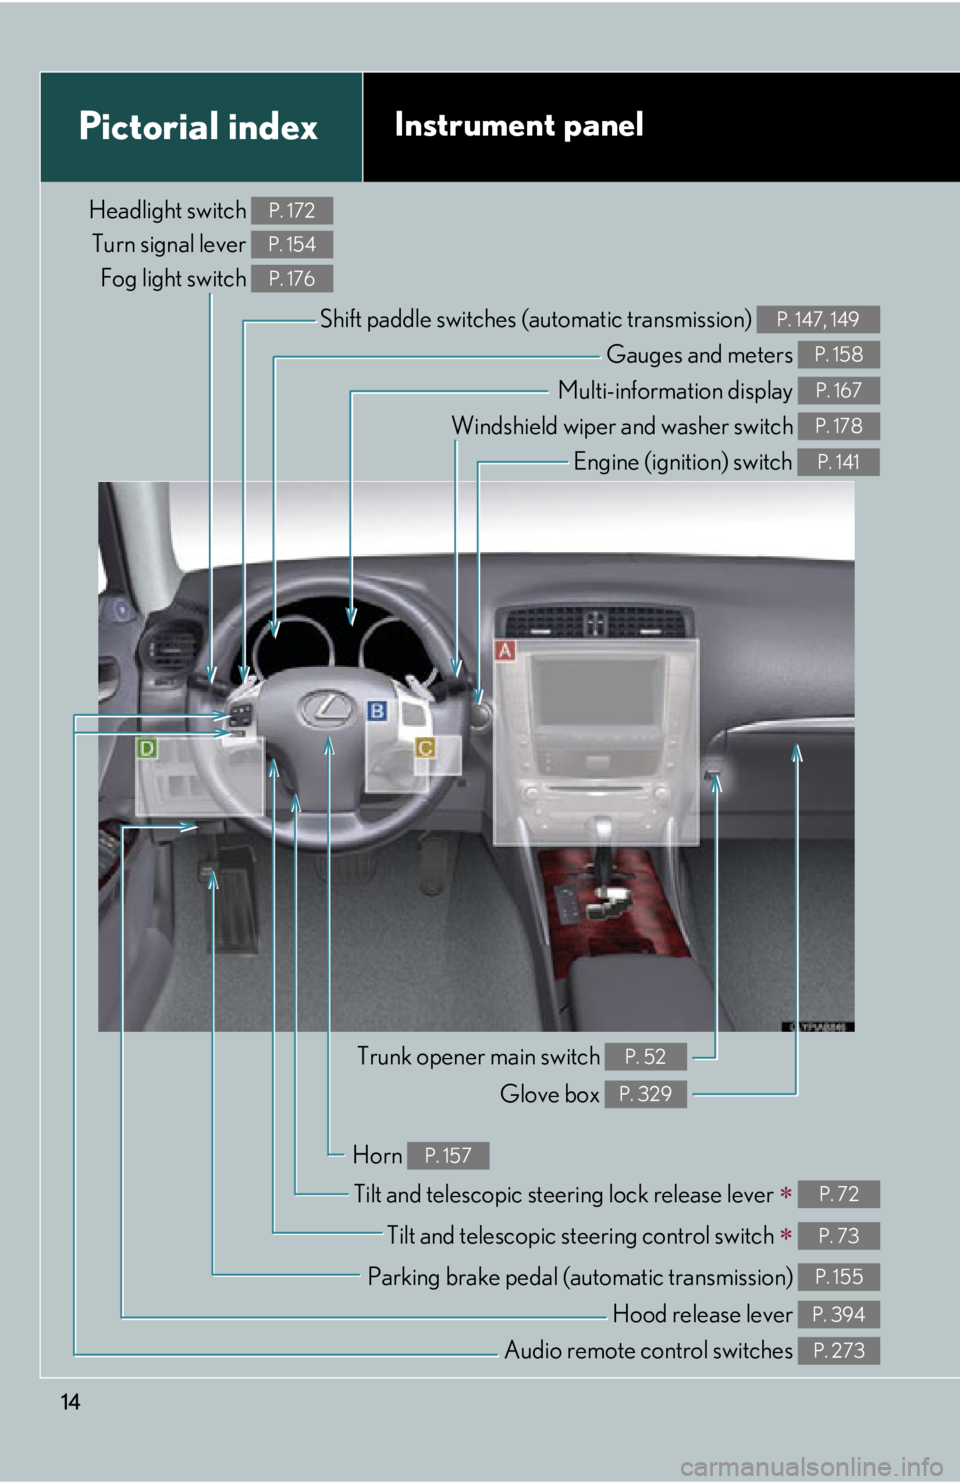
Pictorial indexInstrument panel
Headlight switch Turn signal lever Fog light switch P. 172
P. 154
P. 176
Shift paddle switches (a utomatic transmission) P. 147, 149
Gauges and meters P. 158
Multi-information display P. 167
Windshield wiper and washer switch P. 178
Engine (ignition) switch P. 141
Trunk opener main switch P. 52
Glove box P. 329
Tilt and telescopic steering lock release lever P. 72
Tilt and telescopic steering control switch P. 73
Parking brake pedal (automatic transmission) P. 155
Audio remote control switches P. 273
Horn P. 157
Hood release lever P. 394
Page 20 of 592

20
Installation of a mobile two-way radio system
The installation of a mobile two-way radio system in your vehicle could affect elec-
tronic systems such as:
●Multiport fuel injection system/sequential multiport fuel injection system
●Cruise control system
●Anti-lock brake system
●SRS airbag system
●Seat belt pretensioner system
Be sure to check with your Lexus dealer for precautionary measures or special
instructions regarding installation of a mobile two-way radio system.
Scrapping of your Lexus
The SRS airbag and seat belt pretensioner devices in your Lexus contain explosive
chemicals. If the vehicle is scrapped with the airbags and seat belt pretensioners left
as they are, this may cause an accident such as fire. Be sure to have the systems of
the SRS airbag and seat belt pretensioner removed and disposed of by a qualified
service shop or by your Lexus deal er before you scrap your vehicle.
Perchlorate Material
Special handling may apply, See www.dtsc.ca.gov/hazardouswaste/perchlorate.
Your vehicle has components that may contain perchlorate. These components may
include airbag, seat belt pretensioners, and wireless remote control batteries.
Page 21 of 592

21
Vehicle control and operation data recording
Your Lexus is equipped with sophisticated computers that record certain informa-
tion about your vehicle’s operation, such as:
•Engine speed
• Accelerator status
•Brake status
•Vehicle speed
• Shift position (except manual transmission)
The data recorded varies according to the grade level and options the vehicle is
equipped with. The computers do not record conversations, sound or pictures.
●Data usage
Lexus may use the data recorded in these computers to diagnose malfunctions,
conduct research and development, and improve quality.
Lexus will not disclose the recorded data to a third party except:
• With the consent of the vehicle owner or with the consent of the lessee if the
vehicle is leased
• In response to an official request by the police, a court of law or a government
agency
• For research purposes where the data is not tied to a specific vehicle or vehicle owner
Page 22 of 592

22
●Event data recorder
Your vehicle has computers that monitor and control certain aspects of your vehi-
cle. These computers assist in driving an d maintaining optimal vehicle performance.
Besides storing data useful for troublesh ooting, there is an event data recorder
(EDR) that records data in a crash or near crash event.
The SRS airbag sensor assembly contains the EDR. In a crash or near crash event,
this device may record the following information:
•Engine speed
• Whether the brake pedal was depressed or not
• Vehicle speed
• To what extent the accelerator pedal was depressed
• The transmission shift position
• Whether the driver and front passenger wore seat belts or not
• Driver’s seat position
• SRS airbag deployment data
• SRS airbag system diagnostic data
• Front passenger’s occupant classification
The information above is intended to be used for the purpose of improving vehicle
safety performance. Unlike general data recorders, the EDR does not record sound
data such as conversation between passengers.
Page 59 of 592
59
1-3. Adjustable components (seats, mirrors, steering wheel)
1
Before driving
Linking driving position memory with door unlock operationRecord your driving position to butto n “1”, “2” or “3” before performing
the following.
Carry only the key (including the card key
) to which you want to link the
driving position. If 2 or more keys are in the vehi cle, the driving position
cannot be linked properly.
: If equipped
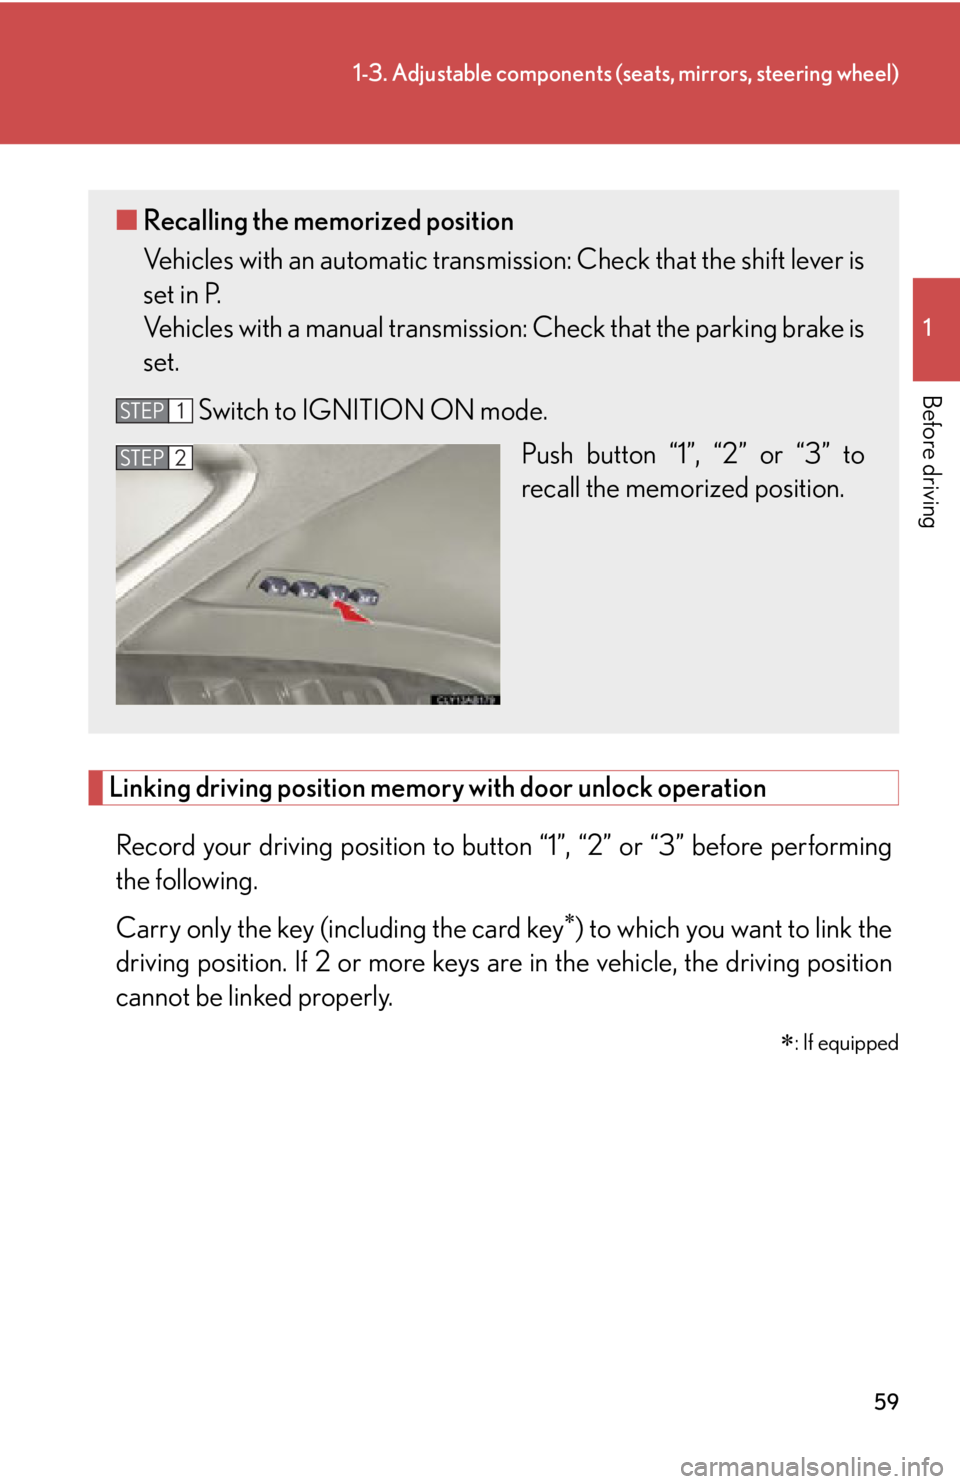
■Recalling the memorized position
Vehicles with an automatic transmis sion: Check that the shift lever is
set in P.
Vehicles with a manual transmissi on: Check that the parking brake is
set.
Switch to IGNITION ON mode. Push button “1”, “2” or “3” to
recall the memorized position.
STEP1
STEP2
Page 129 of 592
When driving2
129
2-1. Driving proceduresDriving the vehicle.................. 130
Engine (ignition) switch .......... 141
Automatic transmission ........ 146
Manual transmission .............. 152
Turn signal lever ....................... 154
Parking brake ........................... 155
Horn ............................................ 157
2-2. Instrument cluster Gauges and meters ................ 158
Indicators and warning lights ......................................... 164
Multi-information display ..... 167
2-3. Operating the lights and windshield wipers
Headlight switch...................... 172
Fog light switch ......................... 176
Windshield wipers and washer ..................................... 178
Headlight cleaner switch...... 185 2-4. Using other driving
systems
Cruise control.......................... 186
Intuitive parking assist ........... 190
Driving assist systems ............ 196
2-5. Driving information Cargo and luggage ............... 202
Vehicle load limits .................. 205
Winter driving tips ................. 206
Trailer towing ........................... 210
Dinghy towing (vehicles with an
automatic transmission)...... 211
Dinghy towing (vehicles with a
manual transmission) .......... 212
Page 130 of 592
130
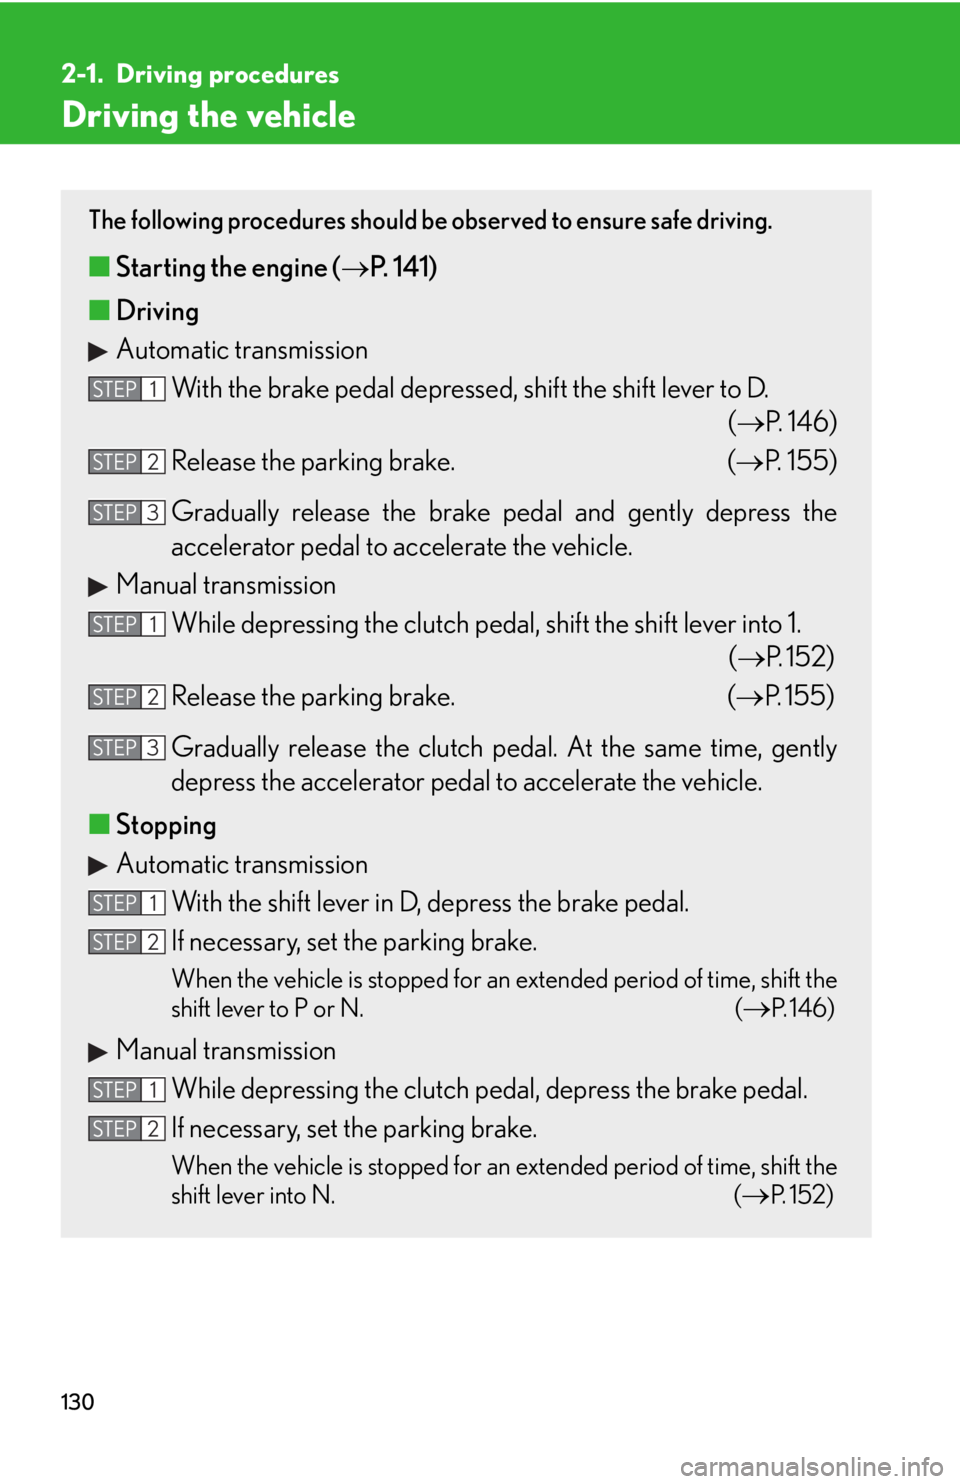
2-1. Driving procedures
Driving the vehicle
The following procedures should be observed to ensure safe driving.
■Starting the engine ( P. 141)
■ Driving
Automatic transmission
With the brake pedal depressed, shift the shift lever to D. (P. 146)
Release the parking brake. ( P. 155)
Gradually release the brake pedal and gently depress the
accelerator pedal to accelerate the vehicle.
Manual transmission
While depressing the clutch pedal, shift the shift lever into 1. (P. 1 5 2 )
Release the parking brake. ( P. 155)
Gradually release the clutch pedal. At the same time, gently
depress the accelerator pedal to accelerate the vehicle.
■ Stopping
Automatic transmission
With the shift lever in D, depress the brake pedal.
If necessary, set the parking brake.
When the vehicle is stopped for an extended period of time, shift the
shift lever to P or N. (
P. 1 4 6 )
Manual transmissionWhile depressing the clutch pedal, depress the brake pedal.
If necessary, set the parking brake.
When the vehicle is stopped for an extended period of time, shift the
shift lever into N. (
P. 1 5 2 )
STEP1
STEP2
STEP3
STEP1
STEP2
STEP3
STEP1
STEP2
STEP1
STEP2
Page 131 of 592
131
2-1. Driving procedures
2
When driving
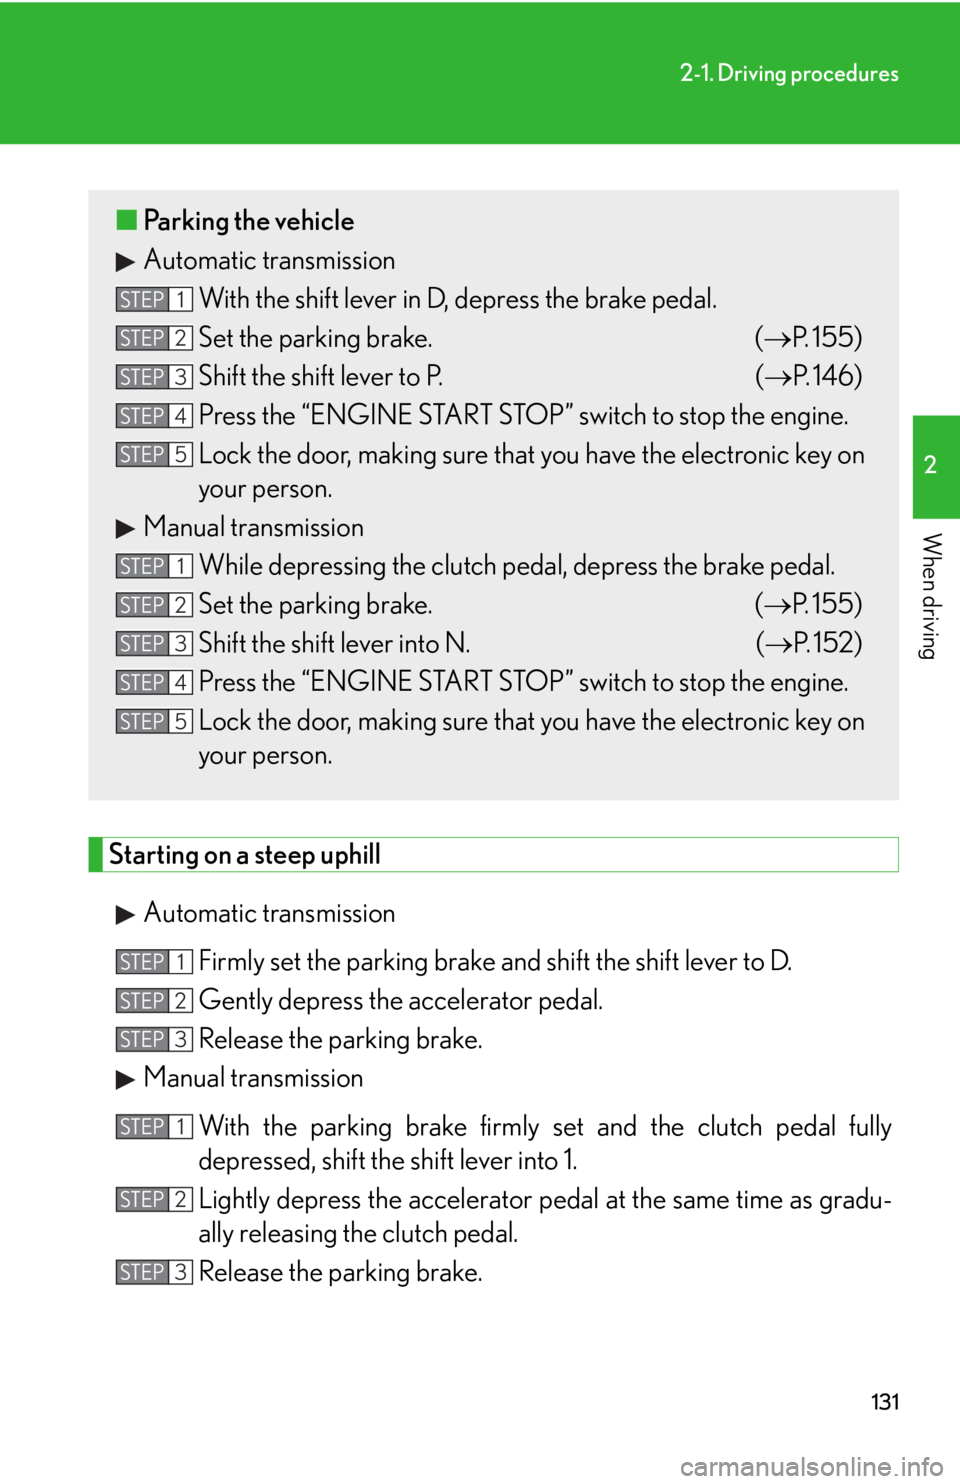
Starting on a steep uphillAutomatic transmission Firmly set the parking brake and shift the shift lever to D.
Gently depress the accelerator pedal.
Release the parking brake.
Manual transmission
With the parking brake firmly set and the clutch pedal fully
depressed, shift the shift lever into 1.
Lightly depress the accelerator pedal at the same time as gradu-
ally releasing the clutch pedal.
Release the parking brake.
■ Parking the vehicle
Automatic transmission
With the shift lever in D, depress the brake pedal.
Set the parking brake. ( P. 155)
Shift the shift lever to P. ( P. 146)
Press the “ENGINE START STOP” switch to stop the engine.
Lock the door, making sure that you have the electronic key on
your person.
Manual transmission While depressing the clutch pedal, depress the brake pedal.
Set the parking brake. ( P. 155)
Shift the shift lever into N. ( P. 1 5 2 )
Press the “ENGINE START STOP” switch to stop the engine.
Lock the door, making sure that you have the electronic key on
your person.
STEP1
STEP2
STEP3
STEP4
STEP5
STEP1
STEP2
STEP3
STEP4
STEP5
STEP1
STEP2
STEP3
STEP1
STEP2
STEP3