buttons Lexus IS250C 2010 Do-It-Yourself Maintenance / LEXUS 2010 IS350C/250C QUICK GUIDE OWNERS MANUAL (OM53738U)
[x] Cancel search | Manufacturer: LEXUS, Model Year: 2010, Model line: IS250C, Model: Lexus IS250C 2010Pages: 98, PDF Size: 5.93 MB
Page 3 of 98
3
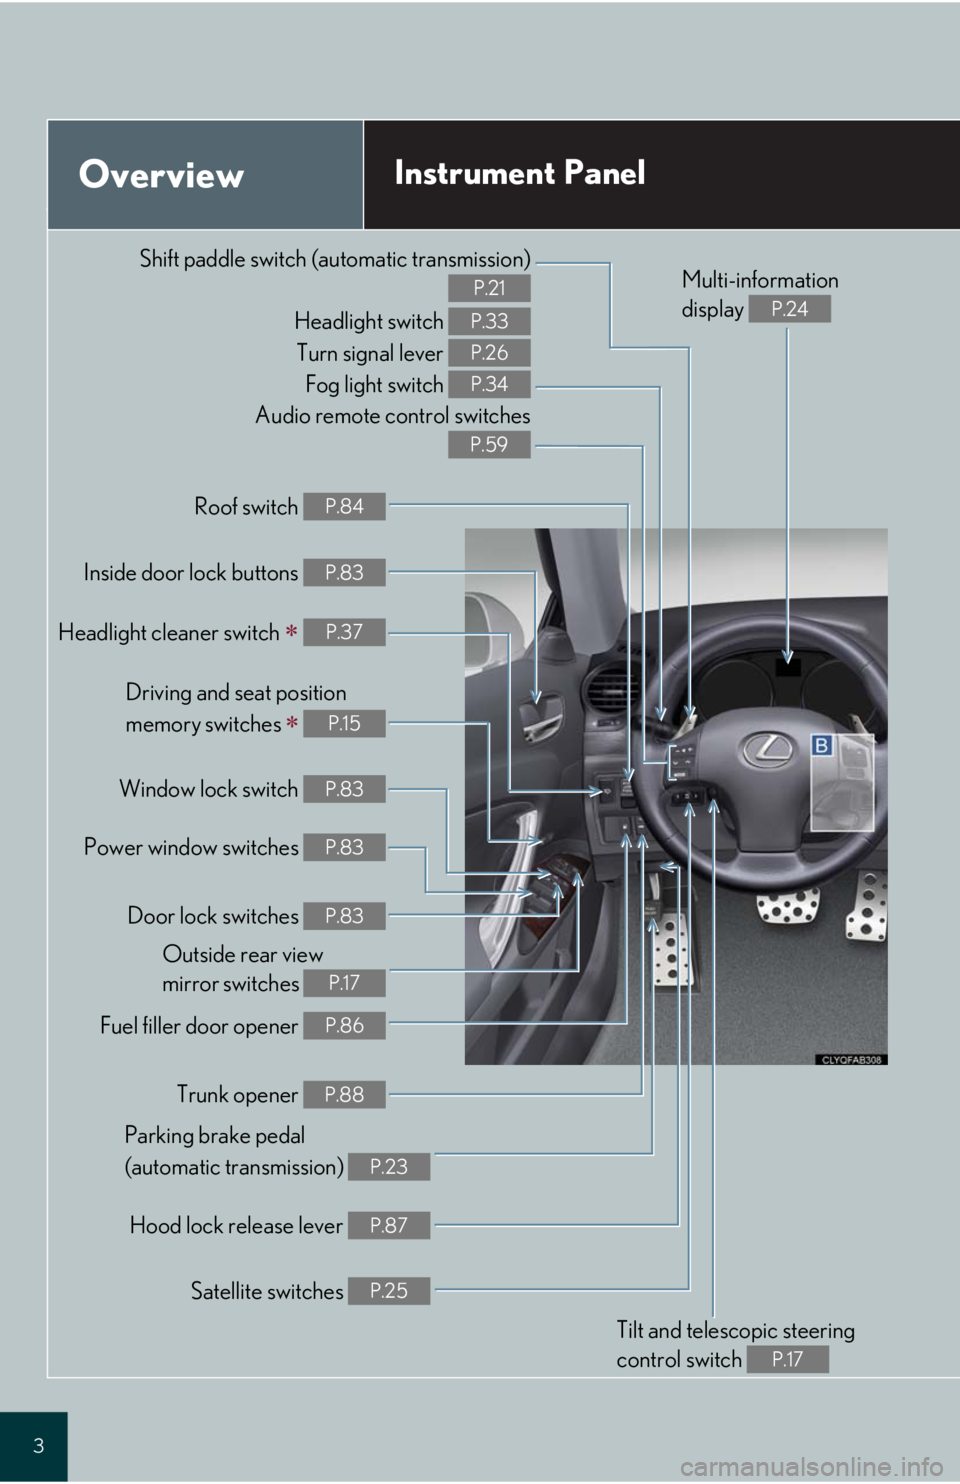
Audio remote control switches
P.59
OverviewInstrument Panel
Shift paddle switch (automatic transmission)
P.21
Headlight switch
Turn signal lever
Fog light switch P.33
P.26
P.34
Headlight cleaner switch P.37
Inside door lock buttons P.83
Fuel filler door opener P.86
Driving and seat position
memory switches
P.15
Power window switches P.83
Window lock switch P.83
Outside rear view
mirror switches
P.17
Trunk opener P.88
Hood lock release lever P.87
Parking brake pedal
(automatic transmission)
P.23
Tilt and telescopic steering
control switch
P.17
Multi-information
display
P.24
Door lock switches P.83
Roof switch P.84
Satellite switches P.25
Page 15 of 98
Topic 2
Before Driving
15
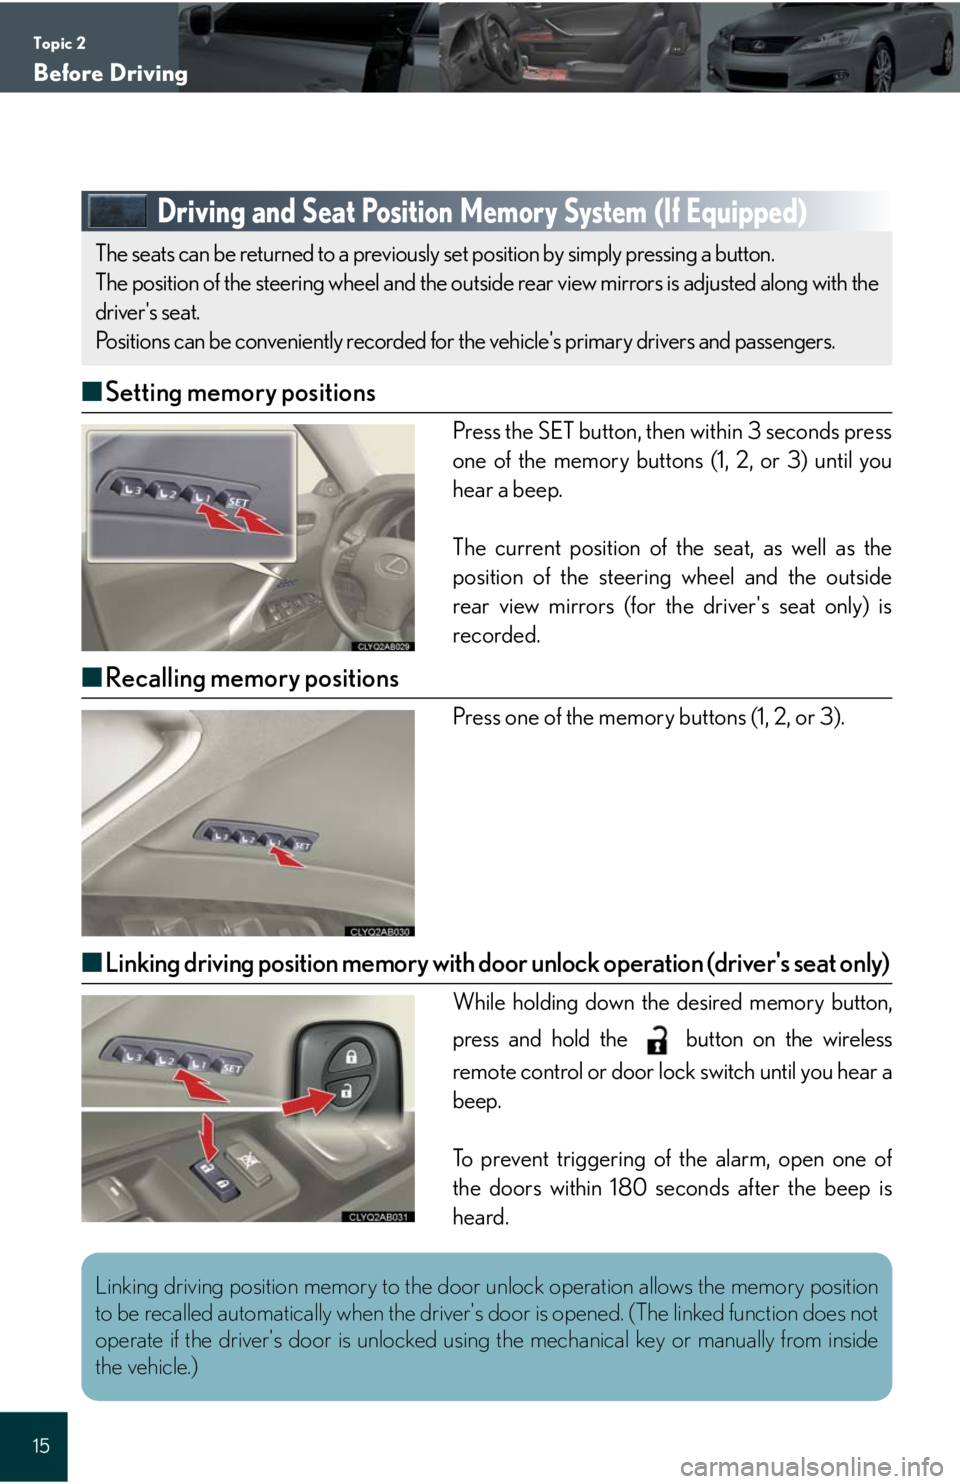
Driving and Seat Position Memory System (If Equipped)
■Setting memory positions
Press the SET button, then within 3 seconds press
one of the memory buttons (1, 2, or 3) until you
hear a beep.
The current position of the seat, as well as the
position of the steering wheel and the outside
rear view mirrors (for the driver's seat only) is
recorded.
■Recalling memory positions
Press one of the memory buttons (1, 2, or 3).
■Linking driving position memory with door unlock operation (driver's seat only)
While holding down the desired memory button,
press and hold the button on the wireless
remote control or door lock switch until you hear a
beep.
To prevent triggering of the alarm, open one of
the doors within 180 seconds after the beep is
heard.
The seats can be returned to a previously set position by simply pressing a button.
The position of the steering wheel and the outside rear view mirrors is adjusted along with the
driver's seat.
Positions can be conveniently recorded for the vehicle's primary drivers and passengers.
Linking driving position memory to the door unlock operation allows the memory position
to be recalled automatically when the driver's door is opened. (The linked function does not
operate if the driver's door is unlocked using the mechanical key or manually from inside
the vehicle.)
Page 56 of 98
Topic 5
Driving Comfort
56
Entering and Exiting
When Driving
Rain and
Night Driving
Driving ComfortDriving Comfort
Opening and Closing
What to do if ...
Customizing
Yo u r L e x u s
Before Driving
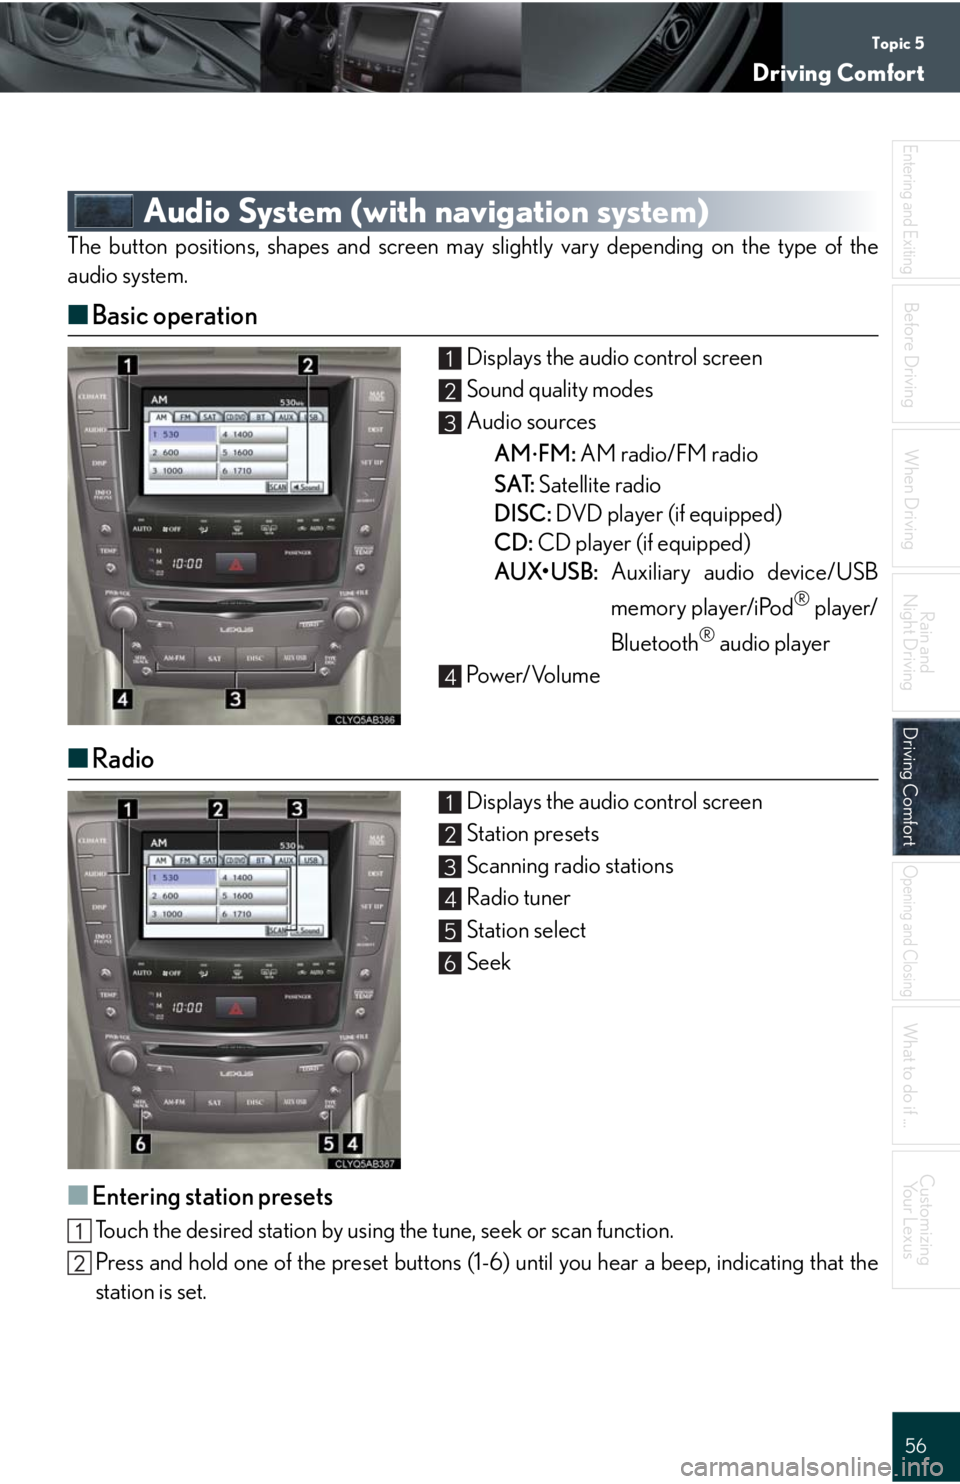
Audio System (with navigation system)
The button positions, shapes and screen may slightly vary depending on the type of the
audio system.
■Basic operation
Displays the audio control screen
Sound quality modes
Audio sources
AM
FM: AM radio/FM radio
SAT: Satellite radio
DISC: DVD player (if equipped)
CD: CD player (if equipped)
AUX•USB: Auxiliary audio device/USB
memory player/iPod
® player/
Bluetooth
® audio player
Pow e r/ Vo l u m e
■Radio
Displays the audio control screen
Station presets
Scanning radio stations
Radio tuner
Station select
Seek
■Entering station presets
Touch the desired station by using the tune, seek or scan function.
Press and hold one of the preset buttons (1-6) until you hear a beep, indicating that the
station is set.
1
2
3
4
1
2
3
4
5
6
Page 68 of 98
Topic 5
Driving Comfort
68
Entering and Exiting
When Driving
Rain and
Night Driving
Driving ComfortDriving Comfort
Opening and Closing
What to do if ...
Customizing
Yo u r L e x u s
Before Driving
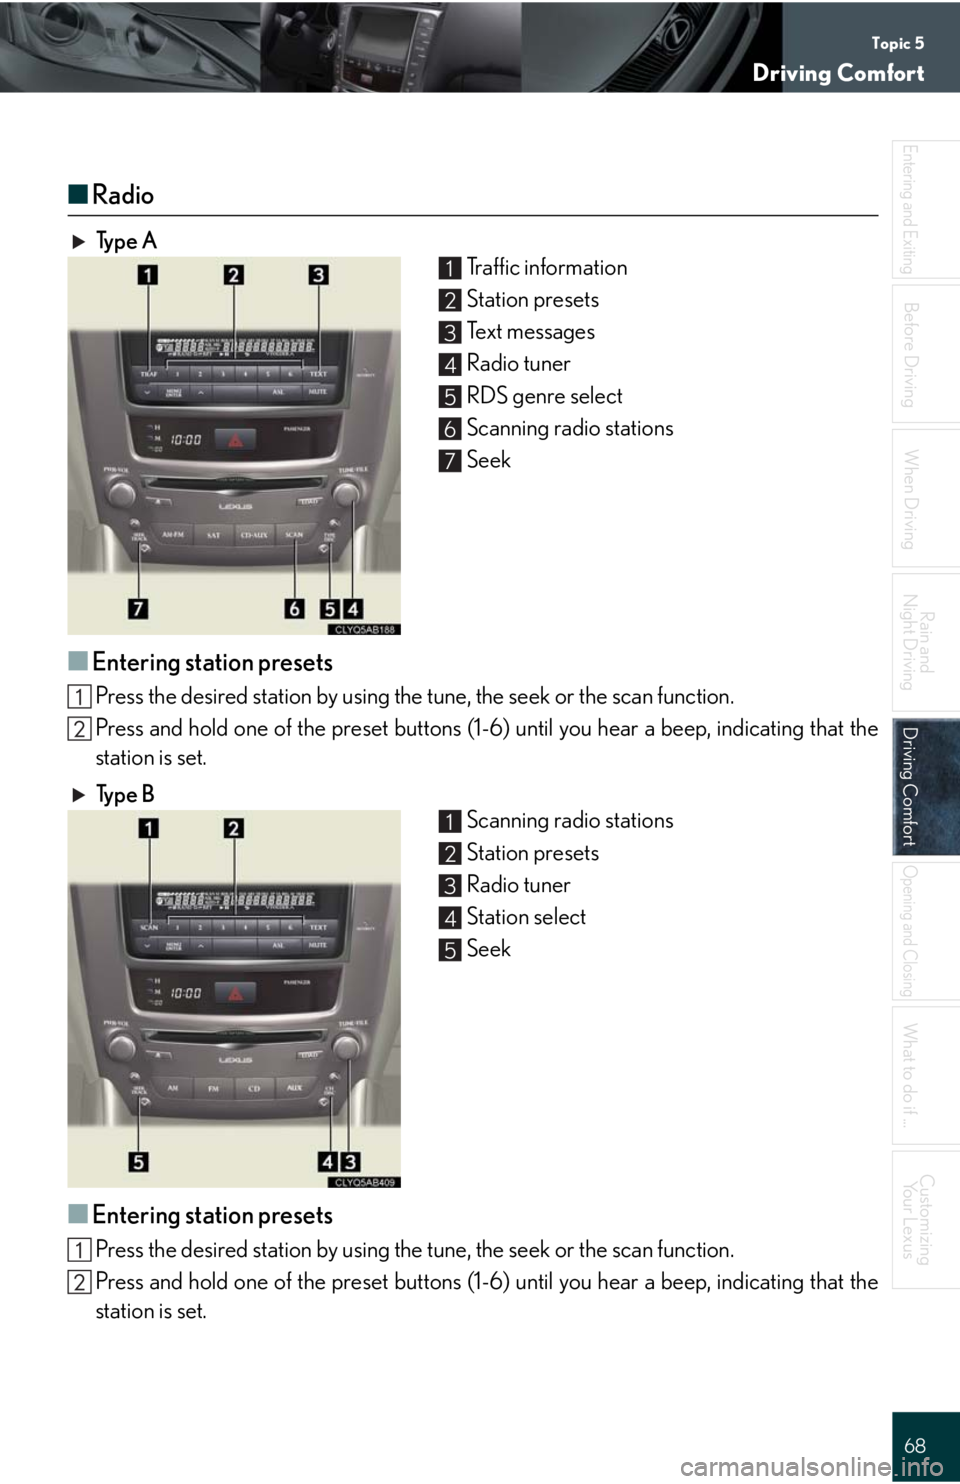
■Radio
Ty p e A
Traffic information
Station presets
Te x t m e s s a g e s
Radio tuner
RDS genre select
Scanning radio stations
Seek
■Entering station presets
Press the desired station by using the tune, the seek or the scan function.
Press and hold one of the preset buttons (1-6) until you hear a beep, indicating that the
station is set.
Ty p e B
Scanning radio stations
Station presets
Radio tuner
Station select
Seek
■Entering station presets
Press the desired station by using the tune, the seek or the scan function.
Press and hold one of the preset buttons (1-6) until you hear a beep, indicating that the
station is set.
1
2
3
4
5
6
7
1
2
3
4
5
Page 79 of 98
Topic 5
Driving Comfort
79
Garage Door Opener
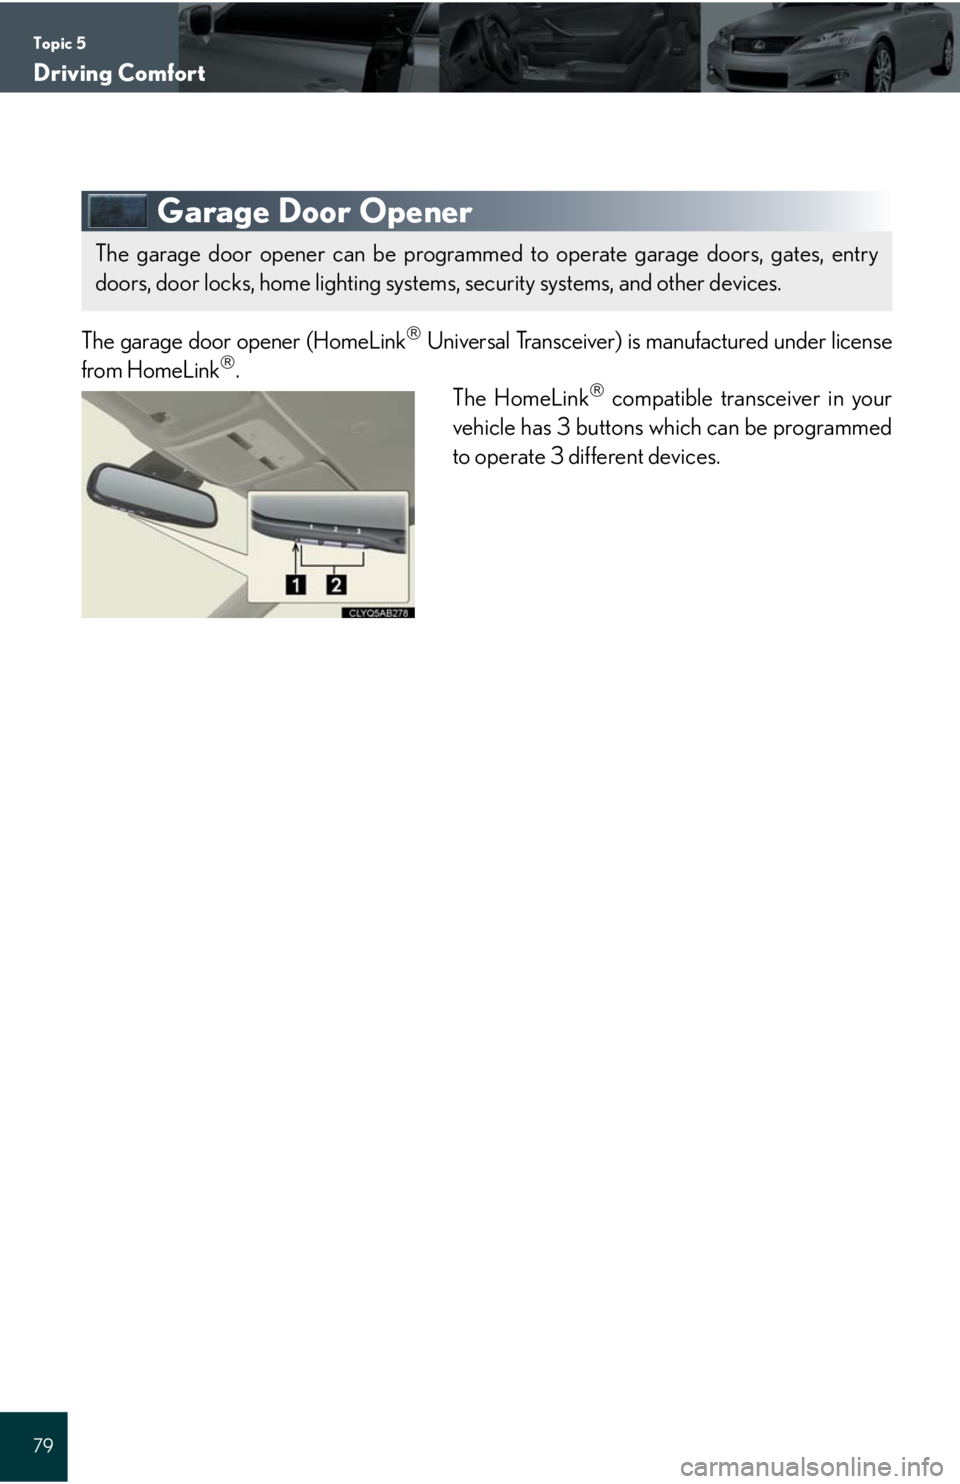
The garage door opener (HomeLink Universal Transceiver) is manufactured under license
from HomeLink.
The HomeLink compatible transceiver in your
vehicle has 3 buttons which can be programmed
to operate 3 different devices.
The garage door opener can be programmed to operate garage doors, gates, entry
doors, door locks, home lighting systems, security systems, and other devices.
Page 80 of 98
Topic 5
Driving Comfort
80
Entering and Exiting
When Driving
Rain and
Night Driving
Driving ComfortDriving Comfort
Opening and Closing
What to do if ...
Customizing
Yo u r L e x u s
Before Driving
■Programming HomeLink
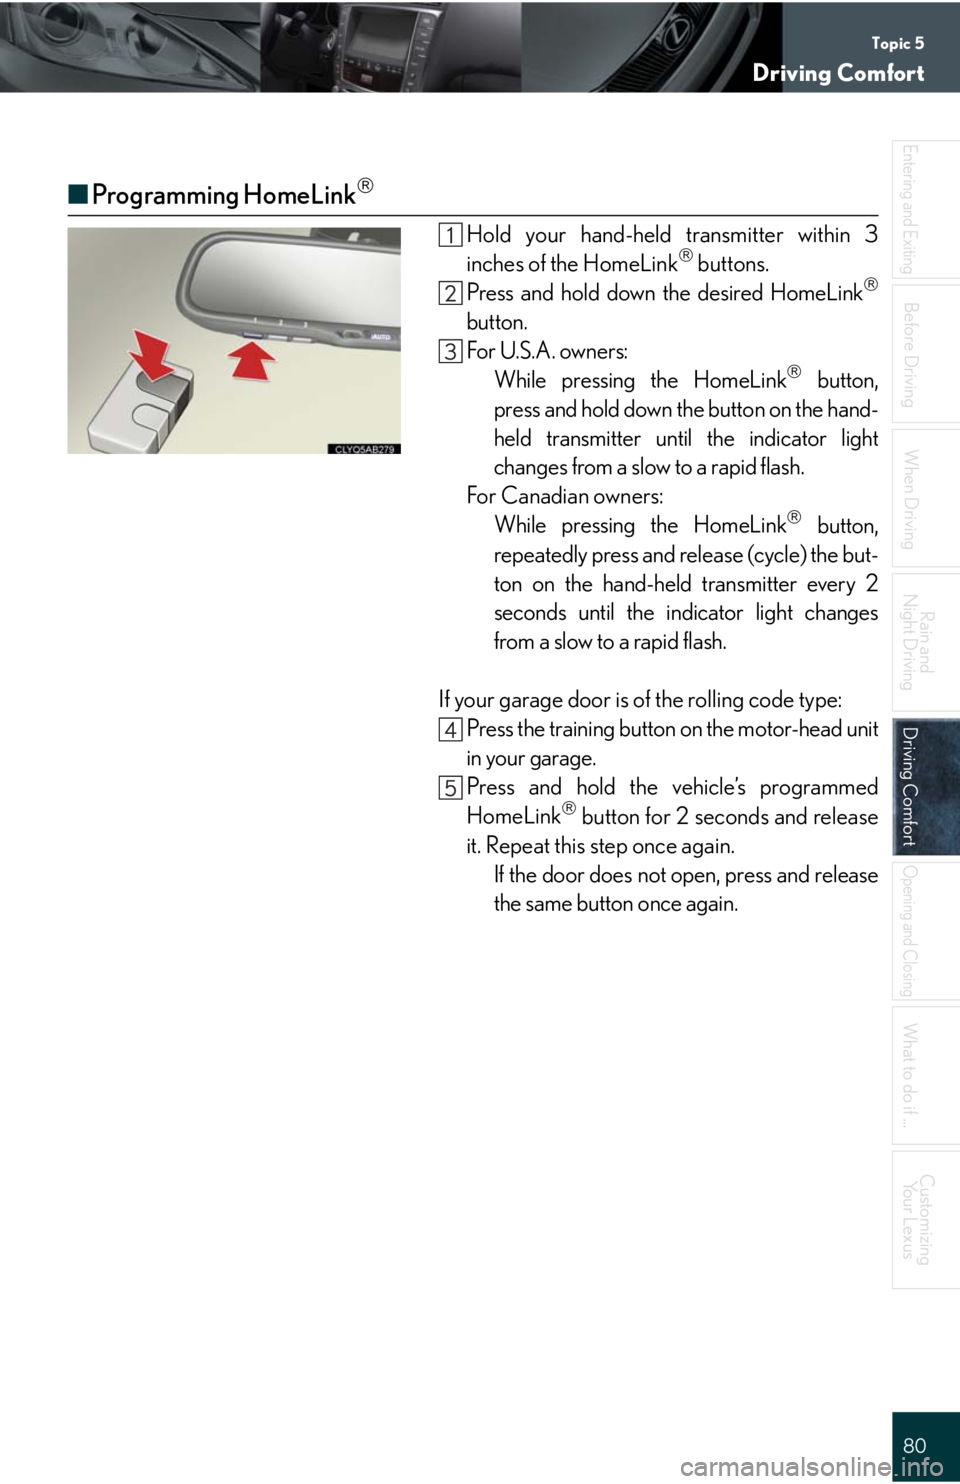
Hold your hand-held transmitter within 3
inches of the HomeLink buttons.
Press and hold down the desired HomeLink
button.
For U.S.A. owners:
While pressing the HomeLink
button,
press and hold down the button on the hand-
held transmitter until the indicator light
changes from a slow to a rapid flash.
For Canadian owners:
While pressing the HomeLink
button,
repeatedly press and release (cycle) the but-
ton on the hand-held transmitter every 2
seconds until the indicator light changes
from a slow to a rapid flash.
If your garage door is of the rolling code type:
Press the training button on the motor-head unit
in your garage.
Press and hold the vehicle’s programmed
HomeLink
button for 2 seconds and release
it. Repeat this step once again.
If the door does not open, press and release
the same button once again.