Lexus IS250C 2010 Owner's Manual
Manufacturer: LEXUS, Model Year: 2010, Model line: IS250C, Model: Lexus IS250C 2010Pages: 586, PDF Size: 31.62 MB
Page 331 of 586
330
3-4. Using the hands-free phone system (for mobile phones)
10_IS250C/350C_U
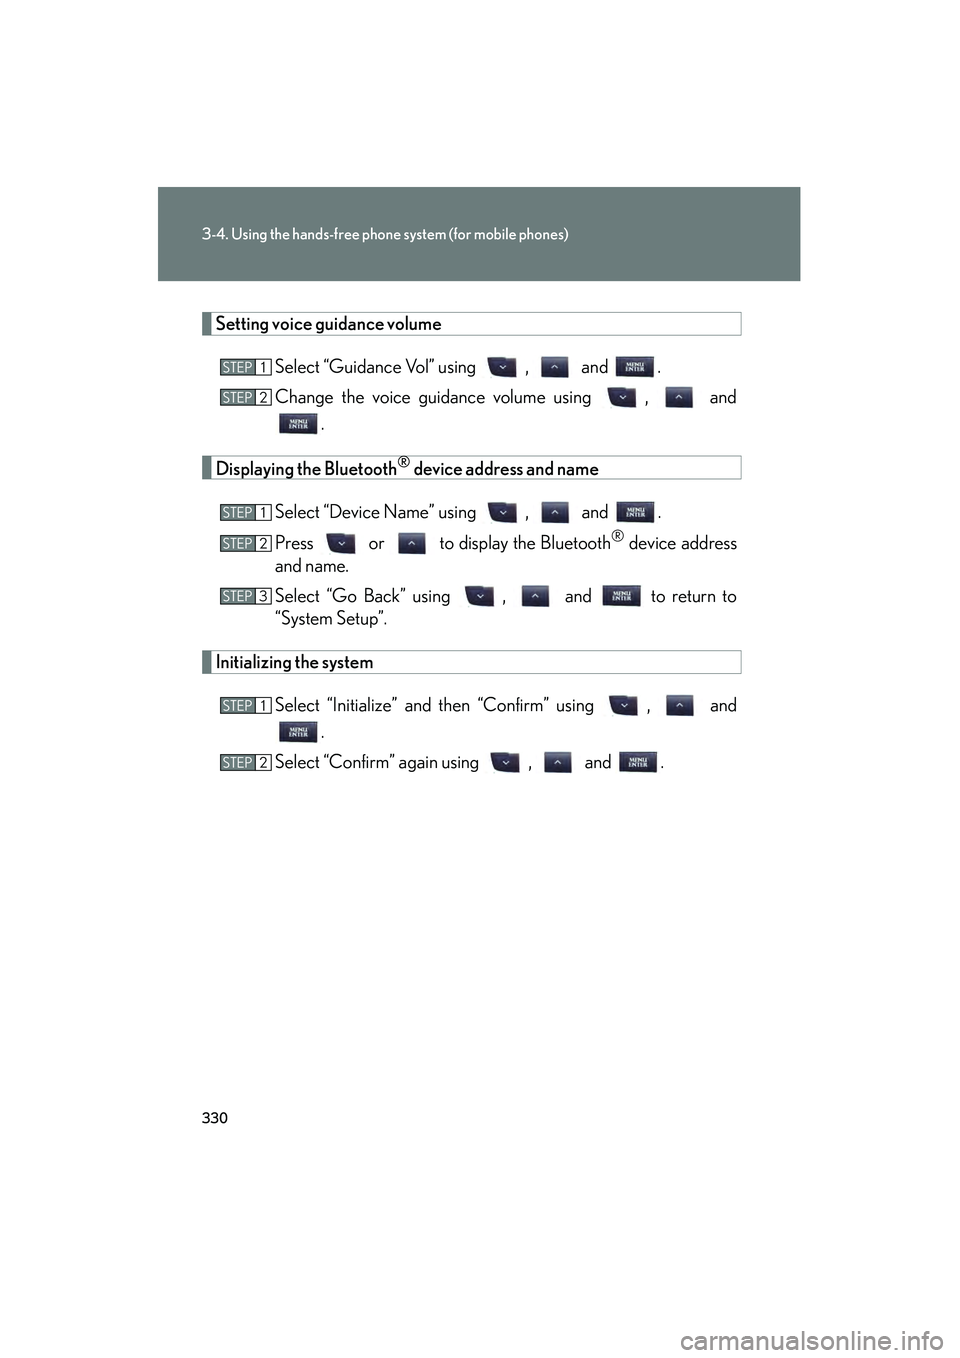
Setting voice guidance volumeSelect “Guidance Vol” using , and .
Change the voice guidance volume using , and.
Displaying the Bluetooth® device address and name
Select “Device Name” using , and .
Press or to display the Bluetooth
® device address
and name.
Select “Go Back” using , and to return to
“System Setup”.
Initializing the system
Select “Initialize” and then “Confirm” using , and.
Select “Confirm” again using , and .
STEP1
STEP2
STEP1
STEP2
STEP3
STEP1
STEP2
Page 332 of 586
331
3-4. Using the hands-free phone system (for mobile phones)
3
Interior features
10_IS250C/350C_U
■Initialization
●The following data in the system can be initialized:
• Phone book
• Outgoing and incoming call history
• Speed dials
• Registered mobile phone data
•Security code
• Registered Bluetooth
® enabled portable player data
• Passkey for the mobile phones
• Passkey for the Bluetooth
® audio players
•Guidance volume
• Receiver volume
•Ring tone volume
●Once the initialization has been completed, the data cannot be restored to its
original state.
■When the phone book is locked
The following functions cannot be used:
●Dialing by inputting a name
●Speed dialing
●Dialing a number stored in the call history memory
●Using the phone book
Page 333 of 586
332
3-4. Using the hands-free phone system (for mobile phones)
10_IS250C/350C_U
Using the phone book
Adding a new phone numberThe following methods can be used to add a new phone number:
● Inputting a phone number using a voice command
● Transferring data from the mobile phone
● Inputting a phone number using , and
● Selecting a phone number from outgoing or incoming call history
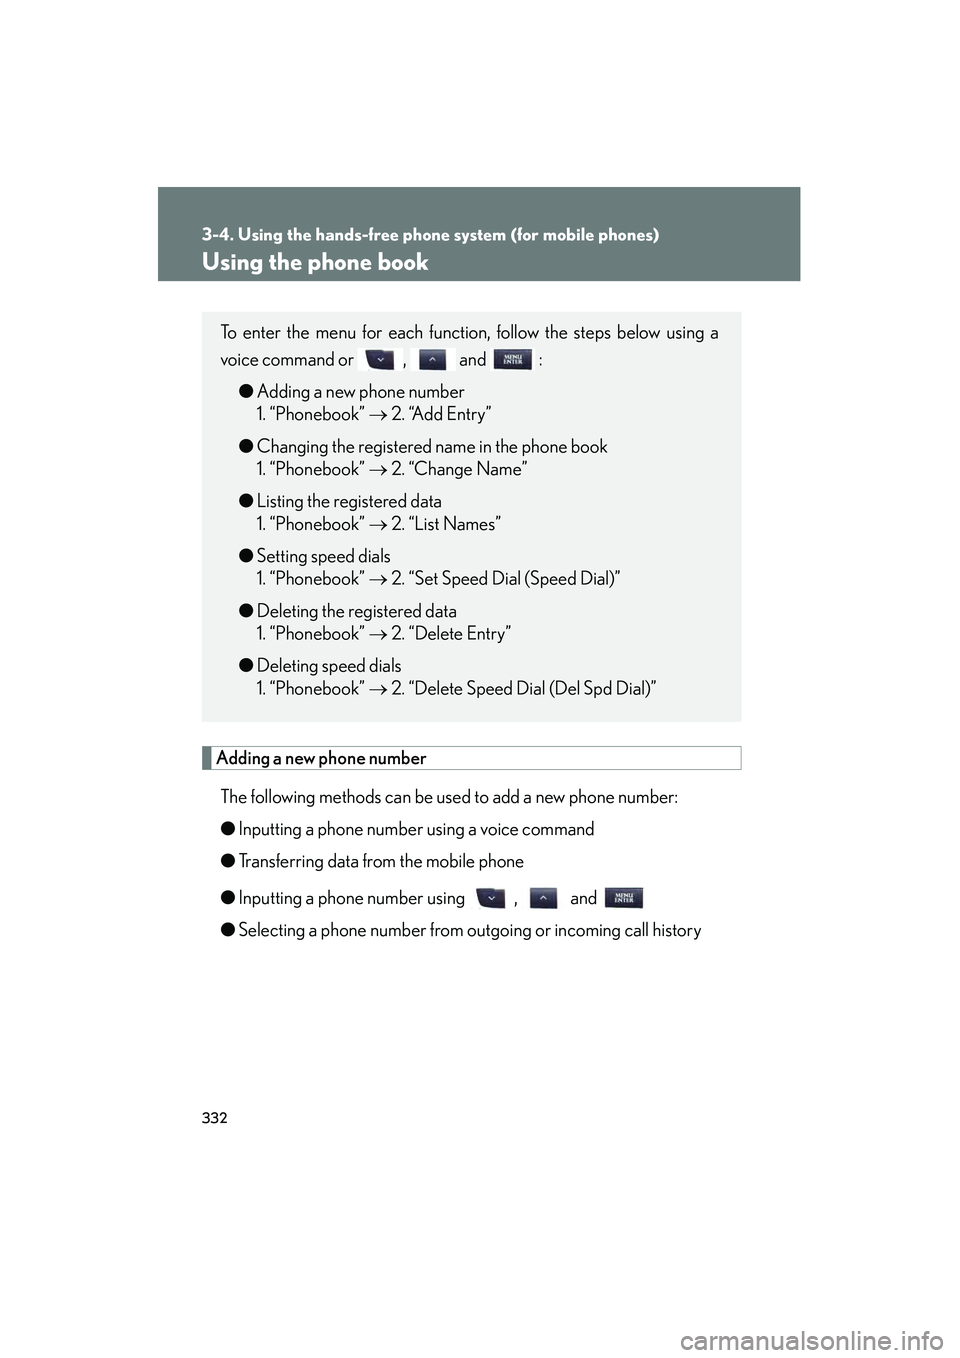
To enter the menu for each function, follow the steps below using a
voice command or , and :
● Adding a new phone number
1. “Phonebook” → 2. “Add Entry”
● Changing the registered name in the phone book
1. “Phonebook” → 2. “Change Name”
● Listing the registered data
1. “Phonebook” → 2. “List Names”
● Setting speed dials
1. “Phonebook” → 2. “Set Speed Dial (Speed Dial)”
● Deleting the registered data
1. “Phonebook” → 2. “Delete Entry”
● Deleting speed dials
1. “Phonebook” → 2. “Delete Speed Dial (Del Spd Dial)”
Page 334 of 586
333
3-4. Using the hands-free phone system (for mobile phones)
3
Interior features
10_IS250C/350C_U■
Adding procedure
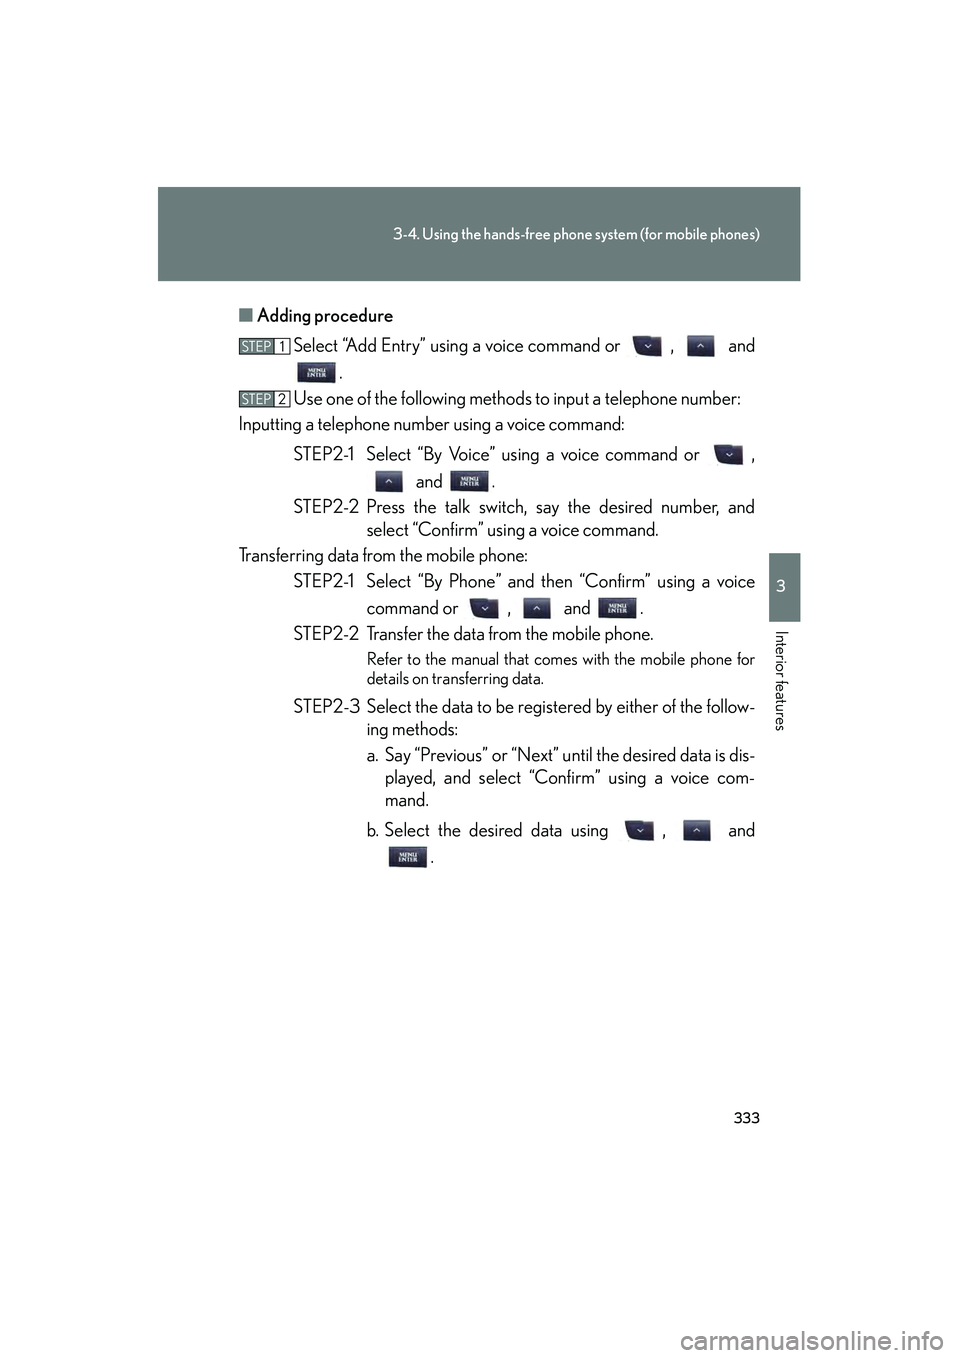
Select “Add Entry” using a voice command or , and .
Use one of the following methods to input a telephone number:
Inputting a telephone number using a voice command:
STEP2-1 Select “By Voice” using a voice command or , and .
STEP2-2 Press the talk switch, say the desired number, and select “Confirm” using a voice command.
Transferring data from the mobile phone: STEP2-1 Select “By Phone” and then “Confirm” using a voice
command or , and .
STEP2-2 Transfer the data from the mobile phone.
Refer to the manual that comes with the mobile phone for
details on transferring data.
STEP2-3 Select the data to be registered by either of the follow- ing methods:
a. Say “Previous” or “Next” until the desired data is dis-played, and select “Confirm” using a voice com-
mand.
b. Select the desired data using , and .
STEP1
STEP2
Page 335 of 586
334
3-4. Using the hands-free phone system (for mobile phones)
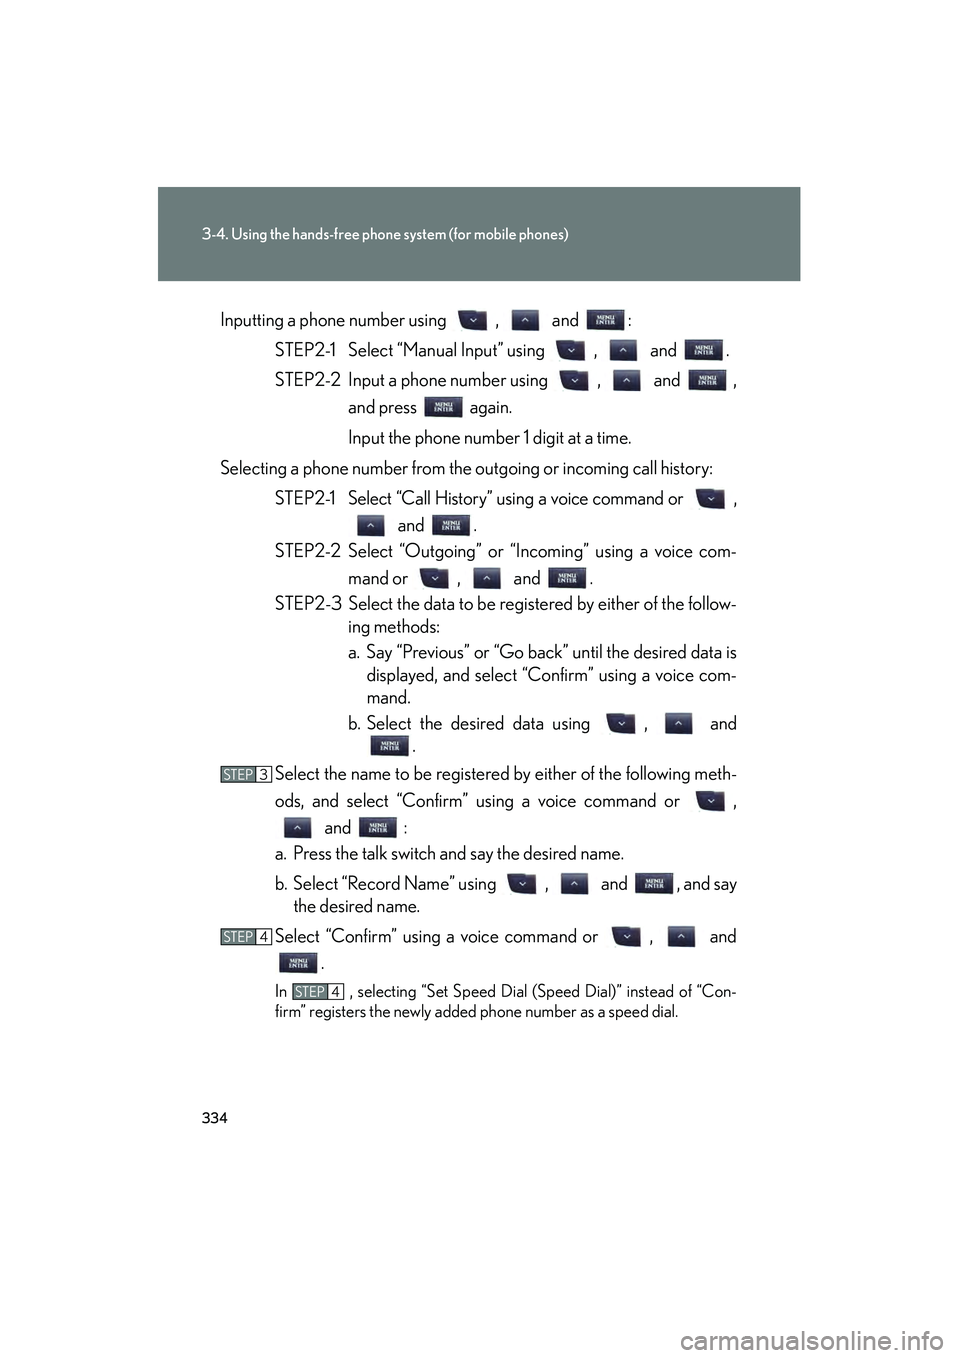
10_IS250C/350C_UInputting a phone number using , and :
STEP2-1 Select “Manual Input” using , and .
STEP2-2 Input a phone number using , and , and press again.
Input the phone number 1 digit at a time.
Selecting a phone number from the outgoing or incoming call history: STEP2-1 Select “Call History” using a voice command or , and .
STEP2-2 Select “Outgoing” or “Incoming” using a voice com-
mand or , and .
STEP2-3 Select the data to be registered by either of the follow- ing methods:
a. Say “Previous” or “Go back” until the desired data isdisplayed, and select “Confirm” using a voice com-
mand.
b. Select the desired data using , and .
Select the name to be registered by either of the following meth-
ods, and select “Confirm” using a voice command or , and :
a. Press the talk switch and say the desired name.
b. Select “Record Name” using , and , and say the desired name.
Select “Confirm” using a voice command or , and .
In , selecting “Set Speed Dial (Speed Dial)” instead of “Con-
firm” registers the newly added phone number as a speed dial.
STEP3
STEP4
STEP4
Page 336 of 586
335
3-4. Using the hands-free phone system (for mobile phones)
3
Interior features
10_IS250C/350C_U
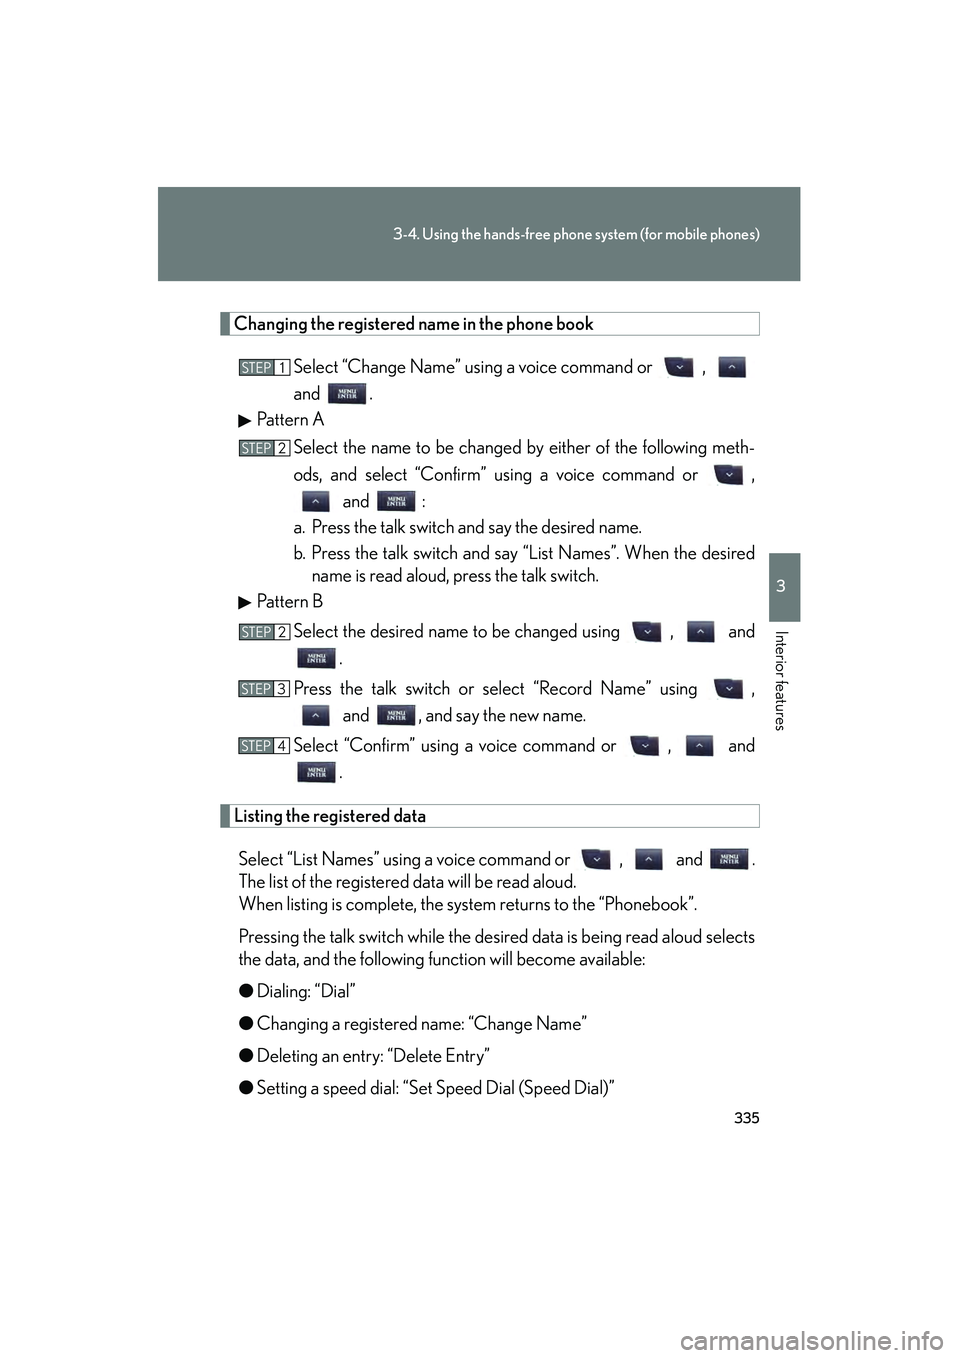
Changing the registered name in the phone bookSelect “Change Name” using a voice command or ,
and .
Pattern A
Select the name to be changed by either of the following meth-
ods, and select “Confirm” using a voice command or , and :
a. Press the talk switch and say the desired name.
b. Press the talk switch and say “List Names”. When the desired name is read aloud, press the talk switch.
Pattern B
Select the desired name to be changed using , and .
Press the talk switch or select “Record Name” using , and , and say the new name.
Select “Confirm” using a voice command or , and .
Listing the registered data
Select “List Names” using a voice command or , and .
The list of the registered data will be read aloud.
When listing is complete, the system returns to the “Phonebook”.
Pressing the talk switch while the desired data is being read aloud selects
the data, and the following function will become available:
● Dialing: “Dial”
● Changing a registered name: “Change Name”
● Deleting an entry: “Delete Entry”
● Setting a speed dial: “Set Speed Dial (Speed Dial)”
STEP1
STEP2
STEP2
STEP3
STEP4
Page 337 of 586

336
3-4. Using the hands-free phone system (for mobile phones)
10_IS250C/350C_U
Setting speed dialsSelect “Set Speed Dial (Speed Dial)” using a voice command or, and .
Pattern A
Select the data to be registered as a speed dial by either of the
following methods and select “Confirm” using a voice command
or , and :
a. Press the talk switch and say the desired name.
b. Press the talk switch and say “List Names”. When the desiredname is read aloud, press the talk switch.
Pattern B
Select the desired data using , and .
Select the desired preset button and register the data into speed
dial by either of the following methods:
a. Press the desired preset button and select “Confirm” by using avoice command or , and .
b. Press and hold the desired preset button.
STEP1
STEP2
STEP2
STEP3
Page 338 of 586

337
3-4. Using the hands-free phone system (for mobile phones)
3
Interior features
10_IS250C/350C_U
Deleting the registered dataSelect “Delete Entry” using a voice command or ,
and .
Pattern A
Select the data to be deleted by either of the following methods
and select “Confirm” using a voice command or ,
and :
a. Press the talk switch and say the name of the desired phonenumber.
b. Press the talk switch and say “List Names”. When the name of the desired phone number is read aloud, press the talk switch.
Pattern B
Select the desired data to be deleted using , and .
Deleting speed dials
Select “Delete Speed Dial (Del Spd Dial)” using a voice com-
mand or , and .
Press the preset button to which the desired speed dial is regis-
tered and select “Confirm” using a voice command or , and .
■Limitation of number of digits
A phone number that exceeds 24 digits cannot be registered.
STEP1
STEP2
STEP2
STEP1
STEP2
Page 339 of 586

338
10_IS250C/350C_U
3-5. Using the interior lights
Interior lights list
Your Lexus is equipped with the illuminated entry system to assist in enter-
ing the vehicle. Owing to the function of the system, the lights shown in the
following illustration automatically turn on/off according to the presence of
the electronic key, whether the door s are locked/unlocked, whether the
doors are opened/closed, and the “ENGINE START STOP” switch mode.
Personal lights (→P. 3 3 9 )
Interior light ( →P. 3 3 9 )
Shift lever light (when “ENGINE START STOP” switch is in
ACCESSORY or IGNITION ON mode)
Door courtesy lights
Scuff lights (if equipped)
Front foot well lights
Outer foot lights
Turning the instrument panel light control knob fully to the left disables the
shift lever light and front foot well lights.
Page 340 of 586

339
3-5. Using the interior lights
3
Interior features
10_IS250C/350C_U
Interior lightDoor position on/off
On/off
Personal lights
On/off
■To prevent the battery from being discharged
If the interior light remain on when the d oor is not fully closed and the interior light
switch (door position on/off) is on, the lights will go off automatically after 20 min-
utes.
■Customization that can be configured at Lexus dealer
Setting (e.g. The time elapsed before lights turn off) can be changed.
(Customizable features
→P. 557)
Interior light and personal lights