ECO mode Lexus IS250C 2012 Instrument cluster / LEXUS 2012 IS250C,IS350C (OM53A62U) Owner's Manual
[x] Cancel search | Manufacturer: LEXUS, Model Year: 2012, Model line: IS250C, Model: Lexus IS250C 2012Pages: 632, PDF Size: 6.77 MB
Page 192 of 632

192
2-3. Operating the lights and windshield wipers
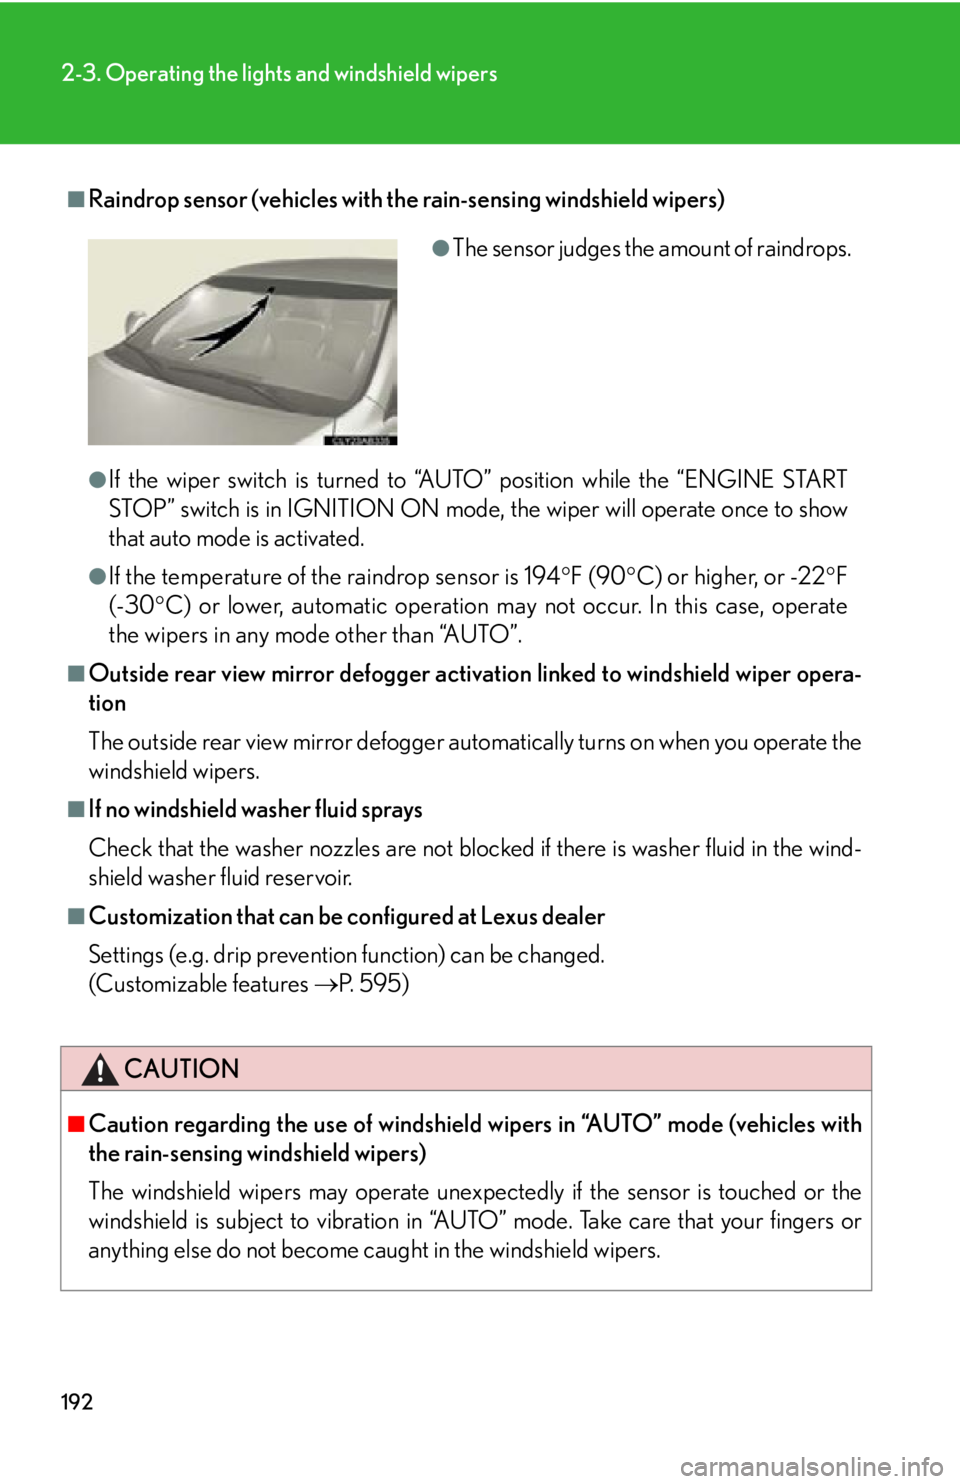
■Raindrop sensor (vehicles with the rain-sensing windshield wipers)
●If the wiper switch is turned to “AUTO” position while the “ENGINE START
STOP” switch is in IGNITION ON mode, the wiper will operate once to show
that auto mode is activated.
●If the temperature of the raindrop sensor is 194 F (90 C) or higher, or -22 F
(-30 C) or lower, automatic operation may not occur. In this case, operate
the wipers in any mode other than “AUTO”.
■Outside rear view mirror defogger activa tion linked to windshield wiper opera-
tion
The outside rear view mirror defogger au tomatically turns on when you operate the
windshield wipers.
■If no windshield washer fluid sprays
Check that the washer nozzles are not blocked if there is washer fluid in the wind-
shield washer fluid reservoir.
■Customization that can be configured at Lexus dealer
Settings (e.g. drip prevention function) can be changed.
(Customizable features P. 5 9 5 )
CAUTION
■Caution regarding the use of windshield wipers in “AUTO” mode (vehicles with
the rain-sensing windshield wipers)
The windshield wipers may operate unexpect edly if the sensor is touched or the
windshield is subject to vibration in “AUTO” mode. Take care that your fingers or
anything else do not become caught in the windshield wipers.
●The sensor judges the amount of raindrops.
Page 200 of 632

200
2-4. Using other driving systems
■Setting the vehicle speed (vehicle-to-vehicle distance control
mode)
Press the “ON-OFF” button to
activate the cruise control.
Cruise control indicator will
come on.
Press the button again to deacti-
vate the cruise control.
Accelerate or decelerate the
vehicle to the desired speed,
and push the lever down to set
the speed.
The vehicle speed at the
moment the lever is released
becomes the set speed.
STEP1
STEP2
Page 201 of 632

201
2-4. Using other driving systems
2
When driving
■Adjusting the set speed
To change the set speed, operate the lever until the desired set
speed is displayed.
Increases the speed
Decreases the speed
Fine adjustment: Momentarily
move the lever in the desired
direction.
Large adjustment: Hold the
lever in the desired direction.
In the vehicle-to-vehicle distance control mode, the set speed will be
increased or decreased as follows:
• When the set speed is shown in “MPH” Fine adjustment: By approximately 5 mph (8 km/h) each time the lever
is operated
Large adjustment: By approximately 5 mph (8 km/h) for each 0.75
seconds the lever is held
• When the set speed is shown in “km/h” Fine adjustment: By approximately 3.1 mph (5 km/h) each time the
lever is operated
Large adjustment: By approximately 3.1 mph (5 km/h) for each 0.75
seconds the lever is held
In the constant speed control mode ( P. 206), the set speed will be
increased or decreased as follows:
Fine adjustment: By approximately 1 mph (1.6 km/h) each time the lever is
operated
Large adjustment: The set speed can be increased or decreased continu-
ally until the lever is released.
Page 206 of 632

206
2-4. Using other driving systems
Selecting conventional constant speed control modeConstant speed control mode differs from vehicle-to-vehicle distance
control mode. When constant speed control mode is selected, your vehi-
cle will maintain a set speed regardless of whether or not there are other
vehicles in the lane ahead.
Press the “ON-OFF” button to
activate the cruise control.
Cruise control indicator will come
on.
Press the button again to deacti-
vate the cruise control.
Switch to constant speed con-
trol mode.
(Push the lever forward and
hold for approximately one sec-
ond.)
When in constant speed control
mode, to return to vehicle-to-vehi-
cle distance control mode, push
the lever forward again and hold
for approximately 1 second.
After the desired speed has been
set, it is not possible to return to
vehicle-to-vehicle distance control
mode.
If the “ENGINE START STOP”
switch is turned off and then turned
to IGNITION ON mode again, the
vehicle will automatically return to
vehicle-to-vehicle distance control
mode.
Page 244 of 632

244
2-5. Driving information
Dinghy towing (vehicles with a manual transmission)
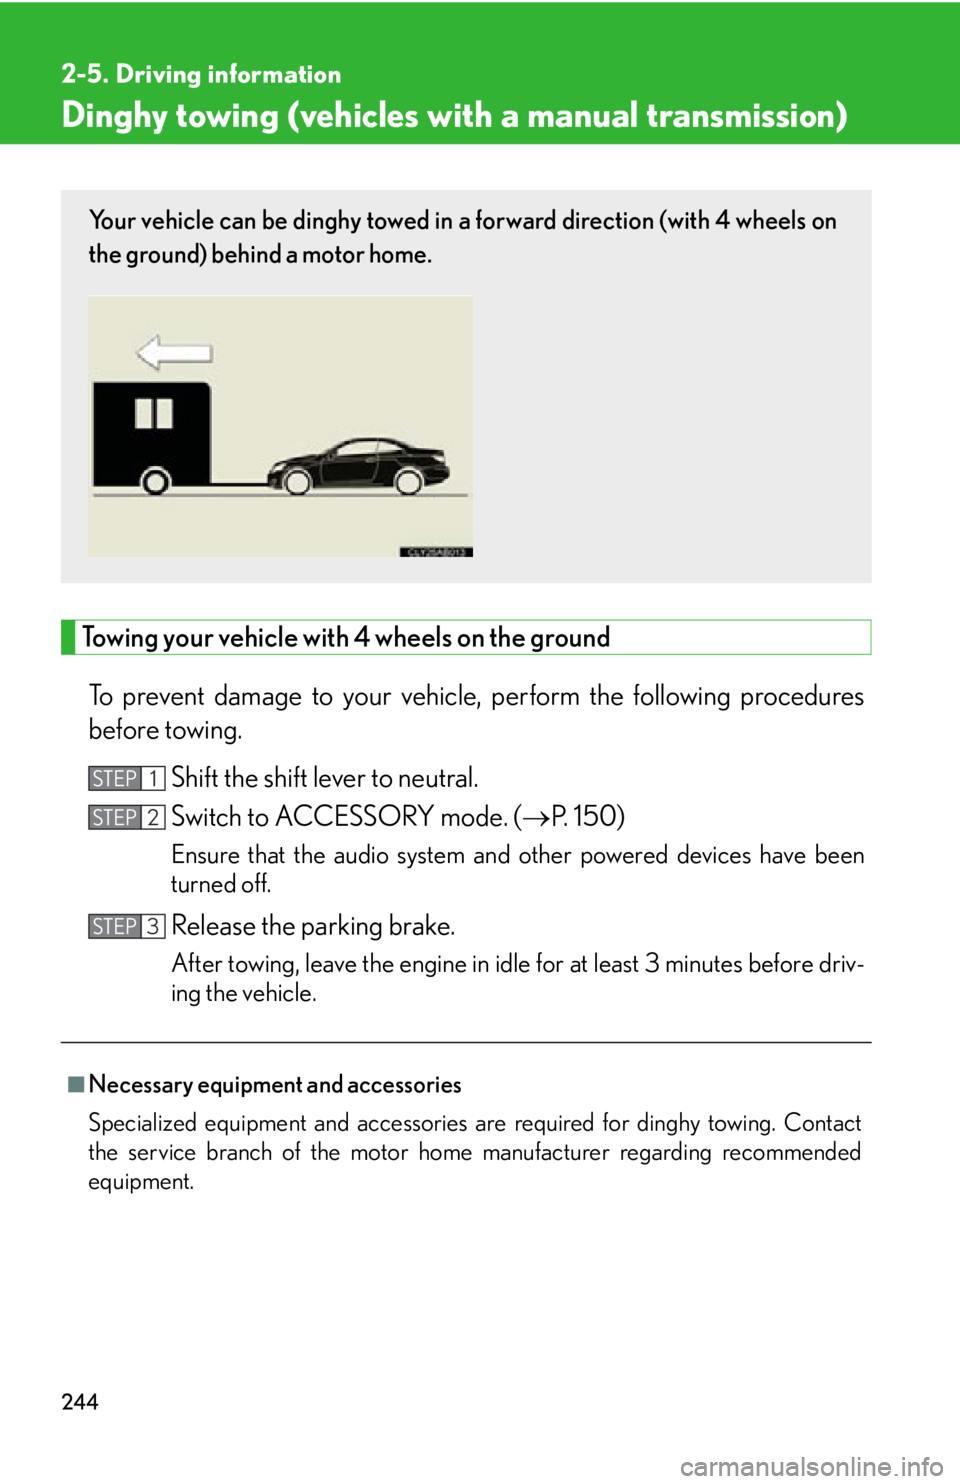
Towing your vehicle with 4 wheels on the groundTo prevent damage to your vehicle, perform the following procedures
before towing. Shift the shift lever to neutral.
Switch to ACCESSORY mode. ( P. 150)
Ensure that the audio system and other powered devices have been
turned off.
Release the parking brake.
After towing, leave the engine in idle for at least 3 minutes before driv-
ing the vehicle.
■Necessary equipment and accessories
Specialized equipment and accessories are required for dinghy towing. Contact
the service branch of the motor home manufacturer regarding recommended
equipment.
Your vehicle can be dinghy towed in a forward direction (with 4 wheels on
the ground) behind a motor home.
STEP1
STEP2
STEP3
Page 255 of 632

255
3-1. Using the air conditioning system and defogger
3
Interior features
■When the indicator light on flashes
Press and turn off the air conditioning system before turning it on once
more. There may be a problem in the air conditioning system if the indicator light
continues to flash. Turn the air conditioning system off and have it inspected by your
Lexus dealer.
■Automatic mode for air intake control (IS350C only)
In automatic mode, the system detects exhaust gas and other pollutants and auto-
matically switches between outside air and recirculated air modes. When the
retractable hardtop is opened, recirculat ed air mode is automatically selected.
■Micro dust and pollen filter
●In order to prevent the window from fogging up when the outside air is cold, the
following may occur.
• Outside air mode does not switch to .
• The air conditioning system operates automatically.
• The operation cancels after 1 minute.
●In rainy weather, the windows may fog up. Press .
■Air conditioning odors
●During use, various odors from inside and outside the vehicle may enter into
and accumulate in the air conditioning sy stem. This may then cause odor to be
emitted from the vents.
●To reduce potential odors from occurring:
• It is recommended that the air conditioning system be set to outside air mode
prior to turning the vehicle off.
• The start timing of the blower may be delayed for a short period of time
immediately after the air conditioning system is started in automatic mode.
CAUTION
■To prevent the windshield from fogging up
Do not use during cool air operation in extremely humid weather. The dif-
ference between the temperature of the outside air and that of the windshield can
cause the outer surface of the windshield to fog up, blocking your vision.
Page 257 of 632

257
3-1. Using the air conditioning system and defogger
3
Interior features
Rear window and outside rear view mirror defoggers
■The defogger can be operated when
The “ENGINE START STOP” switch is in IGNITION ON mode.
■When the retractable hardtop is open
The rear window defogger is not operable. The indicator will come on if the outside
rear view mirror defoggers are used.
CAUTION
■When the outside rear view mirror defoggers are on
Do not touch the outside surface of the rear view mirror, as it can become very hot
and burn you.
These features are used to defog the rear window, and to remove rain-
drops, dew and frost from the outside rear view mirrors.
With navigation system
Owners of models equipped with a navigation system should refer to the
“Navigation System Owner's Manual”.
Without navigation system
On/off
The defoggers will automatically
turn off after 15 to 60 minutes.
The operation time changes
according to the ambient tem-
perature and vehicle speed.
Page 258 of 632

258
3-1. Using the air conditioning system and defogger
Windshield wiper de-icer
■The windshield wiper de-icer can be operated when
The “ENGINE START STOP” switch is in IGNITION ON mode.
CAUTION
■When the windshield wiper de-icer is on
The surface of the glass at the lower part and sides of the windshield become very
hot. To prevent burning yourself, do not touch these areas.
This feature is used to prevent ice fr om building up on the windshield and
wiper blades.
On/off
The windshield wiper de-icer
will automatically turn off after
approximately 15 minutes.
: If equipped
Page 281 of 632

281
3-2. Using the audio system
3
Interior features
■Discs that can be used
Discs with the marks shown below can be used.
Playback may not be possible depending on recording format or disc features, or
due to scratches, dirt or deterioration.
■CD player protection feature
To protect the internal components, play back is automatically stopped when a
problem is detected while th e CD player is being used.
■If CDs are left inside the CD player or in the ejected position for extended peri-
ods
CDs may be damaged and may not play properly.
■Lens cleaners
Do not use lens cleaners. Doing so may damage the CD player.
■MP3 and WMA files
MP3 (MPEG Audio LAYER 3) is a standard audio compression format.
Files can be compressed to approximately 1 /10 of their original size by using MP3
compression.
WMA (Windows Media Audio) is a Microsoft audio compression format.
This format compresses audio data to a size smaller than that of the MP3 format.
There is a limit to the MP3 and WMA file standards and to the media/formats
recorded by them that can be used.
●MP3 file compatibility
• Compatible standards
MP3 (MPEG1 LAYER3, MPEG2 LSF LAYER3)
• Compatible sampling frequencies MPEG1 LAYER3: 32, 44.1, 48 (kHz)
MPEG2 LSF LAYER3: 16, 22.05, 24 (kHz)
• Compatible bit rates (compatible with VBR) MPEG1 LAYER3: 64, 80, 96, 112, 128, 160, 192, 224, 256, 320 (kbps)
MPEG2 LSF LAYER3: 64, 80, 96, 112, 128, 144, 160 (kbps)
• Compatible channel modes: stereo, joint stereo, dual channel and monaural
Page 282 of 632

282
3-2. Using the audio system
●WMA file compatibility
• Compatible standardsWMA Ver. 7, 8, 9
• Compatible sampling frequencies
32, 44.1, 48 (kHz)
• Compatible bit rates (only compat ible with 2-channel playback)
Ver. 7, 8: CBR 48, 64, 80, 96, 128, 160, 192 (kbps)
Ver. 9: CBR 48, 64, 80, 96, 128, 160, 192, 256, 320 (kbps)
●Compatible media
Media that can be used for MP3 and WMA playback are CD-Rs and CD-RWs.
Playback in some instances may not be po ssible, depending on the status of the
CD-R or CD-RW. Playback may not be po ssible or the audio may jump if the disc
is scratched or marked with fingerprints.
●Compatible disc formats
The following disc formats can be used.
• Disc formats: CD-ROM Mode 1 and Mode 2
CD-ROM XA Mode 2, Form 1 and Form 2
• File formats: ISO9660 Level 1, Level 2, (Romeo, Joliet) MP3 and WMA files written in any format other than those
listed above may not play correctly, and their file names and
folder names may not be displayed correctly.
Items related to standards and limitations are as follows.
• Maximum directory hierarchy: 8 levels
• Maximum length of folder names/file names: 32 characters
• Maximum number of folders: 192 (including the root)
• Maximum number of files per disc: 255
●File names
The only files that can be recognized as MP3/WMA and played are those with
the extension .mp3 or .wma.
●Multi-sessions
As the audio system is compatible with multi-sessions, it is possible to play discs
that contain MP3 and WMA files. However, only the first session can be played.