wheel Lexus IS250C 2012 Instrument cluster / LEXUS 2012 IS250C,IS350C (OM53A62U) Workshop Manual
[x] Cancel search | Manufacturer: LEXUS, Model Year: 2012, Model line: IS250C, Model: Lexus IS250C 2012Pages: 632, PDF Size: 6.77 MB
Page 243 of 632

243
2-5. Driving information
2
When driving
Dinghy towing (vehicles with an automatic transmission)
NOTICE
■To avoid serious damage to your vehicle
Do not tow your vehicle with four wheels on the ground.
Your vehicle is not designed to be dinghy towed (with 4 wheels on the
ground) behind a motor home.
Page 244 of 632
244
2-5. Driving information
Dinghy towing (vehicles with a manual transmission)
Towing your vehicle with 4 wheels on the groundTo prevent damage to your vehicle, perform the following procedures
before towing. Shift the shift lever to neutral.
Switch to ACCESSORY mode. ( P. 150)
Ensure that the audio system and other powered devices have been
turned off.
Release the parking brake.
After towing, leave the engine in idle for at least 3 minutes before driv-
ing the vehicle.
■Necessary equipment and accessories
Specialized equipment and accessories are required for dinghy towing. Contact
the service branch of the motor home manufacturer regarding recommended
equipment.
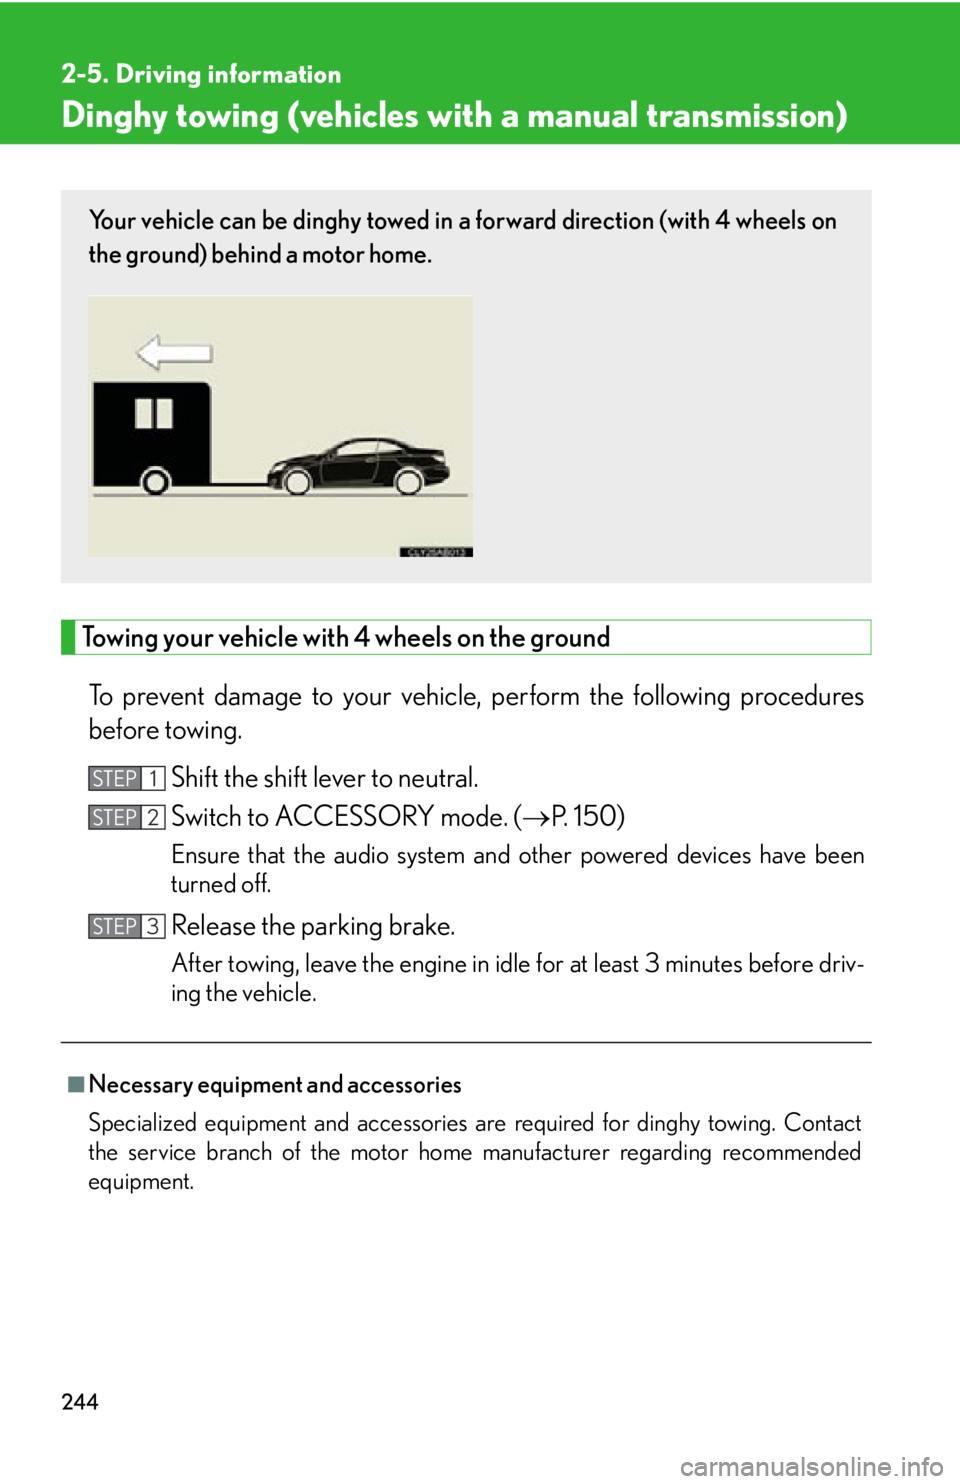
Your vehicle can be dinghy towed in a forward direction (with 4 wheels on
the ground) behind a motor home.
STEP1
STEP2
STEP3
Page 246 of 632
246
3-1. Using the air conditioningsystem and defogger
Automatic air conditioning system............ 248
Rear window and outside rear view mirror
defoggers .............................. 257
Windshield wiper de-icer ... 258 3-2. Using the audio system
Audio system type ................. 259
Using the radio ....................... 262
Using the CD player ............. 270
Playing back MP3 and WMA discs ............................ 277
Operating an iPod ................. 285
Operating a USB memory........................ 293
Optimal use of the audio system ......................... 302
Using the AUX port .............. 304
Using the steering wheel audio switches...................... 306
3-3. Using the Bluetooth
®
audi
o system
Bluetooth
® audio system .... 309
Using the Bluetooth
®
audio system .......................... 312
Operating a Bluetooth
®
enabled portable player .... 317
Setting up a Bluetooth
®
enabled portable player .... 321
Bluetooth
® audio
system setup ......................... 327
Interior features3
Page 260 of 632
260
3-2. Using the audio system
Ti t l ePa g e
Using the radioP. 2 6 2
Using the CD playerP. 2 7 0
Playing back MP3 and WMA discsP. 2 7 7
Operating an iPodP. 2 8 5
Operating a USB memoryP. 2 9 3
Optimal use of the audio systemP. 3 0 2
Using the AUX portP. 3 0 4
Using the steering wheel audio switchesP. 3 0 6
Page 306 of 632

306
3-2. Using the audio system
Using the steering wheel audio switches
Turning on the power
Press when the audio system is turned off.
The audio system can be turned off by holding down until you hear a
beep.
Some audio features can be controlled using the switches on the steering
wheel.
Turns the power on, selects
an audio source
Increases/decreases volume
Radio mode: Selects a radio station
CD mode: Selects a track, file (MP3 and
WMA) and disc
Bluetooth
® audio mode:
Selects a track and
album
iPod mode: Selects a song
USB memory mode: Selects a file and folder
Page 308 of 632

308
3-2. Using the audio system
Selecting an albumPress to select Bluetooth
® audio mode.
Press and hold “ ” or “ ” on until you hear a beep.
Selecting a folder
Press to select USB memory mode.
Press and hold “ ” or “ ” on until you hear a beep.
Selecting a disc in the CD player
Press to select the CD mode.
Press and hold “ ” or “ ” on until you hear a beep.
CAUTION
■To reduce the risk of an accident
Exercise care when operating the audio switches on the steering wheel.
STEP1
STEP2
STEP1
STEP2
STEP1
STEP2
Page 319 of 632
319
3-3. Using the Bluetooth® audio system
3
Interior features
Fast-forwarding and rewinding tracksTo fast-forward or rewind, press and hold “ ” or “ ” on until you
hear a beep.
Random playback Press (RAND).
Repeat playPress (RPT).
Scanning tracks (type A)Press .
Switching the displayPress .
Each time is pressed, the display changes in the order of Elapsed time
Album title Track title Artist name.
Using the steering wheel audio switches
P. 306
Page 333 of 632
333
3-4. Using the hands-free phone system (for mobile phones)
3
Interior features
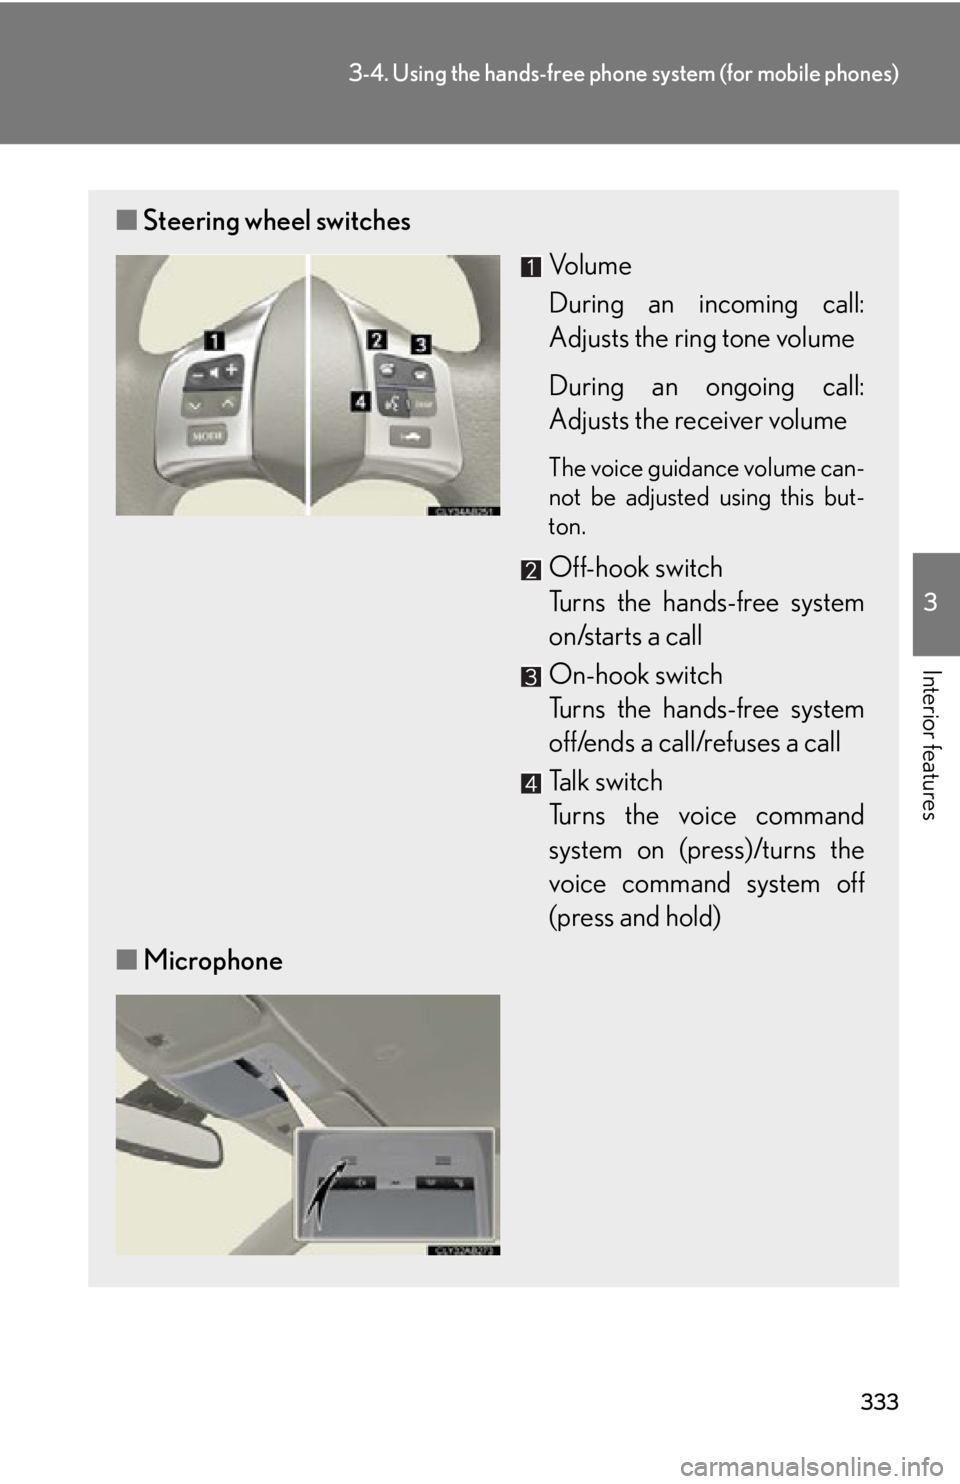
■Steering wheel switches
Vo l u m e
During an incoming call:
Adjusts the ring tone volume
During an ongoing call:
Adjusts the receiver volume
The voice guidance volume can-
not be adjusted using this but-
ton.
Off-hook switch
Turns the hands-free system
on/starts a call
On-hook switch
Turns the hands-free system
off/ends a call/refuses a call
Talk switch
Turns the voice command
system on (press)/turns the
voice command system off
(press and hold)
■ Microphone
Page 373 of 632

373
3-7. Other interior features
3
Interior features
■Changing the settings
Each item is displayed and its setting can be changed only in the following condi-
tions:
●Intuitive parking assist: When the “ENGINE START STOP” switch is in IGNI-
TION ON mode.
●Items other than the above: When the “ENGINE START STOP” switch is in
IGNITION ON mode and the vehicle is stopped.
■Display
The display will return to the original display if the satellite switches are not oper-
ated for an extended period.
Even if the display is in satellite switch mode, it will switch in the event of a warning
or when the radar cruise control (if equipped) is used. If this occurs, press any of the
satellite switches or “DISP” switch on the steering wheel to return the display to sat-
ellite switch mode.
Front seat auto return function on/off ( P. 5 7 )
Page 401 of 632
Maintenance and care4
401
4-1. Maintenance and careCleaning and protecting the vehicle exterior............ 402
Cleaning and protecting the vehicle interior .............. 407
4-2. Maintenance Maintenance requirements ......................... 410
General maintenance ........... 412
Emission inspection and maintenance (I/M)
programs
.................................. 415 4-3. Do-it-yourself
maintenance
Do-it-yourself service precautions ............................ 416
Hood ........................................... 419
Positioning a floor jack ......... 420
Engine compartment ........... 422
Tires............................................ 437
Tire inflation pressure........... 447
Wheels ....................................... 451
Air conditioning filter ........... 453
Electronic key battery.......... 456
Checking and replacing fuses ........................................ 458
Headlight aim ......................... 473
Light bulbs ................................. 475