Pressure Lexus IS300h 2013 Owner's Manual
[x] Cancel search | Manufacturer: LEXUS, Model Year: 2013, Model line: IS300h, Model: Lexus IS300h 2013Pages: 628, PDF Size: 20.23 MB
Page 6 of 628

TABLE OF CONTENTS6
IS300h_EE(OM53B95E)
7-1. Maintenance and care
Cleaning and protecting
the vehicle exterior.......... 426
Cleaning and protecting
the vehicle interior .......... 430
7-2. Maintenance
Maintenance
requirements.................... 433
7-3. Do-it-yourself maintenance
Do-it-yourself service
precautions ...................... 435
Hood .................................. 437
Positioning a floor jack ..... 438
Engine compartment ......... 439
12-volt battery ................... 447
Tires................................... 450
Replacing the tire .............. 460
Tire inflation pressure ....... 466
Wheels............................... 468
Air conditioning filter ....... 470
Electronic key battery ....... 472
Checking and replacing
fuses ................................ 475
Light bulbs ........................ 4798-1. Essential information
Emergency flashers ........... 498
If your vehicle has to be
stopped in an
emergency ....................... 499
8-2. Steps to take in an
emergency
If your vehicle needs to
be towed .......................... 500
If you think something
is wrong........................... 506
If a warning light turns
on or a warning buzzer
sounds ............................. 507
If a warning message is
displayed ......................... 513
If you have a flat tire
(vehicles without
run-flat tires) ................... 530
If you have a flat tire
(vehicles with
run-flat tires) ................... 544
If the hybrid system will
not start............................ 545
If the shift lever cannot
be shifted from P ............. 547
7Maintenance and care8When trouble arises
Page 15 of 628
15Pictorial index
IS300h_EE(OM53B95E)
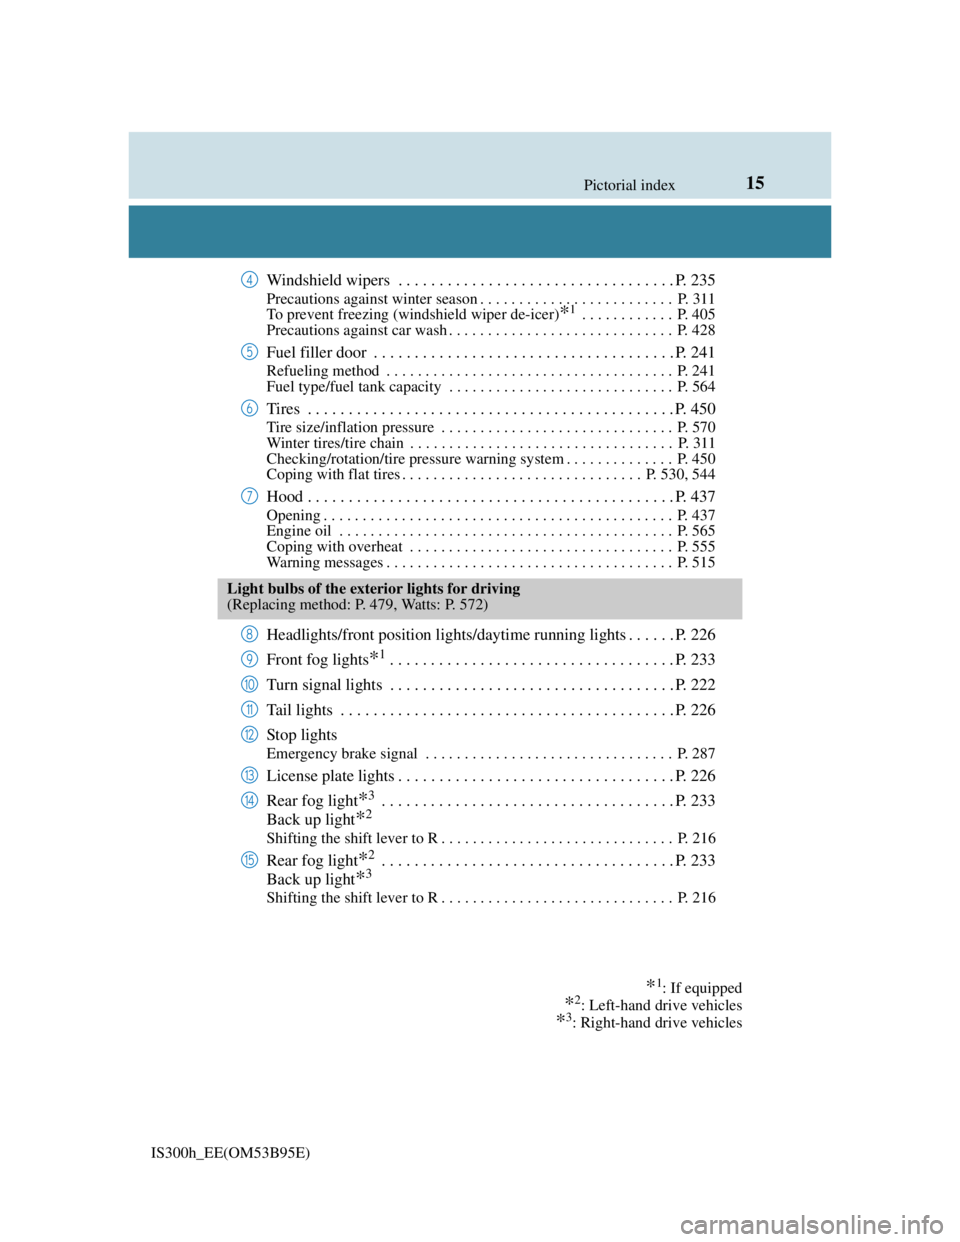
Windshield wipers . . . . . . . . . . . . . . . . . . . . . . . . . . . . . . . . . . P. 235
Precautions against winter season . . . . . . . . . . . . . . . . . . . . . . . . . P. 311
To prevent freezing (windshield wiper de-icer)
*1 . . . . . . . . . . . . P. 405
Precautions against car wash . . . . . . . . . . . . . . . . . . . . . . . . . . . . . P. 428
Fuel filler door . . . . . . . . . . . . . . . . . . . . . . . . . . . . . . . . . . . . . P. 241
Refueling method . . . . . . . . . . . . . . . . . . . . . . . . . . . . . . . . . . . . . P. 241
Fuel type/fuel tank capacity . . . . . . . . . . . . . . . . . . . . . . . . . . . . . P. 564
Tires . . . . . . . . . . . . . . . . . . . . . . . . . . . . . . . . . . . . . . . . . . . . . P. 450
Tire size/inflation pressure . . . . . . . . . . . . . . . . . . . . . . . . . . . . . . P. 570
Winter tires/tire chain . . . . . . . . . . . . . . . . . . . . . . . . . . . . . . . . . . P. 311
Checking/rotation/tire pressure warning system . . . . . . . . . . . . . . P. 450
Coping with flat tires . . . . . . . . . . . . . . . . . . . . . . . . . . . . . . . P. 530, 544
Hood . . . . . . . . . . . . . . . . . . . . . . . . . . . . . . . . . . . . . . . . . . . . . P. 437
Opening . . . . . . . . . . . . . . . . . . . . . . . . . . . . . . . . . . . . . . . . . . . . . P. 437
Engine oil . . . . . . . . . . . . . . . . . . . . . . . . . . . . . . . . . . . . . . . . . . . P. 565
Coping with overheat . . . . . . . . . . . . . . . . . . . . . . . . . . . . . . . . . . P. 555
Warning messages . . . . . . . . . . . . . . . . . . . . . . . . . . . . . . . . . . . . . P. 515
Headlights/front position lights/daytime running lights . . . . . . P. 226
Front fog lights
*1. . . . . . . . . . . . . . . . . . . . . . . . . . . . . . . . . . . P. 233
Turn signal lights . . . . . . . . . . . . . . . . . . . . . . . . . . . . . . . . . . . P. 222
Tail lights . . . . . . . . . . . . . . . . . . . . . . . . . . . . . . . . . . . . . . . . . P. 226
Stop lights
Emergency brake signal . . . . . . . . . . . . . . . . . . . . . . . . . . . . . . . . P. 287
License plate lights . . . . . . . . . . . . . . . . . . . . . . . . . . . . . . . . . . P. 226
Rear fog light
*3 . . . . . . . . . . . . . . . . . . . . . . . . . . . . . . . . . . . . P. 233
Back up light
*2
Shifting the shift lever to R . . . . . . . . . . . . . . . . . . . . . . . . . . . . . . P. 216
Rear fog light*2 . . . . . . . . . . . . . . . . . . . . . . . . . . . . . . . . . . . . P. 233
Back up light
*3
Shifting the shift lever to R . . . . . . . . . . . . . . . . . . . . . . . . . . . . . . P. 216
4
5
6
7
Light bulbs of the exterior lights for driving
(Replacing method: P. 479, Watts: P. 572)
*1: If equipped
*2: Left-hand drive vehicles
*3: Right-hand drive vehicles
8
9
10
11
12
13
14
15
Page 19 of 628
19Pictorial index
IS300h_EE(OM53B95E)
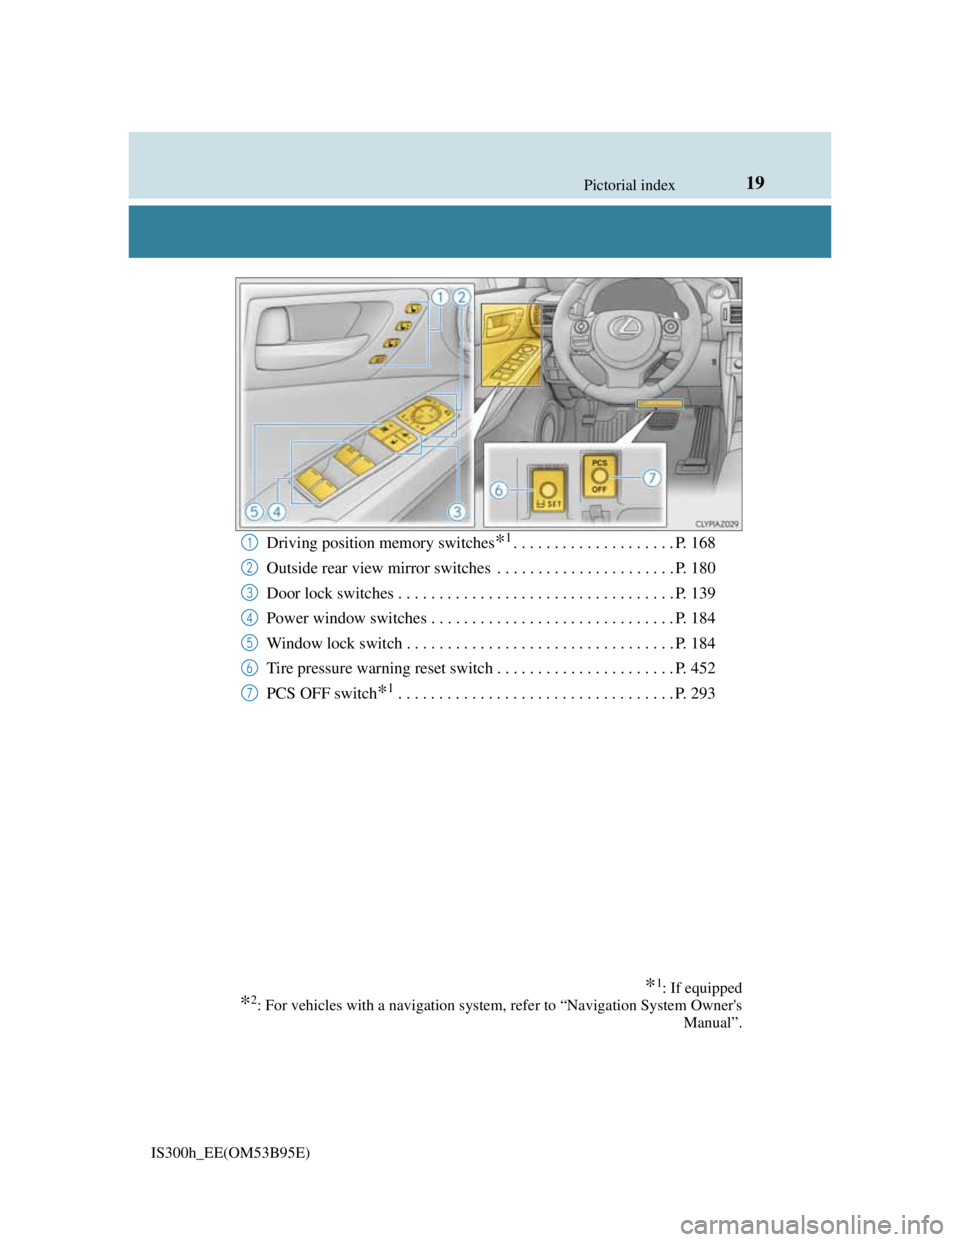
Driving position memory switches*1. . . . . . . . . . . . . . . . . . . . P. 168
Outside rear view mirror switches . . . . . . . . . . . . . . . . . . . . . . P. 180
Door lock switches . . . . . . . . . . . . . . . . . . . . . . . . . . . . . . . . . . P. 139
Power window switches . . . . . . . . . . . . . . . . . . . . . . . . . . . . . . P. 184
Window lock switch . . . . . . . . . . . . . . . . . . . . . . . . . . . . . . . . . P. 184
Tire pressure warning reset switch . . . . . . . . . . . . . . . . . . . . . . P. 452
PCS OFF switch
*1. . . . . . . . . . . . . . . . . . . . . . . . . . . . . . . . . . P. 293
1
2
3
4
5
6
7
*1: If equipped
*2: For vehicles with a navigation system, refer to “Navigation System Owner's
Manual”.
Page 27 of 628
27Pictorial index
IS300h_EE(OM53B95E)
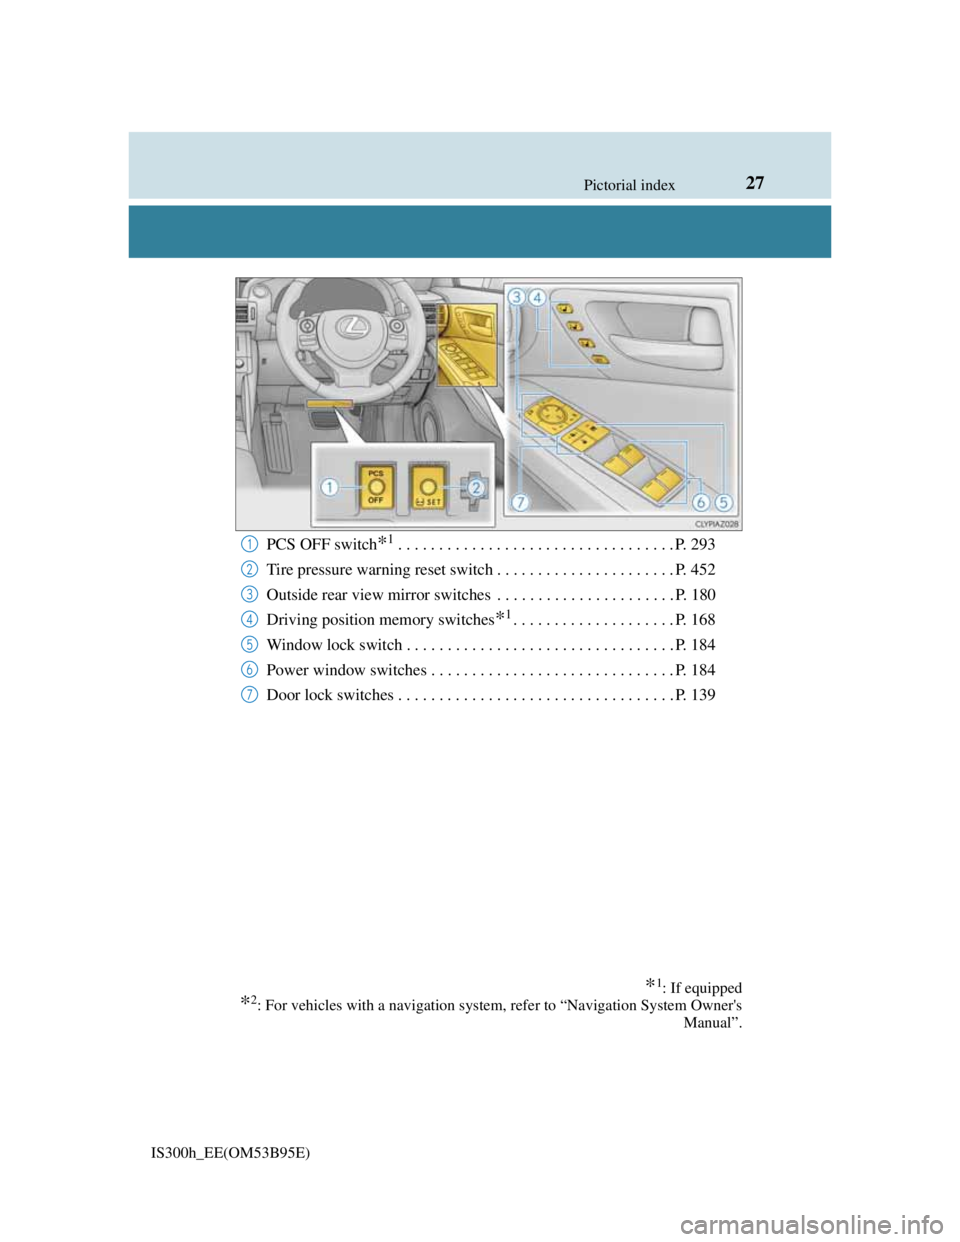
PCS OFF switch*1. . . . . . . . . . . . . . . . . . . . . . . . . . . . . . . . . . P. 293
Tire pressure warning reset switch . . . . . . . . . . . . . . . . . . . . . . P. 452
Outside rear view mirror switches . . . . . . . . . . . . . . . . . . . . . . P. 180
Driving position memory switches
*1. . . . . . . . . . . . . . . . . . . . P. 168
Window lock switch . . . . . . . . . . . . . . . . . . . . . . . . . . . . . . . . . P. 184
Power window switches . . . . . . . . . . . . . . . . . . . . . . . . . . . . . . P. 184
Door lock switches . . . . . . . . . . . . . . . . . . . . . . . . . . . . . . . . . . P. 139
*1: If equipped
*2: For vehicles with a navigation system, refer to “Navigation System Owner's
Manual”.
1
2
3
4
5
6
7
Page 59 of 628
591-1. For safe use
1
For safety and security
IS300h_EE(OM53B95E)
NOTICE
Pop Up Hood precautions
Make sure to close the hood before driving, as the system may not operate
properly if the hood is not fully closed.
Make sure that all 4 tires are of the specified size and inflated to the specified
tire pressure (P. 570). If tires of a different size are used, the system may
not operate properly.
If something has hit the area around the front bumper, the sensors may be
damaged even if the Pop Up Hood has not operated. Have the vehicle
inspected by any authorized Lexus dealer or repairer, or another duly quali-
fied and equipped professional.
Do not remove or repair the parts or wiring of the Pop Up Hood, as doing so
may cause accidental operation or prevent the system from operating prop-
erly. If repair or replacement is necessary, contact any authorized Lexus
dealer or repairer, or another duly qualified and equipped professional.
Do not remove such components as the front bumper, hood or suspension, or
replace them with non-genuine parts, as doing so may prevent the system
from operating properly.
Do not install anything to the front bumper or hood, as doing so may prevent
the sensors from detecting an impact correctly and prevent the system from
operating properly.
Do not close the hood with force or apply load to the lifters, as doing so may
damage the lifters and prevent the system from operating properly.
Do not modify the suspension, as changes made to the vehicle height may
prevent the system from operating properly.
Page 101 of 628
1001-3. Theft deterrent system
IS300h_EE(OM53B95E)
Canceling and automatic re-enabling of the intrusion sensor and tilt sensor
The alarm will still be set even when the intrusion sensor and tilt sensor are can-
celed.
After the intrusion sensor and tilt sensor are canceled, pressing the power
switch or unlocking the doors using the entry function or wireless remote con-
trol will re-enable the intrusion sensor and tilt sensor.
The intrusion sensor and tilt sensor will automatically be re-enabled when the
alarm system is deactivated.
Intrusion sensor detection considerations
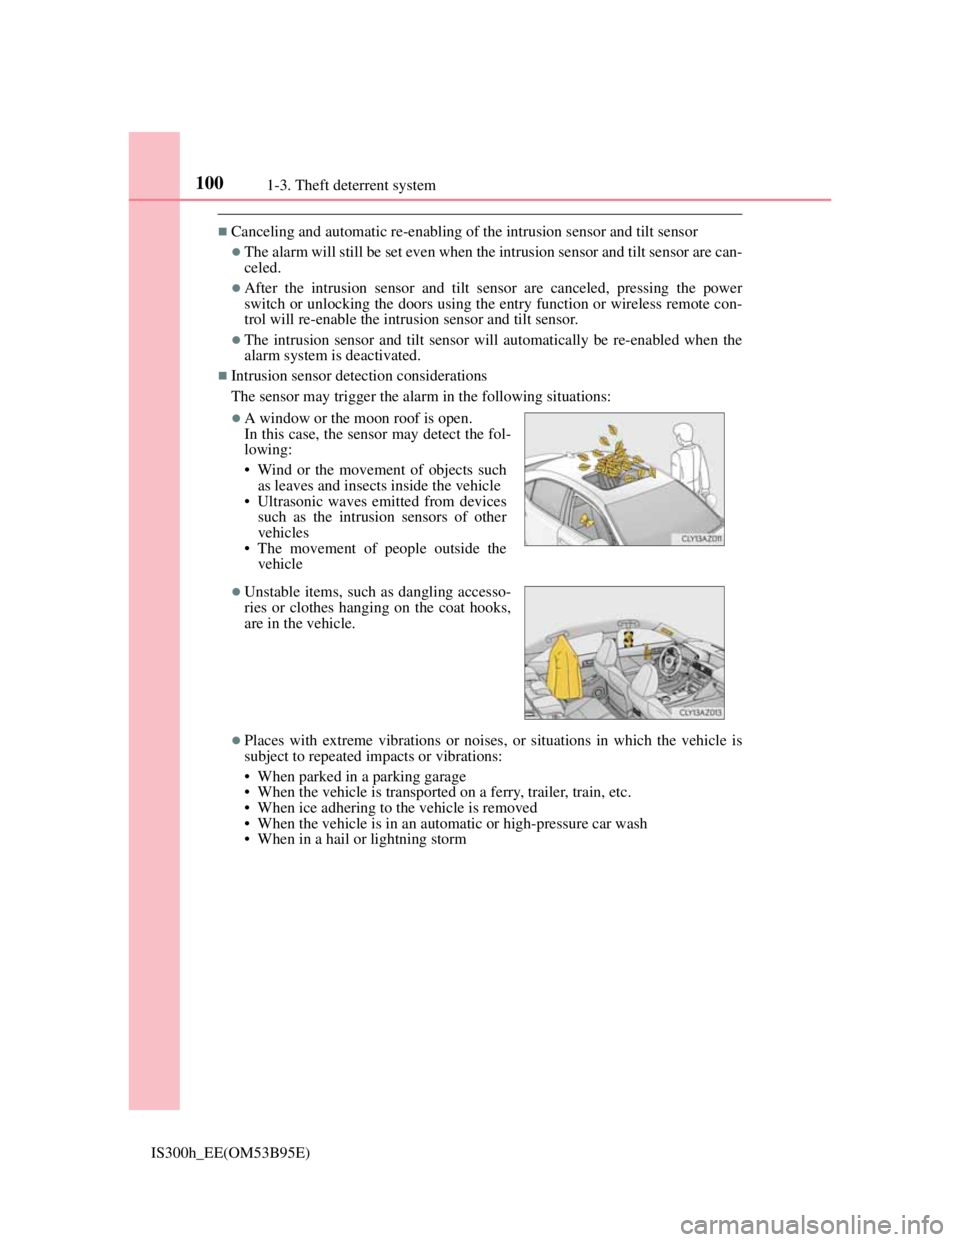
The sensor may trigger the alarm in the following situations:
Places with extreme vibrations or noises, or situations in which the vehicle is
subject to repeated impacts or vibrations:
• When parked in a parking garage
• When the vehicle is transported on a ferry, trailer, train, etc.
• When ice adhering to the vehicle is removed
• When the vehicle is in an automatic or high-pressure car wash
• When in a hail or lightning storm
A window or the moon roof is open.
In this case, the sensor may detect the fol-
lowing:
• Wind or the movement of objects such
as leaves and insects inside the vehicle
• Ultrasonic waves emitted from devices
such as the intrusion sensors of other
vehicles
• The movement of people outside the
vehicle
Unstable items, such as dangling accesso-
ries or clothes hanging on the coat hooks,
are in the vehicle.
Page 102 of 628
1011-3. Theft deterrent system
1
For safety and security
IS300h_EE(OM53B95E)
Tilt sensor detection considerations (if equipped)
The sensor may trigger the alarm in the following situations:
The vehicle is transported by a ferry, trailer, train, etc.
The vehicle is parked in a parking garage.
The vehicle is inside a car wash that moves the vehicle.
Any of the tires loses air pressure.
The vehicle is jacked up.
An earthquake occurs or the road caves in.
NOTICE
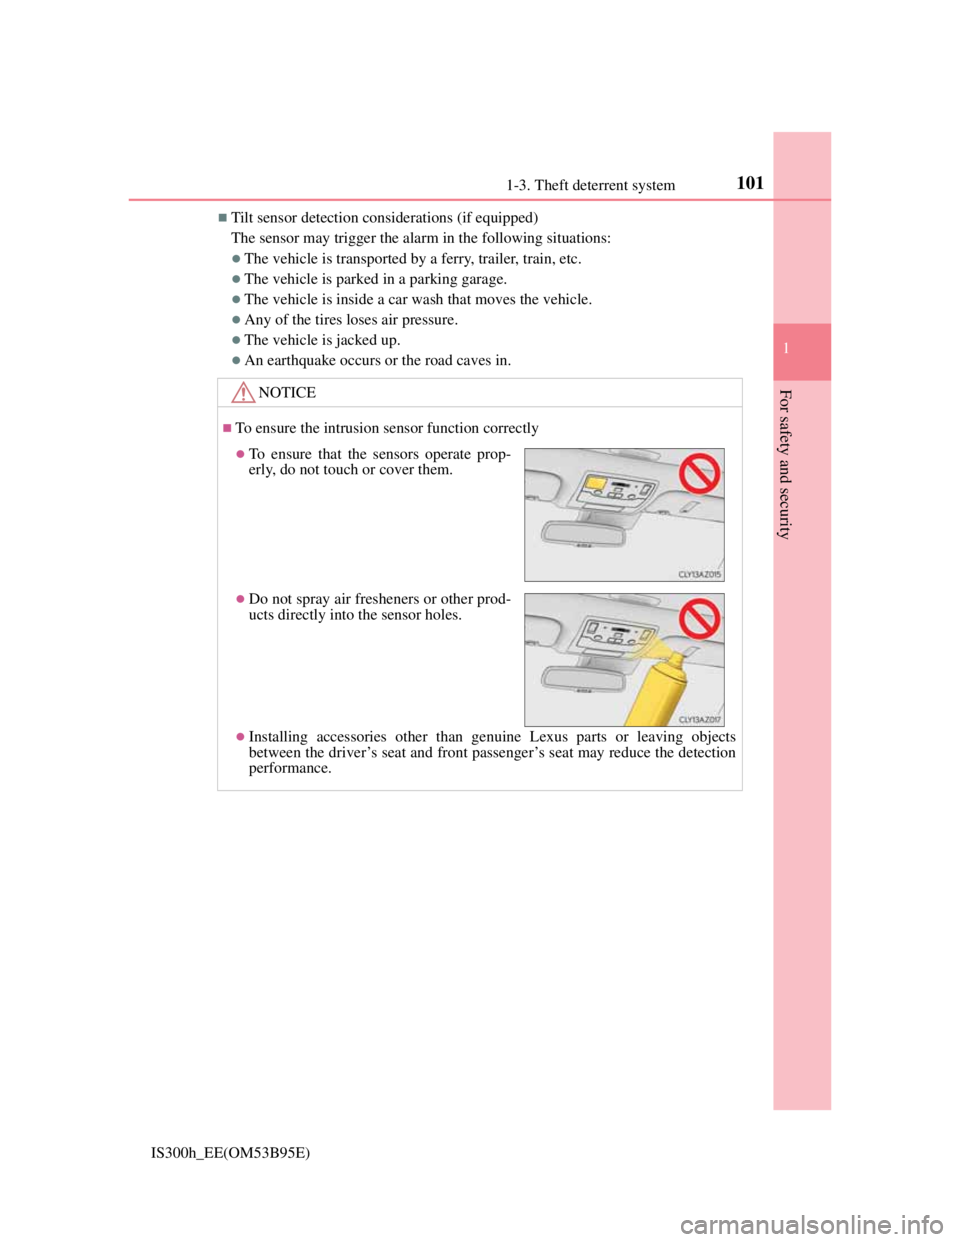
To ensure the intrusion sensor function correctly
Installing accessories other than genuine Lexus parts or leaving objects
between the driver’s seat and front passenger’s seat may reduce the detection
performance.
To ensure that the sensors operate prop-
erly, do not touch or cover them.
Do not spray air fresheners or other prod-
ucts directly into the sensor holes.
Page 106 of 628
1052. Instrument cluster
2
Instrument cluster
IS300h_EE(OM53B95E)
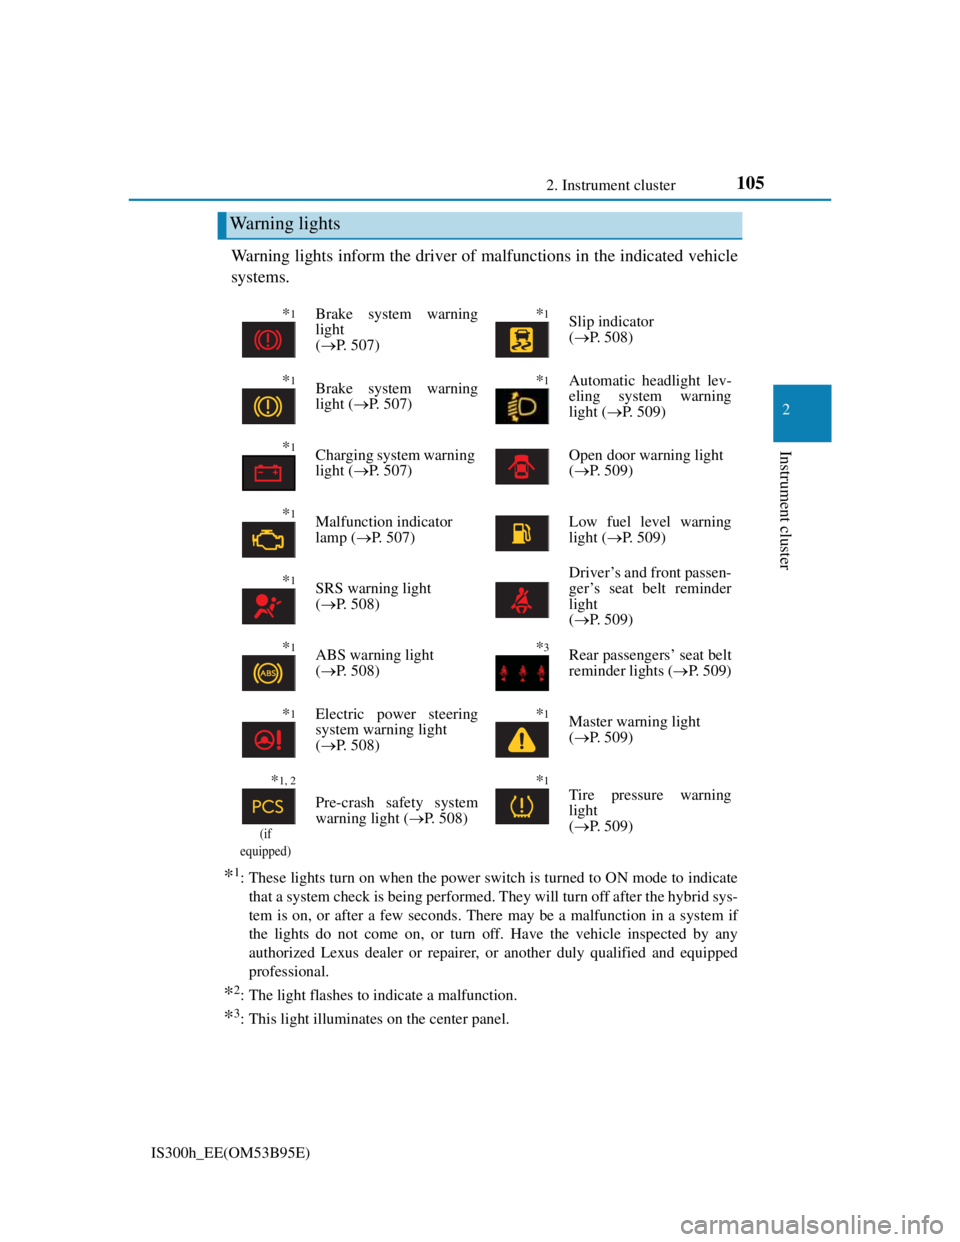
Warning lights inform the driver of malfunctions in the indicated vehicle
systems.
*1: These lights turn on when the power switch is turned to ON mode to indicate
that a system check is being performed. They will turn off after the hybrid sys-
tem is on, or after a few seconds. There may be a malfunction in a system if
the lights do not come on, or turn off. Have the vehicle inspected by any
authorized Lexus dealer or repairer, or another duly qualified and equipped
professional.
*2: The light flashes to indicate a malfunction.
*3: This light illuminates on the center panel.
Warning lights
*1Brake system warning
light
(P. 507)*1Slip indicator
(P. 508)
*1Brake system warning
light (P. 507)*1 Automatic headlight lev-
eling system warning
light (P. 509)
*1Charging system warning
light (P. 507)Open door warning light
(P. 509)
*1Malfunction indicator
lamp (P. 507)Low fuel level warning
light (P. 509)
*1SRS warning light
(P. 508)
Driver’s and front passen-
ger’s seat belt reminder
light
(P. 509)
*1ABS warning light
(P. 508)*3Rear passengers’ seat belt
reminder lights (P. 509)
*1Electric power steering
system warning light
(P. 508)*1Master warning light
(P. 509)
*1, 2
(if
equipped)
Pre-crash safety system
warning light (P. 508)
*1Tire pressure warning
light
(P. 509)
Page 207 of 628
2054-1. Before driving
4
Driving
IS300h_EE(OM53B95E)
Tire information
Increase the tire inflation pressure to 20.0 kPa (0.2 kgf/cm2 or bar, 3 psi) greater
than the recommended value when towing. (P. 570)
Increase the air pressure of the trailer tires in accordance with the total trailer
weight and according to the values recommended by the manufacturer of your
trailer.
Break-in schedule
Lexus recommends that vehicles fitted with new power train components should
not be used for towing trailers for the first 800 km (500 miles).
Safety checks before towing
Check that the maximum load limit for the towing hitch/bracket hitch ball is not
exceeded. Bear in mind that the coupling weight of the trailer will add to the
load exerted on the vehicle. Also make sure that you will not be towing a load
that exceeds the maximum permissible axle capacity.
Ensure that the trailer load is secure.
Supplementary outside rear view mirrors should be added to the vehicle if the
traffic behind cannot be clearly seen with standard mirrors. Adjust the extend-
ing arms of these mirrors on both sides of the vehicle so that they always pro-
vide maximum visibility of the road behind.
Maintenance
Maintenance must be performed more frequently when using the vehicle for
towing due to the greater weight burden placed on the vehicle compared to nor-
mal driving.
Retighten all bolts securing the hitching ball and bracket after towing for
approximately 1000 km (600 miles).
NOTICE
When the rear bumper strengthening material is aluminum
Ensure the steel bracket part does not come directly in contact with that area.
When steel and aluminum come into contact, there is a reaction similar to cor-
rosion, which will weaken the section concerned and may result in damage.
Apply a rust inhibitor to parts that will come in contact when attaching a steel
bracket.
Page 269 of 628

2674-5. Using the driving support systems
4
Driving
IS300h_EE(OM53B95E)
Temporary cancelation of the LDA system functions
If any of the following occurs, the LDA system functions will be temporarily
canceled. The functions will resume after the necessary operating conditions
have returned.
The turn signal lever is operated.
The vehicle speed deviates from the operating range of the LDA system func-
tions.
When the lane lines cannot be recognized while driving.
When the lane departure warning sounds.
The lane departure warning function will not operate again for a several sec-
onds after it has been activated, even if the vehicle leaves the lane again.
The lane departure warning
Depending on the audio system sound level or air conditioning fan noise while
the audio system or air conditioning system is in use, it may be difficult to hear
the warning sound.
After the vehicle has been parked in the sun
The LDA system may not be available and a warning message (P. 518) will be
displayed for a while after driving has started. When the temperature in the cabin
decreases and the temperature around the camera sensor (P. 264) becomes suit-
able for its operation, the functions will begin to operate.
If there are lane markers on only one side of the vehicle
The lane departure warning will not operate for the side on which lane markers
could not be recognized.
Conditions in which the function may not operate correctly
In the following situations, the camera sensor may be unable to recognize lane
markers causing the lane departure warning function to operate incorrectly. How-
ever, this does not indicate a malfunction.
When driving through an area with no lane markers, such as a tollbooth, a
crossing or before a ticket checkpoint
When driving on a sharp curve
When lane markers are extremely narrow or extremely wide
When the vehicle leans to one side an unusual amount due to a heavy load or
improper tire inflation pressure
When the following distance between your vehicle and the vehicle ahead is
extremely short
When the lane markers are yellow (These may be more difficult for the system
to recognize compared to white markers.)
When the lane markers are broken, Botts’ dots (raised pavement markers) or
stones
When the lane markers are on a curb etc.
When lane markers are obscured or partially obscured by sand, dirt, etc.
When there are shadows on the road running parallel with lane markers, or if a
shadow covers the lane markers
When driving on a particularly bright road surface, such as concrete