light Lexus IS350 2008 Scheduled Maintenace Guide / LEXUS 2008 IS 350/250 QUICK GUIDE OWNER'S MANUAL (OM60D81U)
[x] Cancel search | Manufacturer: LEXUS, Model Year: 2008, Model line: IS350, Model: Lexus IS350 2008Pages: 58, PDF Size: 2.05 MB
Page 2 of 58
Entering and Exiting
Before Driving
When Driving
Rain and
Night Driving
Driving Comfort
Opening and Closing
What to do if ...
Customizing
Yo u r L e x u s
2
Driving Comfort
Topic 5
Opening and Closing
Topic 6
What to do if ...
Customizing Your LexusResponding to warning/indicator lights
and other problems that may arise.
A list of features that can be customized.
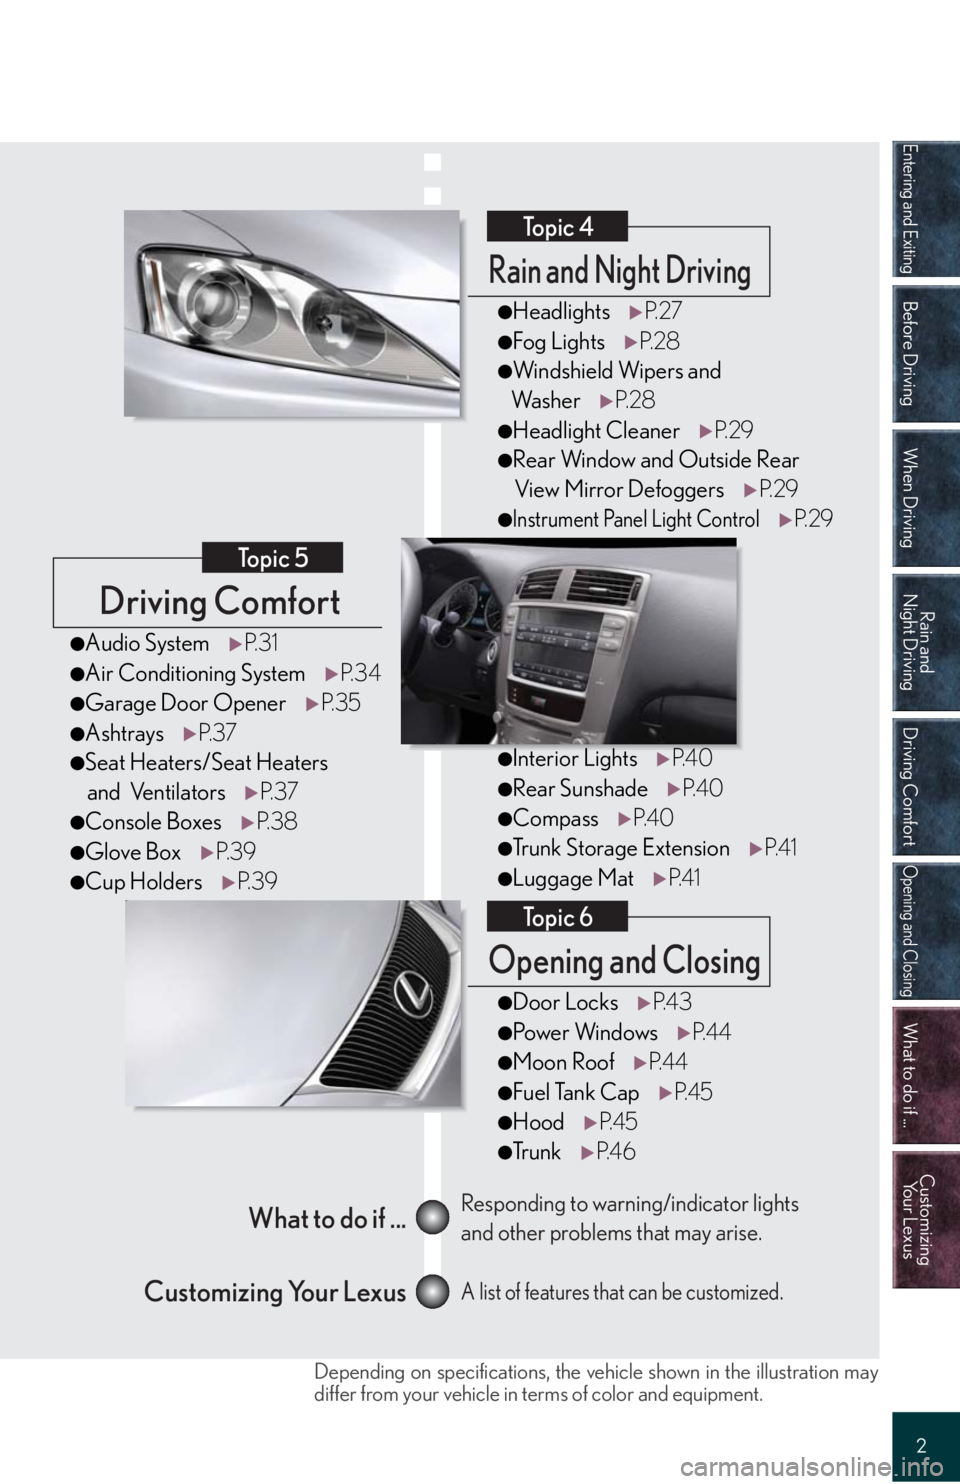
Rain and Night Driving
Topic 4
●HeadlightsP. 2 7
●Fog LightsP. 2 8
●Windshield Wipers and
Wa s h e rP. 2 8
●Headlight CleanerP. 2 9
●Rear Window and Outside Rear
View Mirror DefoggersP. 2 9
●Instrument Panel Light ControlP. 2 9
●Interior LightsP. 4 0
●Rear SunshadeP. 4 0
●CompassP. 4 0
●Trunk Storage ExtensionP. 4 1
●Luggage MatP. 4 1
●Door LocksP. 4 3
●Po w e r Wi n d o w sP. 4 4
●Moon RoofP. 4 4
●Fuel Tank CapP. 4 5
●HoodP. 4 5
●Tr u n kP. 4 6
●Audio SystemP. 3 1
●Air Conditioning SystemP. 3 4
●Garage Door OpenerP. 3 5
●AshtraysP. 3 7
●Seat Heaters/Seat Heaters
and VentilatorsP. 3 7
●Console BoxesP. 3 8
●Glove BoxP. 3 9
●Cup HoldersP. 3 9
Depending on specifications, the vehicle shown in the illustration may
differ from your vehicle in terms of color and equipment.
Page 3 of 58
3
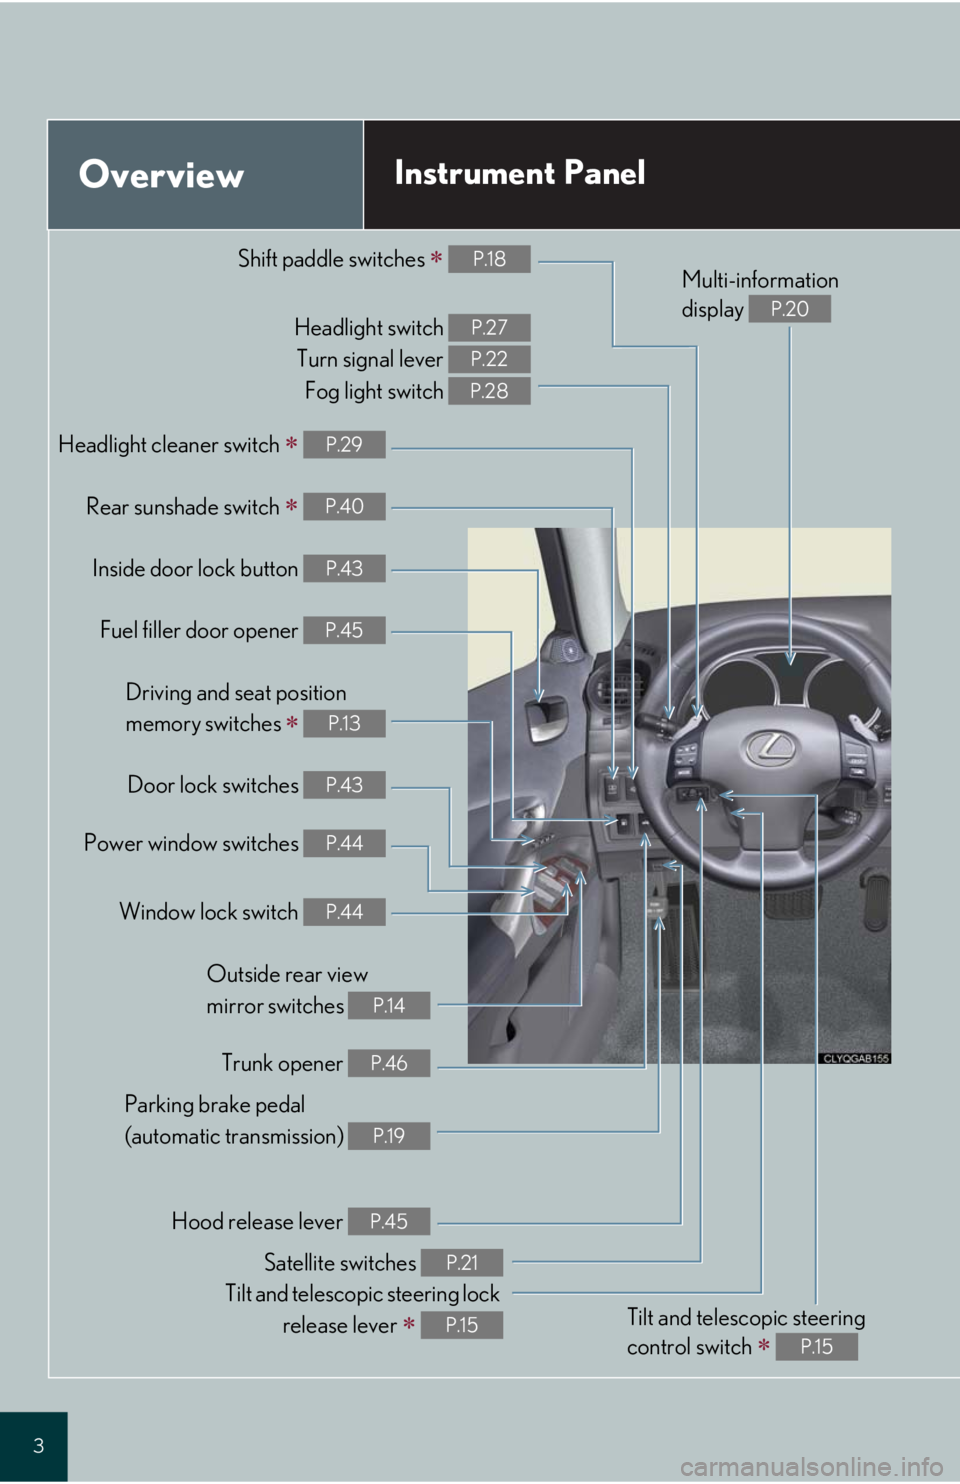
OverviewInstrument Panel
Shift paddle switches P.18
Headlight switch Turn signal lever Fog light switch P.27
P.22
P.28
Headlight cleaner switch P.29
Rear sunshade switch P.40
Inside door lock button P.43
Fuel filler door opener P.45
Driving and seat position
memory switches
P.13
Door lock switches P.43
Power window switches P.44
Window lock switch P.44
Outside rear view
mirror switches
P.14
Trunk opener P.46
Hood release lever P.45
Parking brake pedal
(automatic transmission)
P.19
Satellite switches P.21
Tilt and telescopic steering lock release lever
P.15Tilt and telesc opic steering
control switch
P.15
Multi-information
display
P.20
Page 4 of 58
4
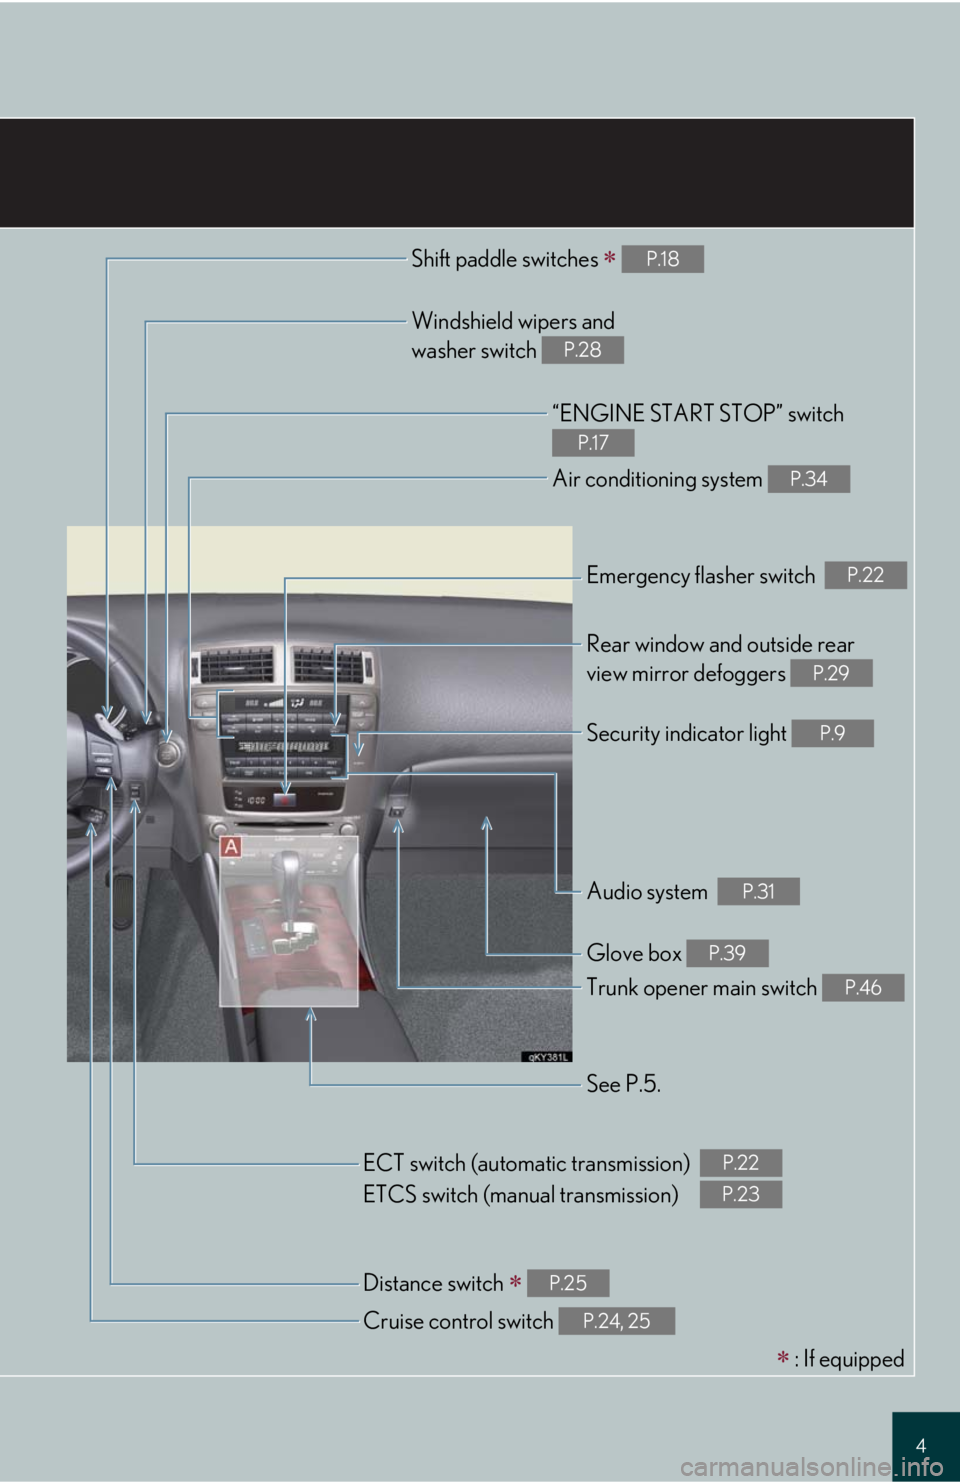
Shift paddle switches P.18
Windshield wipers and
washer switch
P.28
“ENGINE START STOP” switch
P.17
Air conditioning system P.34
Emergency flasher switch P.22
Rear window and outside rear
view mirror defoggers
P.29
Security indicator light P.9
Audio system P.31
Glove box P.39
Trunk opener main switch P.46
See P.5.
Cruise control switch
P.24, 25
Distance switch P.25
ECT switch (automatic transmission)
ETCS switch (manual transmission)P.22
P.23
: If equipped
Page 9 of 58
Topic 1
Entering and Exiting
9
Theft Deterrent System
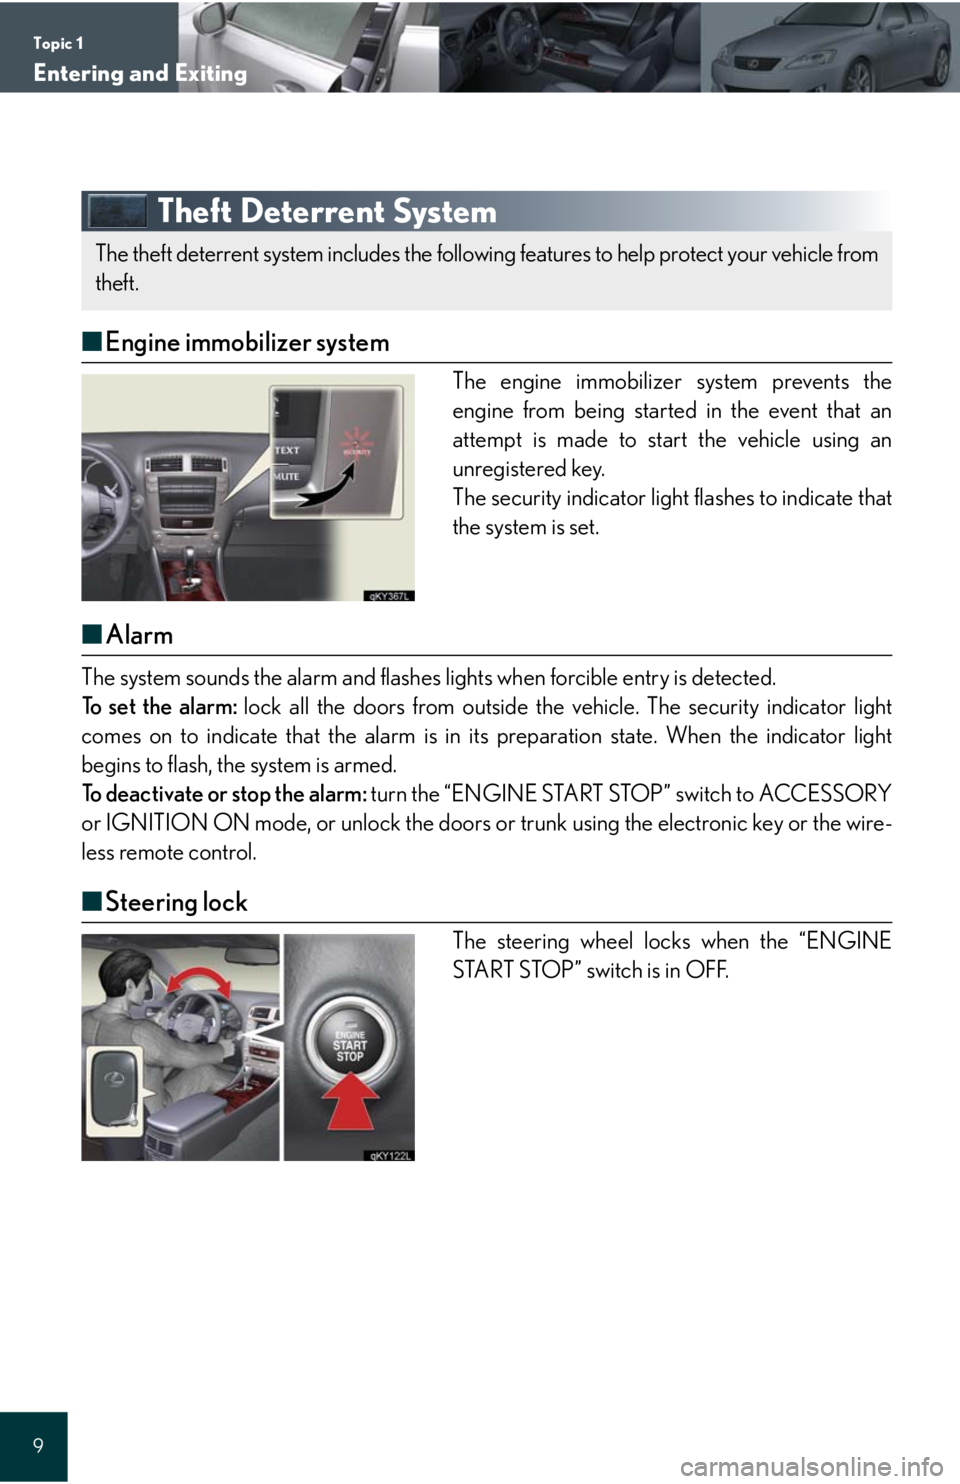
■Engine immobilizer system
The engine immobilizer system prevents the
engine from being started in the event that an
attempt is made to start the vehicle using an
unregistered key.
The security indicator light flashes to indicate that
the system is set.
■Alarm
The system sounds the alarm and flashes lights when forcible entry is detected.
To set the alarm: lock all the doors from outside the vehicle. The security indicator light
comes on to indicate that the alarm is in its preparation state. When the indicator light
begins to flash, the system is armed.
To deactivate or stop the alarm: turn the “ENGINE START STOP” switch to ACCESSORY
or IGNITION ON mode, or unlock the doors or trunk using the electronic key or the wire-
less remote control.
■Steering lock
The steering wheel locks when the “ENGINE
START STOP” switch is in OFF.
The theft deterrent system includes the following features to help protect your vehicle from
theft.
Page 15 of 58

Topic 2
Before Driving
15
Anti-glare Inside Rear View Mirror
To turn AUTO mode ON/OFF, press the AUTO
button.
The indicator comes on when AUTO mode is
turned ON.
Steering Wheel
■Manually adjustable type
To adjust the steering wheel, press the lever down
and move the steering wheel to the desired posi-
tion. Lock the steering wheel in place by pulling
the lever up.
■Power-adjustable type
Up
Down
Aw a y f r o m t h e d r i v e r
Toward the driver
The anti-glare mirror uses a sensor to detect light from vehicles behind and automatically
reduces glare.
1
2
3
4
The power-adjustable type steering wheel retracts automatically when the “ENGINE
START STOP” switch is turned OFF to allow for easy exit and entry. The steering wheel
returns automatically to its previously set position when the “ENGINE START STOP”
switch is switched to ACCESSORY or IGNITION ON mode.
Page 17 of 58

Topic 3
When Driving
17
Starting
■Starting the engine
Automatic transmission
Make sure the parking brake is engaged and the
shift lever is in P.
Depress the brake pedal.
The “ENGINE START STOP” switch indi-
cator light turns green.
Press the “ENGINE START STOP” switch.
Manual transmission
Make sure the parking brake is engaged and the
shift lever is in N.
Depress the clutch pedal.
The “ENGINE START STOP” switch indi-
cator light turns green.
Press the “ENGINE START STOP” switch.
■Stopping the engine
Engage the parking brake and shift the shift lever to P (for automatic transmission) or N
(for manual transmission).
Press the “ENGINE START STOP” switch.
■Changing power modes
To change power modes without turning on the engine, press the “ENGINE START STOP”
switch without depressing the brake pedal (for automatic transmission) or the clutch pedal
(for manual transmission). The modes can be changed in the following order:
With the electronic key on your person, the engine can be started by simply pressing the
“ENGINE START STOP” switch, while depressing the brake pedal or clutch pedal.
(The mechanical key cannot be used to start the engine.)
ACCE SSORY modeIGNITION ON mode
(Indicator light: amber) OFF
(Indicator light: off)
Page 19 of 58

Topic 3
When Driving
19
Manual Transmission
To operate the shift lever, the clutch pedal must be
fully depressed.
To shift into R, the ring on the shift lever must be
pulled up.
Parking Brake
■Automatic transmission
To set the parking brake: firmly depress the park-
ing brake pedal.
To release the parking brake: depress the park-
ing brake pedal again.
■Manual transmission
To set the parking brake: pull the parking
brake lever firmly upward.
To release the parking brake: press and hold
the lock release button and lift the lever slightly
before lowering it as far as it will go.1
2
Page 21 of 58

Topic 3
When Driving
21
Satellite Switches
The satellite switches can be used to change the
settings of the following items.
●Intuitive parking assist (if equipped)
●Tire inflation pressure warning system initial-
ization
●ID code selection for tire inflation pressure
warning sysem
●AFS (Adaptive Front-lighting System)
(if equipped)
●Speed indicator
●Tacho indicator
■Changing the ON/OFF settings
To cycle through the functions, press either the
left or right selector switch.
To change the settings, press the ON/OFF
button.
The satellite switches can be used to change the settings of various functions. Settings
are shown on the multi-information display.
For detailed information of changing the settings, see the Owner’s Manual.
Page 22 of 58
Topic 3
When Driving
22
Entering and Exiting
Before DrivingBefore Driving
When DrivingWhen Driving
Rain and
Night Driving
Driving Comfort
Opening and Closing
What to do if ...
Customizing
Yo u r L e x u s
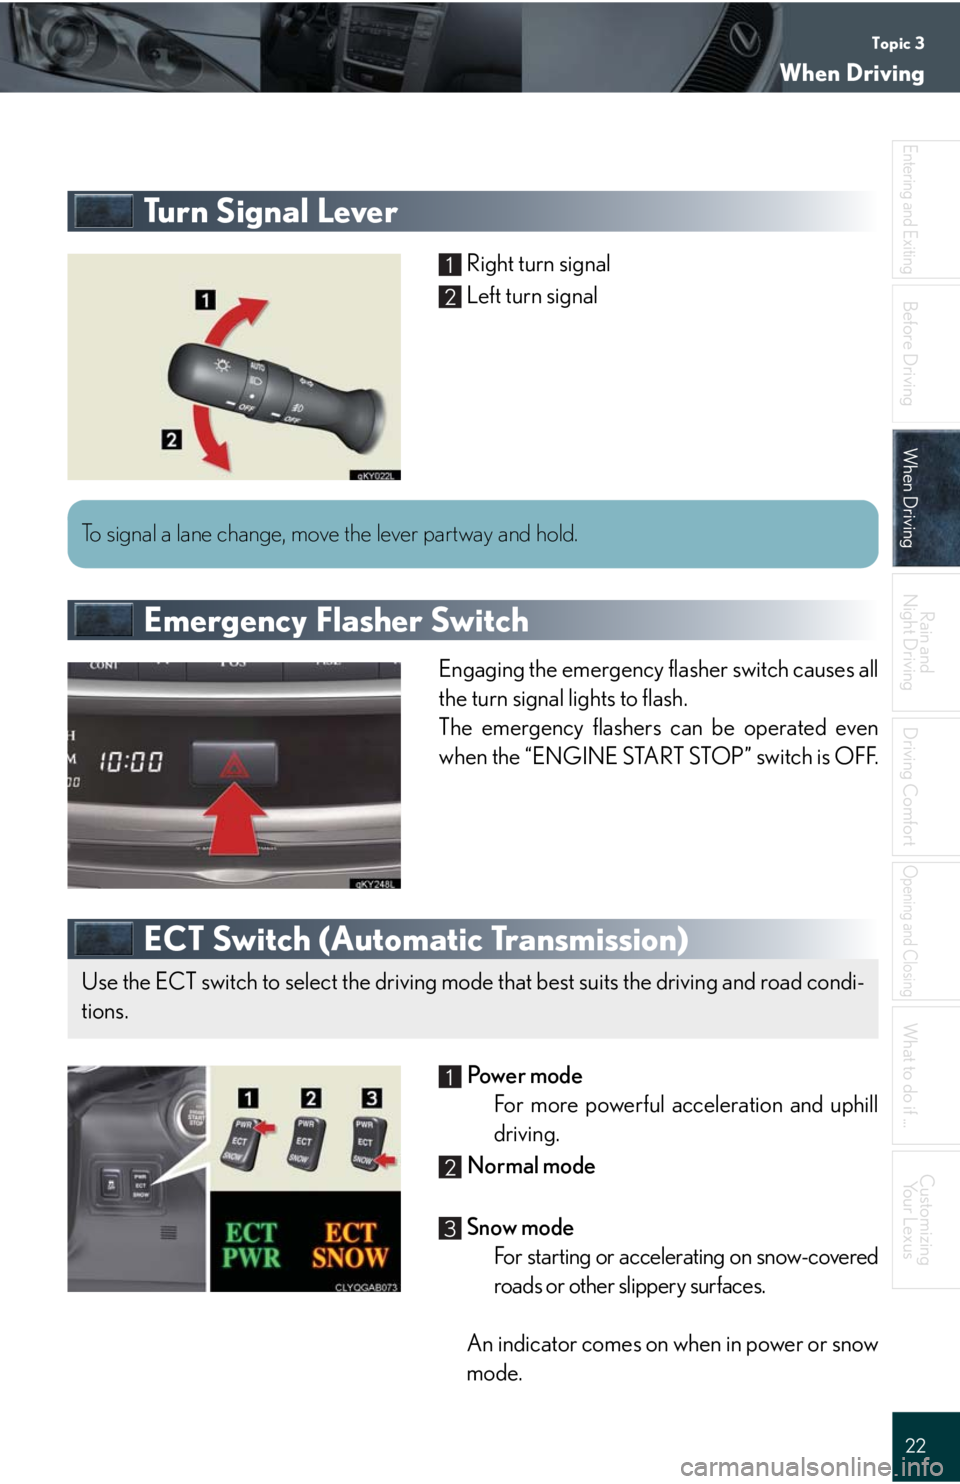
Tu r n S i g n a l L e v e r
Right turn signal
Left turn signal
Emergency Flasher Switch
Engaging the emergency flasher switch causes all
the turn signal lights to flash.
The emergency flashers can be operated even
when the “ENGINE START STOP” switch is OFF.
ECT Switch (Automatic Transmission)
Po w e r m o d e
For more powerful acceleration and uphill
driving.
Normal mode
Snow mode
For starting or accelerating on snow-covered
roads or other slippery surfaces.
An indicator comes on when in power or snow
mode.
1
2
To signal a lane change, move the lever partway and hold.
Use the ECT switch to select the driving mode that best suits the driving and road condi-
tions.
1
2
3
Page 26 of 58

Rain and Night DrivingTopic 4
Headlights............................................................... 27
Fog Lights ................................................................ 28
Windshield Wipers and Washer ...................... 28
Headlight Cleaner ............................................... 29
Rear Window and Outside Rear View
Mirror Defoggers................................................. 29
Instrument Panel Light Control ....................... 29