warning light Lexus IS350 2021 / LEXUS 2021 IS 300, IS 350 (OM53E98U) Owner's Guide
[x] Cancel search | Manufacturer: LEXUS, Model Year: 2021, Model line: IS350, Model: Lexus IS350 2021Pages: 436, PDF Size: 13.46 MB
Page 68 of 436
682-1. Instrument cluster
switch is turned to IGNITION ON
mode to indicate that a system check is
being performed. They will turn off after
the engine is started, or after a few sec-
onds. There may be a malfunction in a
system if the lights do not come on, or
turn off. Have the vehicle inspected by
your Lexus dealer.
*2: This light illuminates on the multi-infor-mation display.
*3: This light illuminates on the center panel.
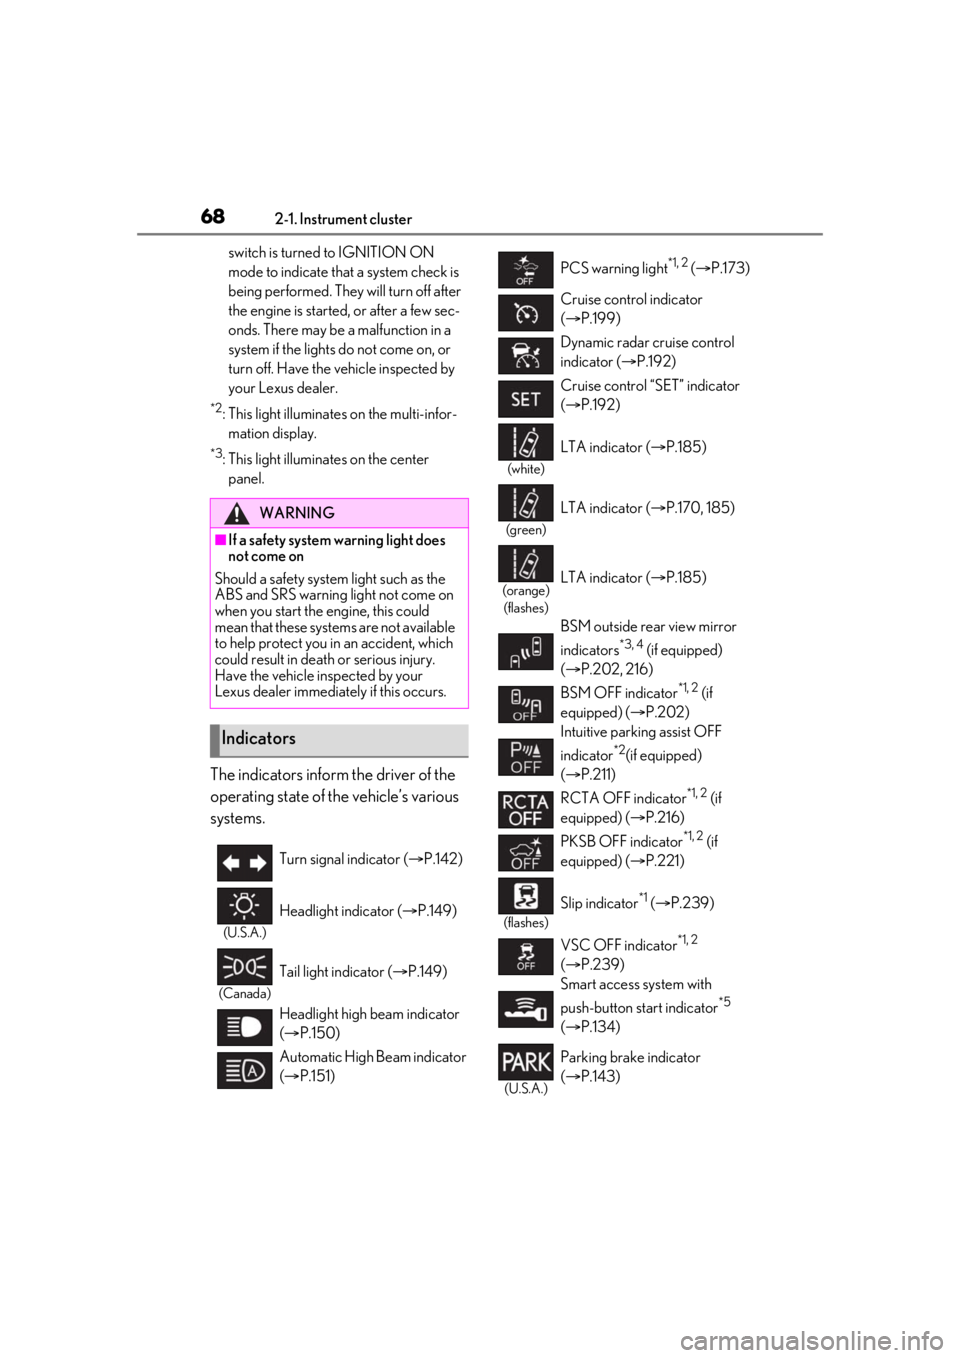
The indicators inform the driver of the
operating state of the vehicle’s various
systems.
WARNING
■If a safety system warning light does
not come on
Should a safety system light such as the
ABS and SRS warning light not come on
when you start the engine, this could
mean that these systems are not available
to help protect you in an accident, which
could result in death or serious injury.
Have the vehicle inspected by your
Lexus dealer immediately if this occurs.
Indicators
Turn signal indicator ( P.142)
(U.S.A.)
Headlight indicator ( P.149)
(Canada)
Tail light indicator ( P.149)
Headlight high beam indicator
( P.150)
Automatic High Beam indicator
( P.151)
PCS warning light*1, 2 ( P.173)
Cruise control indicator
( P.199)
Dynamic radar cruise control
indicator ( P.192)
Cruise control “SET” indicator
( P.192)
(white)
LTA indicator ( P.185)
(green)
LTA indicator ( P.170, 185)
(orange)
(flashes)LTA indicator ( P.185)
BSM outside rear view mirror
indicators
*3, 4 (if equipped)
( P.202, 216)
BSM OFF indicator
*1, 2 (if
equipped) ( P.202)
Intuitive parking assist OFF
indicator
*2(if equipped)
( P.211)
RCTA OFF indicator
*1, 2 (if
equipped) ( P.216)
PKSB OFF indicator
*1, 2 (if
equipped) ( P.221)
(flashes)
Slip indicator*1 ( P.239)
VSC OFF indicator
*1, 2
( P.239)
Smart access system with
push-button start indicator
*5
( P.134)
(U.S.A.)
Parking brake indicator
( P.143)
Page 75 of 436
752-1. Instrument cluster
2
Vehicle status information and indicators
■Display items
Odometer
Displays the total distance the vehicle has
been driven.
Trip meter A/trip meter B
Displays the distance the vehicle has been
driven since the meter was last reset. Trip
meters A and B can be used to record and
display different distances independently.
Distance until next engine oil change
Displays the distance the vehicle can be
driven until an oil change is necessary.
■Changing the display
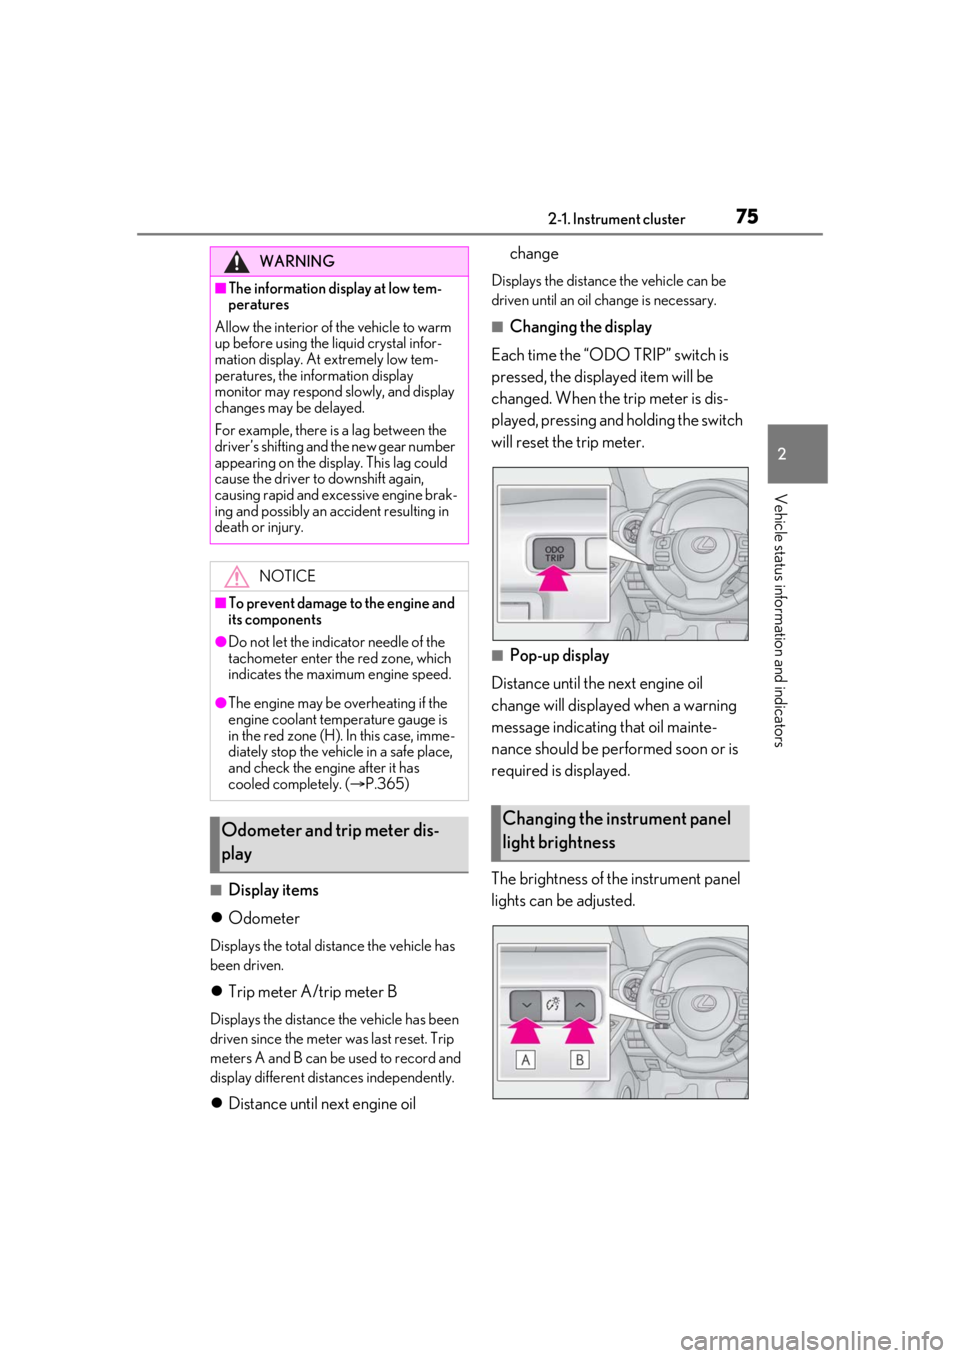
Each time the “ODO TRIP” switch is
pressed, the displayed item will be
changed. When the trip meter is dis-
played, pressing and holding the switch
will reset the trip meter.
■Pop-up display
Distance until the next engine oil
change will displayed when a warning
message indicating that oil mainte-
nance should be performed soon or is
required is displayed.
The brightness of the instrument panel
lights can be adjusted.
WARNING
■The information display at low tem-
peratures
Allow the interior of the vehicle to warm
up before using the liquid crystal infor-
mation display. At extremely low tem-
peratures, the in formation display
monitor may respond slowly, and display
changes may be delayed.
For example, there is a lag between the
driver’s shifting and the new gear number
appearing on the display. This lag could
cause the driver to downshift again,
causing rapid and excessive engine brak-
ing and possibly an accident resulting in
death or injury.
NOTICE
■To prevent damage to the engine and
its components
●Do not let the indicator needle of the
tachometer enter the red zone, which
indicates the maximum engine speed.
●The engine may be overheating if the
engine coolant temperature gauge is
in the red zone (H). In this case, imme-
diately stop the vehicle in a safe place,
and check the engine after it has
cooled completely. ( P.365)
Odometer and trip meter dis-
playChanging the instrument panel
light brightness
Page 76 of 436
762-1. Instrument cluster
Darker
Brighter
■Brightness of the meters (day mode and
night mode)
The brightness of th e meters changes
between day mode and night mode.
●Day mode: When the tail lights are off or
when the tail lights are on but the sur-
rounding area is bright
●Night mode: When the tail lights are on
and the surrounding area is dark
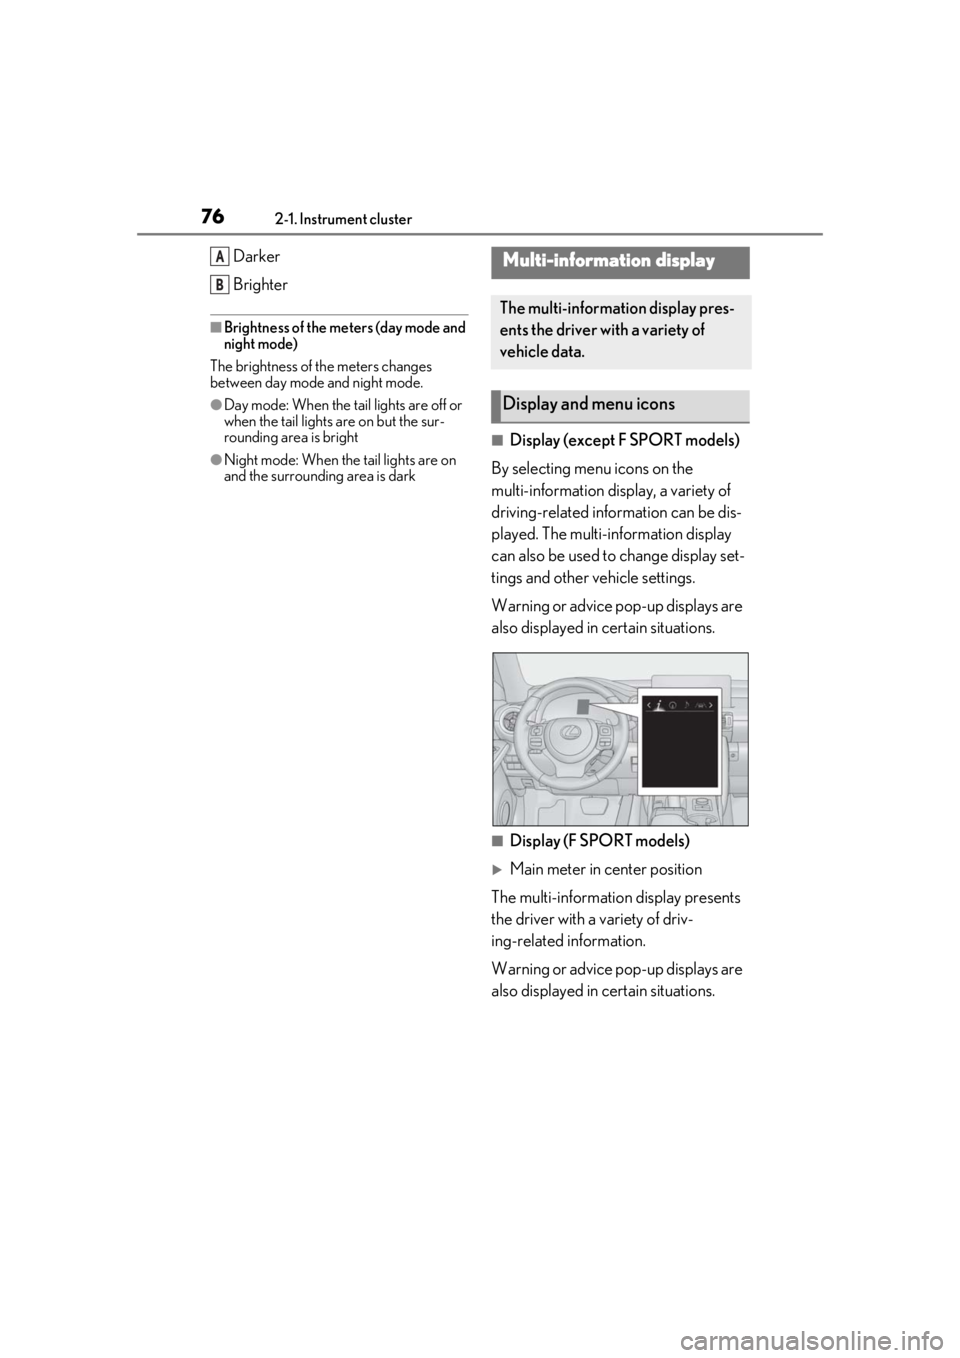
■Display (except F SPORT models)
By selecting menu icons on the
multi-information display, a variety of
driving-related information can be dis-
played. The multi-information display
can also be used to change display set-
tings and other vehicle settings.
Warning or advice pop-up displays are
also displayed in certain situations.
■Display (F SPORT models)
Main meter in center position
The multi-informatio n display presents
the driver with a variety of driv-
ing-related information.
Warning or advice pop-up displays are
also displayed in certain situations.
A
B
Multi-information display
The multi-information display pres-
ents the driver with a variety of
vehicle data.
Display and menu icons
Page 80 of 436
802-1. Instrument cluster
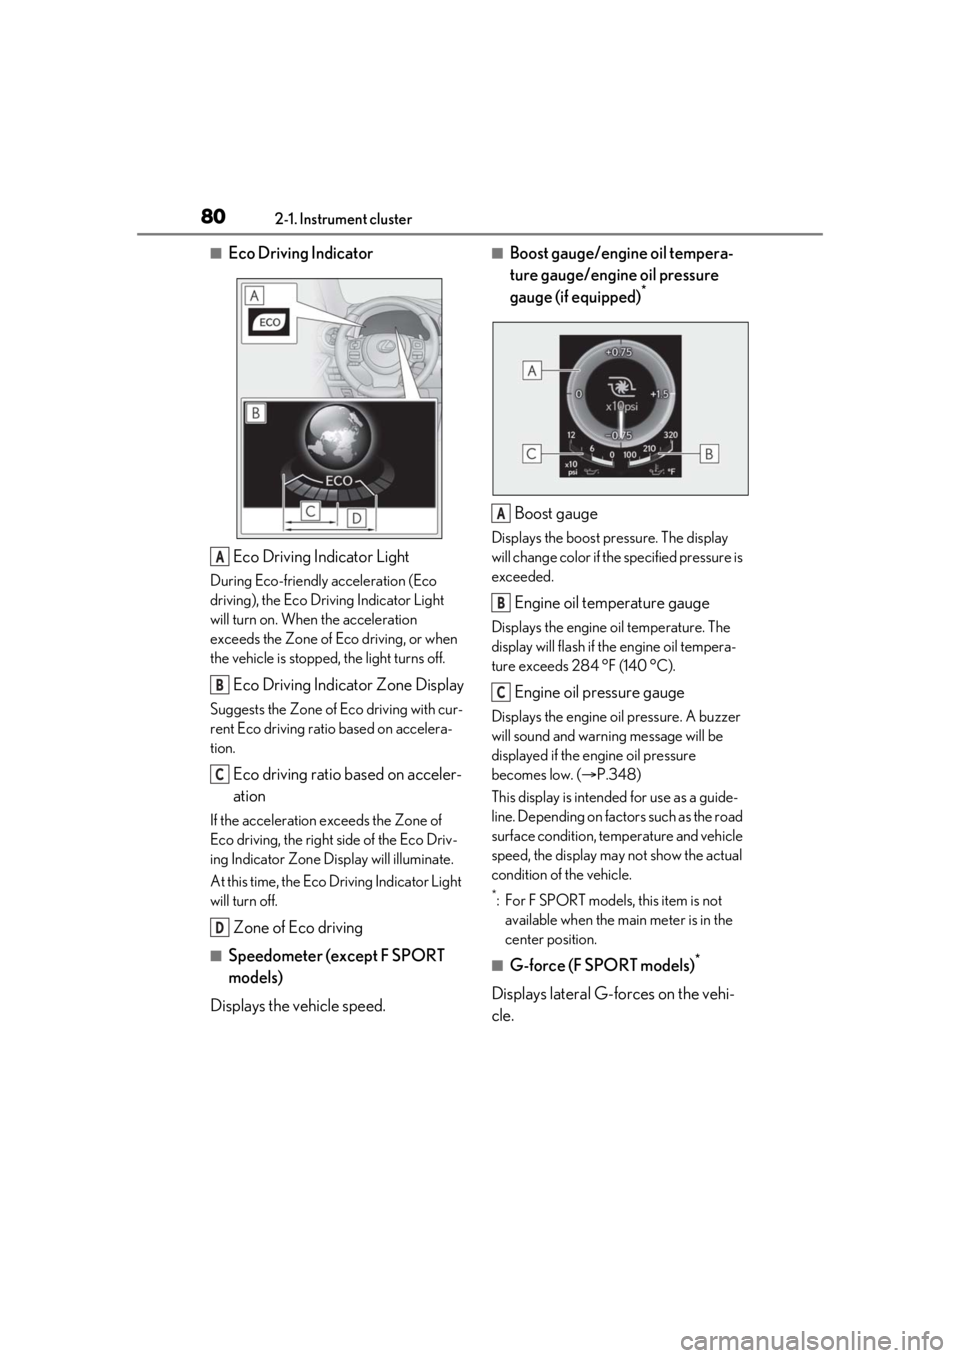
■Eco Driving IndicatorEco Driving Indicator Light
During Eco-friendly acceleration (Eco
driving), the Eco Driving Indicator Light
will turn on. When the acceleration
exceeds the Zone of Eco driving, or when
the vehicle is stopped, the light turns off.
Eco Driving Indicator Zone Display
Suggests the Zone of Eco driving with cur-
rent Eco driving ratio based on accelera-
tion.
Eco driving ratio based on acceler-
ation
If the acceleration exceeds the Zone of
Eco driving, the right side of the Eco Driv-
ing Indicator Zone Display will illuminate.
At this time, the Eco Driving Indicator Light
will turn off.
Zone of Eco driving
■Speedometer (except F SPORT
models)
Displays the vehicle speed.
■Boost gauge/engine oil tempera-
ture gauge/engine oil pressure
gauge (if equipped)
*
Boost gauge
Displays the boost pressure. The display
will change color if th e specified pressure is
exceeded.
Engine oil temperature gauge
Displays the engine oil temperature. The
display will flash if the engine oil tempera-
ture exceeds 284 °F (140 °C).
Engine oil pressure gauge
Displays the engine oil pressure. A buzzer
will sound and warning message will be
displayed if the engine oil pressure
becomes low. ( P.348)
This display is intended for use as a guide-
line. Depending on fact ors such as the road
surface condition, temperature and vehicle
speed, the display may not show the actual
condition of the vehicle.
*: For F SPORT models, this item is not available when the main meter is in the
center position.
■G-force (F SPORT models)*
Displays lateral G-forces on the vehi-
cle.
A
B
C
D
A
B
C
Page 82 of 436
822-1. Instrument cluster
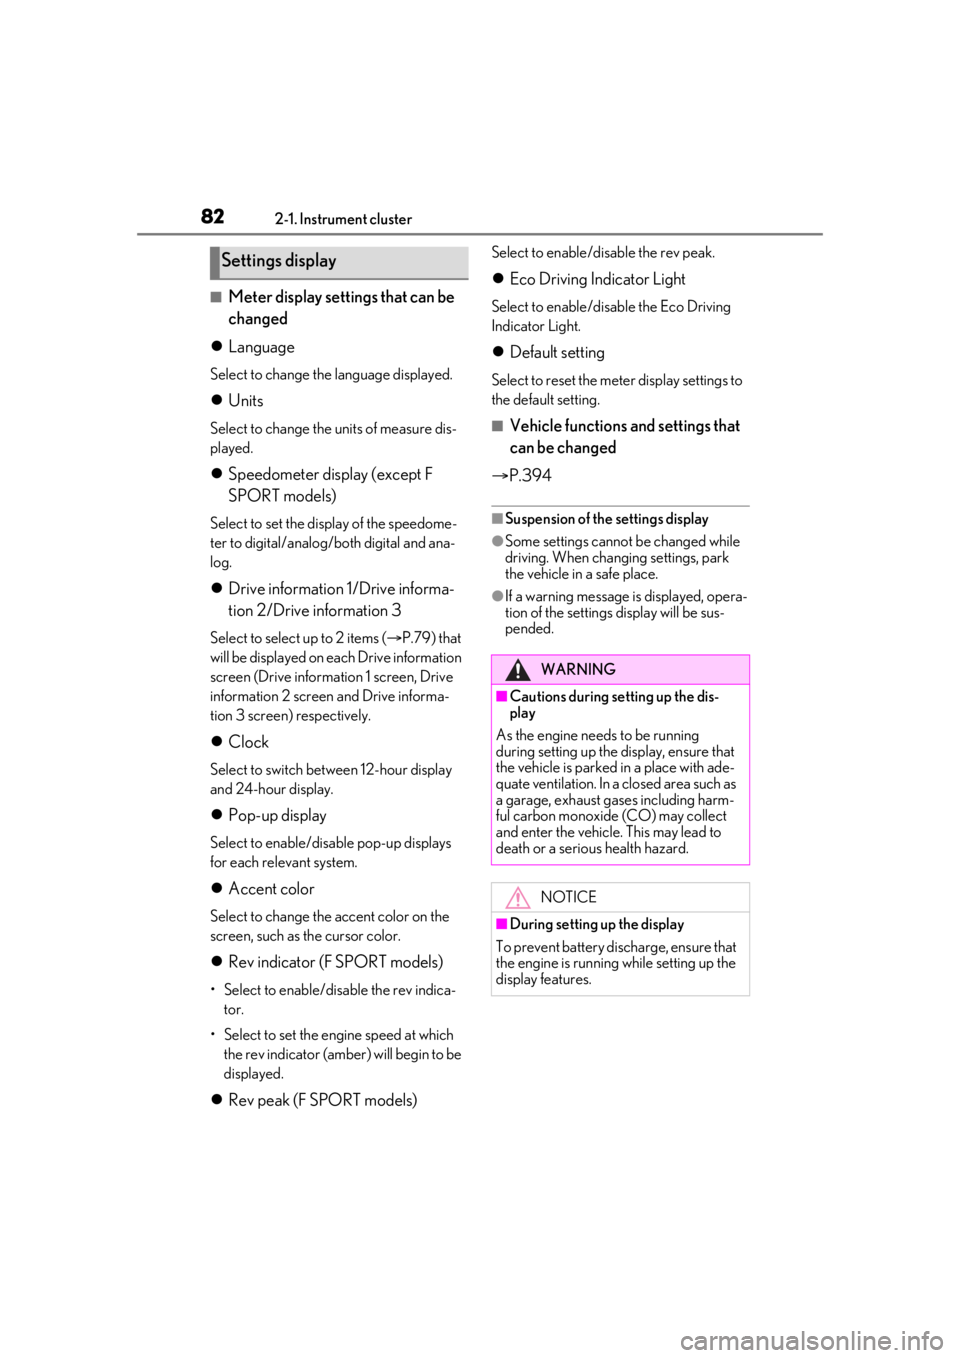
■Meter display settings that can be
changed
Language
Select to change th e language displayed.
Units
Select to change the units of measure dis-
played.
Speedometer display (except F
SPORT models)
Select to set the display of the speedome-
ter to digital/analog/both digital and ana-
log.
Drive information 1/Drive informa-
tion 2/Drive information 3
Select to select up to 2 items ( P.79) that
will be displayed on ea ch Drive information
screen (Drive information 1 screen, Drive
information 2 screen and Drive informa-
tion 3 screen) respectively.
Clock
Select to switch be tween 12-hour display
and 24-hour display.
Pop-up display
Select to enable/disable pop-up displays
for each relevant system.
Accent color
Select to change the accent color on the
screen, such as the cursor color.
Rev indicator (F SPORT models)
• Select to enable/disable the rev indica-
tor.
• Select to set the engine speed at which the rev indicator (amber) will begin to be
displayed.
Rev peak (F SPORT models)
Select to enable/disable the rev peak.
Eco Driving Indicator Light
Select to enable/disable the Eco Driving
Indicator Light.
Default setting
Select to reset the meter display settings to
the default setting.
■Vehicle functions and settings that
can be changed
P.394
■Suspension of the settings display
●Some settings cannot be changed while
driving. When changing settings, park
the vehicle in a safe place.
●If a warning message is displayed, opera-
tion of the settings display will be sus-
pended.
Settings display
WARNING
■Cautions during setting up the dis-
play
As the engine needs to be running
during setting up the display, en sure that
the vehicle is parked in a place with ade-
quate ventilation. In a closed area such as
a garage, exhaust gases including harm-
ful carbon monoxide (CO) may collect
and enter the vehicle. This may lead to
death or a serious health hazard.
NOTICE
■During setting up the display
To prevent battery discharge, ensure that
the engine is running while setting up the
display features.
Page 96 of 436
963-2. Opening, closing and locking the doors and trunk
Trunk
The trunk can be opened using the
trunk opener, entry function or
wireless remote control.
WARNING
Observe the following precautions.
Failure to do so may result in death or
serious injury.
■Before driving
●Make sure that the trunk lid is fully
closed. If the trunk lid is not fully
closed, it may open unexpectedly
while driving and hit near-by objects or
luggage in the trun k may be thrown
out, causing an accident.
●Do not allow children to play in the
trunk.
If a child is accidentally locked in the
trunk, they could suffer from heat
exhaustion, suffocation or other inju-
ries.
●Do not allow a child to open or close
the trunk lid.
Doing so may cause the trunk lid to
open unexpectedly, or cause the
child’s hands, head, or neck to be
caught by the closing trunk lid.
■Important points while driving
Never let anyone sit in the trunk. In the
event of sudden braking or a collision,
they are susceptible to death or serious
injury.
■Using the trunk
Observe the following precautions.
Failure to do so may cause parts of the
body to be caught, resulting in serious
injury.
●Remove any heavy loads, such as snow
and ice, from the trunk lid before
opening it. Failure to do so may cause
the trunk lid to suddenly shut again
after it is opened.
●When opening or closing the trunk lid,
thoroughly check to make sure the
surrounding area is safe.
●If anyone is in the vicinity, make sure
they are safe and let them know that
the trunk is about to open or close.
●Use caution when opening or closing
the trunk lid in windy weather as it may
move abruptly in strong wind.
●The trunk lid may suddenly shut if it is
not opened fully. It is more difficult to
open or close the trunk lid on an
incline than on a level surface, so
beware of the trunk lid unexpectedly
opening or closing by itself. Make sure
that the trunk lid is fully open and
secure before using the trunk.
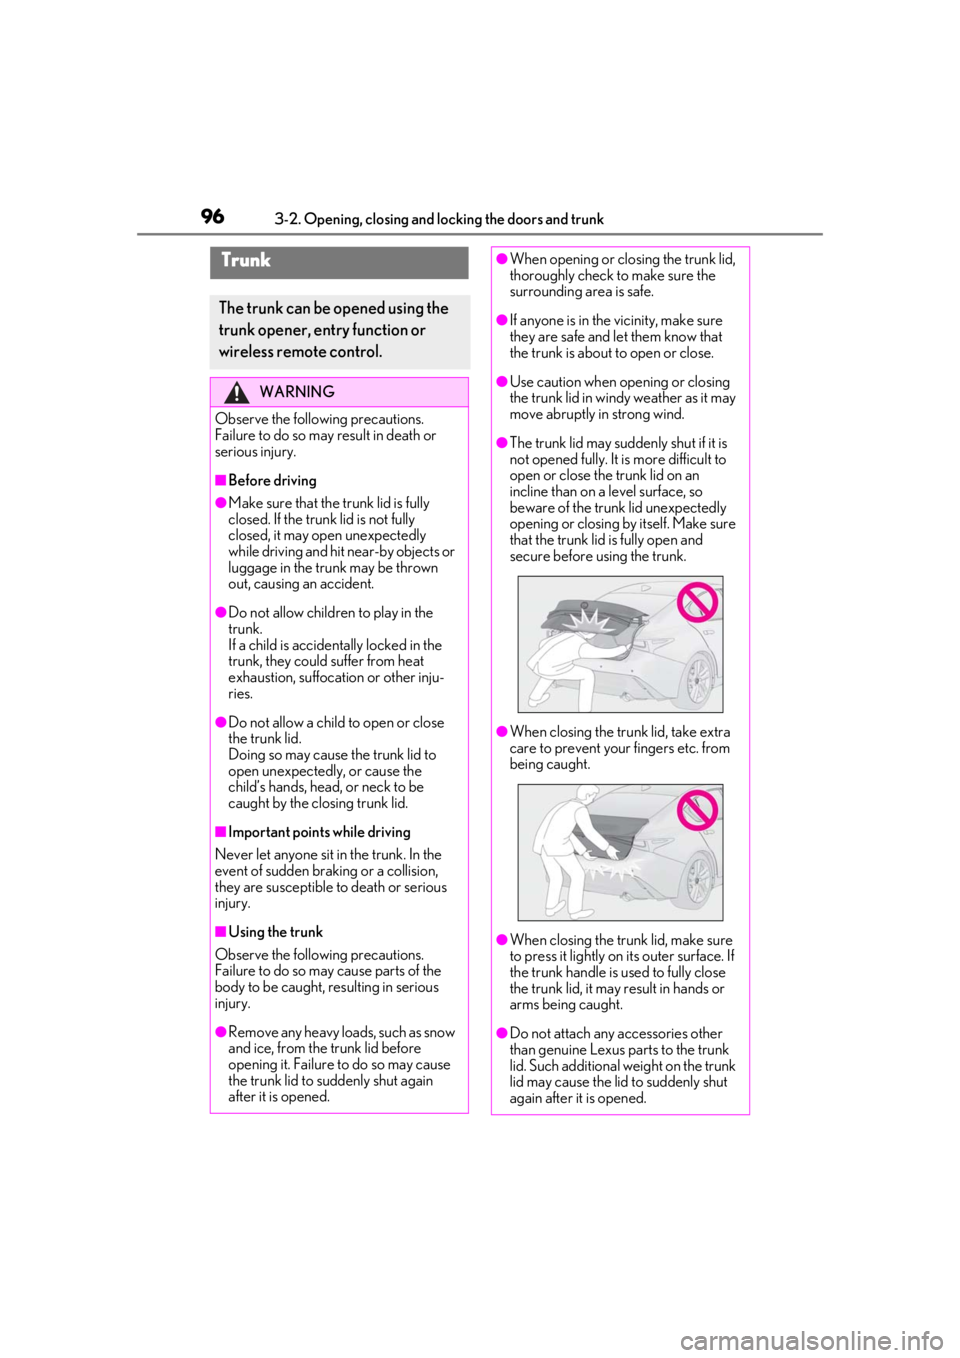
●When closing the trunk lid, take extra
care to prevent your fingers etc. from
being caught.
●When closing the trunk lid, make sure
to press it lightly on its outer surface. If
the trunk handle is used to fully close
the trunk lid, it may result in hands or
arms being caught.
●Do not attach any accessories other
than genuine Lexus parts to the trunk
lid. Such additional weight on the trunk
lid may cause the lid to suddenly shut
again after it is opened.
Page 107 of 436
1073-3. Adjusting the seats
3
Before driving
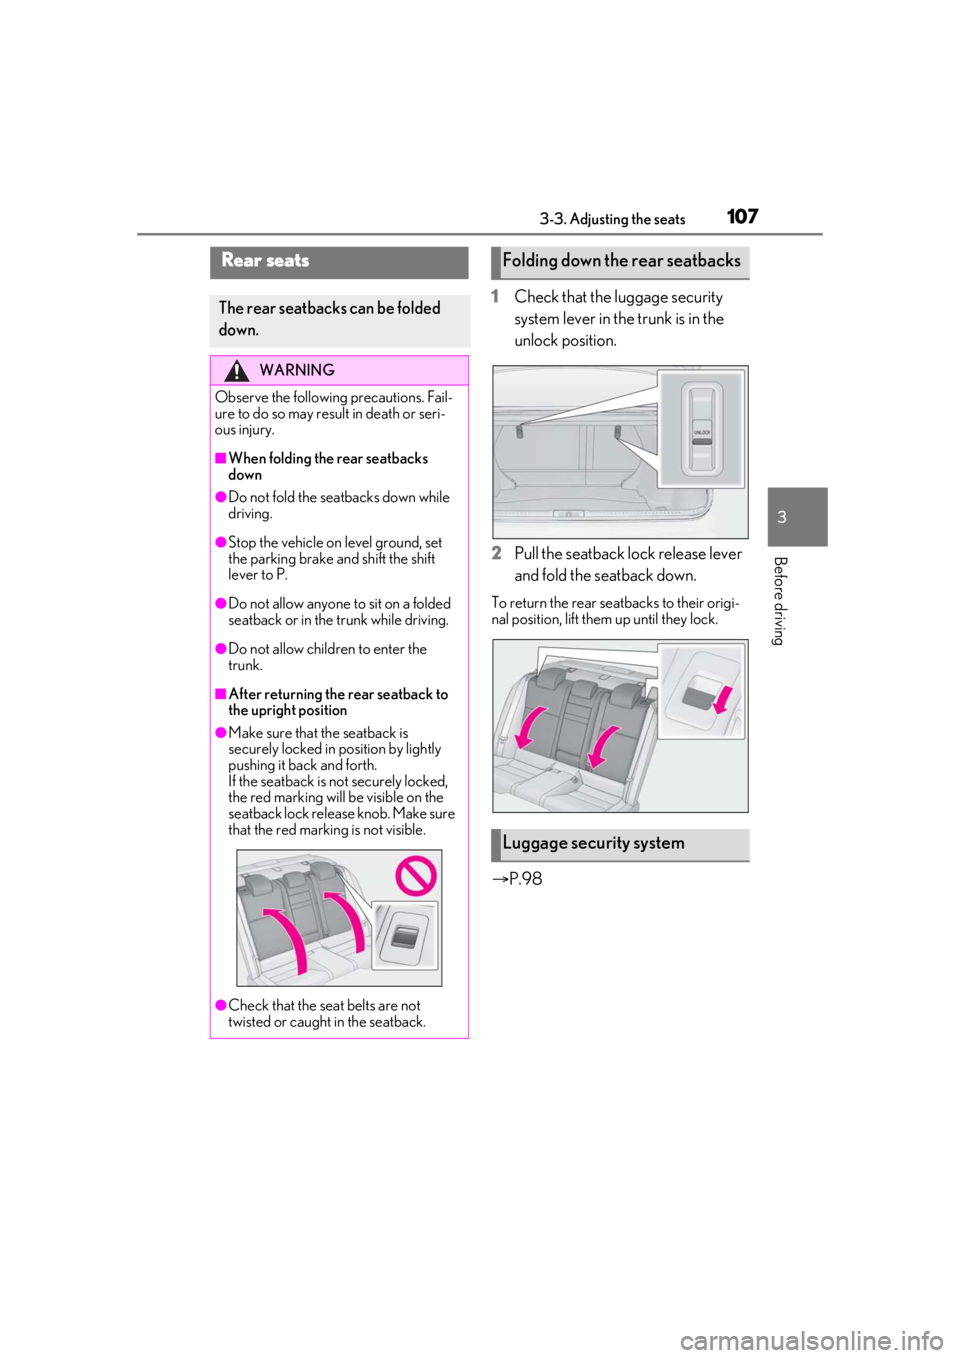
1Check that the luggage security
system lever in the trunk is in the
unlock position.
2 Pull the seatback lock release lever
and fold the seatback down.
To return the rear seatbacks to their origi-
nal position, lift them up until they lock.
P.98
Rear seats
The rear seatbacks can be folded
down.
WARNING
Observe the following precautions. Fail-
ure to do so may result in death or seri-
ous injury.
■When folding the rear seatbacks
down
●Do not fold the seatbacks down while
driving.
●Stop the vehicle on level ground, set
the parking brake and shift the shift
lever to P.
●Do not allow anyone to sit on a folded
seatback or in the trunk while driving.
●Do not allow children to enter the
trunk.
■After returning the rear seatback to
the upright position
●Make sure that the seatback is
securely locked in position by lightly
pushing it back and forth.
If the seatback is not securely locked,
the red marking will be visible on the
seatback lock release knob. Make sure
that the red marking is not visible.
●Check that the seat belts are not
twisted or caught in the seatback.
Folding down the rear seatbacks
Luggage security system
Page 109 of 436
1093-3. Adjusting the seats
3
Before driving
If the selected button has already been
preset, the previously recorded position
will be overwritten.
■Seat positions that can be memorized
( P.106)
The adjusted positions other than the posi-
tion adjusted by lumbar support switch can
be memorized.
■In order to correctly use the driving
position memory function
If a seat position is already in the furthest
possible position and the seat is operated in
the same direction, the recorded position
may be slightly differen t when it is recalled.
1Check that the shift lever is in P.
2 Turn the engine switch to IGNI-
TION ON mode. 3
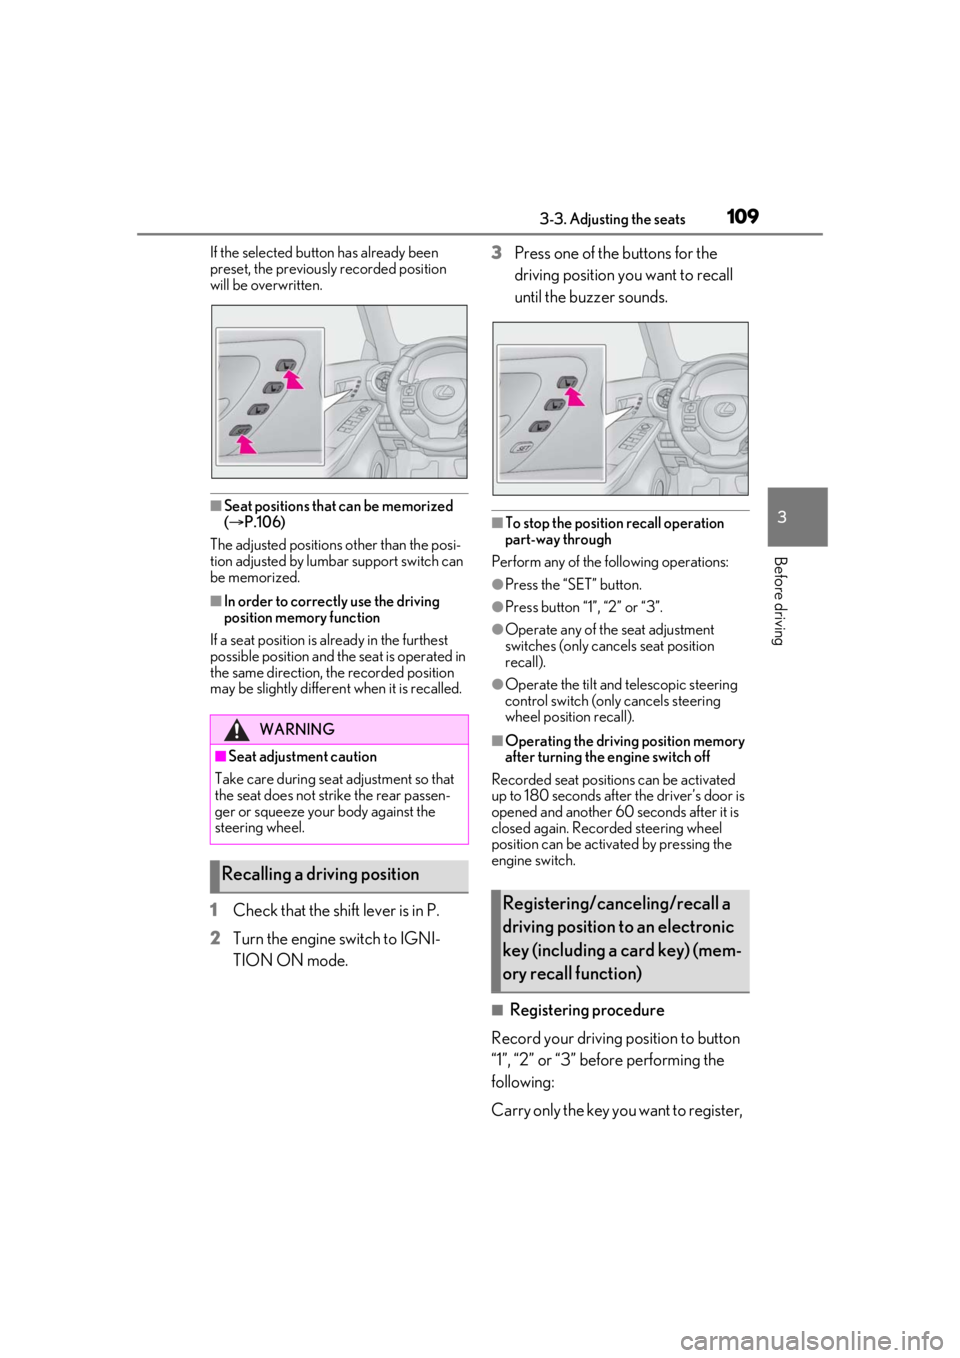
Press one of the buttons for the
driving position you want to recall
until the buzzer sounds.
■To stop the position recall operation
part-way through
Perform any of the following operations:
●Press the “SET” button.
●Press button “1”, “2” or “3”.
●Operate any of the seat adjustment
switches (only cancels seat position
recall).
●Operate the tilt and telescopic steering
control switch (onl y cancels steering
wheel position recall).
■Operating the driving position memory
after turning the engine switch off
Recorded seat positions can be activated
up to 180 seconds after the driver’s door is
opened and another 60 seconds after it is
closed again. Recorded steering wheel
position can be activated by pressing the
engine switch.
■Registering procedure
Record your driving position to button
“1”, “2” or “3” before performing the
following:
Carry only the key yo u want to register,
WARNING
■Seat adjustment caution
Take care during seat adjustment so that
the seat does not strike the rear passen-
ger or squeeze your body against the
steering wheel.
Recalling a driving position
Registering/canceling/recall a
driving position to an electronic
key (including a card key) (mem-
ory recall function)
Page 114 of 436
1143-4. Adjusting the steering wheel and mirrors
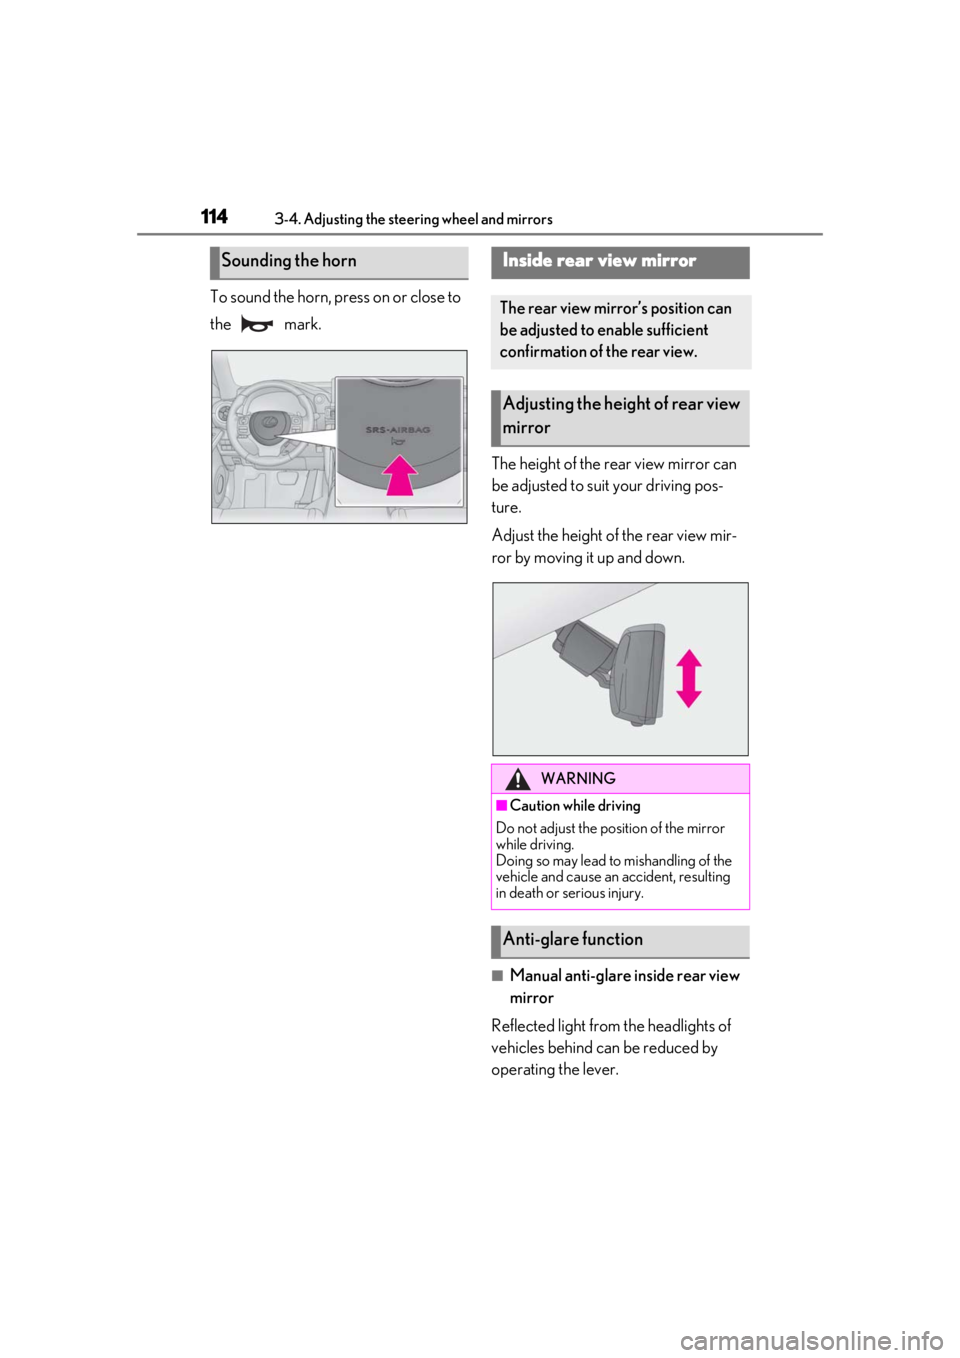
To sound the horn, press on or close to
the mark.The height of the rear view mirror can
be adjusted to suit your driving pos-
ture.
Adjust the height of the rear view mir-
ror by moving it up and down.
■Manual anti-glare inside rear view
mirror
Reflected light from the headlights of
vehicles behind can be reduced by
operating the lever.
Sounding the hornInside rear view mirror
The rear view mirror’s position can
be adjusted to enable sufficient
confirmation of the rear view.
Adjusting the heig ht of rear view
mirror
WARNING
■Caution while driving
Do not adjust the position of the mirror
while driving.
Doing so may lead to mishandling of the
vehicle and cause an accident, resulting
in death or serious injury.
Anti-glare function
Page 116 of 436
1163-4. Adjusting the steering wheel and mirrors
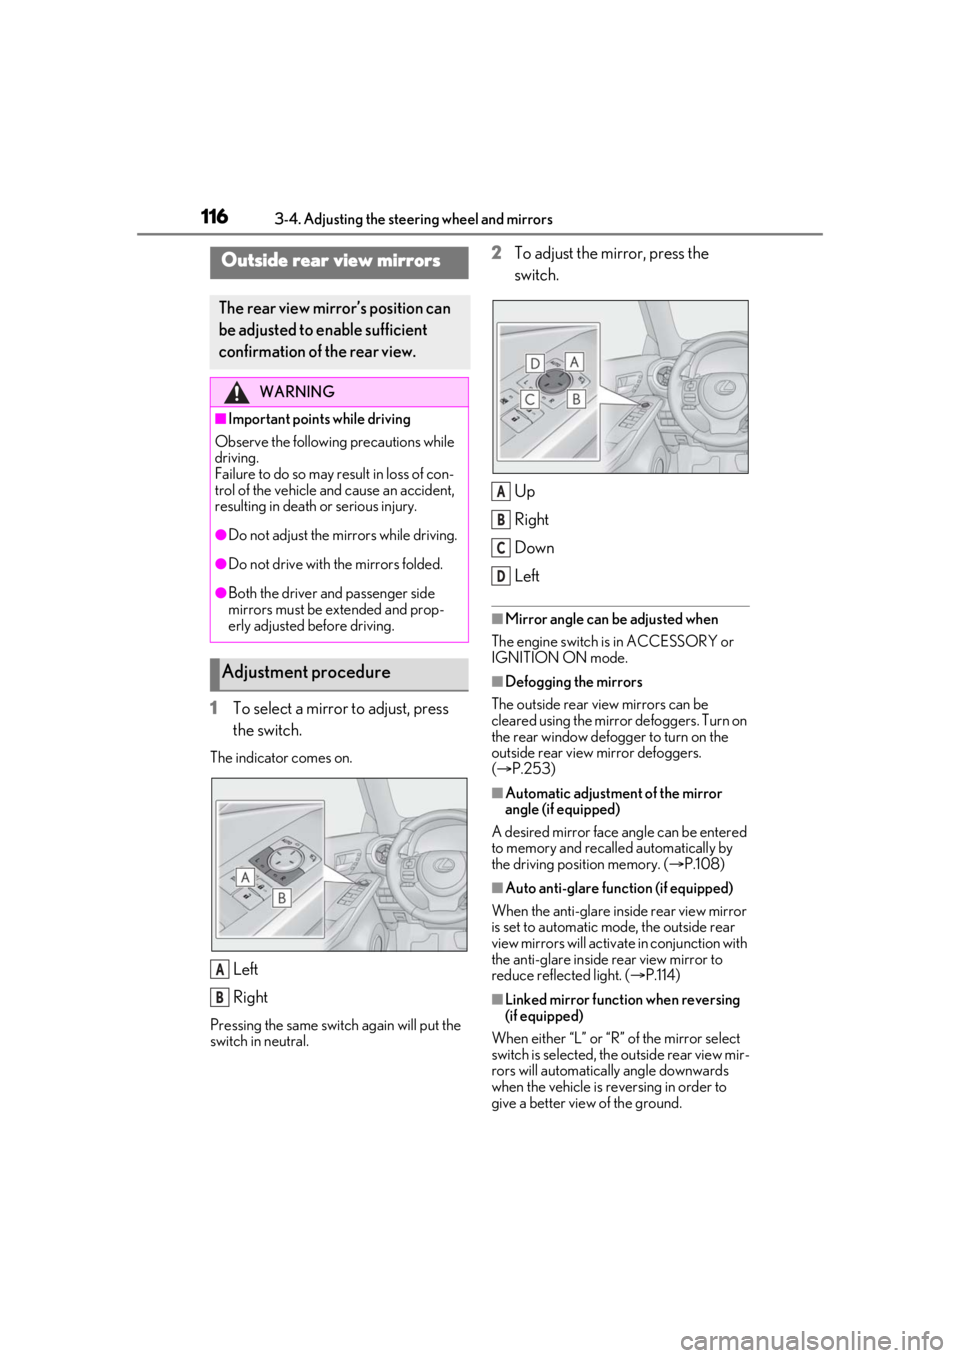
1To select a mirror to adjust, press
the switch.
The indicator comes on.
Left
Right
Pressing the same switch again will put the
switch in neutral.
2To adjust the mirror, press the
switch.
Up
Right
Down
Left
■Mirror angle can be adjusted when
The engine switch is in ACCESSORY or
IGNITION ON mode.
■Defogging the mirrors
The outside rear view mirrors can be
cleared using the mirror defoggers. Turn on
the rear window defogger to turn on the
outside rear view mirror defoggers.
( P.253)
■Automatic adjustment of the mirror
angle (if equipped)
A desired mirror face angle can be entered
to memory and recalled automatically by
the driving position memory. ( P.108)
■Auto anti-glare function (if equipped)
When the anti-glare inside rear view mirror
is set to automatic mode, the outside rear
view mirrors will activate in conjunction with
the anti-glare inside rear view mirror to
reduce reflec ted light. (P.114)
■Linked mirror function when reversing
(if equipped)
When either “L” or “R” of the mirror select
switch is selected, the outside rear view mir-
rors will automatically angle downwards
when the vehicle is re versing in order to
give a better view of the ground.
Outside rear view mirrors
The rear view mirror’s position can
be adjusted to enable sufficient
confirmation of the rear view.
WARNING
■Important points while driving
Observe the following precautions while
driving.
Failure to do so may result in loss of con-
trol of the vehicle and cause an accident,
resulting in death or serious injury.
●Do not adjust the mirrors while driving.
●Do not drive with the mirrors folded.
●Both the driver and passenger side
mirrors must be extended and prop-
erly adjusted before driving.
Adjustment procedure
A
B
A
B
C
D