warning lights Lexus IS350 2021 / LEXUS 2021 IS 300, IS 350 (OM53E98U) Owner's Guide
[x] Cancel search | Manufacturer: LEXUS, Model Year: 2021, Model line: IS350, Model: Lexus IS350 2021Pages: 436, PDF Size: 13.46 MB
Page 183 of 436
1834-5. Using the driving support systems
4
Driving
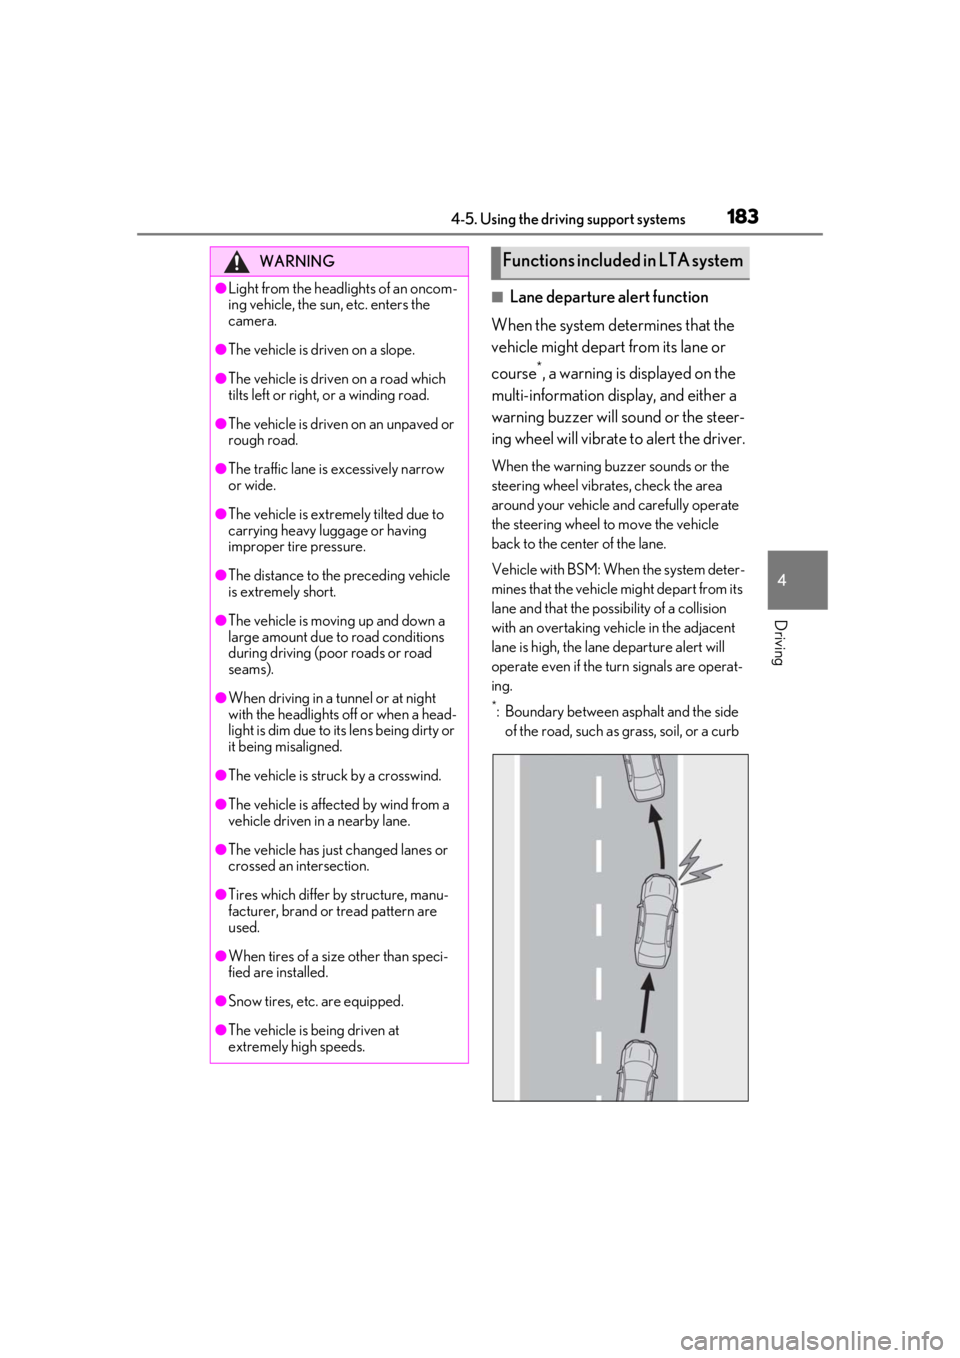
■Lane departure alert function
When the system determines that the
vehicle might depart from its lane or
course
*, a warning is displayed on the
multi-information display, and either a
warning buzzer will sound or the steer-
ing wheel will vibrate to alert the driver.
When the warning buzzer sounds or the
steering wheel vibrates, check the area
around your vehicle and carefully operate
the steering wheel to move the vehicle
back to the center of the lane.
Vehicle with BSM: When the system deter-
mines that the vehicle might depart from its
lane and that the po ssibility of a collision
with an overtaking vehicle in the adjacent
lane is high, the lane departure alert will
operate even if the turn signals are operat-
ing.
*: Boundary between asphalt and the side of the road, such as grass, soil, or a curb
WARNING
●Light from the headlights of an oncom-
ing vehicle, the sun, etc. enters the
camera.
●The vehicle is driven on a slope.
●The vehicle is driven on a road which
tilts left or right, or a winding road.
●The vehicle is driven on an unpaved or
rough road.
●The traffic lane is excessively narrow
or wide.
●The vehicle is extremely tilted due to
carrying heavy luggage or having
improper tire pressure.
●The distance to the preceding vehicle
is extremely short.
●The vehicle is moving up and down a
large amount due to road conditions
during driving (poor roads or road
seams).
●When driving in a tunnel or at night
with the headlights off or when a head-
light is dim due to its lens being dirty or
it being misaligned.
●The vehicle is struck by a crosswind.
●The vehicle is affected by wind from a
vehicle driven in a nearby lane.
●The vehicle has just changed lanes or
crossed an intersection.
●Tires which differ by structure, manu-
facturer, brand or tread pattern are
used.
●When tires of a size other than speci-
fied are installed.
●Snow tires, etc. are equipped.
●The vehicle is being driven at
extremely high speeds.
Functions included in LTA system
Page 194 of 436
1944-5. Using the driving support systems
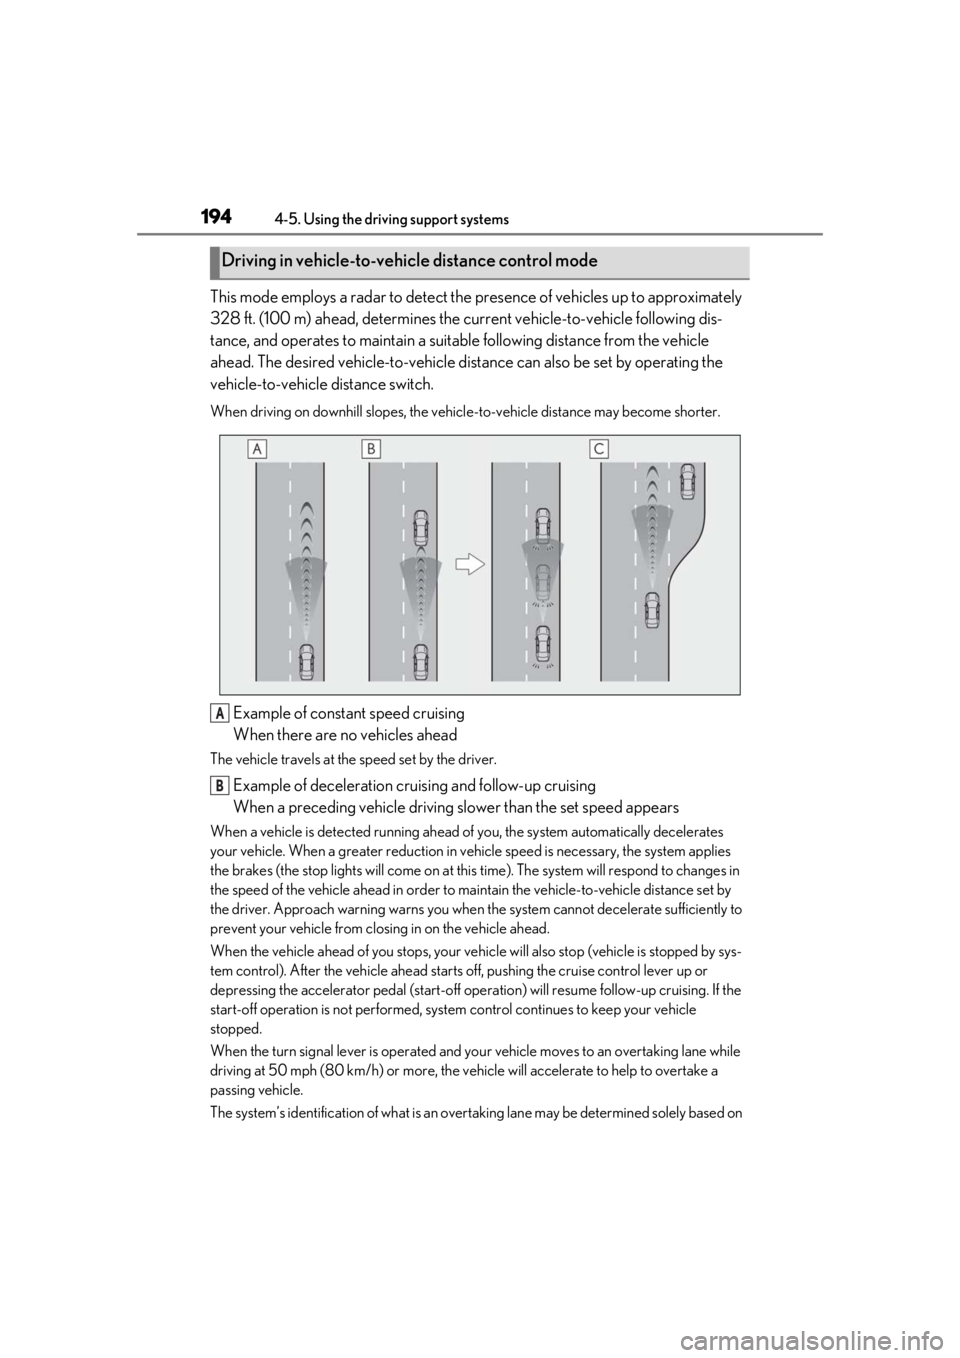
This mode employs a radar to detect the presence of vehicles up to approximately
328 ft. (100 m) ahead, determines the cu rrent vehicle-to-vehicle following dis-
tance, and operates to maintain a suitab le following distance from the vehicle
ahead. The desired vehicle-to-vehicle distance can also be set by operating the
vehicle-to-vehicle distance switch.
When driving on downhill slopes, the vehicl e-to-vehicle distance may become shorter.
Example of constant speed cruising
When there are no vehicles ahead
The vehicle travels at the speed set by the driver.
Example of deceleration cruising and follow-up cruising
When a preceding vehicle driving slower than the set speed appears
When a vehicle is detected running ahead of you, the system automatically decelerates
your vehicle. When a greater reduction in vehicle speed is necessary, the system applies
the brakes (the stop lights will come on at this time). The system will respond to changes in
the speed of the vehicle ahead in order to maintain the vehicle-to-vehicle distance set by
the driver. Approach warning warns you when th e system cannot decelerate sufficiently to
prevent your vehicle from closing in on the vehicle ahead.
When the vehicle ahead of you stops, your vehi cle will also stop (vehicle is stopped by sys-
tem control). After the vehicle ahead starts off, pushing the cruise control lever up or
depressing the accelerator pedal (start-off operation) will resume follow-up cruising. If the
start-off operation is not performed, system control continues to keep your vehicle
stopped.
When the turn signal lever is operated and yo ur vehicle moves to an overtaking lane while
driving at 50 mph (80 km/h) or more, the vehicle will accelerate to help to overtake a
passing vehicle.
The system’s identification of what is an over taking lane may be determined solely based on
Driving in vehicle-to-vehicle distance control mode
A
B
Page 211 of 436
2114-5. Using the driving support systems
4
Driving
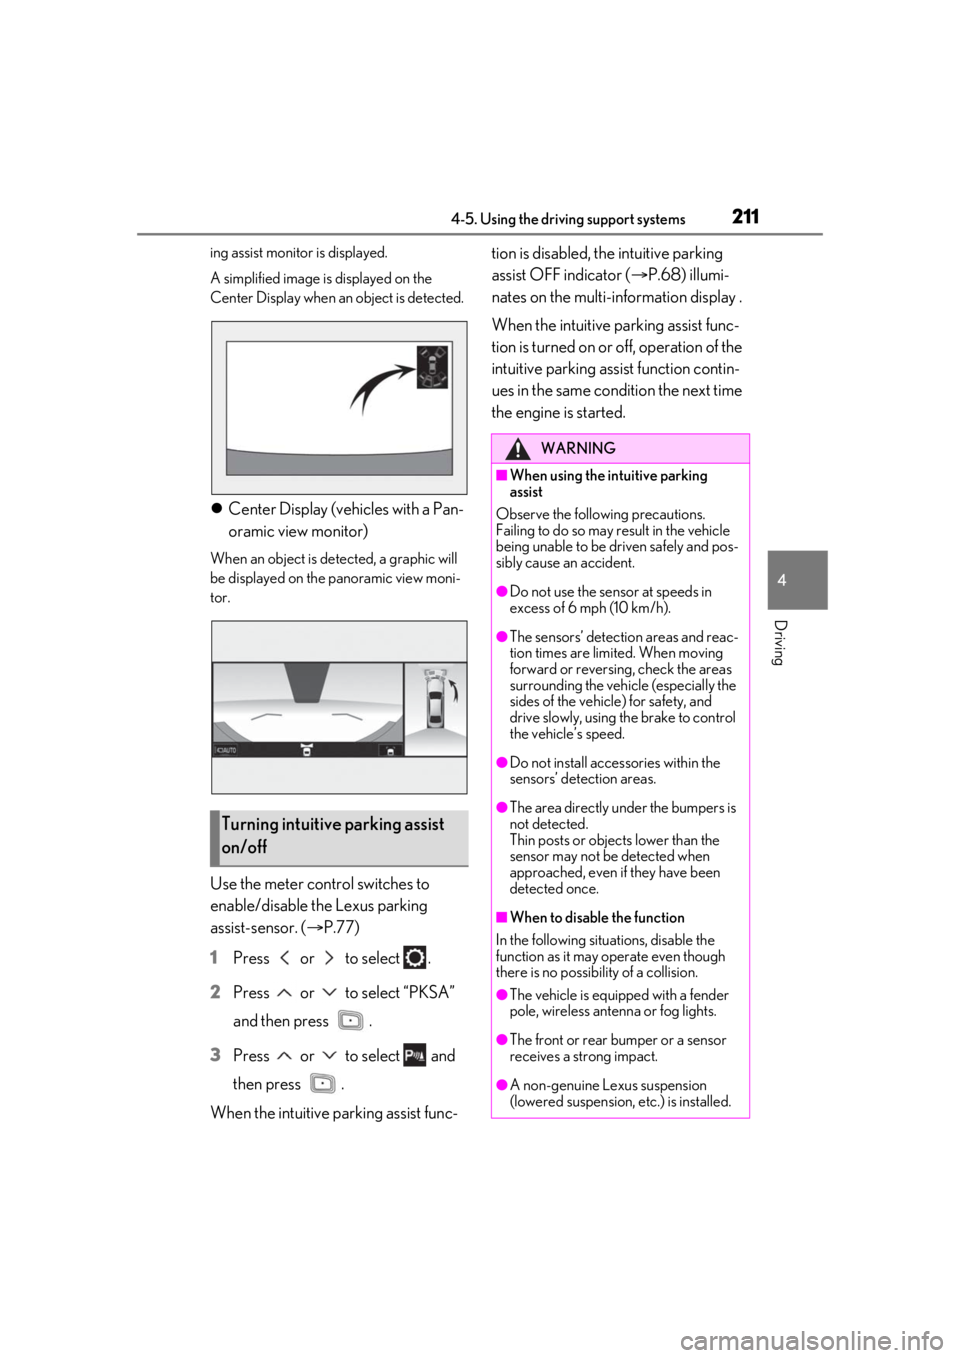
ing assist monitor is displayed.
A simplified image is displayed on the
Center Display when an object is detected.
Center Display (vehicles with a Pan-
oramic view monitor)
When an object is detected, a graphic will
be displayed on the panoramic view moni-
tor.
Use the meter control switches to
enable/disable the Lexus parking
assist-sensor. ( P.77)
1 Press or to select .
2 Press or to select “PKSA”
and then press .
3 Press or to select and
then press .
When the intuitive parking assist func- tion is disabled, th
e intuitive parking
assist OFF indicator ( P.68) illumi-
nates on the multi-information display .
When the intuitive parking assist func-
tion is turned on or off, operation of the
intuitive parking assist function contin-
ues in the same condition the next time
the engine is started.
Turning intuitive parking assist
on/off
WARNING
■When using the intuitive parking
assist
Observe the following precautions.
Failing to do so may result in the vehicle
being unable to be driven safely and pos-
sibly cause an accident.
●Do not use the sensor at speeds in
excess of 6 mph (10 km/h).
●The sensors’ detection areas and reac-
tion times are limited. When moving
forward or reversin g, check the areas
surrounding the vehicle (especially the
sides of the vehicl e) for safety, and
drive slowly, using the brake to control
the vehicle’s speed.
●Do not install accessories within the
sensors’ detection areas.
●The area directly under the bumpers is
not detected.
Thin posts or objects lower than the
sensor may not be detected when
approached, even if they have been
detected once.
■When to disable the function
In the following situations, disable the
function as it may operate even though
there is no possibility of a collision.
●The vehicle is equipped with a fender
pole, wireless antenna or fog lights.
●The front or rear bumper or a sensor
receives a strong impact.
●A non-genuine Lexus suspension
(lowered suspension, etc.) is installed.
Page 239 of 436
2394-5. Using the driving support systems
4
Driving
controlling the brakes, engine output
and steering assist.
■The Secondary Collision Brake
When the SRS airbag sensor detects a
collision and the system operates, the
brakes and brake lights are automati-
cally controlled to reduce the vehicle
speed and help redu ce the possibility
of further damage due to a secondary
collision.
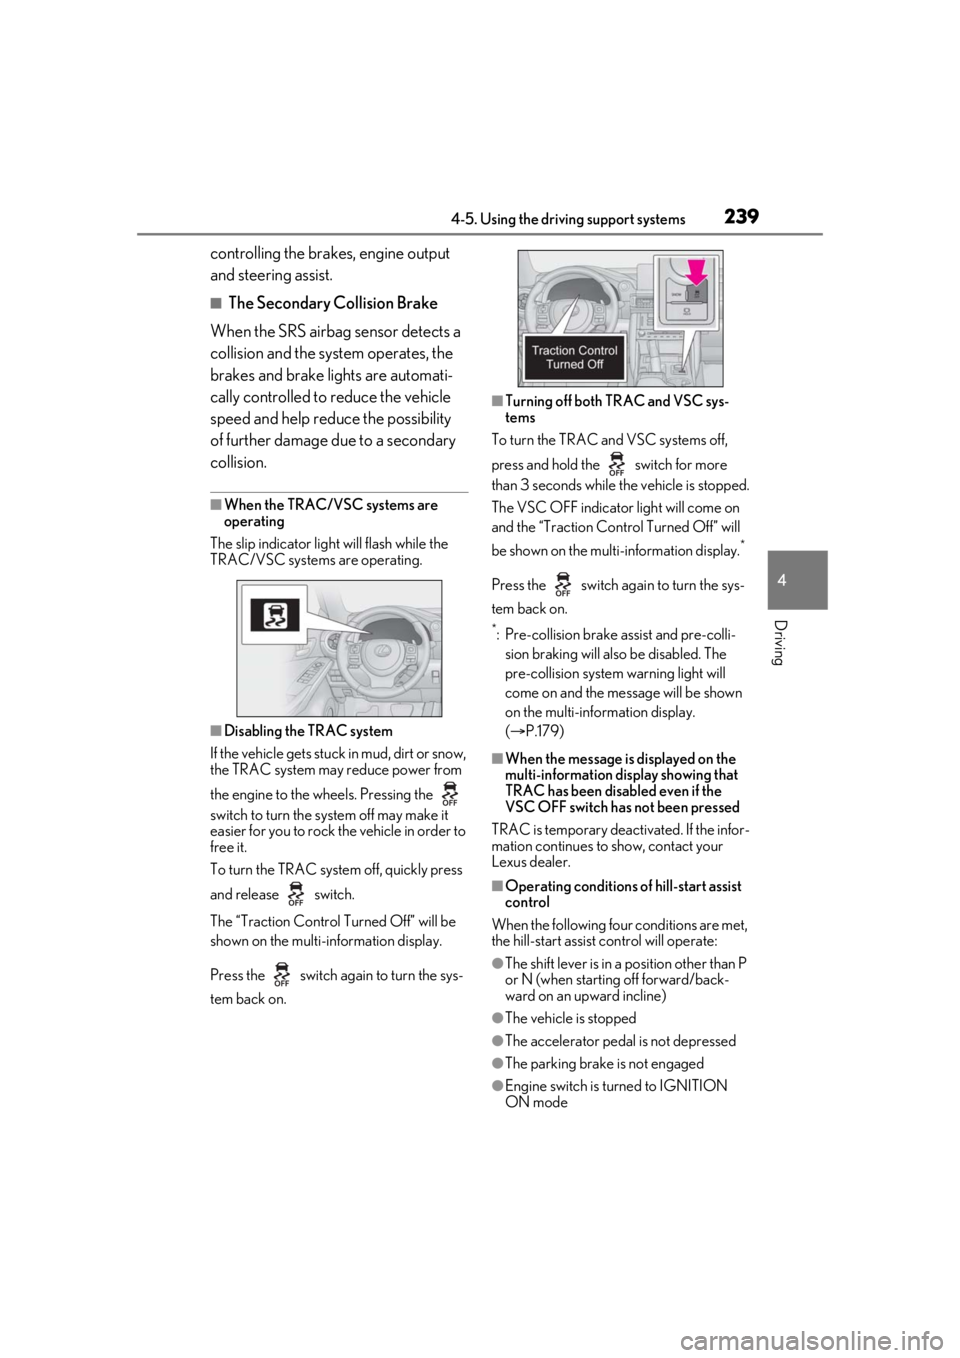
■When the TRAC/VSC systems are
operating
The slip indicator light will flash while the
TRAC/VSC systems are operating.
■Disabling the TRAC system
If the vehicle gets stuck in mud, dirt or snow,
the TRAC system may reduce power from
the engine to the wheels. Pressing the
switch to turn the system off may make it
easier for you to rock the vehicle in order to
free it.
To turn the TRAC system off, quickly press
and release switch.
The “Traction Control Turned Off” will be
shown on the multi-information display.
Press the switch again to turn the sys-
tem back on.
■Turning off both TRAC and VSC sys-
tems
To turn the TRAC and VSC systems off,
press and hold the switch for more
than 3 seconds while the vehicle is stopped.
The VSC OFF indicator light will come on
and the “Traction Control Turned Off” will
be shown on the multi-information display.
*
Press the switch ag ain to turn the sys-
tem back on.
*: Pre-collision brake assist and pre-colli- sion braking will also be disabled. The
pre-collision system warning light will
come on and the messa ge will be shown
on the multi-information display.
( P.179)
■When the message is displayed on the
multi-information display showing that
TRAC has been disabled even if the
VSC OFF switch has not been pressed
TRAC is temporary deactivated. If the infor-
mation continues to show, contact your
Lexus dealer.
■Operating conditions of hill-start assist
control
When the following four conditions are met,
the hill-start assist control will operate:
●The shift lever is in a position other than P
or N (when starting off forward/back-
ward on an upward incline)
●The vehicle is stopped
●The accelerator pedal is not depressed
●The parking brake is not engaged
●Engine switch is turned to IGNITION
ON mode
Page 261 of 436
2615-2. Using the air conditioning system and defogger
5
Interior features
*:If equipped
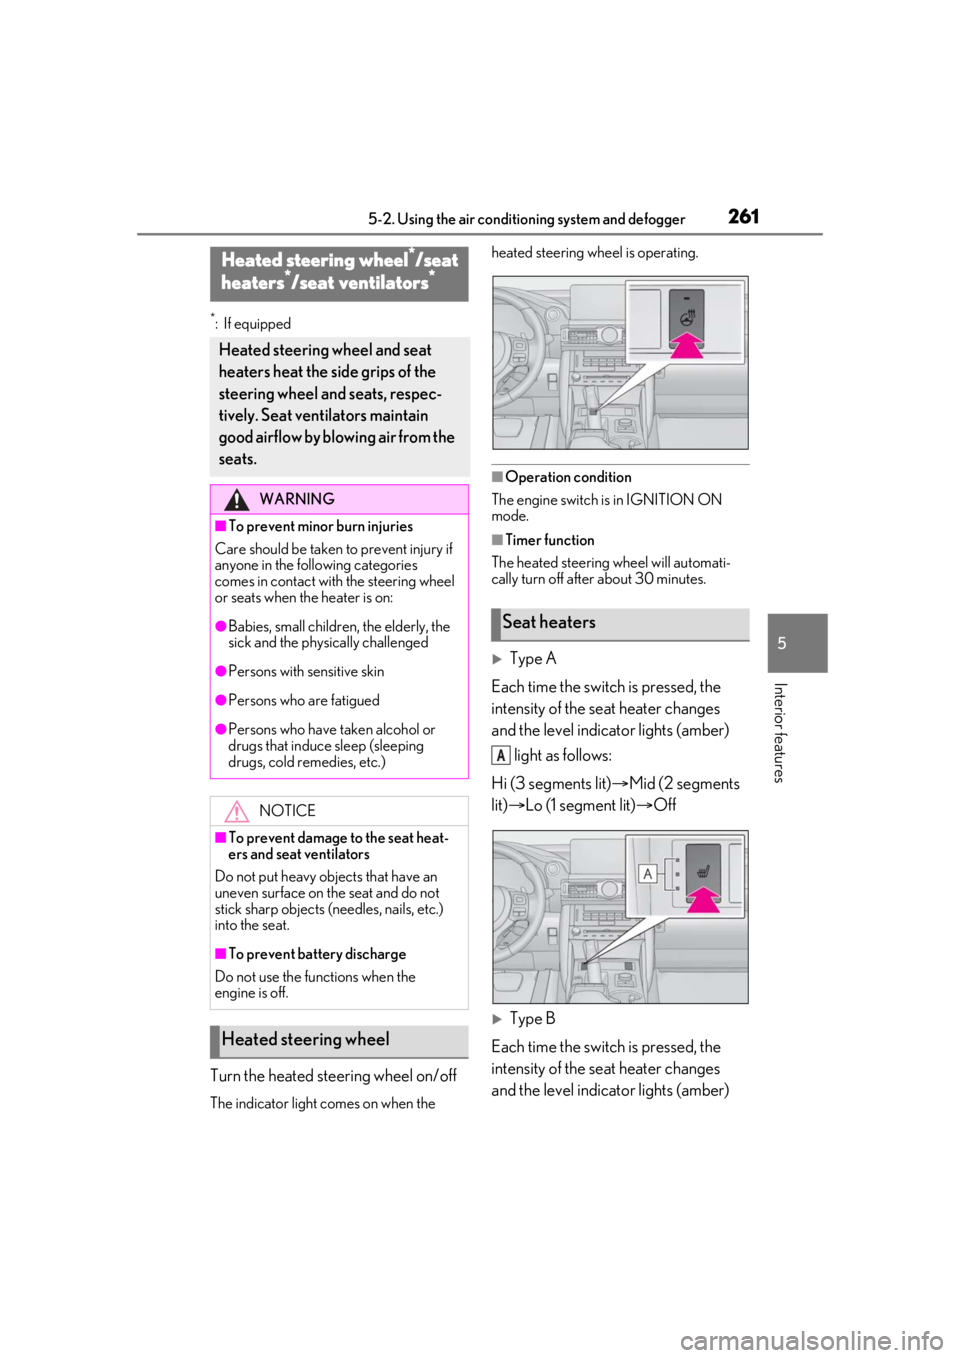
Turn the heated steering wheel on/off
The indicator light comes on when the heated steering wheel is operating.
■Operation condition
The engine switch is in IGNITION ON
mode.
■Timer function
The heated steering wheel will automati-
cally turn off after about 30 minutes.
Type A
Each time the switch is pressed, the
intensity of the seat heater changes
and the level indicator lights (amber) light as follows:
Hi (3 segments lit) Mid (2 segments
lit) Lo (1 segment lit) Off
Type B
Each time the switch is pressed, the
intensity of the seat heater changes
and the level indicator lights (amber)
Heated steering wheel*/seat
heaters*/seat ventilators*
Heated steering wheel and seat
heaters heat the side grips of the
steering wheel and seats, respec-
tively. Seat ventilators maintain
good airflow by blowing air from the
seats.
WARNING
■To prevent minor burn injuries
Care should be taken to prevent injury if
anyone in the following categories
comes in contact with the steering wheel
or seats when the heater is on:
●Babies, small children, the elderly, the
sick and the phys ically challenged
●Persons with sensitive skin
●Persons who are fatigued
●Persons who have taken alcohol or
drugs that induce sleep (sleeping
drugs, cold remedies, etc.)
NOTICE
■To prevent damage to the seat heat-
ers and seat ventilators
Do not put heavy objects that have an
uneven surface on the seat and do not
stick sharp objects (needles, nails, etc.)
into the seat.
■To prevent battery discharge
Do not use the functions when the
engine is off.
Heated steering wheel
Seat heaters
A
Page 262 of 436
2625-2. Using the air conditioning system and defogger
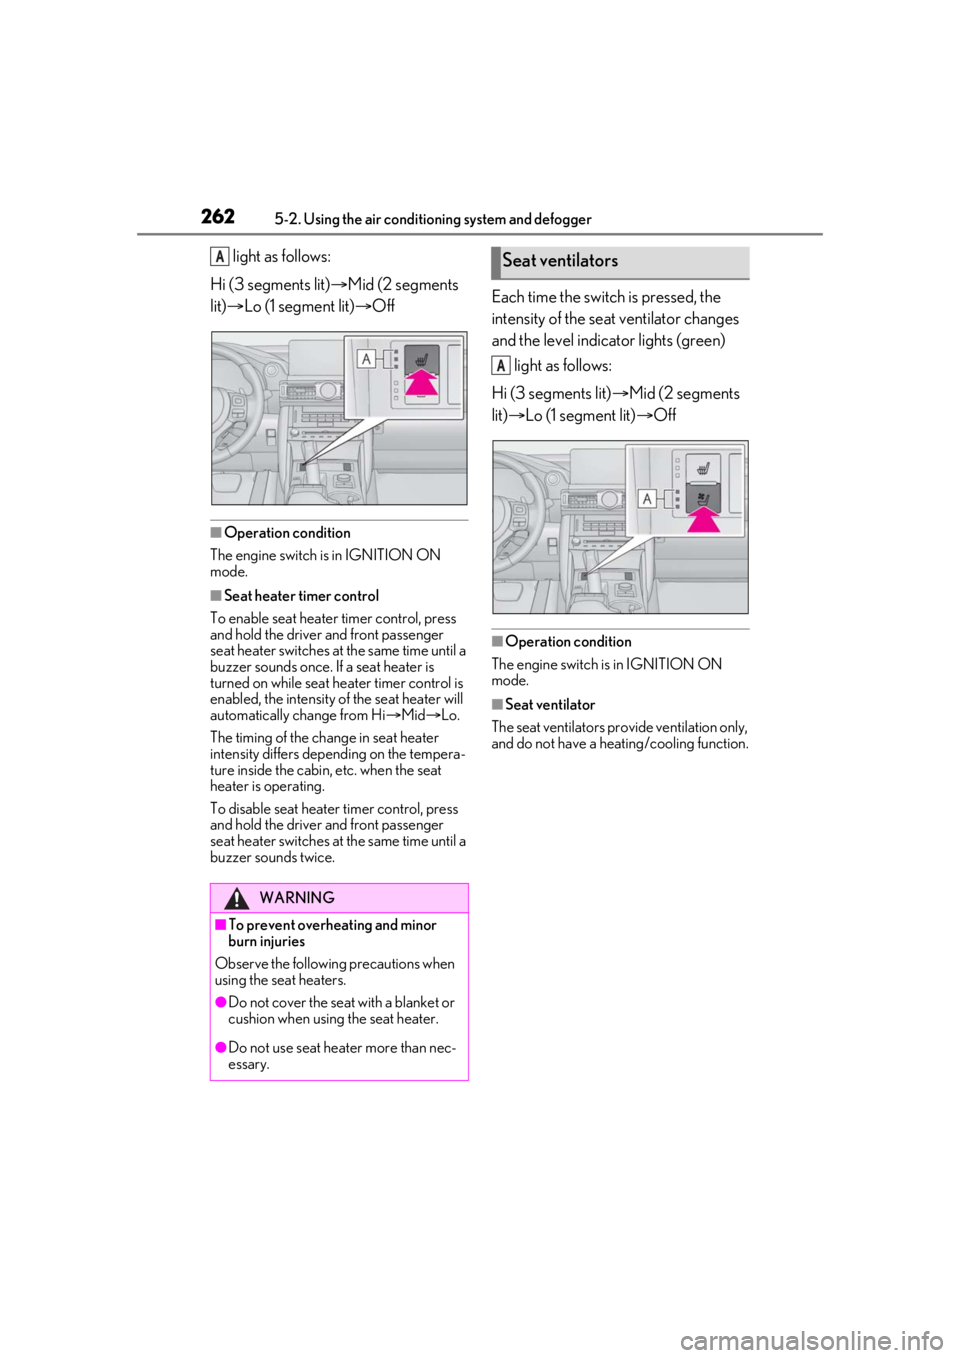
light as follows:
Hi (3 segments lit) Mid (2 segments
lit) Lo (1 segment lit) Off
■Operation condition
The engine switch is in IGNITION ON
mode.
■Seat heater timer control
To enable seat heater timer control, press
and hold the driver and front passenger
seat heater switches at the same time until a
buzzer sounds once. If a seat heater is
turned on while seat he ater timer control is
enabled, the intensity of the seat heater will
automatically change from Hi Mid Lo.
The timing of the change in seat heater
intensity differs depending on the tempera-
ture inside the cabin, etc. when the seat
heater is operating.
To disable seat heater timer control, press
and hold the driver and front passenger
seat heater switches at the same time until a
buzzer sounds twice.
Each time the switch is pressed, the
intensity of the seat ventilator changes
and the level indicator lights (green) light as follows:
Hi (3 segments lit) Mid (2 segments
lit) Lo (1 segment lit) Off
■Operation condition
The engine switch is in IGNITION ON
mode.
■Seat ventilator
The seat ventilators pr ovide ventilation only,
and do not have a heating/cooling function.
WARNING
■To prevent overheating and minor
burn injuries
Observe the following precautions when
using the seat heaters.
●Do not cover the seat with a blanket or
cushion when using the seat heater.
●Do not use seat heater more than nec-
essary.
ASeat ventilators
A
Page 272 of 436
2725-5. Using the other interior features
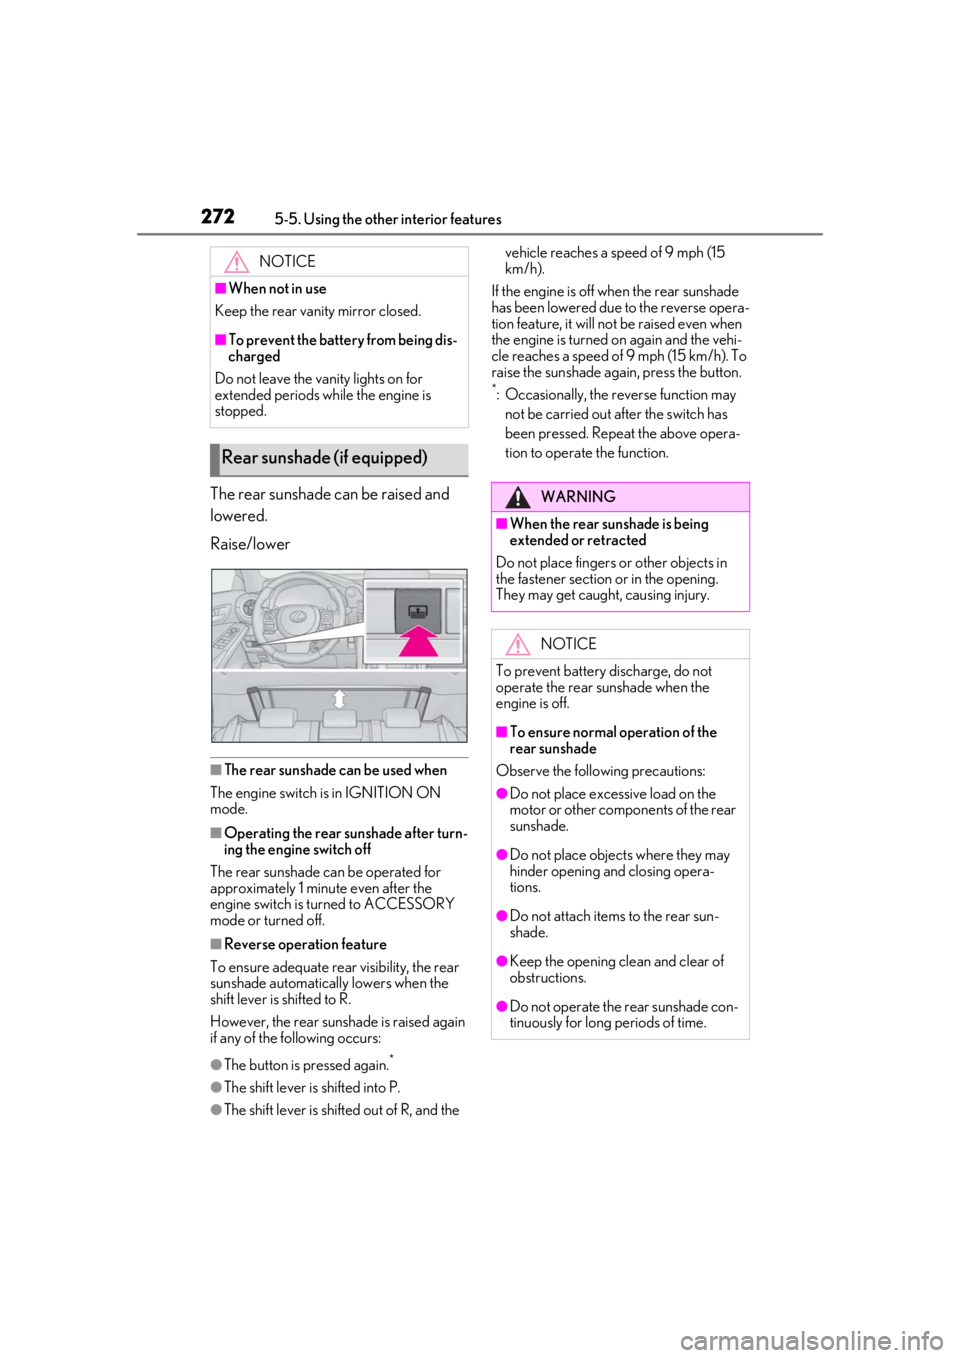
The rear sunshade can be raised and
lowered.
Raise/lower
■The rear sunshade can be used when
The engine switch is in IGNITION ON
mode.
■Operating the rear sunshade after turn-
ing the engine switch off
The rear sunshade can be operated for
approximately 1 minute even after the
engine switch is turned to ACCESSORY
mode or turned off.
■Reverse operation feature
To ensure adequate rear visibility, the rear
sunshade automatically lowers when the
shift lever is shifted to R.
However, the rear suns hade is raised again
if any of the following occurs:
●The button is pressed again.*
●The shift lever is shifted into P.
●The shift lever is shifted out of R, and the vehicle reaches a speed of 9 mph (15
km/h).
If the engine is off when the rear sunshade
has been lowered due to the reverse opera-
tion feature, it will not be raised even when
the engine is turned on again and the vehi-
cle reaches a speed of 9 mph (15 km/h). To
raise the sunshade again, press the button.
*: Occasionally, the reverse function may not be carried out after the switch has
been pressed. Repeat the above opera-
tion to operate the function.
NOTICE
■When not in use
Keep the rear vani ty mirror closed.
■To prevent the battery from being dis-
charged
Do not leave the vanity lights on for
extended periods while the engine is
stopped.
Rear sunshade (if equipped)
WARNING
■When the rear sunshade is being
extended or retracted
Do not place fingers or other objects in
the fastener section or in the opening.
They may get caught, causing injury.
NOTICE
To prevent battery discharge, do not
operate the rear sunshade when the
engine is off.
■To ensure normal operation of the
rear sunshade
Observe the following precautions:
●Do not place excessive load on the
motor or other components of the rear
sunshade.
●Do not place objects where they may
hinder opening and closing opera-
tions.
●Do not attach items to the rear sun-
shade.
●Keep the opening clean and clear of
obstructions.
●Do not operate the rear sunshade con-
tinuously for long periods of time.
Page 282 of 436
2826-1. Maintenance and care
WARNING
■Precautions regarding the exhaust
pipes and rear bumper diffusers
Exhaust gases cause the exhaust pipes
and rear bumper diffusers to become
quite hot.
When washing the vehicle, be careful not
to touch the pipes and diffusers until they
have cooled sufficiently, as touching hot
exhaust pipes and rear bumper diffusers
can cause burns.
■Precaution regarding the rear
bumper
If the paint of the rear bumper is chipped
or scratched, the fo llowing systems may
not function correctly. If this occurs, con-
sult your Lexus dealer.
●Lexus Safety System + 2.5
●BSM (if equipped)
●RCTA (if equipped)
●PKSB (if equipped)
NOTICE
■To prevent paint deterioration and
corrosion on the body and compo-
nents (aluminum wheels, etc.)
●Wash the vehicle immediately in the
following cases:
• After driving near the sea coast
• After driving on salted roads
• If coal tar or tree sap is present on the paint surface
• If dead insects, in sect droppings or
bird droppings are present on the
paint surface
• After driving in an area contaminated with soot, oily smoke, mine dust, iron
powder or chemical substances
• If the vehicle becomes heavily soiled with dust or mud
• If liquids such as benzene and gasoline are spilled on the paint surface
●If the paint is chipped or scratched,
have it repaired immediately.
●To prevent the wheels from corroding,
remove any dirt and store in a place
with low humidity when storing the
wheels.
■Cleaning the exterior lights
●Wash carefully. Do not use organic
substances or scrub with a hard brush.
This may damage the surfaces of the
lights.
●Do not apply wax to the surfaces of the
lights.
Wax may cause damage to the lenses.
■When using an automatic car wash
(vehicles with rain-sensing windshield
wipers)
Set the wiper switch to the off position.
(
P.154)
If the wiper switch is in “AUTO”, the wip-
ers may operate and the wiper blades
may be damaged.
■When using a high pressure car wash
●When washing the vehicle, do not let
water of the high pressure washer hit
directly or the vicinity of the camera.
Due to the shock from the high pres-
sure water, it is possible the device may
not operate as normal.
●Do not spray water directly on the
radar which is equipped behind the
emblem. Otherwise it may cause the
device to be damaged.
●Do not bring the nozzle tip close to
boots (rubber or resin manufactured
cover), connectors or the following
parts. The parts may be damaged if
they come into contact with high-pres-
sure water.
• Traction related parts
•Steering parts
• Suspension parts
Page 319 of 436
3196-3. Do-it-yourself maintenance
6
Maintenance and care
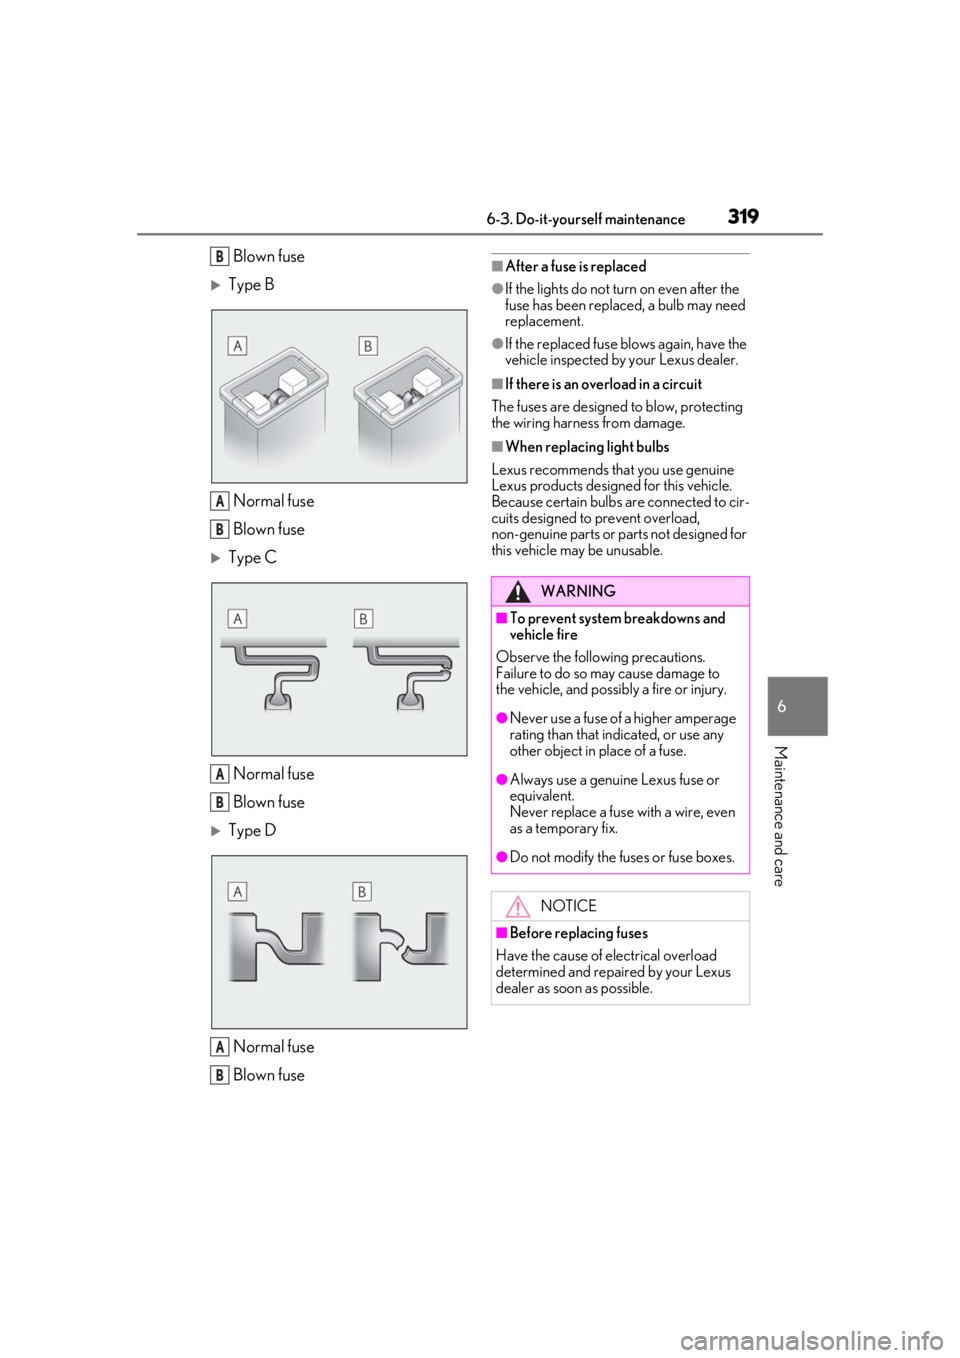
Blown fuse
Type BNormal fuse
Blown fuse
Type CNormal fuse
Blown fuse
Type DNormal fuse
Blown fuse
■After a fuse is replaced
●If the lights do not turn on even after the
fuse has been replaced, a bulb may need
replacement.
●If the replaced fuse blows again, have the
vehicle inspected by your Lexus dealer.
■If there is an overload in a circuit
The fuses are designed to blow, protecting
the wiring harness from damage.
■When replacing light bulbs
Lexus recommends that you use genuine
Lexus products designed for this vehicle.
Because certain bulbs are connected to cir-
cuits designed to prevent overload,
non-genuine parts or parts not designed for
this vehicle may be unusable.
B
A
B
A
B
A
B
WARNING
■To prevent system breakdowns and
vehicle fire
Observe the following precautions.
Failure to do so may cause damage to
the vehicle, and possibly a fire or injury.
●Never use a fuse of a higher amperage
rating than that indicated, or use any
other object in place of a fuse.
●Always use a genuine Lexus fuse or
equivalent.
Never replace a fuse with a wire, even
as a temporary fix.
●Do not modify the fuses or fuse boxes.
NOTICE
■Before replacing fuses
Have the cause of electrical overload
determined and repaired by your Lexus
dealer as soon as possible.
Page 325 of 436
3256-3. Do-it-yourself maintenance
6
Maintenance and care
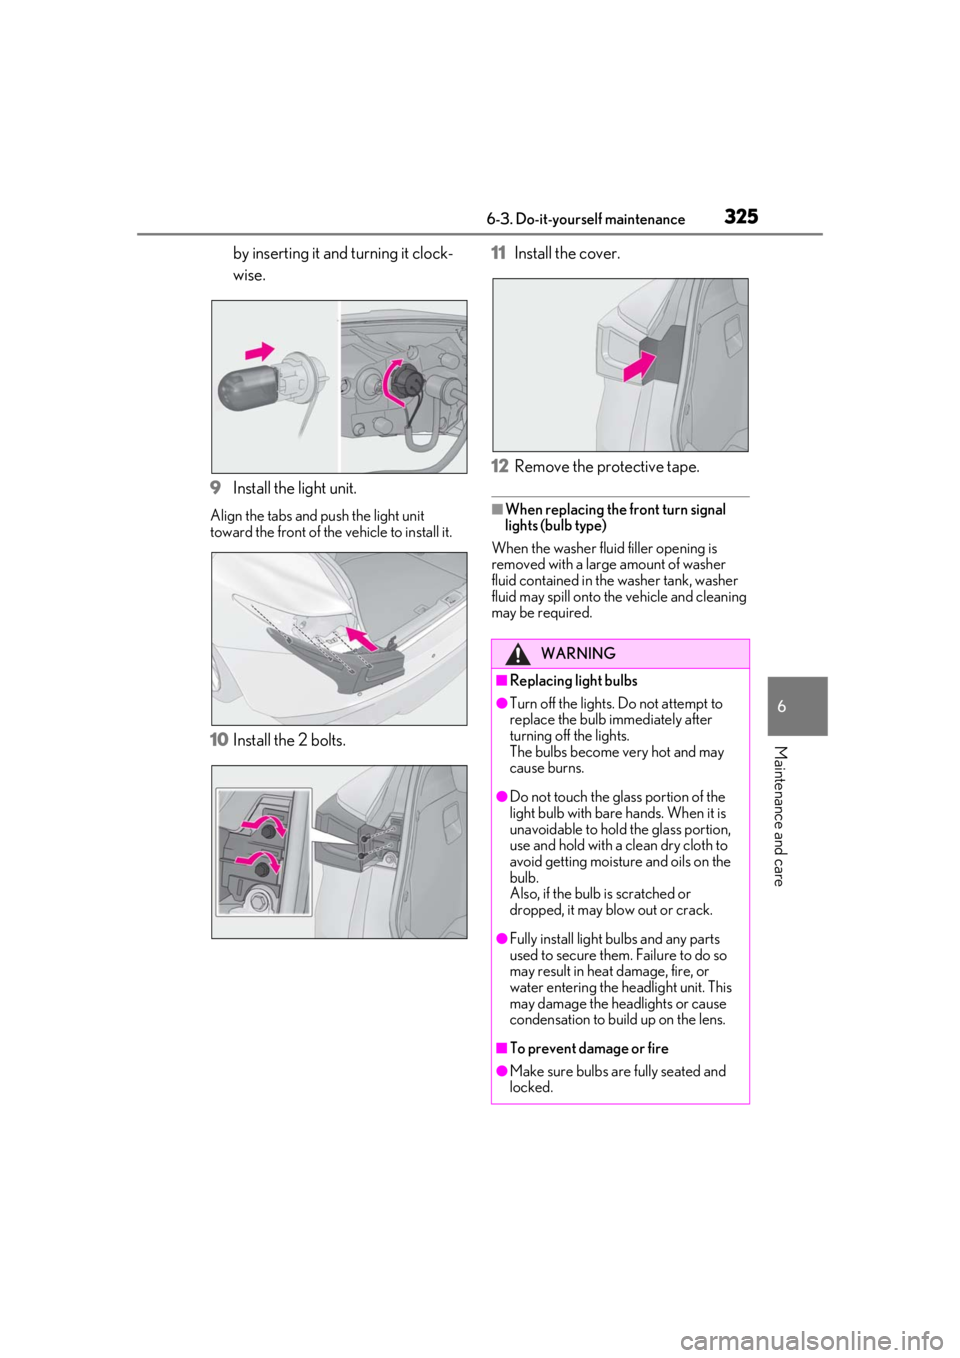
by inserting it and turning it clock-
wise.
9 Install the light unit.
Align the tabs and push the light unit
toward the front of the vehicle to install it.
10Install the 2 bolts. 11
Install the cover.
12 Remove the protective tape.
■When replacing the front turn signal
lights (bulb type)
When the washer fluid filler opening is
removed with a large amount of washer
fluid contained in the washer tank, washer
fluid may spill onto the vehicle and cleaning
may be required.
WARNING
■Replacing light bulbs
●Turn off the lights. Do not attempt to
replace the bulb immediately after
turning off the lights.
The bulbs become very hot and may
cause burns.
●Do not touch the glass portion of the
light bulb with bare hands. When it is
unavoidable to hold the glass portion,
use and hold with a clean dry cloth to
avoid getting moisture and oils on the
bulb.
Also, if the bulb is scratched or
dropped, it may blow out or crack.
●Fully install light bulbs and any parts
used to secure them. Failure to do so
may result in heat damage, fire, or
water entering the he adlight unit. This
may damage the headlights or cause
condensation to build up on the lens.
■To prevent damage or fire
●Make sure bulbs are fully seated and
locked.