ignition LEXUS IS350 2022 Owner's Guide
[x] Cancel search | Manufacturer: LEXUS, Model Year: 2022, Model line: IS350, Model: LEXUS IS350 2022Pages: 440, PDF Size: 22.72 MB
Page 188 of 440

1864-5. Using the driving support systems
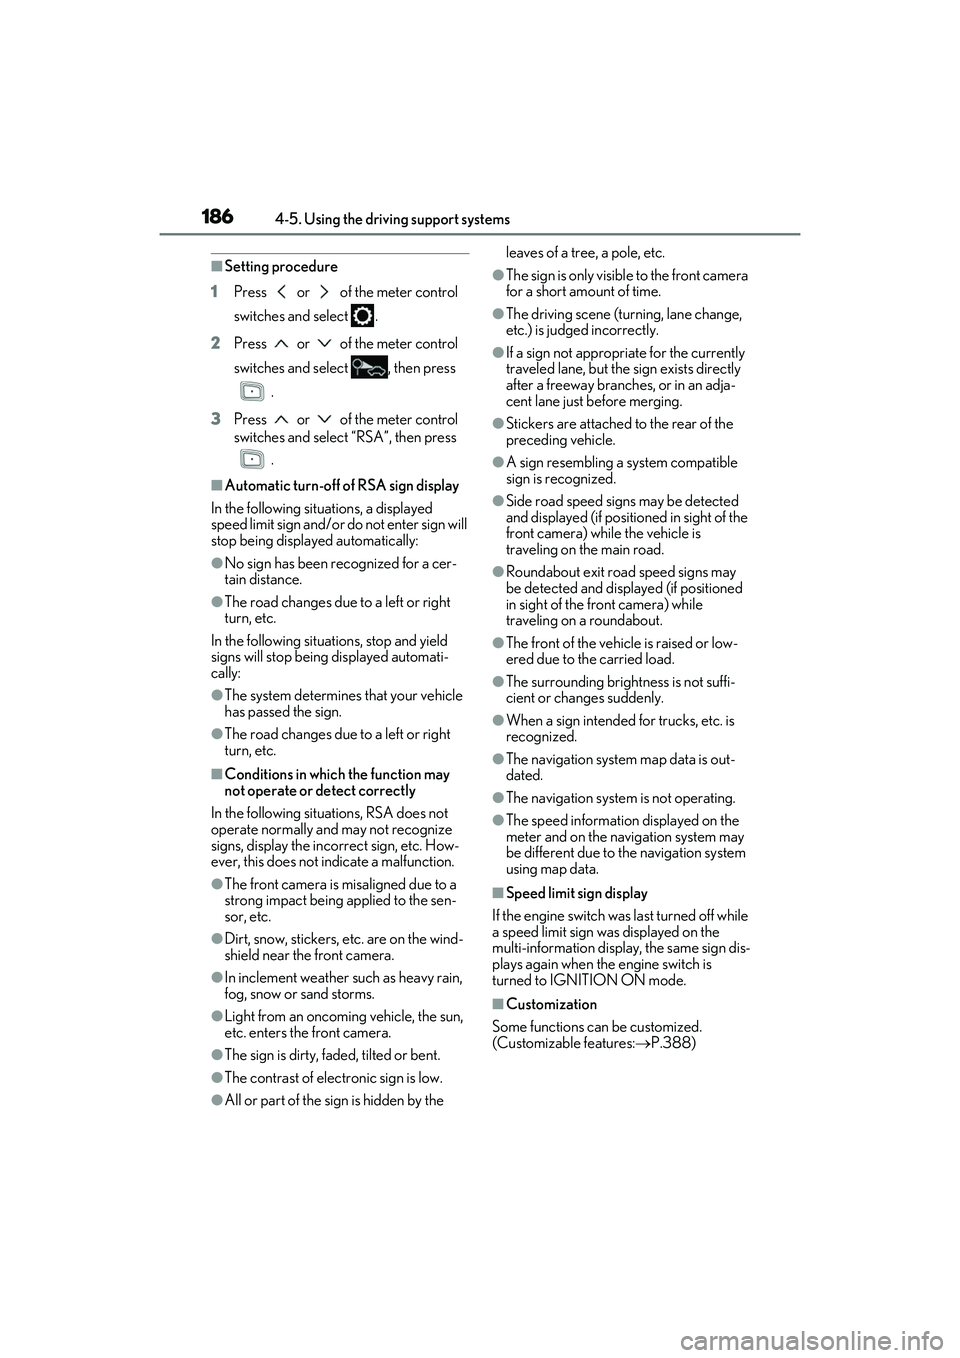
■Setting procedure
1 Press or of the meter control
switches and select .
2 Press or of the meter control
switches and select , then press
.
3 Press or of the meter control
switches and select “RSA”, then press
.
■Automatic turn-off of RSA sign display
In the following situations, a displayed
speed limit sign and/or do not enter sign will
stop being displayed automatically:
●No sign has been recognized for a cer-
tain distance.
●The road changes due to a left or right
turn, etc.
In the following situations, stop and yield
signs will stop being displayed automati-
cally:
●The system determines that your vehicle
has passed the sign.
●The road changes due to a left or right
turn, etc.
■Conditions in which the function may
not operate or detect correctly
In the following situations, RSA does not
operate normally and may not recognize
signs, display the incorrect sign, etc. How-
ever, this does not indicate a malfunction.
●The front camera is misaligned due to a
strong impact being applied to the sen-
sor, etc.
●Dirt, snow, stickers, etc. are on the wind-
shield near the front camera.
●In inclement weather such as heavy rain,
fog, snow or sand storms.
●Light from an oncoming vehicle, the sun,
etc. enters the front camera.
●The sign is dirty, faded, tilted or bent.
●The contrast of electronic sign is low.
●All or part of the sign is hidden by the leaves of a tree, a pole, etc.
●The sign is only visible to the front camera
for a short amount of time.
●The driving scene (turning, lane change,
etc.) is judged incorrectly.
●If a sign not appropriate for the currently
traveled lane, but the sign exists directly
after a freeway branches, or in an adja-
cent lane just before merging.
●Stickers are attached
to the rear of the
preceding vehicle.
●A sign resembling a system compatible
sign is recognized.
●Side road speed signs may be detected
and displayed (if positioned in sight of the
front camera) while the vehicle is
traveling on the main road.
●Roundabout exit road speed signs may
be detected and displayed (if positioned
in sight of the fr ont camera) while
traveling on a roundabout.
●The front of the vehicle is raised or low-
ered due to the carried load.
●The surrounding brightness is not suffi-
cient or changes suddenly.
●When a sign intended for trucks, etc. is
recognized.
●The navigation system map data is out-
dated.
●The navigation system is not operating.
●The speed information displayed on the
meter and on the navigation system may
be different due to the navigation system
using map data.
■Speed limit sign display
If the engine switch was last turned off while
a speed limit sign was displayed on the
multi-information displa y, the same sign dis-
plays again when the engine switch is
turned to IGNITION ON mode.
■Customization
Some functions can be customized.
(Customizable features: P.388)
Page 200 of 440

1984-5. Using the driving support systems
Use the meter control switches to turn
on/off the function.
1Press or to select .
2 Press or to select and
then press .
When the BSM function is disabled, the
BSM OFF indicator (P.66) illuminates
on the multi-informat ion display. (Each
time the engine switch is turned off then
changed to IGNITION ON mode, the
BSM function will be enabled automati-
cally.)
WARNING
●Keep the sensors and the surrounding
areas on the rear bumper clean at all
times.
If a sensor or its su rrounding area on the
rear bumper is dirty or covered with
snow, the Blind Spot Monitor may not
operate and a warning message
( P.197) will be displa yed. In this situa-
tion, clear off the dirt or snow and drive
the vehicle with the operation conditions
of the BSM function ( P.200) satisfied
for approximately 10 minutes. If the
warning message does not disappear,
have the vehicle inspected by your Lexus
dealer.
●Do not attach stickers to the sensor or
surrounding area on the rear bumper.
●Do not subject a sensor or its sur-
rounding area on the rear bumper to a
strong impact.
If a sensor is moved even slightly off
position, the system may malfunction
and vehicles may not be detected cor-
rectly.
In the following situations, have your
vehicle inspected by your Lexus
dealer.
• A sensor or its surrounding area is subject to a strong impact.
• If the surrounding area of a sensor is scratched or dented, or part of them
has become disconnected.
●Do not disassemb le the sensor.
●Do not modify the sensor or surround-
ing area on the rear bumper.
●If a sensor or the rear bumper needs to
be removed/installed or replaced,
contact your Lexus dealer.
●Do not paint the rear bumper any
color other than an official Lexus color.
Turning the Blind Spot Monitor
on/off
Page 207 of 440

2054-5. Using the driving support systems
4
Driving
■The system can be operated when
●The engine switch is in IGNITION ON
mode.
●Intuitive parking assist function is on.
●The vehicle speed is less than about 6
mph (10 km/h).
●A shift lever other than P.
■Setting the buzzer volume
The buzzer volume can be adjusted on the
multi-information display. ( P.202)
■If “Parking Assist Unavailable Clean
Parking Assist Sensor” is displayed on
the multi-information display
A sensor may be covered with ice, snow,
dirt, etc. Remove the ice, snow, dirt, etc.,
from the sensor to return the system to nor-
mal.
Also, due to ice forming on a sensor at low
temperatures, a warning message may be
displayed or the sensor may not be able to detect an object. Once the ice melts, the
system will return to normal.
■If “Parking Assist Unavailable” is dis-
played on the multi-information display
●Water may be continuo
usly flowing over
the sensor surface, such as in a heavy
rain. When the system determines that it
is normal, the system will return to nor-
mal.
●Initialization may no t have been per-
formed after a battery terminal was dis-
connected and reconnect ed. Initialize the
system. ( P.205)
If this message contin ues to be displayed
even after initialization, have the vehicle
inspected by your Lexus dealer.
■If a battery terminal has been discon-
nected and reconnected
The system needs to be initialized. To initial-
ize the system, drive the vehicle straight
ahead for 5 seconds or more at a speed of
approximately 22 mph (35 km/h) or more.
■Sensor detection information
●The sensor's detection areas are limited
to the areas around the vehicle front and
rear bumpers.
●The following situations may occur
during use.
• Depending on the sh ape of the object
and other factors, the detection distance
may shorten, or detection may be impos-
sible.
• There will be a short delay between
object detection and di splay. Even at low
speeds, there is a possibility that the
object will come wi thin the sensor’s
detection areas befo re the display is
shown and the warning beep sounds.
• It might be difficult to hear the buzzer due
to the volume of the audio system or air
flow noise of the air conditioning system.
• It may be difficult to hear the buzzer if buzzers for other systems are sounding.
■Objects which the system may not be
properly detected
The shape of the object may prevent the
sensor from detecting it. Pay particular
attention to the following objects:
●Wires, fences, ropes, etc.
WARNING
■When to disable the function
In the following situations, disable the
function as it may operate even though
there is no possibility of a collision.
●Failing to observe the warnings above.
●A non-genuine Toyota suspension
(lowered suspension, etc.) is installed.
■Notes when washing the vehicle
Do not apply intensive bursts of water or
steam to the sensor area.
Doing so may result in the sensor mal-
functioning.
●When using a high pressure washer to
wash the vehicle, do not spray the sen-
sors directly, as doing so may cause a
sensor to malfunction.
●When using steam to clean the vehicle,
do not direct steam too close to the
sensors as doing so may cause a sen-
sor to malfunction.
Page 215 of 440

2134-5. Using the driving support systems
4
Driving
The buzzer can alert the driver of
faster vehicles approaching from far-
ther away.
Example:
■The RCTA function is operational when
The RCTA function operates when all of the
following conditions are met:
●The engine switch is in IGNITION ON
mode.
●The RCTA function is on.
●The shift lever is in R.
●The vehicle speed is approximately 9
mph (15 km/h) or less.
●The approaching vehicle speed is
between approximately 5 mph (8 km/h)
and 36 mph (56 km/h).
■Setting the buzzer volume
The buzzer volume can be adjusted on the
multi-information display. ( P.81)
Use the meter control switches to change
settings. ( P.76)
■Conditions under which the system will
not detect a vehicle
The RCTA function is not designed to
detect the following types of vehicles and/or objects:
●Vehicles approaching from directly
behind
●Vehicles backing up in a parking space
next to your vehicle
●Vehicles that the sensors cannot detect
due to obstructions
●Guardrails, walls, signs, parked vehicles
and similar stationary objects*
●Small motorcycles, bicycles, pedestrians,
etc.*
●Vehicles moving away from your vehicle
●Vehicles approaching from the parking
spaces next to your vehicle*
●The distance between the sensor and
approaching vehicle gets too close
*: Depending on the conditions, detection
of a vehicle and/or object may occur.
■Situations in which the system may not
operate properly
The RCTA function may not detect vehicles
correctly in the following situations:
●When the sensor is misaligned due to a
strong impact to the sensor or its sur-
rounding area
●When mud, snow, ice, a sticker, etc., is
covering the sensor or surrounding area
Approaching vehi- cle speed Approximate
alert distance
36 mph (56 km/h) (fast)130 ft. (40 m)
5 mph (8 km/h) (slow)18 ft. (5.5 m)
A
Page 219 of 440

2174-5. Using the driving support systems
4
Driving
The Parking Support Brake can be
enabled/disabled on the multi-informa-
tion display. All of the Parking Support
Brake functions (static objects and
rear-crossing vehicles) are
enabled/disabled simultaneously.
Use the meter control switches to
enable/disable the parking support
brake. (P.76)
1 Press or to select . 2
Press or to select “
PKSB” and then press .
When the Parking Support Brake is dis-
abled, the PKSB OFF indicator ( P.66)
illuminates on the multi-information dis-
play.
When the Parking Support Brake is turned
on or off, operation of the Parking Support
Brake continues in the same condition the
next time the engine is started.
If the engine output restriction control or
brake control operates, a buzzer will sound
and a message will be displayed on the
Center Display and multi-information dis-
play, to alert the driver.
Depending on the situat ion, engine output
restriction control will operate to either
limit acceleration or restrict output as
much as possible.
Engine output restriction control is
operating (acceleration restriction)
Acceleration greater than a certain
amount is restricted by the system.
Center Display (Panoramic view monitor)
(If equipped): No warning displayed
Multi-information display: “Object
Detected Acceleration Reduced”
PKSB OFF indicator: Not illuminated
Buzzer: Does not sound
Engine output restriction control is
operating (output restricted as
much as possible)
The system has determined that stron-
ger-than-normal brake operation is neces-
sary.
WARNING
●When the vehicle is driven in a sporty
manner or off-road
●When the tires are not properly
inflated
●When the tires are very worn
●When a tire chains, compact spare tire
or an emergency tire puncture repair
kit is used
NOTICE
■If “Parking Support Brake Unavail-
able” is displayed on the multi-infor-
mation display and the PKSB OFF
indicator is flashing
If this message is displayed immediately
after the engine switch is changed to
IGNITION ON mode, operate the vehi-
cle carefully, paying attention to your
surroundings. It ma y be necessary to
drive the vehicle for a certain amount of
time before the system returns to normal.
(If the system is not return to normal after
driving for a while, clean the sensors and
their surrounding area on the bumpers.)
Enabling/Disabling the Parking
Support Brake
Displays and buzzers for engine
output restriction control and
brake control
Page 232 of 440

2304-5. Using the driving support systems
controlling the brakes, engine output
and steering assist.
■The Secondary Collision Brake
When the SRS airbag sensor detects a
collision and the system operates, the
brakes and brake lights are automati-
cally controlled to reduce the vehicle
speed and help redu ce the possibility
of further damage due to a secondary
collision.
■When the TRAC/VSC systems are
operating
The slip indicator light will flash while the
TRAC/VSC systems are operating.
■Disabling the TRAC system
If the vehicle gets stuck in mud, dirt or snow,
the TRAC system may reduce power from
the engine to the wheels. Pressing the
switch to turn the sy stem off may make it
easier for you to rock the vehicle in order to
free it.
To turn the TRAC system off, quickly press
and release switch.
The “Traction Control Turned Off” will be
shown on the multi-information display.
Press the switch again to turn the sys-
tem back on.
■Turning off both TRAC and VSC sys-
tems
To turn the TRAC and VSC systems off,
press and hold the switch for more
than 3 seconds while the vehicle is stopped.
The VSC OFF indicator light will come on
and the “Traction Control Turned Off” will
be shown on the multi-information display.
*
Press the switch again to turn the sys-
tem back on.
*: Pre-collision brake assist and pre-colli- sion braking will also be disabled. The
pre-collision system warning light will
come on and the messa ge will be shown
on the multi-information display.
( P.174)
■When the message is displayed on the
multi-information display showing that
TRAC has been disabled even if the
VSC OFF switch has not been pressed
TRAC is temporary deactivated. If the infor-
mation continues to show, contact your
Lexus dealer.
■Operating conditions of hill-start assist
control
When the following four conditions are met,
the hill-start assist control will operate:
●The shift lever is in a position other than P
or N (when starting off forward/back-
ward on an upward incline)
●The vehicle is stopped
●The accelerator pedal is not depressed
●The parking brake is not engaged
●Engine switch is turned to IGNITION
ON mode
Page 247 of 440

2455-2. Using the air conditioning system and defogger
5
Interior features
■Defogging the windshield
Defoggers are used to defog the wind-
shield and front side windows.
Press the windshield defogger switch.
Set the outside/recirc ulated air mode but-
ton to outside air mode if the recirculated
air mode is used. (It may switch automati-
cally.)
To defog the windshield and the side win-
dows early, turn the air flow and tempera-
ture up.
To return to the previous mode, press the
windshield defogger switch again when the
windshield is defogged.
When the windshield defogger switch is
on, the indicator illumi nates on the wind-
shield defogger switch.
■Defogging the rear window and
outside rear view mirrors
Defoggers are used to defog the rear
window, and to remove raindrops, dew
and frost from the outside rear view
mirrors.
Press the rear window and outside rear
view mirror defoggers switch.
The defoggers will auto matically turn off
after a period of time.
When the rear window and outside rear
view mirror defoggers switch is on, the
indicator illuminates on the rear window
and outside rear view mirror defoggers
switch.
■When the outside temperature exceeds
75°F (24°C) and the air conditioning
system is on
●In order to reduce the air conditioning
power consumption, the air conditioning
system may switch to recirculated air
mode automatically. This may also
reduce fuel consumption.
●Recirculated air mode is selected as a
default mode when the engine switch is
turned to IGNITION ON mode.
●It is possible to switch to outside air mode
at any time by pressing the outside/recir-
culated air mode switch.
■Fogging up of the windows
The windows will easily fog up when the
humidity in the vehicle is high. Turning A/C
switch (“A/C”) on will dehumidify the air
from the outlets and defog the windshield
effectively.
●If you turn A/C swit ch (“A/C”) off, the
windows may fog up more easily.
●The windows may fog up if the recircu-
lated air mode is used.
■When driving on dusty roads
Close all windows. If dust thrown up by the
vehicle is still drawn into the vehicle after
closing the windows, it is recommended
that the air intake mode be set to outside air
mode and the fan speed to any setting
except off.
■Outside/recirculated air mode
●Setting to the recirculated air mode tem-
porarily is recommended in preventing
dirty air from entering the vehicle interior
and helping to cool the vehicle when the
outside air temperature is high.
●Outside/recirculated air mode may auto-
matically switch depending on the tem-
perature setting or the inside
temperature.
■Registering air conditioning settings to
electronic keys (vehicles with driving
position memory)
●Unlocking the vehicle using an electronic
key and turning the engine switch to
IGNITION ON mode will recall that
key’s registered air conditioning settings.
●When the engine switch is turned off, the
current air conditioning settings will auto-
matically be registered to the electronic
key that was used to unlock the vehicle.
●The system may not operate correctly if
more than one electronic key is in the
vicinity or if the smart access system with
push-button start is used to unlock a pas-
Page 253 of 440

2515-2. Using the air conditioning system and defogger
5
Interior features
*:If equipped
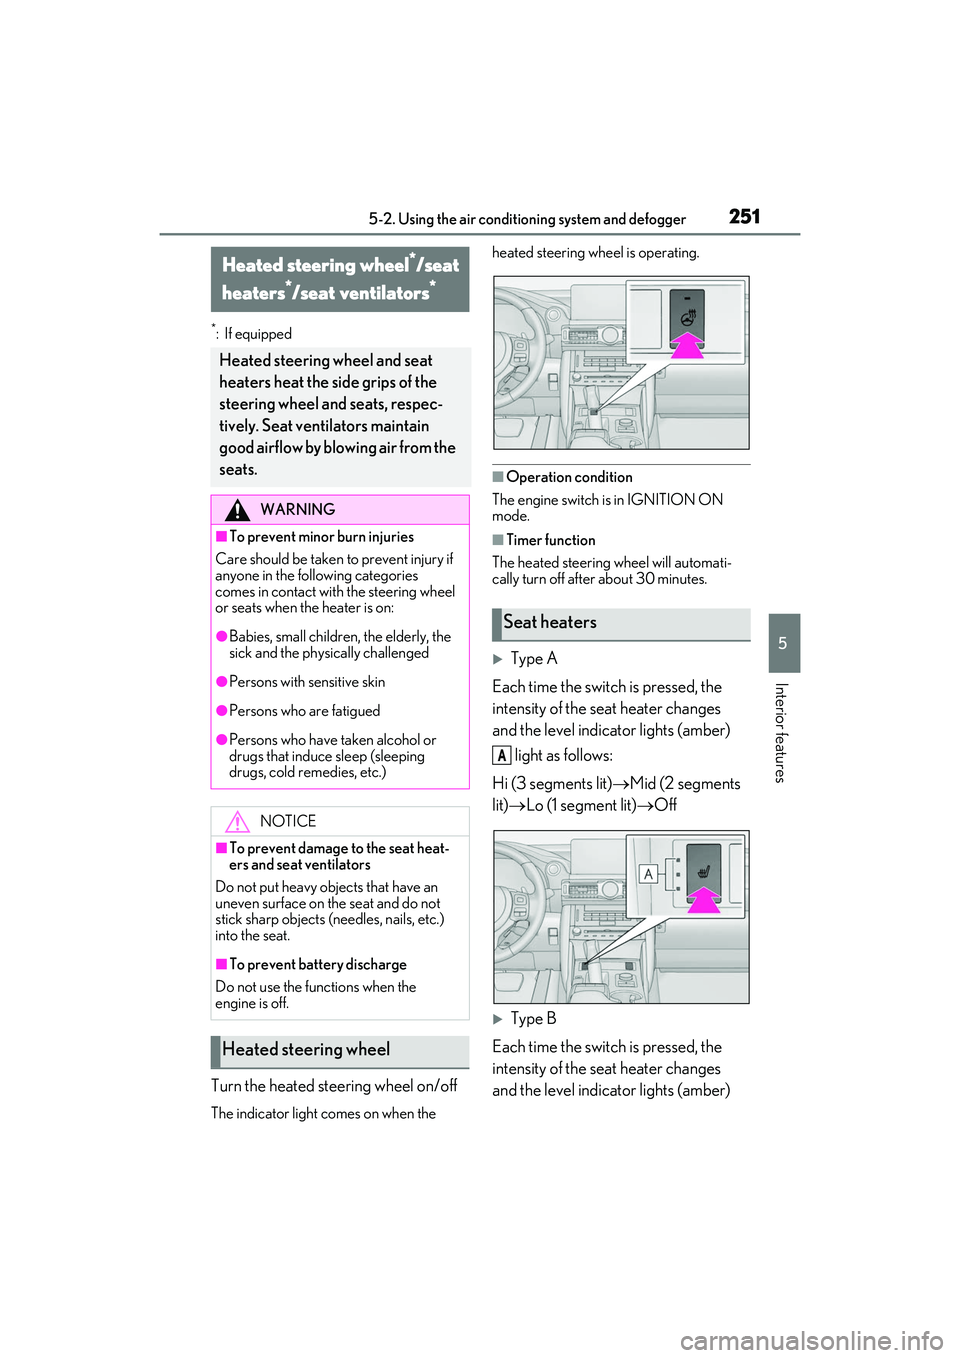
Turn the heated steering wheel on/off
The indicator light comes on when the heated steering wheel is operating.
■Operation condition
The engine switch is in IGNITION ON
mode.
■Timer function
The heated steering wheel will automati-
cally turn off after about 30 minutes.
Type A
Each time the switch is pressed, the
intensity of the seat heater changes
and the level indicator lights (amber) light as follows:
Hi (3 segments lit) Mid (2 segments
lit) Lo (1 segment lit) Off
Type B
Each time the switch is pressed, the
intensity of the seat heater changes
and the level indicator lights (amber)
Heated steering wheel*/seat
heaters
*/seat ventilators*
Heated steering wheel and seat
heaters heat the side grips of the
steering wheel and seats, respec-
tively. Seat ventilators maintain
good airflow by blowing air from the
seats.
WARNING
■To prevent minor burn injuries
Care should be taken to prevent injury if
anyone in the following categories
comes in contact with the steering wheel
or seats when the heater is on:
●Babies, small children, the elderly, the
sick and the phys ically challenged
●Persons with sensitive skin
●Persons who are fatigued
●Persons who have taken alcohol or
drugs that induce sleep (sleeping
drugs, cold remedies, etc.)
NOTICE
■To prevent damage to the seat heat-
ers and seat ventilators
Do not put heavy objects that have an
uneven surface on the seat and do not
stick sharp objects (needles, nails, etc.)
into the seat.
■To prevent battery discharge
Do not use the functions when the
engine is off.
Heated steering wheel
Seat heaters
A
Page 254 of 440

2525-2. Using the air conditioning system and defogger
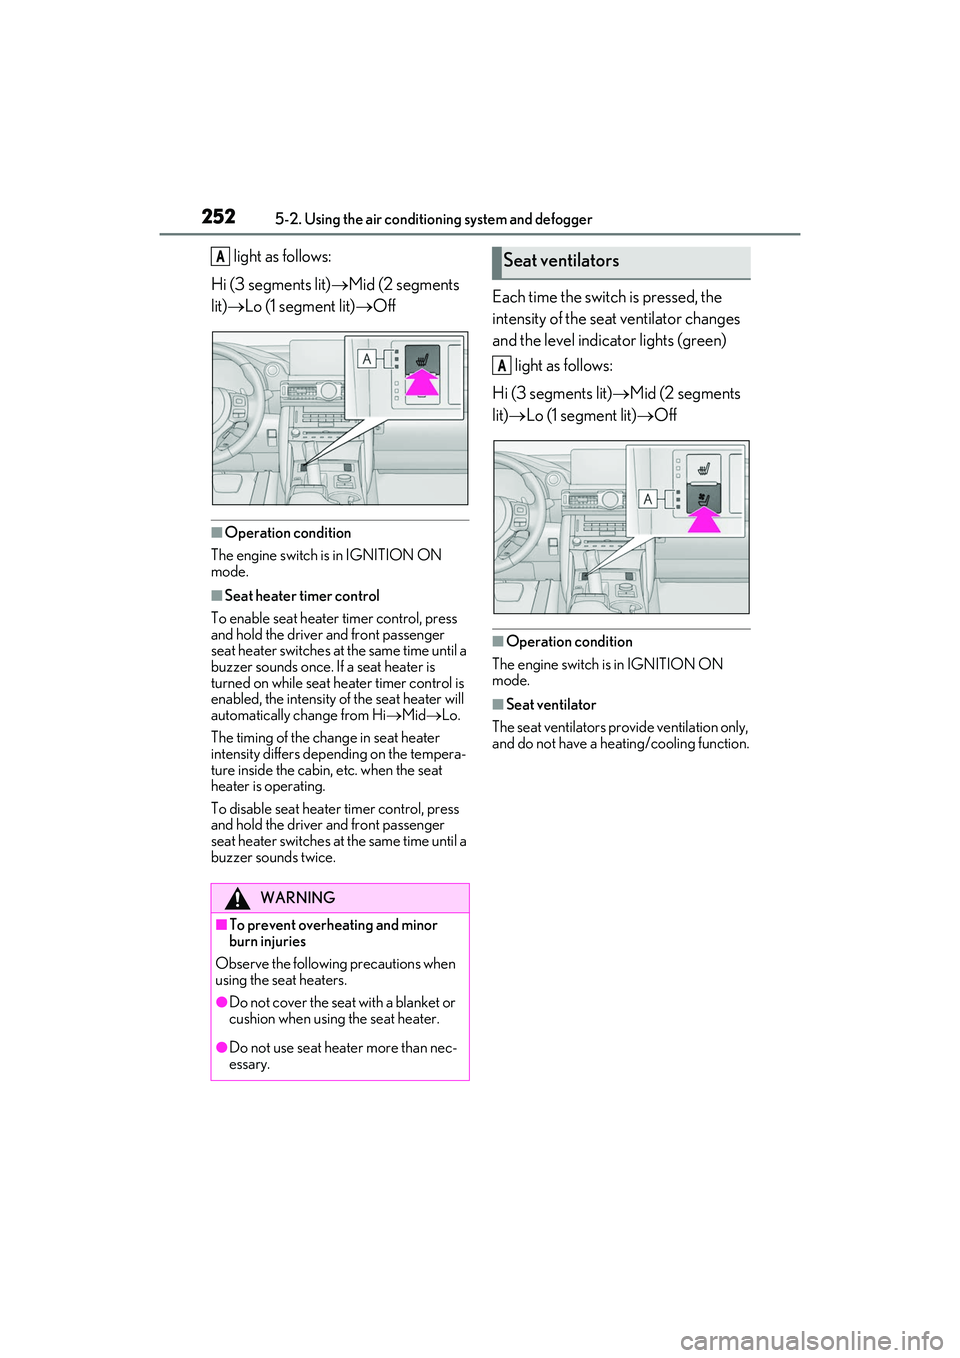
light as follows:
Hi (3 segments lit) Mid (2 segments
lit) Lo (1 segment lit) Off
■Operation condition
The engine switch is in IGNITION ON
mode.
■Seat heater timer control
To enable seat heater timer control, press
and hold the driver and front passenger
seat heater switches at the same time until a
buzzer sounds once. If a seat heater is
turned on while seat he ater timer control is
enabled, the intensity of the seat heater will
automatically change from Hi MidLo.
The timing of the chan ge in seat heater
intensity differs depending on the tempera-
ture inside the cabin, etc. when the seat
heater is operating.
To disable seat heater timer control, press
and hold the driver and front passenger
seat heater switches at the same time until a
buzzer sounds twice.
Each time the switch is pressed, the
intensity of the seat ventilator changes
and the level indicator lights (green)
light as follows:
Hi (3 segments lit) Mid (2 segments
lit) Lo (1 segment lit) Off
■Operation condition
The engine switch is in IGNITION ON
mode.
■Seat ventilator
The seat ventilators provide ventilation only,
and do not have a heating/cooling function.
WARNING
■To prevent overheating and minor
burn injuries
Observe the following precautions when
using the seat heaters.
●Do not cover the seat with a blanket or
cushion when using the seat heater.
●Do not use seat heater more than nec-
essary.
ASeat ventilators
A
Page 263 of 440

2615-5. Using the other interior features
5
Interior features
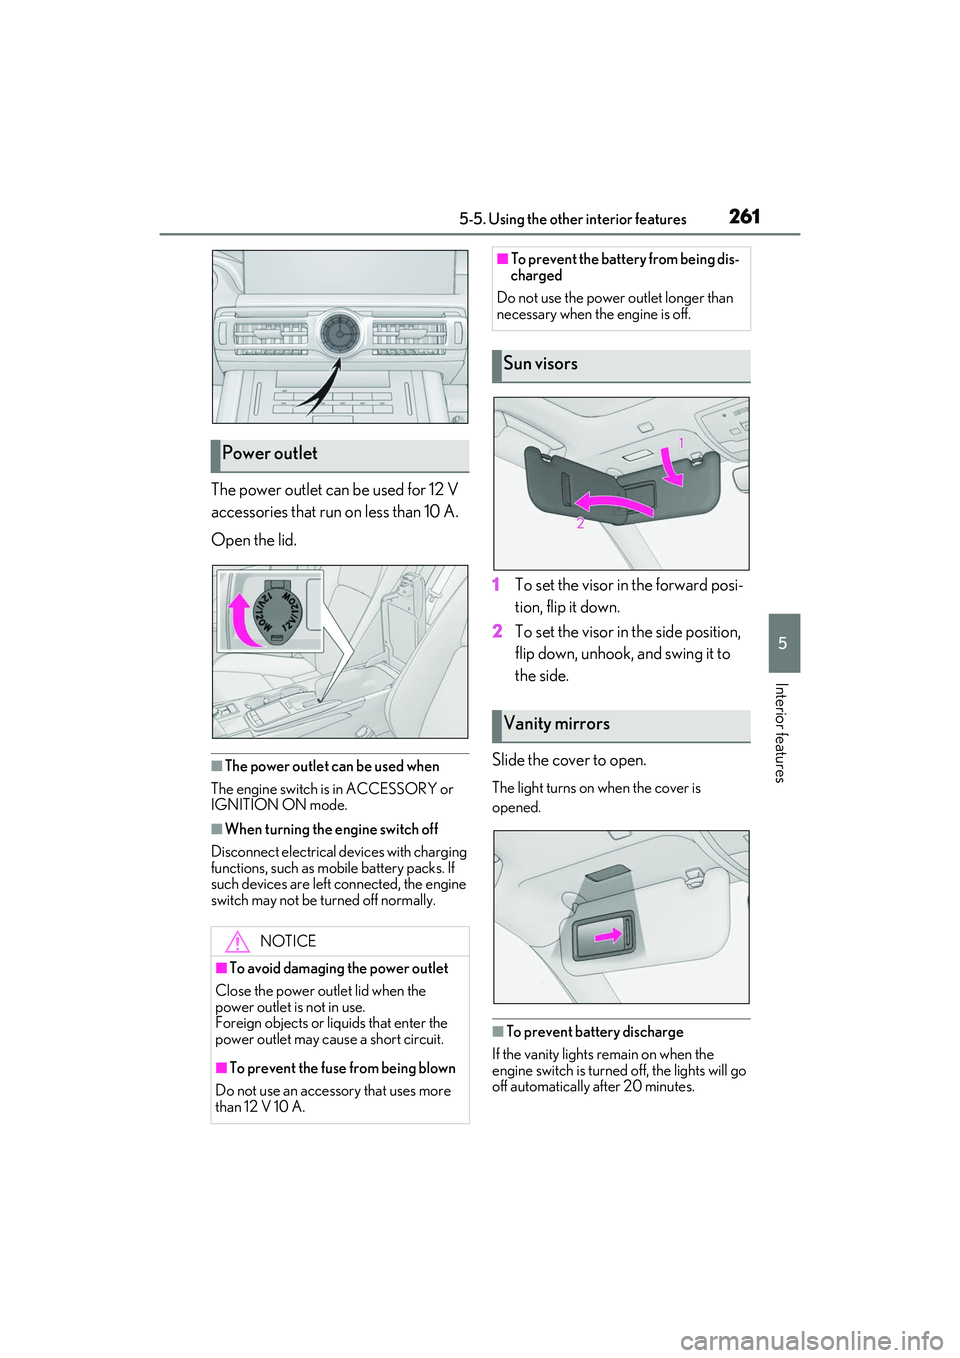
The power outlet can be used for 12 V
accessories that run on less than 10 A.
Open the lid.
■The power outlet can be used when
The engine switch is in ACCESSORY or
IGNITION ON mode.
■When turning the engine switch off
Disconnect electrical devices with charging
functions, such as mobile battery packs. If
such devices are left connected, the engine
switch may not be turned off normally.
1 To set the visor in the forward posi-
tion, flip it down.
2 To set the visor in the side position,
flip down, unhook, and swing it to
the side.
Slide the cover to open.
The light turns on when the cover is
opened.
■To prevent battery discharge
If the vanity lights remain on when the
engine switch is turned off, the lights will go
off automatically after 20 minutes.
Power outlet
NOTICE
■To avoid damaging the power outlet
Close the power outlet lid when the
power outlet is not in use.
Foreign objects or liq uids that enter the
power outlet may cause a short circuit.
■To prevent the fuse from being blown
Do not use an accessory that uses more
than 12 V 10 A.
■To prevent the battery from being dis-
charged
Do not use the power outlet longer than
necessary when the engine is off.
Sun visors
Vanity mirrors