turn signal Lexus LC500 2021 Owner's Manual / LEXUS 2021 LC500,LC500H OWNER'S MANUAL (OM11559U)
[x] Cancel search | Manufacturer: LEXUS, Model Year: 2021, Model line: LC500, Model: Lexus LC500 2021Pages: 448, PDF Size: 14.11 MB
Page 3 of 448
3TABLE OF CONTENTS
1
2
3
4
5
6
7
8
9
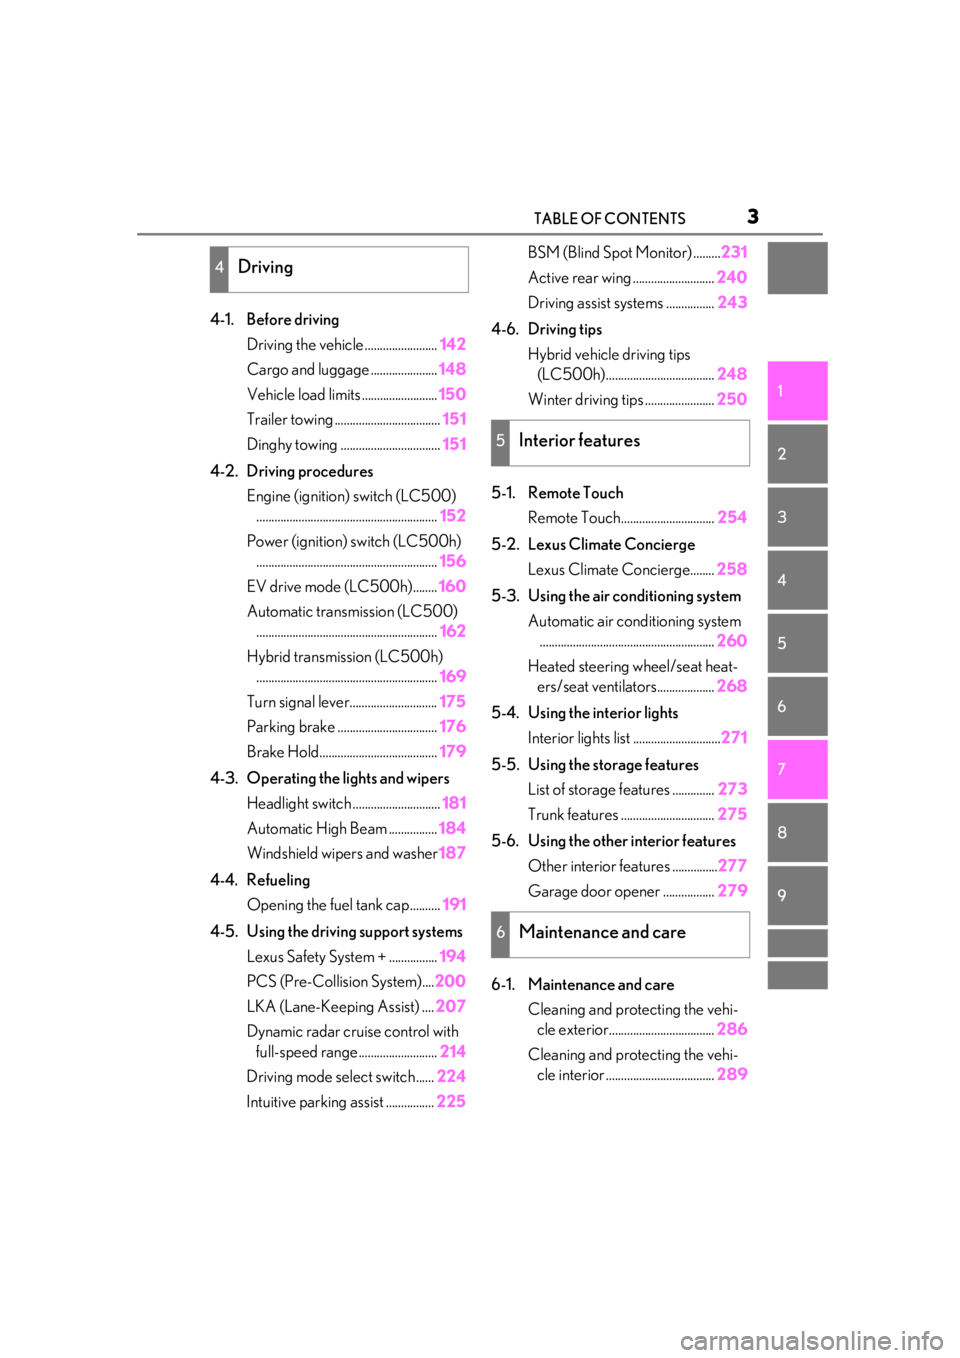
4-1. Before drivingDriving the vehicle ........................ 142
Cargo and luggage ...................... 148
Vehicle load limits ......................... 150
Trailer towing ................................... 151
Dinghy towing ................................. 151
4-2. Driving procedures Engine (ignition) switch (LC500)............................................................ 152
Power (ignition) switch (LC500h) ............................................................ 156
EV drive mode (LC500h)........ 160
Automatic transmission (LC500) ............................................................ 162
Hybrid transmission (LC500h) ............................................................ 169
Turn signal lever............................. 175
Parking brake ................................. 176
Brake Hold....................................... 179
4-3. Operating the lights and wipers Headlight switch ............................. 181
Automatic High Beam ................ 184
Windshield wipers and washer 187
4-4. Refueling Opening the fuel tank cap.......... 191
4-5. Using the driving support systems Lexus Safety System + ................ 194
PCS (Pre-Collision System).... 200
LKA (Lane-Keeping Assist) .... 207
Dynamic radar crui se control with
full-speed range.......................... 214
Driving mode select switch...... 224
Intuitive parking assist ................ 225BSM (Blind Spot Monitor) .........
231
Active rear wing ........................... 240
Driving assist systems ................ 243
4-6. Driving tips Hybrid vehicle driving tips (LC500h).................................... 248
Winter driving tips ....................... 250
5-1. Remote Touch Remote Touch............................... 254
5-2. Lexus Climate Concierge Lexus Climate Concierge........ 258
5-3. Using the air conditioning system Automatic air conditioning system.......................................................... 260
Heated steering wheel/seat heat- ers/seat ventilators................... 268
5-4. Using the interior lights Interior lights list ............................. 271
5-5. Using the storage features List of storage features .............. 273
Trunk features ............................... 275
5-6. Using the other interior features Other interior features ............... 277
Garage door opener ................. 279
6-1. Maintenance and care Cleaning and protecting the vehi-cle exterior................................... 286
Cleaning and protecting the vehi- cle interior .................................... 289
4Driving
5Interior features
6Maintenance and care
Page 13 of 448
13Pictorial index
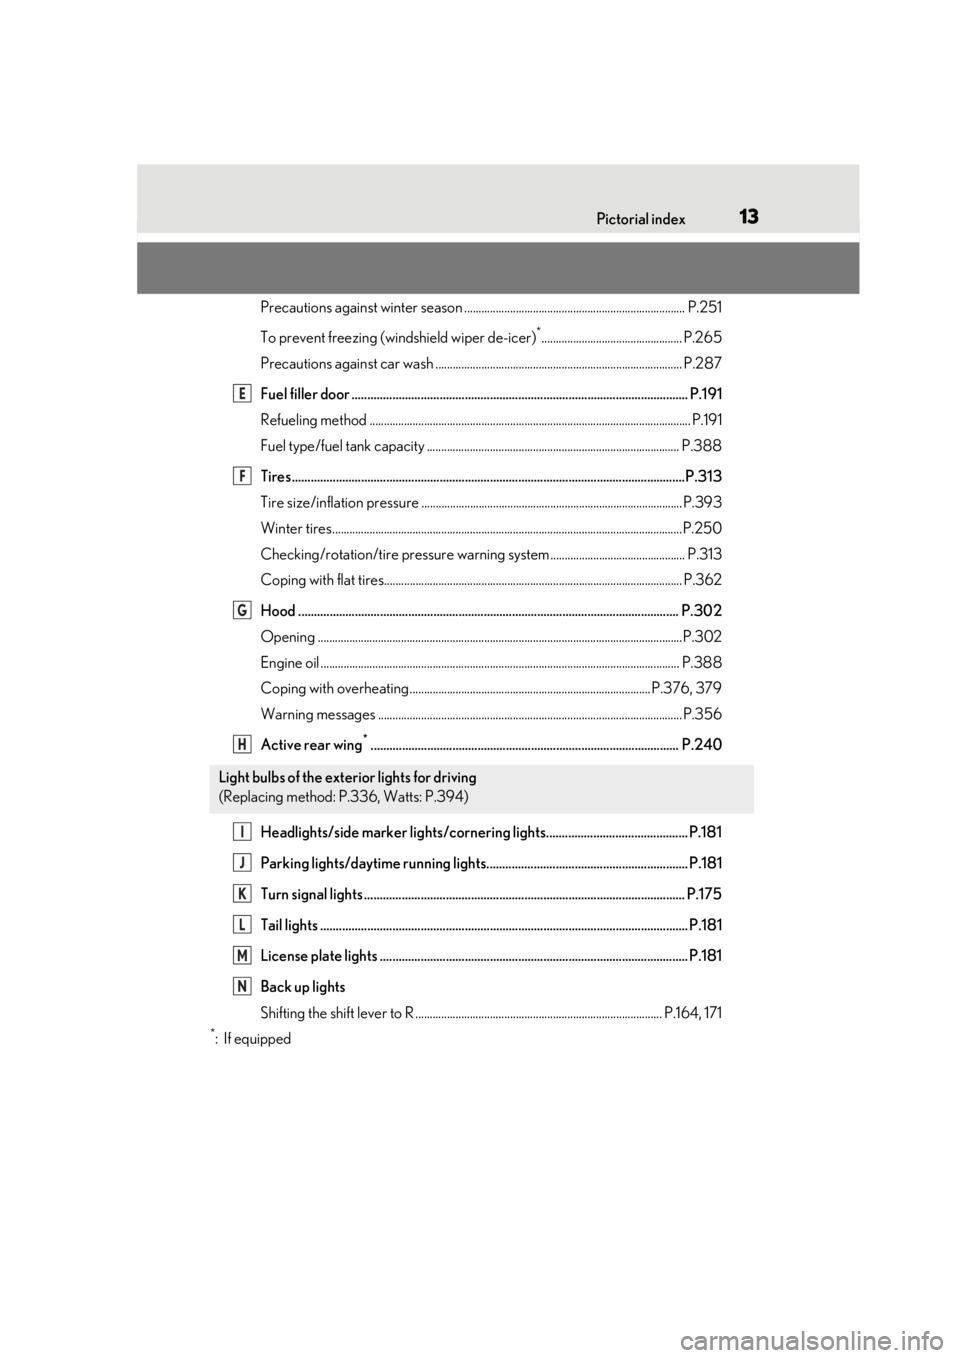
Precautions against winter season ............................................................................. P.251
To prevent freezing (windshield wiper de-icer)
*................................................. P.265
Precautions against car wash ............................. ......................................................... P.287
Fuel filler door ........................................................................................................... P.19 1
Refueling method ............................................................................................................... .P.191
Fuel type/fuel tank capacity ...... .................................................................................. P.388
Tires.......................................................................................................................... ...P.313
Tire size/inflation pressure ........................................................................................... P.393
Winter tires..........................................................................................................................P.250
Checking/rotation/tire pressure warning system............................................... P.313
Coping with flat tires........................................................................................................ P .362
Hood ......................................................................................................................... P. 302
Opening ........................................................................................................................ .......P.302
Engine oil ..................................................................................................................... ........ P.388
Coping with overheating .................................................................................... P.376, 379
Warning messages .......................................................................................................... P.356
Active rear wing
*.................................................................................................. P.240
Headlights/side marker lights/cornering lights............................................. P.181
Parking lights/daytime running lights................................................................ P.181
Turn signal lights ...................................................................................................... P.175
Tail lights .................................................................................................................... .P.181
License plate lights .................................................................................................. P.181
Back up lights
Shifting the shift lever to R .............................. ........................................................ P.164, 171
*:If equipped
Light bulbs of the exterior lights for driving
(Replacing method: P.336, Watts: P.394)
E
F
G
H
I
J
K
L
M
N
Page 15 of 448

15Pictorial index
Applying/releasing ............................................................................................................P.176
Precautions against winter season ................... .......................................................... P.251
Warning buzzer/message................................................................................ P.350, 357
Turn signal lever ...................................................................................................... P.175
Headlight switch....................................................................................................... P.181
Headlights/parking lights/tail lights/daytime running lights .............................P.181
Windshield wiper and washer switch ................................................................ P.187
Usage.......................................................................................................................... ............ P.187
Adding washer fluid .......................................................................................................... P. 310
Warning messages .......................................................................................................... P.357
Emergency flasher switch .................................................................................. P.338
Hood lock release lever ...................................................................................... P.302
Tilt and telescopic steering contro l switch................................ .................... ..P.133
Adjustment ..................................................................................................................... ...... P.133
Driving position memory ................................................................................................. P.127
Air conditioning system .......................................................................................P.260
Usage.......................................................................................................................... ........... P.260
Rear window defogger.....................................................................................................P.261
Audio system
*
Trunk opener main switch ..................................................................................... P.117
*: Refer to “NAVIGATION SYSTEM OWNER’S MANUAL”.
F
G
H
I
J
K
L
M
Page 78 of 448
782-1. Instrument cluster
indicate that a system check is being
performed. They will turn off after the
engine
after a few seconds. There may be a
malfunction in a system if a light does
not come on, or turn off. Have the vehi-
cle inspected by your Lexus dealer.
*2: This light illuminates on the multi-infor-mation display.
*3: The light flashes to indicate a malfunc-tion.
*4: This light illuminates on the center panel.
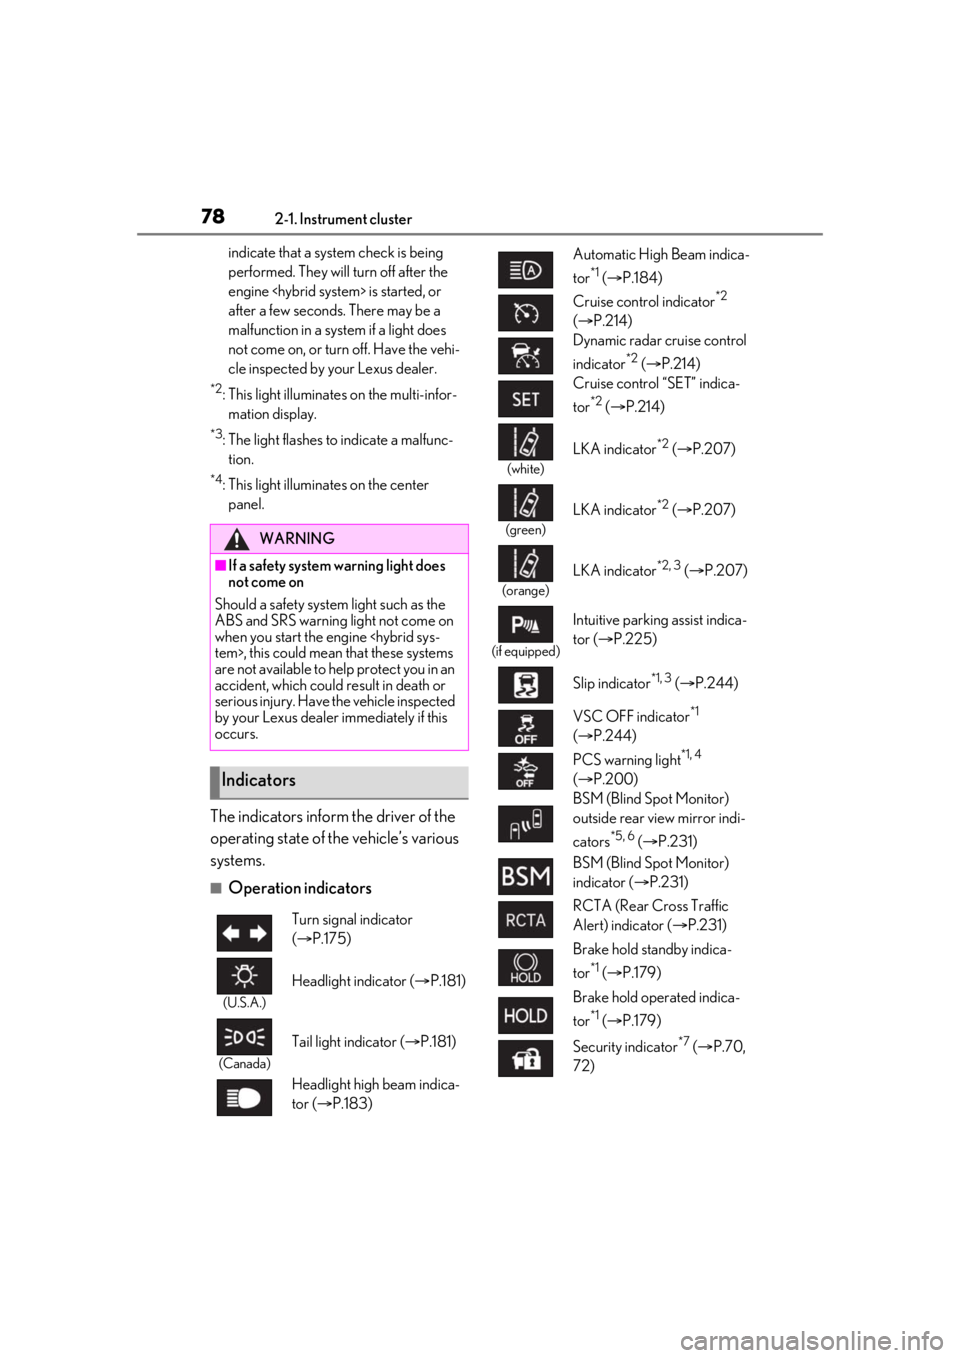
The indicators inform the driver of the
operating state of the vehicle’s various
systems.
■Operation indicators
WARNING
■If a safety system warning light does
not come on
Should a safety system light such as the
ABS and SRS warning light not come on
when you start the engine
are not available to he lp protect you in an
accident, which could result in death or
serious injury. Have the vehicle inspected
by your Lexus dealer immediately if this
occurs.
Indicators
Turn signal indicator
( P.175)
(U.S.A.)
Headlight indicator ( P.181)
(Canada)
Tail light indicator ( P.181)
Headlight high beam indica-
tor ( P.183)
Automatic High Beam indica-
tor
*1 ( P.184)
Cruise control indicator
*2
( P.214)
Dynamic radar cruise control
indicator
*2 ( P.214)
Cruise control “SET” indica-
tor
*2 ( P.214)
(white)
LKA indicator*2 ( P.207)
(green)
LKA indicator*2 ( P.207)
(orange)
LKA indicator*2, 3 ( P.207)
(if equipped)
Intuitive parking assist indica-
tor ( P.225)
Slip indicator
*1, 3 ( P.244)
VSC OFF indicator
*1
( P.244)
PCS warning light
*1, 4
( P.200)
BSM (Blind Spot Monitor)
outside rear view mirror indi-
cators
*5, 6 ( P.231)
BSM (Blind Spot Monitor)
indicator ( P.231)
RCTA (Rear Cross Traffic
Alert) indicator ( P.231)
Brake hold standby indica-
tor
*1 ( P.179)
Brake hold operated indica-
tor
*1 ( P.179)
Security indicator
*7 ( P.70,
72)
Page 111 of 448
1113-2. Opening, closing and locking the doors and trunk
3
Before driving
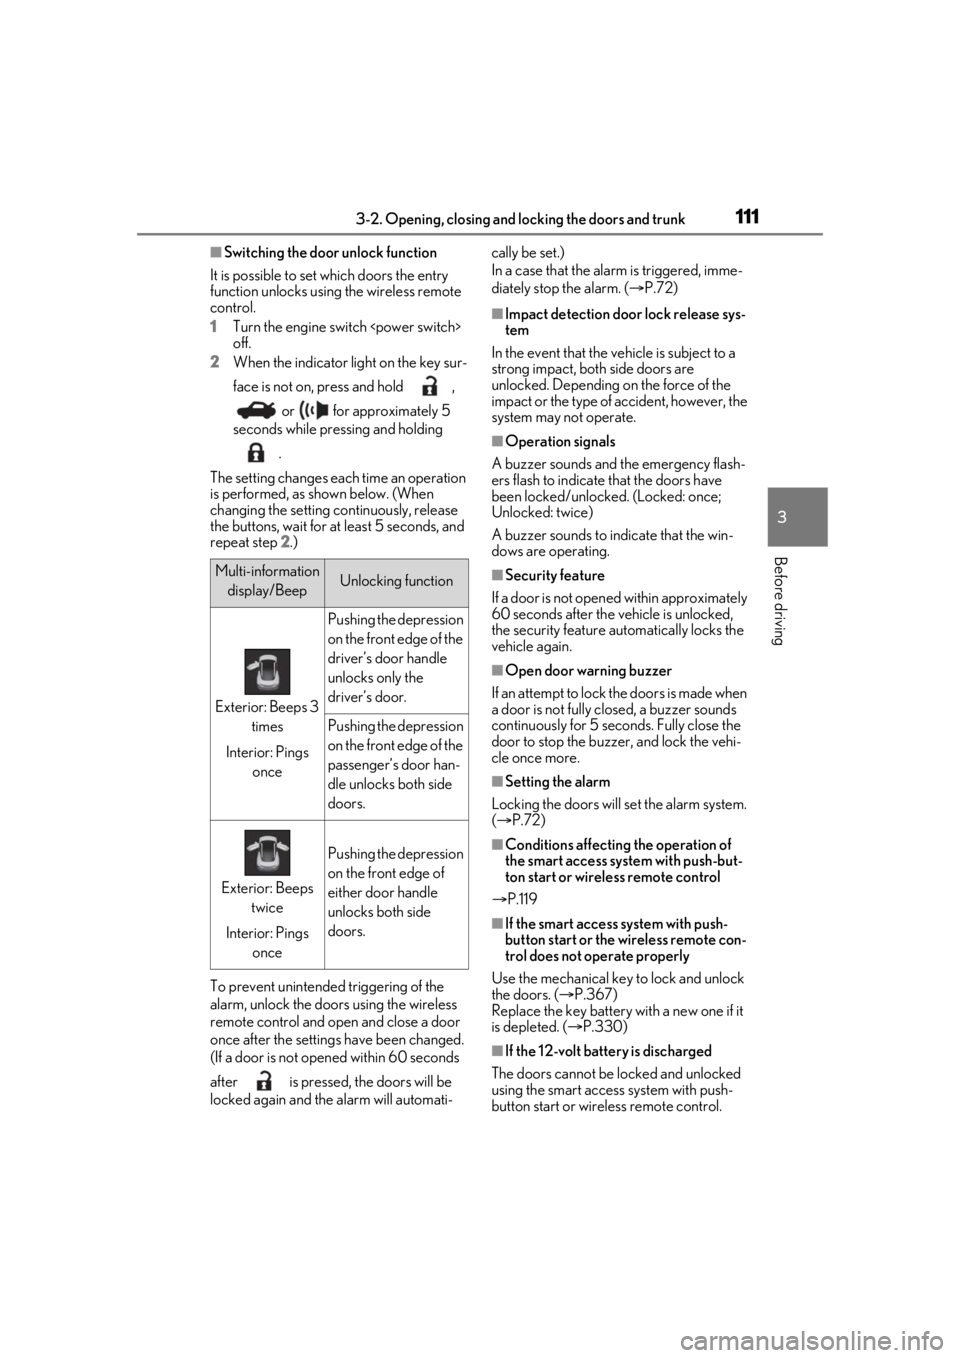
■Switching the door unlock function
It is possible to set which doors the entry
function unlocks using the wireless remote
control.
1 Turn the engine switch
off.
2 When the indicator light on the key sur-
face is not on, press and hold ,
or for approximately 5
seconds while pressing and holding
.
The setting changes each time an operation
is performed, as shown below. (When
changing the setting continuously, release
the buttons, wait for at least 5 seconds, and
repeat step 2 .)
To prevent unintended triggering of the
alarm, unlock the doors using the wireless
remote control and open and close a door
once after the settings have been changed.
(If a door is not opened within 60 seconds
after is pressed, the doors will be
locked again and the alarm will automati- cally be set.)
In a case that the alarm is triggered, imme-
diately stop the alarm. (
P.72)
■Impact detection door lock release sys-
tem
In the event that the vehicle is subject to a
strong impact, both side doors are
unlocked. Depending on the force of the
impact or the type of accident, however, the
system may not operate.
■Operation signals
A buzzer sounds and the emergency flash-
ers flash to indicate that the doors have
been locked/unlocked. (Locked: once;
Unlocked: twice)
A buzzer sounds to in dicate that the win-
dows are operating.
■Security feature
If a door is not opened within approximately
60 seconds after the vehicle is unlocked,
the security feature automatically locks the
vehicle again.
■Open door warning buzzer
If an attempt to lock the doors is made when
a door is not fully closed, a buzzer sounds
continuously for 5 seconds. Fully close the
door to stop the buzzer, and lock the vehi-
cle once more.
■Setting the alarm
Locking the doors will set the alarm system.
( P.72)
■Conditions affecting the operation of
the smart access system with push-but-
ton start or wireless remote control
P.119
■If the smart access system with push-
button start or the wireless remote con-
trol does not operate properly
Use the mechanical key to lock and unlock
the doors. ( P.367)
Replace the key battery with a new one if it
is depleted. ( P.330)
■If the 12-volt batte ry is discharged
The doors cannot be locked and unlocked
using the smart access system with push-
button start or wireless remote control.
Multi-information display/BeepUnlocking function
Exterior: Beeps 3 times
Interior: Pings once
Pushing the depression
on the front edge of the
driver’s door handle
unlocks only the
driver’s door.
Pushing the depression
on the front edge of the
passenger’s door han-
dle unlocks both side
doors.
Exterior: Beeps twice
Interior: Pings once
Pushing the depression
on the front edge of
either door handle
unlocks both side
doors.
Page 120 of 448

1203-2. Opening, closing and locking the doors and trunk
■Note for the entry function
●Even when the electronic key is within the
effective range (detection areas), the sys-
tem may not operate properly in the fol-
lowing cases:
• The electronic key is too close to the win- dow or outside door handle, near the
ground, or in a high place when the doors
are locked or unlocked.
• The electronic key is near the ground or in a high place, or too close to the rear
bumper center when the trunk is opened.
• The electronic key is on the instrument panel, rear package tray or floor, or in the
door pockets or glove box when the
engine
engine switch
changed.
●Do not leave the electronic key on top of
the instrument panel or near the door
pockets when exiting the vehicle.
Depending on the radio wave reception
conditions, it may be detected by the
antenna outside the cabin and the doors
will become lockable from the outside,
possibly trapping the electronic key
inside the vehicle.
●As long as the electron ic key is within the
effective range, the doors may be locked
or unlocked by anyone. However, only
the doors detecting the electronic key
can be used to unlock the vehicle.
●Even if the electronic key is not inside the
vehicle, it may be possible to start the
engine
key is near the window.
●The doors may unlock or lock if a large
amount of water spla shes on the door
handle, such as in the rain or in a car
wash, when the electronic key is within
the effective range. (The doors will auto-
matically be locked after approximately
60 seconds if the d oors are not opened
and closed.)
●If the wireless remote control is used to
lock the doors when the electronic key is
near the vehicle, there is a possibility that
the door may not be unlocked by the
entry function. (Use the wireless remote
control to unlock the doors.)
●When the lock operation is performed using the lock sensor, recognition signals
will be shown up to two consecutive
times. After this, no recognition signals
will be given.
●If the door handle becomes wet while the
electronic key is within the effective
range, the door may lock and unlock
repeatedly. In this case, follow the follow-
ing correction procedures to wash the
vehicle:
• Place the electronic key in a location 6 ft.
(2 m) or more away from the vehicle.
(Take care to ensure that the key is not
stolen.)
• Set the electronic key to battery-saving mode to disable the smart access system
with push-button start. ( P.119)
●If the electronic key is inside the vehicle
and a door handle becomes wet during a
car wash, a message may be shown on
the multi-information display and a
buzzer will sound outside the vehicle. To
turn off the alarm, lock both side doors.
●If an outside door handle is not retracted
during a car wash, a door may be opened
or an outside door handle may be dam-
aged. Make sure that the outside door
handles are retracted before using the
car wash.
●A sudden handle operation or a handle
operation immediately after entering the
effective range may prevent the doors
from being unlocked. Touch the door
unlock sensor and check that the doors
are unlocked before pulling the door
handle again.
●Unlocking the vehicle may take more
time if another electronic key is within the
effective range.
■When the vehicle is not driven for
extended periods
●To prevent theft of the vehicle, do not
leave the electronic key within 6 ft. (2 m)
of the vehicle.
●The smart access system with push-but-
ton start can be deactivated in advance.
●Setting the electronic key to battery-sav-
ing mode helps to reduce key battery
depletion. ( P.119)
Page 141 of 448
141
4
4
Driving
Driving
4-1. Before drivingDriving the vehicle ..................... 142
Cargo and luggage ................... 148
Vehicle load limits ...................... 150
Trailer towing ................................ 151
Dinghy towing .............................. 151
4-2. Driving procedures Engine (ignition) switch (LC500)......................................................... 152
Power (ignition) switch (LC500h) ......................................................... 156
EV drive mode (LC500h)..... 160
Automatic transmission (LC500) ......................................................... 162
Hybrid transmission (LC500h) ......................................................... 169
Turn signal lever.......................... 175
Parking brake .............................. 176
Brake Hold.................................... 179
4-3. Operating the lights and wipers Headlight switch .......................... 181
Automatic High Beam ............. 184
Windshield wipers and washer ......................................................... 187
4-4. Refueling Opening the fuel tank cap....... 191
4-5. Using the driving support sys- tems
Lexus Safety System + ............. 194
PCS (Pre-Collision System). 200
LKA (Lane-Keeping Assist) . 207Dynamic radar cruise control with
full-speed range........................ 214
Driving mode select switch ...224
Intuitive parking assist ............. 225
BSM (Blind Spot Monitor) ..... 231
Active rear wing ........................ 240
Driving assist systems.............. 243
4-6. Driving tips Hybrid vehicle driving tips (LC500h)................................. 249
Winter driving tips ..................... 251
Page 175 of 448
1754-2. Driving procedures
4
Driving
However, even when in the M position,
the gears will be automatically
changed in the following situation:
When vehicle speed drops (down-
shift only).
When vehicle speed increases
(upshift only).
When the accelerator pedal is firmly
depressed.
When it is necessary to protect the
transmission fluid temperature is
high or low, or other reasons.
When particulate matter has accu-
mulated in the exhaust filter.
Also, the gear will not shift when the
vehicle speed is low, even if an upshift
operation is performed.
■Downshifting restrictions warning
buzzer
To help ensure safety and driving perfor-
mance, downshifting operation may some-
times be restricted. In some circumstances,
downshifting may not be possible even
when the paddle shift switch is operated. (A
buzzer will sound twice.)
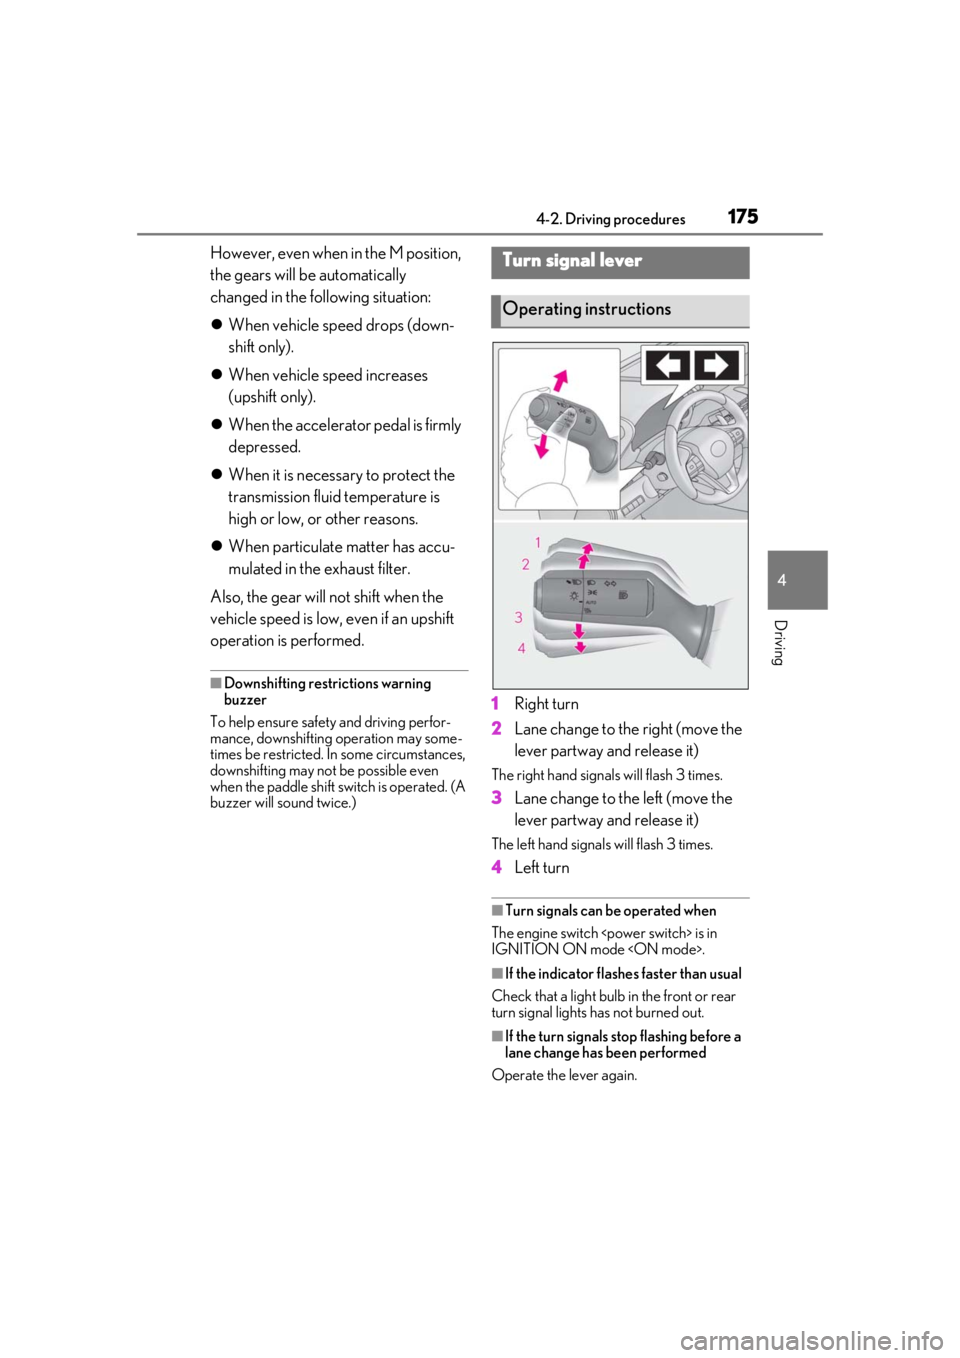
1 Right turn
2 Lane change to the right (move the
lever partway and release it)
The right hand signals will flash 3 times.
3Lane change to the left (move the
lever partway and release it)
The left hand signals will flash 3 times.
4Left turn
■Turn signals can be operated when
The engine switch
IGNITION ON mode
■If the indicator flashes faster than usual
Check that a light bulb in the front or rear
turn signal lights has not burned out.
■If the turn signals stop flashing before a
lane change has been performed
Operate the lever again.
Turn signal lever
Operating instructions
Page 183 of 448
1834-3. Operating the lights and wipers
4
Driving
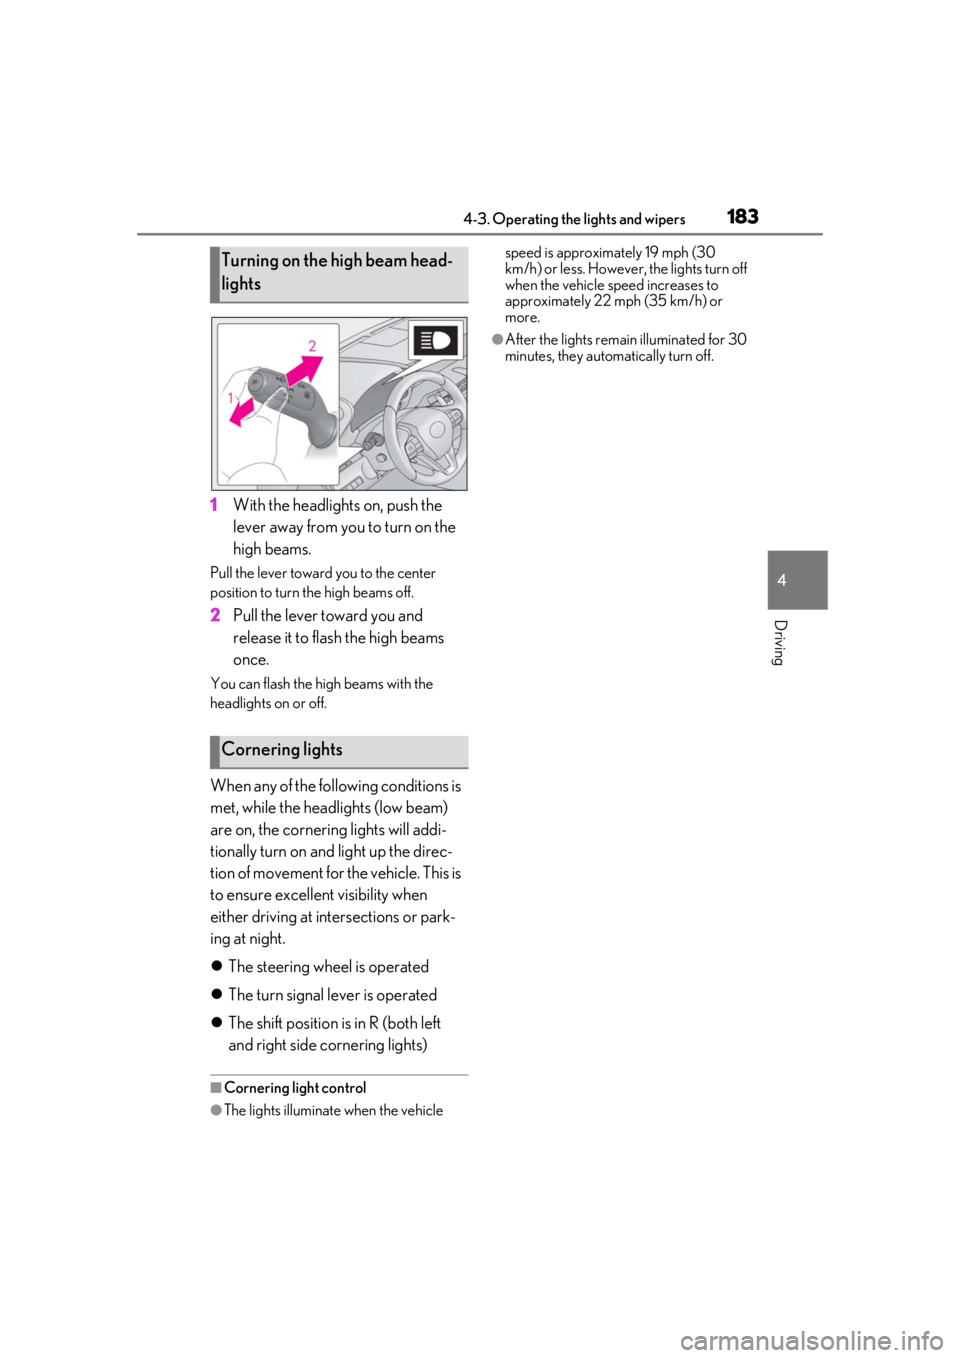
1With the headlights on, push the
lever away from you to turn on the
high beams.
Pull the lever toward you to the center
position to turn the high beams off.
2Pull the lever toward you and
release it to flash the high beams
once.
You can flash the high beams with the
headlights on or off.
When any of the following conditions is
met, while the headlights (low beam)
are on, the cornering lights will addi-
tionally turn on and light up the direc-
tion of movement for the vehicle. This is
to ensure excellent visibility when
either driving at intersections or park-
ing at night.
The steering wheel is operated
The turn signal lever is operated
The shift position is in R (both left
and right side cornering lights)
■Cornering light control
●The lights illuminate when the vehicle speed is approximately 19 mph (30
km/h) or less. However,
the lights turn off
when the vehicle speed increases to
approximately 22 mph (35 km/h) or
more.
●After the lights remain illuminated for 30
minutes, they automatically turn off.
Turning on the high beam head-
lights
Cornering lights
Page 185 of 448
1854-3. Operating the lights and wipers
4
Driving
●House lights, street lights, traffic signals,
and illuminated billboards or signs may
cause the high beam to switch to the low
beams, or the low beams to remain on.
●The following factors may affect the
amount of time taken to turn the high
beam on or off:
• The brightness of headlights, fog lights,
and tail lights of vehicles ahead
• The movement and direction of vehicles ahead
• When a vehicle ahead only has opera- tional lights on one side
• When a vehicle ahead is a two-wheeled
vehicle
• The condition of the road (gradient, curve, condition of the road surface etc.)
• The number of passengers and amount of luggage
●The high beam may be turned on or off
when the driver does not expect it.
●Bicycles or similar objects may not be
detected.
●In the situations show n below, the system
may not be able to accurately detect sur-
rounding brightness levels. This may
cause the low beams to remain on or the
high beams to cause problems for pedes-
trians, vehicles ahead or other parties. In
these cases, manually switch between the
high and low beams.
• In bad weather (rain, snow, fog, sand-
storms etc.)
• The windshield is obscured by fog, mist, ice, dirt etc.
• The windshield is cracked or damaged.
• The front camera is deformed or dirty.
• Surrounding brightness levels are equal to those of headlights, tail lights or fog
lights.
• Vehicles ahead have headlights or tail
lights that are either switched off, dirty,
changing color, or have improperly
adjusted aim.
• When driving through an area of inter- mittently changing brightness and dark-
ness.
• When frequently and repeatedly driving
ascending/descending roads, or roads
with rough, bumpy or uneven surfaces
(such as stone-paved roads, gravel tracks
etc.). • When frequently and repeatedly taking
curves or driving on a winding road.
• There is a highly re flective object ahead
of the vehicle, such as a sign or a mirror.
• The vehicle’s headlights are damaged or dirty.
• The vehicle is listing or titling, due to a flat tire, a trailer being towed etc.
• The driver believes that the high beam
may be causing problems or distress to
other drivers or pedestrians nearby.
■Temporarily lowering sensor sensitivity
The sensitivity of the sensor can be tempo-
rarily lowered.
1 Turn the engine switch
off while the following conditions are
met.
• The headlight swit ch is in or .
• The headlight switch lever is in low beam
position.
• Automatic High Be am switch is on.
2 Turn the engine switch
to IGNITION ON mode
3 Within 60 seconds after 2, repeat pull-
ing the headlight switch lever to the
original position then pushing it to the
high beam position quickly 10 times,
then leave the lever in high beam posi-
tion.
4 If the sensitivity is changed, the Auto-
matic High Beam indicator turns on and
off 3 times.
Automatic High Beam (headlights) may
turn on even the vehicle is stopped.
■Switching to high beam
Push the lever away from you.
The Automatic High Beam indicator will
turn off and the high beam indicator will
turn on.
Pull the lever to its original position to acti-
vate the Automatic High Beam system
again.
Turning the high beam on/off
manually