headlights lexus LFA 2012 Owner's Manual / LEXUS 2012 LFA OWNERS MANUAL (OM77006U)
[x] Cancel search | Manufacturer: LEXUS, Model Year: 2012, Model line: LFA, Model: Lexus LFA 2012Pages: 420, PDF Size: 5.02 MB
Page 15 of 420
13
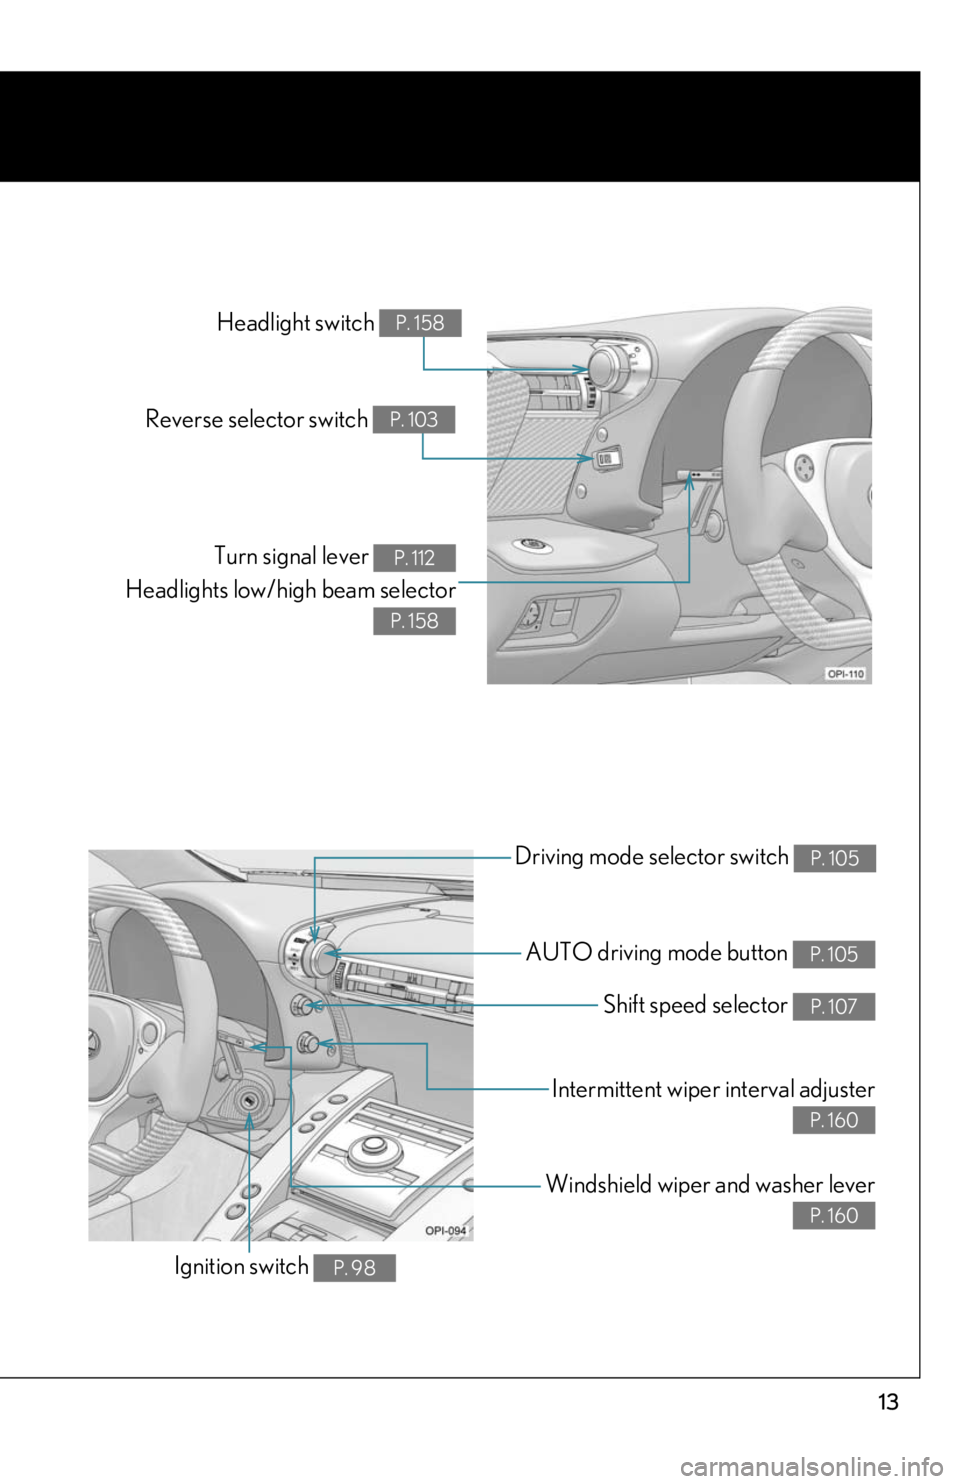
Driving mode selector switch P. 105
AUTO driving mode button P. 105
Shift speed selector P. 107
Intermittent wiper interval adjuster
P. 160
Windshield wiper and washer lever
P. 160
Ignition switch P. 98
Headlight switch P. 158
Reverse selector switch P. 103
Turn signal lever
Headlights low/high beam selectorP. 112
P. 158
Page 44 of 420
42
1-3. Adjustable components (seats, mirrors, steering wheel)
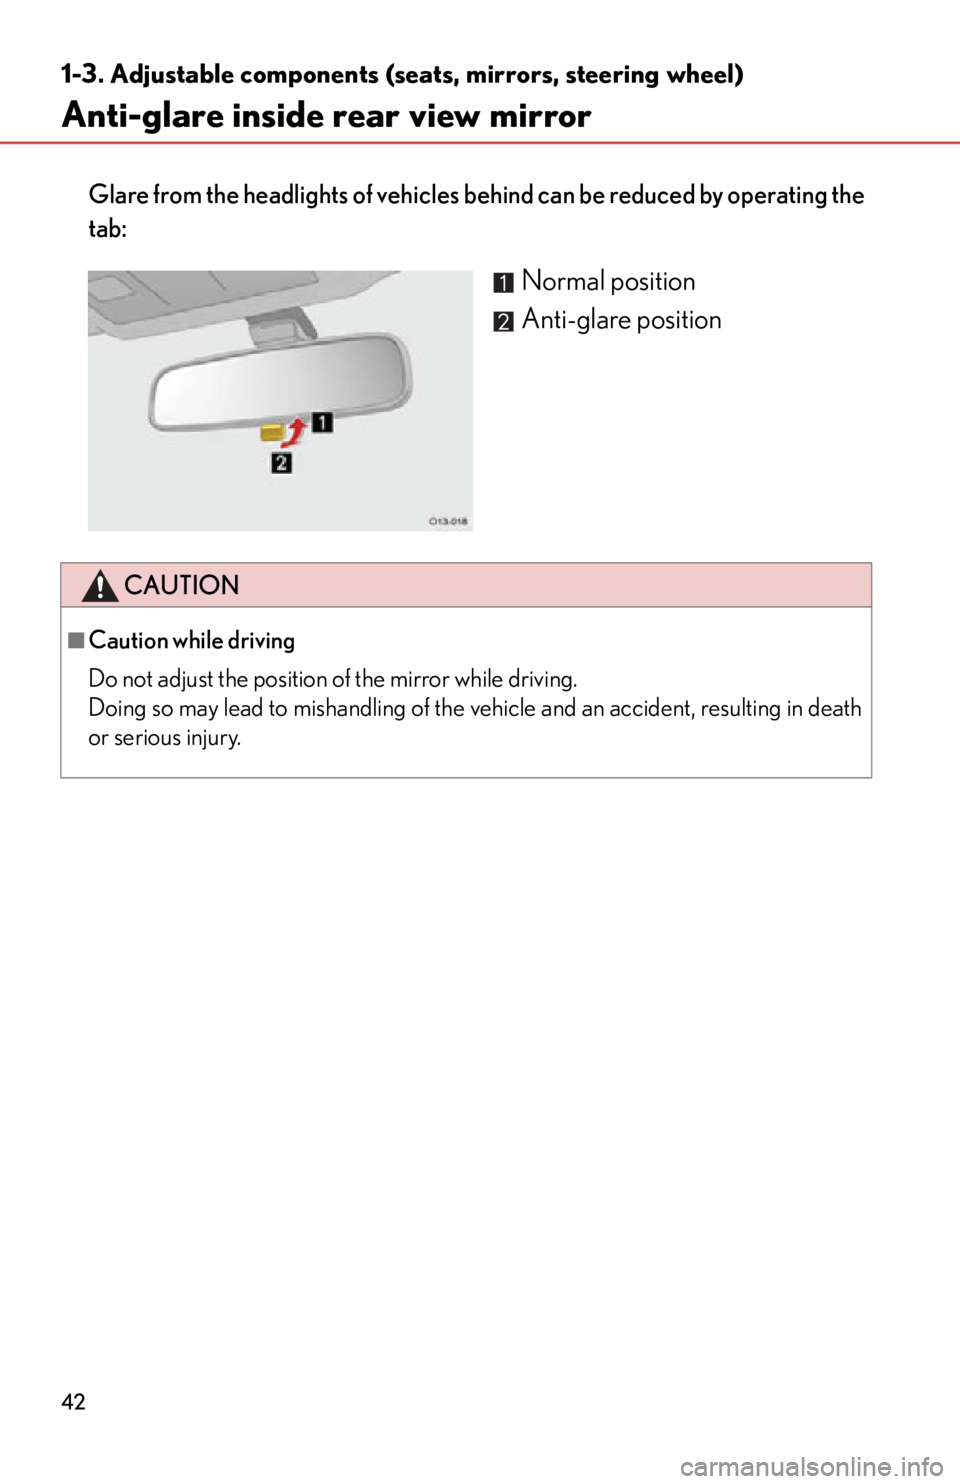
Anti-glare inside rear view mirror
Glare from the headlights of vehicles behind can be reduced by operating the
tab:
Normal position
Anti-glare position
CAUTION
■Caution while driving
Do not adjust the position of the mirror while driving.
Doing so may lead to mishandling of the ve hicle and an accident, resulting in death
or serious injury.
Page 160 of 420
158
2-3.Operating the lights and windshield wipers
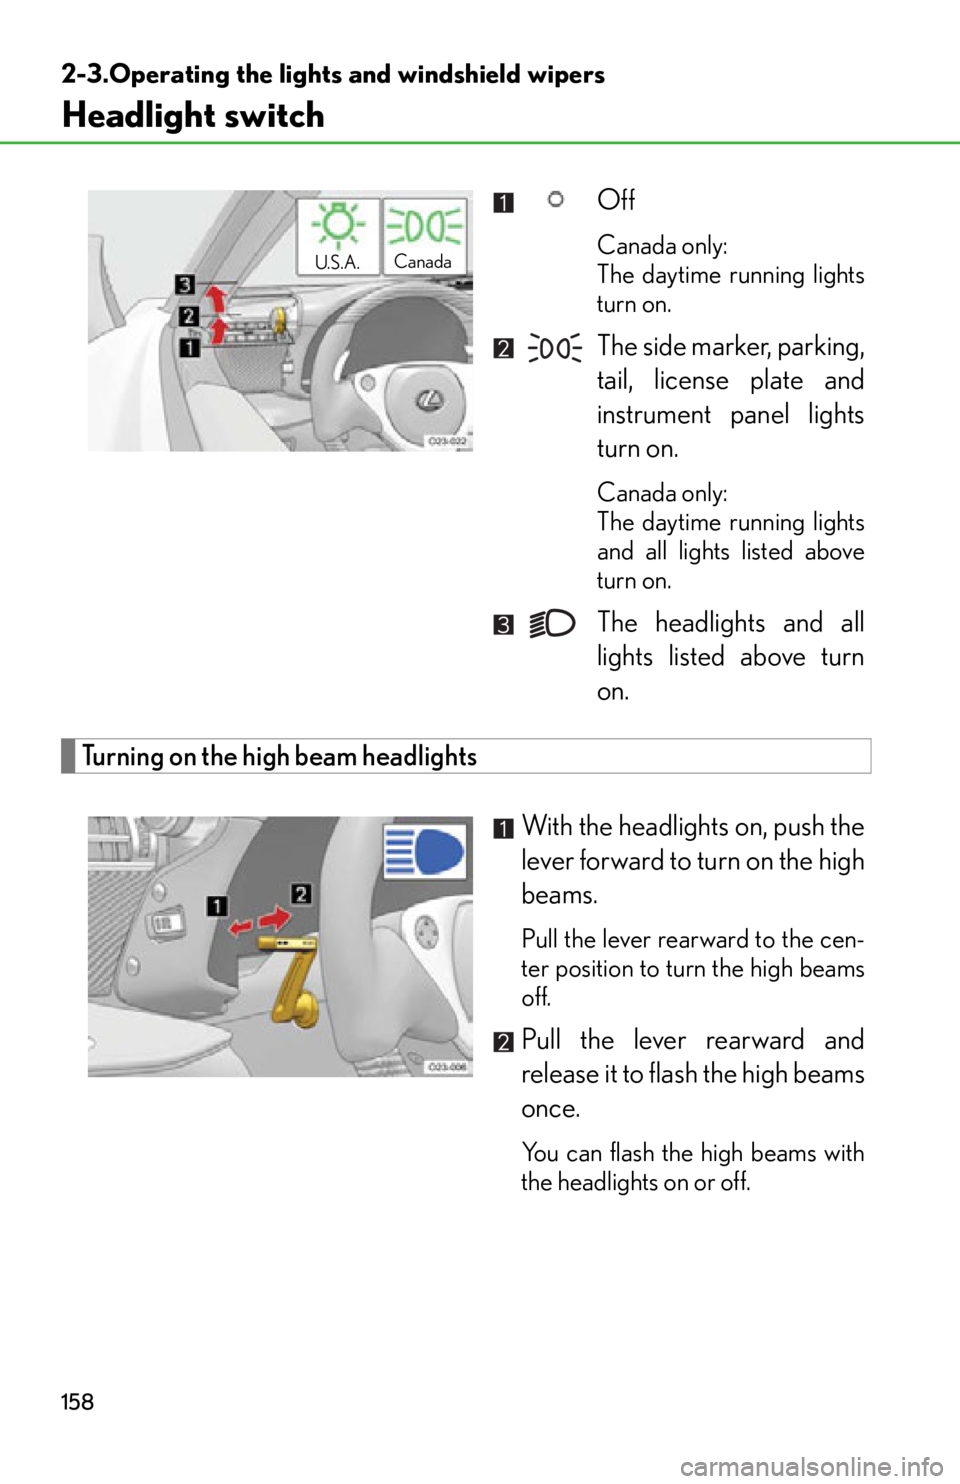
Headlight switch
Off
Canada only:
The daytime running lights
turn on.
The side marker, parking,
tail, license plate and
instrument panel lights
turn on.
Canada only:
The daytime running lights
and all lights listed above
turn on.
The headlights and all
lights listed above turn
on.
Turning on the high beam headlights
With the headlights on, push the
lever forward to turn on the high
beams.
Pull the lever rearward to the cen-
ter position to turn the high beams
off.
Pull the lever rearward and
release it to flash the high beams
once.
You can flash the high beams with
the headlights on or off.
U.S.A.Canada
Page 161 of 420
159
2-3. Operating the lights and windshield wipers
2
When driving
■Daytime running light system (Canada only)
To make your vehicle more visible to other drivers, the headlights and tail lights turn
on automatically whenever the engine is started and the parking brake is released.
■Automatic light off system
●When the headlights come on: The headlights and tail lights turn off 30 seconds
after a door is opened and closed if the ignition switch is turned to the “ACC” or
“LOCK” position. (The light turns off immediately if on the key is pressed
after both side doors are locked.)
●When only the tail lights come on: The tail lights turn off automatically if the igni-
tion switch is turned to the “ACC” or “LOCK” position and the driver’s door is
opened.
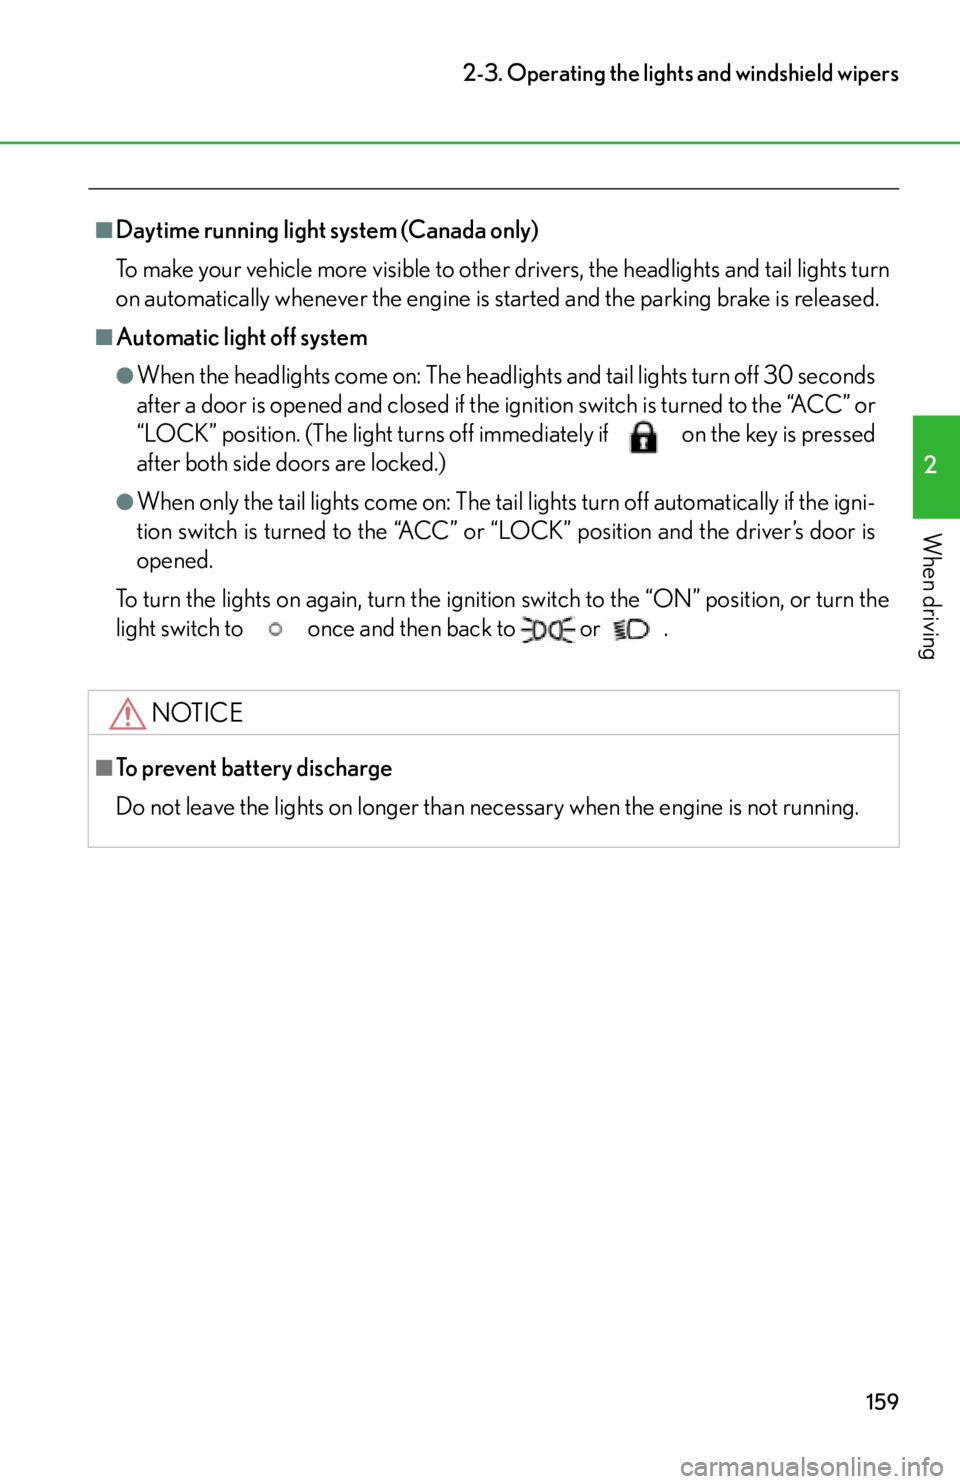
To turn the lights on again, turn the ignition switch to the “ON” position, or turn the
light switch to once and then back to or
.
NOTICE
■To prevent battery discharge
Do not leave the lights on longer than necessary when the engine is not running.
Page 162 of 420
160
2-3. Operating the lights and windshield wipers
Windshield wipers and washer
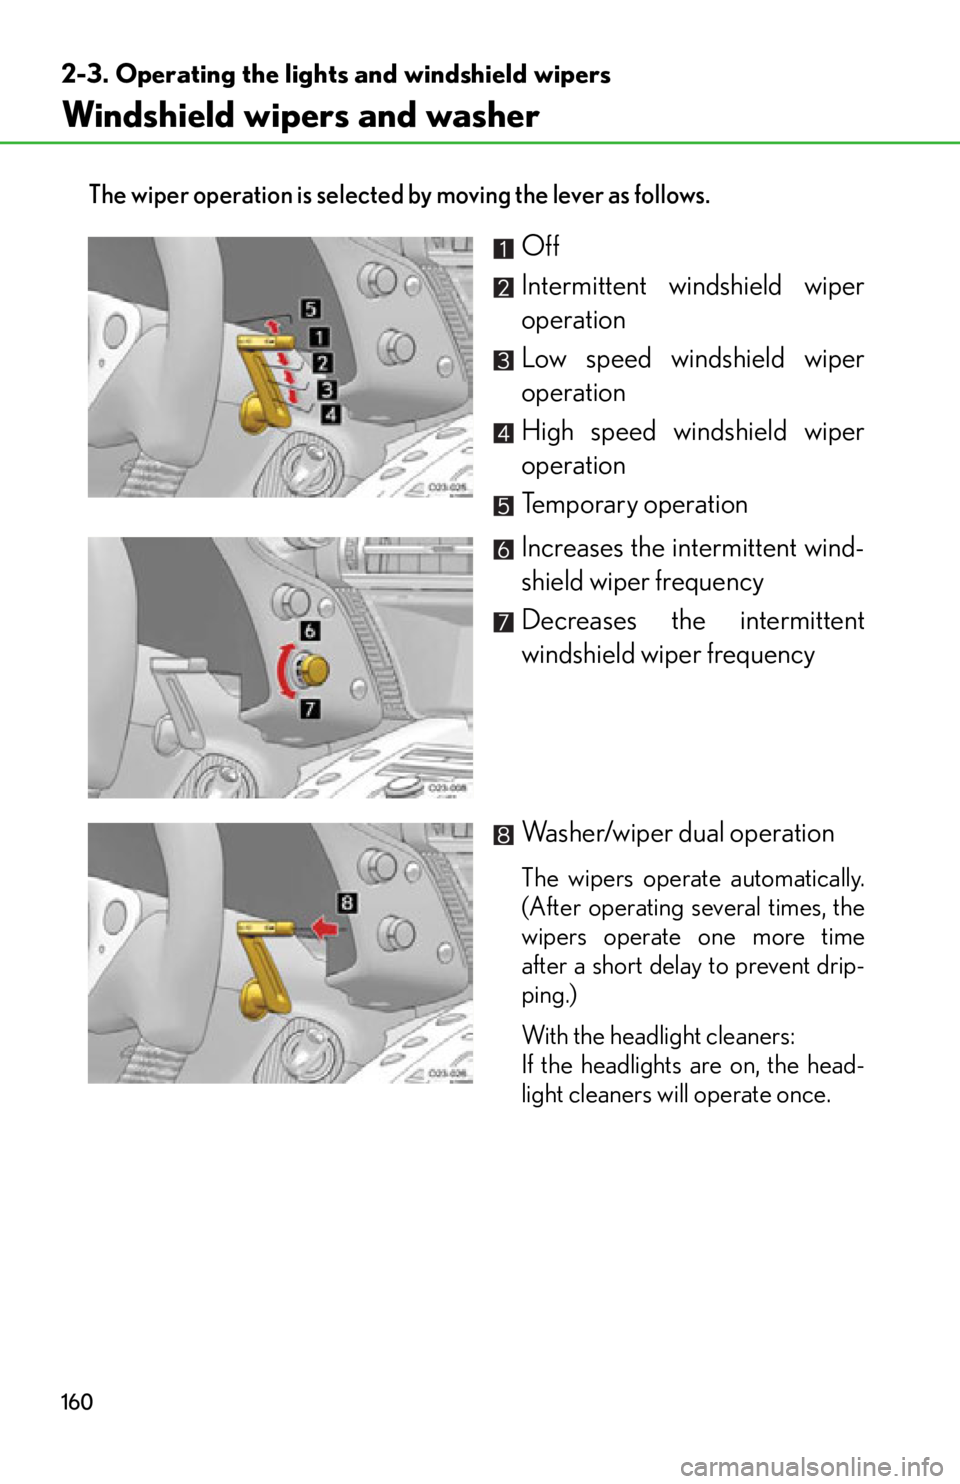
The wiper operation is selected by moving the lever as follows.
Off
Intermittent windshield wiper
operation
Low speed windshield wiper
operation
High speed windshield wiper
operation
Temporary operation
Increases the intermittent wind-
shield wiper frequency
Decreases the intermittent
windshield wiper frequency
Washer/wiper dual operation
The wipers operate automatically.
(After operating several times, the
wipers operate one more time
after a short delay to prevent drip-
ping.)
With the headlight cleaners:
If the headlights are on, the head-
light cleaners will operate once.
Page 166 of 420
164
2-4. Using other driving systems
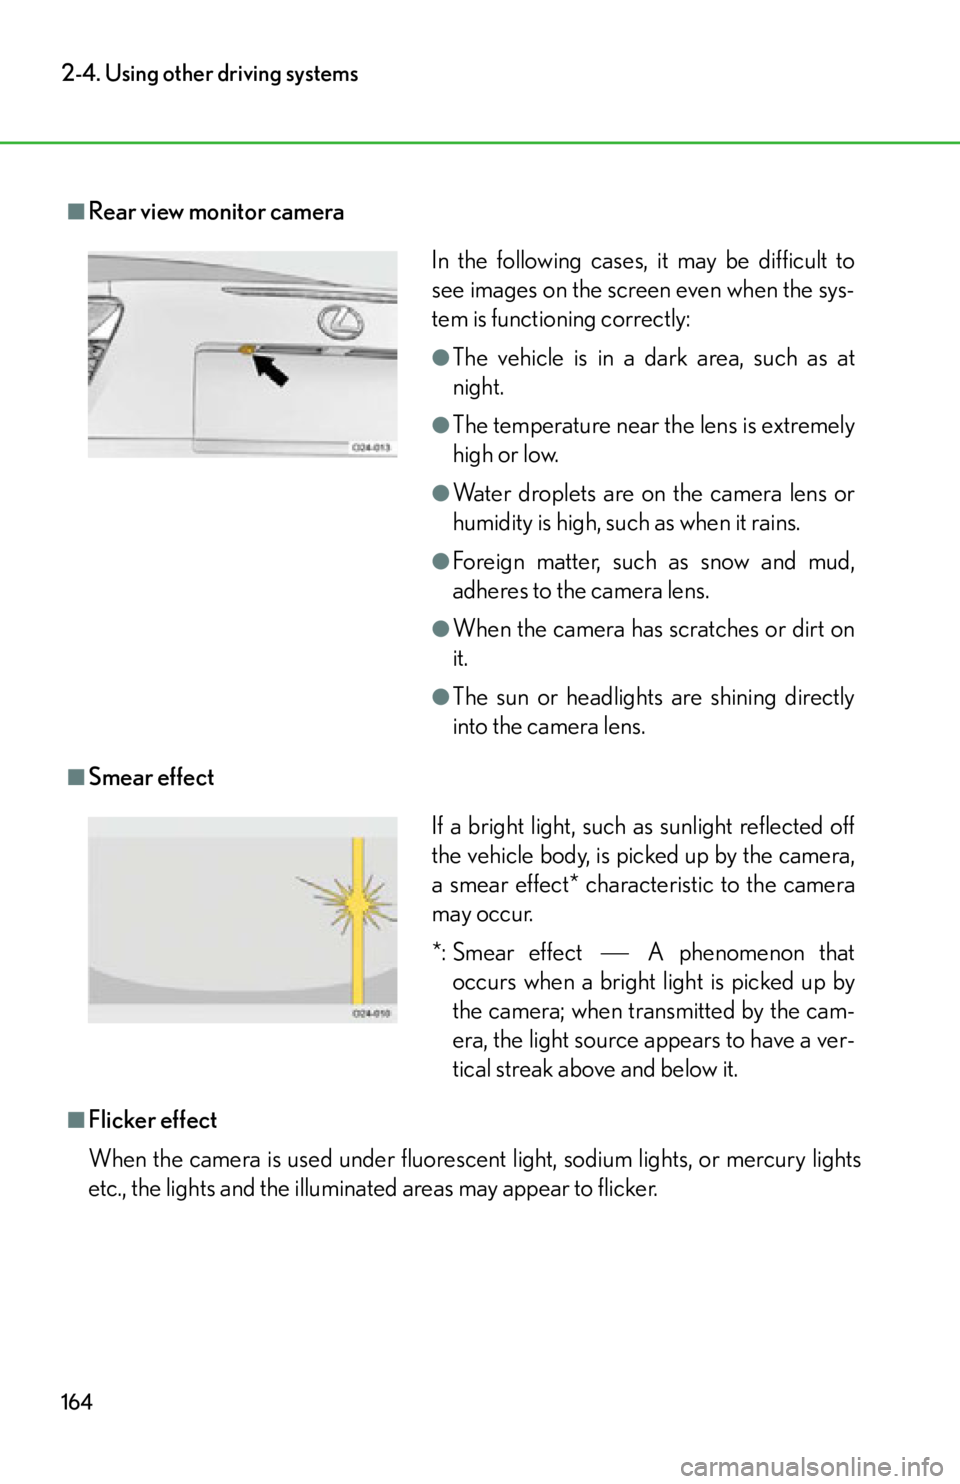
■Rear view monitor camera
■Smear effect
■Flicker effect
When the camera is used under fluorescent light, sodium lights, or mercury lights
etc., the lights and the illuminated areas may appear to flicker.
In the following cases, it may be difficult to
see images on the screen even when the sys-
tem is functioning correctly:
●The vehicle is in a dark area, such as at
night.
●The temperature near the lens is extremely
high or low.
●Water droplets are on the camera lens or
humidity is high, such as when it rains.
●Foreign matter, such as snow and mud,
adheres to the camera lens.
●When the camera has scratches or dirt on
it.
●The sun or headlights are shining directly
into the camera lens.
If a bright light, such as sunlight reflected off
the vehicle body, is picked up by the camera,
a smear effect* characteristic to the camera
may occur.
*: Smear effectA phenomenon that
occurs when a bright light is picked up by
the camera; when transmitted by the cam-
era, the light source appears to have a ver-
tical streak above and below it.
Page 302 of 420
300
4-3. Do-it-yourself maintenance
■Discharge headlights
If voltage to the discharge bulbs is insufficient, the bulbs may not come on, or may
go out temporarily. The discharge bulbs will come on when normal power is
restored.
■LED light bulbs
The following lights consist of a number of LEDs. If any of the LEDs burn out, take
your vehicle to your Lexus dealer to have the light replaced:
●Parking lights
●Stop/tail lights
●High mounted stoplight
■Condensation build-up on the inside of the lens
Contact your Lexus dealer for more information in the following situations. Tempo-
rary condensation build-up on the inside of the headlight lens does not indicate a
malfunction.
●Large drops of water are built up on the inside of the lens.
●Water has built up inside the headlight.
CAUTION
■Handling lights and bulbs
●Do not touch the lights or bulbs while they are on or immediately after they have
been turned off. Doing so may result in burns.
●Do not touch the glass portion of the light bulb with bare hands. Hold the bulb by
the plastic or metal portion.
If the bulb is scratched or dropped it may blow out or crack.
■Discharge headlights
●Do not touch the high-intensity discharge headlight’s high voltage socket when
the headlights are turned on.
An extremely high voltage of 30000 V wi ll be discharged and could result in
serious injury or death by electric shock.
●Do not attempt to take apart or repair the discharge headlight bulbs, connectors,
power supply circuits, or related components.
Doing so could result in electric shock and serious injury or death.
Page 345 of 420

5
When trouble arises
343
5-2. Steps to take in an emergency
If the engine will not start
If the engine will not start, even though correct starting procedures are being
followed (
P. 98), consider each of the following points.
■ The engine will not start even when the starter motor operates nor-
mally.
One of the following may be the cause of the problem.
● There may not be sufficient fuel in the vehicle’s tank.
Refuel the vehicle.
● The engine may be flooded.
Try to restart the engine once more following correct starting pro-
cedures. ( P. 9 8 )
● There may be a malfunction in the engine immobilizer system.
( P. 5 3 )
■ The starter motor turns over slowly , the interior lights and headlights
are dim, or the horn does not sound or sounds at a low volume.
One of the following may be the cause of the problem.
● The battery may be discharged. ( P. 3 4 8 )
● The battery terminal connections may be loose or corroded.
■ The starter motor does not turn over, the interior lights and head-
lights do not turn on, or the horn does not sound.
One of the following may be the cause of the problem.
● One or both of the battery terminals may be disconnected.
● The battery may be discharged. ( P. 3 4 8 )
Contact your Lexus dealer if the prob lem cannot be repaired, or if repair
procedures are unknown.
Page 351 of 420
5
When trouble arises
349
5-2. Steps to take in an emergency
Start the engine of the second vehicle. Increase the engine speed
slightly and maintain at that level for approximately 5 minutes to
recharge the battery of your vehicle.
Maintain the engine speed of th e second vehicle and start the
engine of your vehicle.
Once the vehicle’s engine has started, remove the jumper cables
in the exact reverse order from which they were connected.
After disconnecting the jumper cables, make sure that the negative (-)
battery terminal on your vehicle is fixed securely.
Once the engine starts, have the vehicle inspected at your Lexus dealer
as soon as possible.
■Starting the engine when the battery is discharged
●If the gear indicator is not displayed when an attempt is made to start the
engine, the engine is not yet ready to start. Depress the brake pedal for several
seconds and wait for the ge ar indicator to appear.
●The engine cannot be started by push-starting.
■To prevent battery discharge
●Turn off the headlights and the audio system while the engine is off.
●Turn off any unnecessary electrical compon ents when the vehicle is running at a
low speed for an extended period, such as in heavy traffic.
STEP3
STEP4
STEP5
Page 386 of 420

384
6-2. Customization
Door lock
(
P. 2 5 )Unlocking using a key
Driver's door
unlocked in one
step, both side
doors unlocked
in two stepsBoth side doors
unlocked in one
step
Speed-detecting auto-
matic door lock function Off On
Opening driver's door
unlocks both side doors Off On
Pow e r e a s y
access system
(
P. 3 2 ) Auto away function Off On
Pow e r w i n -
dows
(
P. 4 6 ) Key linked operation Off
Open and close
Open onlyClose only
Wireless remote control
linked operation Off Open only
Automatic
light control
system
(
P. 1 5 8 ) Ti m e e l a p s e d b e f o r e
headlights automatically
turn off after doors are
closed
30 seconds0 seconds
60 seconds
90 seconds
ASG
(Automated
Sequential
Gearbox)
(
P. 1 0 2 ) Reverse warning buzzer Intermittent Once
ItemFunctionDefault settingCustomized
setting