ECU lexus LFA 2012 Technical Information / LEXUS 2012 LFA: INSIDE THE LFA
[x] Cancel search | Manufacturer: LEXUS, Model Year: 2012, Model line: LFA, Model: Lexus LFA 2012Pages: 128, PDF Size: 5.91 MB
Page 62 of 128

60
■
■Engine coolant temperature gauge
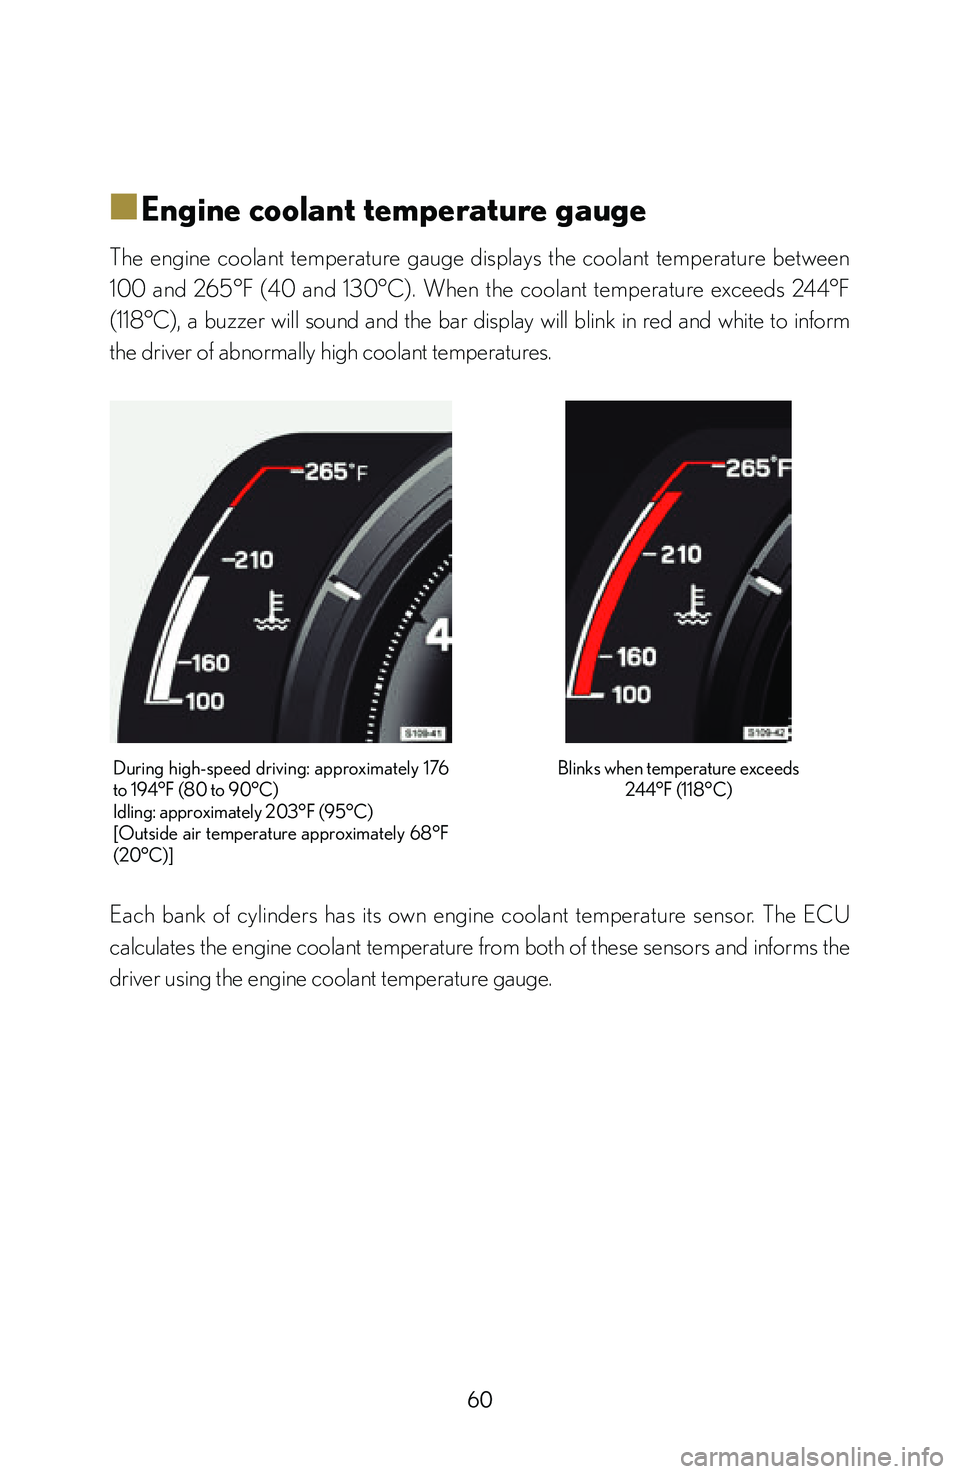
The engine coolant temperature gauge displays the coolant temperature between
100 and 265°F (40 and 130°C). When the coolant temperature exceeds 244°F
(118°C), a buzzer will sound and the bar display will blink in red and white to inform
the driver of abnormally high coolant temperatures.
During high-speed driving: approximately 176
to 194°F (80 to 90°C)
Idling: approximately 203°F (95°C)
[Outside air temperature approximately 68°F
(20°C)]Blinks when temperature exceeds
244°F (118°C)
Each bank of cylinders has its own engine coolant temperature sensor. The ECU
calculates the engine coolant temperature from both of these sensors and informs the
driver using the engine coolant temperature gauge.
Page 63 of 128

61
Checking the engine
■
■Engine oil temperature gauge
The engine oil temperature gauge displays the oil temperature from 100 to 320°F
(40 to 160°C). When the oil temperature exceeds 284°F (140°C), a buzzer will
sound and the bar display will blink in red and white to inform the driver that the
oil temperature is abnormally high and that the performance and lifespan of the
oil is severely compromised. Allowing the engine oil to cool and maintain a stable
temperature helps to stabilize its performance.
During high-speed driving: approximately 176
to 194°F (80 to 90°C)
[Outside air temperature approximately 68°F
(20°C)]Blinks when temperature exceeds
284°F (140°C)
An oil temperature sensor is installed near the oil filter to monitor the temperature
of the engine oil supplied by the oil pump. The ECU processes the engine oil
temperature from this sensor and informs the driver using the engine oil temperature
gauge.
Page 64 of 128

62
■
■Engine oil pressure gauge
The engine oil pressure gauge displays the engine oil pressure from 0 to 800
kPa. The rapid response of the TFT LCD panel allows for the fluctuations in engine
oil pressure that occur with engine speed to be displayed instantly. The engine oil
pressure is also affected by other factors such as engine oil type, temperature and
deterioration. If the engine oil pressure is too low, the master warning light comes on
and the “Engine oil pressure low” warning message is displayed. Checking the engine
oil pressure regularly aids understanding of the condition of the engine and engine oil.
During high-speed driving: approximately 400
to 800 kPa
(changes depending on driving conditions)
[Outside air temperature approximately 68°F
(20°C)]
When oil pressure is insufficient
An oil pressure sensor is installed near the oil filter.
The oil pressure measurements are processed by the ECU and displayed by the
engine oil pressure gauge.
Page 65 of 128

63
Checking the engine
■
■Fuel gauge
The fuel gauge displays the amount of fuel remaining on a scale of 0 to 1/1. The
saddle-shaped fuel tank consists of a main tank compartment and a sub-tank
compartment. When the fuel level drops to approximately 2.9 gal. (11 L, 2.4 Imp. gal.)
between both compartments, the bar display will blink in amber to inform the driver
that the remaining fuel level is low. In this state, the remaining amount of fuel is directed
into the main tank compartment in order to ensure a stable supply of fuel to the engine
even under high cornering G-loads.
S109-14Main tank
compartment Sub-tank compartment
Fuel
Remaining fuel directed to main tank
compartment
Blinks when remaining fuel drops to approx. 2.9 gal. (11 L, 2.4 Imp. gal.)
The main tank compar tment and sub-tank compar tment each have their own
individual sender gauges to monitor the fuel levels. The ECU calculates the total
amount of fuel remaining from both of these sensors and informs the driver using
the fuel gauge. The ECU digitally processes the fuel level data in order to display a
clear and accurate fuel level even when the fuel level fluctuates under high cornering
G-loads.
Page 100 of 128

98
■
■Starting the engine by connecting an external
battery
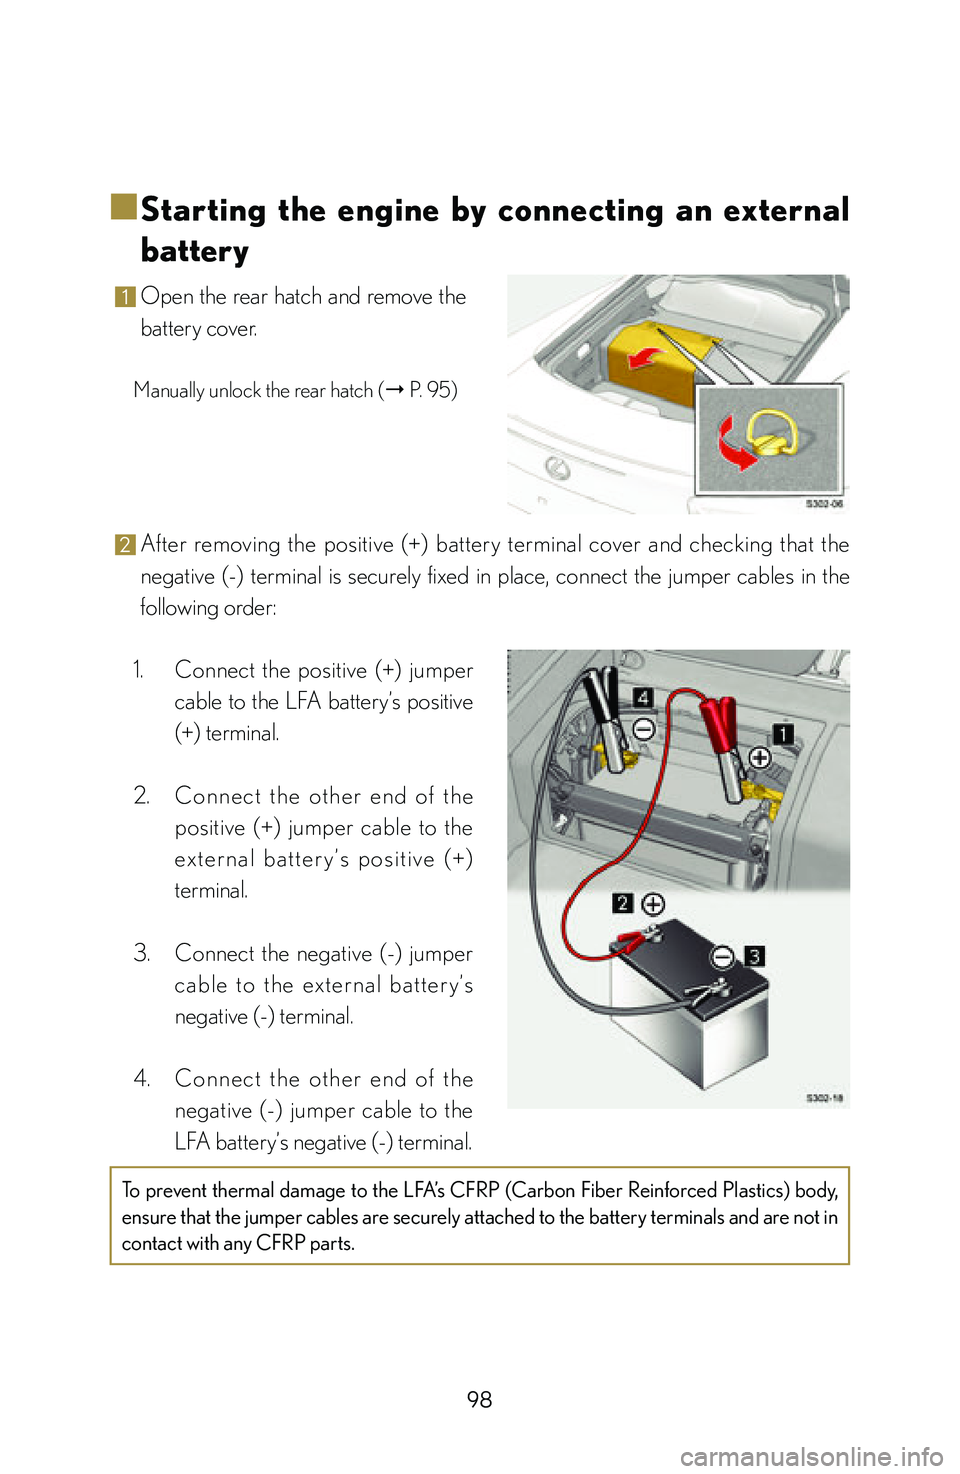
1 Open the rear hatch and remove the
battery cover.
Manually unlock the rear hatch (" P. 95)
2 After removing the positive (+) battery terminal cover and checking that the
negative (-) terminal is securely fixed in place, connect the jumper cables in the
following order:
1. Connect the positive (+) jumper
cable to the LFA battery’s positive
(+) terminal.
2. C o n n e c t t h e o t h e r e n d o f t h e
positive (+) jumper cable to the
e x t e r n a l b a t t e r y ’s p o s i t i ve ( + )
terminal.
3. Connect the negative (-) jumper
c a b l e t o t h e ext e r n a l b a t t e r y ’s
negative (-) terminal.
4. C o n n e c t t h e o t h e r e n d o f t h e
negative (-) jumper cable to the
LFA battery’s negative (-) terminal.
To prevent thermal damage to the LFA’s CFRP (Carbon Fiber Reinforced Plastics) body,
ensure that the jumper cables are securely attached to the battery terminals and are not in
contact with any CFRP parts.
Page 104 of 128

102
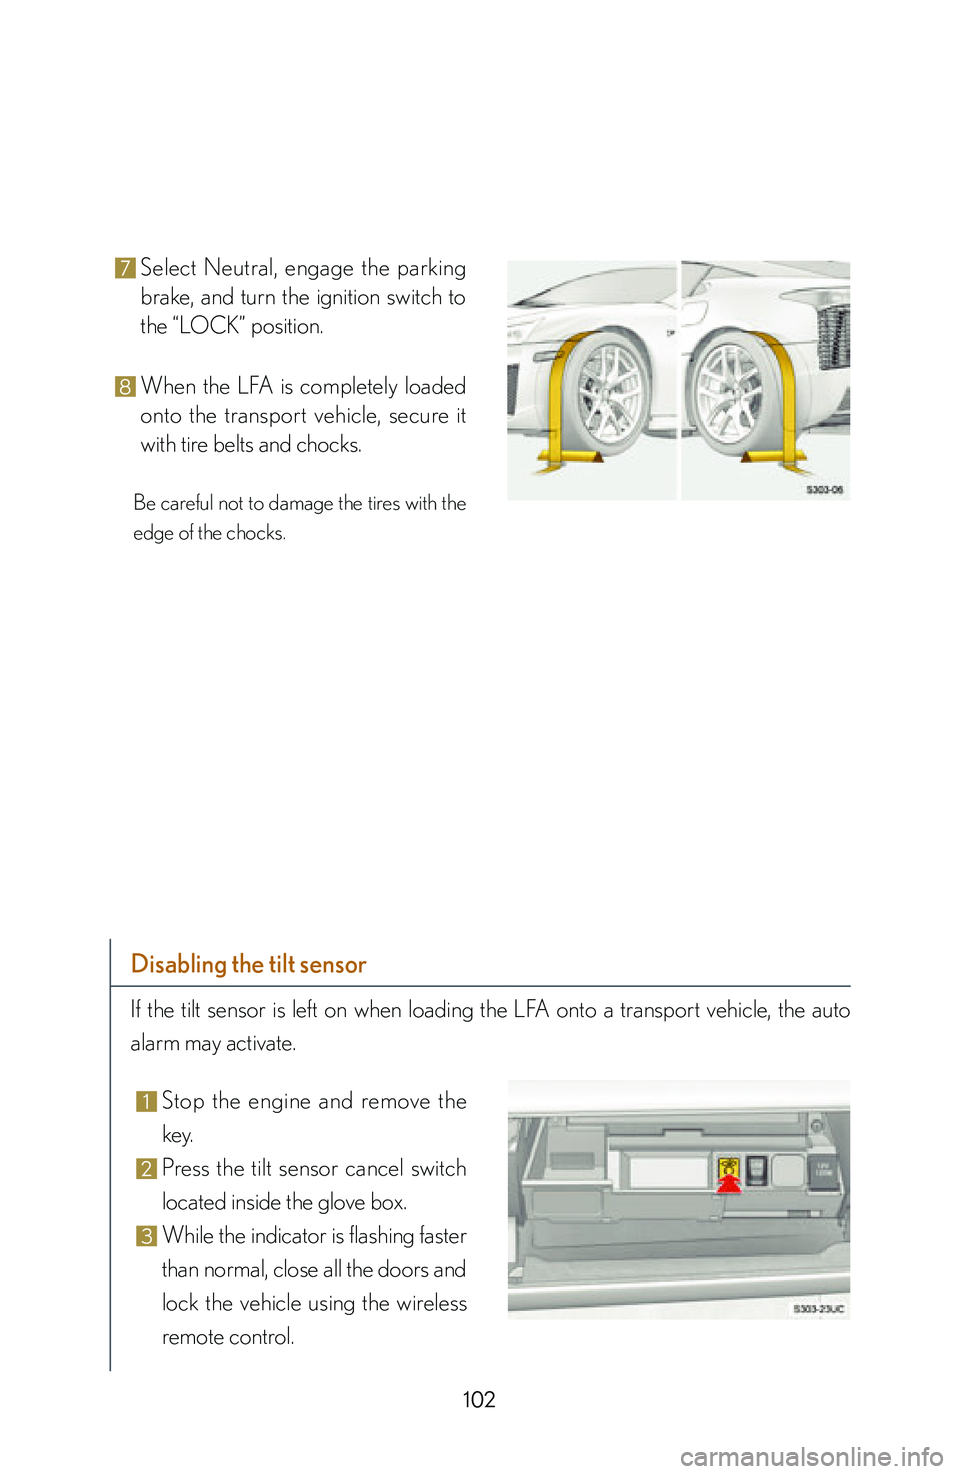
7 Select Neutral, engage the parking
brake, and turn the ignition switch to
the “LOCK” position.
8 When the LFA is completely loaded
onto the transport vehicle, secure it
with tire belts and chocks.
Be careful not to damage the tires with the
edge of the chocks.
Disabling the tilt sensor
If the tilt sensor is left on when loading the LFA onto a transport vehicle, the auto
alarm may activate.
1 Stop the engine and remove the
key.
2 Press the tilt sensor cancel switch
located inside the glove box.
3 While the indicator is flashing faster
than normal, close all the doors and
lock the vehicle using the wireless
remote control.