fuel lexus LFA 2012 Technical Information / LEXUS 2012 LFA: INSIDE THE LFA
[x] Cancel search | Manufacturer: LEXUS, Model Year: 2012, Model line: LFA, Model: Lexus LFA 2012Pages: 128, PDF Size: 5.91 MB
Page 11 of 128
9
Basic operations
1 Reverse selector switch
Pull the switch to select Reverse (R).
2 Paddle shift switches ("P. 40)
Pull the right paddle shift switch to upshift and the left paddle shift switch to
downshift. Pull both paddle shift switches at once to select Neutral (N).
3 Control pad ("P. 66)
4 “ENGINE START” switch
5 Driving mode selector switch ("P. 26)
6 AUTO driving mode button ("P. 27)
7 Shift speed selector ("P. 41)
Allows the driver to choose their desired shift speeds for the manually shifted
SPORT, NORMAL, and WET driving modes.
8 Parking brake switch
9 Ignition switch
10 Accelerator pedal ("P. 32)
11 Tilt and telescopic steering lock release lever
12 Brake pedal ("P. 50)
13 Hood release lever ("P. 12)
14 Rear hatch opener switch ("P. 12)
15 Fuel filler door opener switch ("P. 12)
16 Outside rear view mirror switches
17 VSC off switch
Turns VSC and TRAC off. Press the switch again to turn VSC and TRAC back on.
Page 14 of 128

12
■
■Opening and closing each door
■
■
Rear hatch
Press the opener switch and then manually lift
up the rear hatch.
If the rear hatch opener switch is inoperable
(
"P. 95)
■
■Fuel filler door
Press the opener switch.
Fuel type Unleaded gasoline only
Fuel tank
capacity
(Reference) 19.3 gal.
(73 L, 16.1 Imp. gal.)
I f t h e f u e l f i l l e r d o o r o p e n e r s w i t c h i s
inoperable (
"P. 95)
■
■Hood
1 Pull the hood release lever.
Page 59 of 128
57
Checking the engine
■
■Meter layout
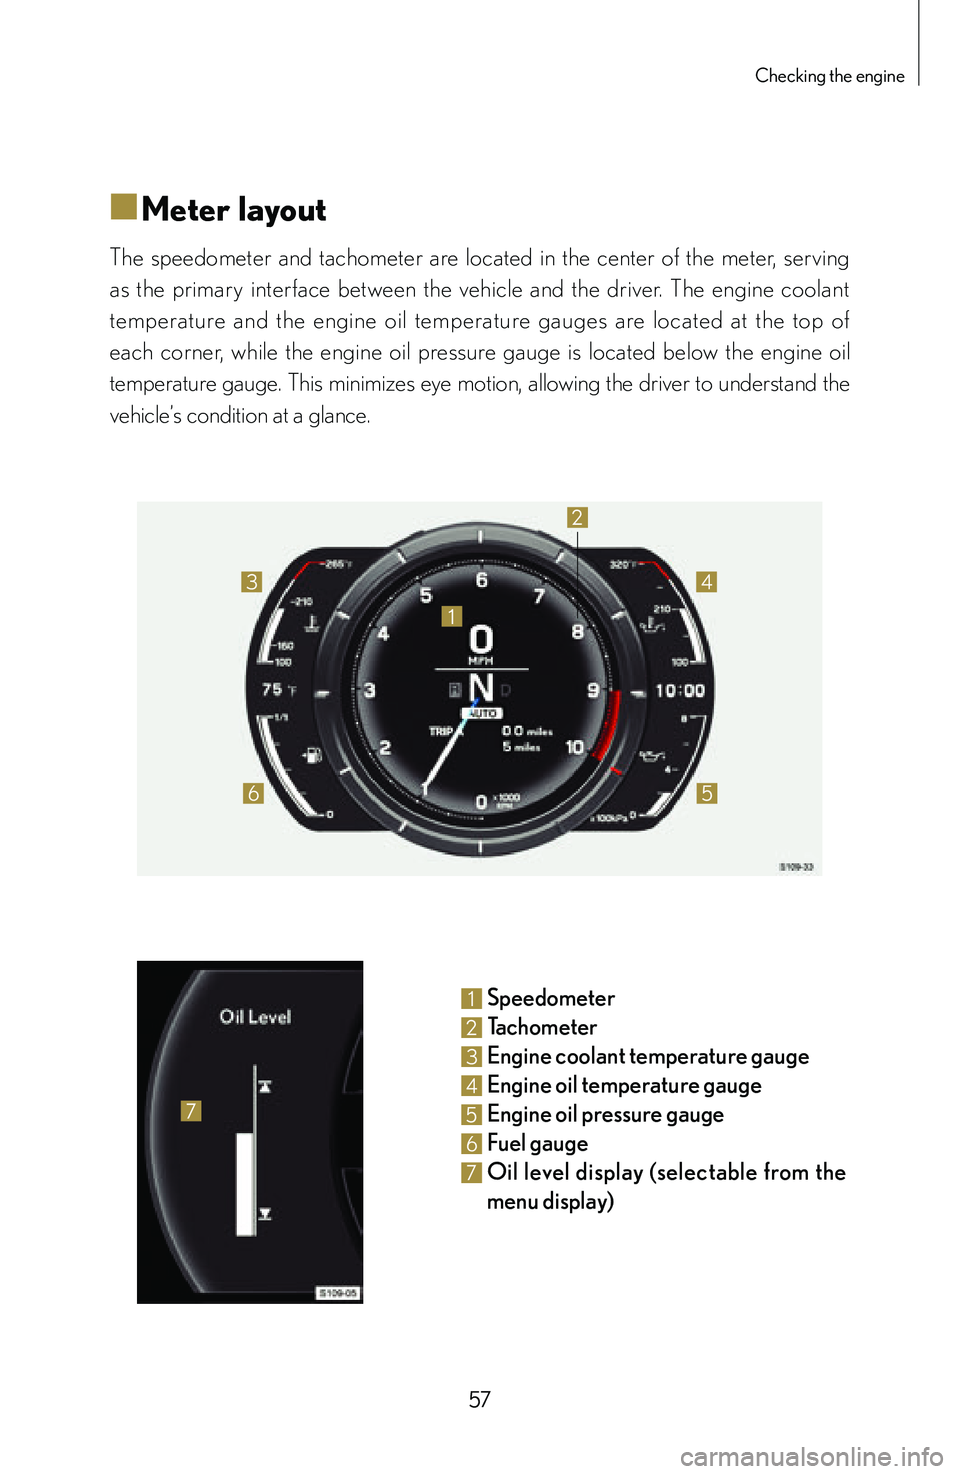
The speedometer and tachometer are located in the center of the meter, serving
as the primary interface between the vehicle and the driver. The engine coolant
temperature and the engine oil temperature gauges are located at the top of
each corner, while the engine oil pressure gauge is located below the engine oil
temperature gauge. This minimizes eye motion, allowing the driver to understand the
vehicle’s condition at a glance.
1
2
3
65
4
7
1 Speedometer
2 Tachometer
3 Engine coolant temperature gauge
4 Engine oil temperature gauge
5 Engine oil pressure gauge
6 Fuel gauge
7 Oil level display (s electable fr om th e
menu display)
Page 65 of 128

63
Checking the engine
■
■Fuel gauge
The fuel gauge displays the amount of fuel remaining on a scale of 0 to 1/1. The
saddle-shaped fuel tank consists of a main tank compartment and a sub-tank
compartment. When the fuel level drops to approximately 2.9 gal. (11 L, 2.4 Imp. gal.)
between both compartments, the bar display will blink in amber to inform the driver
that the remaining fuel level is low. In this state, the remaining amount of fuel is directed
into the main tank compartment in order to ensure a stable supply of fuel to the engine
even under high cornering G-loads.
S109-14Main tank
compartment Sub-tank compartment
Fuel
Remaining fuel directed to main tank
compartment
Blinks when remaining fuel drops to approx. 2.9 gal. (11 L, 2.4 Imp. gal.)
The main tank compar tment and sub-tank compar tment each have their own
individual sender gauges to monitor the fuel levels. The ECU calculates the total
amount of fuel remaining from both of these sensors and informs the driver using
the fuel gauge. The ECU digitally processes the fuel level data in order to display a
clear and accurate fuel level even when the fuel level fluctuates under high cornering
G-loads.
Page 69 of 128
67
Using the meter
■
■Menu structure
Speed Ind The color will change and a buzzer will sound when
the vehicle reaches a set speed.
Rev Ind The color will change and a buzzer will sound when
the engine speed reaches a set speed.
Status Trip Info
Indicates the instantaneous fuel consumption, average
vehicle speed, average fuel consumption, and driving
range.
Oil Level Shows the amount of engine oil in the oil tank.
Oil
Maintenance Indicates engine oil replacement timing. (Be sure to
reset after replacing the oil.)
Tire Pressure Shows inflation pressure of each tire.
Lap Timer Measures and shows lap times.
Brightness Allows driver to adjust the brightness of the meter and
interior illumination.
Settings Needle
Allows driver to change the color of the tachometer
needle.
Rev Peak Retains an image of the tachometer needle at the
highest engine speed attained prior to an upshift or
deceleration.
Clock Allows driver to adjust the displayed time and choose
between 12-hour (12H) and 24-hour (24H) mode.
Shortcut Allows driver to jump to a preset display.
Units Changes units of the displayed speed, odometer
readings and fuel consumption between MPG,
L/100 km and km/l.
Temp Changes the display temperature between Celsius
and Fahrenheit.
Language Changes the language displayed.
When a warning is displayed on the meter, the “Menu” text at the top of the menu
screen will change to “Warning”.
Page 97 of 128
95
If the vehicle battery is discharged
■
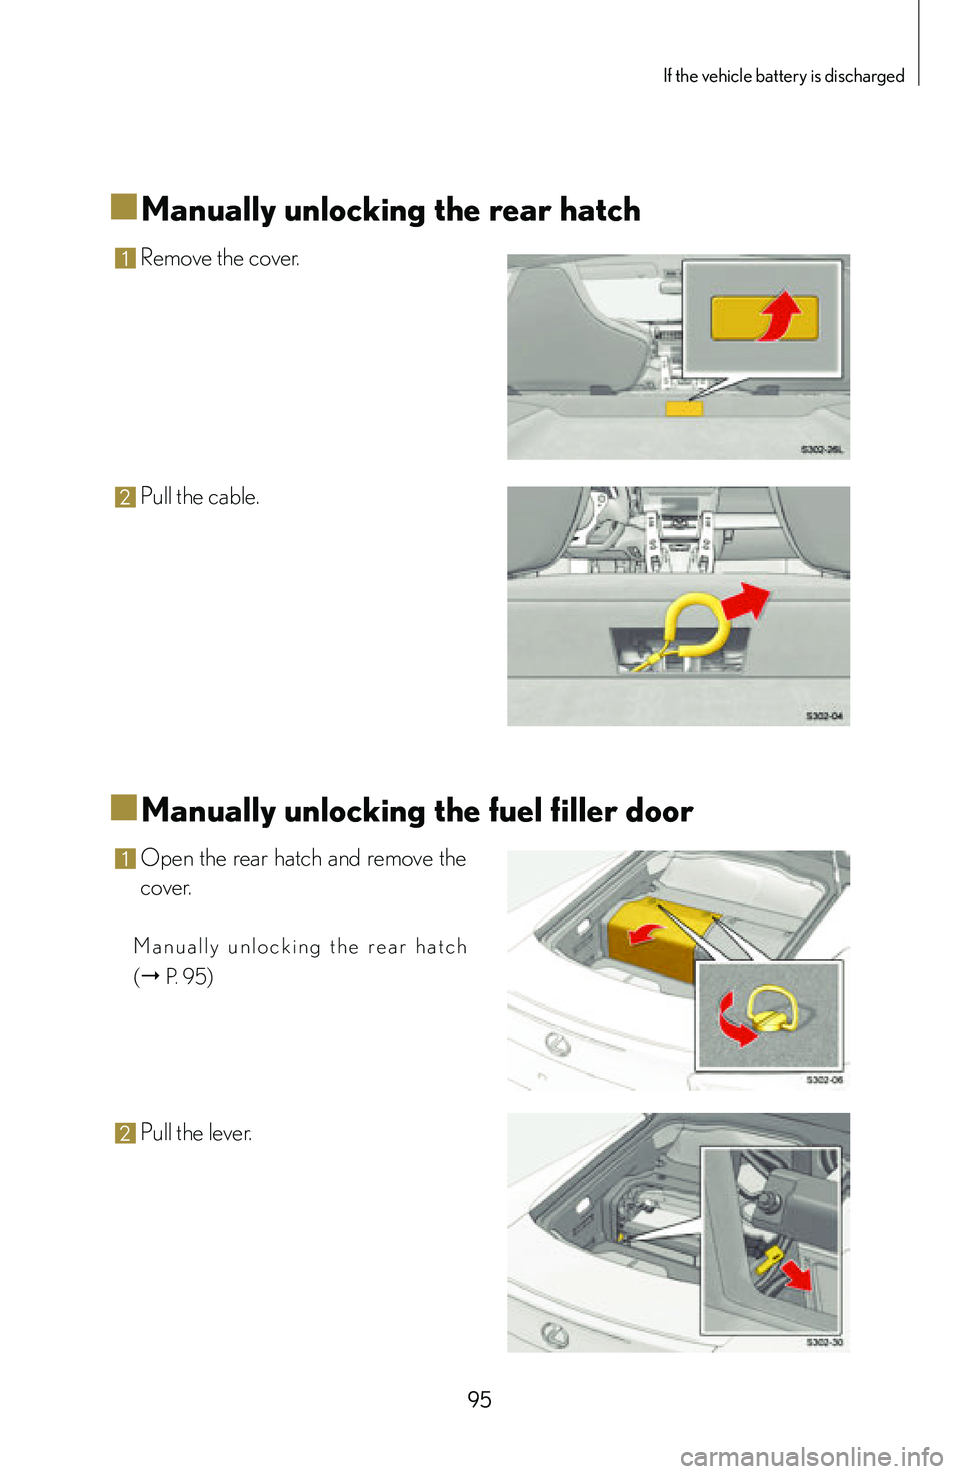
■Manually unlocking the rear hatch
1 Remove the cover.
2 Pull the cable.
■
■Manually unlocking the fuel filler door
1 Open the rear hatch and remove the
cover.
M a n u a l l y u n l o c k i n g t h e r e a r h a t c h
(
" P. 95)
2 Pull the lever.
Page 110 of 128
108
Technical information
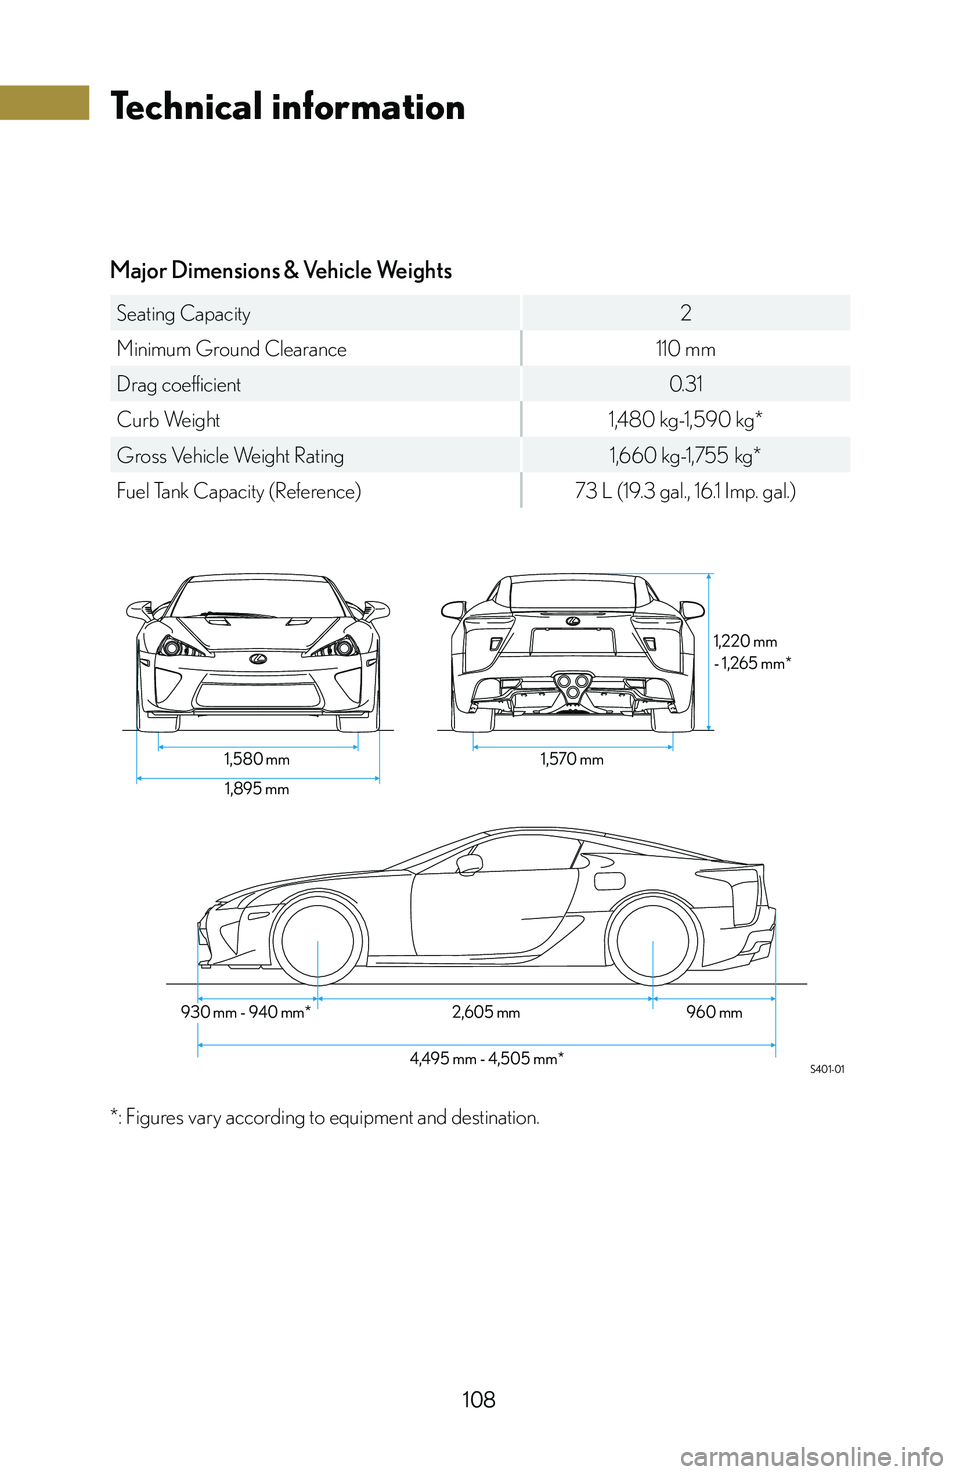
Major Dimensions & Vehicle Weights
Seating Capacity2
Minimum Ground Clearance 110 mm
Drag coefficient 0.31
Curb Weight 1,480 kg-1,590 kg*
Gross Vehicle Weight Rating 1,660 kg-1,755 kg*
Fuel Tank Capacity (Reference) 73 L (19.3 gal., 16.1 Imp. gal.)
S401-01
1,580 mm1,570 mm
930 mm - 940 mm* 2,605 mm
4,495 mm - 4,505 mm* 960 mm1,220 mm
- 1,265 mm*
1,895 mm
*: Figures vary according to equipment and destination.
Page 111 of 128
109
Technical information
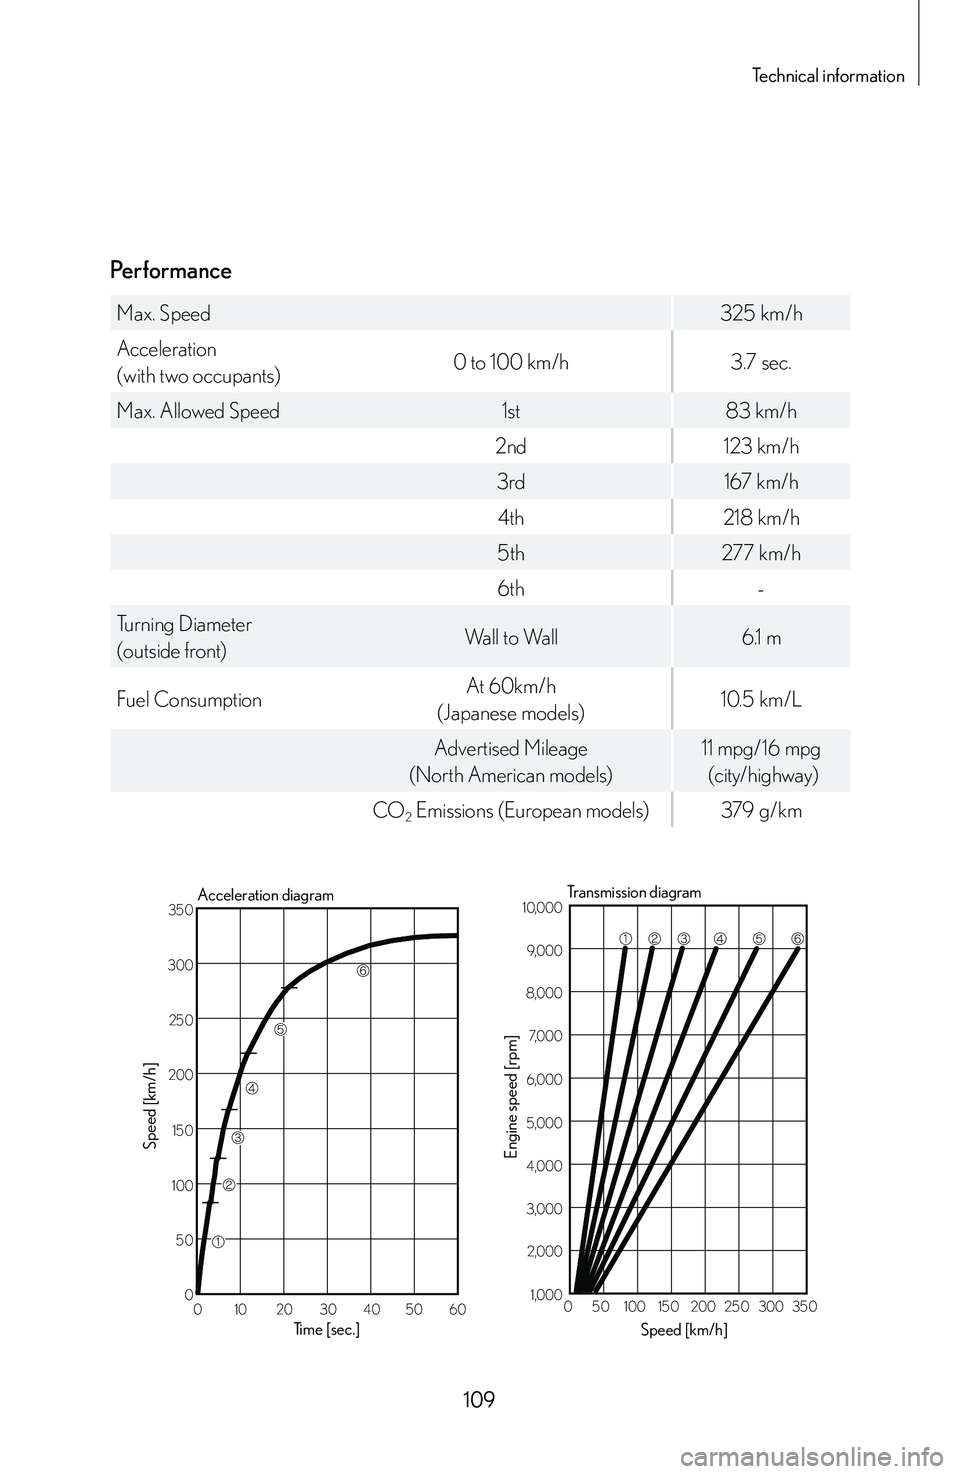
Performance
Max. Speed325 km/h
Acceleration
(with two occupants) 0 to 100 km/h
3.7 sec.
Max. Allowed Speed 1st83 km/h
2nd 123 km/h
3rd 167 km/h
4th 218 km/h
5th 277 km/h
6th -
Turning Diameter
(outside front) Wall to Wall
6.1 m
Fuel Consumption At 60km/h
(Japanese models) 10.5 km/L
Advertised Mileage
(North American models) 11 mpg/16 mpg
(city/highway)
CO
2 Emissions (European models) 379 g/km
Acceleration diagram
Time [sec.]
Speed [km/h]
350
300 250
200
150
100 50 0 0 10 20 30 40 50 60
Transmission diagram
Speed [km/h]
Engine speed [rpm]
10,0009,000
8,000 7,000
6,000 5,000 4,000
3,000 2,000
1,000 0 50 100 150 200 250 300 350
Page 116 of 128
114
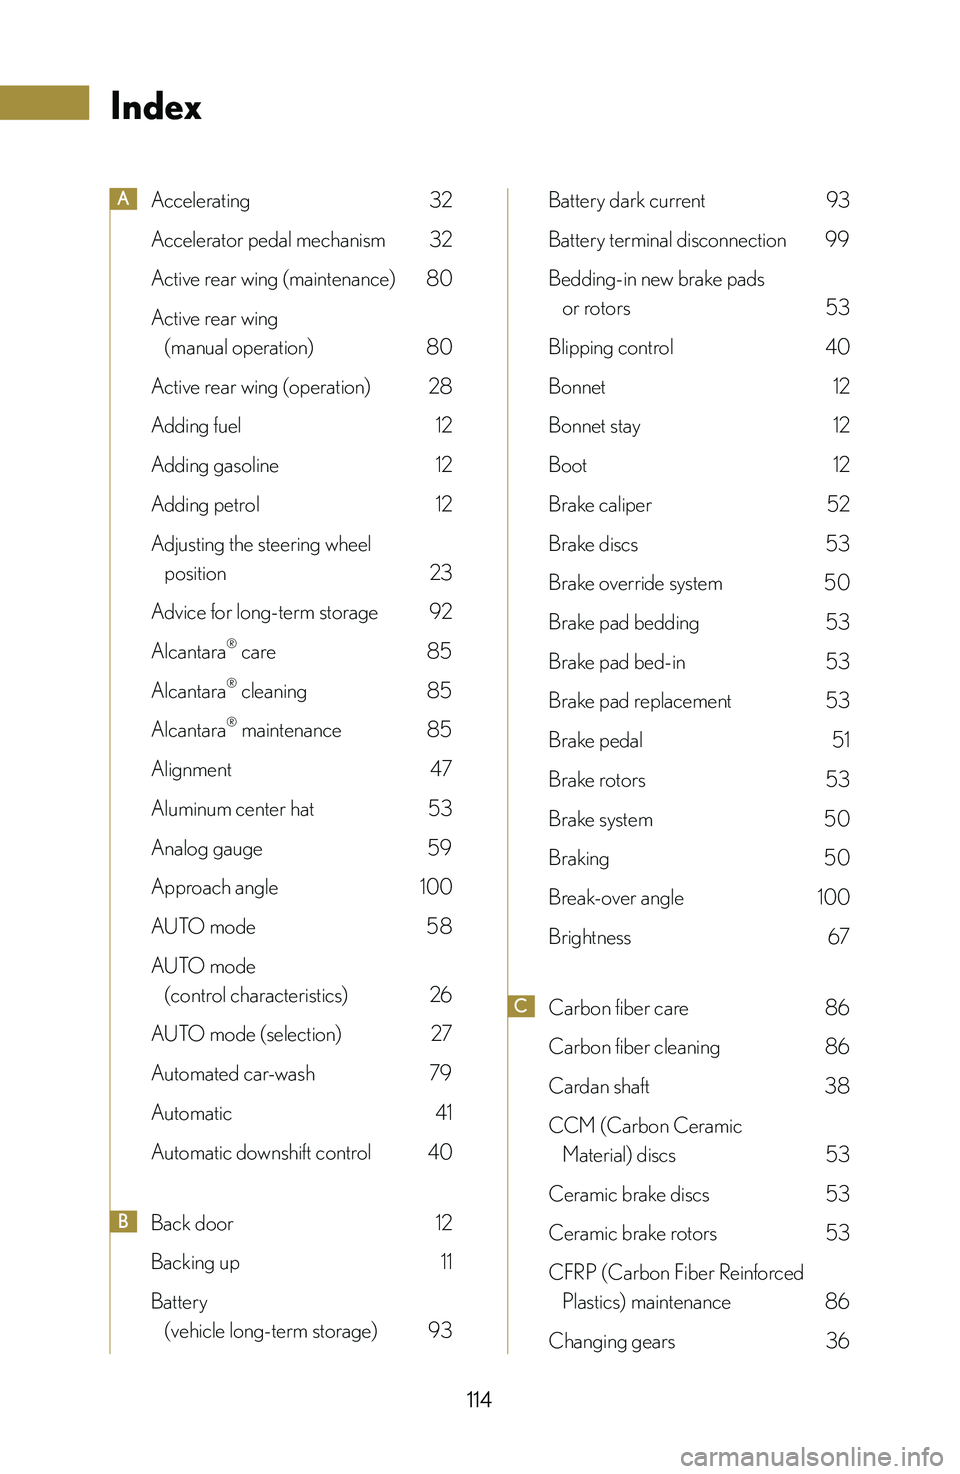
Index
AAccelerating 32
Accelerator pedal mechanism 32
Active rear wing (maintenance) 80
Active rear wing
(manual operation) 80
Active rear wing (operation) 28
Adding fuel 12
Adding gasoline 12
Adding petrol 12
Adjusting the steering wheel
position 23
Advice for long-term storage 92
Alcantara® care 85
Alcantara® cleaning 85
Alcantara® maintenance 85
Alignment 47
Aluminum center hat 53
Analog gauge 59
Approach angle 100
AUTO mode 58
AUTO mode
(control characteristics) 26
AUTO mode (selection) 27
Automated car-wash 79
Automatic 41
Automatic downshift control 40
BBack door 12
Backing up 11
Battery
(vehicle long-term storage) 93
Battery dark current 93
Battery terminal disconnection 99
Bedding-in new brake pads
or rotors 53
Blipping control 40
Bonnet 12
Bonnet stay 12
Boot 12
Brake caliper 52
Brake discs 53
Brake override system 50
Brake pad bedding 53
Brake pad bed-in 53
Brake pad replacement 53
Brake pedal 51
Brake rotors 53
Brake system 50
Braking 50
Break-over angle 100
Brightness 67
CCarbon fiber care 86
Carbon fiber cleaning 86
Cardan shaft 38
CCM (Carbon Ceramic
Material) discs 53
Ceramic brake discs 53
Ceramic brake rotors 53
CFRP (Carbon Fiber Reinforced
Plastics) maintenance 86
Changing gears 36
Page 118 of 128
116
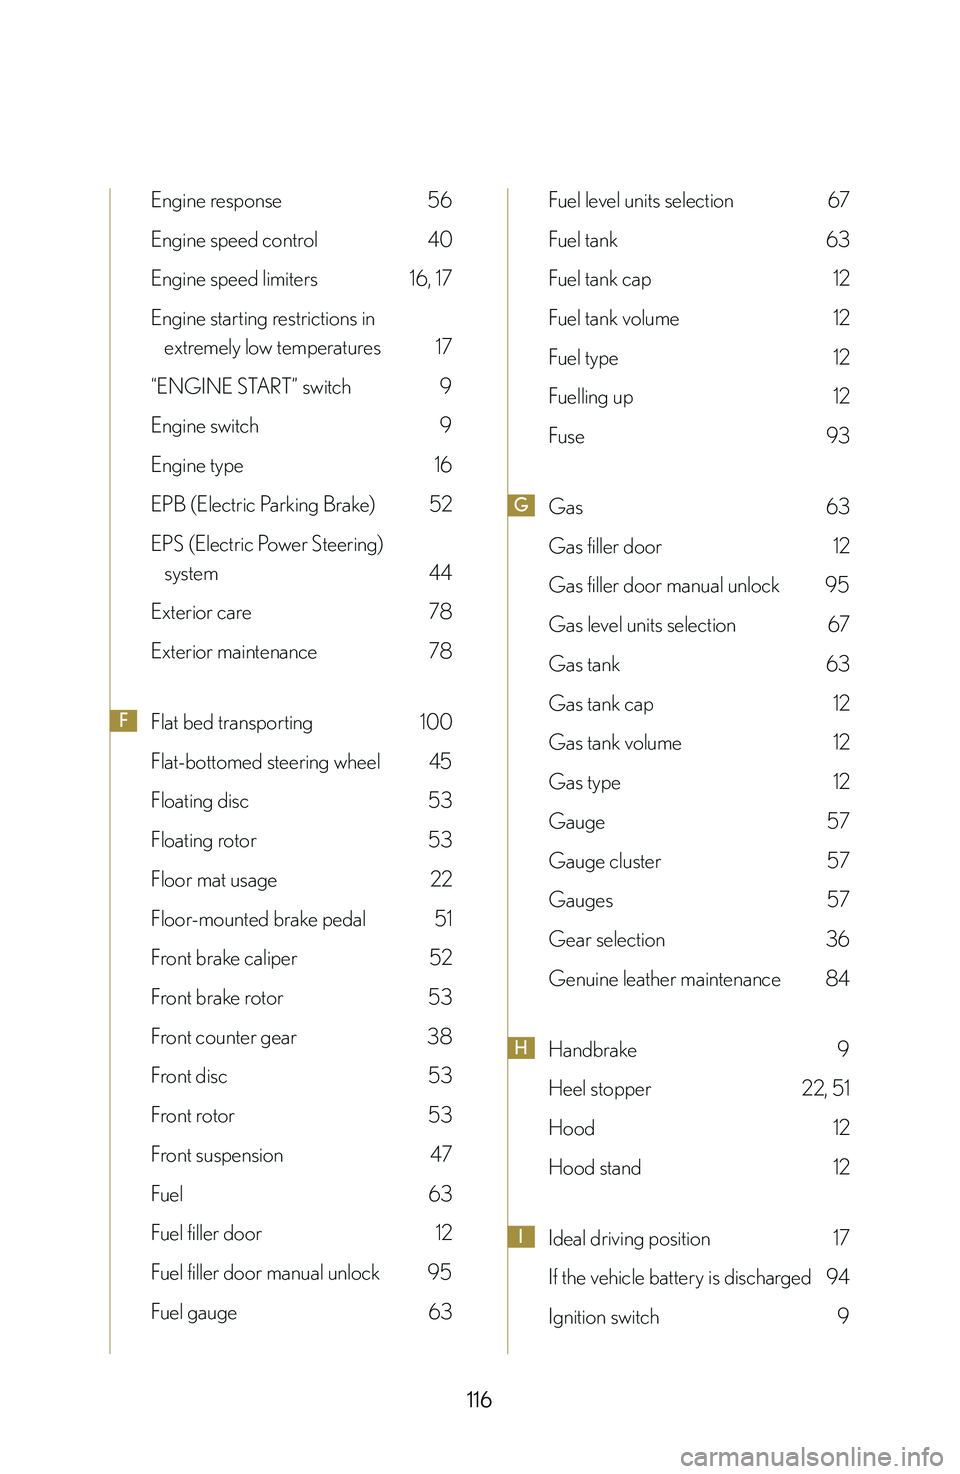
Engine response 56
Engine speed control 40
Engine speed limiters 16, 17
Engine starting restrictions in
extremely low temperatures 17
“ENGINE START” switch 9
Engine switch 9
Engine type 16
EPB (Electric Parking Brake) 52
EPS (Electric Power Steering)
system 44
Exterior care 78
Exterior maintenance 78
FFlat bed transporting 100
Flat-bottomed steering wheel 45
Floating disc 53
Floating rotor 53
Floor mat usage 22
Floor-mounted brake pedal 51
Front brake caliper 52
Front brake rotor 53
Front counter gear 38
Front disc 53
Front rotor 53
Front suspension 47
Fuel 63
Fuel filler door 12
Fuel filler door manual unlock 95
Fuel gauge 63
Fuel level units selection 67
Fuel tank 63
Fuel tank cap 12
Fuel tank volume 12
Fuel type 12
Fuelling up 12
Fuse 93
GGas 63
Gas filler door 12
Gas filler door manual unlock 95
Gas level units selection 67
Gas tank 63
Gas tank cap 12
Gas tank volume 12
Gas type 12
Gauge 57
Gauge cluster 57
Gauges 57
Gear selection 36
Genuine leather maintenance 84
HHandbrake 9
Heel stopper 22, 51
Hood 12
Hood stand 12
IIdeal driving position 17
If the vehicle battery is discharged 94
Ignition switch 9