key lexus LFA 2012 Technical Information / LEXUS 2012 LFA (OM77006U) User Guide
[x] Cancel search | Manufacturer: LEXUS, Model Year: 2012, Model line: LFA, Model: Lexus LFA 2012Pages: 420, PDF Size: 5.02 MB
Page 35 of 420
33
1-3. Adjustable components (seats, mirrors, steering wheel)
1
Before driving
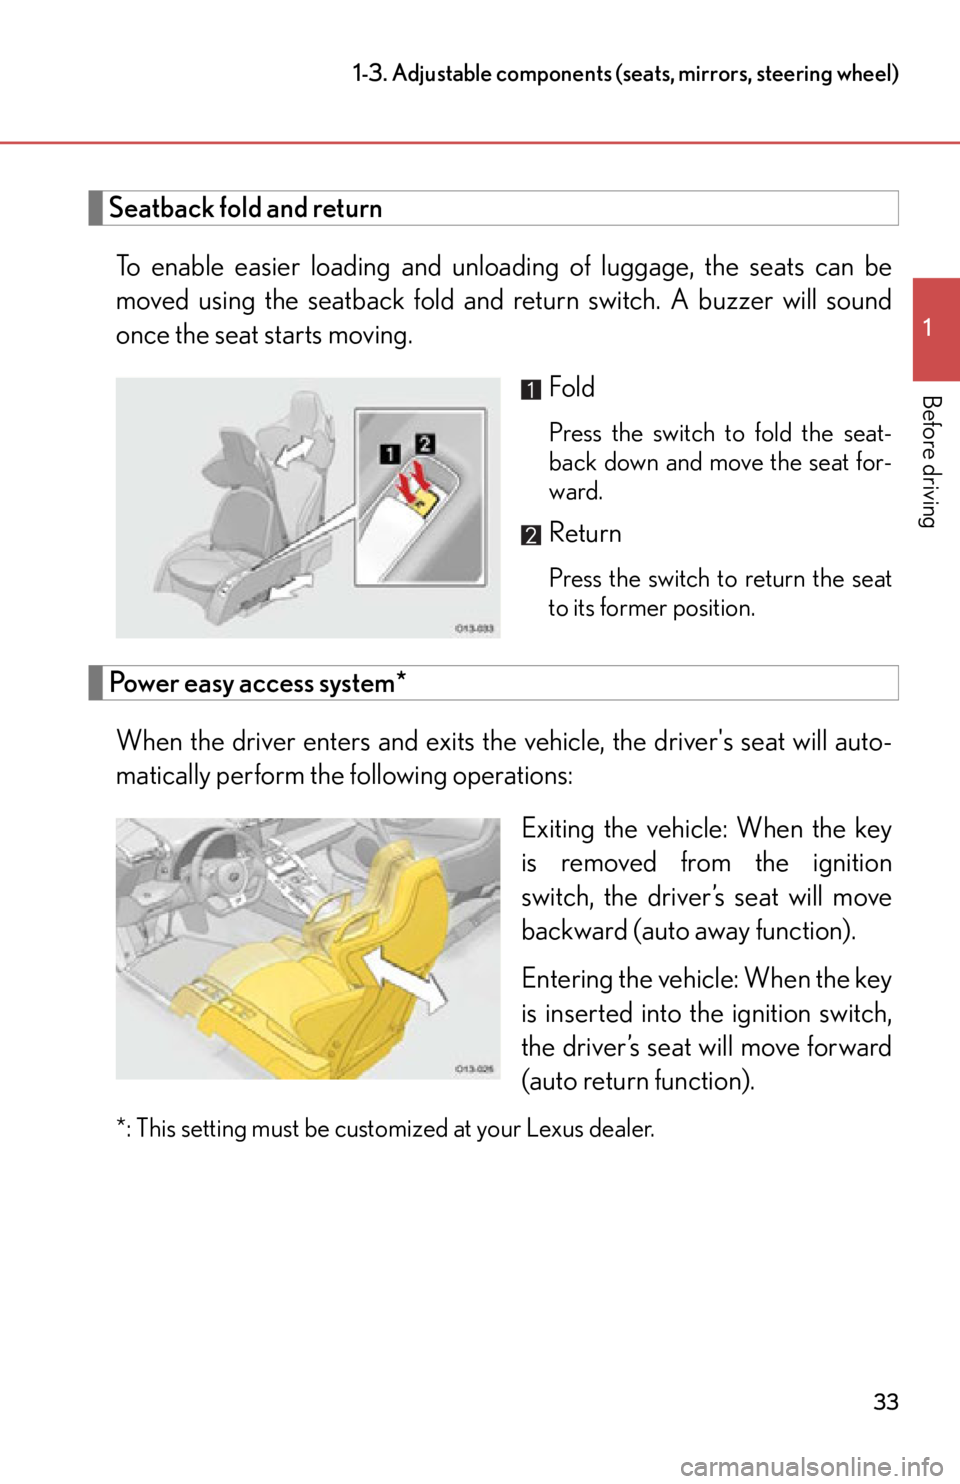
Seatback fold and returnTo enable easier loading and unloading of luggage, the seats can be
moved using the seatback fold and return switch. A buzzer will sound
once the seat starts moving. Fold
Press the switch to fold the seat-
back down and move the seat for-
ward.
Return
Press the switch to return the seat
to its former position.
Power easy access system*
When the driver enters and exits the vehicle, the driver's seat will auto-
matically perform the following operations: Exiting the vehicle: When the key
is removed from the ignition
switch, the driver’s seat will move
backward (auto away function).
Entering the vehicle: When the key
is inserted into the ignition switch,
the driver’s seat will move forward
(auto return function).
*: This setting must be customized at your Lexus dealer.
Page 48 of 420
46
1-4.Opening and closing the windows
Power windows
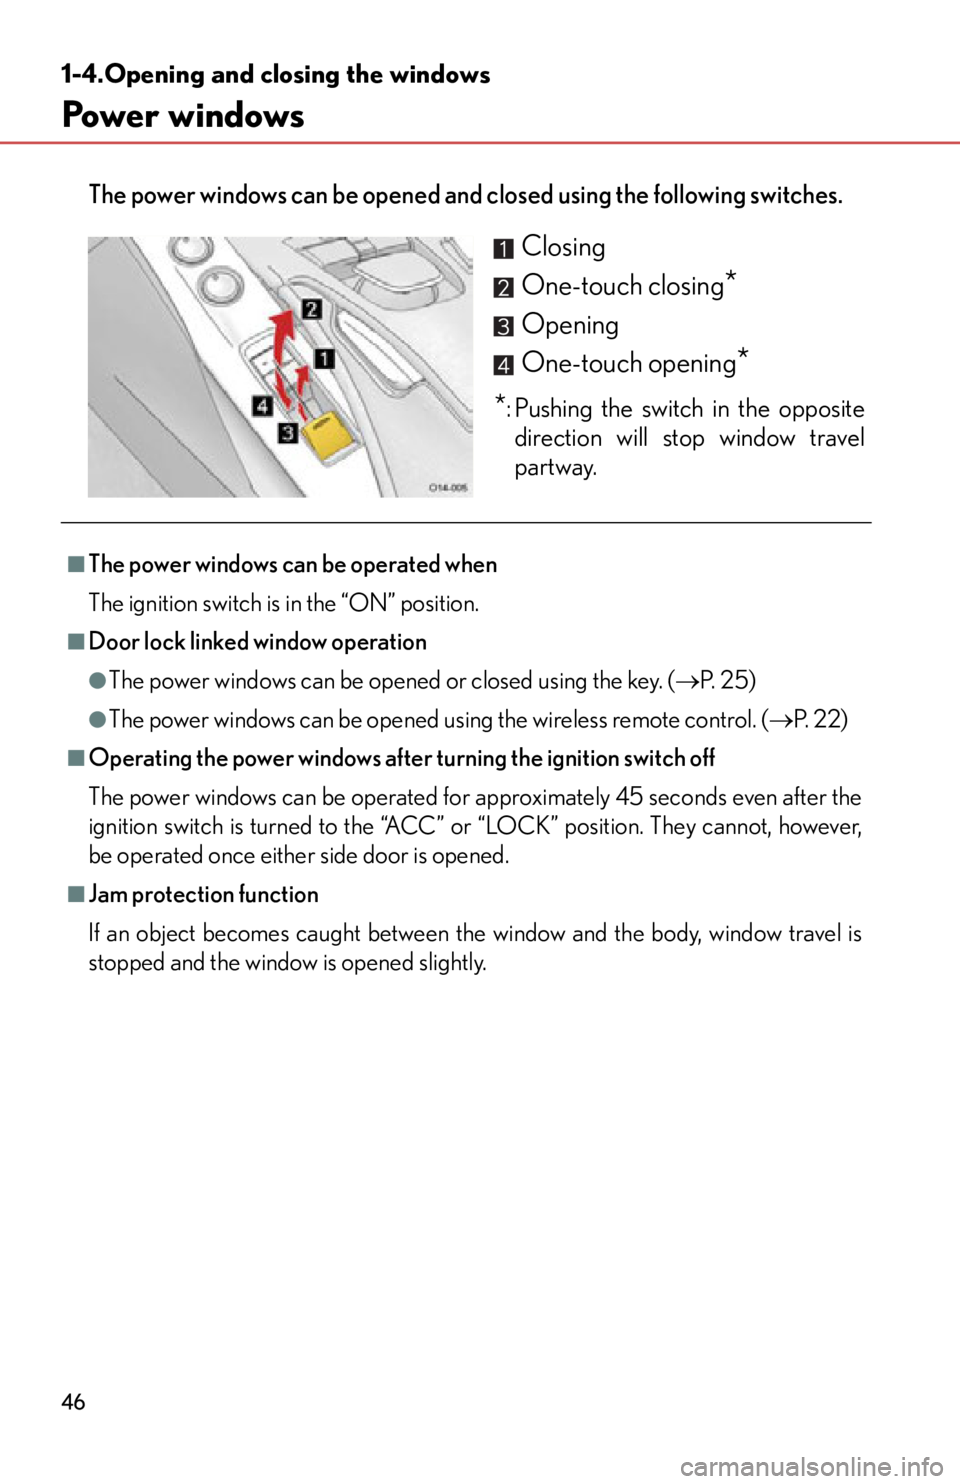
The power windows can be opened and closed using the following switches.
Closing
One-touch closing
*
Opening
One-touch opening
*
*: Pushing the switch in the opposite
direction will stop window travel
partway.
■The power windows can be operated when
The ignition switch is in the “ON” position.
■Door lock linked window operation
●The power windows can be opened or closed using the key. (P. 2 5 )
●The power windows can be opened using the wireless remote control. ( P. 2 2 )
■Operating the power windows after turning the ignition switch off
The power windows can be operated for ap proximately 45 seconds even after the
ignition switch is turned to the “ACC” or “LOCK” position. They cannot, however,
be operated once either side door is opened.
■Jam protection function
If an object becomes caught between the window and the body, window travel is
stopped and the window is opened slightly.
Page 49 of 420

47
1-4. Opening and closing the windows
1
Before driving
■When the power window does not close normally
If the jam protection function is operating abnormally and a window cannot be
closed, perform the following operations using the power window switch on the rel-
evant door.
●After stopping the vehicle, the window can be closed with the door closed by
holding the power window switch in the one-touch closing position while the
ignition switch is turned to the “ON” position.
●If the window still cannot be closed even by carrying out the operation
explained above, initialize the function by performing the following procedure.
Hold the power window switch in the one-touch closing position. Con-
tinue holding the switch for a further 6 seconds after the window has
closed.
Hold the power window switch in the one-touch opening position. Con-
tinue holding the switch for a further 2 seconds after the window has
opened completely.
Hold the power window switch in the one-touch closing position once
again. Continue holding the switch for a further 2 seconds after the win-
dow has closed.
If you release the switch while the window is moving, start again from the beginning.
If the window continues to close but then re-open slightly even after performing the
above procedure correctly, have the vehicle inspected by your Lexus dealer.
■Customization that can be conf igured at your Lexus dealer
Settings of the linked key and wireless remote control operation can be changed.
(Customizable features P. 383)
STEP1
STEP2
STEP3
Page 55 of 420
53
1
Before driving
1-6.Theft deterrent system
Engine immobilizer system
The vehicle's keys have built-in transponder chips that prevent the engine
from starting if the key has not been previously registered in the vehicle's on-
board computer.
Never leave the keys inside the vehicle when you leave the vehicle.
■ Setting and canceling the engine immobilizer system
U.S.A.
The system will set after the key has been removed from the ignition
switch.
The system will be canceled when the registered key is inserted into the
ignition switch.
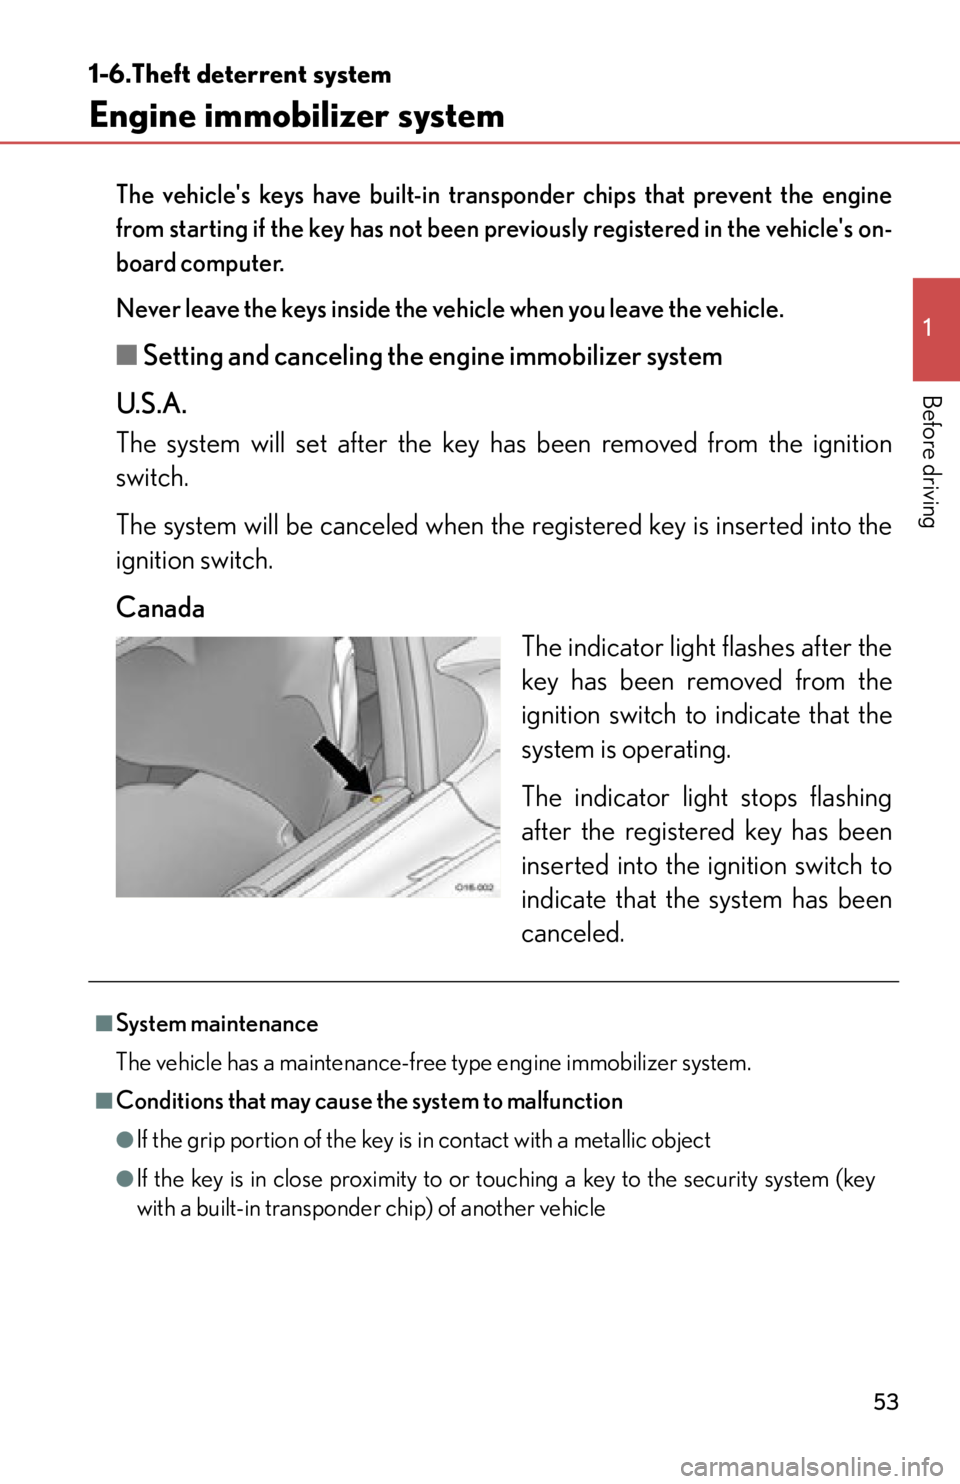
Canada
The indicator light flashes after the
key has been removed from the
ignition switch to indicate that the
system is operating.
The indicator light stops flashing
after the registered key has been
inserted into the ignition switch to
indicate that the system has been
canceled.
■System maintenance
The vehicle has a maintenance-free type engine immobilizer system.
■Conditions that may cause the system to malfunction
●If the grip portion of the key is in contact with a metallic object
●If the key is in close proximity to or touching a key to the security system (key
with a built-in transponder chip) of another vehicle
Page 57 of 420
55
1
1-6. Theft deterrent system
Before driving
Alarm
The system sounds the alarm and flashes the lights when forcible entry is
detected.
■ Triggering of the alarm
The alarm is triggered in the following situations when the alarm is set:
●A locked door is unlocked or op ened in any way other than using
the wireless remote control or key.
● The hood or rear hatch is opened.
● The tilt sensor detects a change of vehicle inclination.
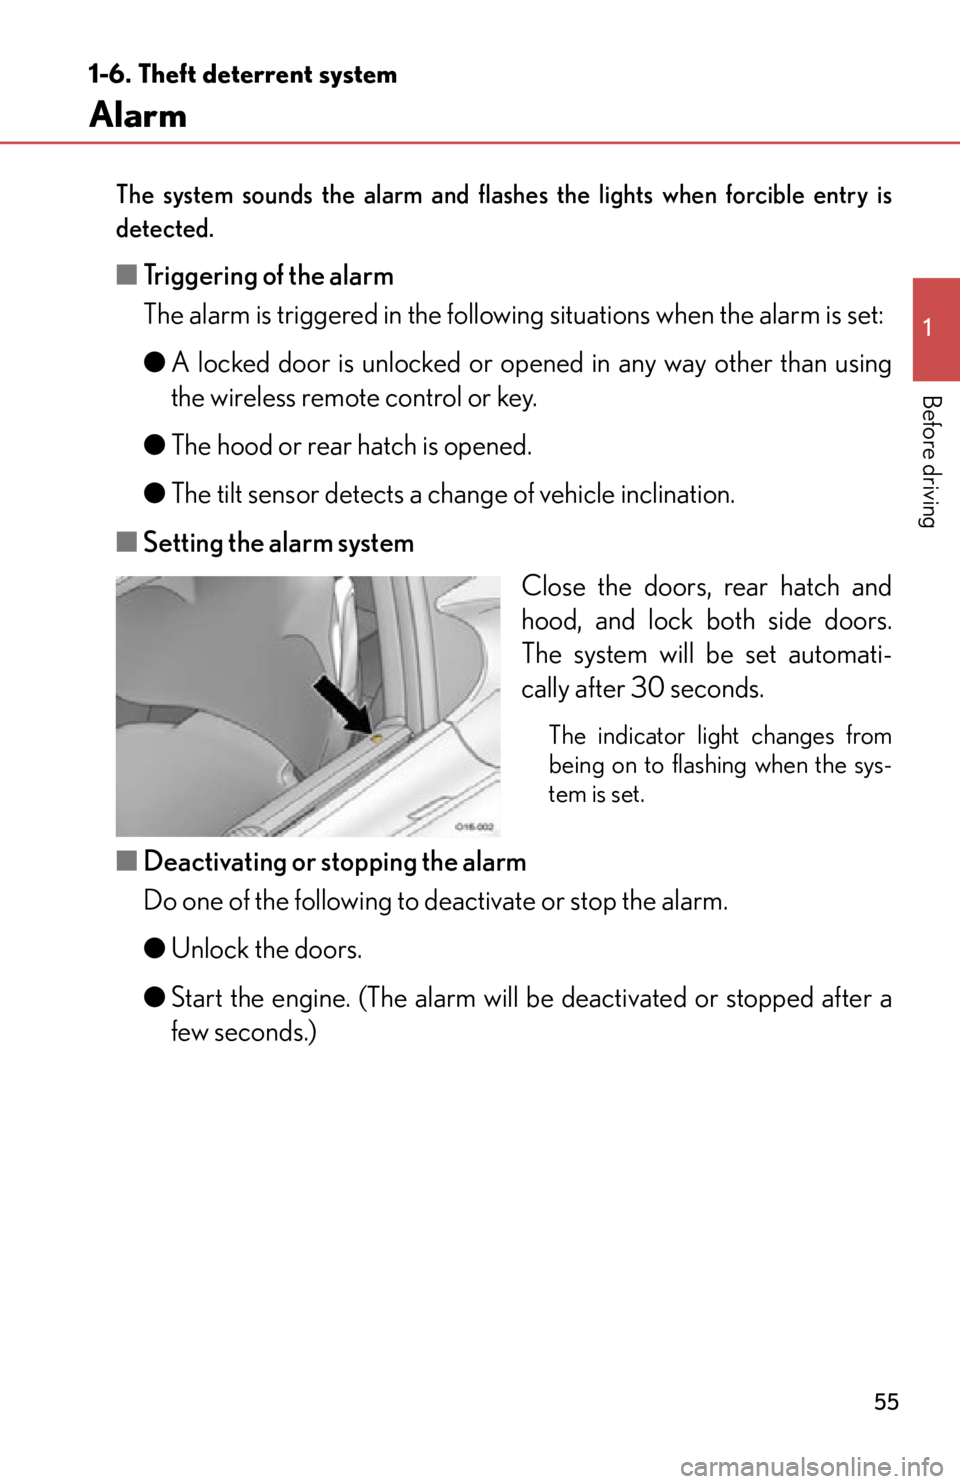
■ Setting the alarm system
Close the doors, rear hatch and
hood, and lock both side doors.
The system will be set automati-
cally after 30 seconds.
The indicator light changes from
being on to flashing when the sys-
tem is set.
■Deactivating or stopping the alarm
Do one of the following to deactivate or stop the alarm.
●Unlock the doors.
● Start the engine. (The alarm will be deactivated or stopped after a
few seconds.)
Page 58 of 420
56
1-6. Theft deterrent system
Tilt sensorThe tilt sensor detects changes in vehicle inclination, such as when the
vehicle is towed away.
This system is designed to deter and p revent vehicle theft but does not
guarantee absolute security against all tilts.
The tilt sensor can be canceled using the cancel switch.
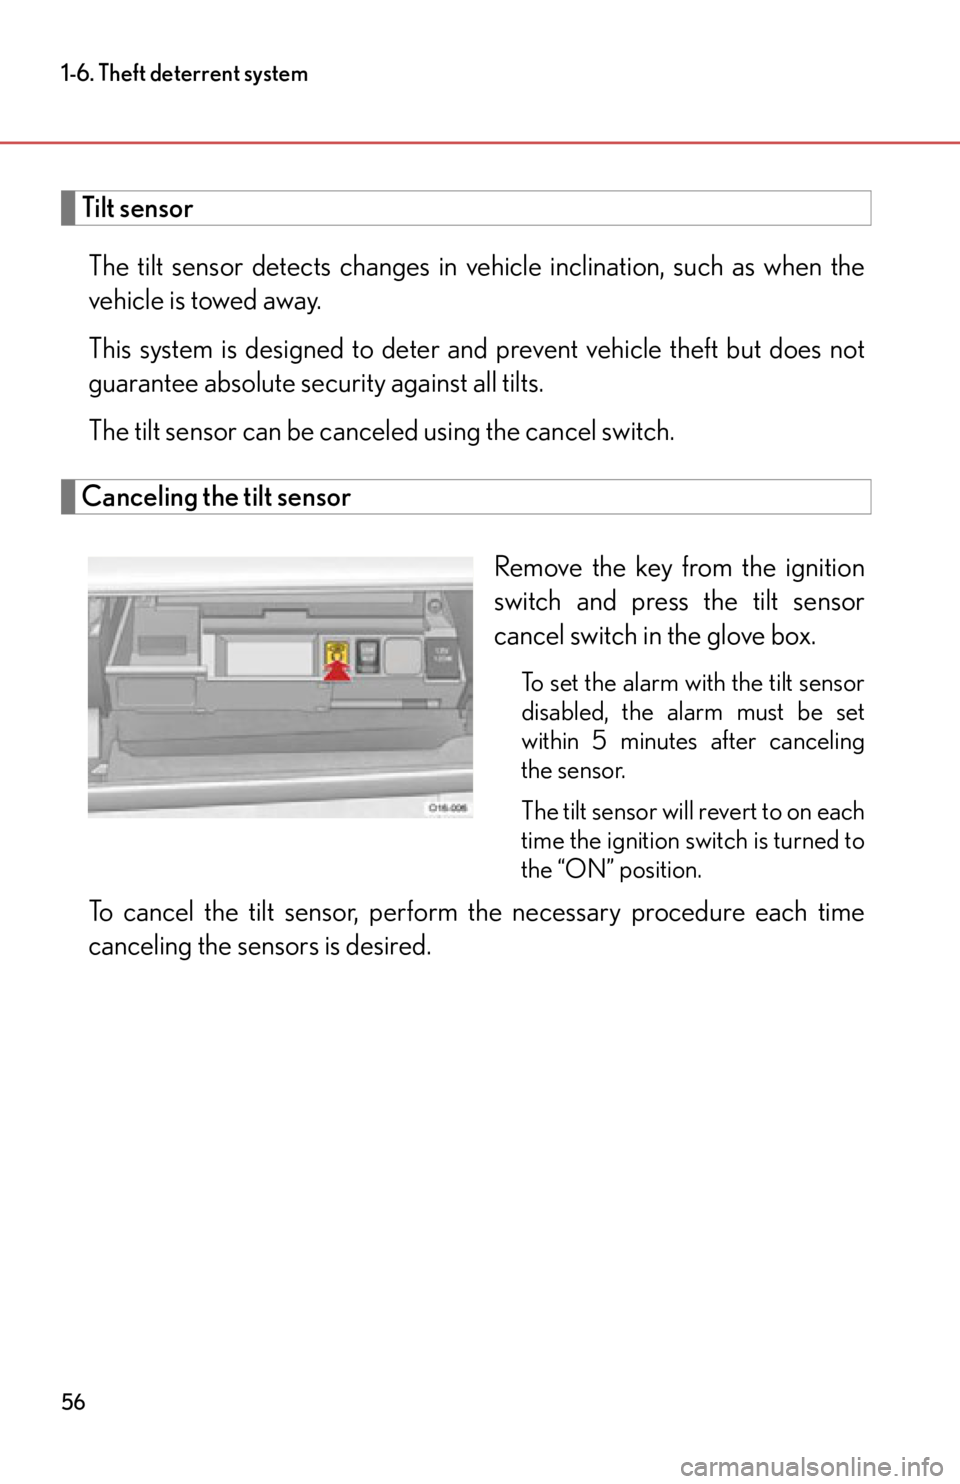
Canceling the tilt sensor
Remove the key from the ignition
switch and press the tilt sensor
cancel switch in the glove box.
To set the alarm with the tilt sensor
disabled, the alarm must be set
within 5 minutes after canceling
the sensor.
The tilt sensor will revert to on each
time the ignition switch is turned to
the “ON” position.
To cancel the tilt sensor, perform the necessary procedure each time
canceling the sensors is desired.
Page 59 of 420
57
1-6. Theft deterrent system
1
Before driving
■System maintenance
The vehicle has a maintenance-free type alarm system.
■Items to check before locking the vehicle
To prevent unexpected triggering of the alarm and vehicle theft, make sure of the
following.
●Nobody is in the vehicle.
●The windows are closed before the alarm is set.
●No valuables or other personal items are left in the vehicle.
■Tr i g g e r i n g o f t h e a l a r m
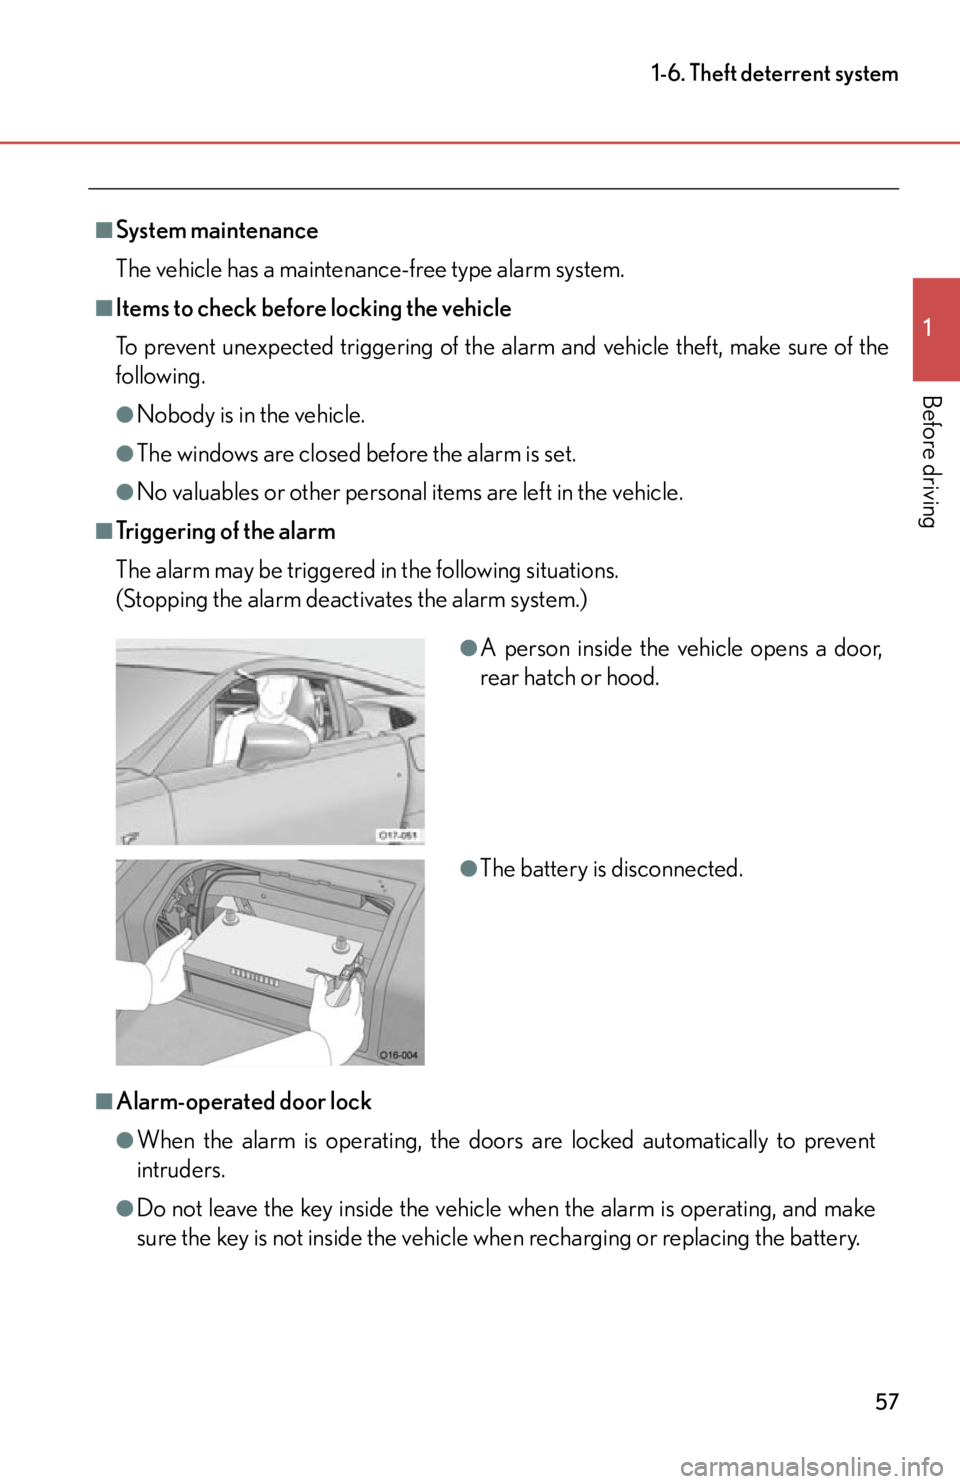
The alarm may be triggered in the following situations.
(Stopping the alarm deactivates the alarm system.)
■Alarm-operated door lock
●When the alarm is operating, the door s are locked automatically to prevent
intruders.
●Do not leave the key inside the vehicle when the alarm is operating, and make
sure the key is not inside the vehicle when recharging or replacing the battery.
●A person inside the vehicle opens a door,
rear hatch or hood.
●The battery is disconnected.
Page 60 of 420

58
1-6. Theft deterrent system
■The alarm cannot be set when
In the following situations, the alarm cannot be set. Be careful if the vehicle will not
be used for an extended period of time.
●When a battery terminal is disconnected
●When the “D/C CUT” fuse is removed
■Canceling and automatic re-enabling of the tilt sensor
●The alarm will still be set even when the tilt sensor is canceled.
●After the tilt sensor is canceled, turning the ignition switch to the “ON” position
or unlocking the doors using the wireless remote control or key will re-enable
the tilt sensor.
●When the alarm system is set again, the intrusion sensor and tilt sensor will be
set.
■Tilt sensor detection considerations
The sensor may trigger the alarm in the fo llowing situations. Cancel the tilt sensor
as necessary.
●The vehicle is transported by a ferry, a flatbed track, train, etc.
●The vehicle is parked in a parking garage.
●Any of the tires loses air pressure.
●The vehicle is jacked up.
●An earthquake occurs or the road caves in.
NOTICE
■To ensure the system operates correctly
Do not modify or remove the system. If mo dified or removed, the proper operation
of the system cannot be guaranteed.
Page 90 of 420

88
2-1.Driving procedures
Driving the vehicle
The following procedures should be observed to ensure safe driving:
■Starting the engine
P. 9 8
■ Driving
With the brake pedal depressed, select 1st gear. ( P. 1 0 2 )
Check that “D1” or “1” is displayed on the gear indicator.
Release the parking brake. ( P. 113)
Gradually release the brake pedal and gently depress the accel-
erator pedal to accelerate the vehicle.
■ Stopping
Depress the brake pedal.
If necessary, set the parking brake.
If the vehicle is to be stopped for an extended period of time, select
Neutral. ( P. 1 0 3 )
■Parking the vehicle
Depress the brake pedal.
Set the parking brake. ( P. 113)
Select 1st gear or Reverse. ( P. 1 0 2 )
Check that “D1”, “1” or “R” is displayed on the gear indicator.
Turn the ignition switch to the “LOCK” position to stop the
engine.
Check that “D1” or “R” is no long er displayed on the gear indicator.
Lock the door, making sure that you have the key on your person.
STEP1
STEP2
STEP3
STEP1
STEP2
STEP1
STEP2
STEP3
STEP4
STEP5
Page 101 of 420
99
2-1. Driving procedures
2
When driving
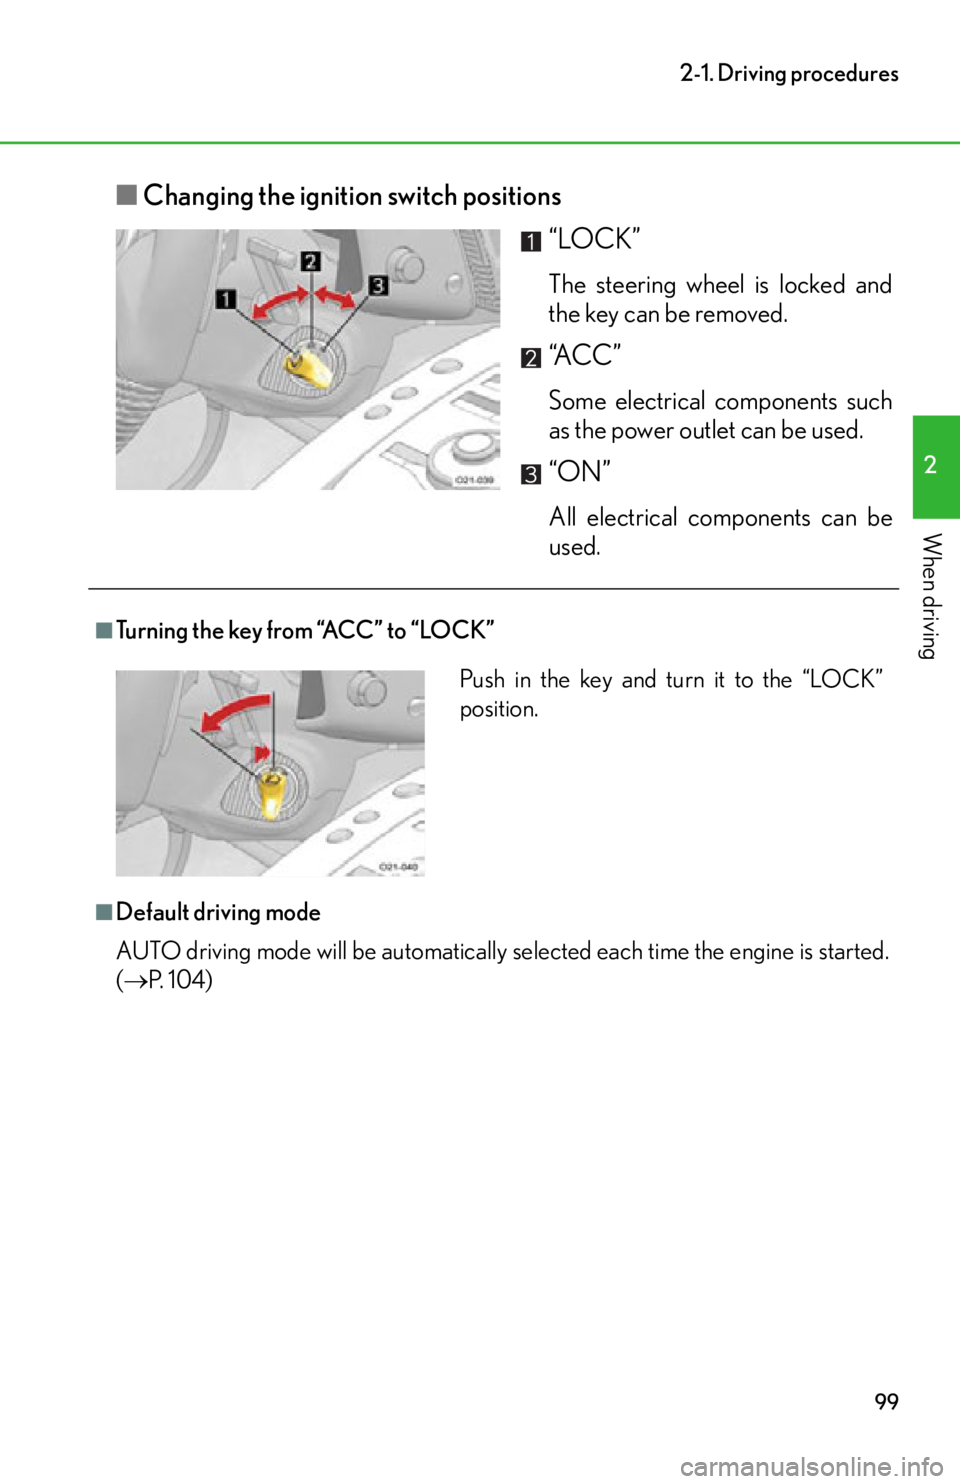
■Changing the ignition switch positions
“LOCK”
The steering wheel is locked and
the key can be removed.
“A C C ”
Some electrical components such
as the power outlet can be used.
“ON”
All electrical components can be
used.
■Turning the key from “ACC” to “LOCK”
■Default driving mode
AUTO driving mode will be automatically se lected each time the engine is started.
( P. 1 0 4 )
Push in the key and turn it to the “LOCK”
position.