rear view mirror LEXUS LS500 2018 User Guide
[x] Cancel search | Manufacturer: LEXUS, Model Year: 2018, Model line: LS500, Model: LEXUS LS500 2018Pages: 514, PDF Size: 10.62 MB
Page 127 of 514
1273-3. Adjusting the seats
LS500_OM_OM50F54U_(U) 3
Before driving If a seat is not occupi ed, do not operate the
rear seat relaxation system for that seat. ■
Relaxation system●
Operating conditions
• The engine switch is in IGNITION ON
mode.
• The temperature in the cabin is not
extremely high.
• The weight of an occupant is detected on
the rear seat or the rear seat belt is fas-
tened.
Once weight is detect ed on the seat, the
seat will be judged as occupied until the
rear door is opened then closed or the
engine switch is turned off. ●
Automatic stop function
• The operation will be canceled automati-
cally after approximately 15 minutes.
• If the door for a seat that the relaxation
system is currently being used is opened,
the relaxation system will stop operating.
The seat and steering wheel are auto-
matically adjusted to allow the driver to
enter and exit the vehicle easily.
Driver’s seat
When all of the following have been
performed, the seat and steering
wheel are automatically adjusted to a
position that allows driver to enter and
exit the vehicle easily.
• The shift position has been shifted to
P.
• The engine switch has been turned
off.
• The driver’s seat belt has been
unfastened. When the driver’s seat adjustment
switches are in front passenger mode
( → P.118), the seat and steering wheel will
not move.WARNING■
Using the relaxation system●
Those who are pregnant, have recently
given birth, or suffer from ailments
requiring rest (heart disease etc.)
should consult a doctor before use.
●
Do not allow children to use the relax-
ation function.
●
Do not use immediately after consum-
ing a meal or alcohol, or for an
extended period of time.
●
If you feel sick while using the relax-
ation function, immediately discon-
tinue use. Driving position memory This feature automatically adjusts
the positions of the front seats,
steering wheel, outside rear view
mirrors and head-up display (if
equipped) to make entering and
exiting the vehicle easier or to suit
your preferences.
Up to 3 different driving positions
can be recorded.
Each electronic key (including a
card key) can be registered to
recall your preferred driving posi-
tion.
Power easy access system
Page 128 of 514
128 3-3. Adjusting the seats
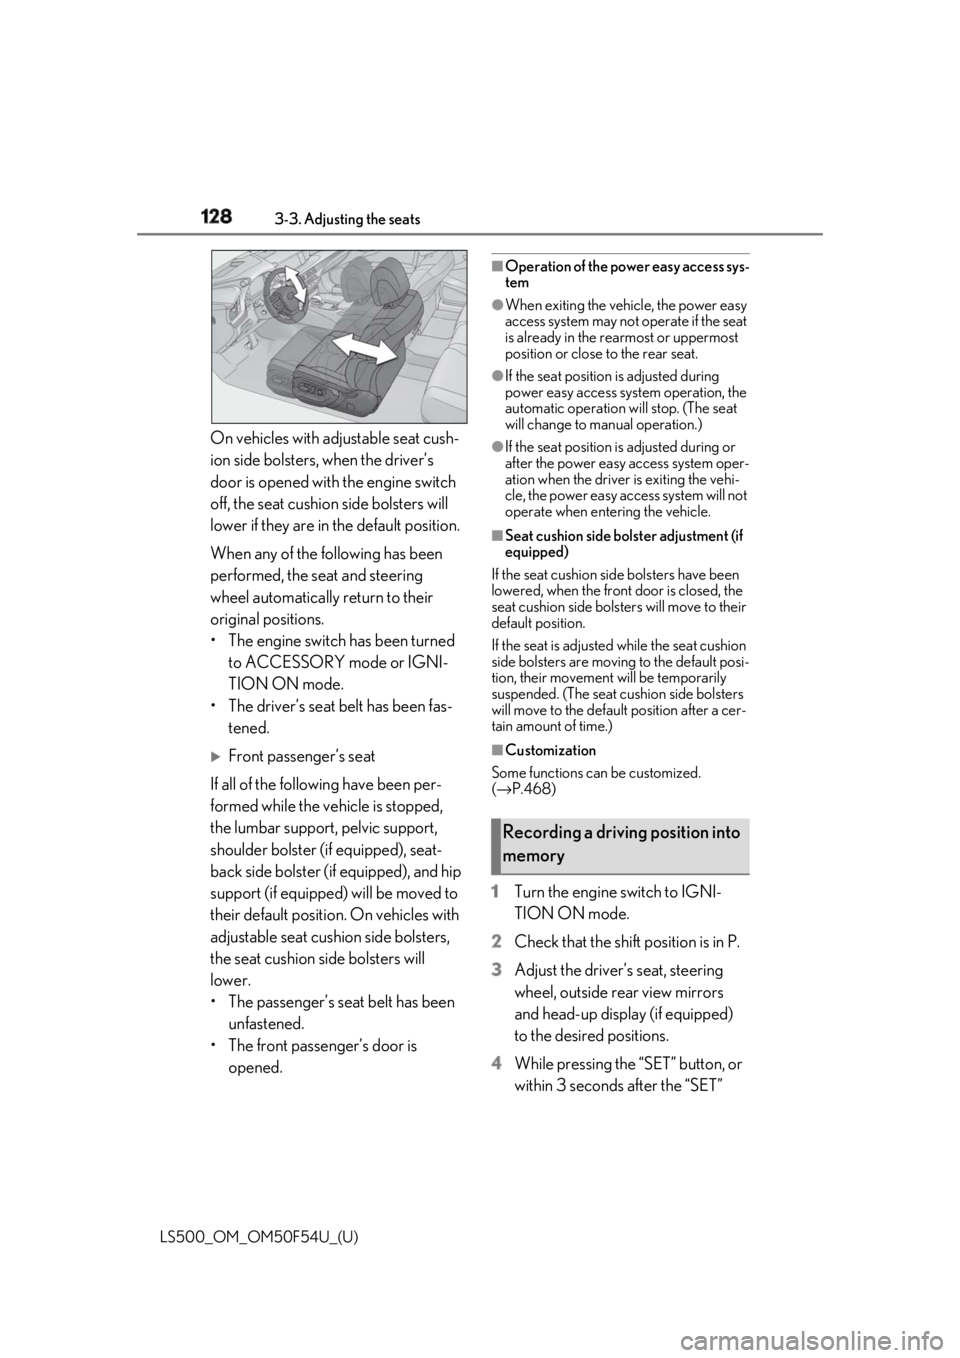
LS500_OM_OM50F54U_(U) On vehicles with adjustable seat cush-
ion side bolsters, when the driver’s
door is opened with the engine switch
off, the seat cushio n side bolsters will
lower if they are in the default position.
When any of the following has been
performed, the seat and steering
wheel automatically return to their
original positions.
• The engine switch has been turned
to ACCESSORY mode or IGNI-
TION ON mode.
• The driver’s seat belt has been fas-
tened.
Front passenger’s seat
If all of the following have been per-
formed while the vehicle is stopped,
the lumbar support, pelvic support,
shoulder bolster (if equipped), seat-
back side bolster (if equipped), and hip
support (if equipped) will be moved to
their default position. On vehicles with
adjustable seat cushion side bolsters,
the seat cushion side bolsters will
lower.
• The passenger’s seat belt has been
unfastened.
• The front passenger’s door is
opened. ■
Operation of the power easy access sys-
tem ●
When exiting the vehicle, the power easy
access system may not operate if the seat
is already in the rearmost or uppermost
position or close to the rear seat. ●
If the seat position is adjusted during
power easy access syst em operation, the
automatic operation will stop. (The seat
will change to manual operation.) ●
If the seat position is adjusted during or
after the power easy access system oper-
ation when the driver is exiting the vehi-
cle, the power easy access system will not
operate when entering the vehicle. ■
Seat cushion side bolster adjustment (if
equipped)
If the seat cushion side bolsters have been
lowered, when the front door is closed, the
seat cushion side bolsters will move to their
default position.
If the seat is adjusted while the seat cushion
side bolsters are moving to the default posi-
tion, their movement will be temporarily
suspended. (The seat cushion side bolsters
will move to the default position after a cer-
tain amount of time.) ■
Customization
Some functions can be customized.
( → P.468)
1 Turn the engine switch to IGNI-
TION ON mode.
2 Check that the shift position is in P.
3 Adjust the driver’s seat, steering
wheel, outside rear view mirrors
and head-up display (if equipped)
to the desired positions.
4 While pressing the “SET” button, or
within 3 seconds after the “SET” Recording a driving position into
memory
Page 131 of 514
1313-3. Adjusting the seats
LS500_OM_OM50F54U_(U) 3
Before driving cle easier.
If the driving position is in a position that
has already been recorded, the seat and
outside rear view mirrors will not move.
2 Turn the engine switch to ACCES-
SORY mode or IGNITION ON
mode, or fasten a seat belt.The seat, steering wheel and head-up dis-
play (if equipped) will move to the
recorded position. ■
Recalling the driving position using the
memory recall function●
Different driving positions can be regis-
tered for each electronic key. Therefore,
the driving position that is recalled may
be different depending on the key being
carried.●
If a door other than the driver’s door is
unlocked with the smart access system
with push-button start, the driving posi-
tion cannot be recalled. In this case, press
the driving position button which has
been set.■
Customization
Some functions can be customized.
( → P.468) *
: If equipped
1 Turn the engine switch to IGNI-
TION ON mode.
2 Display the home screen on the
Rear Multi Operation Panel
( → P.308) and then touch “Seat”.
3 Touch “Left” or “Right”.
4 Adjust the rear seat to the desired
position and then touch “Set Mem-
ory”.
5 Touch “1” or “2”. If the preset is being used, the previously
recorded seat position will be overwritten.
■
In order to correctly use the position
memory function
If a seat position is already in the furthest
possible position and the seat is operated in
the same direction, the recorded position
may be slightly differen t when it is recalled.Rear seat position memory *
The rear seat position can be mem-
orized and recalled with the touch
of a button.
Recording a position into mem-
ory
WARNING
■
Seat adjustme nt caution
Take care during seat adjustment so that
the rear passengers do not strike the
front seats.
Page 136 of 514
136 3-4. Adjusting the steering wheel and mirrors
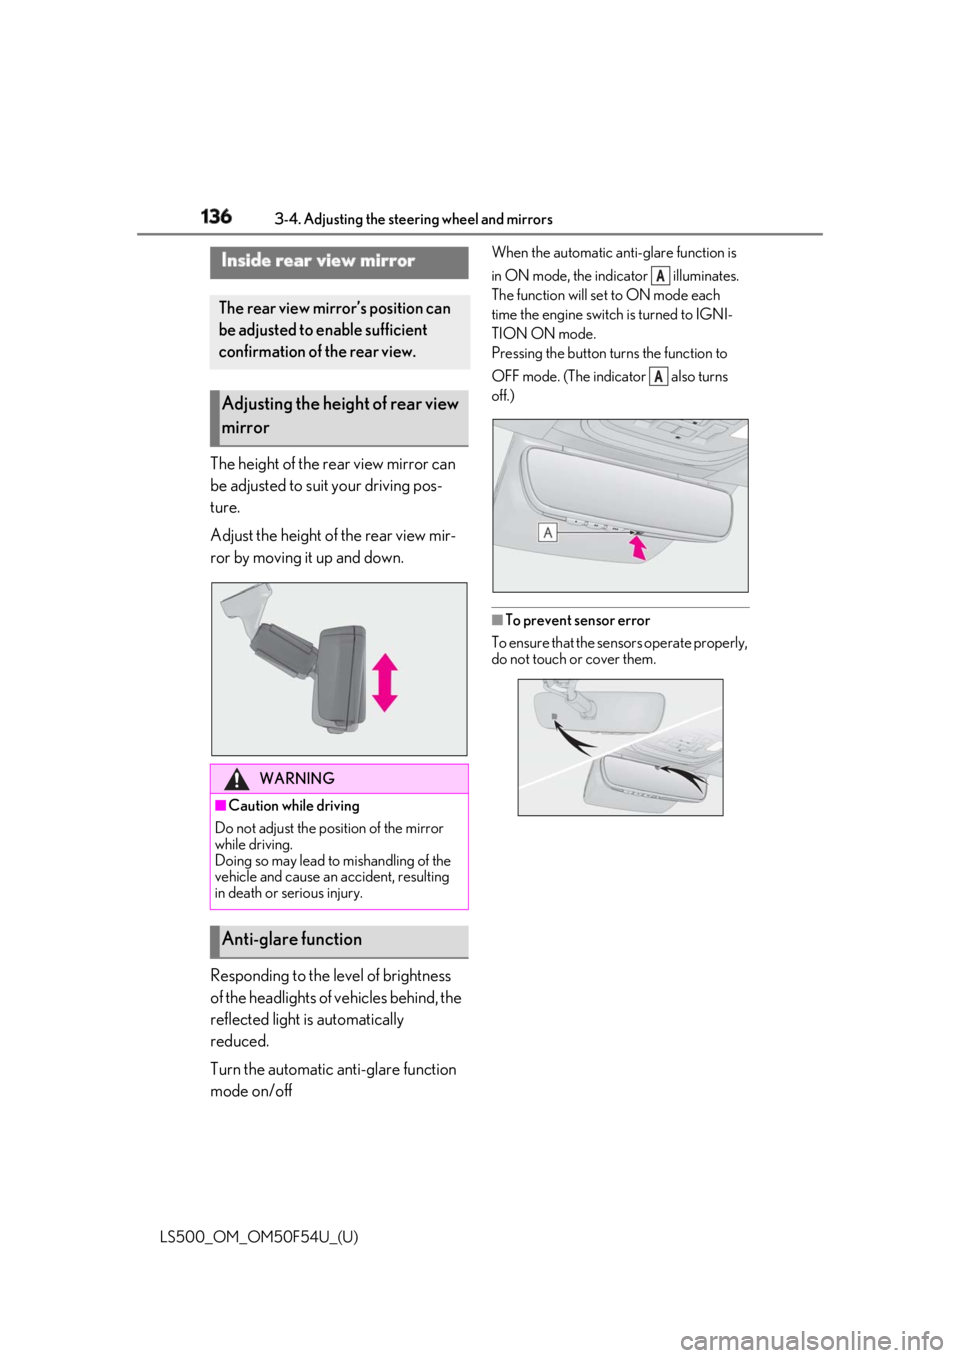
LS500_OM_OM50F54U_(U) The height of the rear view mirror can
be adjusted to suit your driving pos-
ture.
Adjust the height of the rear view mir-
ror by moving it up and down.
Responding to the level of brightness
of the headlights of vehicles behind, the
reflected light is automatically
reduced.
Turn the automatic anti-glare function
mode on/off When the automatic anti-glare function is
in ON mode, the indicator illuminates.
The function will set to ON mode each
time the engine switch is turned to IGNI-
TION ON mode.
Pressing the button turns the function to
OFF mode. (The indicator also turns
off.)
■
To prevent sensor error
To ensure that the sensors operate properly,
do not touch or cover them.Inside rear view mirror The rear view mirror’s position can
be adjusted to enable sufficient
confirmation of the rear view.
Adjusting the height of rear view
mirror
WARNING■
Caution while driving
Do not adjust the position of the mirror
while driving.
Doing so may lead to mishandling of the
vehicle and cause an accident, resulting
in death or serious injury.
Anti-glare function A
A
Page 137 of 514
1373-4. Adjusting the steering wheel and mirrors
LS500_OM_OM50F54U_(U) 3
Before driving
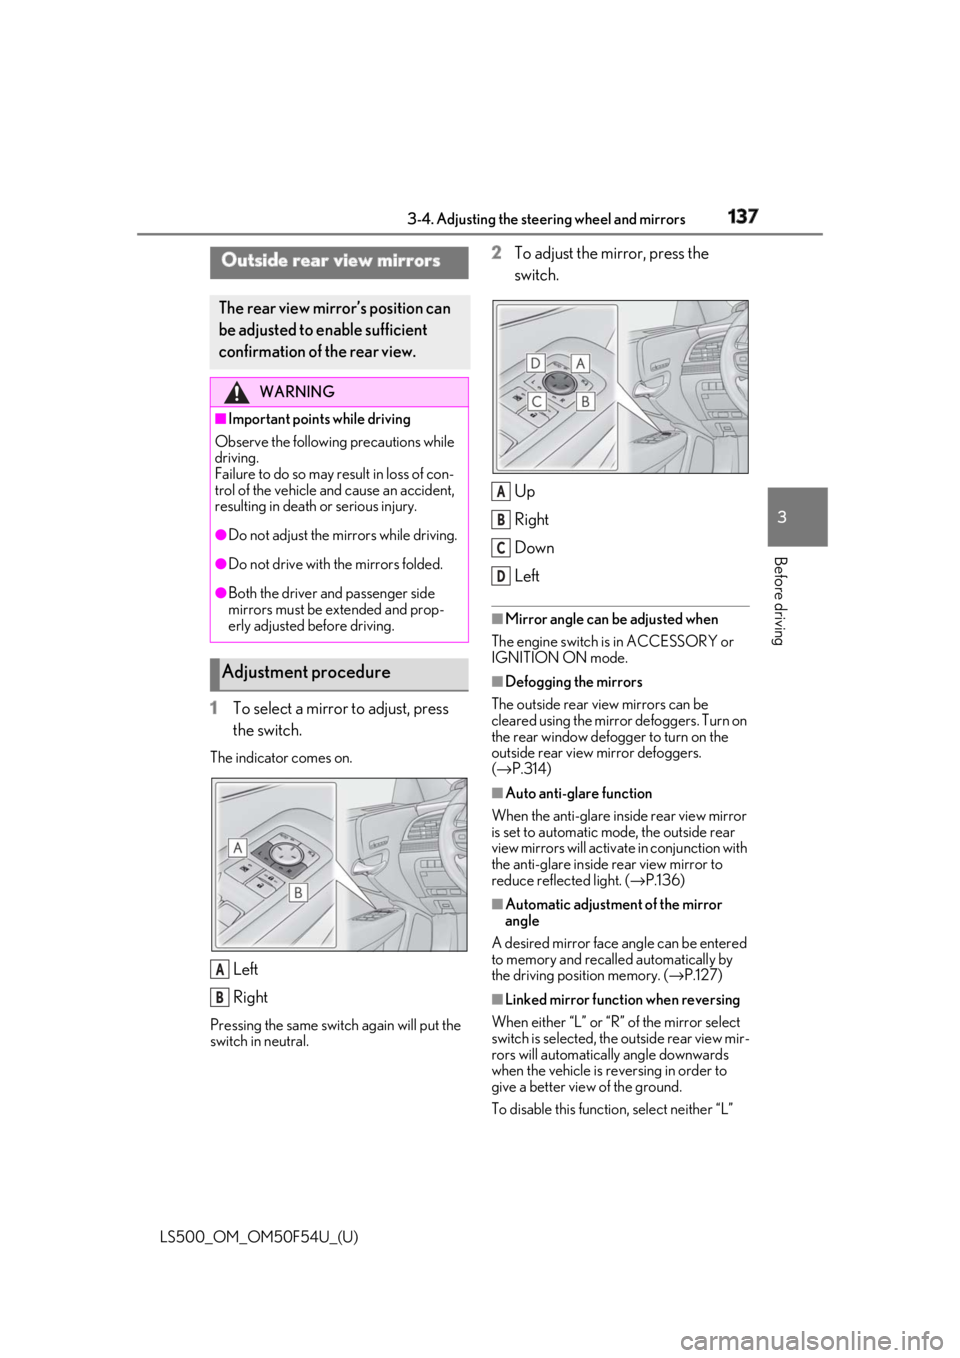
1 To select a mirror to adjust, press
the switch.The indicator comes on.
Left
RightPressing the same switch again will put the
switch in neutral. 2 To adjust the mirror, press the
switch.
Up
Right
Down
Left ■
Mirror angle can be adjusted when
The engine switch is in ACCESSORY or
IGNITION ON mode. ■
Defogging the mirrors
The outside rear view mirrors can be
cleared using the mirror defoggers. Turn on
the rear window defogger to turn on the
outside rear view mirror defoggers.
( → P.314) ■
Auto anti-glare function
When the anti-glare inside rear view mirror
is set to automatic mode, the outside rear
view mirrors will activate in conjunction with
the anti-glare inside rear view mirror to
reduce reflec ted light. ( → P.136)
■
Automatic adjustment of the mirror
angle
A desired mirror face angle can be entered
to memory and recalled automatically by
the driving position memory. ( → P.127)
■
Linked mirror function when reversing
When either “L” or “R” of the mirror select
switch is selected, the outside rear view mir-
rors will automatically angle downwards
when the vehicle is re versing in order to
give a better view of the ground.
To disable this function, select neither “L” Outside rear view mirrors The rear view mirror’s position can
be adjusted to enable sufficient
confirmation of the rear view. WARNING■
Important points while driving
Observe the following precautions while
driving.
Failure to do so may result in loss of con-
trol of the vehicle and cause an accident,
resulting in death or serious injury. ●
Do not adjust the mirrors while driving.●
Do not drive with the mirrors folded.●
Both the driver and passenger side
mirrors must be extended and prop-
erly adjusted before driving.
Adjustment procedure
A
B A
B
C
D
Page 138 of 514
138 3-4. Adjusting the steering wheel and mirrors
LS500_OM_OM50F54U_(U) nor “R”.
To set the mirror angle used when the vehi-
cle is reversing, adjust the mirror angle at a
desired position with the shift position in R.
The adjusted angle will be memorized and
the mirror will automatically tilt to the mem-
orized angle whenever the shift position is
shifted to R from next time.
The memorized downward tilt position of
the mirror is linked to the normal position
(angle adjusted with the shift position in
other than R). Therefore, if the normal posi-
tion is changed after adjustment, the tilt
position will also change.
When the normal position is changed, read-
just the angle in reversing.
■
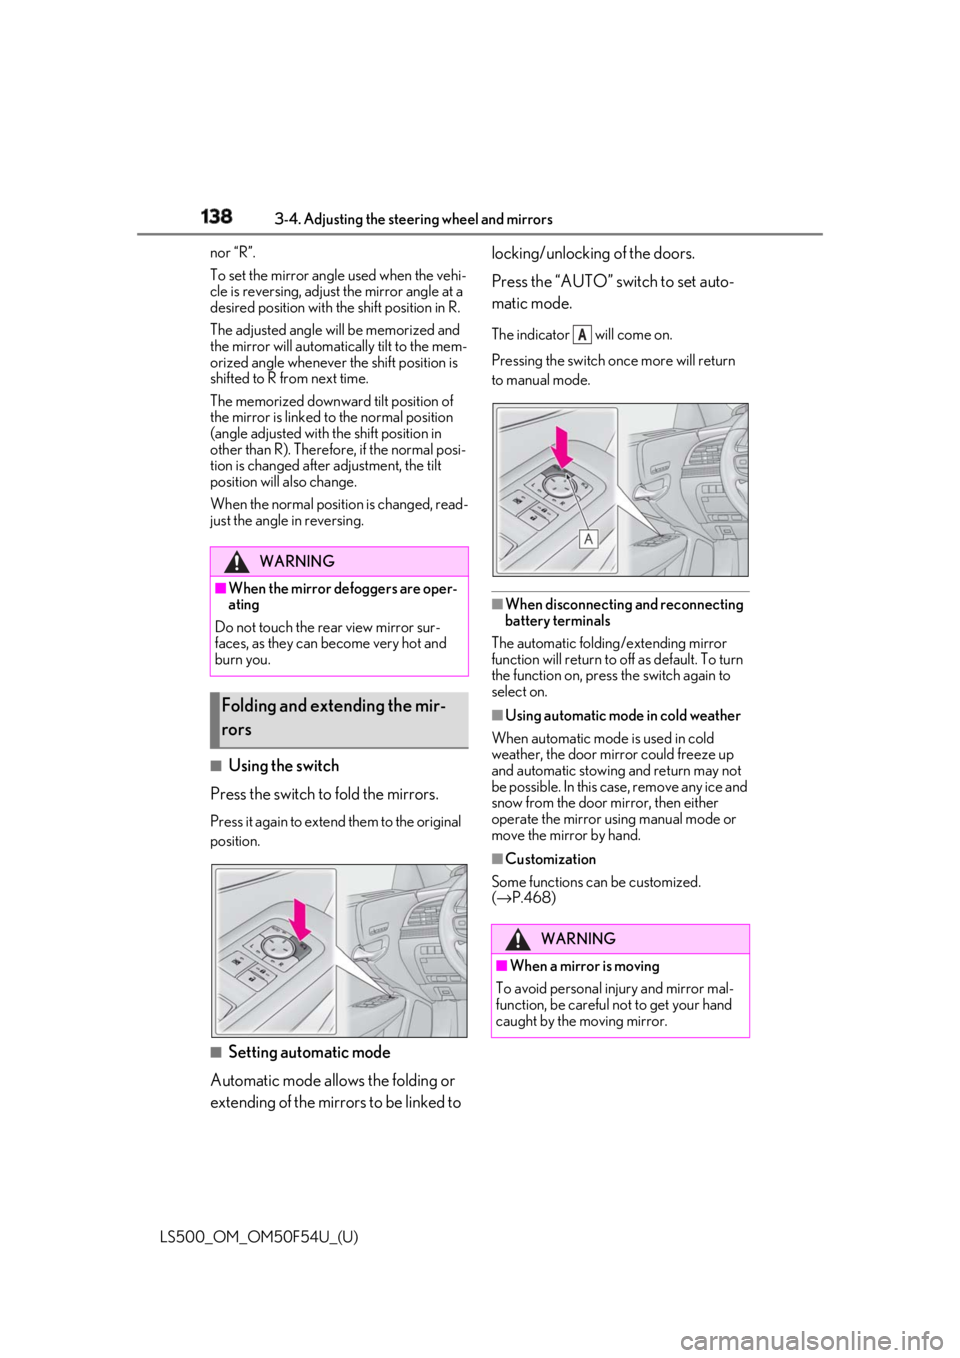
Using the switch
Press the switch to fold the mirrors. Press it again to extend them to the original
position.
■
Setting automatic mode
Automatic mode allows the folding or
extending of the mirrors to be linked to locking/unlocking of the doors.
Press the “AUTO” switch to set auto-
matic mode. The indicator will come on.
Pressing the switch on ce more will return
to manual mode.
■
When disconnecting and reconnecting
battery terminals
The automatic folding/extending mirror
function will return to off as default. To turn
the function on, press the switch again to
select on. ■
Using automatic mode in cold weather
When automatic mode is used in cold
weather, the door mirror could freeze up
and automatic stowing and return may not
be possible. In this case, remove any ice and
snow from the door mirror, then either
operate the mirror using manual mode or
move the mirror by hand. ■
Customization
Some functions can be customized.
( → P.468)WARNING■
When the mirror defoggers are oper-
ating
Do not touch the rear view mirror sur-
faces, as they can become very hot and
burn you.
Folding and extending the mir-
rors
WARNING
■
When a mirror is moving
To avoid personal injury and mirror mal-
function, be careful not to get your hand
caught by the moving mirror. A
Page 152 of 514
152 4-1. Before driving
LS500_OM_OM50F54U_(U) WARNING■
When driving the vehicle●
Do not drive if you are unfamiliar with
the location of the brake and accelera-
tor pedals to avoid depressing the
wrong pedal.
• Accidentally depressing the accelera-
tor pedal instead of the brake pedal
will result in sudden acceleration that
may lead to an accident.
• When backing up, you may twist your
body around, leading to a difficulty in
operating the pedals. Make sure to
operate the pedals properly.
• Make sure to keep a correct driving
posture even when moving the vehicle
only slightly. This allows you to depress
the brake and accelerator pedals
properly.
• Depress the brake pedal using your
right foot. Depressing the brake pedal
using your left foot may delay
response in an emergency, resulting in
an accident.●
Do not drive the vehicle over or stop
the vehicle near flammable materials.
The exhaust system and exhaust gases
can be extremely hot. These hot parts
may cause a fire if there is any flamma-
ble material nearby.
●
Vehicles without Lexus Safety Sys-
tem+A: During normal driving, do not
turn off the engine. Turning the engine
off while driving will not cause loss of
steering or braking control, but the
power assist to these systems will be
lost. This will make it more difficult to
steer and brake, so you should putt
over and stop the vehicle as soon as it
is safe to do so.
However, in the event of an emer-
gency, such as if it becomes impossible
to stop the vehicle in the normal way:
→ P.410 ●
Vehicles with Lexus Safety System+A:
During normal driving, do not turn off
the engine. Turning the engine off
while driving will not cause loss of
steering or braking control, however,
power assist to the st eering will be lost.
This will make it more difficult to steer
smoothly, so you should pull over and
stop the vehicle as soon as it is safe to
do so.
In the event of an emergency, such as if
it becomes impossible to stop the vehi-
cle in the normal way: → P.410●
Use engine braking (downshift) to
maintain a safe speed when driving
down a steep hill.
Using the brakes continuously may
cause the brakes to overheat and lose
effectiveness. ( → P.163)●
Do not adjust the positions of the
steering wheel, the seat, or the inside
or outside rear view mirrors while driv-
ing.
Doing so may result in a loss of vehicle
control. ●
Always check that all passengers’
arms, heads or other parts of their
body are not outside the vehicle. ●
Do not drive in excess of the speed
limit. Even if the legal speed limit per-
mits it, do not drive over 85 mph (140
km/h) unless your vehicle has
high-speed capability tires. Driving
over 85 mph (140 km /h) may result in
tire failure, loss of control and possible
injury. Be sure to consult a tire dealer
to determine whether the tires on your
vehicle are high-speed capability tires
or not before driving at such speeds.
■
When driving on slippery road sur-
faces
●
Sudden braking, acceleration and
steering may cause tire slippage and
reduce your ability to control the vehi-
cle.
●
Sudden acceleration, engine braking
due to shifting, or changes in engine
speed could cause the vehicle to skid.
Page 182 of 514
182 4-3. Operating the lights and wipers
LS500_OM_OM50F54U_(U) ●
If the wiper is turned to AUTO mode
while the engine switch is in IGNITION
ON mode, the wipers will operate once
to show that AUTO mode is activated.●
If the temperature of the raindrop sensor
is 185°F (85°C) or higher, or 5°F
(-15°C) or lower, automatic operation
may not occur. In this case, operate the
wipers in any mode other than AUTO
mode.■
If no windshield washer fluid sprays
Check that the washer nozzles are not
blocked if there is wash er fluid in the wind-
shield washer fluid reservoir.
■
Front door opening linked windshield
wiper stop function
When is selected and the windshield
wipers are operating, if a front door is
opened while the vehicle is stopped and the
P shift position is sele cted, operation of the
windshield wipers w ill be stopped to pre-
vent anyone near the vehicle from being
sprayed by water from the wipers. When
the front door is closed, wiper operation will
resume.
■
When stopping the engine in an emer-
gency while driving
If the windshield wipers are operating when
the engine is stopped, the windshield wipers
will operate in high speed operation. After
the vehicle is stopped, operation will return
to normal when the engi ne switch is turned to IGNITION ON mode, or operation will
stop when the driver’s door is opened. ■
Outside rear view mirror defogger acti-
vation linked to windshield wiper opera-
tion
The outside rear view mirror defoggers
automatically turn on when you operate the
windshield wipers.
The outside rear view mirror defoggers
automatically turn off approximately 15
minutes after the wipers stop.
For details about the outside rear view mir-
ror defoggers: → P.314
WARNING■
Caution regarding the use of wind-
shield wipers in AUTO mode
The windshield wipers may operate
unexpectedly if the sensor is touched or
the windshield is subj ect to vibration in
AUTO mode. Take care that your fingers
or anything else do not become caught
in the windshield wipers. ■
Caution regarding the use of washer
fluid
When it is cold, do not use the washer
fluid until the windshield becomes warm.
The fluid may freeze on the windshield
and cause low visibility. This may lead to
an accident, resulting in death or serious
injury.
NOTICE
■
When there is no washer fluid spray
from the nozzle
Damage to the washer fluid pump may
be caused if the lever is pulled toward
you and held continually.
■
When a nozzle becomes blocked
In this case, contact your Lexus dealer.
Do not try to clear it with a pin or other
object. The nozzle will be damaged.
Page 193 of 514
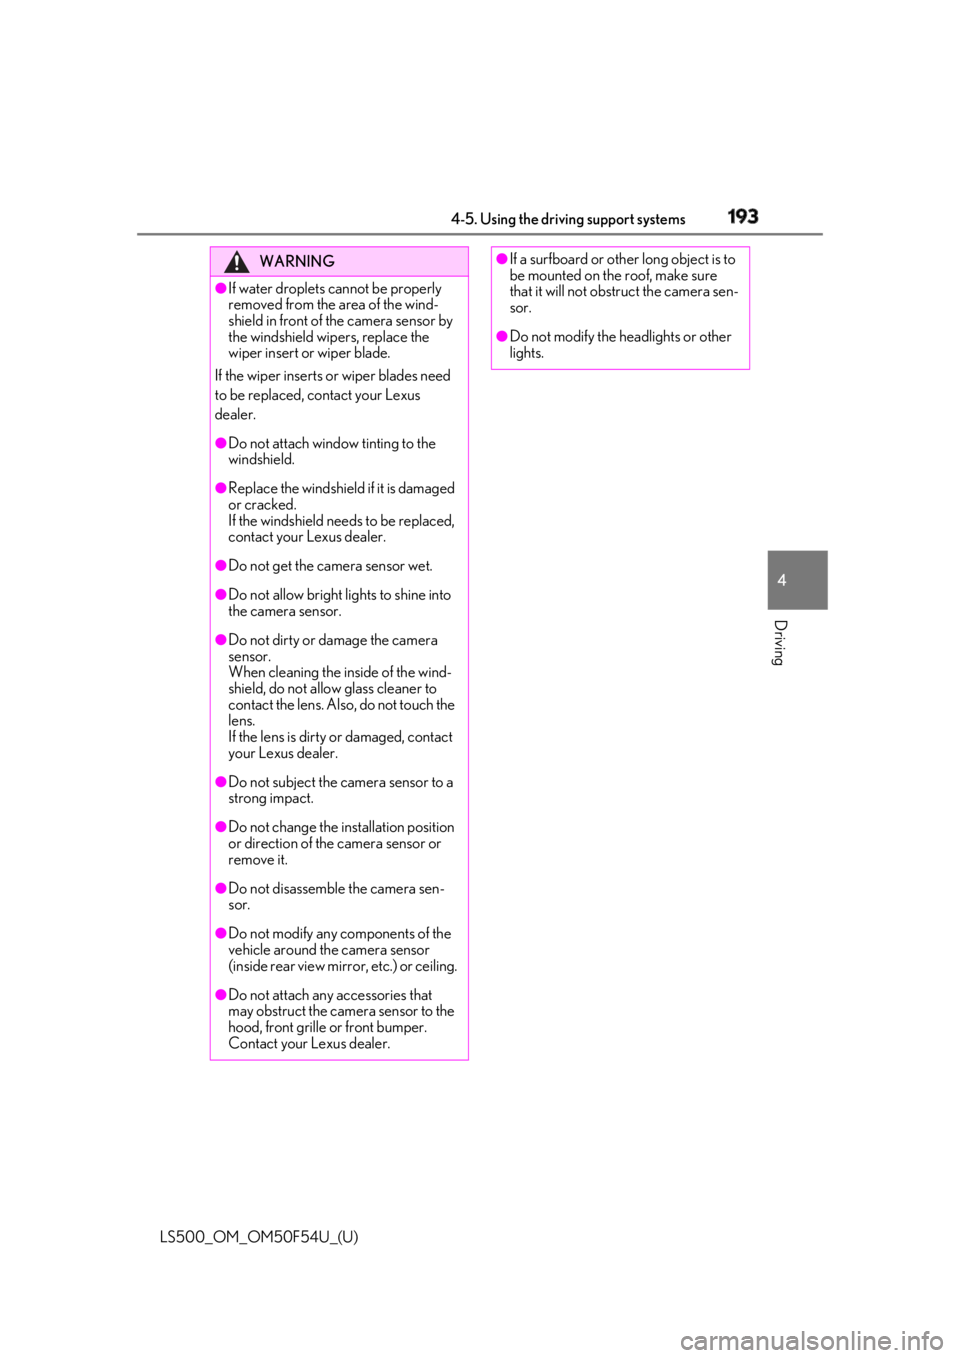
1934-5. Using the driving support systems
LS500_OM_OM50F54U_(U) 4
Driving WARNING●
If water droplets cannot be properly
removed from the area of the wind-
shield in front of the camera sensor by
the windshield wipers, replace the
wiper insert or wiper blade.
If the wiper inserts or wiper blades need
to be replaced, contact your Lexus
dealer. ●
Do not attach window tinting to the
windshield.●
Replace the windshield if it is damaged
or cracked.
If the windshield needs to be replaced,
contact your Lexus dealer.●
Do not get the camera sensor wet.●
Do not allow bright lights to shine into
the camera sensor.●
Do not dirty or damage the camera
sensor.
When cleaning the inside of the wind-
shield, do not allow glass cleaner to
contact the lens. Also, do not touch the
lens.
If the lens is dirty or damaged, contact
your Lexus dealer.
●
Do not subject the camera sensor to a
strong impact.
●
Do not change the installation position
or direction of the camera sensor or
remove it.
●
Do not disassemble the camera sen-
sor.
●
Do not modify any components of the
vehicle around the camera sensor
(inside rear view mirror, etc.) or ceiling.
●
Do not attach any accessories that
may obstruct the camera sensor to the
hood, front grille or front bumper.
Contact your Lexus dealer. ●
If a surfboard or other long object is to
be mounted on the roof, make sure
that it will not obstruct the camera sen-
sor. ●
Do not modify the headlights or other
lights.
Page 199 of 514
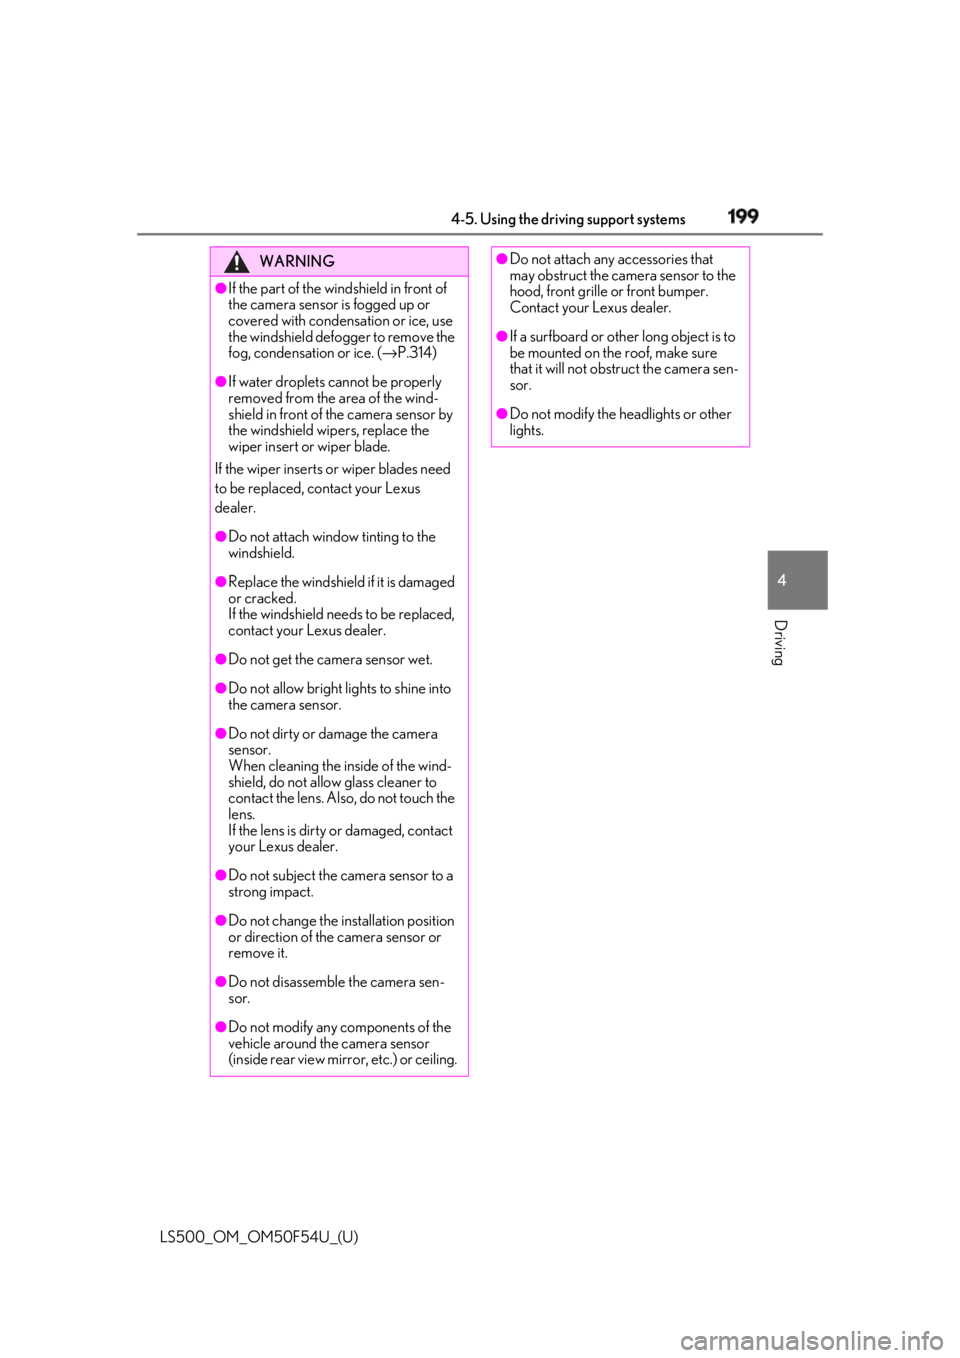
1994-5. Using the driving support systems
LS500_OM_OM50F54U_(U) 4
Driving WARNING●
If the part of the windshield in front of
the camera sensor is fogged up or
covered with condensation or ice, use
the windshield defogger to remove the
fog, condensation or ice. ( → P.314)●
If water droplets cannot be properly
removed from the area of the wind-
shield in front of the camera sensor by
the windshield wipers, replace the
wiper insert or wiper blade.
If the wiper inserts or wiper blades need
to be replaced, contact your Lexus
dealer. ●
Do not attach window tinting to the
windshield.●
Replace the windshield if it is damaged
or cracked.
If the windshield needs to be replaced,
contact your Lexus dealer.●
Do not get the camera sensor wet.●
Do not allow bright lights to shine into
the camera sensor.●
Do not dirty or damage the camera
sensor.
When cleaning the inside of the wind-
shield, do not allow glass cleaner to
contact the lens. Also, do not touch the
lens.
If the lens is dirty or damaged, contact
your Lexus dealer.
●
Do not subject the camera sensor to a
strong impact.
●
Do not change the installation position
or direction of the camera sensor or
remove it.
●
Do not disassemble the camera sen-
sor.
●
Do not modify any components of the
vehicle around the camera sensor
(inside rear view mirror, etc.) or ceiling. ●
Do not attach any accessories that
may obstruct the camera sensor to the
hood, front grille or front bumper.
Contact your Lexus dealer. ●
If a surfboard or other long object is to
be mounted on the roof, make sure
that it will not obstruct the camera sen-
sor. ●
Do not modify the headlights or other
lights.