start stop button LEXUS LS500 2019 Owners Manual
[x] Cancel search | Manufacturer: LEXUS, Model Year: 2019, Model line: LS500, Model: LEXUS LS500 2019Pages: 512, PDF Size: 9.71 MB
Page 96 of 512
96 3-1. Key information
LS500_OM_(U)_1810 3-1.Key information
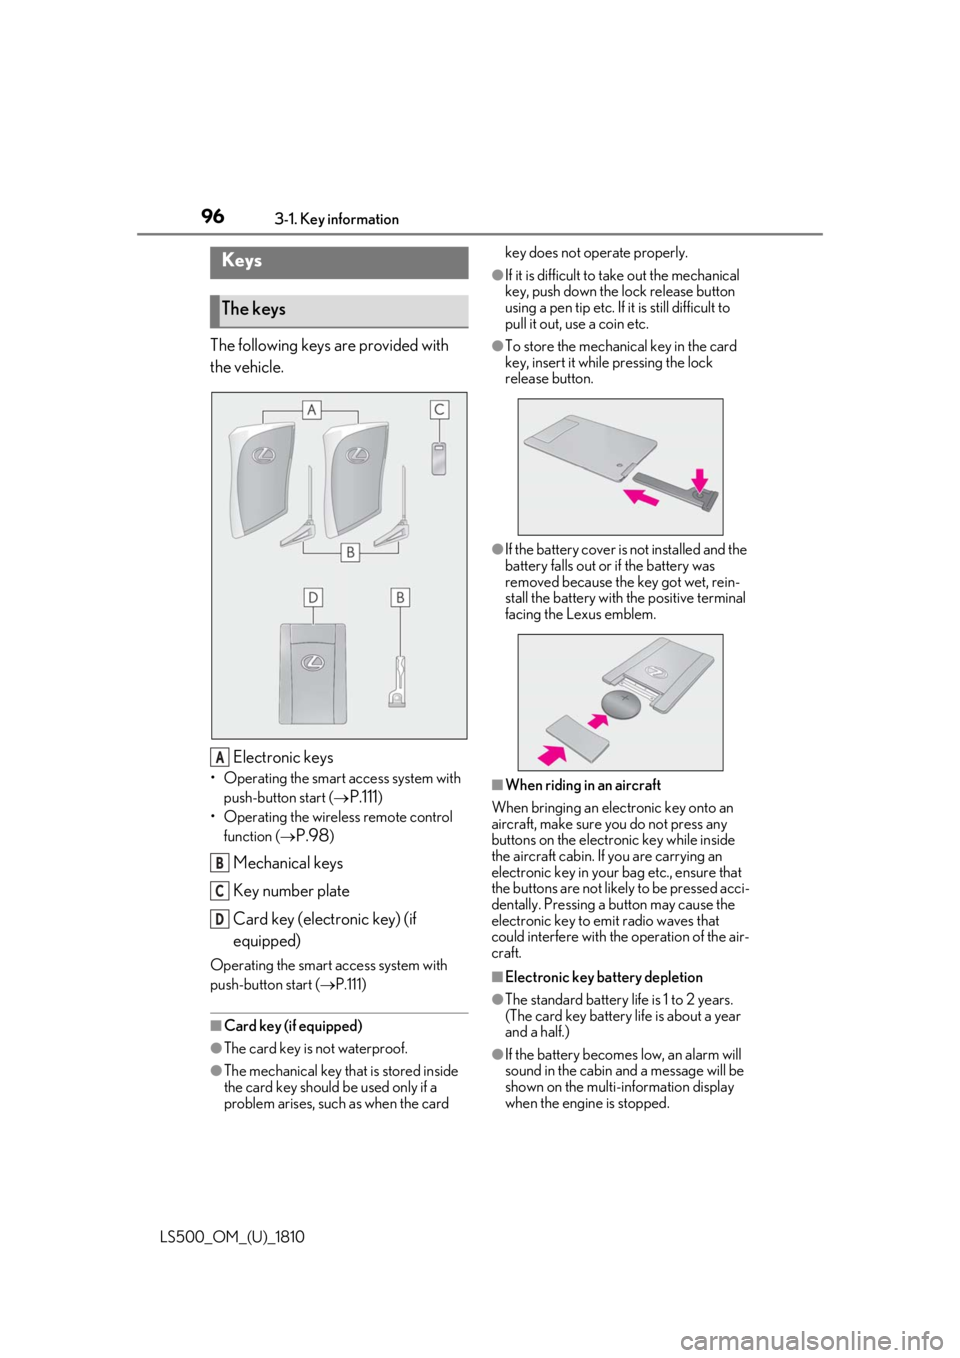
The following keys are provided with
the vehicle.
Electronic keys• Operating the smart access system with
push-button start (
P.111 )
• Operating the wireless remote control
function (
P.98 )
Mechanical keys
Key number plate
Card key (electronic key) (if
equipped)Operating the smart access system with
push-button start ( P.111)
■
Card key (if equipped)
●
The card key is not waterproof.
●
The mechanical key that is stored inside
the card key should be used only if a
problem arises, such as when the card key does not operate properly. ●
If it is difficult to take out the mechanical
key, push down the lock release button
using a pen tip etc. If it is still difficult to
pull it out, use a coin etc. ●
To store the mechanical key in the card
key, insert it while pressing the lock
release button.
●
If the battery cover is not installed and the
battery falls out or if the battery was
removed because the key got wet, rein-
stall the battery with the positive terminal
facing the Lexus emblem.
■
When riding in an aircraft
When bringing an electronic key onto an
aircraft, make sure you do not press any
buttons on the electronic key while inside
the aircraft cabin. If you are carrying an
electronic key in your bag etc., ensure that
the buttons are not likely to be pressed acci-
dentally. Pressing a button may cause the
electronic key to em it radio waves that
could interfere with the operation of the air-
craft.
■
Electronic key battery depletion
●
The standard battery life is 1 to 2 years.
(The card key battery life is about a year
and a half.)
●
If the battery becomes low, an alarm will
sound in the cabin and a message will be
shown on the multi-information display
when the engine is stopped.Keys
The keys
A
B
C
D
Page 101 of 512
1013-2. Opening, closing and locking the doors and trunk
LS500_OM_(U)_1810 3
Before driving
To prevent unintended triggering of the
alarm, unlock the doors using the wireless
remote control and open and close a door
once after the settings have been changed.
(If a door is not opened within 60 seconds
after is pressed, the doors will be
locked again and the alarm will automati-
cally be set.)
In a case that the alarm is triggered, imme-
diately stop the alarm. ( P.65)■
Impact detection door lock release sys-
tem
In the event that the vehicle is subject to a
strong impact, all the doors are unlocked.
Depending on the force of the impact or the
type of accident, however, the system may
not operate.
■
Operation signals
A buzzer sounds and the emergency flash-
ers flash to indicate that the doors have
been locked/unlocked. (Locked: once;
Unlocked: twice)
A buzzer sounds to indicate that the win-
dows and moon roof or panoramic moon
roof are operating.
■
Security feature
If a door is not opened within approximately 60 seconds after the vehicle is unlocked,
the security feature automatically locks the
vehicle again. ■
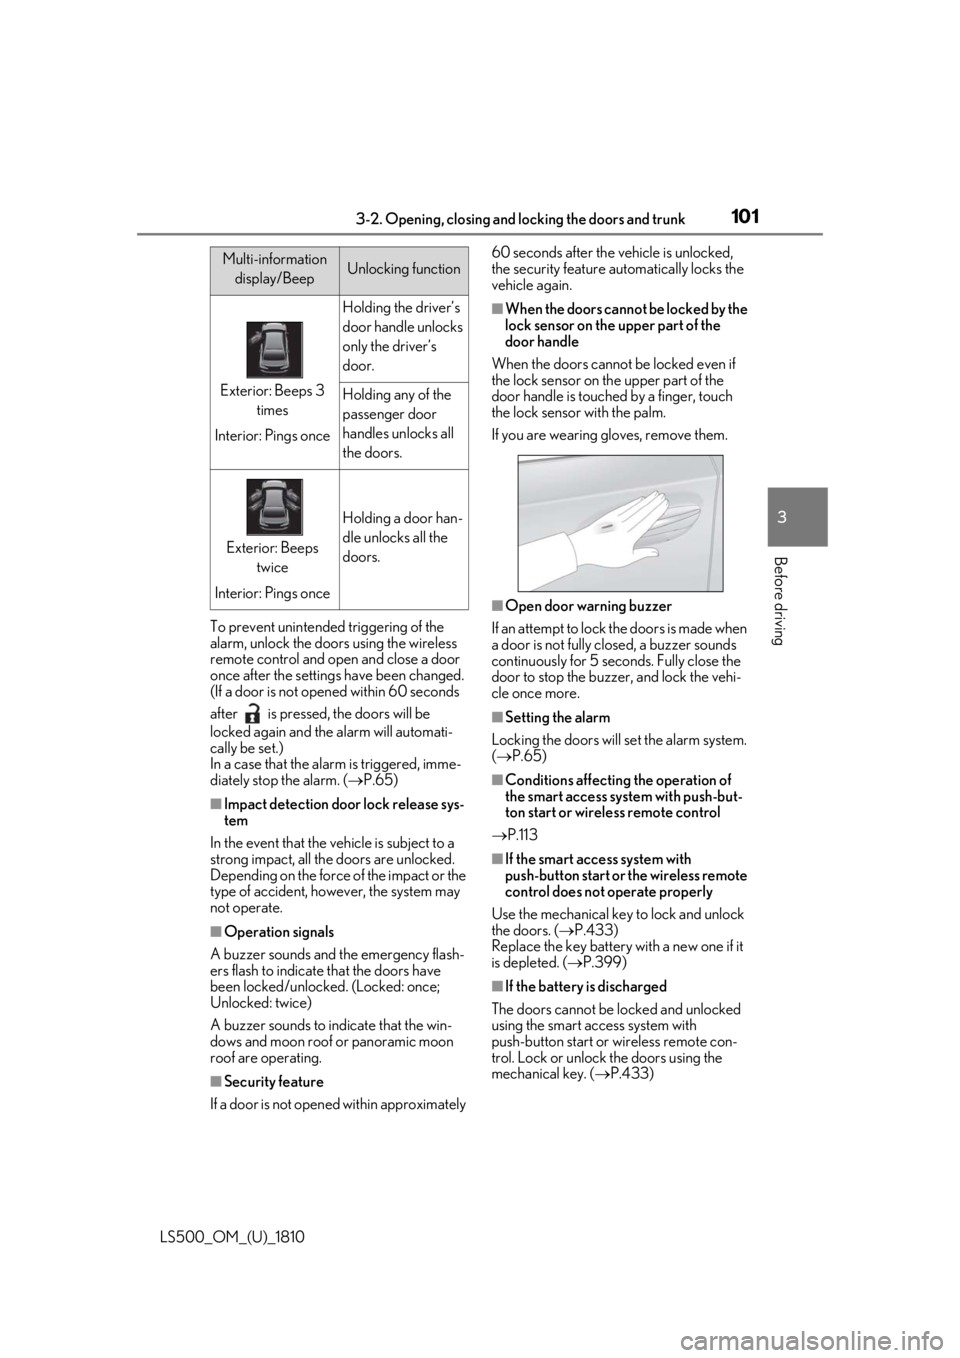
When the doors cannot be locked by the
lock sensor on the upper part of the
door handle
When the doors cannot be locked even if
the lock sensor on th e upper part of the
door handle is touched by a finger, touch
the lock sensor with the palm.
If you are wearing gloves, remove them.
■
Open door warning buzzer
If an attempt to lock the doors is made when
a door is not fully closed, a buzzer sounds
continuously for 5 seconds. Fully close the
door to stop the buzzer, and lock the vehi-
cle once more. ■
Setting the alarm
Locking the doors will set the alarm system.
( P.65) ■
Conditions affecting the operation of
the smart access system with push-but-
ton start or wireless remote control
P.113 ■
If the smart access system with
push-button start or the wireless remote
control does not operate properly
Use the mechanical key to lock and unlock
the doors. ( P.433)
Replace the key battery with a new one if it
is depleted. ( P.399)
■
If the battery is discharged
The doors cannot be locked and unlocked
using the smart access system with
push-button start or wireless remote con-
trol. Lock or unlock the doors using the
mechanical key. ( P.433)Multi-information
display/Beep Unlocking function
Exterior: Beeps 3
times
Interior: Pings once Holding the driver’s
door handle unlocks
only the driver’s
door.
Holding any of the
passenger door
handles unlocks all
the doors.
Exterior: Beeps
twice
Interior: Pings once Holding a door han-
dle unlocks all the
doors.
Page 107 of 512
1073-2. Opening, closing and locking the doors and trunk
LS500_OM_(U)_1810 3
Before driving ■
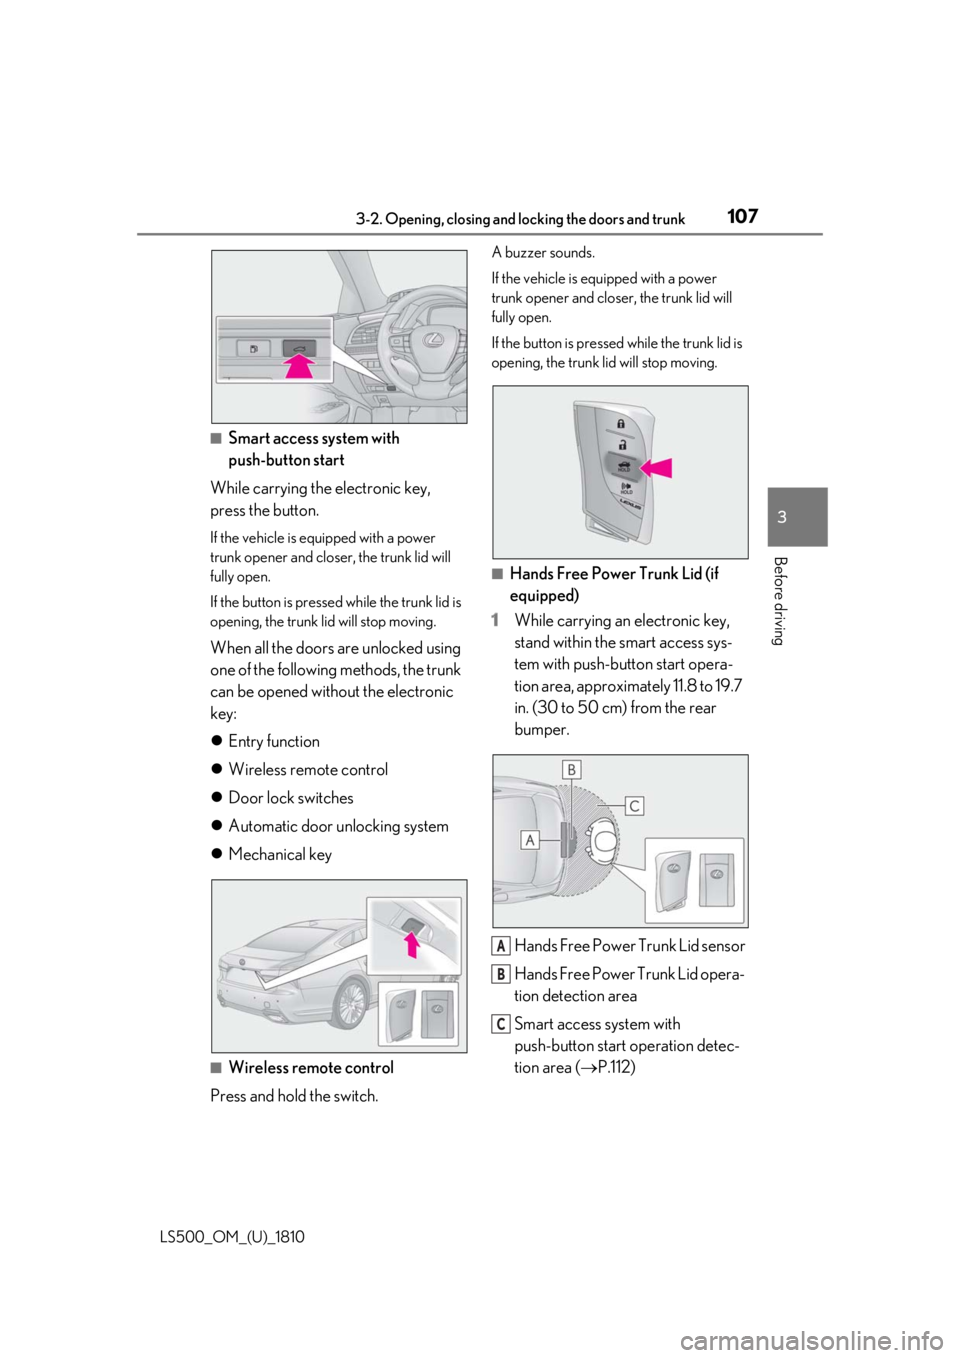
Smart access system with
push-button start
While carrying the electronic key,
press the button. If the vehicle is equipped with a power
trunk opener and closer, the trunk lid will
fully open.
If the button is presse d while the trunk lid is
opening, the trunk lid will stop moving.
When all the doors are unlocked using
one of the following methods, the trunk
can be opened without the electronic
key:
Entry function
Wireless remote control
Door lock switches
Automatic door unlocking system
Mechanical key
■
Wireless remote control
Press and hold the switch. A buzzer sounds.
If the vehicle is equipped with a power
trunk opener and closer, the trunk lid will
fully open.
If the button is presse d while the trunk lid is
opening, the trunk lid will stop moving.
■
Hands Free Power Trunk Lid (if
equipped)
1 While carrying an electronic key,
stand within the smart access sys-
tem with push-button start opera-
tion area, approximately 11.8 to 19.7
in. (30 to 50 cm) from the rear
bumper.
Hands Free Power Trunk Lid sensor
Hands Free Power Trunk Lid opera-
tion detection area
Smart access system with
push-button start operation detec-
tion area ( P.112) A
B
C
Page 109 of 512
1093-2. Opening, closing and locking the doors and trunk
LS500_OM_(U)_1810 3
Before driving cally close it to the fully closed position. ●
The trunk easy closer will operate
regardless of the en gine switch mode.●
If the trunk easy closer does not operate,
open the trunk to the half open position
or more and then close it.■
Function to prevent the trunk being
locked with the electronic key inside●
When all doors are locked, closing the
trunk lid with the electr onic key left inside
the trunk will sound an alarm.
In this case, the trunk lid can be opened
pressing the trunk release button on the
trunk lid.●
If the spare electronic key is put in the
trunk with all the doors locked, the key
confinement prevention function is acti-
vated so the trunk can be opened. In
order to prevent theft, take all electronic
keys with you when leaving the vehicle.●
If the electronic key is put in the trunk with
all the doors locked, the key may not be
detected depending on the location of
the key and the surrounding radio wave
conditions. In this case, the key confine-
ment prevention function cannot be acti-
vated, causing the doors to lock when the
trunk is closed. Make sure to check
where the key is before closing the trunk.●
The key confinement prevention function
cannot be activated if any one of the
doors is unlocked. In this case, open the
trunk using the trunk opener.■
Overload protection function (vehicles
with power trunk opener and closer)
The trunk lid will not operate when exces-
sive load is present on the top of the trunk
lid.
■
Fall-down protection function (vehicles
with power trunk opener and closer)
While the trunk lid is opening automatically,
applying excessive force to it will stop the
opening operation to prevent the trunk lid
from rapidly falling down.
■
Jam protection function (vehicles with
power trunk opener and closer)
While the trunk lid is closing automatically,
the trunk lid will stop closing and open if something gets caught. ■
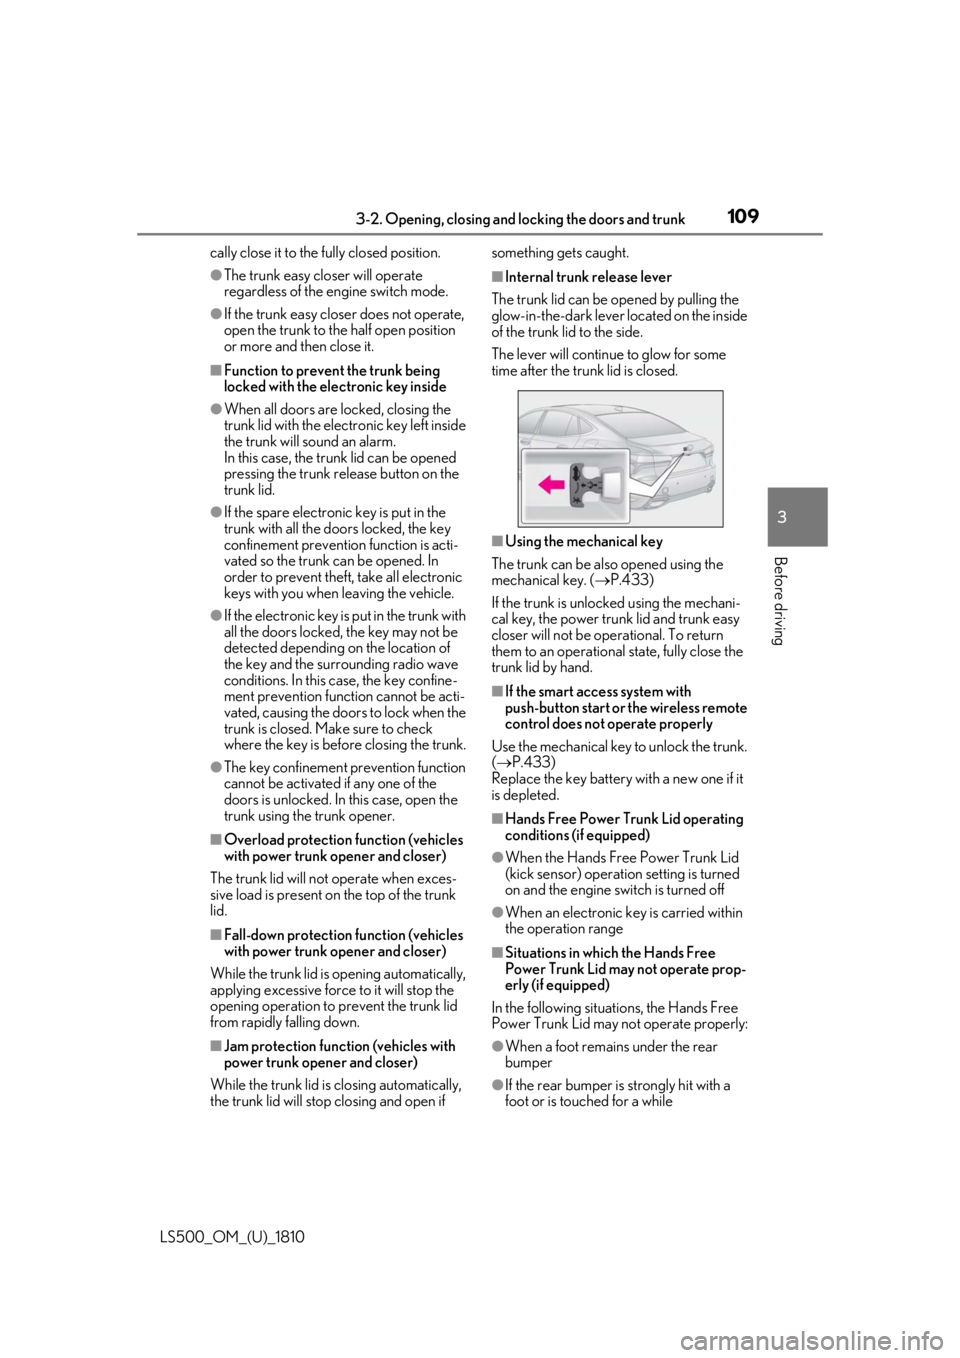
Internal trunk release lever
The trunk lid can be opened by pulling the
glow-in-the-dark lever located on the inside
of the trunk lid to the side.
The lever will continue to glow for some
time after the trunk lid is closed.
■
Using the mechanical key
The trunk can be also opened using the
mechanical key. ( P.433)
If the trunk is unlocked using the mechani-
cal key, the power trunk lid and trunk easy
closer will not be operational. To return
them to an operational state, fully close the
trunk lid by hand. ■
If the smart access system with
push-button start or the wireless remote
control does not operate properly
Use the mechanical key to unlock the trunk.
( P.433)
Replace the key battery with a new one if it
is depleted. ■
Hands Free Power Trunk Lid operating
conditions (if equipped) ●
When the Hands Free Power Trunk Lid
(kick sensor) operatio n setting is turned
on and the engine switch is turned off
●
When an electronic key is carried within
the operation range
■
Situations in which the Hands Free
Power Trunk Lid may not operate prop-
erly (if equipped)
In the following situations, the Hands Free
Power Trunk Lid may not operate properly:
●
When a foot remain s under the rear
bumper
●
If the rear bumper is strongly hit with a
foot or is touched for a while
Page 113 of 512
1133-2. Opening, closing and locking the doors and trunk
LS500_OM_(U)_1810 3
Before driving take some time to unlock the doors.
• The electronic key has been left in an
area of approximately 6 ft. (2 m) of the
outside of the vehicle for 10 minutes or
longer.
• The smart access system with push-but-
ton start has not been used for 5 days or
longer.●
If the smart access system with push-but-
ton start has not been used for 14 days or
longer, the doors cannot be unlocked at
any doors except the driver’s door. In this
case, take hold of the driver’s door han-
dle, or use the wireless remote control or
the mechanical key, to unlock the doors.■
Turning an electronic key to bat-
tery-saving mode
When battery-saving mode is set, battery
depletion is minimized by stopping the elec-
tronic key from re ceiving radio waves.
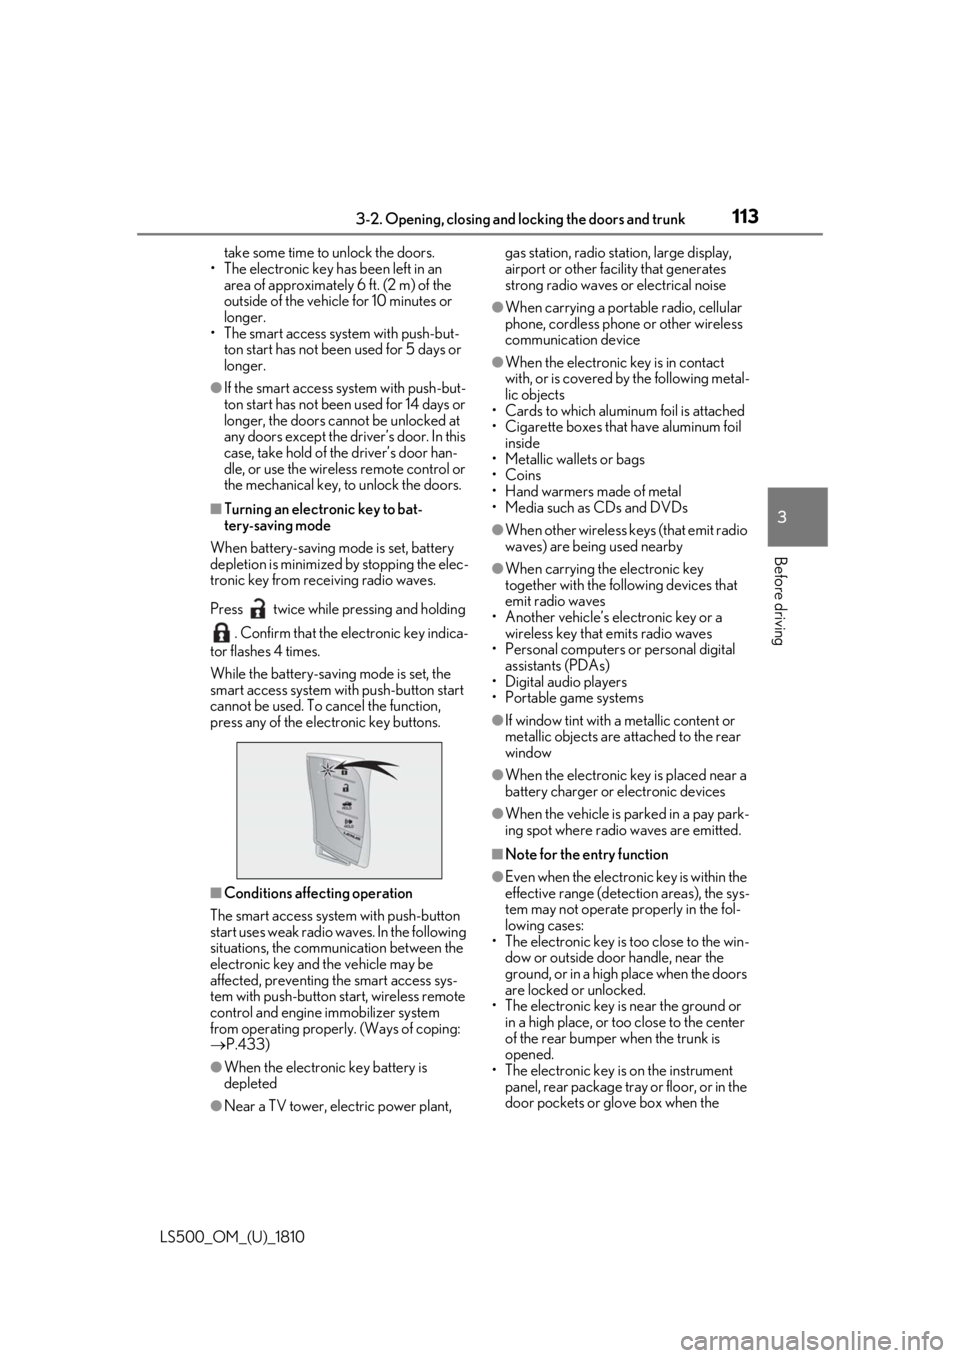
Press twice while pressing and holding
. Confirm that the electronic key indica-
tor flashes 4 times.
While the battery-saving mode is set, the
smart access system with push-button start
cannot be used. To cancel the function,
press any of the electronic key buttons.
■
Conditions affe cting operation
The smart access system with push-button
start uses weak radio waves. In the following
situations, the communication between the
electronic key and the vehicle may be
affected, preventing the smart access sys-
tem with push-button start, wireless remote
control and engine immobilizer system
from operating properly. (Ways of coping:
P.433)
●
When the electronic key battery is
depleted
●
Near a TV tower, electric power plant, gas station, radio stat ion, large display,
airport or other fac ility that generates
strong radio waves or electrical noise ●
When carrying a portable radio, cellular
phone, cordless phone or other wireless
communication device ●
When the electronic key is in contact
with, or is covered by the following metal-
lic objects
• Cards to which aluminum foil is attached
• Cigarette boxes that have aluminum foil
inside
• Metallic wallets or bags
•Coins
• Hand warmers made of metal
• Media such as CDs and DVDs ●
When other wireless keys (that emit radio
waves) are being used nearby ●
When carrying the electronic key
together with the following devices that
emit radio waves
• Another vehicle’s electronic key or a
wireless key that emits radio waves
• Personal computers or personal digital
assistants (PDAs)
• Digital audio players
• Portable game systems ●
If window tint with a metallic content or
metallic objects are attached to the rear
window ●
When the electronic key is placed near a
battery charger or electronic devices ●
When the vehicle is parked in a pay park-
ing spot where radio waves are emitted. ■
Note for the entry function ●
Even when the electronic key is within the
effective range (detection areas), the sys-
tem may not operate properly in the fol-
lowing cases:
• The electronic key is too close to the win-
dow or outside door handle, near the
ground, or in a high place when the doors
are locked or unlocked.
• The electronic key is near the ground or
in a high place, or too close to the center
of the rear bumper when the trunk is
opened.
• The electronic key is on the instrument
panel, rear package tray or floor, or in the
door pockets or glove box when the
Page 115 of 512
1153-2. Opening, closing and locking the doors and trunk
LS500_OM_(U)_1810 3
Before driving The key confinement prevention function
may not operate, depending on the loca-
tion of the key (the inside edge of the
trunk), conditions (inside a metal bag,
close to metallic objects) and the radio
waves in the surrounding area. ( P.109)■
If the smart access system with
push-button start does not operate
properly●
Locking and unlocking the doors and
trunk: P.433●
Starting the engine: P.434 ■
Customization
Some functions can be customized.
( P.466) ■
If the smart access system with
push-button start has been deactivated
in a customized setting ●
Locking and unloc king the doors and
opening the trunk:
Use the wireless remote control or
mechanical key. ( P.100, 107, 433)●
Starting the engine and changing engine
switch modes: P.434●
Stopping the engine: P.165■
Certification for the smart access system with push-button start
For vehicles sold in the U.S.A. , Hawaii, Guam and Puerto Rico
Page 165 of 512
1654-2. Driving procedures
LS500_OM_(U)_1810 4
Driving while turning the steering wheel left and
right.
●
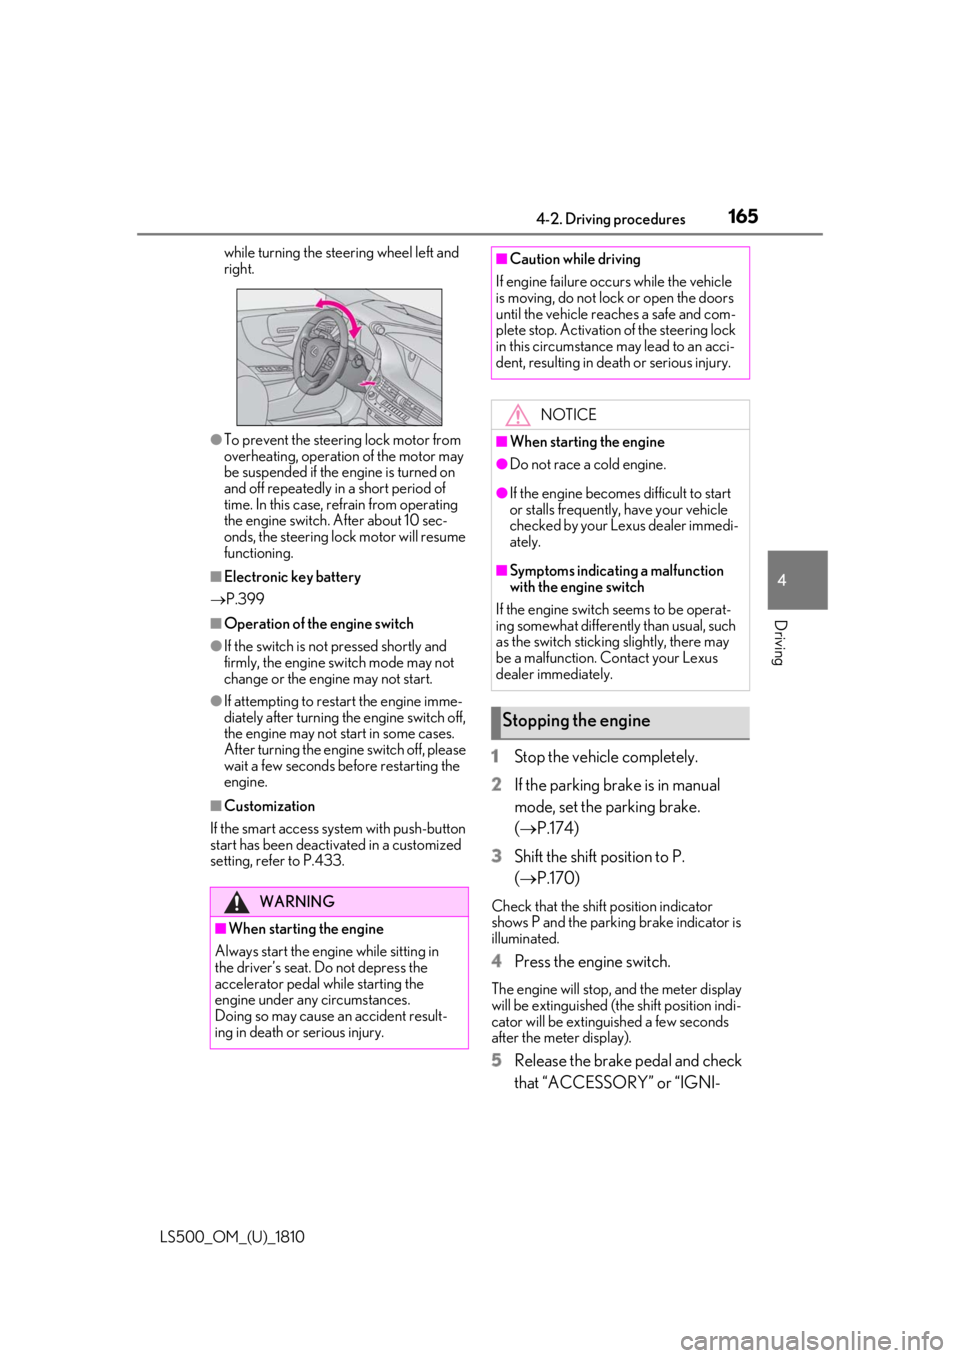
To prevent the steering lock motor from
overheating, operation of the motor may
be suspended if the engine is turned on
and off repeatedly in a short period of
time. In this case, refrain from operating
the engine switch. After about 10 sec-
onds, the steering lock motor will resume
functioning.■
Electronic key battery
P.399■
Operation of the engine switch●
If the switch is not pressed shortly and
firmly, the engine switch mode may not
change or the engine may not start.●
If attempting to restart the engine imme-
diately after turning the engine switch off,
the engine may not start in some cases.
After turning the engine switch off, please
wait a few seconds before restarting the
engine.■
Customization
If the smart access sy stem with push-button
start has been deactivated in a customized
setting, refer to P.433. 1 Stop the vehicle completely.
2 If the parking brake is in manual
mode, set the parking brake.
( P.174)
3 Shift the shift position to P.
( P.170) Check that the shift position indicator
shows P and the parking brake indicator is
illuminated.
4 Press the engine switch. The engine will stop, and the meter display
will be extinguished (the shift position indi-
cator will be extinguished a few seconds
after the meter display).
5 Release the brake pedal and check
that “ACCESSORY” or “IGNI-WARNING
■
When starting the engine
Always start the engine while sitting in
the driver’s seat. Do not depress the
accelerator pedal while starting the
engine under any circumstances.
Doing so may cause an accident result-
ing in death or serious injury. ■
Caution while driving
If engine failure occurs while the vehicle
is moving, do not lock or open the doors
until the vehicle reaches a safe and com-
plete stop. Activation of the steering lock
in this circumstance may lead to an acci-
dent, resulting in death or serious injury.
NOTICE■
When starting the engine ●
Do not race a cold engine. ●
If the engine becomes difficult to start
or stalls frequently, have your vehicle
checked by your Lexus dealer immedi-
ately. ■
Symptoms indicating a malfunction
with the engine switch
If the engine switch seems to be operat-
ing somewhat differently than usual, such
as the switch sticking slightly, there may
be a malfunction. Contact your Lexus
dealer immediately.
Stopping the engine
Page 177 of 512
1774-2. Driving procedures
LS500_OM_(U)_1810 4
Driving
Press the brake hold switch to turn the
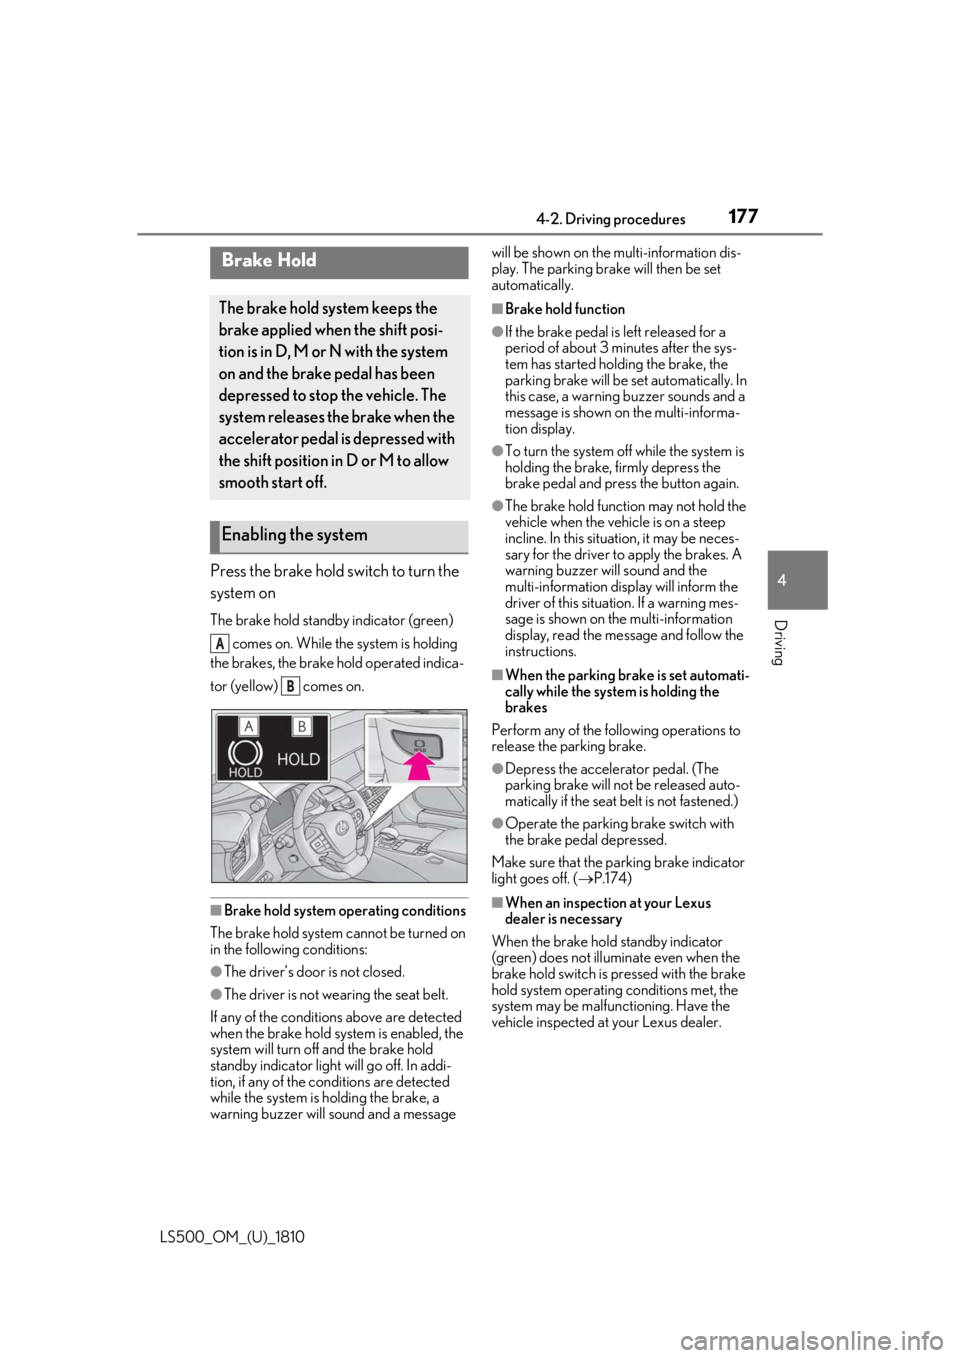
system on The brake hold standby indicator (green)
comes on. While the system is holding
the brakes, the brake hold operated indica-
tor (yellow) comes on.
■
Brake hold system operating conditions
The brake hold system cannot be turned on
in the following conditions:
●
The driver’s door is not closed.
●
The driver is not wearing the seat belt.
If any of the conditions above are detected
when the brake hold system is enabled, the
system will turn off and the brake hold
standby indicator light will go off. In addi-
tion, if any of the conditions are detected
while the system is holding the brake, a
warning buzzer will sound and a message will be shown on the multi-information dis-
play. The parking brake will then be set
automatically. ■
Brake hold function ●
If the brake pedal is left released for a
period of about 3 mi nutes after the sys-
tem has started holding the brake, the
parking brake will be set automatically. In
this case, a warning buzzer sounds and a
message is shown on the multi-informa-
tion display. ●
To turn the system off while the system is
holding the brake, firmly depress the
brake pedal and press the button again. ●
The brake hold function may not hold the
vehicle when the vehicle is on a steep
incline. In this situation, it may be neces-
sary for the driver to apply the brakes. A
warning buzzer will sound and the
multi-information display will inform the
driver of this situat ion. If a warning mes-
sage is shown on the multi-information
display, read the message and follow the
instructions. ■
When the parking brake is set automati-
cally while the system is holding the
brakes
Perform any of the following operations to
release the parking brake. ●
Depress the accelerator pedal. (The
parking brake will not be released auto-
matically if the seat belt is not fastened.) ●
Operate the parking brake switch with
the brake pedal depressed.
Make sure that the pa rking brake indicator
light goes off. ( P.174)
■
When an inspection at your Lexus
dealer is necessary
When the brake hold standby indicator
(green) does not illuminate even when the
brake hold switch is pressed with the brake
hold system operating conditions met, the
system may be malfun ctioning. Have the
vehicle inspected at your Lexus dealer.Brake Hold The brake hold system keeps the
brake applied when the shift posi-
tion is in D, M or N with the system
on and the brake pedal has been
depressed to stop the vehicle. The
system releases the brake when the
accelerator pedal is depressed with
the shift position in D or M to allow
smooth start off.
Enabling the system A
B
Page 291 of 512
2914-5. Using the driving support systems
LS500_OM_(U)_1810 4
Driving *
:If equipped
■
Situations in which the vehicle height
control may not operate properly●
In the following situations, the vehicle
height may change slowly or may not
change to the correct height:
• When the vehicle comes into contact
with snow, ice, stone, etc.
• When the ambient temperature is low
• When the accumulator tank pressure is
low●
In the following situations, the vehicle
height may not change:
• If the hood or trunk is not fully closed
• If the brake pedal depressed and the
vehicle is stopped
• When the vehicle is on a significantly
uneven or undulating road
• When the vehicle is on a slanted road or a
slope
■
Operating sound of the air suspension
compressor and valves
When the vehicle height is changed, such
as due to passengers entering the vehicle or
cargo being loaded, or when the vehicle
height is changed using the vehicle height
adjustment switch, the air suspension com-
pressor and valves may operate and a sound may be heard. This does not indicate
a malfunction. ■
When the accumulator tank pressure is
low
When the accumulator tank pressure is low,
the air suspension compressor and valves
may operate repeatedly even though the
vehicle height is not being changed. This
does not indicate a malfunction.
Electronically modulated air
suspension *
The height of the vehicle when driv-
ing can be selected using the vehi-
cle height adjustment switch. The
selected height level will be main-
tained regardless of the number of
passengers or weight of cargo.
Additionally, setti ngs of the follow-
ing functions can be changed:
Enabling/Disabling controls of
access mode
Temporarily disabling vehicle
height control WARNING■
Situations in whic h the operation of
the electronically modulated air sus-
pension should be temporarily dis-
abled
In the following situations, make sure to
temporarily disable all functions of the
vehicle height control of the electroni-
cally modulated air suspension and then
stop the engine. Otherwise, the vehicle
height may change and part of your body
may be caught under the vehicle, possi-
bly causing injury. ●
When the vehicle is parked on a curb ●
If any of the wheels is not touching the
ground ●
If the vehicle needs to be jacked up
●
If the vehicle is to be tied down
●
If the vehicle is to be towed
■
Vehicle height control precautions
In the following situations, make sure to
check the safety of the area around the
vehicle, as the vehicle height may change
and part of someone’s body may be
caught in the vehicle, possibly causing
injury or the vehicle may be damaged.
●
When opening a door
●
When unlocking the doors using the
smart access system with push-button
start
●
When changing the vehicle height
using the vehicle height adjustment
switch
Page 354 of 512
354 5-6. Using the other interior features
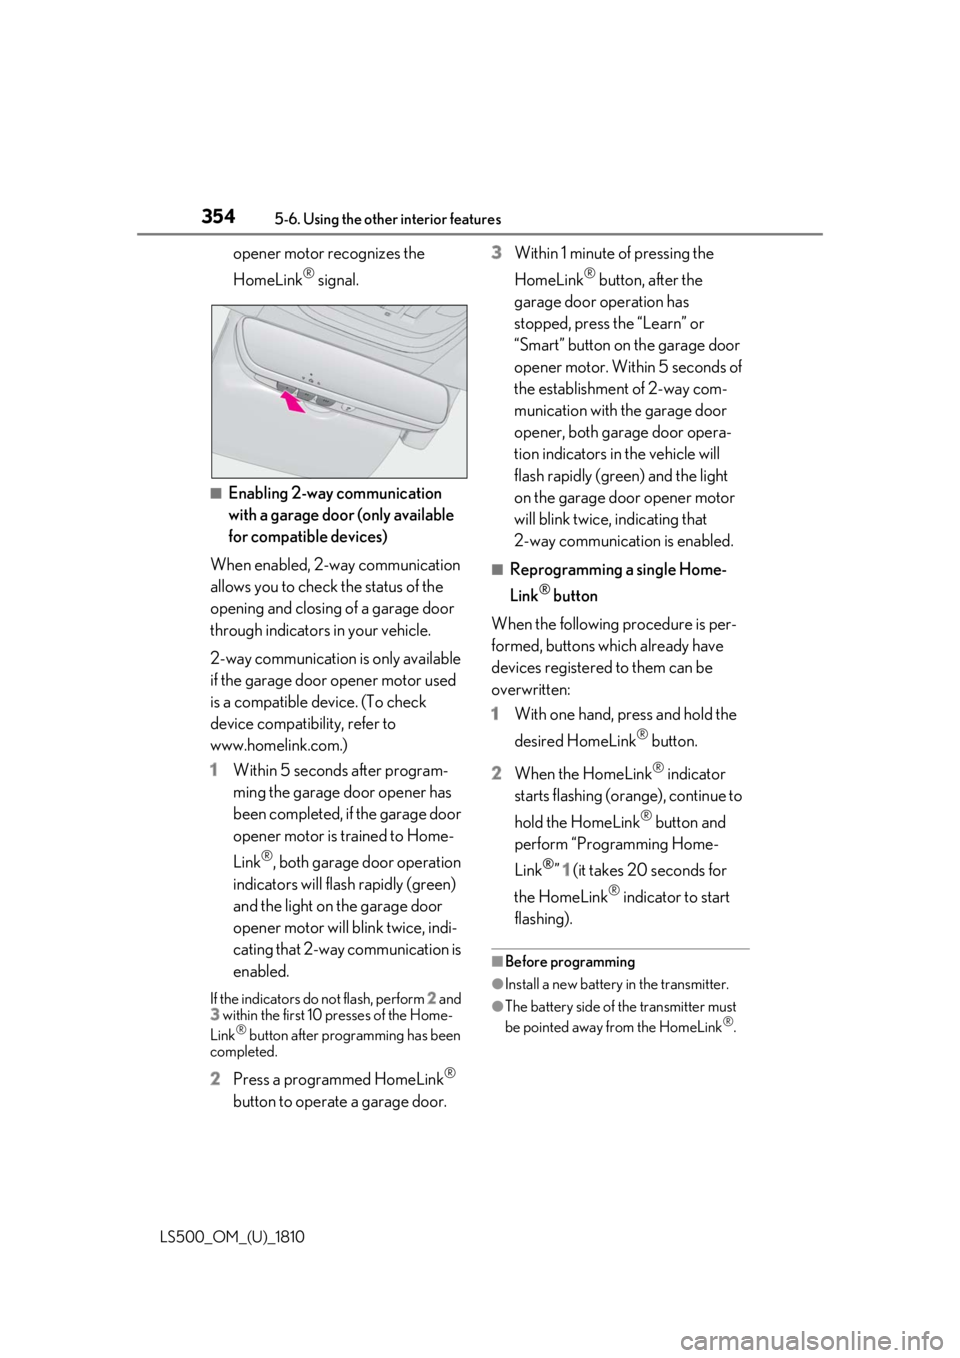
LS500_OM_(U)_1810 opener motor recognizes the
HomeLink ®
signal.
■
Enabling 2-way communication
with a garage door (only available
for compatible devices)
When enabled, 2-way communication
allows you to check the status of the
opening and closing of a garage door
through indicators in your vehicle.
2-way communication is only available
if the garage door opener motor used
is a compatible device. (To check
device compatibility, refer to
www.homelink.com.)
1 Within 5 seconds after program-
ming the garage door opener has
been completed, if the garage door
opener motor is trained to Home-
Link ®
, both garage door operation
indicators will flash rapidly (green)
and the light on the garage door
opener motor will b link twice, indi-
cating that 2-way communication is
enabled.If the indicators do not flash, perform 2 and
3 within the first 10 presses of the Home-
Link ®
button after programming has been
completed.
2 Press a programmed HomeLink ®
button to operate a garage door. 3 Within 1 minute of pressing the
HomeLink ®
button, after the
garage door operation has
stopped, press the “Learn” or
“Smart” button on the garage door
opener motor. Within 5 seconds of
the establishment of 2-way com-
munication with the garage door
opener, both garage door opera-
tion indicators in the vehicle will
flash rapidly (green) and the light
on the garage door opener motor
will blink twice, indicating that
2-way communication is enabled. ■
Reprogramming a single Home-
Link ®
button
When the following procedure is per-
formed, buttons which already have
devices registered to them can be
overwritten:
1 With one hand, press and hold the
desired HomeLink ®
button.
2 When the HomeLink ®
indicator
starts flashing (orange), continue to
hold the HomeLink ®
button and
perform “Programming Home-
Link ®
” 1 (it takes 20 seconds for
the HomeLink ®
indicator to start
flashing). ■
Before programming
●
Install a new battery in the transmitter.
●
The battery side of the transmitter must
be pointed away from the HomeLink ®
.