light LEXUS LS500H 2020 Owners Manual
[x] Cancel search | Manufacturer: LEXUS, Model Year: 2020, Model line: LS500H, Model: LEXUS LS500H 2020Pages: 516, PDF Size: 10.38 MB
Page 356 of 516
3565-6. Using the other interior features
a stepladder or other sturdy, safe
device to reach the “Learn” or
“Smart” button on the garage door
opener motor.
■Programming HomeLink®
Steps 1 through 3 must be performed
within 60 seconds, otherwise the indi-
cator light will stop flashing and pro-
gramming will not be able to be
completed.
1 Press and release the HomeLink
®
button you want to program and
check that the HomeLink
® indica-
tor light flashes (orange).
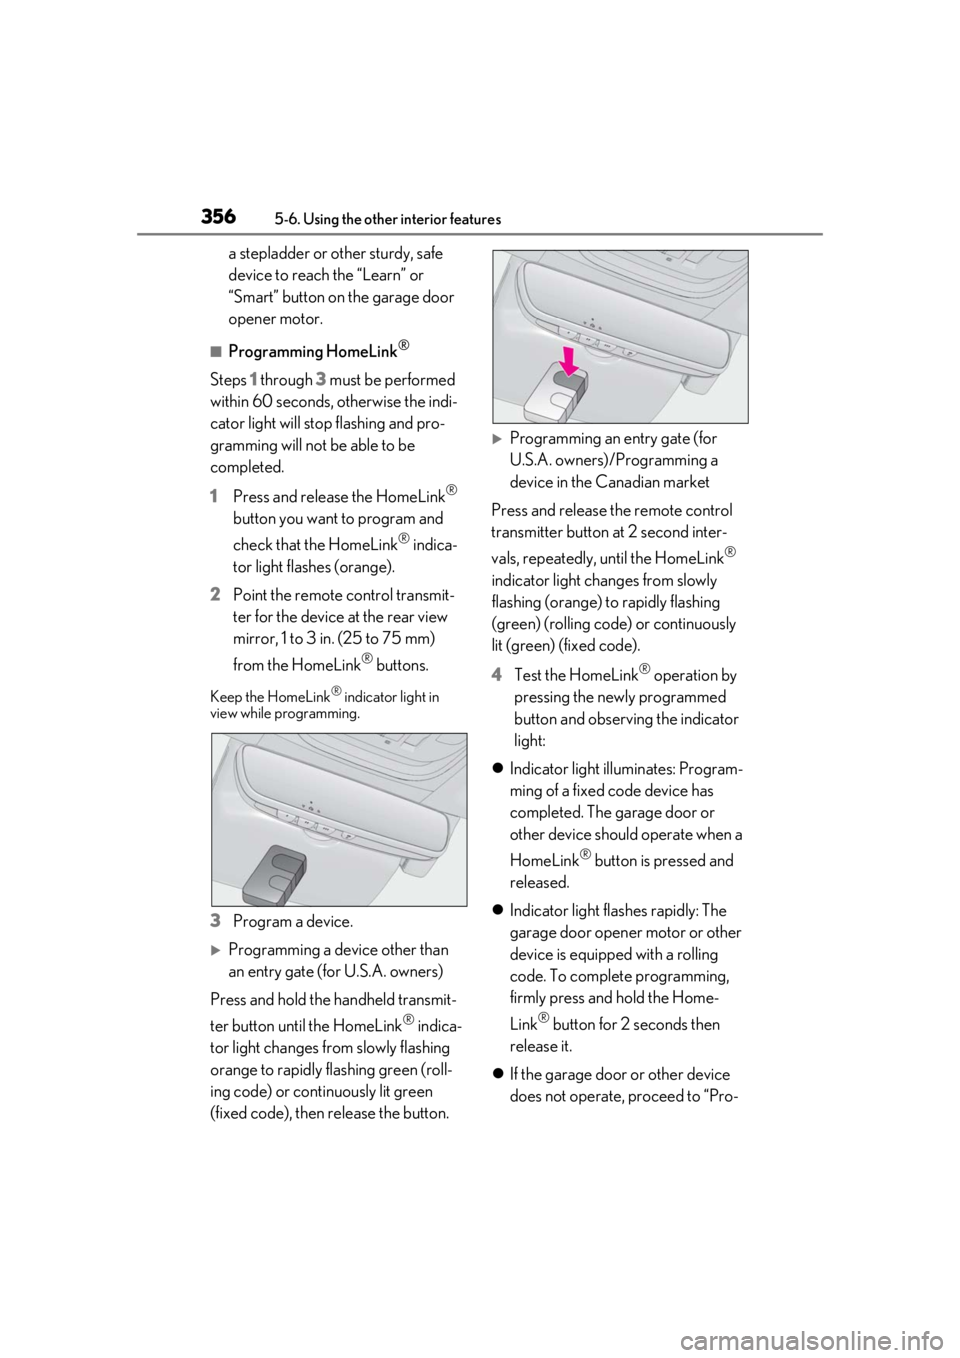
2 Point the remote control transmit-
ter for the device at the rear view
mirror, 1 to 3 in. (25 to 75 mm)
from the HomeLink
® buttons.
Keep the HomeLink® indicator light in
view while programming.
3 Program a device.
Programming a device other than
an entry gate (for U.S.A. owners)
Press and hold the handheld transmit-
ter button until the HomeLink
® indica-
tor light changes from slowly flashing
orange to rapidly flashing green (roll-
ing code) or continuously lit green
(fixed code), then release the button.
Programming an entry gate (for
U.S.A. owners)/Programming a
device in the Canadian market
Press and release the remote control
transmitter button at 2 second inter-
vals, repeatedly, until the HomeLink
®
indicator light changes from slowly
flashing (orange) to rapidly flashing
(green) (rolling code) or continuously
lit (green) (fixed code).
4 Test the HomeLink
® operation by
pressing the newly programmed
button and observing the indicator
light:
Indicator light illuminates: Program-
ming of a fixed code device has
completed. The garage door or
other device should operate when a
HomeLink
® button is pressed and
released.
Indicator light flashes rapidly: The
garage door opener motor or other
device is equipped with a rolling
code. To complete programming,
firmly press and hold the Home-
Link
® button for 2 seconds then
release it.
If the garage door or other device
does not operate, proceed to “Pro-
Page 357 of 516
3575-6. Using the other interior features
5
Interior features
gramming a rolling code system”.
5 Repeat the steps above to program
another device for any of the
remaining HomeLink
® buttons.
■Programming a rolling code sys-
tem
2 or more people may be necessary to
complete rolling code programming.
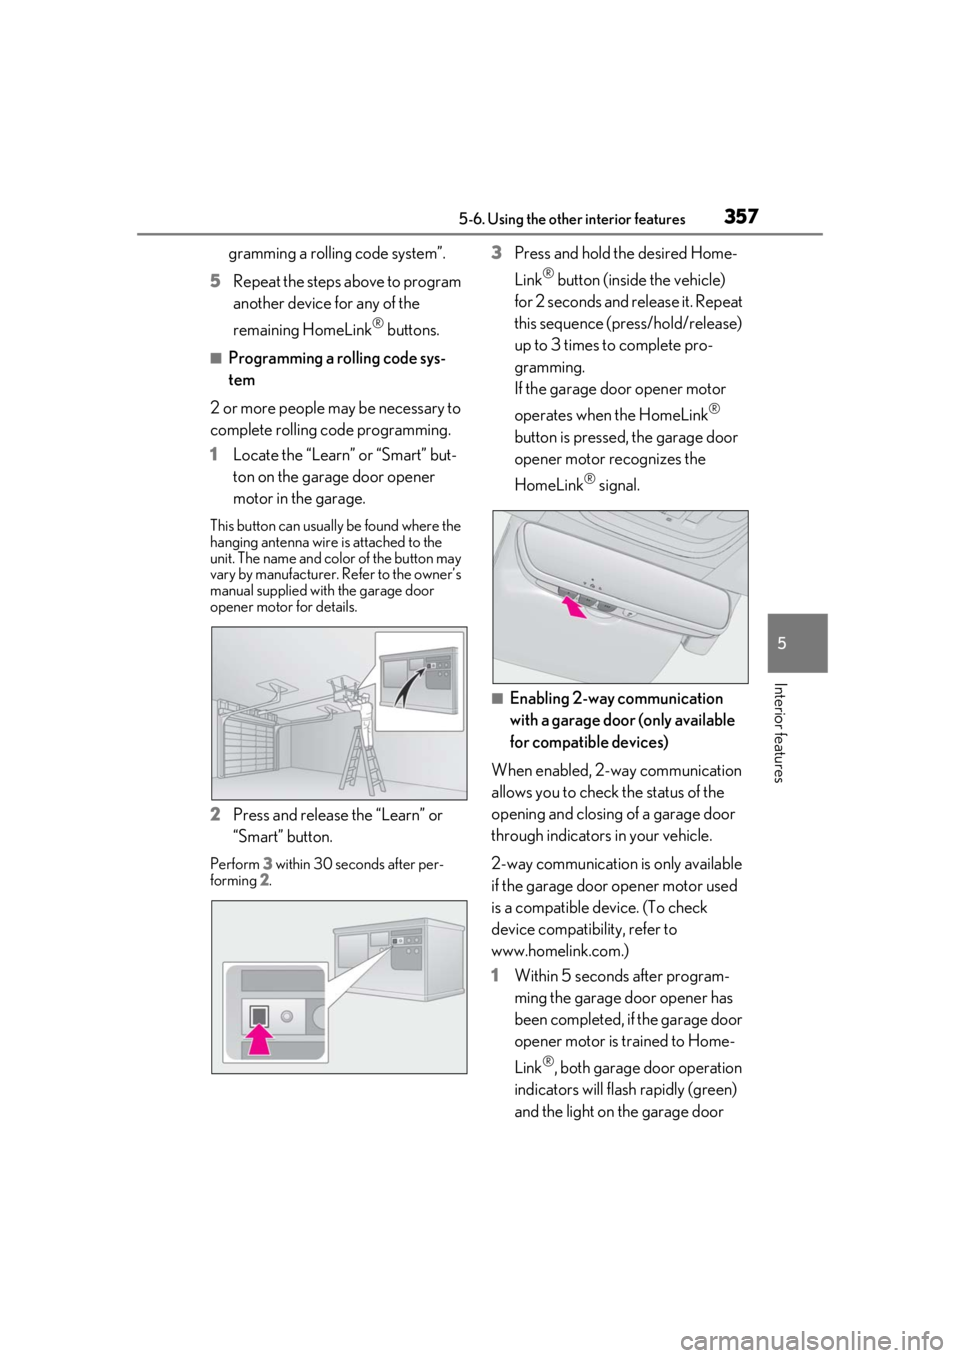
1 Locate the “Learn” or “Smart” but-
ton on the garage door opener
motor in the garage.
This button can usuall y be found where the
hanging antenna wire is attached to the
unit. The name and color of the button may
vary by manufacturer. Refer to the owner’s
manual supplied with the garage door
opener motor for details.
2 Press and release the “Learn” or
“Smart” button.
Perform 3 within 30 seconds after per-
forming 2.
3 Press and hold the desired Home-
Link
® button (inside the vehicle)
for 2 seconds and release it. Repeat
this sequence (press/hold/release)
up to 3 times to complete pro-
gramming.
If the garage door opener motor
operates when the HomeLink
®
button is pressed, the garage door
opener motor recognizes the
HomeLink
® signal.
■Enabling 2-way communication
with a garage door (only available
for compatible devices)
When enabled, 2-way communication
allows you to check the status of the
opening and closing of a garage door
through indicators in your vehicle.
2-way communication is only available
if the garage door opener motor used
is a compatible device. (To check
device compatibility, refer to
www.homelink.com.)
1 Within 5 seconds after program-
ming the garage door opener has
been completed, if the garage door
opener motor is trained to Home-
Link
®, both garage door operation
indicators will flash rapidly (green)
and the light on the garage door
Page 358 of 516
3585-6. Using the other interior features
opener motor will blink twice, indi-
cating that 2-way communication is
enabled.
If the indicators do not flash, perform 2 and
3 within the first 10 presses of the Home-
Link
® button after programming has been
completed.
2 Press a programmed HomeLink®
button to operate a garage door.
3 Within 1 minute of pressing the
HomeLink
® button, after the
garage door operation has
stopped, press the “Learn” or
“Smart” button on the garage door
opener motor. Within 5 seconds of
the establishment of 2-way com-
munication with the garage door
opener, both garage door opera-
tion indicators in the vehicle will
flash rapidly (green) and the light
on the garage door opener motor
will blink twice, indicating that
2-way communication is enabled.
■Reprogramming a single Home-
Link
® button
When the following procedure is per-
formed, buttons which already have
devices registered to them can be
overwritten:
1 With one hand, press and hold the
desired HomeLink
® button.
2 When the HomeLink
® indicator
starts flashing (orange), continue to
hold the HomeLink
® button and
perform “Programming Home-
Link
®” 1 (it takes 20 seconds for the HomeLink
® indicator to start
flashing).
■Before programming
●Install a new battery in the transmitter.
●The battery side of the transmitter must
be pointed away from the HomeLink®.
Press the appropriate HomeLink®
button. The HomeLink
® indicator light
should turn on.
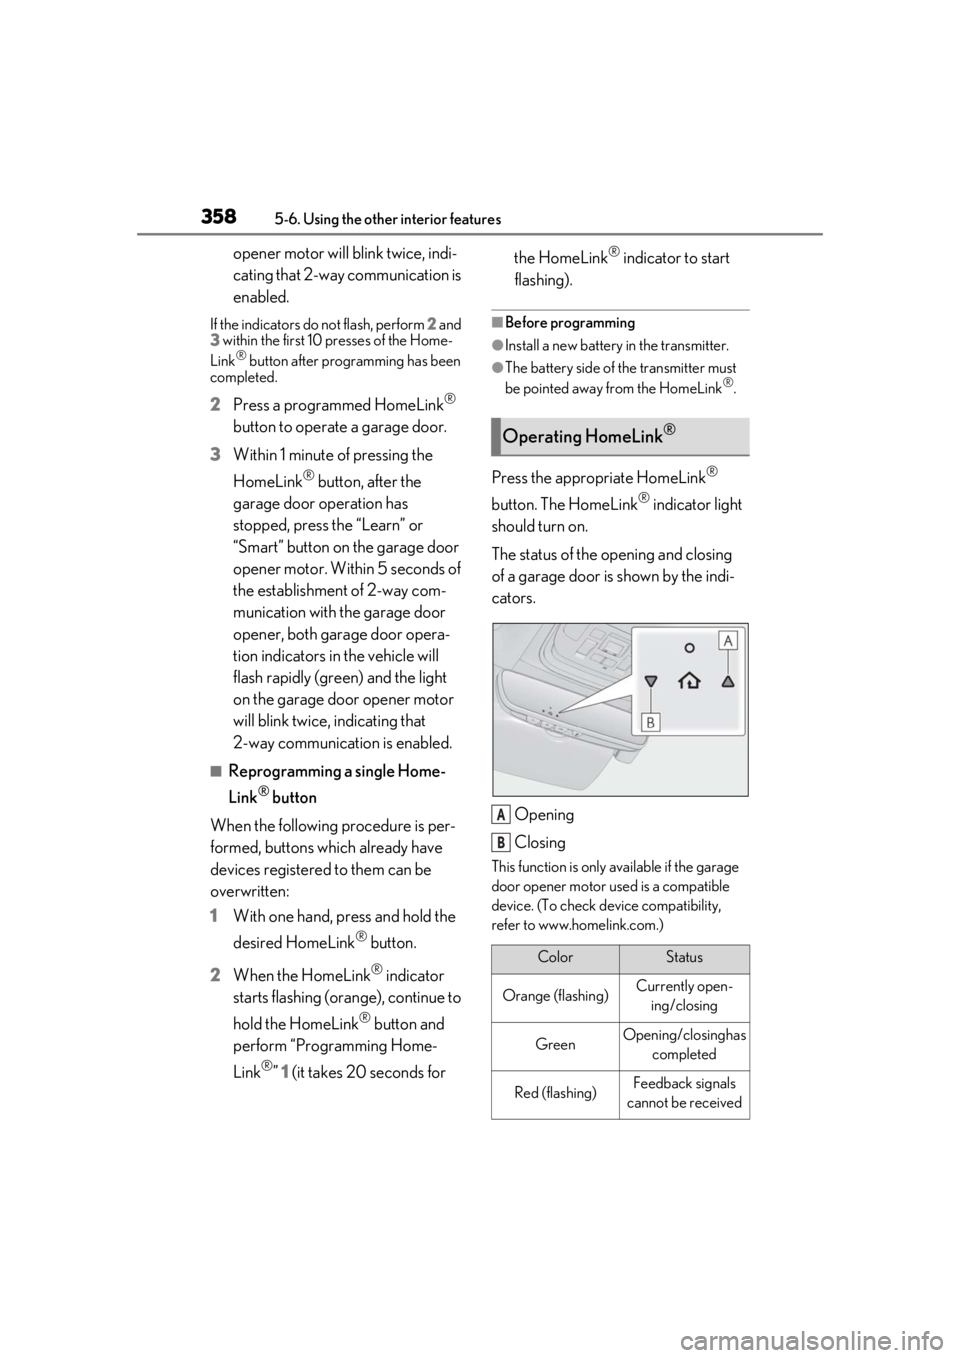
The status of the opening and closing
of a garage door is shown by the indi-
cators.
Opening
Closing
This function is only available if the garage
door opener motor used is a compatible
device. (To check device compatibility,
refer to www.homelink.com.)
Operating HomeLink®
ColorStatus
Orange (flashing)Currently open- ing/closing
GreenOpening/closing has completed
Red (flashing)Feedback signals
cannot be received
A
B
Page 359 of 516
3595-6. Using the other interior features
5
Interior features
The indicators can operate within
approximately 820 ft. (250 m) of the
garage door. However, if there are
obstructions between the garage door
and the vehicle, such as houses and
trees, feedback signals from the
garage door may not be received.
To recall the previous door operation
status, press and release either Home-
Link
® buttons and or and simultaneously. The
last recorded status will be displayed
for 3 seconds.
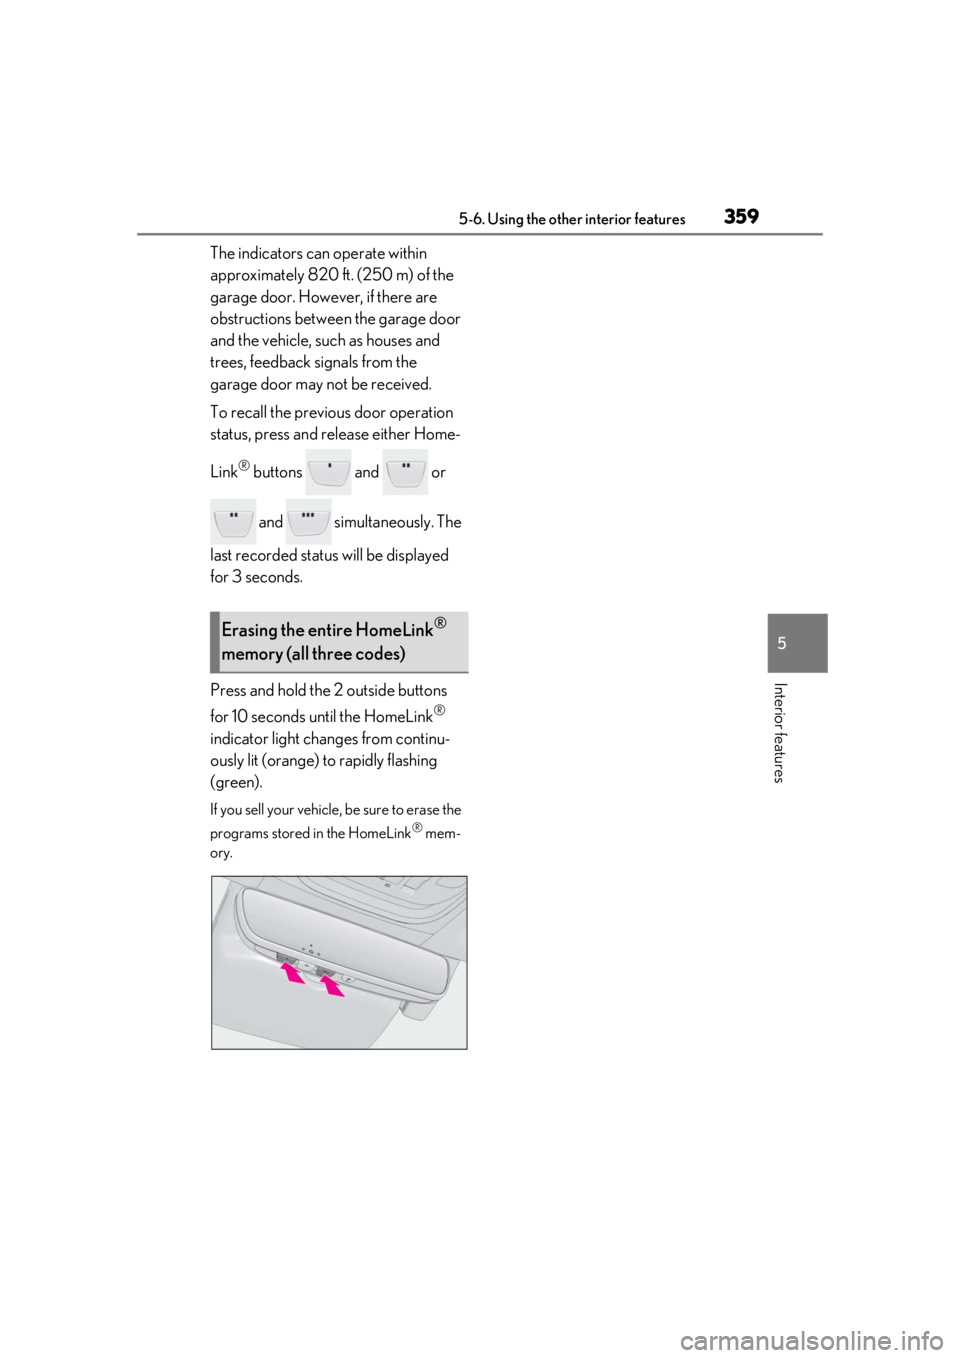
Press and hold the 2 outside buttons
for 10 seconds until the HomeLink
®
indicator light changes from continu-
ously lit (orange) to rapidly flashing
(green).
If you sell your vehicle, be sure to erase the
programs stored in the HomeLink
® mem-
ory.
Erasing the entire HomeLink®
memory (all three codes)
Page 361 of 516
361
6
6
Maintenance and care
Maintenance and care
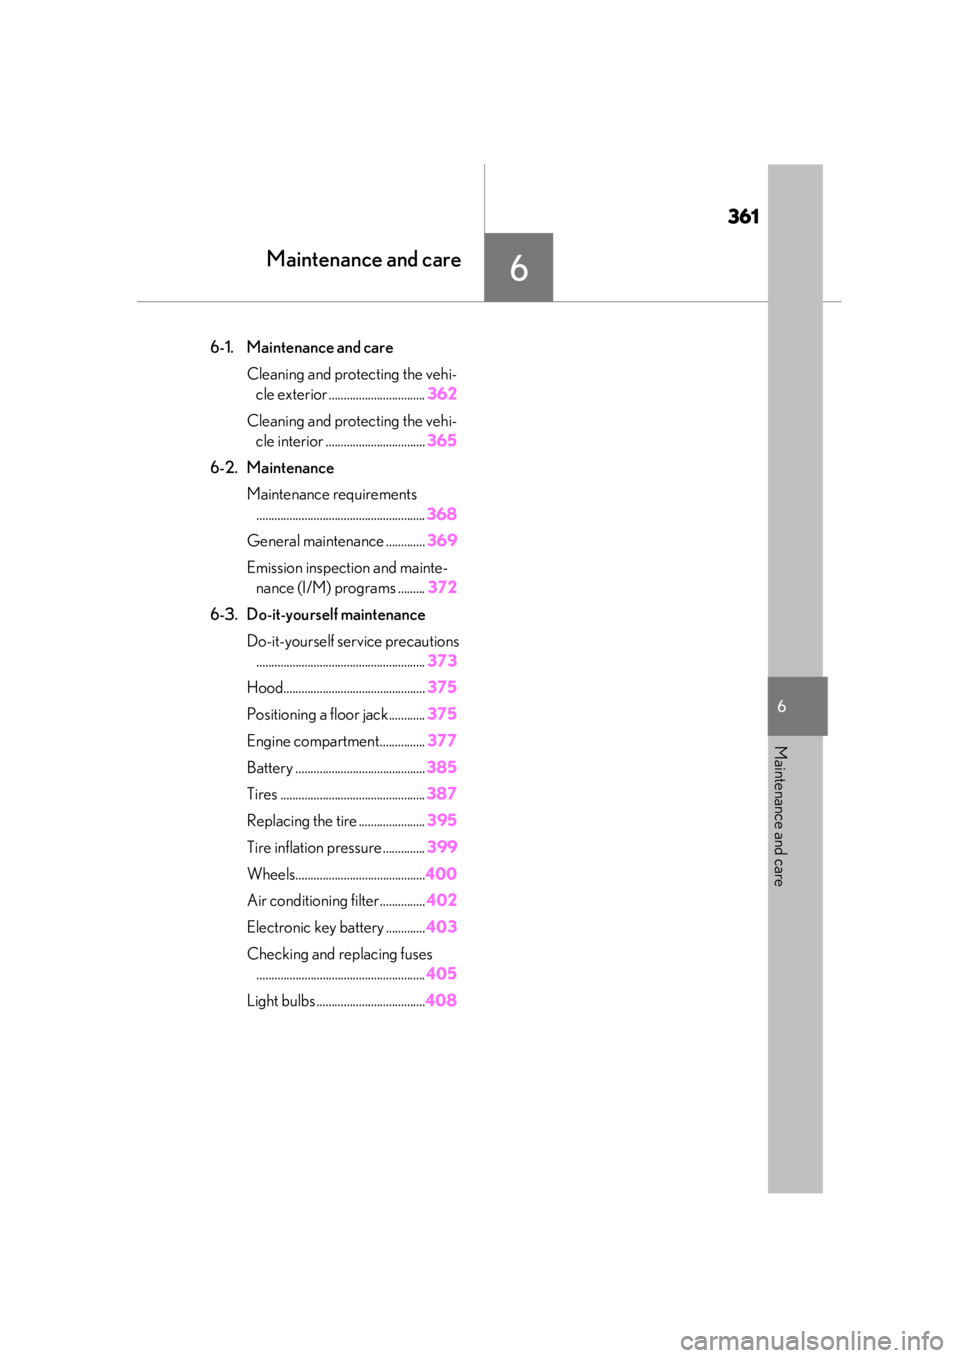
.6-1. Maintenance and careCleaning and protecting the vehi-cle exterior ................................ 362
Cleaning and protecting the vehi- cle interior ................................. 365
6-2. Maintenance Maintenance requirements........................................................ 368
General maintenance ............. 369
Emission inspection and mainte- nance (I/M) programs ......... 372
6-3. Do-it-yourself maintenance Do-it-yourself service precautions........................................................ 373
Hood............................................... 375
Positioning a floor jack............ 375
Engine compartment............... 377
Battery ........................................... 385
Tires ................................................ 387
Replacing the tire ...................... 395
Tire inflation pressure .............. 399
Wheels........................................... 400
Air conditioning filter...............402
Electronic key battery ............. 403
Checking and replacing fuses ........................................................ 405
Light bulbs .................................... 408
Page 364 of 516
3646-1. Maintenance and care
WARNING
■Precaution regarding the rear
bumper
If the paint of the rear bumper is chipped
or scratched, the following systems may
not function correctly. If this occurs, con-
sult your Lexus dealer.
●Lexus Safety System + A (if equipped)
●BSM (if equipped)
●RCTA (if equipped)
●PKSB (if equipped)
NOTICE
■To prevent paint deterioration and
corrosion on the body and compo-
nents (aluminum wheels, etc.)
●Wash the vehicle immediately in the
following cases:
• After driving near the sea coast
• After driving on salted roads
• If coal tar or tree sap is present on the paint surface
• If dead insects, insect droppings or bird droppings are present on the
paint surface
• After driving in an area contaminated with soot, oily smoke, mine dust, iron
powder or chemical substances
• If the vehicle becomes heavily soiled with dust or mud
• If liquids such as benzene and gasoline are spilled on the paint surface
●If the paint is chip ped or scratched,
have it repaired immediately.
●To prevent the wheels from corroding,
remove any dirt and store in a place
with low humidity when storing the
wheels.
■Cleaning the exterior lights
●Wash carefully. Do not use organic
substances or scrub with a hard brush.
This may damage the surfaces of the
lights.
●Do not apply wax to the surfaces of the
lights.
Wax may cause damage to the lenses.
■When using an automatic car wash
Set the wiper switch to the off position.
If the wiper switch is in “AUTO”, the wip-
ers may operate and the wiper blades
may be damaged.
■When using a high pressure car wash
●When washing the vehicle, do not
spray the camera or its surrounding
area directly with a high pressure
washer. Shock applied from high pres-
sure water may cause the device to not
operate normally.
●Do not bring the nozzle tip close to
boots (rubber or resin manufactured
cover), connectors or the following
parts. The parts may be damaged if
they come into contact with high-pres-
sure water.
• Traction related parts
• Steering parts
• Suspension parts
• Brake parts
●Keep the cleaning nozzle at least 11.9
in. (30 cm) away from the vehicle
body. Otherwise resin section, such as
moldings and bumpers, may be
deformed and damaged.
Also, do not continuously hold the nozzle
in the same place.
●Do not spray the lower part of the
windshield continuously.
If water enters the air conditioning sys-
tem intake located near the lower part of
the windshield, the air conditioning sys-
tem may not operate correctly.
Page 366 of 516
3666-1. Maintenance and care
Remove dirt using a water-damp-
ened soft cloth or synthetic chamois.
Wipe the surface with a dry, soft
cloth to remove any remaining
moisture.
■Cleaning the areas with satin-finish
metal accents
The metal areas use a layer of real metal for
the surface. It is necessary to clean them
regularly. If dirty area s are left uncleaned for
long periods of time, they may be difficult to
clean.
Remove dirt and dust using a vac-
uum cleaner.
Wipe off any excess dirt and dust
with a soft cloth dampened with
diluted detergent.
Use a diluted water solution of approxi-
mately 5% neutral wool detergent.
Wring out any excess water from
the cloth and thoroughly wipe off all
remaining traces of detergent.
Wipe the surface with a dry, soft
cloth to remove any remaining
moisture. Allow the leather to dry in
a shaded and ventilated area.
■Caring for leather areas
Lexus recommends cleani ng the interior of
the vehicle at least twice a year to maintain
the quality of the vehicle’s interior.
NOTICE
■Preventing damage to leather sur-
faces
Observe the following precautions to
avoid damage to and deterioration of
leather surfaces:
●Remove any dust or dirt from leather
surfaces immediately.
●Do not expose the vehicle to direct
sunlight for extended periods of time.
Park the vehicle in the shade, espe-
cially during summer.
●Do not place items made of vinyl, plas-
tic, or containing wax on the uphol-
stery, as they may stick to the leather
surface if the vehicle interior heats up
significantly.
■Water on the floor
Do not wash the vehicle floor with water.
Vehicle systems such as the audio system
may be damaged if water comes into
contact with electrical components such
as the audio system above or under the
floor of the vehicle. Water may also
cause the body to rust.
■When cleaning the inside of the wind-
shield
Do not allow glass cleaner to contact the
lens. Also, do not touch the lens.
(
P.192, 199)
■Cleaning the inside of the rear win-
dow
●Do not use glass cleaner to clean the
rear window, as this may cause dam-
age to the rear window defogger
heater wires or antenna. Use a cloth
dampened with lukewarm water to
gently wipe the window clean. Wipe
the window in strokes running parallel
to the heater wires or antenna.
●Be careful not to scratch or damage
the heater wires or antenna.
Cleaning the areas with satin-fin-
ish metal accents
Cleaning the leather areas
Page 370 of 516
3706-2. Maintenance
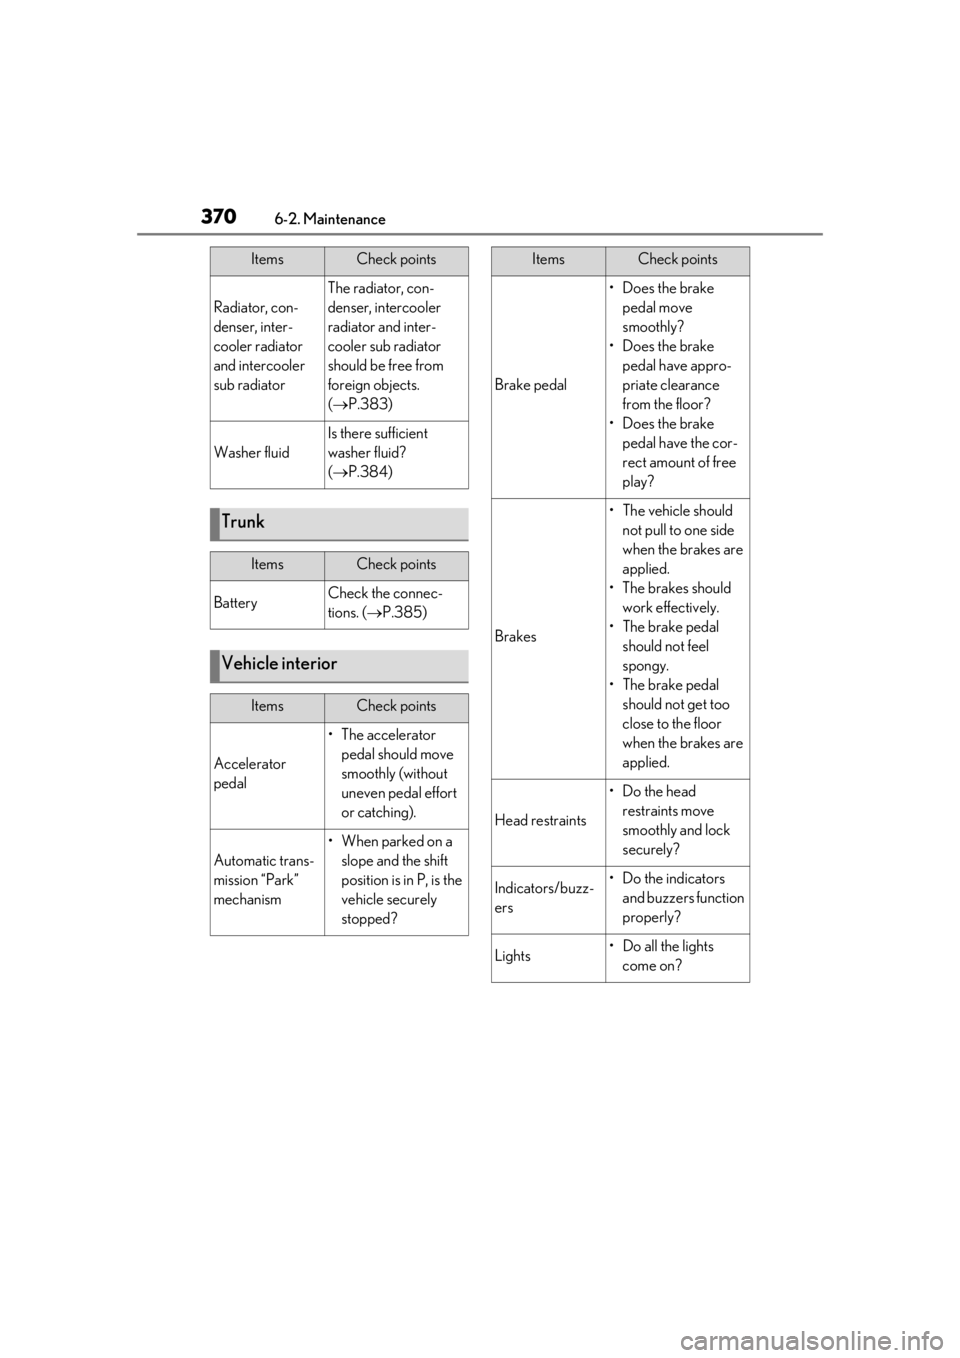
Radiator, con-
denser, inter-
cooler radiator
and intercooler
sub radiator
The radiator, con-
denser, intercooler
radiator and inter-
cooler sub radiator
should be free from
foreign objects.
( P.383)
Washer fluid
Is there sufficient
washer fluid?
( P.384)
Trunk
ItemsCheck points
BatteryCheck the connec-
tions. ( P.385)
Vehicle interior
ItemsCheck points
Accelerator
pedal
• The accelerator
pedal should move
smoothly (without
uneven pedal effort
or catching).
Automatic trans-
mission “Park”
mechanism
•When parked on a slope and the shift
position is in P, is the
vehicle securely
stopped?
ItemsCheck points
Brake pedal
•Does the brake pedal move
smoothly?
•Does the brake pedal have appro-
priate clearance
from the floor?
•Does the brake pedal have the cor-
rect amount of free
play?
Brakes
• The vehicle should not pull to one side
when the brakes are
applied.
•The brakes should work effectively.
• The brake pedal should not feel
spongy.
• The brake pedal should not get too
close to the floor
when the brakes are
applied.
Head restraints
•Do the head restraints move
smoothly and lock
securely?
Indicators/buzz-
ers•Do the indicators and buzzers function
properly?
Lights• Do all the lights come on?
ItemsCheck points
Page 375 of 516
3756-3. Do-it-yourself maintenance
6
Maintenance and care
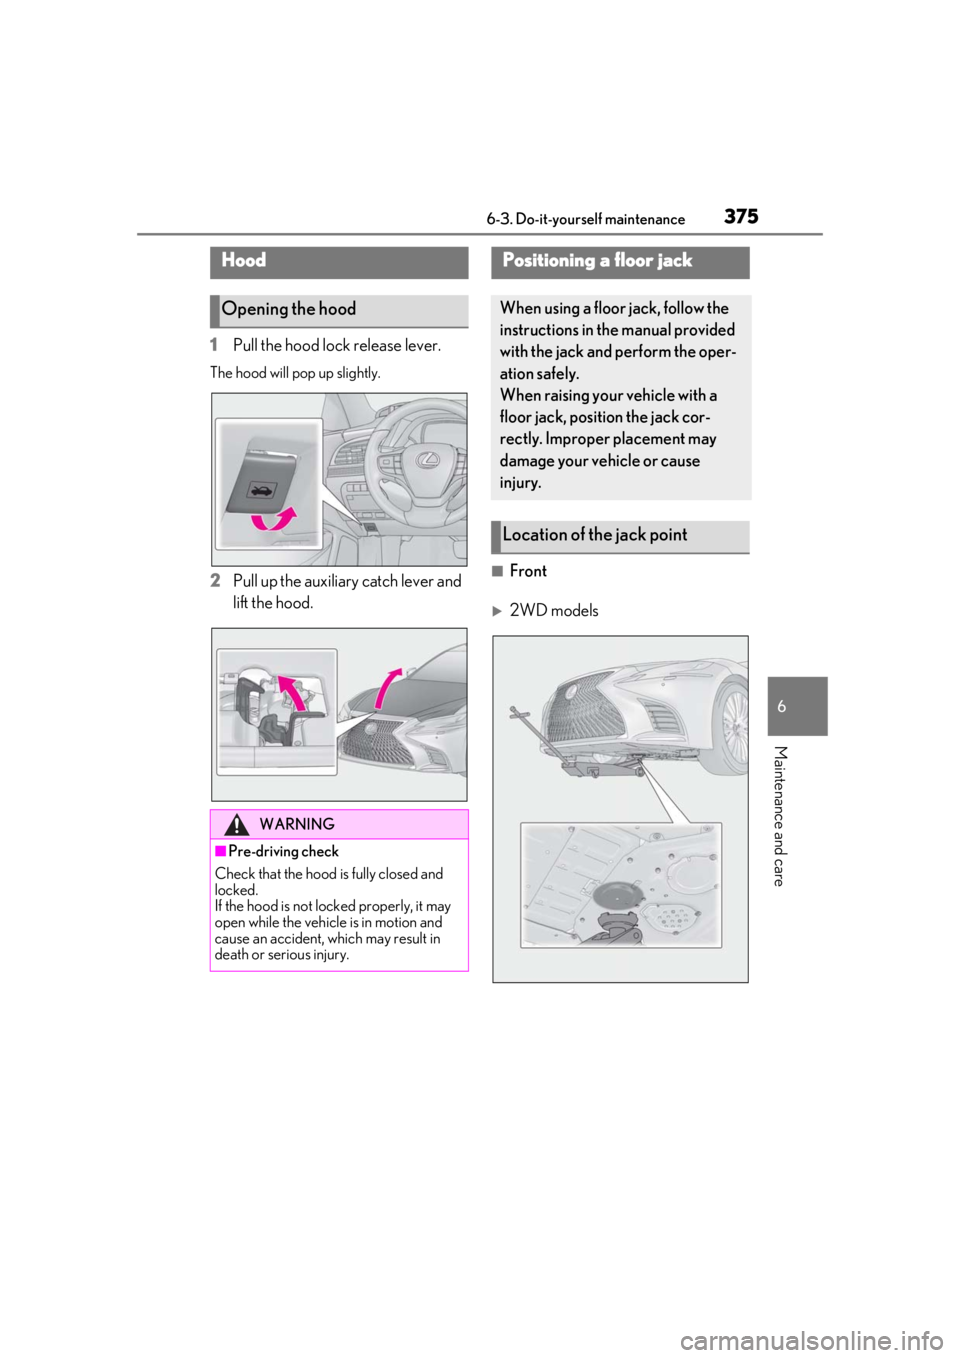
1Pull the hood lock release lever.
The hood will pop up slightly.
2Pull up the auxiliary catch lever and
lift the hood.■Front
2WD models
Hood
Opening the hood
WARNING
■Pre-driving check
Check that the hood is fully closed and
locked.
If the hood is not locked properly, it may
open while the vehicle is in motion and
cause an accident, which may result in
death or serious injury.
Positioning a floor jack
When using a floor jack, follow the
instructions in the manual provided
with the jack and perform the oper-
ation safely.
When raising your vehicle with a
floor jack, position the jack cor-
rectly. Improper placement may
damage your vehicle or cause
injury.
Location of the jack point
Page 384 of 516
3846-3. Do-it-yourself maintenance
a dangerous loss of braking efficiency. Use
only newly opened brake fluid.
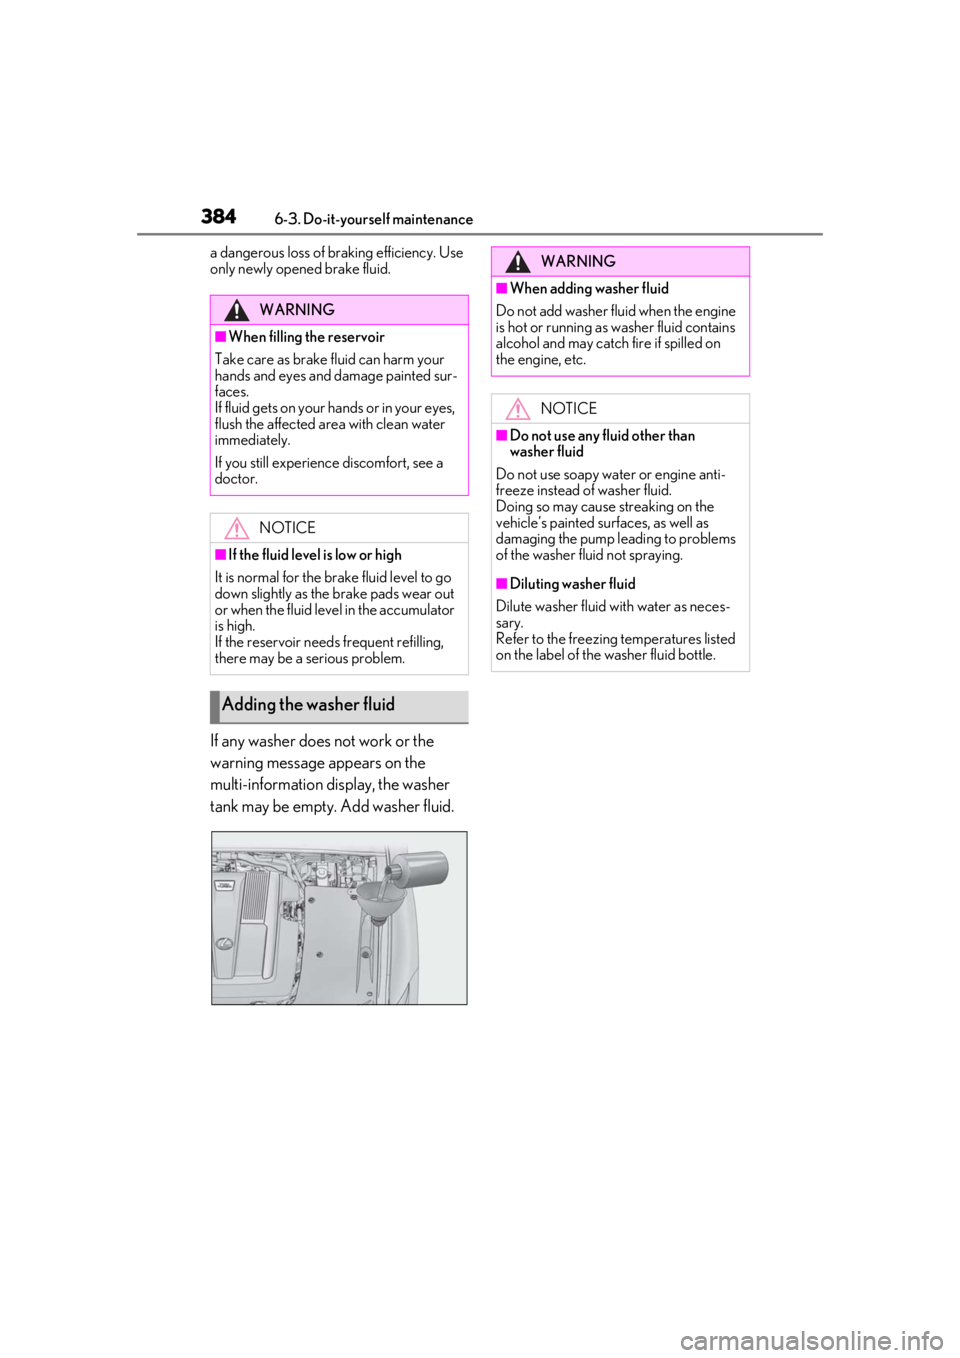
If any washer does not work or the
warning message appears on the
multi-information display, the washer
tank may be empty. Add washer fluid.
WARNING
■When filling the reservoir
Take care as brake fluid can harm your
hands and eyes and damage painted sur-
faces.
If fluid gets on your hands or in your eyes,
flush the affected area with clean water
immediately.
If you still experience discomfort, see a
doctor.
NOTICE
■If the fluid level is low or high
It is normal for the brake fluid level to go
down slightly as the brake pads wear out
or when the fluid level in the accumulator
is high.
If the reservoir need s frequent refilling,
there may be a serious problem.
Adding the washer fluid
WARNING
■When adding washer fluid
Do not add washer fluid when the engine
is hot or running as washer fluid contains
alcohol and may catch fire if spilled on
the engine, etc.
NOTICE
■Do not use any fluid other than
washer fluid
Do not use soapy water or engine anti-
freeze instead of washer fluid.
Doing so may cause streaking on the
vehicle’s painted surfaces, as well as
damaging the pump leading to problems
of the washer fluid not spraying.
■Diluting washer fluid
Dilute washer fluid with water as neces-
sary.
Refer to the freezing temperatures listed
on the label of the washer fluid bottle.