warning LEXUS LS500H 2020 Service Manual
[x] Cancel search | Manufacturer: LEXUS, Model Year: 2020, Model line: LS500H, Model: LEXUS LS500H 2020Pages: 516, PDF Size: 10.38 MB
Page 77 of 516
772-1. Instrument cluster
2
Vehicle status information and indicators
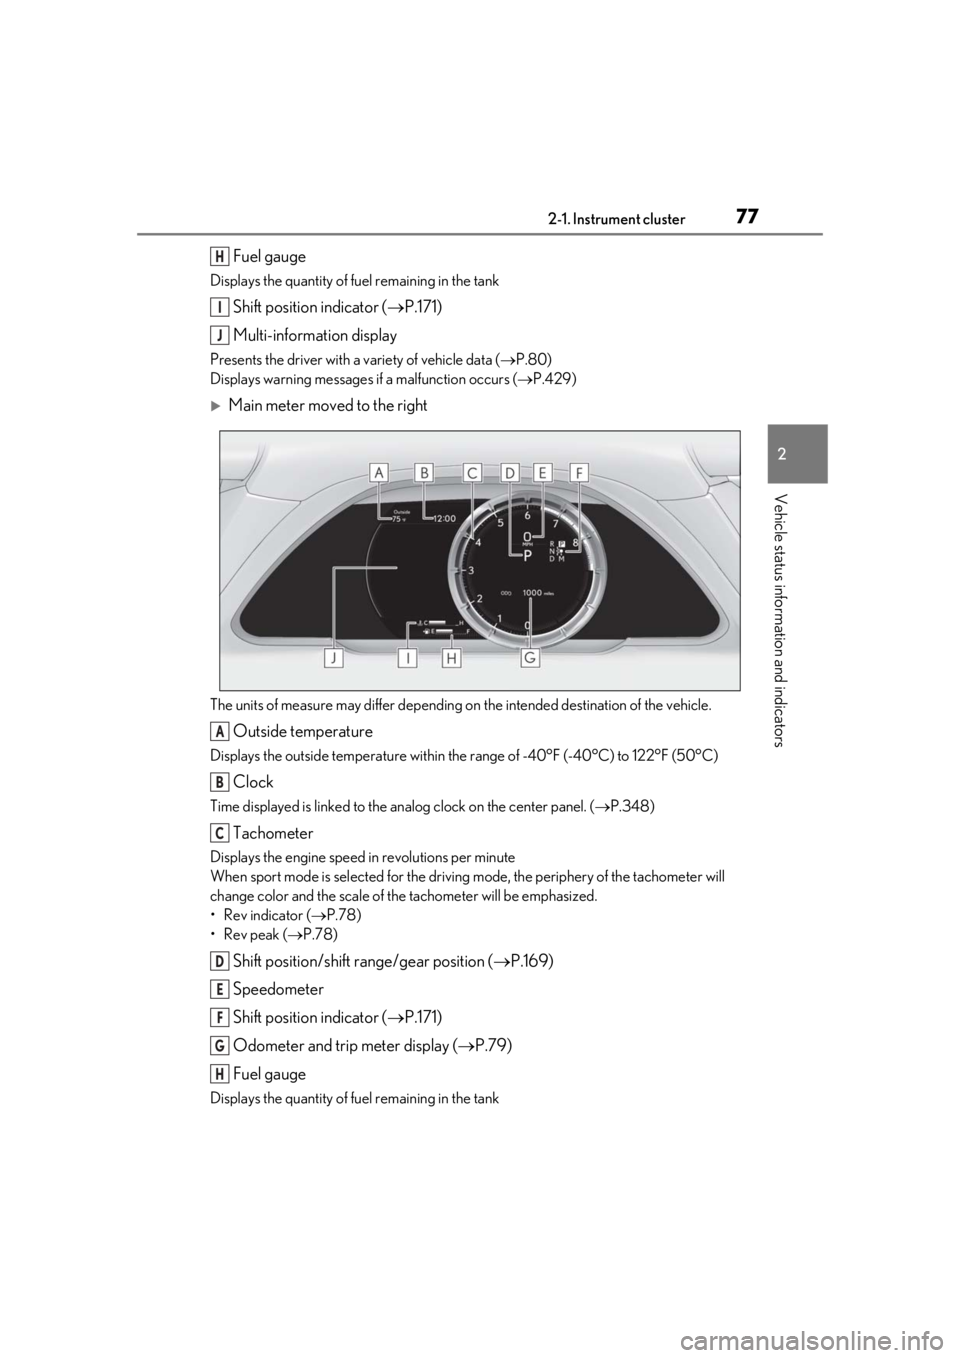
Fuel gauge
Displays the quantity of fuel remaining in the tank
Shift position indicator (P.171)
Multi-information display
Presents the driver with a variety of vehicle data ( P.80)
Displays warning messages if a malfunction occurs (P.429)
Main meter moved to the right
The units of measure may differ depending on the intended destination of the vehicle.
Outside temperature
Displays the outside temperature within the range of -40°F (-40°C) to 122°F (50°C)
Clock
Time displayed is linked to the analog clock on the center panel. (P.348)
Tachometer
Displays the engine speed in revolutions per minute
When sport mode is se lected for the driving mode, the periphery of the tachometer will
change color and the scale of the tachometer will be emphasized.
• Rev indicator ( P.78)
•Rev peak ( P.78)
Shift position/shift range/gear position ( P.169)
Speedometer
Shift position indicator ( P.171)
Odometer and trip meter display ( P.79)
Fuel gauge
Displays the quantity of fuel remaining in the tank
H
I
J
A
B
C
D
E
F
G
H
Page 78 of 516
782-1. Instrument cluster
Engine coolant temperature gauge
Displays the engine coolant temperature
Multi-information display
Presents the driver with a variety of vehicle data (P.80)
Displays warning messages if a malfunction occurs (P.429)
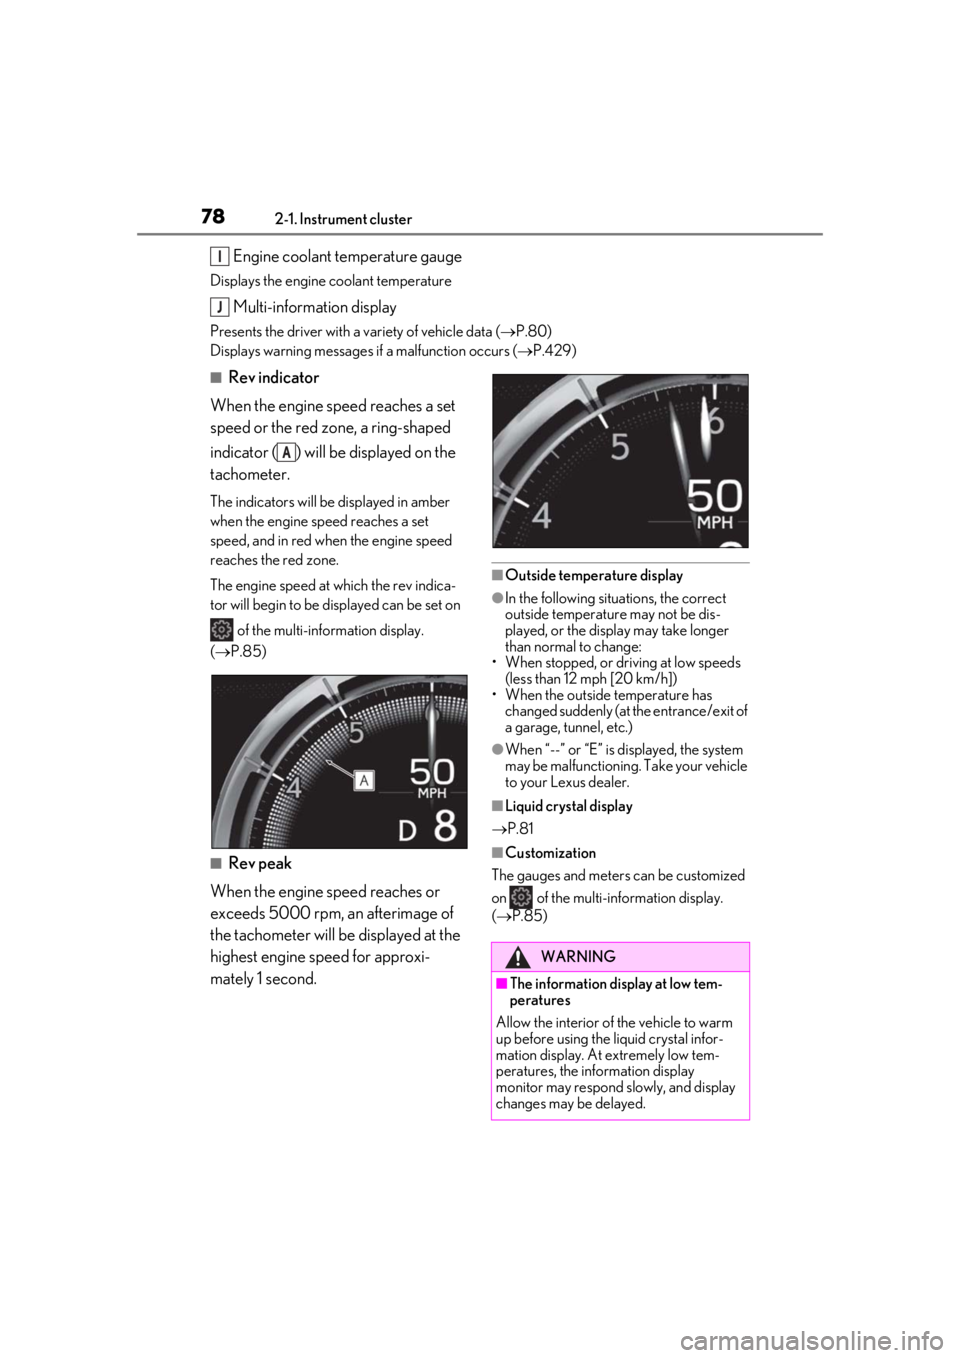
■Rev indicator
When the engine speed reaches a set
speed or the red zone, a ring-shaped
indicator ( ) will be displayed on the
tachometer.
The indicators will be displayed in amber
when the engine speed reaches a set
speed, and in red when the engine speed
reaches the red zone.
The engine speed at which the rev indica-
tor will begin to be displayed can be set on of the multi-information display.
( P.85)
■Rev peak
When the engine speed reaches or
exceeds 5000 rpm, an afterimage of
the tachometer will be displayed at the
highest engine speed for approxi-
mately 1 second.
■Outside temperature display
●In the following situations, the correct
outside temperature may not be dis-
played, or the display may take longer
than normal to change:
• When stopped, or driving at low speeds (less than 12 mph [20 km/h])
• When the outside temperature has
changed suddenly (at the entrance/exit of
a garage, tunnel, etc.)
●When “--” or “E” is displayed, the system
may be malfunctioning. Take your vehicle
to your Lexus dealer.
■Liquid crystal display
P.81
■Customization
The gauges and meters can be customized
on of the multi-information display.
( P.85)
I
J
A
WARNING
■The information display at low tem-
peratures
Allow the interior of the vehicle to warm
up before using the liquid crystal infor-
mation display. At extremely low tem-
peratures, the information display
monitor may respond slowly, and display
changes may be delayed.
Page 79 of 516
792-1. Instrument cluster
2
Vehicle status information and indicators
■Display items
Odometer
Displays the total distance the vehicle has
been driven.
Trip meter A/trip meter B
Displays the distance the vehicle has been
driven since the meter was last reset. Trip
meters A and B can be used to record and
display different distances independently.
Distance until next engine oil
change
Displays the distance the vehicle can be
driven until an oil change is necessary.
■Changing the display
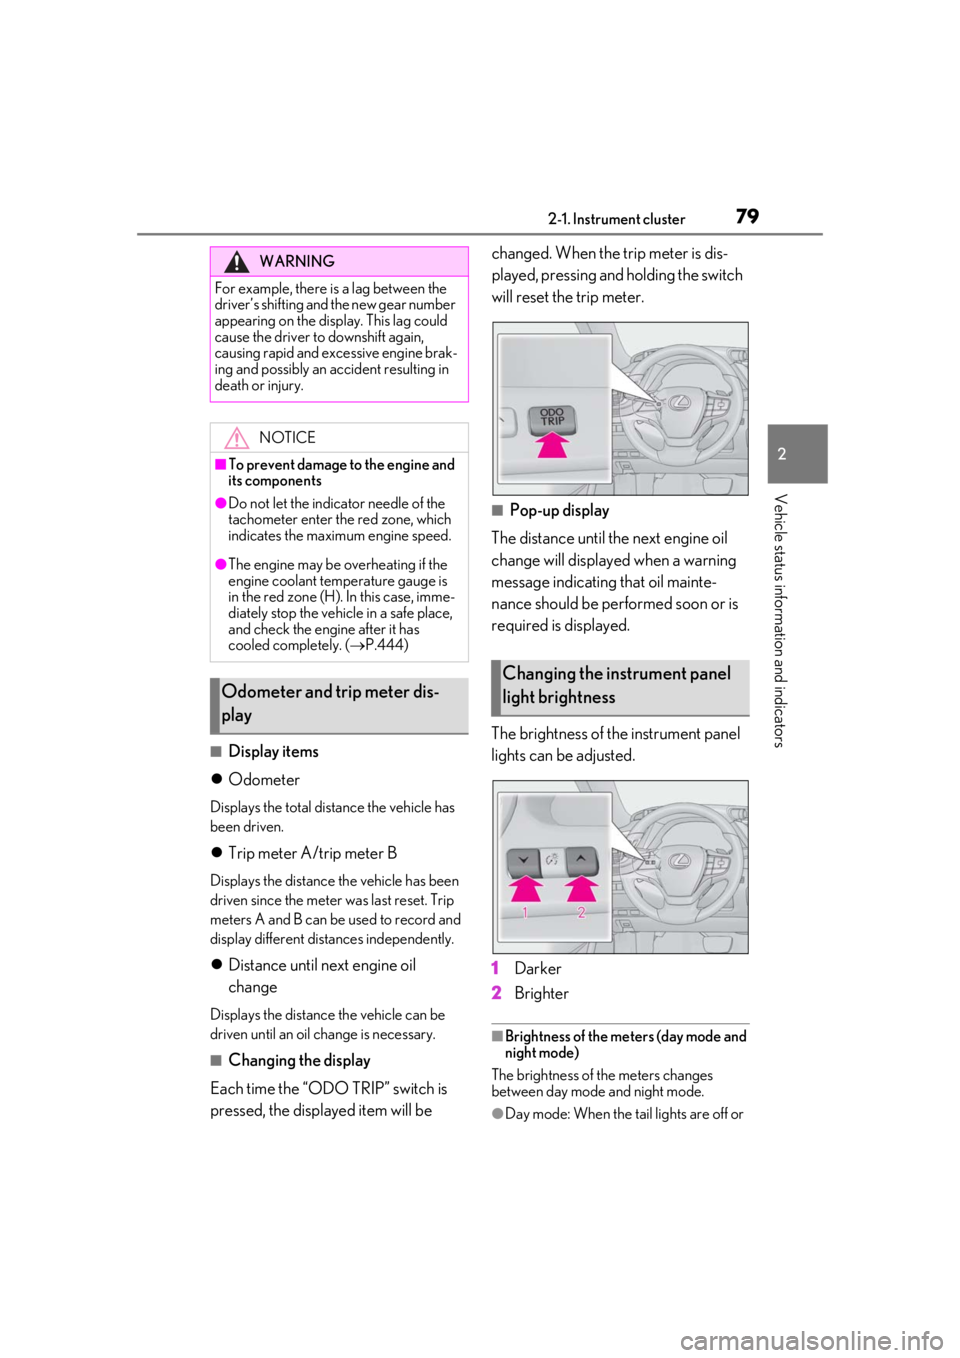
Each time the “ODO TRIP” switch is
pressed, the displayed item will be changed. When the trip meter is dis-
played, pressing and holding the switch
will reset the trip meter.
■Pop-up display
The distance until the next engine oil
change will displayed when a warning
message indicating that oil mainte-
nance should be performed soon or is
required is displayed.
The brightness of the instrument panel
lights can be adjusted.
1
Darker
2
Brighter
■Brightness of the meters (day mode and
night mode)
The brightness of the meters changes
between day mode and night mode.
●Day mode: When the tail lights are off or
WARNING
For example, there is a lag between the
driver’s shifting and the new gear number
appearing on the display. This lag could
cause the driver to downshift again,
causing rapid and excessive engine brak-
ing and possibly an accident resulting in
death or injury.
NOTICE
■To prevent damage to the engine and
its components
●Do not let the indicator needle of the
tachometer enter the red zone, which
indicates the maximum engine speed.
●The engine may be overheating if the
engine coolant temperature gauge is
in the red zone (H). In this case, imme-
diately stop the vehicle in a safe place,
and check the engine after it has
cooled completely. ( P.444)
Odometer and trip meter dis-
play
Changing the instrument panel
light brightness
Page 80 of 516
802-1. Instrument cluster
when the tail lights are on but the sur-
rounding area is bright
●Night mode: When the tail lights are on
and the surrounding area is dark
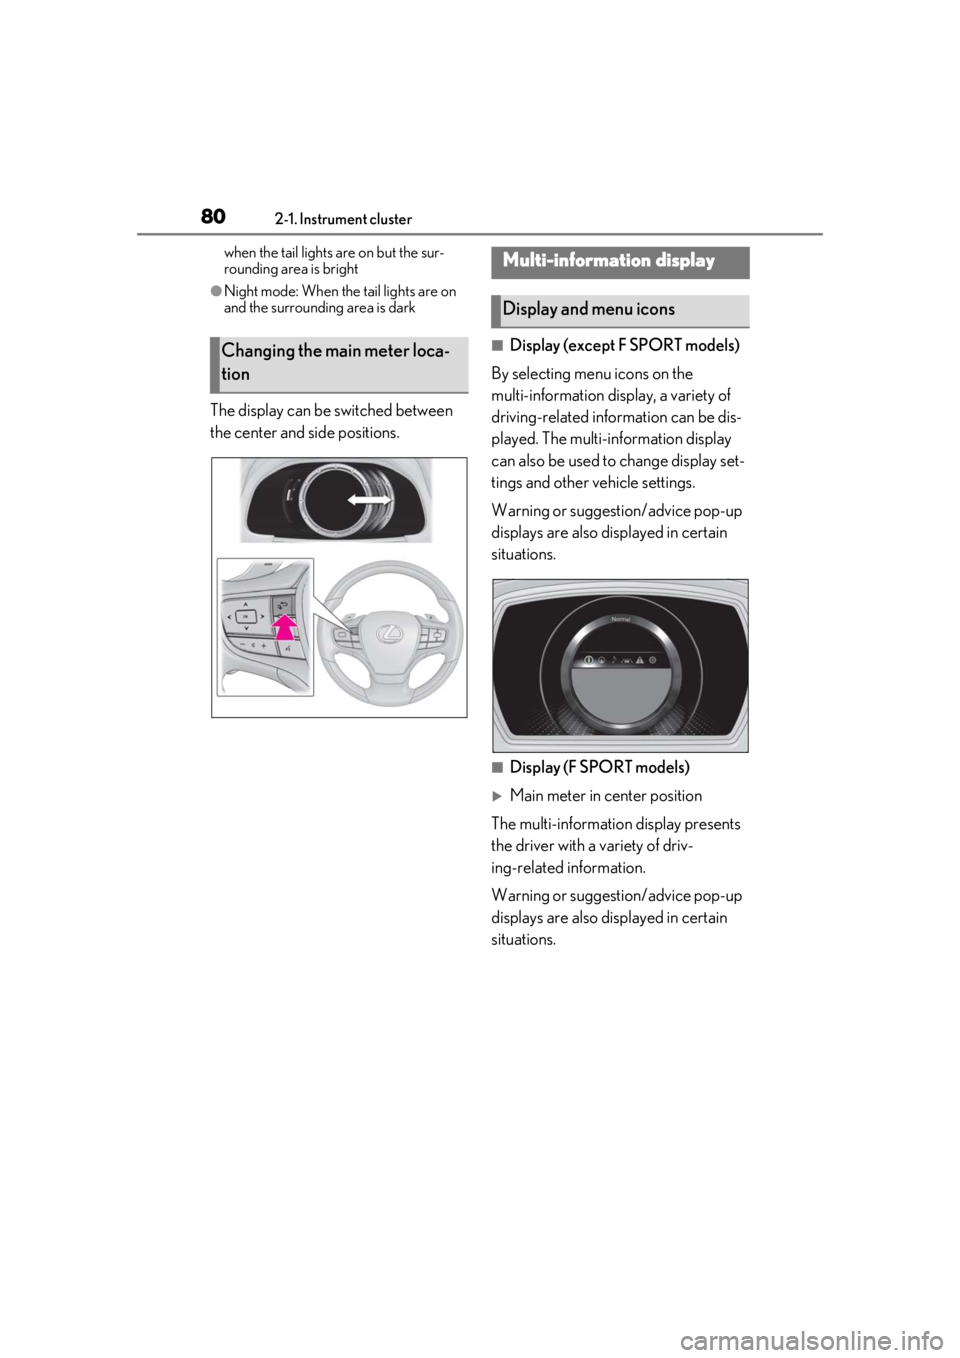
The display can be switched between
the center and side positions.
■Display (except F SPORT models)
By selecting menu icons on the
multi-information display, a variety of
driving-related information can be dis-
played. The multi-information display
can also be used to change display set-
tings and other vehicle settings.
Warning or suggestion/advice pop-up
displays are also displayed in certain
situations.
■Display (F SPORT models)
Main meter in center position
The multi-informatio n display presents
the driver with a variety of driv-
ing-related information.
Warning or suggestion/advice pop-up
displays are also displayed in certain
situations.
Changing the main meter loca-
tion
Multi-information display
Display and menu icons
Page 81 of 516

812-1. Instrument cluster
2
Vehicle status information and indicators
Main meter moved to the right
By selecting menu icons on the
multi-information display, a variety of
driving-related information can be dis-
played. The multi-information display
can also be used to change display set-
tings and other vehicle settings.
Warning or suggestion/advice pop-up
displays are also displayed in certain
situations.
■Menu icons
The menu icons will be displayed by
pressing or of the meter con-
trol switch.
F SPORT models: The menu icons can be
displayed when the main meter is moved to
the right.
■Liquid crystal display
Small spots or light spots may appear on the
display. This phenomen on is characteristic
of liquid crystal disp lays, and there is no
problem continuing to use the display.
The multi-information display is oper-
ated using the meter control switches.
Driving information display
( P.82)
Navigation syst em-linked dis-
play (if equipped) ( P.84)
Audio system-linked display
( P.85)
Driving support system infor-
mation display ( P.85)
Warning message display
( P.429)
Settings display ( P.85)
WARNING
■Caution for use while driving
●When operating the multi-information
display while driving, pay extra atten-
tion to the safety of the area around the
vehicle.
●Do not look continuously at the
multi-information display while driving
as you may fail to see pedestrians,
objects on the road, etc. ahead of the
vehicle.
■The information display at low tem-
peratures
P.74, 78
Changing the meter display
Page 86 of 516
862-1. Instrument cluster
■Suspension of the settings display
●Some settings cannot be changed while
driving. When changing settings, park
the vehicle in a safe place.
●If a warning message is displayed, opera-
tion of the settings display will be sus-
pended.
Displays suggestions to the driver in
the following situations. To select a
response to a displayed suggestion,
use the meter control switches.
■Suggestion to turn off the head-
lights
If the headlights are left on for a certain
amount of time with the headlight
switch in after the engine switch
has been turned off, a suggestion mes-
sage will be displayed asking if you
wish to turn the headlights off.
To turn the headlights off, select “Yes”.
If a front door is opened after the engine
switch is turned off, this suggestion mes-
sage will not be displayed.
■Customization
Some functions can be customized.
( P.470)
WARNING
■Cautions during setting up the dis-
play
As the engine needs to be running
during setting up the display, ensure that
the vehicle is parked in a place with ade-
quate ventilation. In a closed area such as
a garage, exhaust gases including harm-
ful carbon monoxide (CO) may collect
and enter the vehicle. This may lead to
death or a serious health hazard.
NOTICE
■During setting up the display
To prevent battery discharge, ensure that
the engine is running while setting up the
display features.
Suggestion function
Page 88 of 516
882-1. Instrument cluster
Displays the following items:
• Speedometer
• Shift position/shift range/gear position (P.169)
Tachometer/Eco Driving Indicator display area ( P.90)
HUD (Head-up display) switch
■Head-up display will operate when
The engine switch is in IGNITION ON
mode.
■When using the head-up display
The head-up display may seem dark or hard
to see when viewed through sunglasses,
especially polarized su nglasses. Adjust the
brightness of the head-up display or
remove your sunglasses.
■Street name display
Only street names whic h are included in the
map data will be displayed.
■Outside temperature display
●When the ambient temperature is
approximately 37°F (3°C) or lower, the
low outside temperature indicator will
flash for approximately 10 seconds and
the outside temperature display will turn
off. In this case, the display will be dis-
played again when the outside tempera-
ture becomes approximately 41°F (5°C)
or higher.
●In the following situations, the correct
outside temperature may not be dis-
played, or the display may take longer
than normal to change:
• When stopped, or driving at low speeds (less than 12 mph [20 km/h])
• When the outside temperature has
changed suddenly (at the entrance/exit of
a garage, tunnel, etc.)
●When “--” or “E” is displayed, the system
may be malfunctioning. Take your vehicle
to your Lexus dealer.
F
G
WARNING
■When using the head-up display
●Check that the position and brightness
of the head-up display image does not
interfere with safe driving. Incorrect
adjustment of the image’s position or
brightness may obstruct the driver’s
view and lead to an accident, resulting
in death or serious injury.
●Do not continuously look at the
head-up display while driving as you
may fail to see pedestrians, objects on
the road, etc. ahead of the vehicle.
NOTICE
■Head-up display projector
●Do not place any drinks near the
head-up display projector. If the pro-
jector gets wet, electrical malfunctions
may result.
●Do not place anything on or put stick-
ers onto the head-up display projector.
Doing so could interrupt head-up dis-
play indications.
●Do not touch the inside of the head-up
display projector or thrust sharp edges
or the like into the projector.
Doing so could cause mechanical mal-
functions.
Page 89 of 516
892-1. Instrument cluster
2
Vehicle status information and indicators
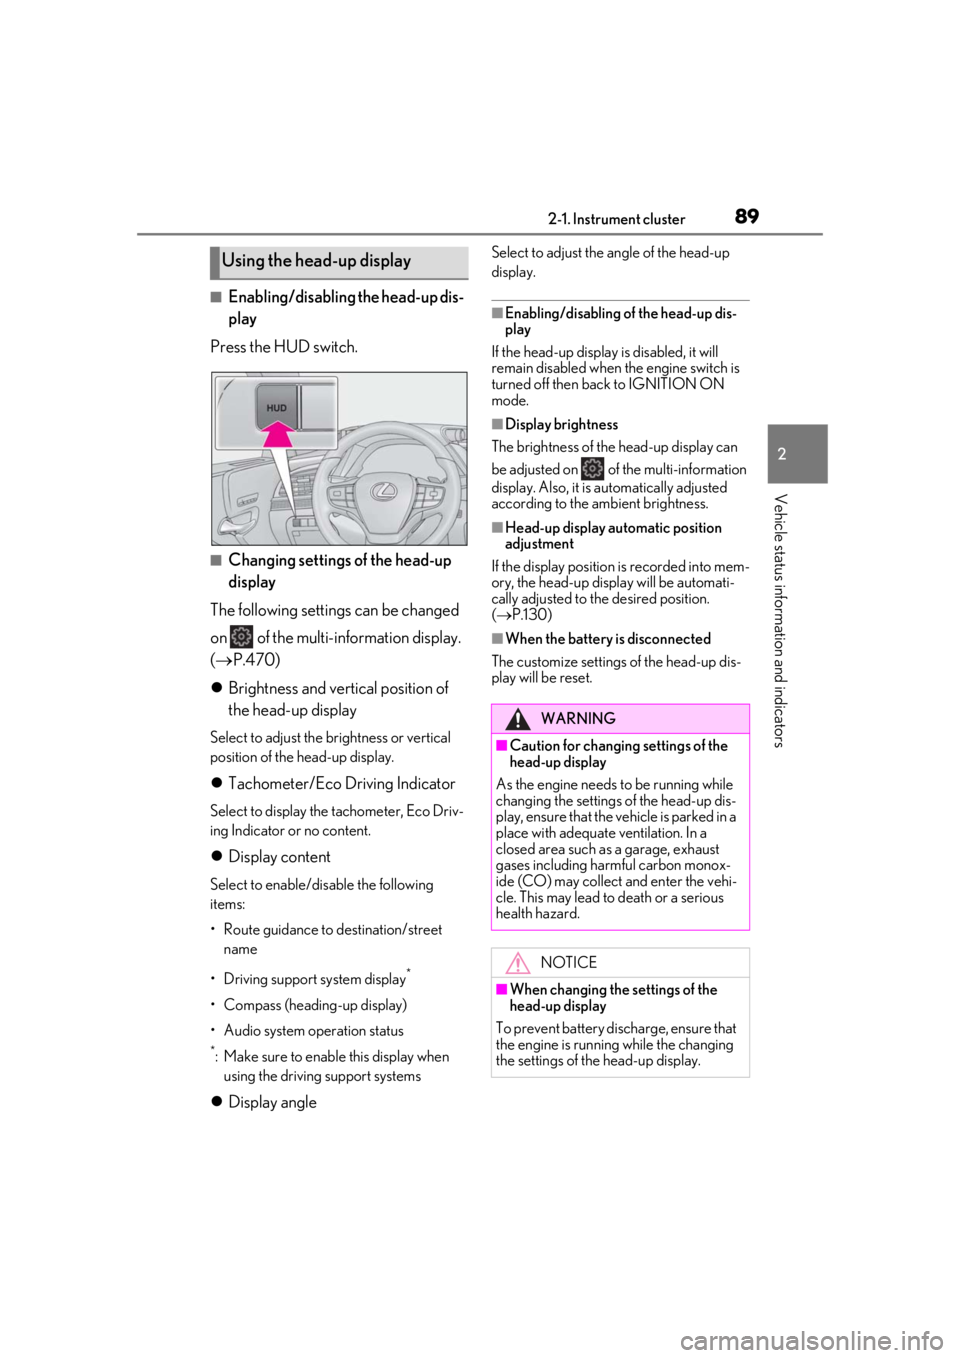
■Enabling/disabling the head-up dis-
play
Press the HUD switch.
■Changing settings of the head-up
display
The following settings can be changed
on of the multi-information display.
( P.470)
Brightness and vertical position of
the head-up display
Select to adjust the brightness or vertical
position of the head-up display.
Tachometer/Eco Driving Indicator
Select to display the tachometer, Eco Driv-
ing Indicator or no content.
Display content
Select to enable/dis able the following
items:
• Route guidance to destination/street
name
• Driving support system display
*
• Compass (heading-up display)
• Audio system operation status
*: Make sure to enable this display when using the driving support systems
Display angle
Select to adjust the angle of the head-up
display.
■Enabling/disabling of the head-up dis-
play
If the head-up display is disabled, it will
remain disabled when the engine switch is
turned off then back to IGNITION ON
mode.
■Display brightness
The brightness of the head-up display can
be adjusted on of the multi-information
display. Also, it is automatically adjusted
according to the ambient brightness.
■Head-up display automatic position
adjustment
If the display position is recorded into mem-
ory, the head-up display will be automati-
cally adjusted to th e desired position.
( P.130)
■When the battery is disconnected
The customize settings of the head-up dis-
play will be reset.
Using the head-up display
WARNING
■Caution for changing settings of the
head-up display
As the engine needs to be running while
changing the settings of the head-up dis-
play, ensure that the vehicle is parked in a
place with adequate ventilation. In a
closed area such as a garage, exhaust
gases including harmful carbon monox-
ide (CO) may collect and enter the vehi-
cle. This may lead to death or a serious
health hazard.
NOTICE
■When changing the settings of the
head-up display
To prevent battery discharge, ensure that
the engine is running while the changing
the settings of the head-up display.
Page 90 of 516
902-1. Instrument cluster
Displays the operational status of the
following systems:
LTA (Lane Tracing Assist) ( P.226)
Dynamic radar cruise control with
full-speed range ( P.241)
Details of content displayed on the
head-up display may differ from that dis-
played on the multi-information display. For
details, refer to the explanation of each sys-
tem.
Pop-up displays for the following sys-
tems will be displayed when necessary.
■Driving support systems
Displays a warning/suggestion/advice
message or the operating state of a rel-
evant system.
PCS (Pre-Collision System)
( P.205, 216)
FCTA (Front Cross Traffic Alert) (if
equipped) ( P.223)
Intuitive parking assist (if equipped)
( P.259)
Parking Support Brake function (for
static objects) (if equipped)
( P.279)
Brake Override System ( P.155)
Drive-Start Control ( P.155)
Details of content displayed on the
head-up display may differ from that dis-
played on the multi-information display. For
details, refer to the explanation of each sys-
tem.
■/ icons
These icons are linked to the
multi-information display
: Master warning icon
Displayed when a warn ing message is dis-
played on the multi-information display.
( P.429)
: Information icon
Displayed when a suggestion pop-up dis-
play ( P.86) or advice pop-up display is
displayed on the multi-information display.
■Warning message
Some warning messages are displayed
when necessary, according to certain
conditions.
Details of content displayed on the
head-up display may differ from that dis-
played on the multi-information display.
■Audio system operation status
Displayed when an audio remote con-
trol switch on the steering wheel is
operated.
■Hands-free system status
Displayed when the hands-free system
is operated.
■When a pop-up display is displayed
When a pop-up display is displayed, a cur-
rent display may no long er be displayed. In
this case, the display will return after the
pop-up display disappears.
■Tachometer
Displays the engine speed in revolu-
Driving support system display
area
Pop-up display
Tachometer/Eco Driving Indica-
tor
Page 101 of 516
1013-2. Opening, closing and locking the doors and trunk
3
Before driving
To prevent unintended triggering of the
alarm, unlock the doors using the wireless
remote control and open and close a door
once after the settings have been changed.
(If a door is not opened within 60 seconds
after is pressed, the doors will be
locked again and the alarm will automati-
cally be set.)
In a case that the alarm is triggered, imme-
diately stop the alarm. (P.65)
■Impact detection door lock release sys-
tem
In the event that the vehicle is subject to a
strong impact, all the doors are unlocked.
Depending on the force of the impact or the
type of accident, however, the system may
not operate.
■Operation signals
A buzzer sounds and the emergency flash-
ers flash to indicate that the doors have
been locked/unlocked. (Locked: once;
Unlocked: twice)
A buzzer sounds to indicate that the win-
dows and moon roof or panoramic moon
roof are operating.
■Security feature
If a door is not opened within approximately 60 seconds after the vehicle is unlocked,
the security feature automatically locks the
vehicle again.
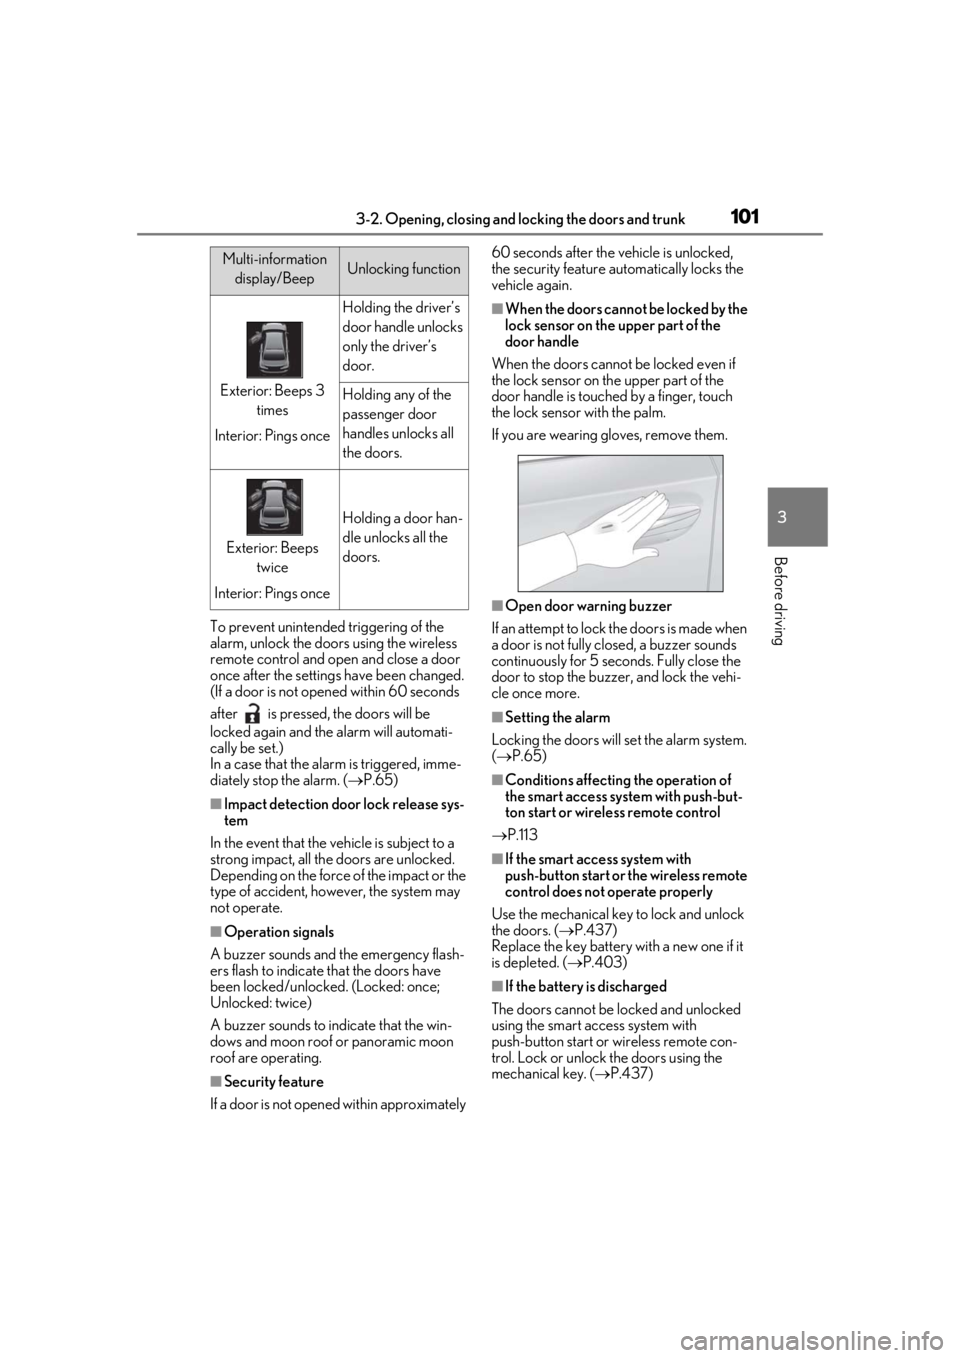
■When the doors cannot be locked by the
lock sensor on the upper part of the
door handle
When the doors cannot be locked even if
the lock sensor on th e upper part of the
door handle is touched by a finger, touch
the lock sensor with the palm.
If you are wearing gloves, remove them.
■Open door warning buzzer
If an attempt to lock the doors is made when
a door is not fully closed, a buzzer sounds
continuously for 5 seconds. Fully close the
door to stop the buzzer, and lock the vehi-
cle once more.
■Setting the alarm
Locking the doors will set the alarm system.
( P.65)
■Conditions affecting the operation of
the smart access system with push-but-
ton start or wireless remote control
P.113
■If the smart access system with
push-button start or the wireless remote
control does not operate properly
Use the mechanical key to lock and unlock
the doors. ( P.437)
Replace the key battery with a new one if it
is depleted. ( P.403)
■If the battery is discharged
The doors cannot be locked and unlocked
using the smart access system with
push-button start or wireless remote con-
trol. Lock or unlock the doors using the
mechanical key. ( P.437)
Multi-information
display/BeepUnlocking function
Exterior: Beeps 3 times
Interior: Pings once
Holding the driver’s
door handle unlocks
only the driver’s
door.
Holding any of the
passenger door
handles unlocks all
the doors.
Exterior: Beeps twice
Interior: Pings once
Holding a door han-
dle unlocks all the
doors.