clock LEXUS LX470 2007 Owners Manual
[x] Cancel search | Manufacturer: LEXUS, Model Year: 2007, Model line: LX470, Model: LEXUS LX470 2007Pages: 426, PDF Size: 10.95 MB
Page 4 of 426

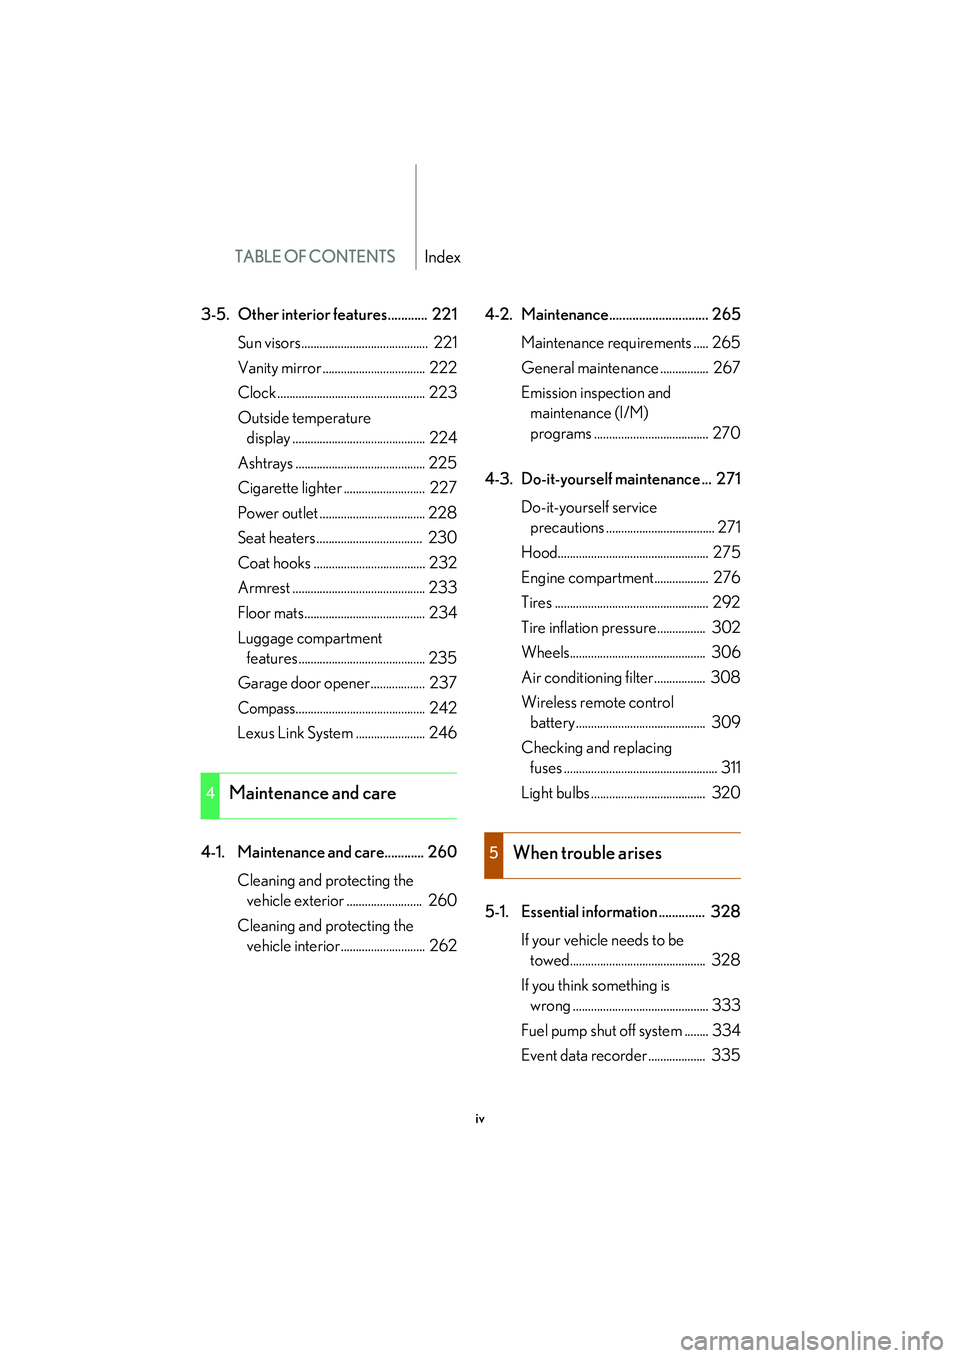
TABLE OF CONTENTSIndex
iv
3-5. Other interior features............ 221Sun visors.......................................... 221
Vanity mirror .................................. 222
Clock ................................................. 223
Outside temperature display ............................................ 224
Ashtrays ........................................... 225
Cigarette lighter ........................... 227
Power outlet ................................... 228
Seat heaters ................................... 230
Coat hooks ..................................... 232
Armrest ............................................ 233
Floor mats........................................ 234
Luggage compartment features .......................................... 235
Garage door opener .................. 237
Compass........................................... 242
Lexus Link System ....................... 246
4-1. Maintenance and care............ 260 Cleaning and protecting the vehicle exterior ......................... 260
Cleaning and protecting the vehicle interior............................ 262 4-2. Maintenance.............................. 265
Maintenance requirements ..... 265
General maintena nce ................ 267
Emission inspection and maintenance (I/M)
programs ...................................... 270
4-3. Do-it-yourself maintenance ... 271 Do-it-yourself service precautions .................................... 271
Hood.................................................. 275
Engine compartment.................. 276
Tires ................................................... 292
Tire inflation pressure................ 302
Wheels............................................. 306
Air conditioning filter................. 308
Wireless remote control battery ........................................... 309
Checking and replacing fuses ................................................... 311
Light bulbs ...................................... 320
5-1. Essential information .............. 328 If your vehicle needs to be towed............................................. 328
If you think something is wrong ............................................. 333
Fuel pump shut off system ........ 334
Event data recorder ................... 335
4Maintenance and care
5When trouble arises
Page 13 of 426

xiii
A
Trip information display P. 110
Clock P. 223
Outside temperature display
P. 224
Security indicator light
P. 47,49
Audio system
P. 183
AIRBAG ON and OFF
indicator
P. 67
Front passenger's
seat belt reminder
switch
P. 67,340
Air conditioning system P. 172
Outside rear view mirror
defogger switch
P. 182
Rear air conditioning switch P. 180
Emergency flashers
Center differential lock/
unlock switch
P. 139
Antenna switch
P. 193
Rear window defogger switch P. 182
Without navigation system
Page 14 of 426

xiv
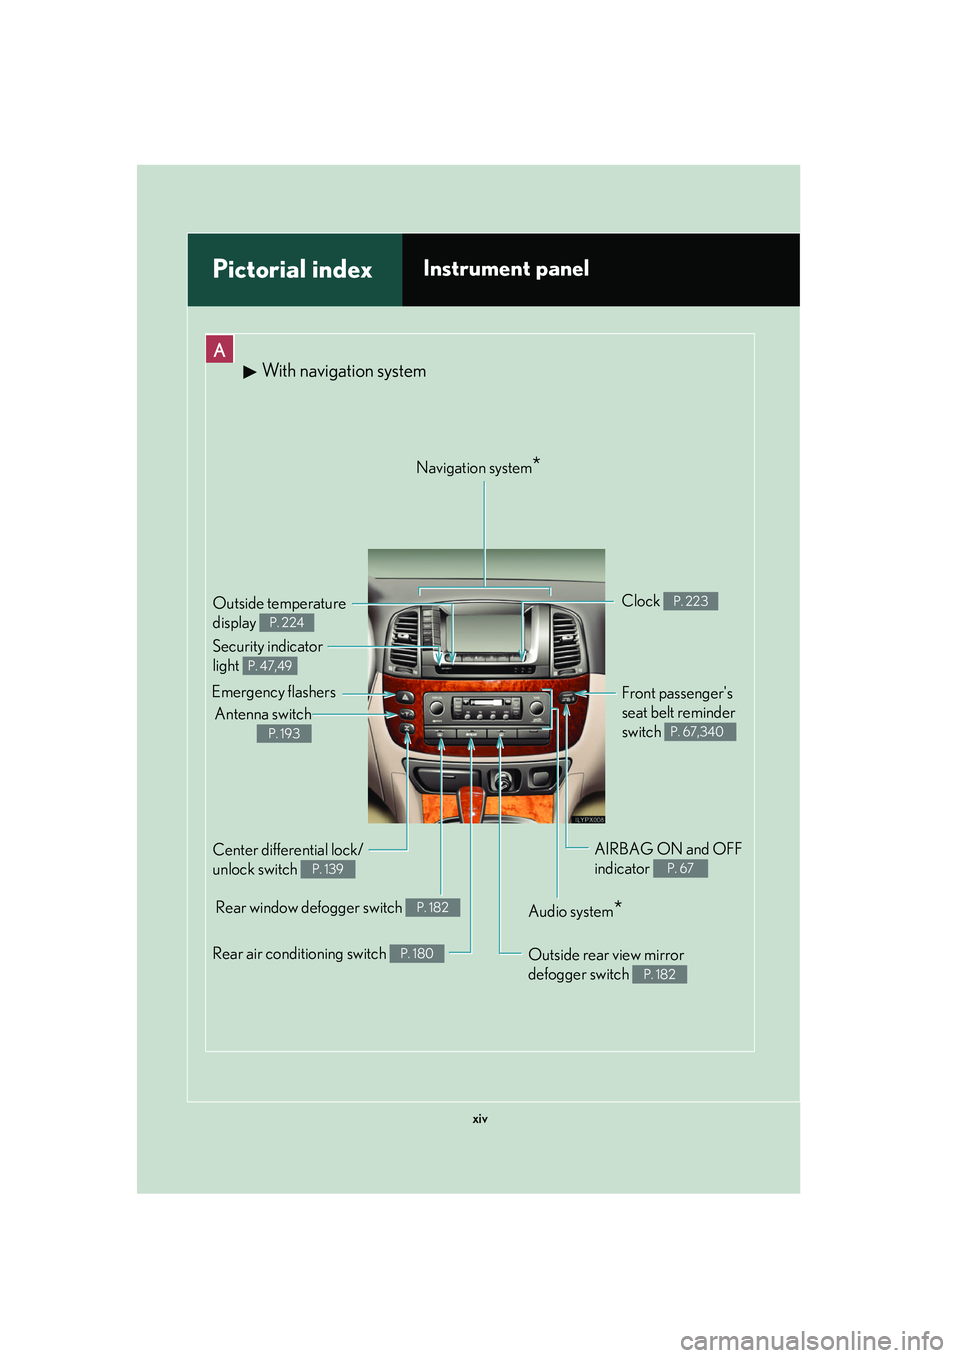
Pictorial indexInstrument panel
A
Rear air conditioning switch P. 180Outside rear view mirror
defogger switch
P. 182
Audio system*
Rear window defogger switch P. 182
Front passenger's
seat belt reminder
switch
P. 67,340
AIRBAG ON and OFF
indicator
P. 67
Clock P. 223Outside te
mperature
display
P. 224
Navigation system*
Center differential lock/
unlock switch
P. 139
Antenna switch
P. 193
Emergency flashers
Security indicator
light
P. 47,49
With navigation system
Page 52 of 426

34
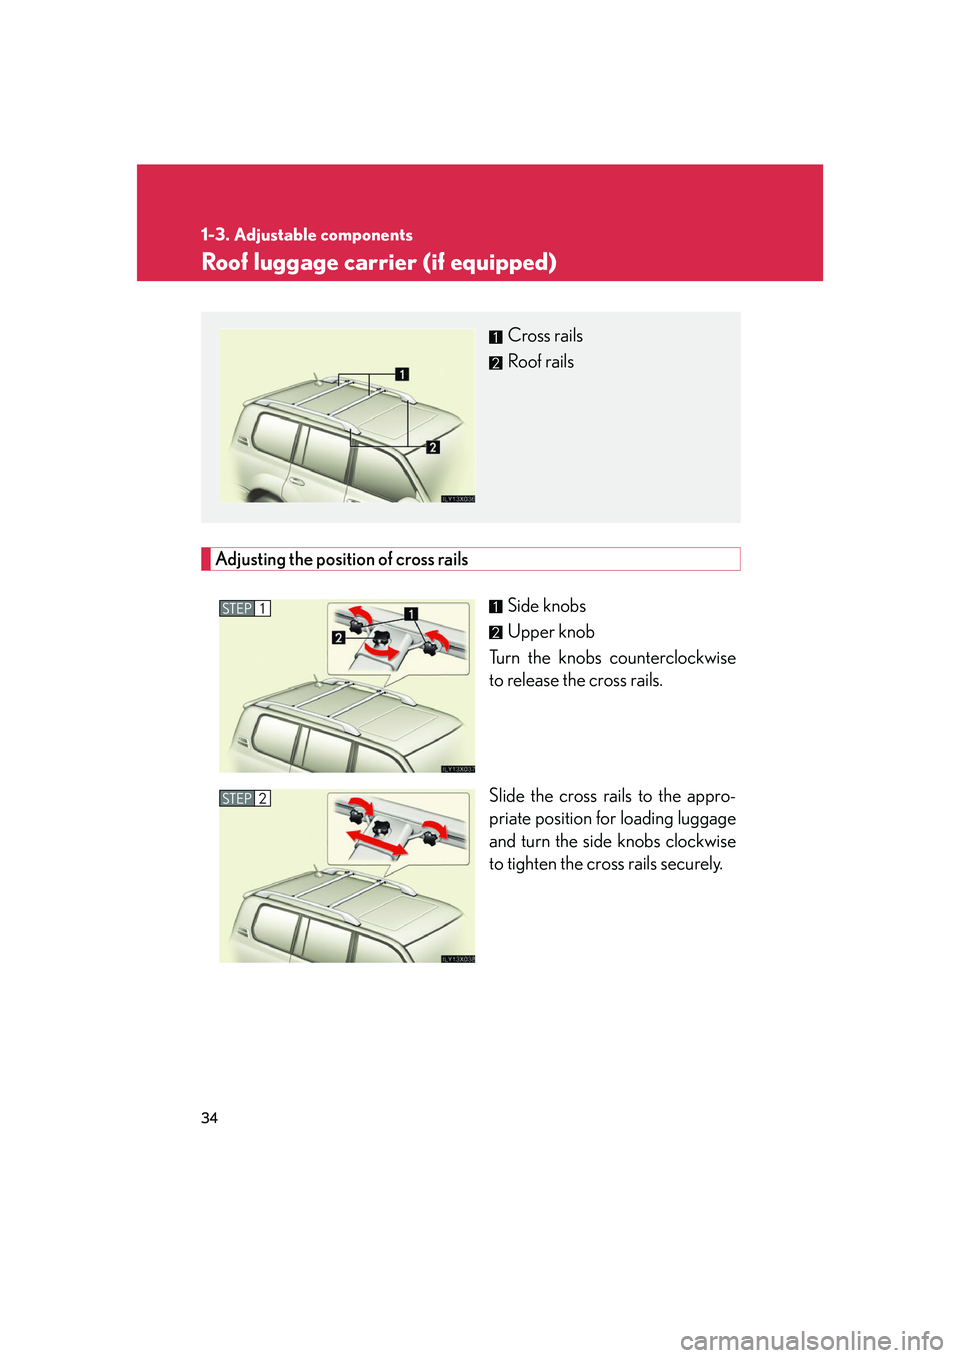
1-3. Adjustable components
Roof luggage carrier (if equipped)
Adjusting the position of cross railsSide knobs
Upper knob
Turn the knobs counterclockwise
to release the cross rails.
Slide the cross rails to the appro-
priate position for loading luggage
and turn the side knobs clockwise
to tighten the cross rails securely.
Cross rails
Roof rails
STEP1
STEP2
Page 53 of 426

35
1-3. Adjustable components
1
Before driving
Turn the upper knobs clockwise to
fix the cross rails to the appropri-
ate length.STEP3
CAUTION
■Cross rail adjustment
Make sure the cross rails are locked securely by pushing forward and rearward
them.
Failure to do so may cause an unexpected accident or severe injury in the event of
emergency braking or a collision.
■When loading cargo
Observe the following precautions.
●Place the cargo so that its weight is distributed evenly between the front and rear
axles.
●If loading long or wide cargo, never exceed the vehicle overall length or
width.(
P. 3 6 8 )
●Before driving, make sure the cargo is securely fastened on the roof luggage car-
rier.
●Loading cargo on the roof luggage carrier will make the center of the vehicle
gravity higher. Avoid high speeds, sudden starts, sharp turns, sudden braking or
abrupt maneuvers, otherwise it may result in loss of control or vehicle rollover
due to failure to operate this vehicle correctly.
●If driving for a long distance, on rough ro ads, or at high speeds, stop the vehicle
now and then during the trip to make sure the cargo remains in its place.
●Do not exceed 143 lb. (70 kg) cargo weight on the roof luggage carrier.
Page 63 of 426

45
1-5. Refueling
1
Before driving
Closing the fuel tank capAfter refueling, turn the fuel tank
cap clockwise until you hear a
click. The cap will revolve slightly in
the opposite direction once
released.
■Fuel types
Use premium unleaded gasoline. (91 Octane Rating [Research Octane Number
96] or higher)
■Fuel tank capacity
Approximately 25.4 gal. (96 L, 21.1 Imp. gal.)
Page 189 of 426

Interior features3
171
3-1. Using the air conditioning system and defogger ........... 172
Automatic air conditioning system (without navigation
system).......................................... 172
Rear air conditioning controls........................................ 180
Rear window and outside rear view mirror defoggers........... 182
3-2. Using the audio system ......... 183 Audio system type (without navigation system) .................. 183
Using the radio ............................ 185
Using the cassette player........ 194
Using the CD player .................. 197
Optimal use of the audio system ......................................... 204
Using the steering switches ...................................... 206
Rear seat audio system .......... 209 3-3. Using the interior lights ........ 212
Interior lights list .......................... 212
3-4. Using the storage features ................................... 215
List of storage features ............ 215
3-5. Other interior features......... 221 Sun visors ....................................... 221
Vanity mirror ............................... 222
Clock.............................................. 223
Outside temperature display ......................................... 224
Ashtrays ........................................ 225
Cigarette lighter ........................ 227
Power outlet ................................ 228
Seat heaters ................................ 230
Coat hooks .................................. 232
Armrest ......................................... 233
Floor mats .................................... 234
Luggage compartment features....................................... 235
Garage door opener............... 237
Compass....................................... 242
Lexus Link System .................... 246
Page 241 of 426

223
3-5. Other interior features
3
Interior features
Clock
■The clock is displayed when
The ignition key is in the “ACC” or “ON” position.
■When the battery is disconnected
The time display will automatically be set to 1:00.
■Adjust clock
Adjust hours.
Adjust minutes.
Round the nearest hour.*
*: e.g. 1:00 to 1:291:00
1:30 to 1:59 2:00
Page 296 of 426

278
4-3. Do-it-yourself maintenance
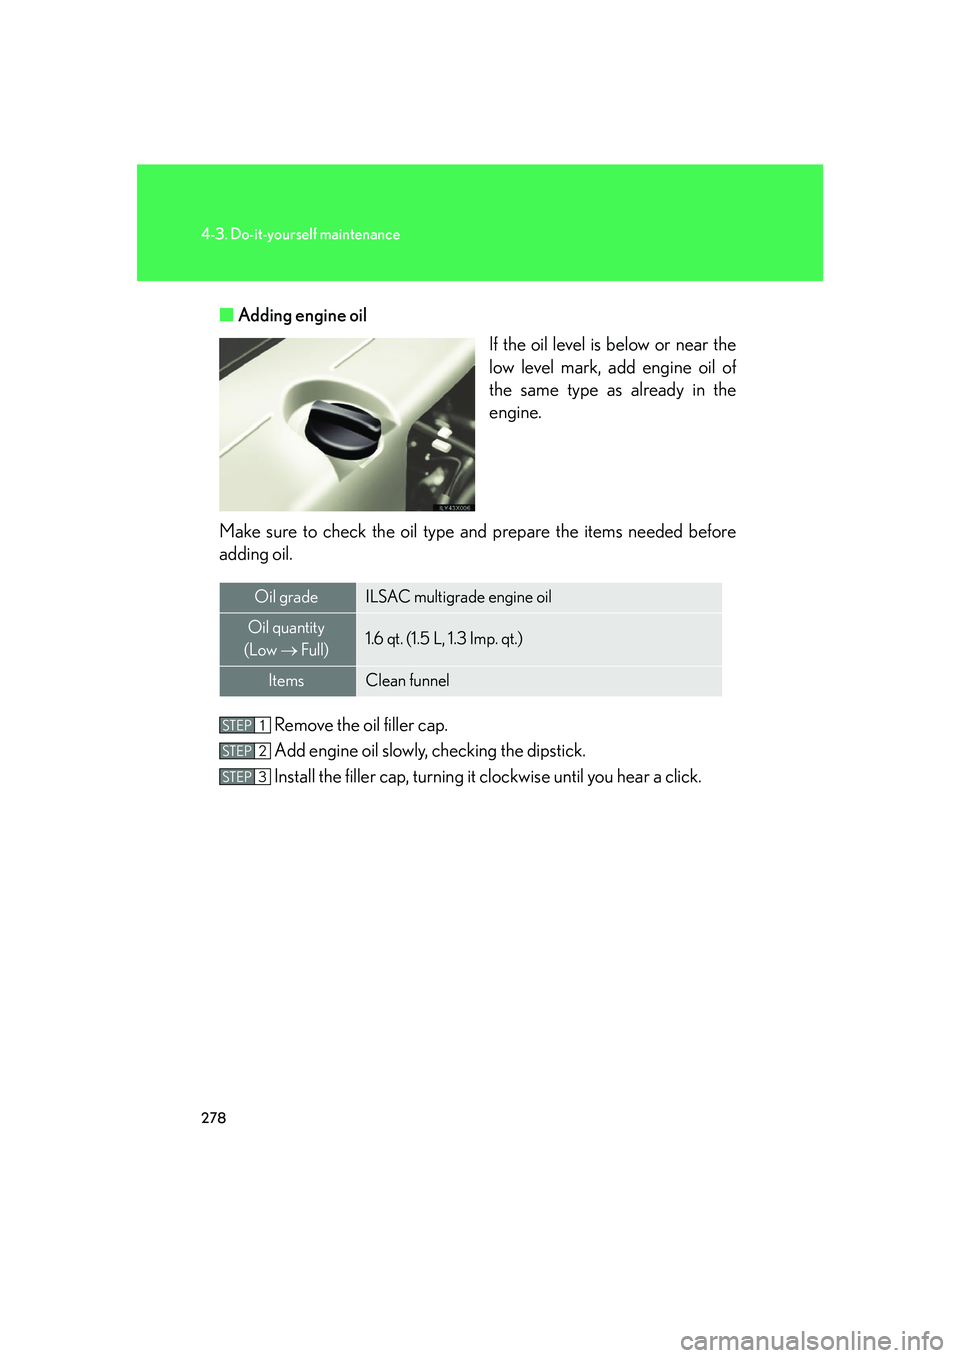
■Adding engine oil
If the oil level is below or near the
low level mark, add engine oil of
the same type as already in the
engine.
Make sure to check th e oil type and prepare the items needed before
adding oil.
Remove the oil filler cap.
Add engine oil slowly, checking the dipstick.
Install the filler cap, turning it clockwise until you hear a click.
Oil gradeILSAC multigrade engine oil
Oil quantity
(Low Full)1.6 qt. (1.5 L, 1.3 Imp. qt.)
ItemsClean funnel
STEP1
STEP2
STEP3
Page 304 of 426

286
4-3. Do-it-yourself maintenance
Power steering fluid■ Fluid level
The fluid level should be within the appropriate range.
Full (when hot)
Add fluid (when hot)
Full (when cold)
Add fluid (when cold)
Hot: Vehicle has been driven arou nd 50 mph (80 km/h) for 20 min-
utes, or slightly longer in frig id temperatures. (Fluid tempera-
ture, 140°F - 175°F [60°C - 80°C]).
Cold: Engine has not been run for about five hours. (Room tempera- ture, 50°F - 85°F [10°C - 30°C]).
■ Checking the fluid level
Make sure to check the fluid type and prepare the necessary items.
Clean all dirt off the reservoir.
Remove the cap by turning it counterclockwise.
Wipe the dipstick clean.
Reinstall and remove the reservoir cap again.
Check the fluid level.
Fluid typeAutomatic transmission fluid DEXRON® II or III
ItemsRag or paper, Clean funnel (only for adding fluid)
STEP1
STEP2
STEP3
STEP4
STEP5