interior lights LEXUS RC300 2020 Owners Manual
[x] Cancel search | Manufacturer: LEXUS, Model Year: 2020, Model line: RC300, Model: LEXUS RC300 2020Pages: 390, PDF Size: 8.65 MB
Page 3 of 390
3TABLE OF CONTENTS
1
2
3
4
5
6
7
8
9
4-2. Driving proceduresEngine (ignition) switch .............. 125
Automatic transmission.............. 129
Turn signal lever............................. 134
Parking brake ................................. 135
ASC (Active Sound Control) ............................................................ 135
4-3. Operating the lights and wipers Headlight switch ............................ 137
Automatic High Beam ................ 139
Windshield wipers and washer ............................................................ 142
4-4. Refueling Opening the fuel tank cap......... 149
4-5. Using the driving support systems Lexus Safety System + ................ 152
PCS (Pre-Collision System)..... 156
LDA (Lane Departure Alert with steering control) ......................... 163
Dynamic radar cruise control ............................................................ 170
Intuitive parking assist ................. 178
BSM (Blind Spot Monitor) ........ 184
Driving mode select switch....... 192
Driving assist systems .................. 194
4-6. Driving tips Winter driving tips ........................ 198
5-1. Remote Touch/Display Remote Touch ............................... 202
Center Display .............................. 204
5-2. Using the air conditioning system Automatic air conditioning system........................................................... 207Heated steering wheel/seat heat-
ers/seat ventilators..................... 214
5-3. Using the interior lights Interior lights list ............................. 217
5-4. Using the storage features List of storage features ................ 219
Trunk features ................................. 221
5-5. Using the other interior features Other interior features ............... 222
Garage door opener .................. 224
Compass .......................................... 229
6-1. Maintenance and care Cleaning and protecting the vehi-cle exterior................................... 234
Cleaning and protecting the vehi- cle interior .................................... 237
6-2. Maintenance Maintenance re quirements .....240
General maintenance.................. 241
Emission inspection and mainte- nance (I/M) programs ............. 244
6-3. Do-it-yourself maintenance Do-it-yourself service precautions.......................................................... 245
Hood .................................................. 247
Positioning a floor jack ............... 247
Engine compartment ................. 249
Tires ................................................... 257
Tire inflation pressure................. 263
Wheels
............................................. 265
Air conditioning filter ................. 266
Electronic key battery ................ 267
5Interior features
6Maintenance and care
Page 19 of 390
19Pictorial index
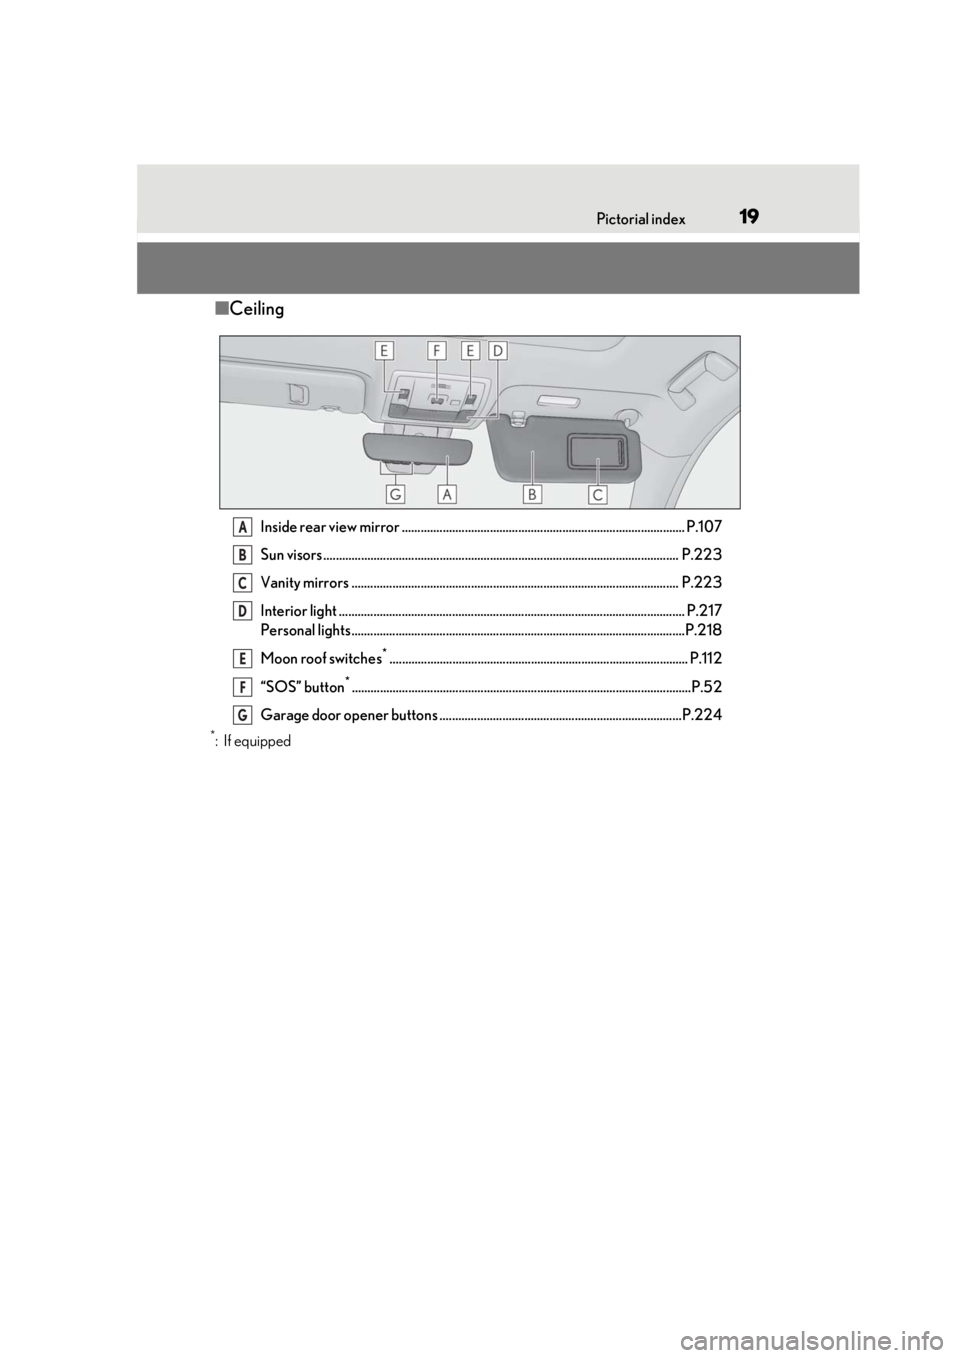
■Ceiling
Inside rear view mirror .......................................................................................... P.107
Sun visors ................................................................................................................. P.22 3
Vanity mirrors ........................................................................................................ P.223
Interior light .............................................................................................................. P.2 17
Personal lights..........................................................................................................P.218
Moon roof switches
*............................................................................................... P.112
“SOS” button
*............................................................................................................P.52
Garage door opener buttons .............................................................................P.224
*:If equipped
A
B
C
D
E
F
G
Page 87 of 390
873-2. Opening, closing and locking the doors and trunk
3
Before driving
To prevent unintended triggering of the
alarm, unlock the doors using the wireless
remote control and open and close a door
once after the settings have been changed.
(If a door is not opened within 60 seconds
after is pressed, the doors will be
locked again and the alarm will automati-
cally be set.)
In a case that the alarm is triggered, imme-
diately stop the alarm. (P.57)
■Impact detection door lock release sys-
tem
In the event that the vehicle is subject to a
strong impact, both side doors are
unlocked. Depending on the force of the
impact or the type of accident, however, the
system may not operate.
■Operation signals
A buzzer sounds and the emergency flash-
ers flash to indicate that the doors have
been locked/unlocked. (Locked: once;
Unlocked: twice)
A buzzer sounds to indicate that the win-
dows and moon roof are operating.
■Welcome light illumination control
The side marker, parking, tail and license
plate lights automatically turn on at night when the doors are unlocked using the
entry function or wireless remote control if
the light switch is in the position.
■Security feature
If a door is not opened within approximately
60 seconds after the vehicle is unlocked,
the security feature automatically locks the
vehicle again.
■When the door cannot be locked by the
lock sensor on the surface of the door
handle
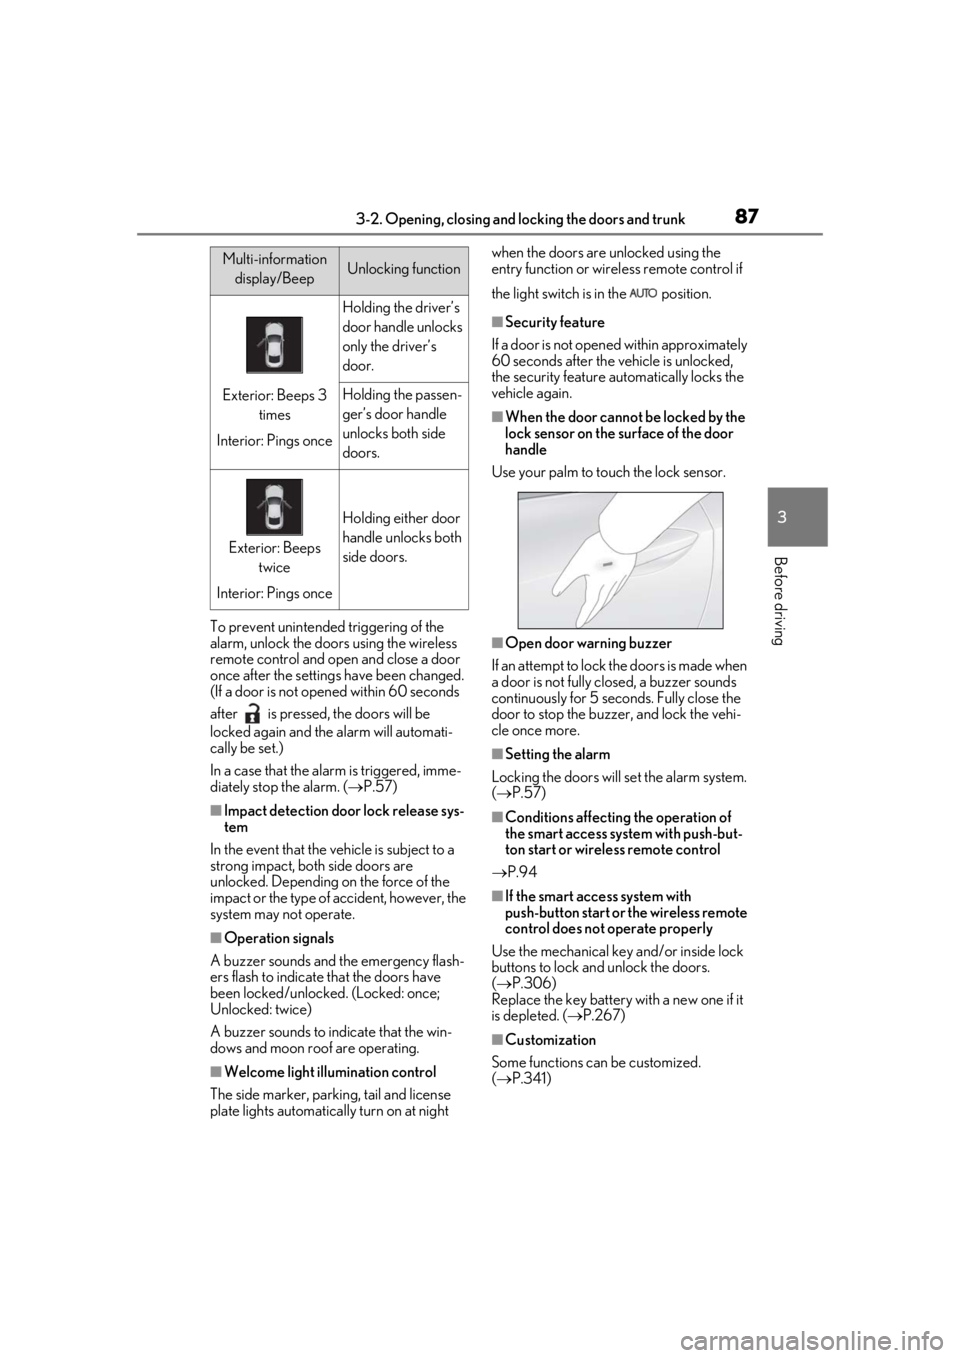
Use your palm to touch the lock sensor.
■Open door warning buzzer
If an attempt to lock the doors is made when
a door is not fully closed, a buzzer sounds
continuously for 5 seconds. Fully close the
door to stop the buzzer, and lock the vehi-
cle once more.
■Setting the alarm
Locking the doors will set the alarm system.
( P.57)
■Conditions affecting the operation of
the smart access system with push-but-
ton start or wireless remote control
P.94
■If the smart access system with
push-button start or the wireless remote
control does not operate properly
Use the mechanical key and/or inside lock
buttons to lock and unlock the doors.
( P.306)
Replace the key battery with a new one if it
is depleted. ( P.267)
■Customization
Some functions can be customized.
( P.341)
Multi-information
display/BeepUnlocking function
Exterior: Beeps 3 times
Interior: Pings once
Holding the driver’s
door handle unlocks
only the driver’s
door.
Holding the passen-
ger’s door handle
unlocks both side
doors.
Exterior: Beeps twice
Interior: Pings once
Holding either door
handle unlocks both
side doors.
Page 201 of 390

201
5
5
Interior features
Interior features
.5-1. Remote Touch/DisplayRemote Touch ............................ 202
Center Display ........................... 204
5-2. Using the air conditioning system Automatic air conditioning system........................................................ 207
Heated steering wheel/seat heat- ers/seat ventilators ................. 214
5-3. Using the interior lights Interior lights list.......................... 217
5-4. Using the storage features List of storage features............. 219
Trunk features.............................. 221
5-5. Using the other interior features
Other interior features ........... 222
Garage door opener............... 224
Compass....................................... 229
Page 215 of 390
2155-2. Using the air conditioning system
5
Interior features
heated steering wheel is operating.
■Operation condition
The engine switch is in IGNITION ON
mode.
■Timer function
The heated steering wheel will automati-
cally turn off after about 30 minutes.
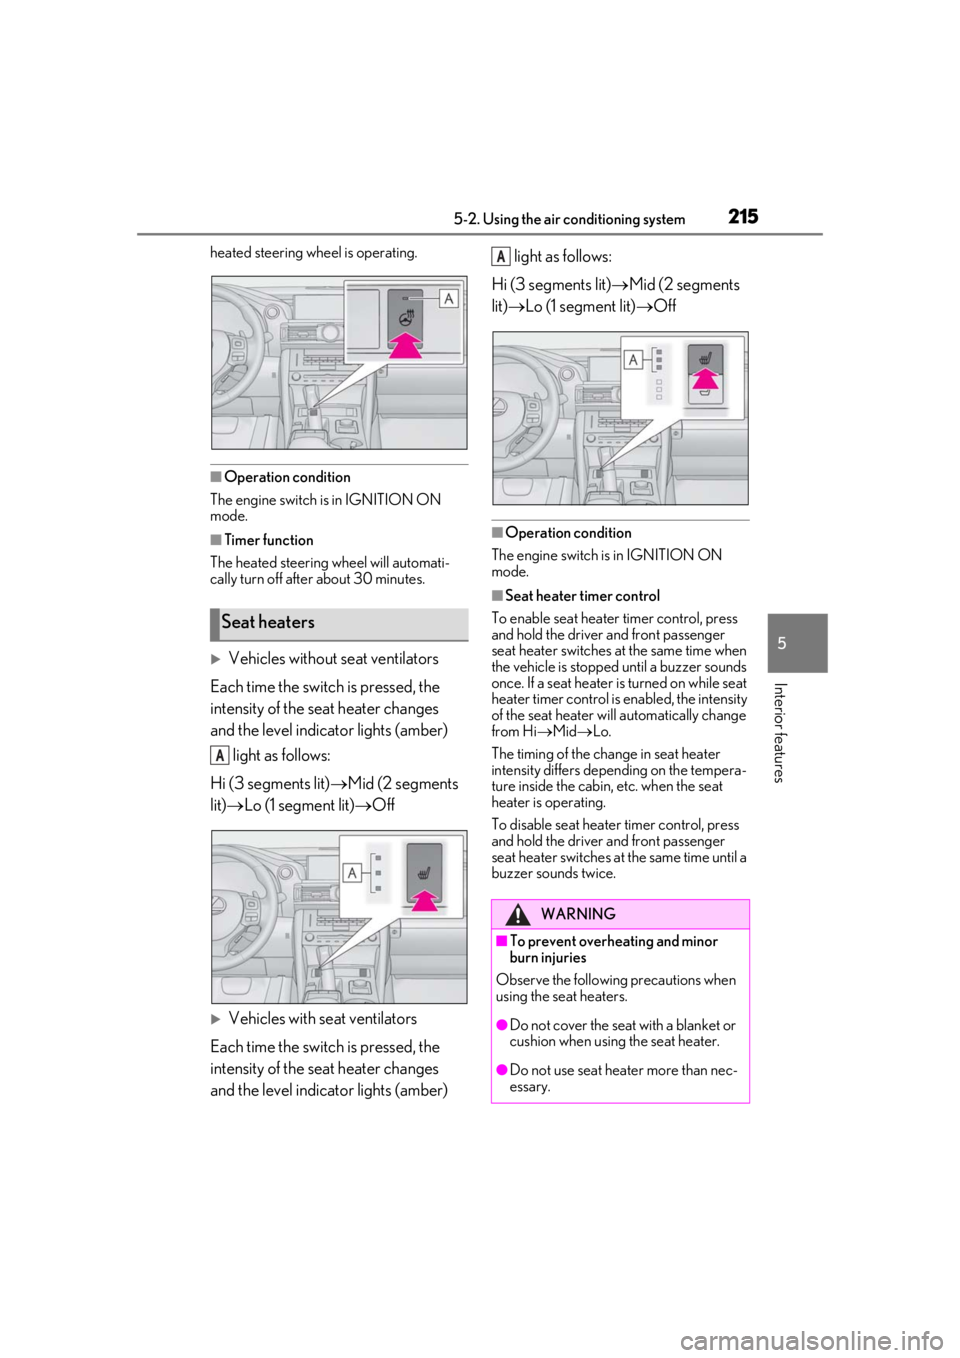
Vehicles without seat ventilators
Each time the switch is pressed, the
intensity of the seat heater changes
and the level indicator lights (amber) light as follows:
Hi (3 segments lit) Mid (2 segments
lit) Lo (1 segment lit) Off
Vehicles with seat ventilators
Each time the switch is pressed, the
intensity of the seat heater changes
and the level indicator lights (amber) light as follows:
Hi (3 segments lit) Mid (2 segments
lit) Lo (1 segment lit) Off
■Operation condition
The engine switch is in IGNITION ON
mode.
■Seat heater timer control
To enable seat heater timer control, press
and hold the driver and front passenger
seat heater switches at the same time when
the vehicle is stopped until a buzzer sounds
once. If a seat heater is turned on while seat
heater timer control is enabled, the intensity
of the seat heater w ill automatically change
from Hi Mid Lo.
The timing of the chan ge in seat heater
intensity differs depending on the tempera-
ture inside the cabin, etc. when the seat
heater is operating.
To disable seat heater timer control, press
and hold the driver and front passenger
seat heater switches at the same time until a
buzzer sounds twice.
Seat heaters
A
WARNING
■To prevent overheating and minor
burn injuries
Observe the following precautions when
using the seat heaters.
●Do not cover the seat with a blanket or
cushion when using the seat heater.
●Do not use seat heater more than nec-
essary.
A
Page 217 of 390
2175-3. Using the interior lights
5
Interior features
5-3.Using the interior lights
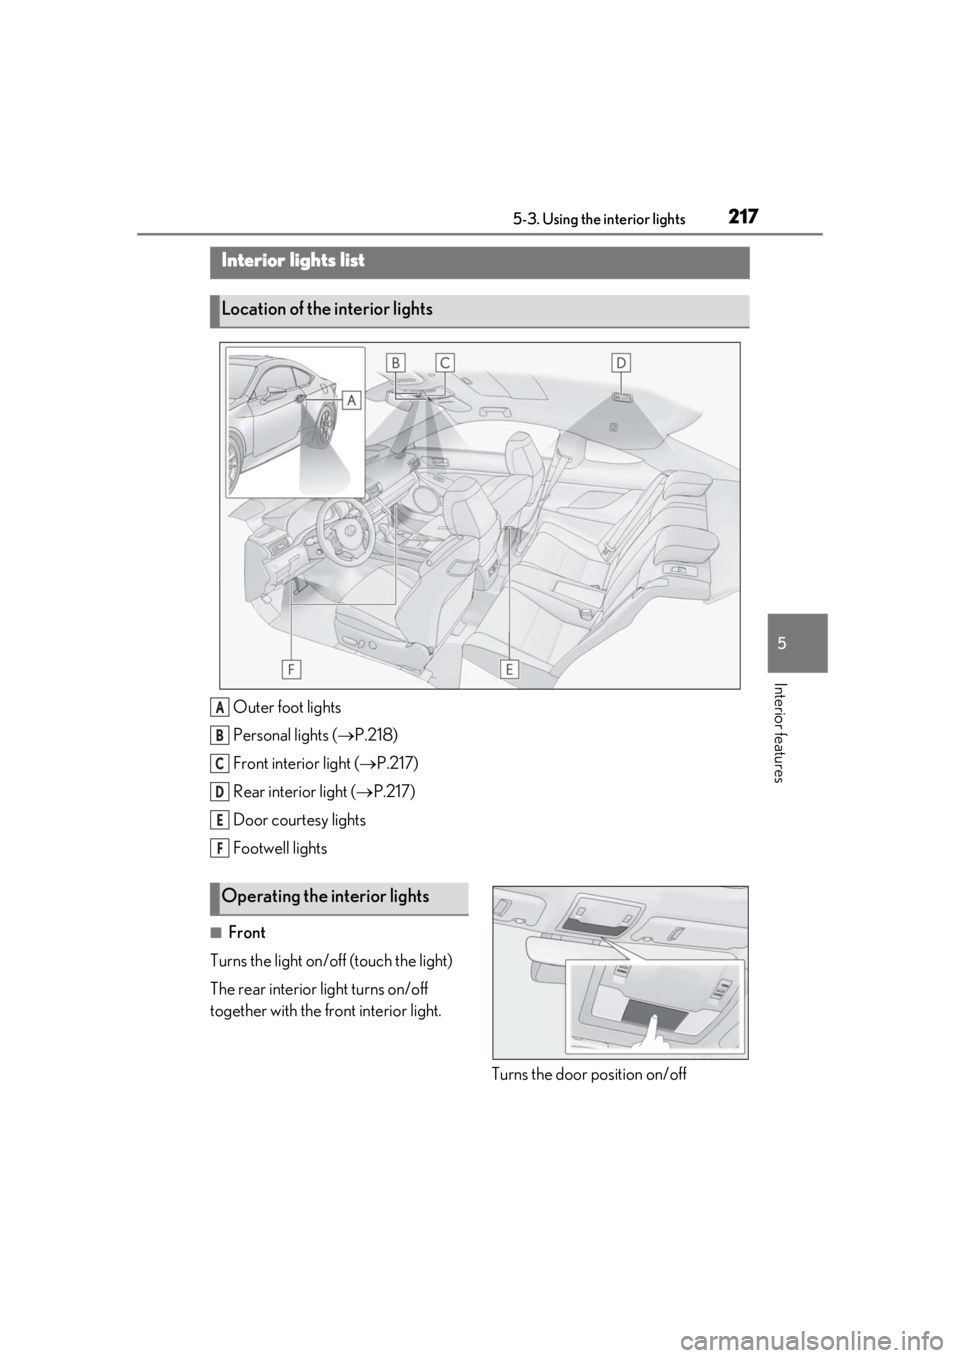
Outer foot lights
Personal lights (P.218)
Front interi or light (P.217)
Rear interior light ( P.217)
Door courtesy lights
Footwell lights
■Front
Turns the light on/off (touch the light)
The rear interior light turns on/off
together with the front interior light.
Turns the door position on/off
Interior lights list
Location of the interior lights
A
B
C
D
E
F
Operating the interior lights
Page 218 of 390
2185-3. Using the interior lights
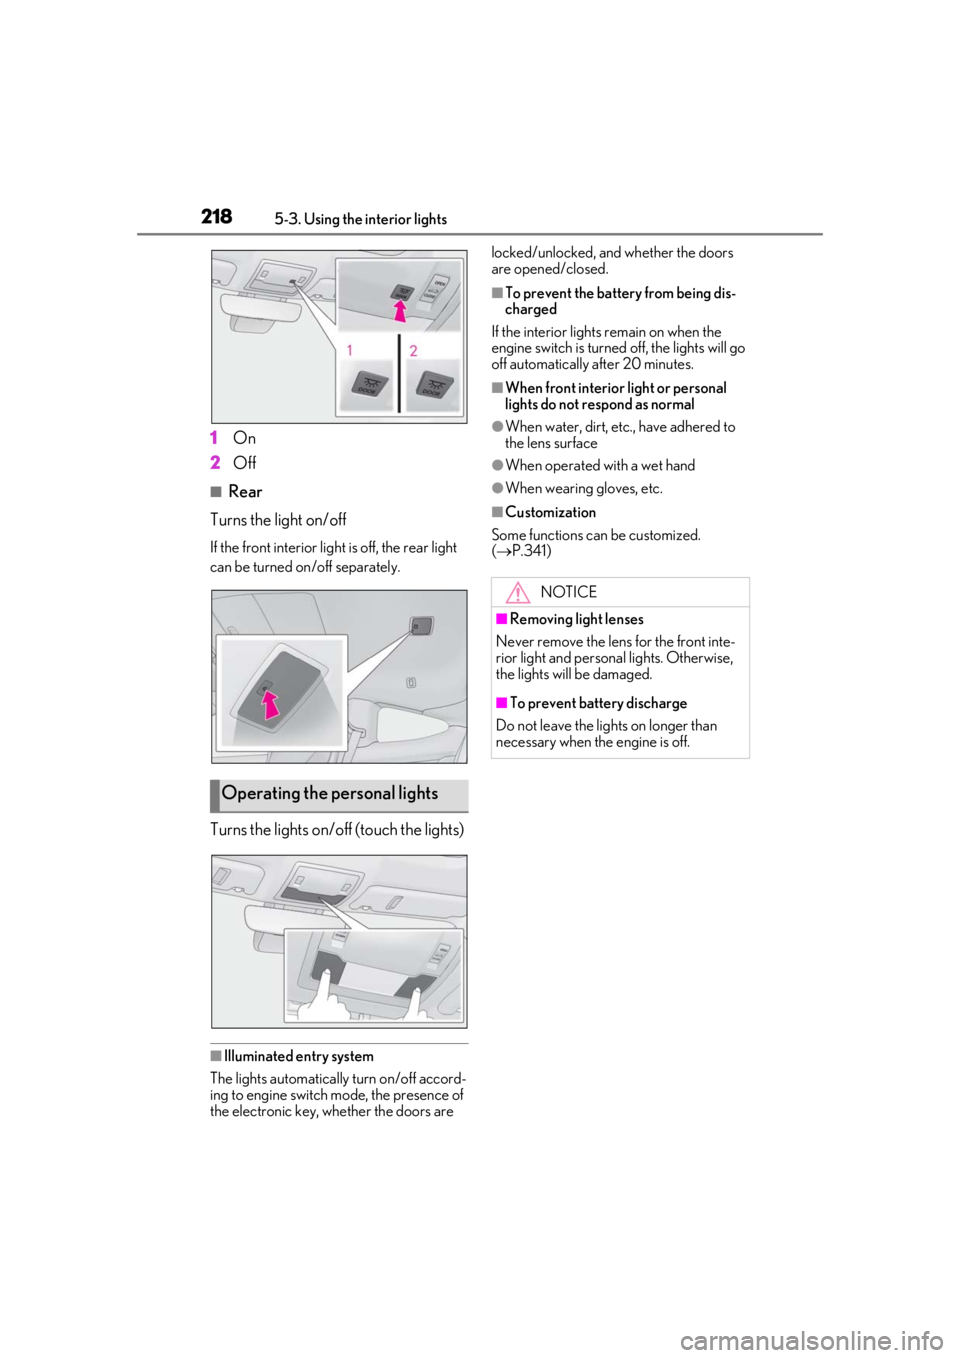
1On
2
Off
■Rear
Turns the light on/off
If the front interior light is off, the rear light
can be turned on/off separately.
Turns the lights on/off (touch the lights)
■Illuminated entry system
The lights automatically turn on/off accord-
ing to engine switch mode, the presence of
the electronic key, whether the doors are locked/unlocked, and whether the doors
are opened/closed.
■To prevent the battery from being dis-
charged
If the interior lights remain on when the
engine switch is turned off, the lights will go
off automatically after 20 minutes.
■When front interior light or personal
lights do not respond as normal
●When water, dirt, etc., have adhered to
the lens surface
●When operated with a wet hand
●When wearing gloves, etc.
■Customization
Some functions can be customized.
( P.341)
Operating the personal lights
NOTICE
■Removing light lenses
Never remove th e lens for the front inte-
rior light and personal lights. Otherwise,
the lights will be damaged.
■To prevent battery discharge
Do not leave the lights on longer than
necessary when the engine is off.
Page 223 of 390
2235-5. Using the other interior features
5
Interior features
■The power outlet can be used when
The engine switch is in ACCESSORY or
IGNITION ON mode.
■Using the power outlet
●The shape of the console box rim allows
power cables to be passed through when
the console box lid is closed.
■When turning the engine switch off
Disconnect electrical devices with charging
functions, such as mobile battery packs. If
such devices are left connected, the engine
switch may not be turned off normally.
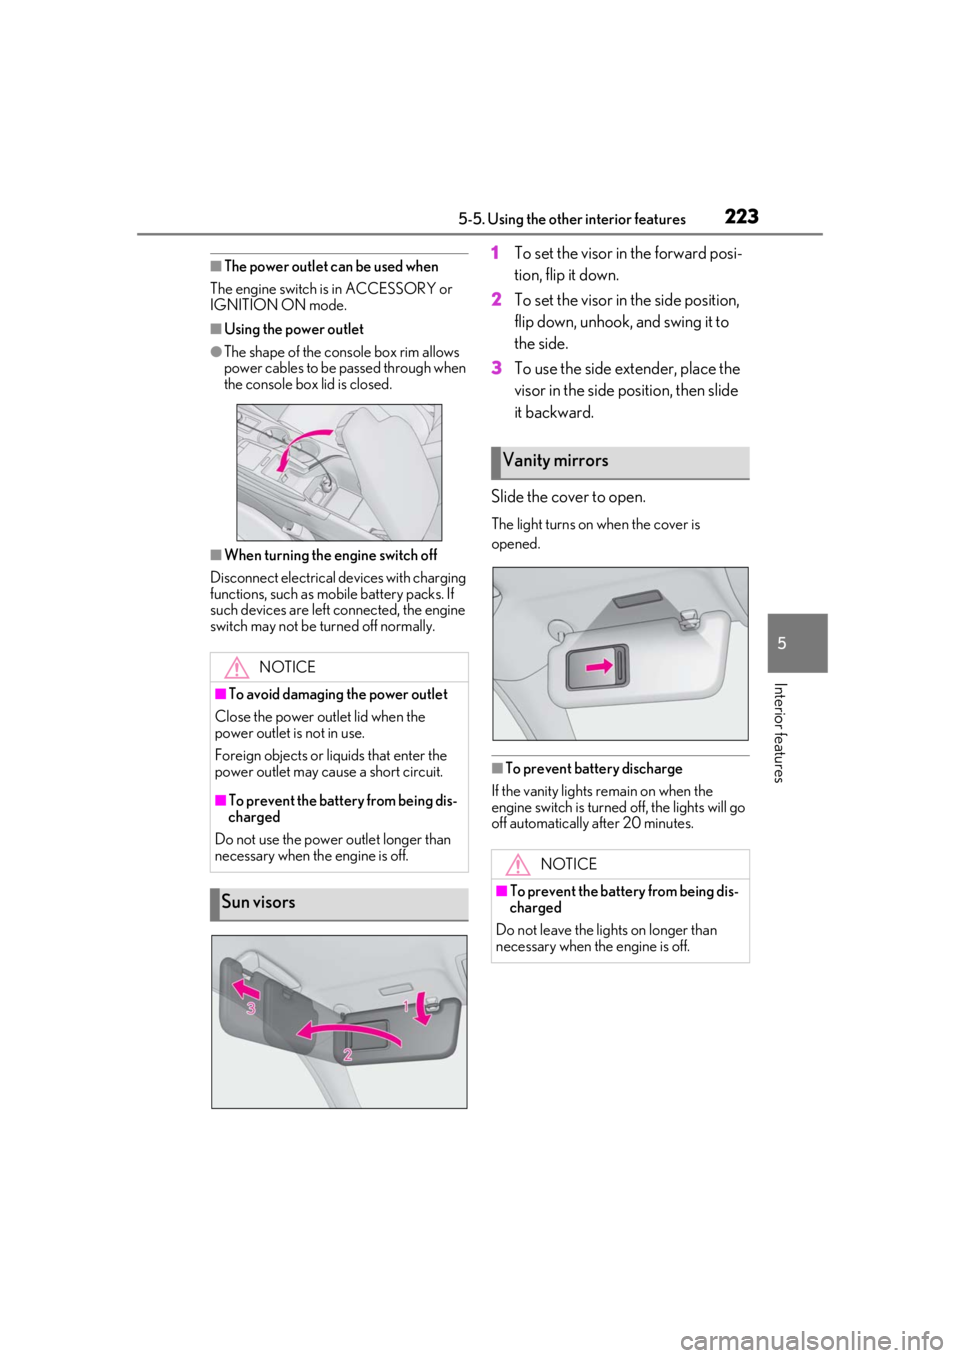
1To set the visor in the forward posi-
tion, flip it down.
2
To set the visor in the side position,
flip down, unhook, and swing it to
the side.
3
To use the side extender, place the
visor in the side position, then slide
it backward.
Slide the cover to open.
The light turns on when the cover is
opened.
■To prevent battery discharge
If the vanity lights remain on when the
engine switch is turned off, the lights will go
off automatically after 20 minutes.
NOTICE
■To avoid damaging the power outlet
Close the power outlet lid when the
power outlet is not in use.
Foreign objects or liquids that enter the
power outlet may cause a short circuit.
■To prevent the battery from being dis-
charged
Do not use the power outlet longer than
necessary when the engine is off.
Sun visors
Vanity mirrors
NOTICE
■To prevent the battery from being dis-
charged
Do not leave the lights on longer than
necessary when the engine is off.
Page 242 of 390
2426-2. Maintenance
Radiator, con-
denser and inter-
cooler radiator
The radiator, con-
denser and inter-
cooler radiator should
be free from foreign
objects. (P.254)
Washer fluid
Is there sufficient
washer fluid?
( P.256)
Vehicle interior
ItemsCheck points
Accelerator
pedal
• The accelerator
pedal should move
smoothly (without
uneven pedal effort
or catching).
Automatic trans-
mission “Park”
mechanism
•When parked on a slope and the shift
lever is in P, is the
vehicle securely
stopped?
Brake pedal
• Does the brake pedal move
smoothly?
• Does the brake pedal have appro-
priate clearance
from the floor?
• Does the brake pedal have the cor-
rect amount of free
play?
ItemsCheck points
Brakes
• The vehicle should not pull to one side
when the brakes are
applied.
•The brakes should work effectively.
• The brake pedal should not feel
spongy.
• The brake pedal should not get too
close to the floor
when the brakes are
applied.
Head restraints
•Do the head restraints move
smoothly and lock
securely?
Indicators/buzz-
ers•Do the indicators and buzzers function
properly?
Lights• Do all the lights come on?
Parking brake
• Does the parking brake pedal move
smoothly?
• When parked on a slope and the park-
ing brake is on, is the
vehicle securely
stopped?
Seat belts
• Do the seat belts operate smoothly?
• The seat belts should not be damaged.
ItemsCheck points
Page 305 of 390

3037-2. Steps to take in an emergency
7
When trouble arises
One of the following may be the cause
of the problem:
There may not be sufficient fuel in
the vehicle’s tank.
Refuel the vehicle.
The engine may be flooded.
Try to restart the engine again fol-
lowing correct starting procedures.
( P.125)
There may be a malfunction in the
engine immobilizer system.
( P.56)
One of the following may be the cause
of the problem:
The battery may be discharged.
( P.308)
The battery terminal connections
may be loose or corroded.
( P.255)
NOTICE
■Driving with tire chains and the spare
tire
Do not fit tire chains to the spare tire.
Tire chains may damage the vehicle body
and adversely affect driving perfor-
mance.
■When replacing the tires
When removing or fitting the wheels,
tires or the tire pressure warning valve
and transmitter, contact your Lexus
dealer as the tire pr essure warning valve
and transmitter may be damaged if not
handled correctly.
If the engine will not start
If the engine will not start even
though correct starting procedures
are being followed ( P.125), con-
sider each of the following points:
The engine will not start even
though the starter motor oper-
ates normally.
The starter motor turns over
slowly, the interior lights and
headlights are dim, or the horn
does not sound or sounds at a low
volume.