tow LEXUS RC350 2022 User Guide
[x] Cancel search | Manufacturer: LEXUS, Model Year: 2022, Model line: RC350, Model: LEXUS RC350 2022Pages: 400, PDF Size: 27.73 MB
Page 117 of 400
115
RC350/RC300 Owner's Manual
4
4
Driving
Driving
.4-1. Before drivingDriving the vehicle ...................... 116
Cargo and luggage .................... 121
Vehicle load limits ...................... 123
Trailer towing ............................... 124
Dinghy towing ............................. 124
4-2. Driving procedures Engine (ignition) switch ........... 125
Automatic transmission........... 129
Turn signal lever.......................... 134
Parking brake .............................. 135
Brake Hold.................................... 137
ASC (Active Sound Control) ......................................................... 139
4-3. Operating the lights and wipers Headlight switch ......................... 140
AHB (Automatic High Beam) ......................................................... 142
Windshield wipers and washer ......................................................... 145
4-4. Refueling Opening the fuel tank cap...... 153
4-5. Using the driving support sys- tems
Lexus Safety System + ............. 156
PCS (Pre-Collision System) ......................................................... 160
LDA (Lane Departure Alert with steering control) ...................... 167
Dynamic radar cruise control with full-speed range ....................... 174Intuitive parking assist ..............
183
BSM (Blind Spot Monitor) ..... 189
Driving mode select switch ... 196
Driving assist systems............... 198
4-6. Driving tips Winter driving tips .................... 203
Page 124 of 400

1224-1. Before driving
RC350/RC300 Owner's Manual
gage load capacity calculated in Step
4.
(6) If your vehicle will be towing a
trailer, load from your trailer will be
transferred to your vehicle. Consult
this manual to determine how this
reduces the available cargo and lug-
gage load capacity of your vehicle.
( P.123)
Lexus does not recommend towing a
trailer with your vehicle. Your vehicle is not
designed for trailer towing.
Cargo capacity
Total load capacity (vehicle capac-
ity weight) ( P.326)
When 2 people with the combined
weight of A lb. (kg) are riding in your
vehicle, which has a total load capacity
(vehicle capacity weight) of B lb. (kg),
the available amount of cargo and lug-
gage load capacity will be C lb. (kg) as
follows:
B
*2 lb. (kg) - A*1 lb. (kg) = C*3 lb. (kg)
*1: A =Weight of people
*2: B =Total load capacity
*3:C =Available carg o and luggage load
In this condition, if 2 more passengers with
the combined weight of D lb. (kg) get on,
the available cargo and luggage load will
be reduced E lb. (kg) as follows:
C lb. (kg) - D*4 lb. (kg) = E*5 lb. (kg)
*4: D =Additional weight of people
*5: E =Available cargo and luggage load
As shown in the example above, if the
number of occupant s increases, the
cargo and luggage load will be
reduced by an amount that equals the
increased weight due to the additional
occupants. In other words, if an
increase in the number of occupants
causes an excess of the total load
capacity (combined weight of occu-
pants plus cargo and luggage load),
you must reduce the cargo and lug-
gage on your vehicle.
Calculation formula for your
vehicle
A
B
WARNING
■Things that must not be carried in the
trunk
The following things may cause a fire if
loaded in the trunk:
●Receptacles containing gasoline
●Aerosol cans
■Storage precautions
Observe the following precautions.
Failure to do so may prevent the pedals
from being depressed properly, may
block the driver’s visi on, or may result in
items hitting the driver or passengers,
possibly causing an accident.
●Stow cargo and luggage in the trunk
whenever possible.
Page 125 of 400

1234-1. Before driving
RC350/RC300 Owner's Manual
4
Driving
■Total load capacity and seating capacity
These details are also described on the tire
and loading information label. ( P.271)
WARNING
●To prevent cargo and luggage from
sliding forward during braking, do not
stack anything in the enlarged trunk.
Keep cargo and luggage low, as close
to the floor as possible.
●When you fold down the rear seats,
long items should not be placed
directly behind the front seats.
●Never allow anyone to ride in the
enlarged trunk. It is not designed for
passengers. They shou ld ride in their
seats with their seat belts properly fas-
tened.
●Do not place cargo or luggage in or on
the following locations.
• At the feet of the driver
• On the front passenger or rear seats (when stacking items)
• On the package tray
• On the instrument panel
•On the dashboard
• In front of the Center Display
●Secure all items in the occupant com-
partment.
■Capacity and distribution
●Do not exceed the maximum axle
weight rating or the total vehicle
weight rating.
●Even if the total load of occupant’s
weight and the cargo load is less than
the total load capacity, do not apply the
load unevenly. Improper loading may
cause deterioration of steering or
braking control which may cause
death or serious injury.
Vehicle load limits
Vehicle load limits include total
load capacity, seating capacity,
towing capacity and cargo capac-
ity.
Total load capacity (vehicle
capacity weight): P.326
Total load capacity means the com-
bined weight of occupants, cargo
and luggage.
Seating capacity: P.326
Seating capacity means the maxi-
mum number of occupants whose
estimated average weight is 150 lb.
(68 kg) per person.
Towing capacity
Lexus does not recommend towing
a trailer with your vehicle.
Cargo capacity
Cargo capacity may increase or
decrease depending on the weight
and the number of occupants.
WARNING
■Overloading the vehicle
Do not overload the vehicle.
It may not only cause damage to the tires,
but also degrade steering and braking
ability, resulting in an accident.
Page 126 of 400

1244-1. Before driving
RC350/RC300 Owner's Manual
Trailer towing
Lexus does not recommend towing
a trailer with your vehicle. Lexus
also does not recommend the
installation of a tow hitch or the use
of a tow hitch carrier for a wheel-
chair, scooter, bicycle, etc. Your
vehicle is not designed for trailer
towing or for the use of tow hitch
mounted carriers.
Dinghy towing
Your vehicle is not designed to be
dinghy towed (with 4 wheels on the
ground) behind a motor home.
NOTICE
■To avoid serious damage to your vehi-
cle
Do not tow your vehicle with the four
wheels on the ground.
Page 143 of 400
1414-3. Operating the lights and wipers
RC350/RC300 Owner's Manual
4
Driving
ing the level of ambient light and may cause
the automatic headlight system to malfunc-
tion.
■Automatic light off system
When the light switch is in , or : The headlights and tail lights turn off
30 seconds after the engine switch is
turned to ACCESSORY mode or turned
off and a door is opened and all of the doors
and trunk are closed. (The lights turn off
immediately if on the key is pressed
twice after both side doors are closed.)
To turn the lights on again, turn the engine
switch to IGNITION ON mode, or turn the
light switch off once and then back to
or .
If any of the doors or trunk lid is left open,
the lights automatically turn off after 20
minutes.
■Light reminder buzzer
A buzzer sounds when the engine switch is
turned off or turned to ACCESSORY
mode and the driver’s door is opened while
the lights are turned on.
■Automatic headlight leveling system
The level of the headlights is automatically
adjusted according to the number of pas-
sengers and the loading condition of the
vehicle to ensure that the headlights do not
interfere with other road users.
■Customization
Some functions can be customized.
( P.349)
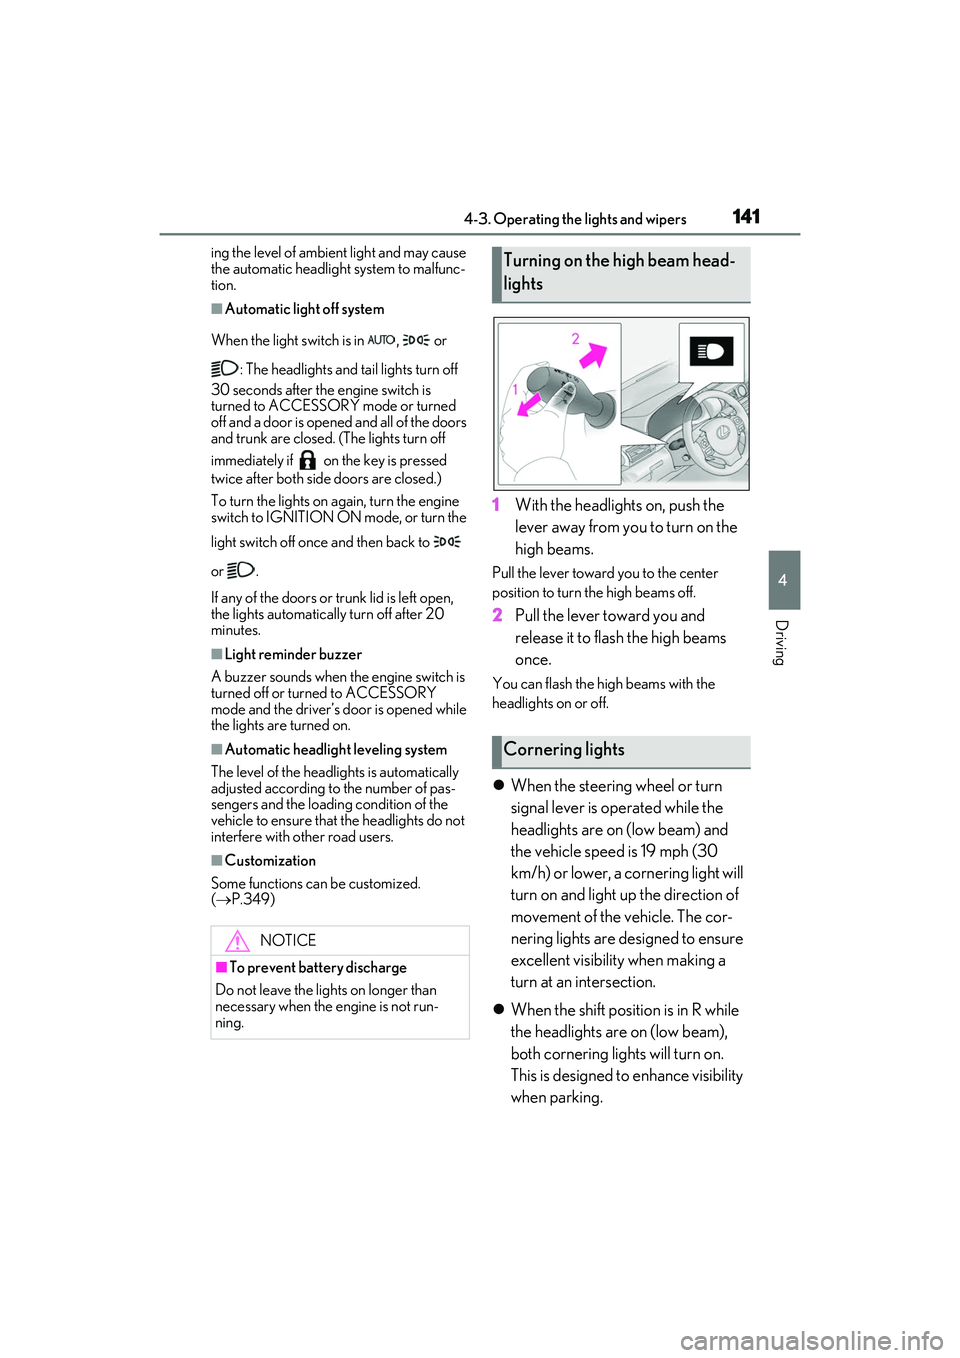
1 With the headlights on, push the
lever away from you to turn on the
high beams.
Pull the lever toward you to the center
position to turn the high beams off.
2Pull the lever toward you and
release it to flash the high beams
once.
You can flash the high beams with the
headlights on or off.
When the steering wheel or turn
signal lever is operated while the
headlights are on (low beam) and
the vehicle speed is 19 mph (30
km/h) or lower, a cornering light will
turn on and light up the direction of
movement of the vehicle. The cor-
nering lights are designed to ensure
excellent visibility when making a
turn at an intersection.
When the shift position is in R while
the headlights are on (low beam),
both cornering lights will turn on.
This is designed to enhance visibility
when parking.
NOTICE
■To prevent battery discharge
Do not leave the lights on longer than
necessary when the engine is not run-
ning.
Turning on the high beam head-
lights
Cornering lights
Page 146 of 400
1444-3. Operating the lights and wipers
RC350/RC300 Owner's Manual
mittently changing brightness and dark-
ness
• When frequently and repeatedly driving
ascending/descending roads, or roads
with rough, bumpy or uneven surfaces
(such as stone-paved ro ads, gravel roads,
etc.)
• When frequently and repeatedly taking curves or driving on a winding road
• When there is a highly reflective object ahead of the vehicle, such as a sign or
mirror
• When the back of a preceding vehicle is highly reflective, such as a container on a
truck
• When the vehicle’s headlights are dam- aged or dirty, or are not aimed properly
• When the vehicle is listing or titling due to
a flat tire, a trailer being towed, etc.
• When the headlights are changed between the high beams and low beams
repeatedly in an abnormal manner
• When the driver believes that the high beams may be flashing or dazzling
pedestrians or other drivers
■Temporarily lowering sensor sensitivity
The sensitivity of the sensor can be tempo-
rarily lowered.
1 Turn the engine switch off while the fol-
lowing conditions are met.
●The headlight switch is in or .
●The headlight switch le ver is in the origi-
nal position.
●Automatic High Beam switch is on.
2 Turn the engine switch to IGNITION
ON mode.
3 Within 30 seconds after 2 , repeat
pushing the headlight switch lever to the
high beam position then pulling it to the
original position quickly 10 times, then
leave the lever in original position.
4 If the sensitivity is changed, the Auto-
matic High Beam indicator is turn on
and off 3 times.
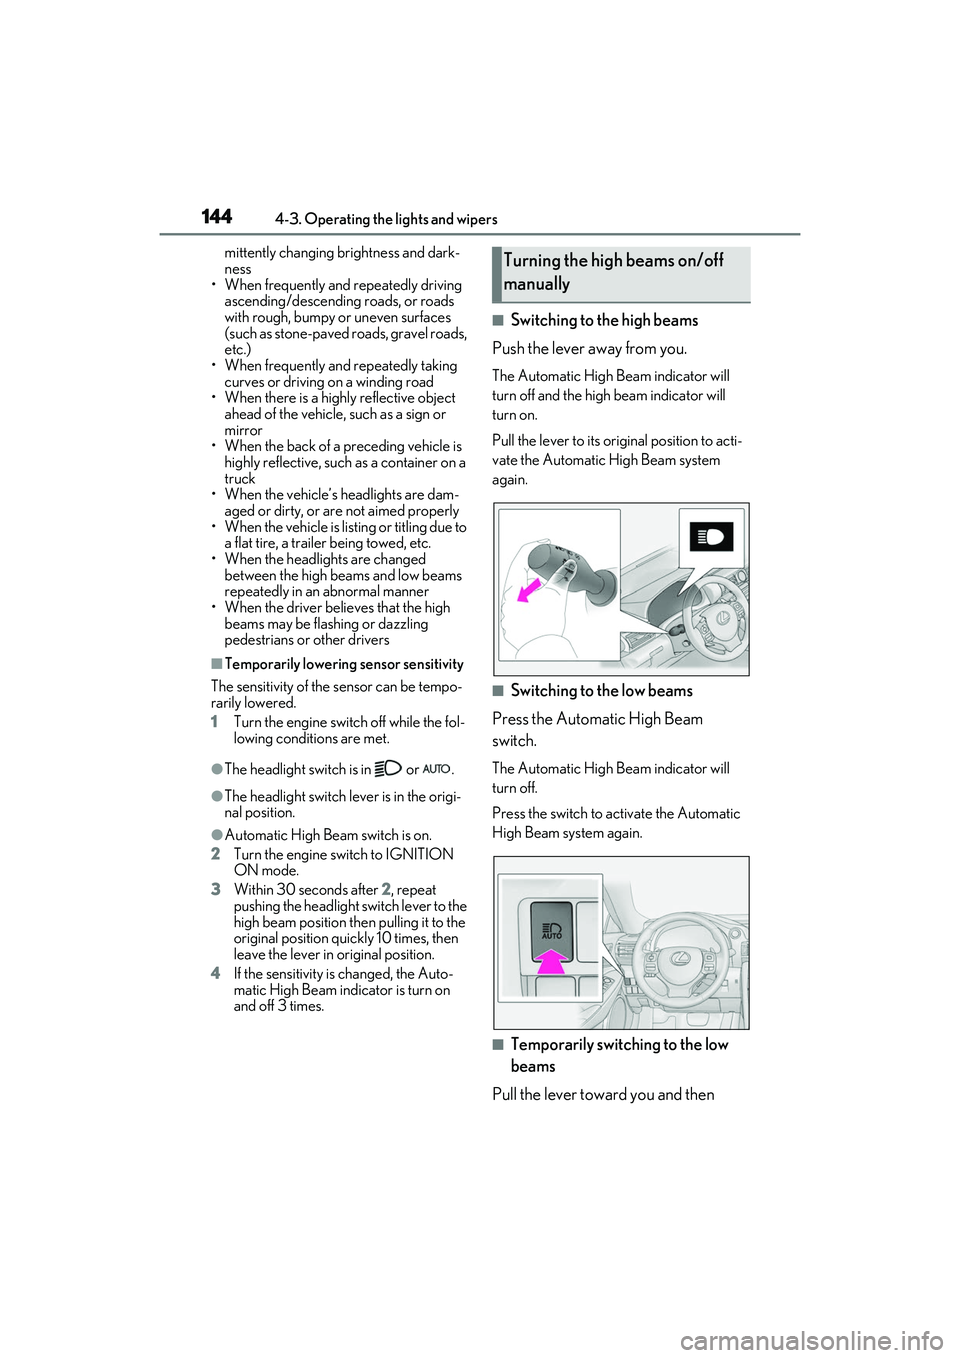
■Switching to the high beams
Push the lever away from you.
The Automatic High Beam indicator will
turn off and the high beam indicator will
turn on.
Pull the lever to its orig inal position to acti-
vate the Automatic High Beam system
again.
■Switching to the low beams
Press the Automatic High Beam
switch.
The Automatic High Beam indicator will
turn off.
Press the switch to activate the Automatic
High Beam system again.
■Temporarily switching to the low
beams
Pull the lever toward you and then
Turning the high beams on/off
manually
Page 147 of 400
1454-3. Operating the lights and wipers
RC350/RC300 Owner's Manual
4
Driving
return it to its original position.
The high beams are on while the lever is
pulled toward you, however, after the lever
is returned to its original position, the low
beams remain on for a certain amount of
time. Afterwards, the Automatic High
Beam will be activated again.
■Temporarily switching to the low beams
It is recommended to switch to the low
beams when the high beam may cause
problems or distress to other drivers or
pedestrians nearby.
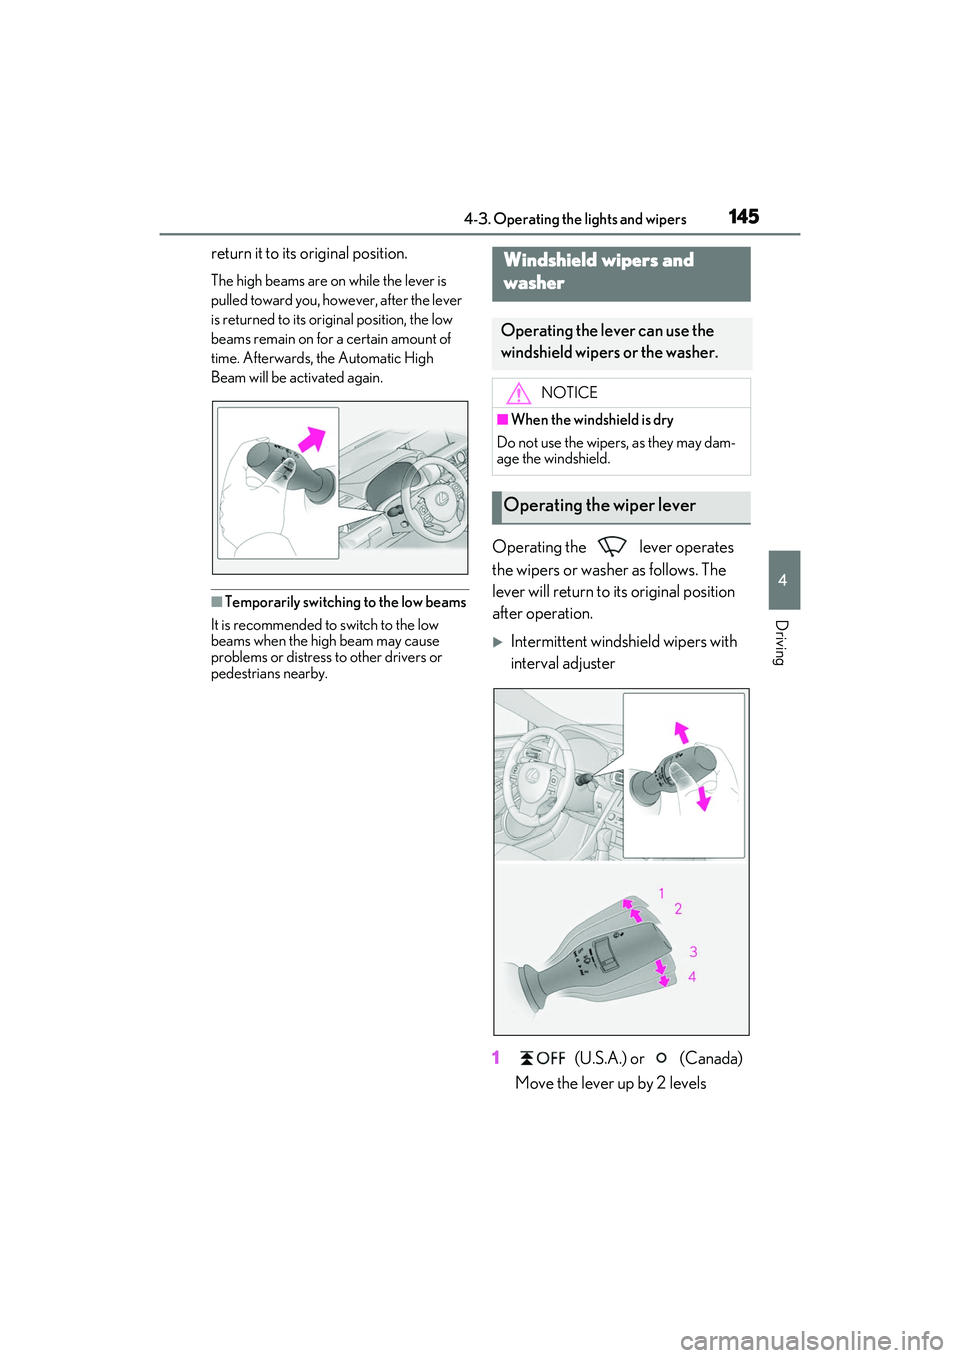
Operating the lever operates
the wipers or washer as follows. The
lever will return to its original position
after operation.
Intermittent windsh ield wipers with
interval adjuster
1 (U.S.A.) or (Canada)
Move the lever up by 2 levels
Windshield wipers and
washer
Operating the lever can use the
windshield wipers or the washer.
NOTICE
■When the windshield is dry
Do not use the wipers, as they may dam-
age the windshield.
Operating the wiper lever
Page 153 of 400

1514-3. Operating the lights and wipers
RC350/RC300 Owner's Manual
4
Driving
once. After this, the headlight cleaners will
operate every 5th time the lever is pulled.
■The windshield wiper and washer can be
operated when
The engine switch is in IGNITION ON
mode.
■Dripping prevention wiper sweep
After performing a washing and wiping
operation several times, the wipers operate
one more time after a short delay to prevent
dripping.
However, this final wiper operation will not
be performed while driving.
■Effects of vehicle speed on wiper opera-
tion (vehicles with rain-sensing wind-
shield wipers)
Vehicle speed affects the following even
when the wipers are not in AUTO mode.
●Intermittent wiper interval
●Wiper operation when the washer is
being used (delay until drip prevention
wiper sweep occurs)
With low speed windshield wiper opera-
tion selected, wiper operation will be
switched from low speed to intermittent
wiper operation only when the vehicle is
stationary.
■Raindrop sensor (vehicles with
rain-sensing windshield wipers)
●The raindrop sensor judges the amount
of raindrops.
An optical sensor is adopted. It may not
operate properly when sunlight from the
rising or setting of the sun intermittently
strikes the windshield, or if bugs etc. are
present on the windshield.
●If the wiper is turned to AUTO mode
while the engine switch is in IGNITION ON mode, the wipers will operate once
to show that AUTO mode is activated.
●If the temperature of
the raindrop sensor
is 185°F (85°C) or higher, or -22°F
(-30°C) or lower, automatic operation
may not occur. In this case, operate the
wipers in any mode other than AUTO
mode.
■When the windshield wipers are in tem-
porary operation (vehicles with
rain-sensing wind shield wipers)
AUTO mode cannot be activated even if is pressed.
■If no windshield washer fluid sprays
Check that the washer nozzles are not
blocked if there is wash er fluid in the wind-
shield washer fluid reservoir.
WARNING
■Caution regarding the use of wind-
shield wipers in AUTO mode
The windshield wipers may operate
unexpectedly if the se nsor is touched or
the windshield is subj ect to vibration in
AUTO mode. Take care that your fingers
or anything else do not become caught
in the windshield wipers.
■Caution regarding the use of washer
fluid
When it is cold, do not use the washer
fluid until the windshield becomes warm.
The fluid may freeze on the windshield
and cause low visibility. This may lead to
an accident, resulting in death or serious
injury.
NOTICE
■When there is no washer fluid spray
from the nozzle
Damage to the washer fluid pump may
be caused if the lever is pulled toward
you and held continually.
Page 163 of 400

1614-5. Using the driving support systems
RC350/RC300 Owner's Manual
4
Driving
and rear wheels and effort necessary
to turn the steering wheel to help
enhance steering responsiveness.
WARNING
■Limitations of the pre-collision system
●The driver is solely responsible for safe
driving. Always drive safely, taking
care to observe your surroundings.
Do not use the pre-collision system
instead of normal braking operations
under any circumstances. This system
will not prevent collisions or lessen col-
lision damage or injury in every situa-
tion. Do not overly rely on this system.
Failure to do so may lead to an acci-
dent, resulting in death or serious
injury.
●Although this system is designed to
help avoid a collision or help reduce
the impact of the collision, its effective-
ness may change according to various
conditions, therefore the system may
not always be able to achieve the same
level of performance.
Read the following conditions care-
fully. Do not overly rely on this system
and always drive carefully.
• Conditions under which the system may operate even if there is no possi-
bility of a collision:
P.163
• Conditions under which the system may not operate properly:
P.165
●Do not attempt to test the operation of
the pre-collision system yourself.
Depending on the objects used for
testing (dummies, cardboard objects
imitating detectable objects, etc.), the
system may not operate properly, pos-
sibly leading to an accident.
■Pre-collision braking
●When the pre-collision braking func-
tion is operating, a large amount of
braking force will be applied.
●If the vehicle is st opped by the opera-
tion of the pre-collision braking func-
tion, the pre-collision braking function
operation will be canceled after
approximately 2 seco nds. Depress the
brake pedal as necessary.
●The pre-collision braking function may
not operate if certain operations are
performed by the driver. If the acceler-
ator pedal is being depressed strongly
or the steering wheel is being turned,
the system may determine that the
driver is taking evasive action and pos-
sibly prevent the pre-collision braking
function from operating.
●In some situations, while the pre-colli-
sion braking function is operating,
operation of the function may be
canceled if the ac celerator pedal is
depressed strongly or the steering
wheel is turned and the system deter-
mines that the driver is taking evasive
action.
●If the brake pedal is being depressed,
the system may determine that the
driver is taking evasive action and pos-
sibly delay the operat ion timing of the
pre-collision braking function.
■When to disable the pre-collision sys-
tem
In the following situations, disable the
system, as it may not operate properly,
possibly leading to an accident resulting
in death or serious injury:
●When the vehicle is being towed
●When your vehicle is towing another
vehicle
●When transporting the vehicle via
truck, boat, train or similar means of
transportation
●When the vehicle is raised on a lift with
the engine running and the tires are
allowed to rotate freely
Page 167 of 400
1654-5. Using the driving support systems
RC350/RC300 Owner's Manual
4
Driving
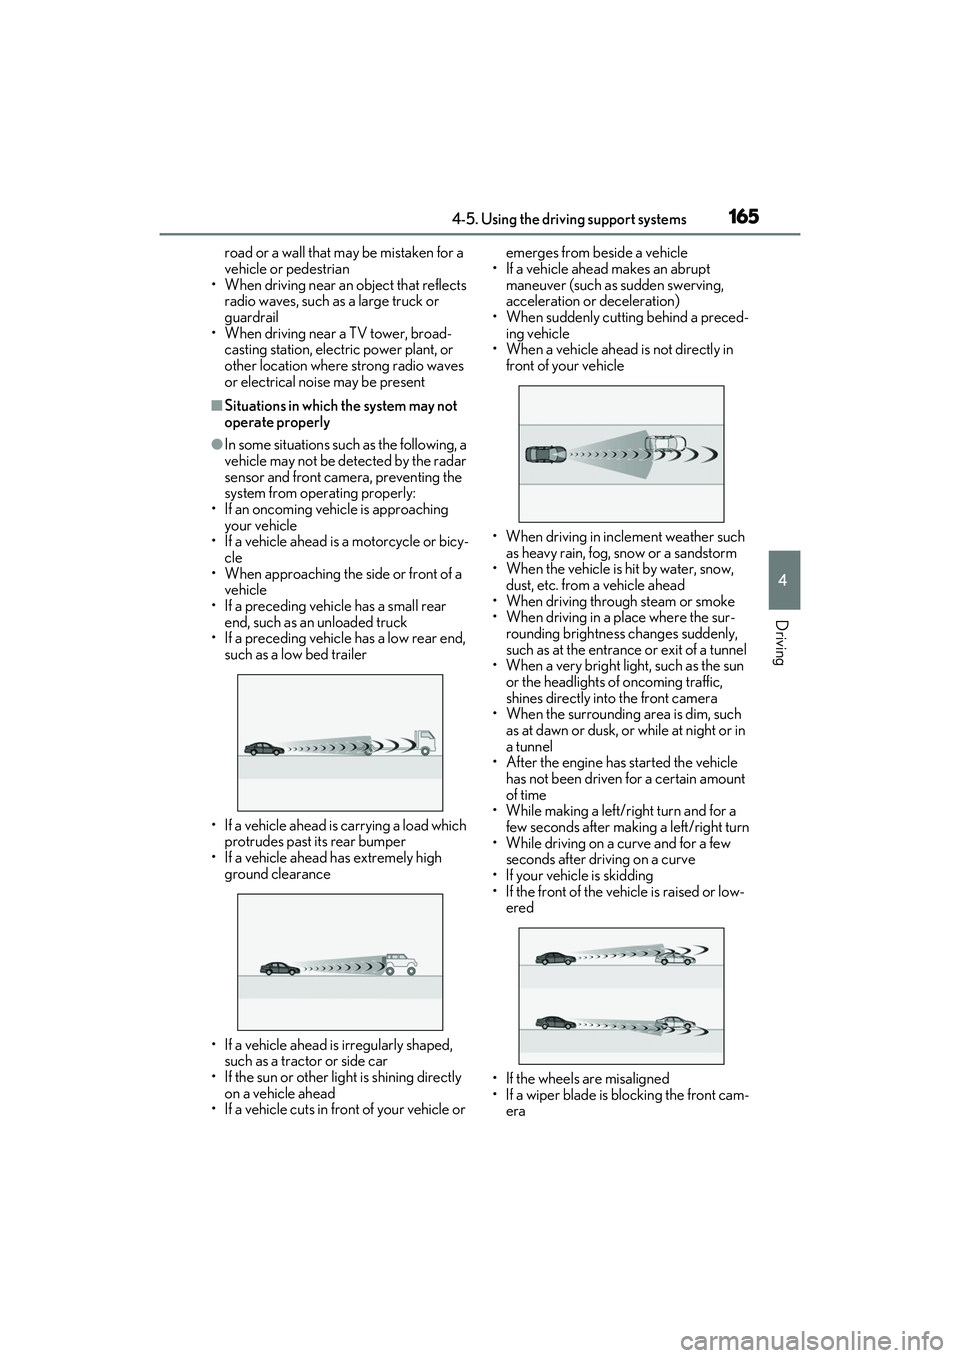
road or a wall that may be mistaken for a
vehicle or pedestrian
• When driving near an object that reflects
radio waves, such as a large truck or
guardrail
• When driving near a TV tower, broad-
casting station, electric power plant, or
other location where strong radio waves
or electrical noise may be present
■Situations in which the system may not
operate properly
●In some situations such as the following, a
vehicle may not be detected by the radar
sensor and front camera, preventing the
system from operating properly:
• If an oncoming vehicle is approaching your vehicle
• If a vehicle ahead is a motorcycle or bicy-
cle
• When approaching the side or front of a vehicle
• If a preceding vehicle has a small rear end, such as an unloaded truck
• If a preceding vehicle has a low rear end,
such as a low bed trailer
• If a vehicle ahead is carrying a load which protrudes past its rear bumper
• If a vehicle ahead has extremely high ground clearance
• If a vehicle ahead is irregularly shaped, such as a tractor or side car
• If the sun or other light is shining directly
on a vehicle ahead
• If a vehicle cuts in front of your vehicle or emerges from beside a vehicle
• If a vehicle ahead makes an abrupt maneuver (such as sudden swerving,
acceleration or deceleration)
• When suddenly cutting behind a preced- ing vehicle
• When a vehicle ahead is not directly in front of your vehicle
• When driving in incl ement weather such
as heavy rain, fog, snow or a sandstorm
• When the vehicle is hit by water, snow,
dust, etc. from a vehicle ahead
• When driving through steam or smoke
• When driving in a place where the sur- rounding brightness changes suddenly,
such as at the entrance or exit of a tunnel
• When a very bright light, such as the sun
or the headlights of oncoming traffic,
shines directly into the front camera
• When the surrounding area is dim, such
as at dawn or dusk, or while at night or in
a tunnel
• After the engine has started the vehicle
has not been driven for a certain amount
of time
• While making a left/r ight turn and for a
few seconds after making a left/right turn
• While driving on a curve and for a few seconds after driving on a curve
• If your vehicle is skidding
• If the front of the vehicle is raised or low- ered
• If the wheels are misaligned
• If a wiper blade is blocking the front cam- era