bulb LEXUS RX270 2014 Owners Manual
[x] Cancel search | Manufacturer: LEXUS, Model Year: 2014, Model line: RX270, Model: LEXUS RX270 2014Pages: 652, PDF Size: 48.98 MB
Page 5 of 652
1
2
3
4
5
6
RX350/270_EE
5
3-4. Using the storage features
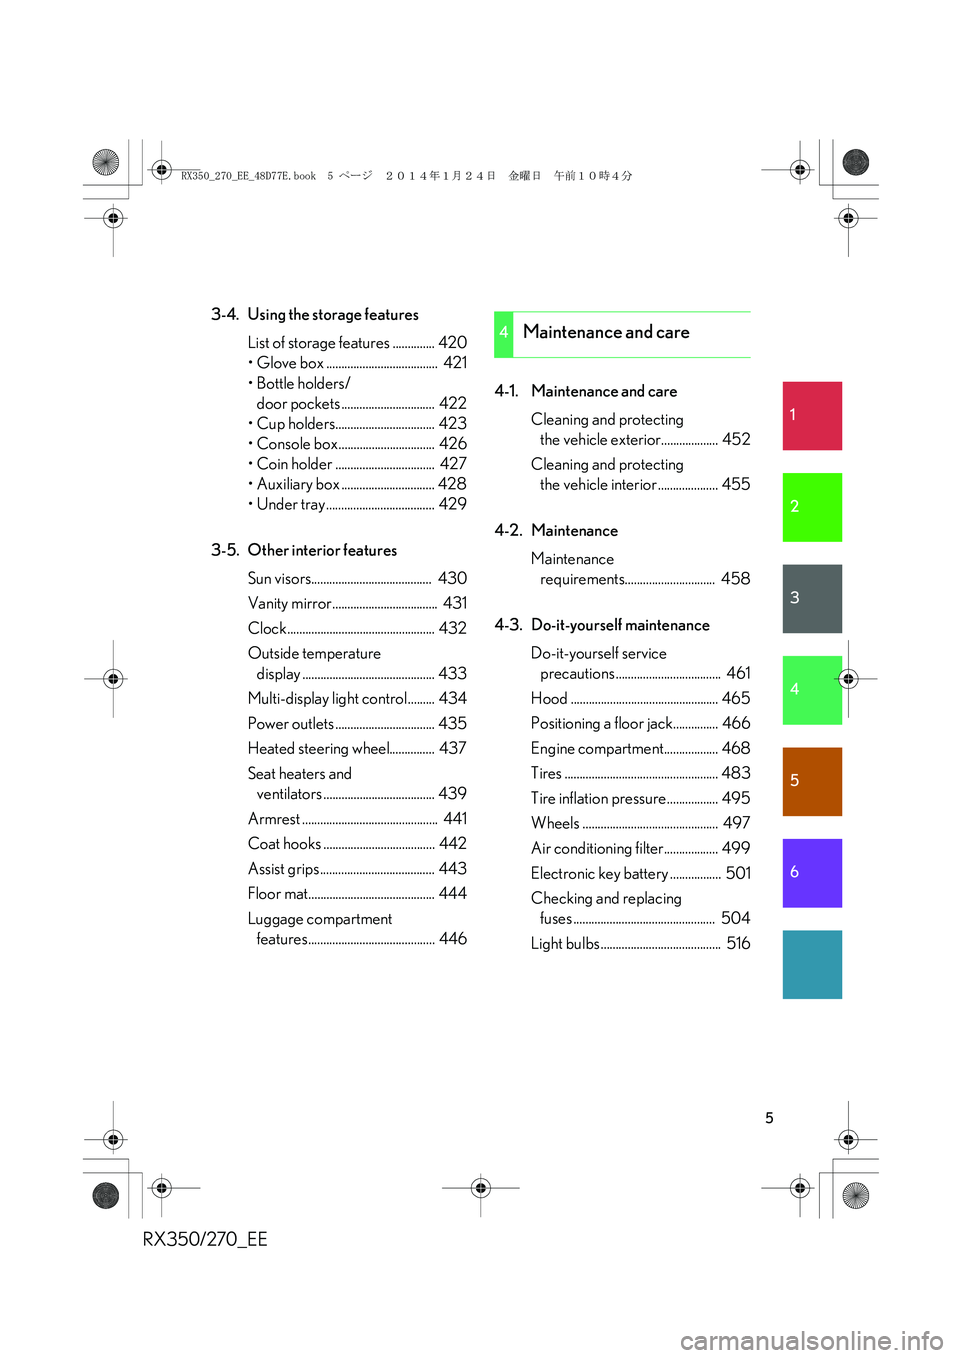
List of storage features .............. 420
• Glove box ..................................... 421
• Bottle holders/
door pockets ............................... 422
• Cup holders................................. 423
• Console box................................ 426
• Coin holder ................................. 427
• Auxiliary box ............................... 428
• Under tray .................................... 429
3-5. Other interior features
Sun visors........................................ 430
Vanity mirror................................... 431
Clock................................................. 432
Outside temperature
display ............................................ 433
Multi-display light control......... 434
Power outlets ................................. 435
Heated steering wheel............... 437
Seat heaters and
ventilators ..................................... 439
Armrest ............................................. 441
Coat hooks ..................................... 442
Assist grips...................................... 443
Floor mat.......................................... 444
Luggage compartment
features.......................................... 4464-1. Maintenance and care
Cleaning and protecting
the vehicle exterior................... 452
Cleaning and protecting
the vehicle interior .................... 455
4-2. Maintenance
Maintenance
requirements.............................. 458
4-3. Do-it-yourself maintenance
Do-it-yourself service
precautions ................................... 461
Hood ................................................. 465
Positioning a floor jack............... 466
Engine compartment.................. 468
Tires ................................................... 483
Tire inflation pressure................. 495
Wheels ............................................. 497
Air conditioning filter.................. 499
Electronic key battery ................. 501
Checking and replacing
fuses ............................................... 504
Light bulbs ........................................ 516
4Maintenance and care
RX350_270_EE_48D77E.book 5 ページ 2014年1月24日 金曜日 午前10時4分
Page 193 of 652

193
2-1. Driving procedures
2
When driving
RX350/270_EE
Turn signal lever
■Turn signals can be operated when
The “ENGINE START STOP” switch is in IGNITION ON mode.
■If the indicators flash faster than usual
Check that a light bulb in the front or rear turn signal lights has not burned out.
■If the turn signals stop flashing before a lane change has been performed
Operate the lever again.
■To discontinue flashing of the turn signals during a lane change
Operate the lever in the opposite direction.
■Customization
The number of times the turn signals flash during a lane change can be changed.
(Customizable features →P. 6 2 2 )
The turn signal lever can be used to show the following intention of the
driver:
Right turn
Left turn
Lane change to the right
(move the lever partway and
release it)
The right hand signals will flash
3 times.
Lane change to the left (move
the lever partway and release
it)
The left hand signals will flash 3
times.
RX350_270_EE_48D77E.book 193 ページ 2014年1月24日 金曜日 午前10時4分
Page 451 of 652

4Maintenance and care
451
RX350/270_EE
4-1. Maintenance and care
Cleaning and protecting
the vehicle exterior............. 452
Cleaning and protecting
the vehicle interior .............. 455
4-2. Maintenance
Maintenance
requirements ........................ 458
4-3. Do-it-yourself
maintenance
Do-it-yourself service
precautions ............................ 461
Hood .......................................... 465
Positioning a floor jack.......... 466
Engine compartment ............ 468
Tires ........................................... 483
Tire inflation pressure ........... 495
Wheels ...................................... 497
Air conditioning filter............ 499
Electronic key battery ........... 501
Checking and replacing
fuses........................................ 504
Light bulbs ................................. 516
RX350_270_EE_48D77E.book 451 ページ 2014年1月24日 金曜日 午前10時4分
Page 462 of 652
462
4-3. Do-it-yourself maintenance
RX350/270_EE
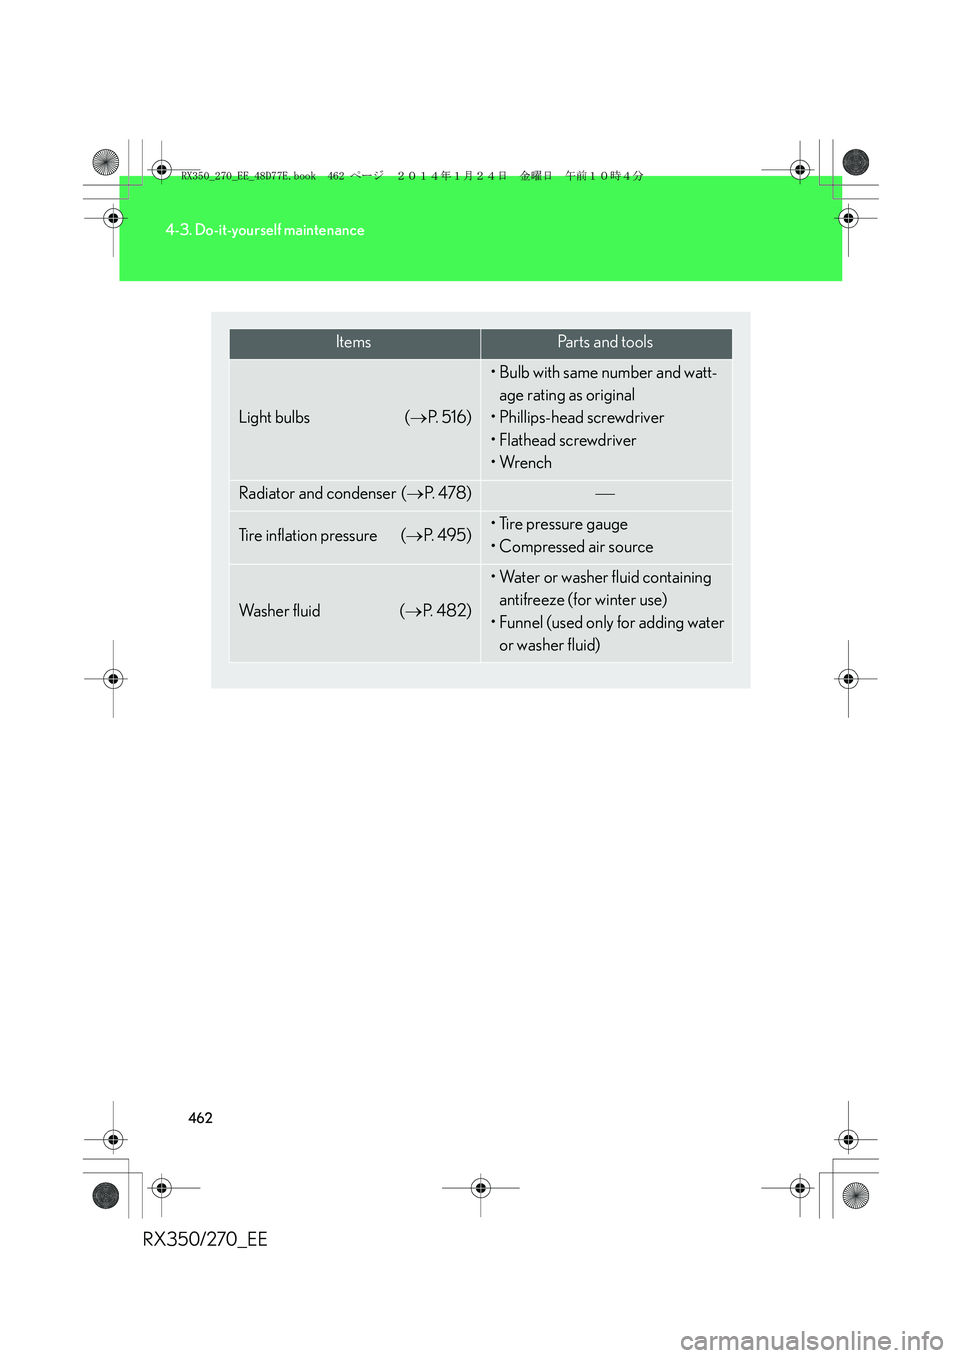
ItemsParts and tools
Light bulbs (→P. 5 1 6 )
• Bulb with same number and watt-
age rating as original
• Phillips-head screwdriver
•Flathead screwdriver
•Wrench
Radiator and condenser (→P. 4 7 8 )
Tire inflation pressure (→P. 4 9 5 )• Tire pressure gauge
• Compressed air source
Wa s h e r f l u i d (→P. 4 8 2 )
• Water or washer fluid containing
antifreeze (for winter use)
• Funnel (used only for adding water
or washer fluid)
RX350_270_EE_48D77E.book 462 ページ 2014年1月24日 金曜日 午前10時4分
Page 515 of 652
515
4-3. Do-it-yourself maintenance
4
Maintenance and care
RX350/270_EE
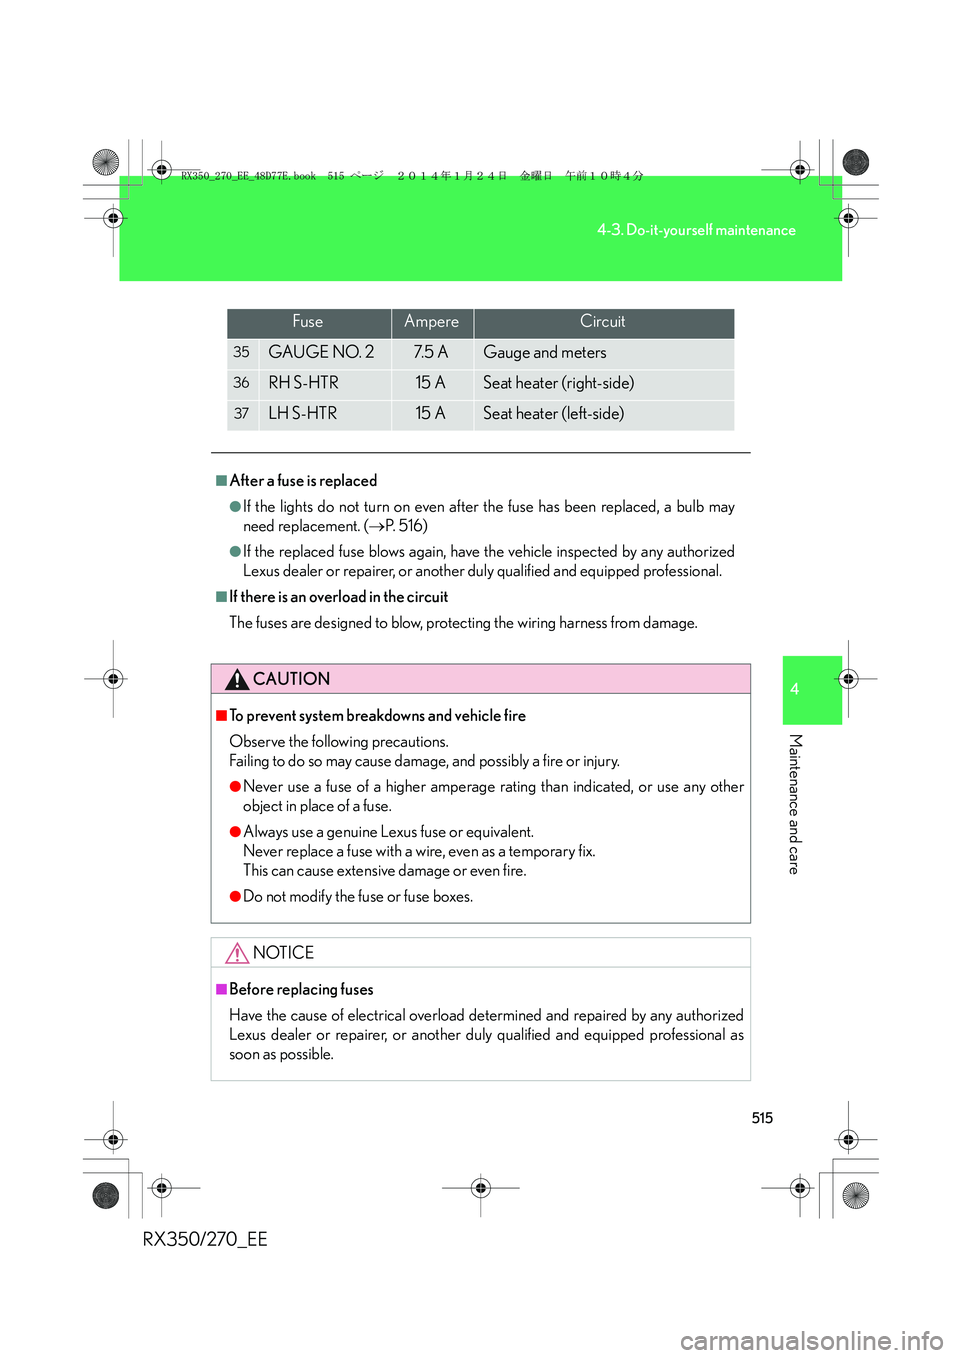
35GAUGE NO. 27. 5 AGauge and meters
36RH S-HTR15 ASeat heater (right-side)
37LH S-HTR15 ASeat heater (left-side)
■After a fuse is replaced
●If the lights do not turn on even after the fuse has been replaced, a bulb may
need replacement. (→P. 5 1 6 )
●If the replaced fuse blows again, have the vehicle inspected by any authorized
Lexus dealer or repairer, or another duly qualified and equipped professional.
■If there is an overload in the circuit
The fuses are designed to blow, protecting the wiring harness from damage.
CAUTION
■To prevent system breakdowns and vehicle fire
Observe the following precautions.
Failing to do so may cause damage, and possibly a fire or injury.
●Never use a fuse of a higher amperage rating than indicated, or use any other
object in place of a fuse.
●Always use a genuine Lexus fuse or equivalent.
Never replace a fuse with a wire, even as a temporary fix.
This can cause extensive damage or even fire.
●Do not modify the fuse or fuse boxes.
NOTICE
■Before replacing fuses
Have the cause of electrical overload determined and repaired by any authorized
Lexus dealer or repairer, or another duly qualified and equipped professional as
soon as possible.
FuseAmpereCircuit
RX350_270_EE_48D77E.book 515 ページ 2014年1月24日 金曜日 午前10時4分
Page 516 of 652
516
4-3. Do-it-yourself maintenance
RX350/270_EE
Light bulbs
You may replace the following bulbs by yourself. The difficulty level of
replacement varies depending on the bulb. If necessary bulb replacement
seems difficult to perform, contact any authorized Lexus dealer or
repairer, or another duly qualified and equipped professional.
For more information about replacing other light bulbs, contact any autho-
rized Lexus dealer or repairer, or another duly qualified and equipped pro-
fessional.
■Preparing for light bulb replacement
Check the wattage of the light bulb to be replaced. (→P. 6 1 9 )
■Removing the engine compartment covers
→P. 4 7 0
■Turning off the power back door main switch (if equipped).
→P. 6 2
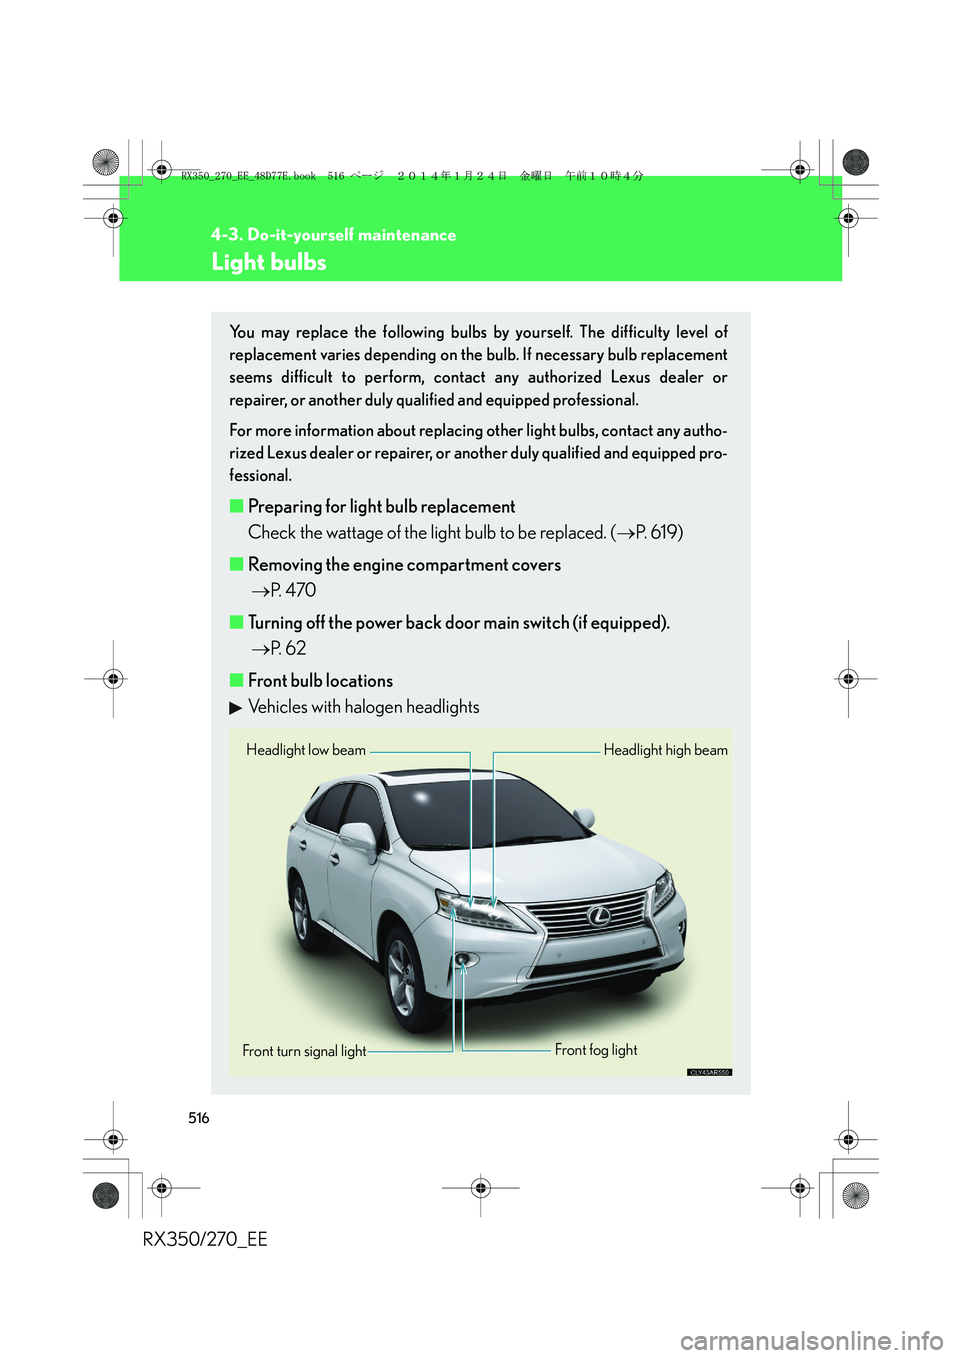
■Front bulb locations
Vehicles with halogen headlights
Headlight high beam Headlight low beam
Front turn signal light
Front fog light
RX350_270_EE_48D77E.book 516 ページ 2014年1月24日 金曜日 午前10時4分
Page 517 of 652
517
4-3. Do-it-yourself maintenance
4
Maintenance and care
RX350/270_EE
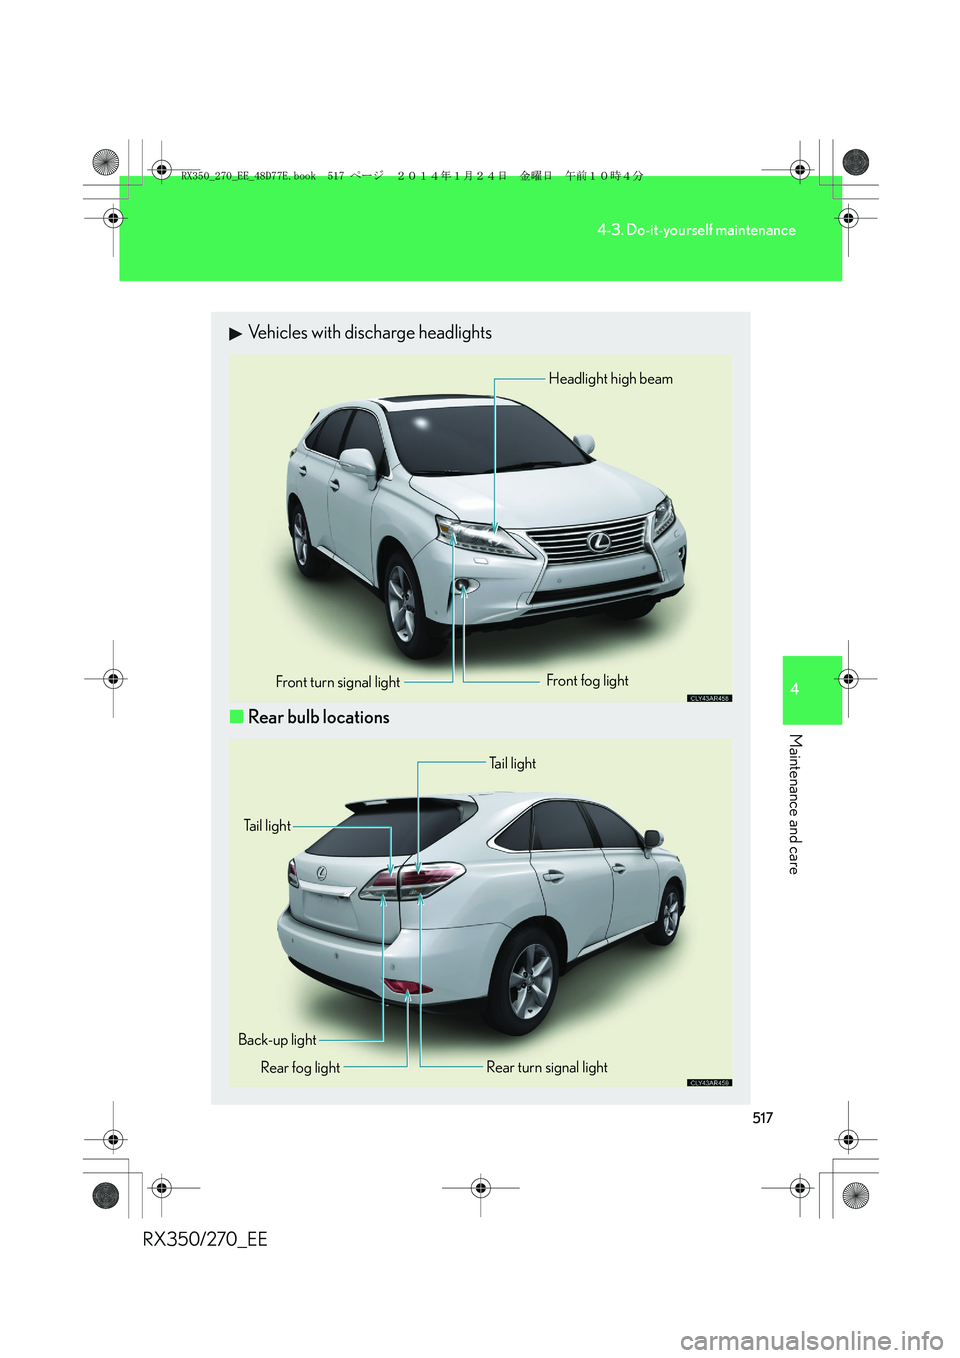
Vehicles with discharge headlights
■Rear bulb locations
Front turn signal lightFront fog lightHeadlight high beam
Rear turn signal light Back-up light
Rear fog lightTail light
Tail light
RX350_270_EE_48D77E.book 517 ページ 2014年1月24日 金曜日 午前10時4分
Page 518 of 652
518
4-3. Do-it-yourself maintenance
RX350/270_EE
Replacing light bulbs
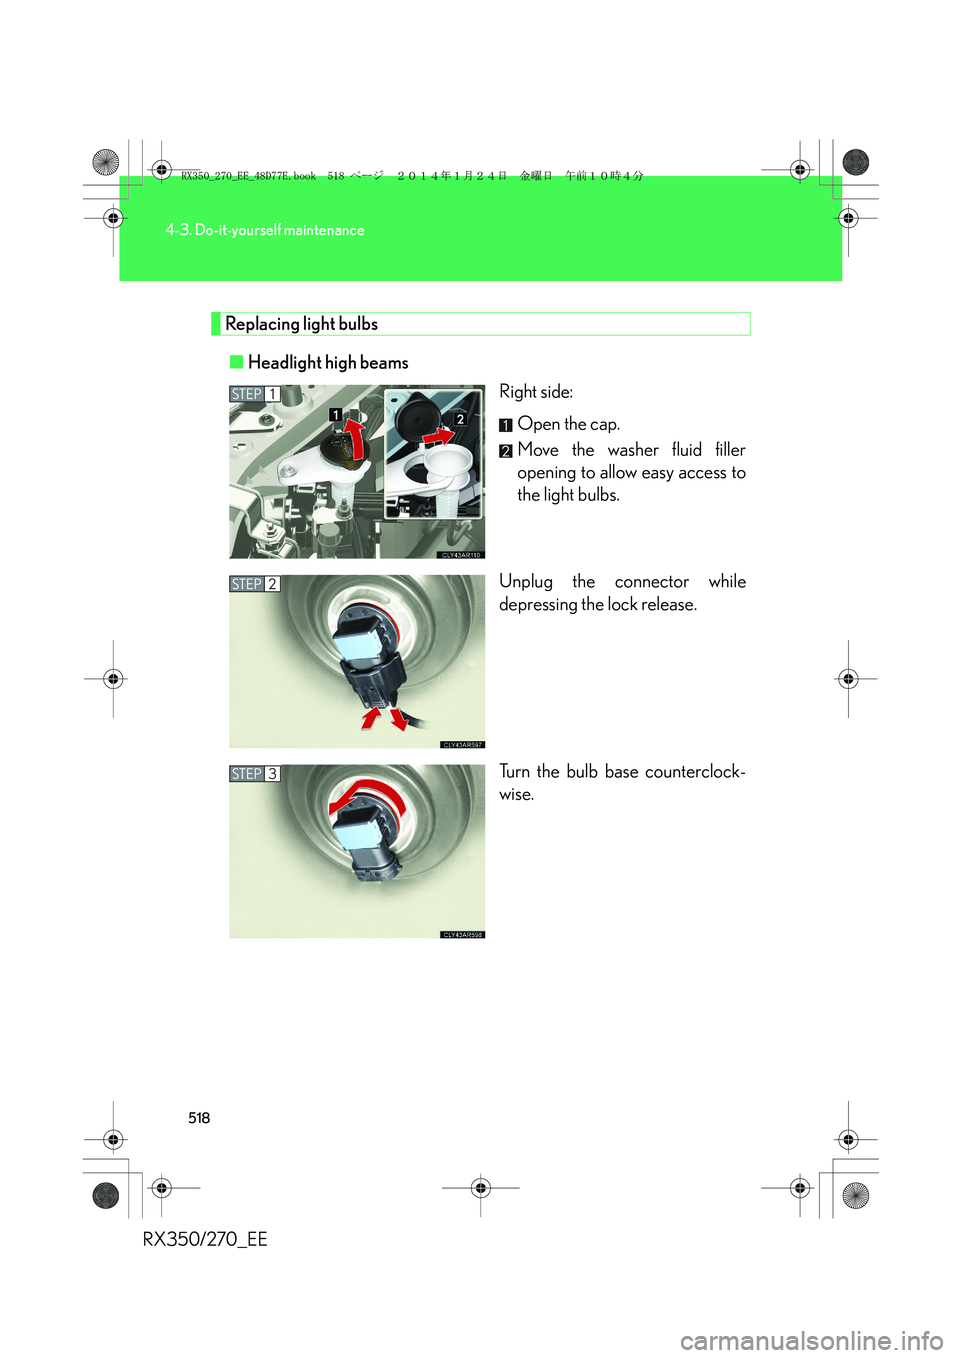
■Headlight high beams
Right side:
Open the cap.
Move the washer fluid filler
opening to allow easy access to
the light bulbs.
Unplug the connector while
depressing the lock release.
Turn the bulb base counterclock-
wise.
STEP1
STEP2
STEP3
RX350_270_EE_48D77E.book 518 ページ 2014年1月24日 金曜日 午前10時4分
Page 519 of 652
519
4-3. Do-it-yourself maintenance
4
Maintenance and care
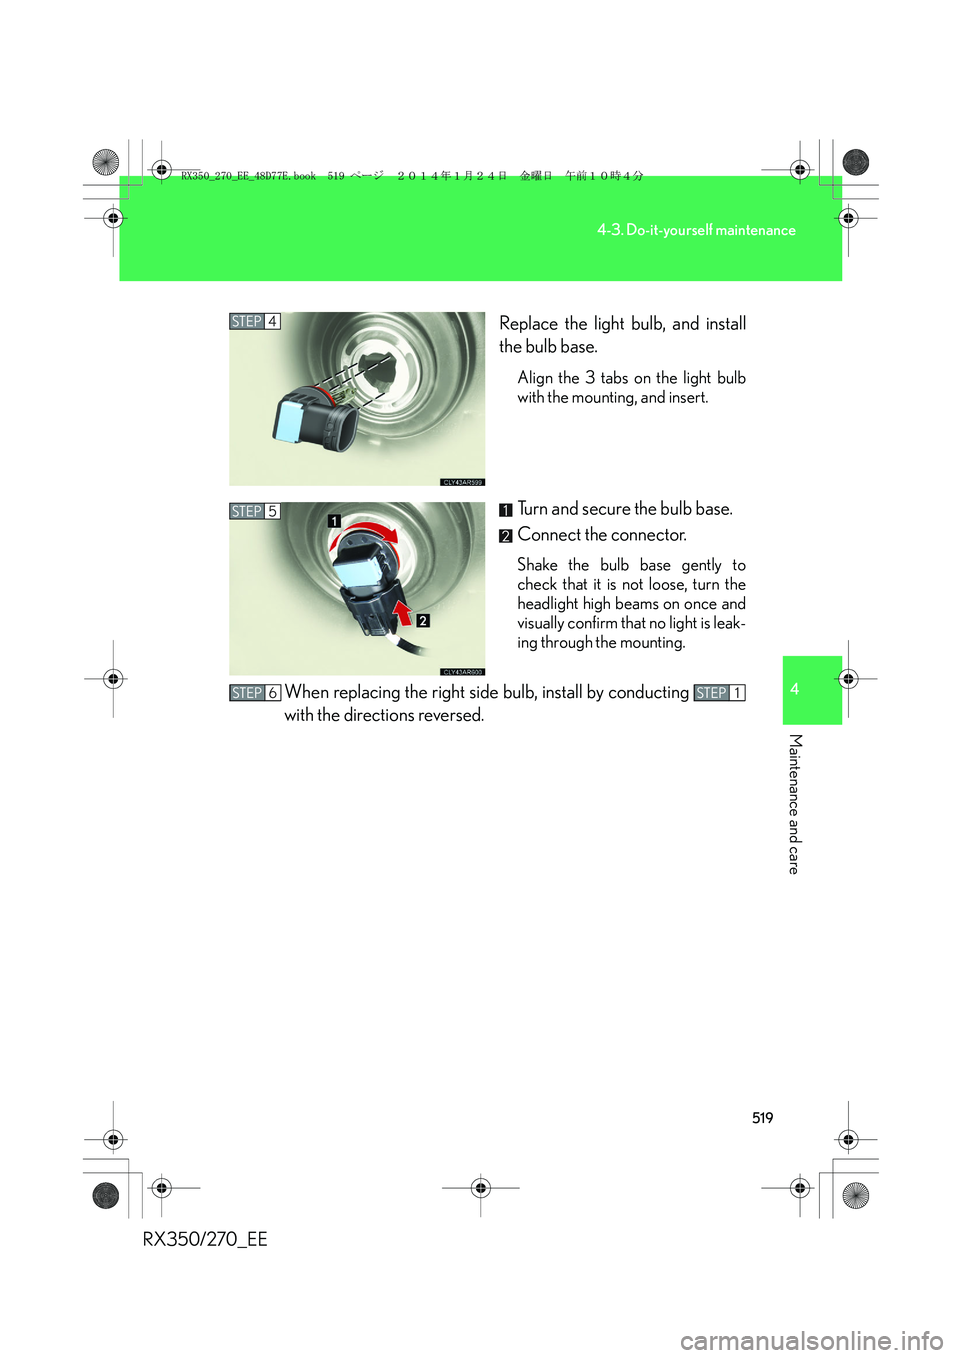
RX350/270_EEReplace the light bulb, and install
the bulb base.
Align the 3 tabs on the light bulb
with the mounting, and insert.
Turn and secure the bulb base.
Connect the connector.
Shake the bulb base gently to
check that it is not loose, turn the
headlight high beams on once and
visually confirm that no light is leak-
ing through the mounting.
When replacing the right side bulb, install by conducting
with the directions reversed.
STEP4
STEP5
STEP5STEP6STEP5STEP1
RX350_270_EE_48D77E.book 519 ページ 2014年1月24日 金曜日 午前10時4分
Page 520 of 652

520
4-3. Do-it-yourself maintenance
RX350/270_EE■Halogen headlight low beams (if equipped)
Turn the bulb base counterclock-
wise.
Unplug the connector while
depressing the lock release.
Replace the light bulb, and install
the bulb base.
Align the 3 tabs on the light bulb
with the mounting, and insert.
Turn and secure the bulb base.
Shake the bulb base gently to
check that it is not loose, turn the
headlight low beams on once and
visually confirm that no light is leak-
ing through the mounting.
STEP1
STEP2
STEP3
STEP4
RX350_270_EE_48D77E.book 520 ページ 2014年1月24日 金曜日 午前10時4分