parking brake switch LEXUS RX350 2015 Owners Manual
[x] Cancel search | Manufacturer: LEXUS, Model Year: 2015, Model line: RX350, Model: LEXUS RX350 2015Pages: 886, PDF Size: 11 MB
Page 3 of 886

1
2
3
4
5
6
7
32-1. Driving procedures
Driving the vehicle ........................ 154
Engine (ignition) switch .............. 165
Automatic transmission
(6-speed models) ........................ 171
Automatic transmission
(8-speed models) ...................... 178
Turn signal lever ............................ 187
Parking brake ................................. 189
Horn.................................................... 190
2-2. Instrument cluster
Gauges and meters ....................... 191
Indicators and warning
lights................................................. 194
Multi-information display......... 200
Head-up display ........................... 206
2-3. Operating the lights and
windshield wipers
Headlight switch .............................. 211
Fog light switch .............................. 215
Windshield wipers and
washer.............................................. 217
Rear window wiper and
washer............................................ 224
Headlight cleaner switch .......... 226 2-4. Using other driving systems
Cruise control ............................... 227
Dynamic radar cruise
control............................................ 232
Intuitive parking assist ................ 245
Rear view monitor system
(rear view mirror-attached
type) ................................................ 255
Rear view monitor system
(vehicles with the Lexus
Display Audio system) ............ 264
Driving assist systems................. 269
All-wheel drive lock switch ...... 275
Hill-start assist control ............... 276
Pre-Collision System.................. 278
BSM (Blind Spot Monitor) ....... 286
2-5. Driving information
Utility vehicle pre cautions ........ 292
Cargo and luggage ..................... 296
Vehicle load limits ......................... 301
Winter driving tips ....................... 302
Trailer towing ................................ 306
Dinghy towing ............................... 3232
When driving
Page 14 of 886
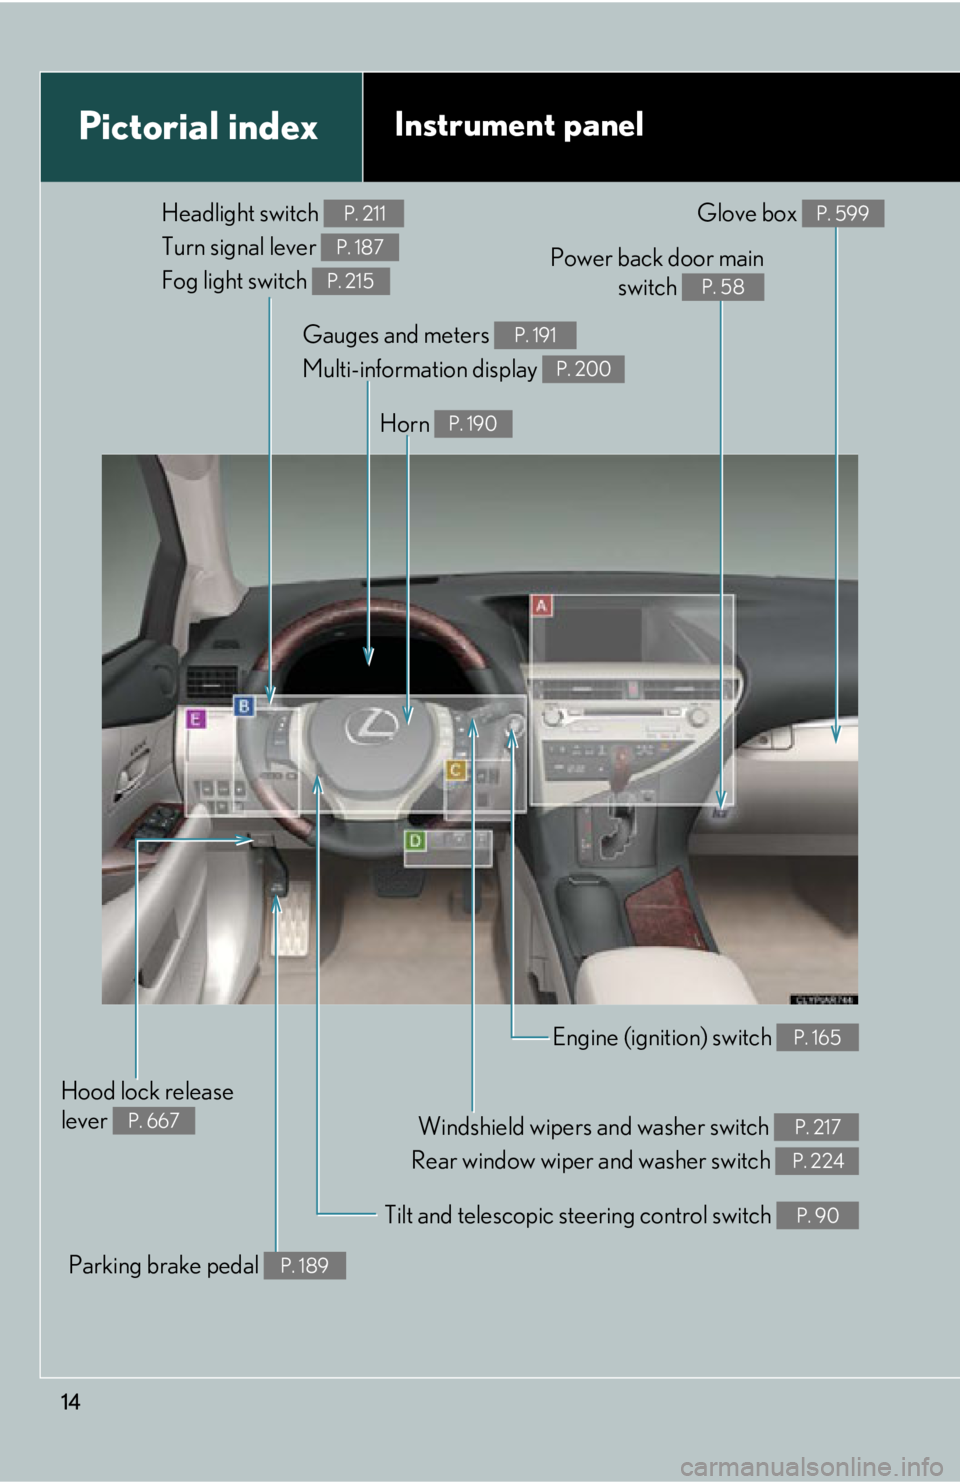
14Pictorial index Instrument panelHeadlight switch
Turn signal lever
Fog light switch P. 211
P. 187
P. 215
Windshield wipers and washer switch
Rear window wiper and washer switch P. 217
P. 224Power back door main
switch P. 58
Tilt and telescopic steering control switch P. 90Engine (ignition) switch P. 165
Hood lock release
lever P. 667 Gauges and meters
Multi-information display P. 191
P. 200
Glove box P. 599
Horn P. 190
Parking brake pedal P. 189
Page 153 of 886
When driving
2
1532-1. Driving procedures
Driving the vehicle.................. 154
Engine (ignition) switch ......... 165
Automatic transmission
(6-speed models) .................. 171
Automatic transmission
(8-speed models) ................. 178
Turn signal lever ....................... 187
Parking brake ........................... 189
Horn ............................................ 190
2-2. Instrument cluster
Gauges and meters ................. 191
Indicators and warning
lights ......................................... 194
Multi-information
display .................................... 200
Head-up display ..................... 206
2-3. Operating the lights and
windshield wipers
Headlight switch....................... 211
Fog light switch ........................ 215
Windshield wipers and
washer ..................................... 217
Rear window wiper and
washer .................................... 224
Headlight cleaner switch..... 226 2-4. Using other driving
systems
Cruise control......................... 227
Dynamic radar cruise
control .................................... 232
Intuitive parking assist .......... 245
Rear view monitor system
(rear view mirror-attached
type) ........................................ 255
Rear view monitor system
(vehicles with the Lexus
Display Audio system) ....... 264
Driving assist systems ........... 269
All-wheel drive lock
switch ....................................... 275
Hill-start assist control .......... 276
Pre-Collision System ............ 278
BSM
(Blind Spot Monitor) .......... 286
2-5. Driving information
Utility vehicle
precautions ........................... 292
Cargo and luggage ............... 296
Vehicle load limits ................... 301
Winter driving tips ................. 302
Trailer towing .......................... 306
Dinghy towing ......................... 323
Page 154 of 886
1542-1. Driving procedures
Driving the vehicle
Starting off on a steep uphill
Make sure that the pa rking brake is set and shift the shift lever to
D.
Gently depress the accelerator pedal.
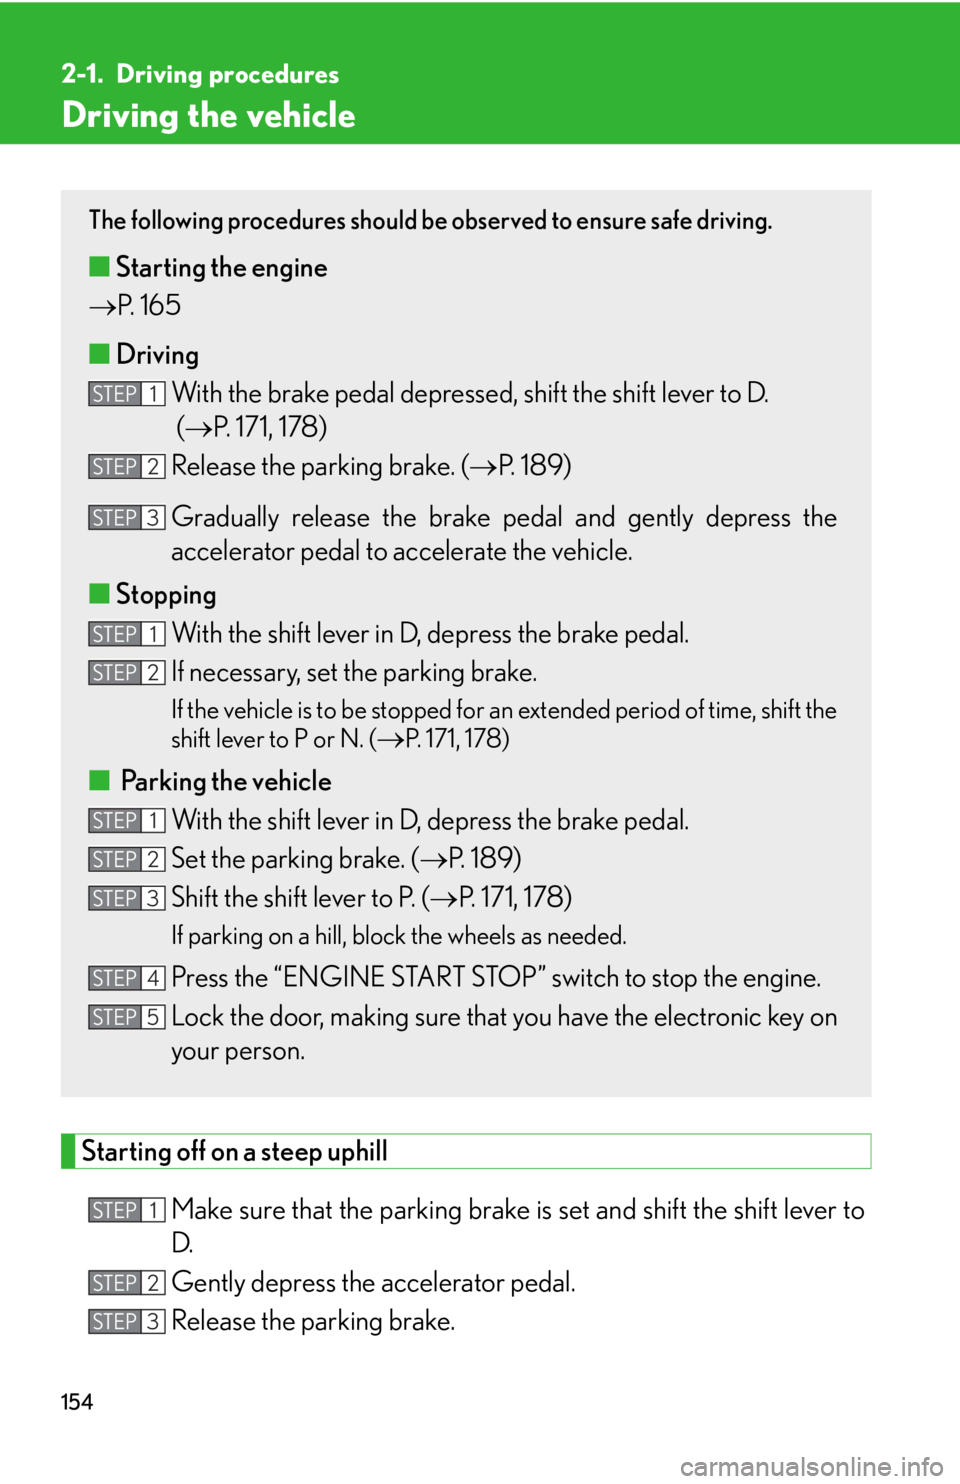
Release the parking brake. The following procedures should be observed to ensure safe driving.
■ Starting the engine
P. 1 6 5
■ Driving
With the brake pedal depressed, shift the shift lever to D.
( P. 171, 178)
Release the parking brake. ( P. 1 8 9 )
Gradually release the brake pedal and gently depress the
accelerator pedal to accelerate the vehicle.
■ Stopping
With the shift lever in D, depress the brake pedal.
If necessary, set the parking brake. If the vehicle is to be stopped for an extended period of time, shift the
shift lever to P or N. (
P. 171, 178)
■
Parking the vehicle
With the shift lever in D, depress the brake pedal.
Set the parking brake. ( P. 1 8 9 )
Shift the shift lever to P. ( P. 171, 178)If parking on a hill, block the wheels as needed.
Press the “ENGINE START STOP” switch to stop the engine.
Lock the door, making sure that you have the electronic key on
your person.STEP 1
STEP 2
STEP 3
STEP 1
STEP 2
STEP 1
STEP 2
STEP 3
STEP 4
STEP 5
STEP 1
STEP 2
STEP 3
Page 156 of 886
1562-1. Driving procedures
■
Drum-in-disc type parking brake system
Your vehicle has a drum-in-disc type parking brake system. This type of brake sys-
tem needs bedding-down of the brake shoe s periodically or whenever the parking
brake shoes and/or drum are replaced. Have your Lexus dealer perform the bed-
ding down operation.■
Operating your vehicle in a foreign country
Comply with the relevant vehicle registration laws and confirm the availability of the
correct fuel. ( P. 808)■
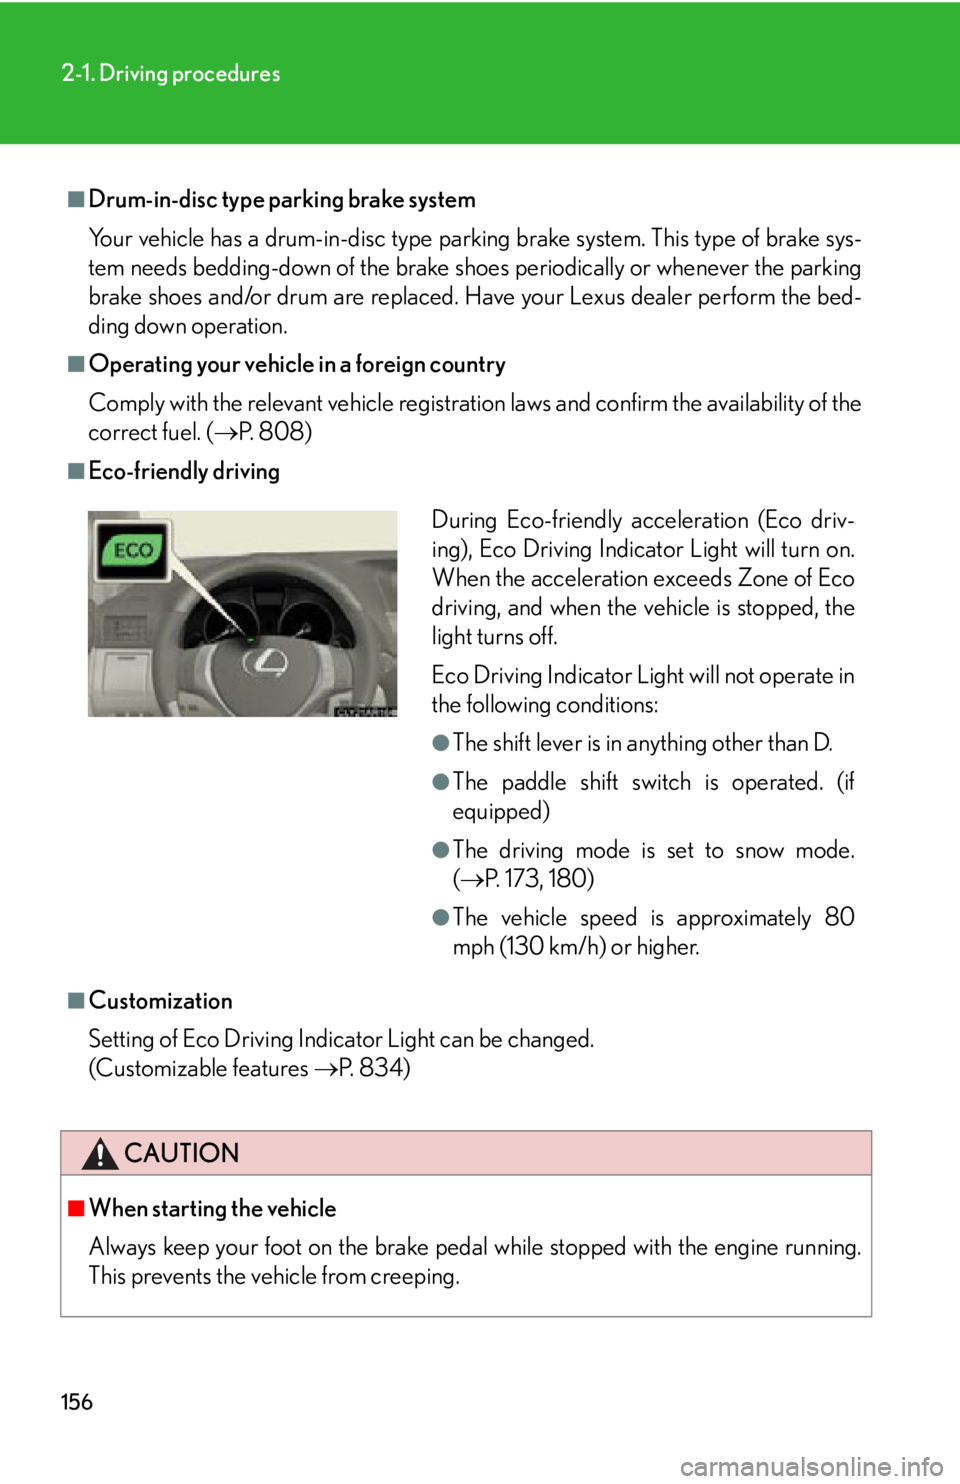
Eco-friendly driving
■
Customization
Setting of Eco Driving Indica tor Light can be changed.
(Customizable features P. 8 3 4 )
CAUTION
■
When starting the vehicle
Always keep your foot on the brake pedal while stopped with the engine running.
This prevents the vehicle from creeping. During Eco-friendly acceleration (Eco driv-
ing), Eco Driving Indicator Light will turn on.
When the acceleration exceeds Zone of Eco
driving, and when the ve hicle is stopped, the
light turns off.
Eco Driving Indicator Light will not operate in
the following conditions: ●
The shift lever is in anything other than D. ●
The paddle shift switch is operated. (if
equipped) ●
The driving mode is set to snow mode.
( P. 173, 180)●
The vehicle speed is approximately 80
mph (130 km/h) or higher.
Page 165 of 886
1652-1. Driving procedures
2
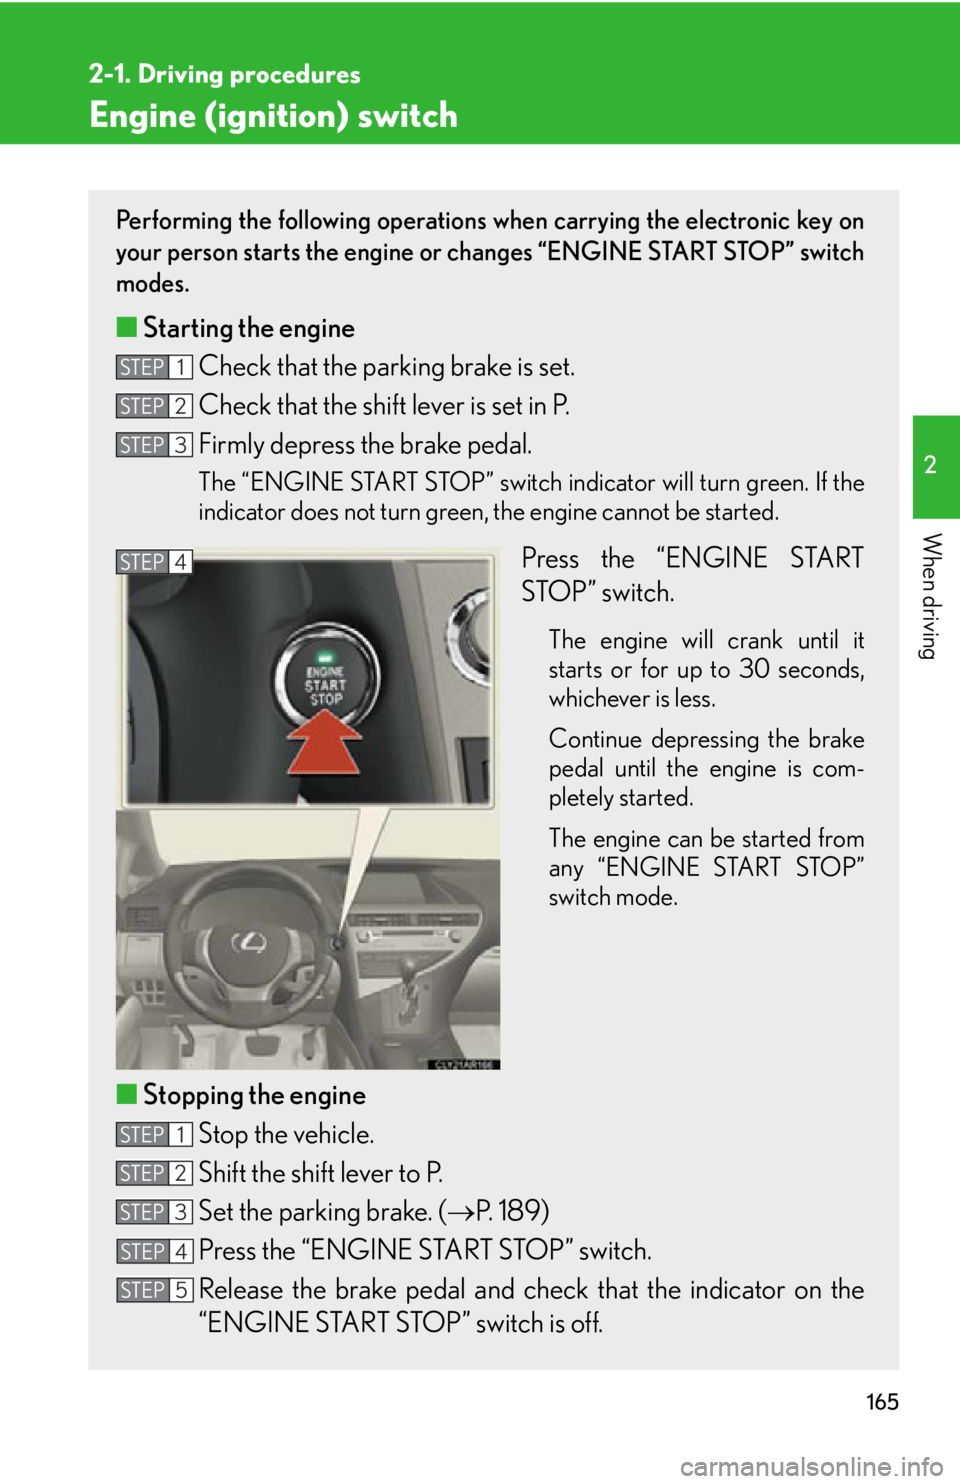
When driving Engine (ignition) switch Performing the following operations when carrying the electronic key on
your person starts the engine or changes “ENGINE START STOP” switch
modes.
■ Starting the engine
Check that the parking brake is set.
Check that the shift lever is set in P.
Firmly depress the brake pedal. The “ENGINE START STOP” switch indicator will turn green. If the
indicator does not turn green, the engine cannot be started.
Press the “ENGINE START
STOP” switch. The engine will crank until it
starts or for up to 30 seconds,
whichever is less.
Continue depressing the brake
pedal until the engine is com-
pletely started.
The engine can be started from
any “ENGINE START STOP”
switch mode.
■ Stopping the engine
Stop the vehicle.
Shift the shift lever to P.
Set the parking brake. ( P. 1 8 9 )
Press the “ENGINE START STOP” switch.
Release the brake pedal and chec k that the indicator on the
“ENGINE START STOP” switch is off.STEP 1
STEP 2
STEP 3
STEP 4
STEP 1
STEP 2
STEP 3
STEP 4
STEP 5
Page 167 of 886

1672-1. Driving procedures
2
When driving When stopping the engine with the shift lever in a position other than P
If the engine is stopped with the shift lever in a position other than P, the
“ENGINE START STOP” switch will not be turned off but instead be
turned to ACCESSORY mode. Perfor m the following procedure to turn
the switch off:
Check that the parking brake is set.
Shift the shift lever to P.
Check that the indicator on the “ENGINE START STOP” switch
is illuminated in amber and th en press the “ENGINE START
STOP” switch once.
Check that the indicator on the “ENGINE START STOP” switch
is off.■
Auto power off function
When the shift lever is in P, if the vehicle is left in ACCESSORY or IGNITION ON
mode with the engine not running for more than 20 minutes (ACCESSORY mode)
or one hour (IGNITION ON mode), the “ENGINE START STOP” switch will auto-
matically turn off. However, this function cannot entirely prevent battery discharge.
Do not leave the vehicle with the “ENGINE START STOP” switch in ACCESSORY
or IGNITION ON mode for lo ng periods of time when the engine is not running.■
Operation of the “ENGINE START STOP” switch
When operating the “ENGINE START STOP” switch, one short, firm press is
enough. If the switch is pressed improperly, the engine may not start or the
“ENGINE START STOP” switch mode may not change. It is not necessary to press
and hold the switch.■
Electronic key battery depletion
P. 4 5
■
Conditions affecting operation
P. 4 2
■
Note for the entry function
P. 4 3STEP 1
STEP 2
STEP 3
STEP 4
Page 178 of 886
1782-1. Driving procedures
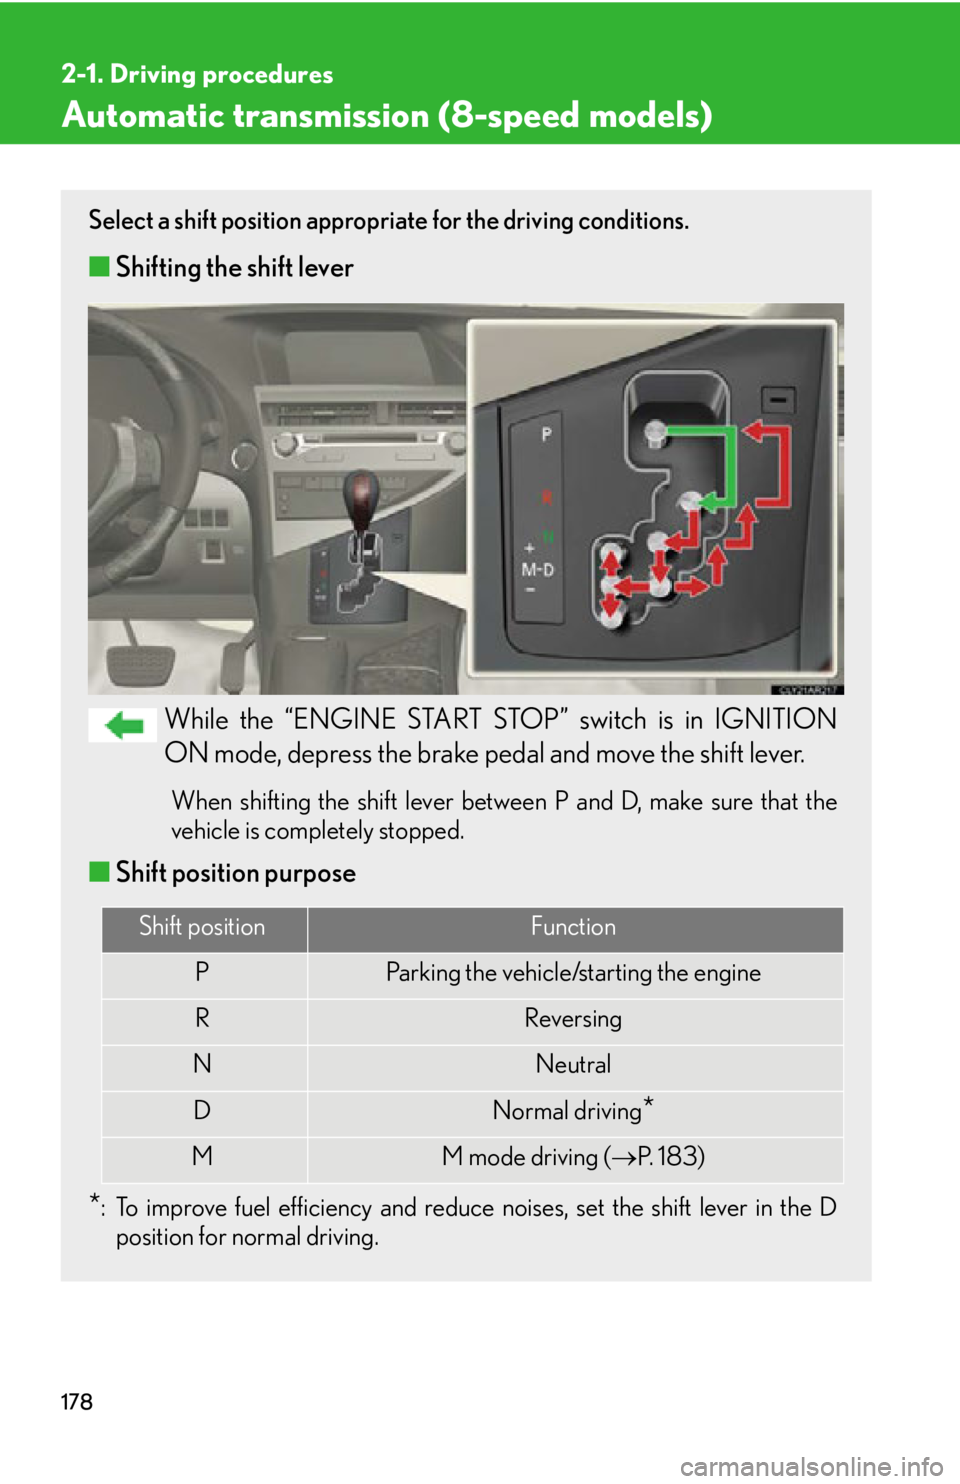
Automatic transmission (8-speed models) Select a shift position appropriate for the driving conditions.
■ Shifting the shift lever
While the “ENGINE START STOP” switch is in IGNITION
ON mode, depress the brake pedal and move the shift lever. When shifting the shift lever between P and D, make sure that the
vehicle is completely stopped.
■ Shift position purpose
* : To improve fuel efficiency and reduce noises, set the shift lever in the D
position for normal driving. Shift position Function
P Parking the vehicle/starting the engine
R Reversing
N Neutral
D Normal driving
*M M mode driving ( P. 1 8 3 )
Page 213 of 886

2132-3. Operating the light s and windshield wipers
2
When driving Turning on the high beam headlights
With the headlights on, push the
lever away from you to turn on
the high beams. Pull the lever toward you to the
center position to turn the high
beams off.
Pull the lever toward you to turn
on the high beams. Release the lever to turn them off.
You can flash the high beams with
the headlights on or off.■
Daytime running light system ●
To make your vehicle more visible to other drivers, the daytime running lights
turn on automatically whenever the engine is started and the parking brake is
released. Daytime running lights ar e not designed for use at night.
Type A: Daytime running lights can be turned off by operating the switch.●
Compared to turning on th e headlights, the daytime running light system offers
greater durability and consumes less electricity, so it can help improve fuel
economy.■
Headlight control sensor
The sensor may not function properly if an
object is placed on the sensor, or anything
that blocks the sensor is affixed to the wind-
shield.
Doing so interferes with the sensor detecting
the level of ambient light and may cause the
automatic headlight system to malfunction.
Page 739 of 886
5
When trouble arises
7395-1. Essential information
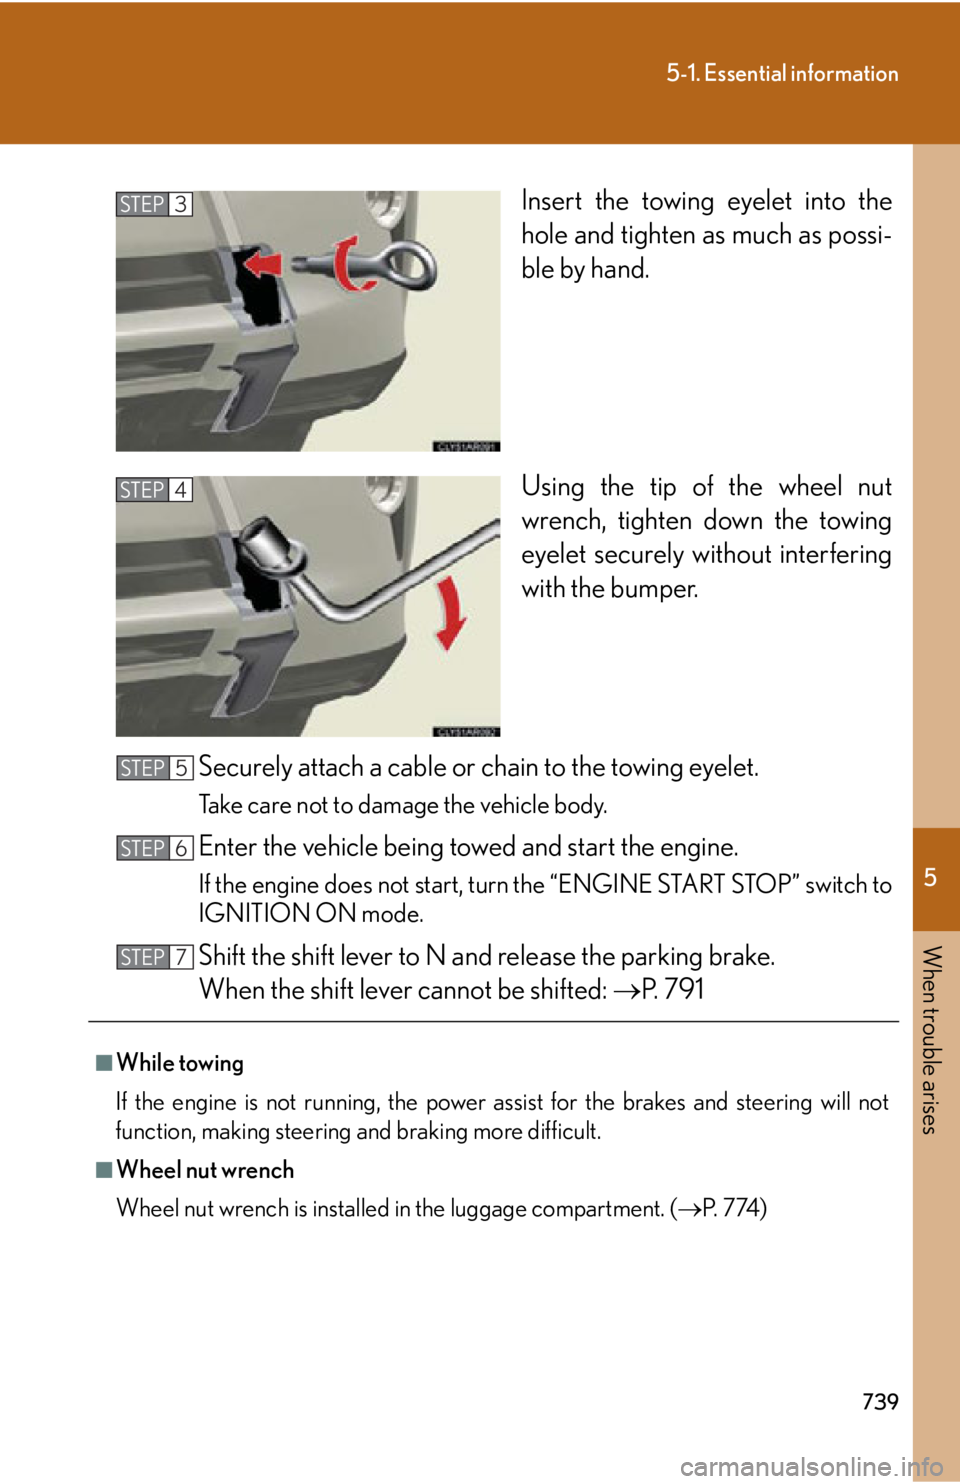
Insert the towing eyelet into the
hole and tighten as much as possi-
ble by hand.
Using the tip of the wheel nut
wrench, tighten down the towing
eyelet securely without interfering
with the bumper.
Securely attach a cable or chain to the towing eyelet.Take care not to damage the vehicle body.
Enter the vehicle being towed and start the engine. If the engine does not start, turn the “ENGINE START STOP” switch to
IGNITION ON mode.
Shift the shift lever to N and release the parking brake.
When the shift lever cannot be shifted: P. 7 9 1STEP 3
STEP 4
■
While towing
If the engine is not running, the power assist for the brakes and steering will not
function, making steering and braking more difficult.
■
Wheel nut wrench
Wheel nut wrench is installed in the luggage compartment. ( P. 7 74 )STEP 5
STEP 6
STEP 7