warning light LEXUS RX350 2021 Repair Manual
[x] Cancel search | Manufacturer: LEXUS, Model Year: 2021, Model line: RX350, Model: LEXUS RX350 2021Pages: 508, PDF Size: 10.33 MB
Page 276 of 508

2764-5. Using the driving support systems
function has occurred.
• Vibrations may be felt through the vehicle body and steering.
• A motor sound may be heard also after the vehicle comes to a stop.
• The brake pedal may pulsate slightly after
the ABS is activated.
• The brake pedal may move down slightly after the ABS is activated.
■Active Cornering Assist operation
sounds and vibrations
When the Active Cornering Assist is oper-
ated, operation sounds and vibrations may
be generated from the brake system, but
this is not a malfunction.
■EPS operation sound
When the steering wheel is operated, a
motor sound (whirring sound) may be
heard. This does not indicate a malfunction.
■Reduced effectiveness of the EPS sys-
tem
The effectiveness of the EPS system is
reduced to prevent the system from over-
heating when there is frequent steering
input over an extended period of time. The
steering wheel may feel heavy as a result.
Should this occur, re frain from excessive
steering input or stop the vehicle and turn
the engine off. The EPS system should
return to normal within 10 minutes.
■Automatic reactivation of TRAC, Trailer
Sway Control and VSC systems
After turning the TRAC, Trailer Sway Con-
trol and VSC systems off, the systems will
be automatically re-enabled in the following
situations:
●When the engine switch is turned off
●If only the TRAC system is turned off, the
TRAC will turn on when vehicle speed
increases
If both the TRAC and VSC systems are
turned off, automatic re-enabling will not
occur when vehicle speed increases.
■Operating conditions of Active Corner-
ing Assist
The system operates when the following
occurs.
●TRAC/VSC can operate
●The driver is attempting to accelerate
while turning
●The system detects that the vehicle is
drifting to the outer side
●The brake pedal is released
■Secondary Collision Brake operating
conditions
The system operates when the SRS airbag
sensor detects a collision while the vehicle
is in motion.
However, the system does not operate in
any of the following situations.
●The vehicle speed is below 6 mph (10
km/h)
●Components are damaged
■Secondary Collision Brake automatic
cancellation
The system is automatically canceled in any
of the following situations.
●The vehicle speed drops below approxi-
mately 6 mph (10 km/h)
●A certain amount of time elapses during
operation
●The accelerator pedal is depressed a
large amount
WARNING
■The ABS does not operate effectively
when
●The limits of tire gripping performance
have been exceeded (such as exces-
sively worn tires on a snow covered
road).
●The vehicle hydroplanes while driving
at high speed on wet or slick roads.
■Stopping distance when the ABS is
operating may exceed that of normal
conditions
The ABS is not designed to shorten the
vehicle’s stopping di stance. Always main-
tain a safe distance from the vehicle in
front of you, especially in the following
situations:
●When driving on dirt, gravel or
snow-covered roads
Page 277 of 508
2774-5. Using the driving support systems
4
Driving
WARNING
●When driving with tire chains
●When driving over bumps in the road
●When driving over roads with potholes
or uneven surfaces
■TRAC/VSC may not operate effec-
tively when
Directional control and power may not
be achievable while driving on slippery
road surfaces, even if the TRAC/VSC
system is operating. Drive the vehicle
carefully in conditions where stability and
power may be lost.
■Active Cornering Assist does not
operate effectively when
●Do not overly rely on Active Corner-
ing Assist. Active Cornering Assist
may not operate effectively when
accelerating down slopes or driving on
slippery road surfaces.
●When Active Cornering Assist fre-
quently operates, Active Cornering
Assist may temporarily stop operating
to ensure proper operation of the
brakes, TRAC and VSC.
■Hill-start assist control does not oper-
ate effectively when
●Do not overly rely on hill-start assist
control. Hill-start assist control may
not operate effectively on steep
inclines and roads covered with ice.
●Unlike the parking brake, hill-start
assist control is not intended to hold
the vehicle stationary for an extended
period of time. Do not attempt to use
hill-start assist control to hold the vehi-
cle on an incline, as doing so may lead
to an accident.
■When the TRAC/VSC/Trailer Sway
Control is activated
The slip indicator light flashes. Always
drive carefully. Re ckless driving may
cause an accident. Exercise particular
care when the indicator light flashes.
■When the TRAC/VSC/Trailer Sway
Control systems are turned off
●Be especially careful and drive at a
speed appropriate to the road condi-
tions. As these are the systems to help
ensure vehicle stab ility and driving
force, do not turn the
TRAC/VSC/Trailer Sway Control sys-
tems off unless necessary.
●Trailer Sway Control is part of the VSC
system and will not operate if VSC is
turned off or experiences a malfunc-
tion.
■Replacing tires
Make sure that all ti res are of the speci-
fied size, brand, tread pattern and total
load capacity. In addition, make sure that
the tires are inflated to the recom-
mended tire inflation pressure level.
The ABS, TRAC, Trailer Sway Control
and VSC systems will not function cor-
rectly if different tire s are installed on the
vehicle.
Contact your Lexus dealer for further
information when replacing tires or
wheels.
■Handling of tires and the suspension
Using tires with any kind of problem or
modifying the suspensi on will affect the
driving assist systems, and may cause a
system to malfunction.
■Trailer Sway Control precaution
The Trailer Sway Control system is not
able to reduce trailer sway in all situa-
tions. Depending on many factors such
as the conditions of the vehicle, trailer,
road surface and driving environment,
the Trailer Sway Control system may not
be effective. Refer to your trailer owner’s
manual for information on how to tow
your trailer properly.
Page 306 of 508
3065-3. Using the air conditioning system and defogger
*:If equipped
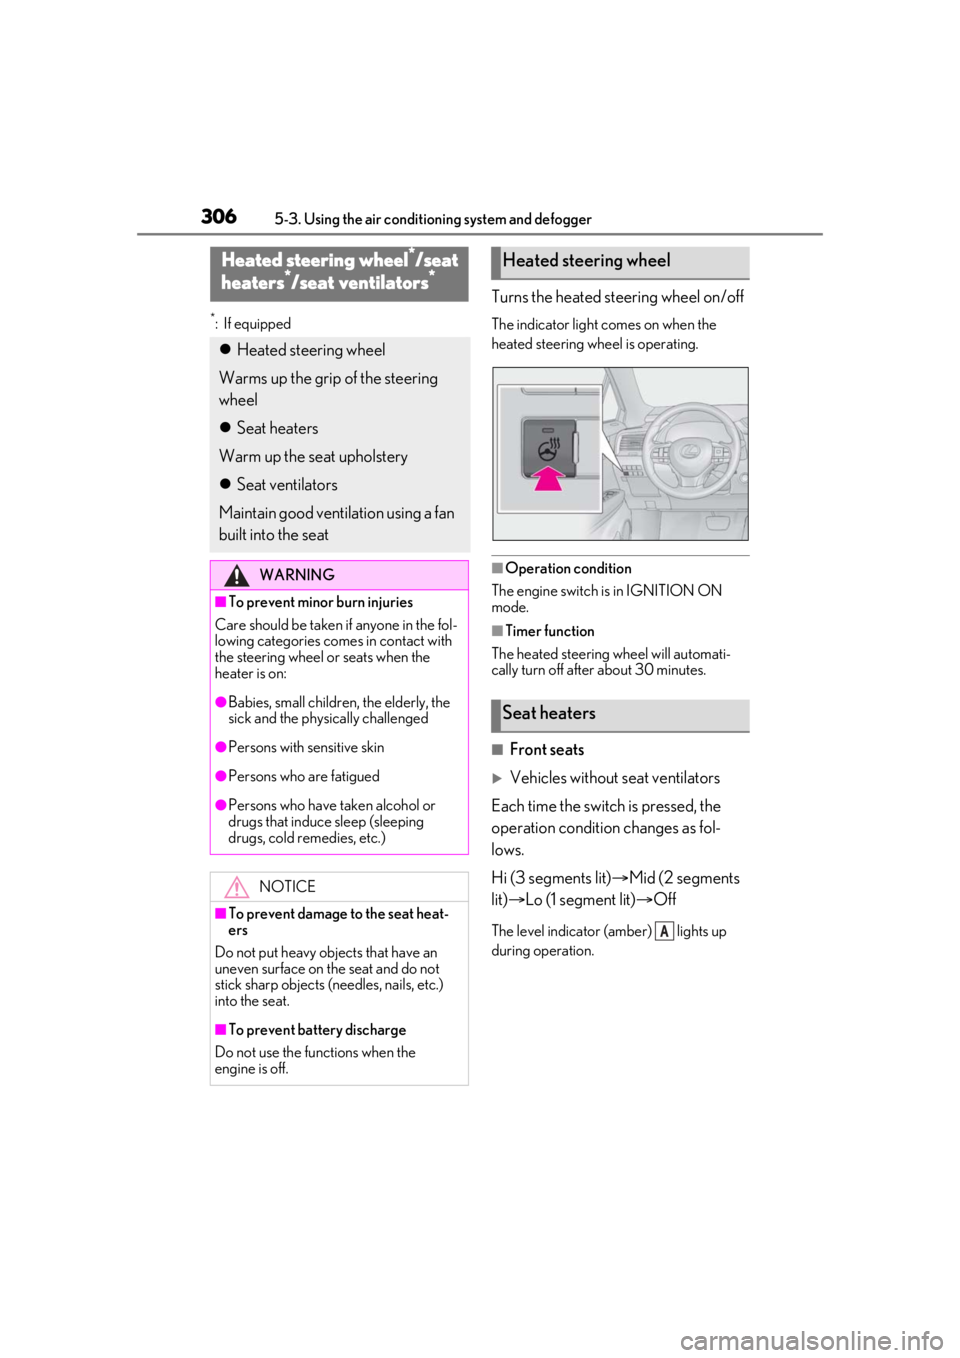
Turns the heated steering wheel on/off
The indicator light comes on when the
heated steering wheel is operating.
■Operation condition
The engine switch is in IGNITION ON
mode.
■Timer function
The heated steering wheel will automati-
cally turn off after about 30 minutes.
■Front seats
Vehicles without seat ventilators
Each time the switch is pressed, the
operation condition changes as fol-
lows.
Hi (3 segments lit) Mid (2 segments
lit) Lo (1 segment lit) Off
The level indicator (amber) lights up
during operation.
Heated steering wheel*/seat
heaters*/seat ventilators*
Heated steering wheel
Warms up the grip of the steering
wheel
Seat heaters
Warm up the seat upholstery
Seat ventilators
Maintain good ventilation using a fan
built into the seat
WARNING
■To prevent minor burn injuries
Care should be taken if anyone in the fol-
lowing categories comes in contact with
the steering wheel or seats when the
heater is on:
●Babies, small children, the elderly, the
sick and the phys ically challenged
●Persons with sensitive skin
●Persons who are fatigued
●Persons who have taken alcohol or
drugs that induce sleep (sleeping
drugs, cold remedies, etc.)
NOTICE
■To prevent damage to the seat heat-
ers
Do not put heavy objects that have an
uneven surface on the seat and do not
stick sharp objects (needles, nails, etc.)
into the seat.
■To prevent battery discharge
Do not use the functions when the
engine is off.
Heated steering wheel
Seat heaters
A
Page 307 of 508
3075-3. Using the air conditioning system and defogger
5
Interior features
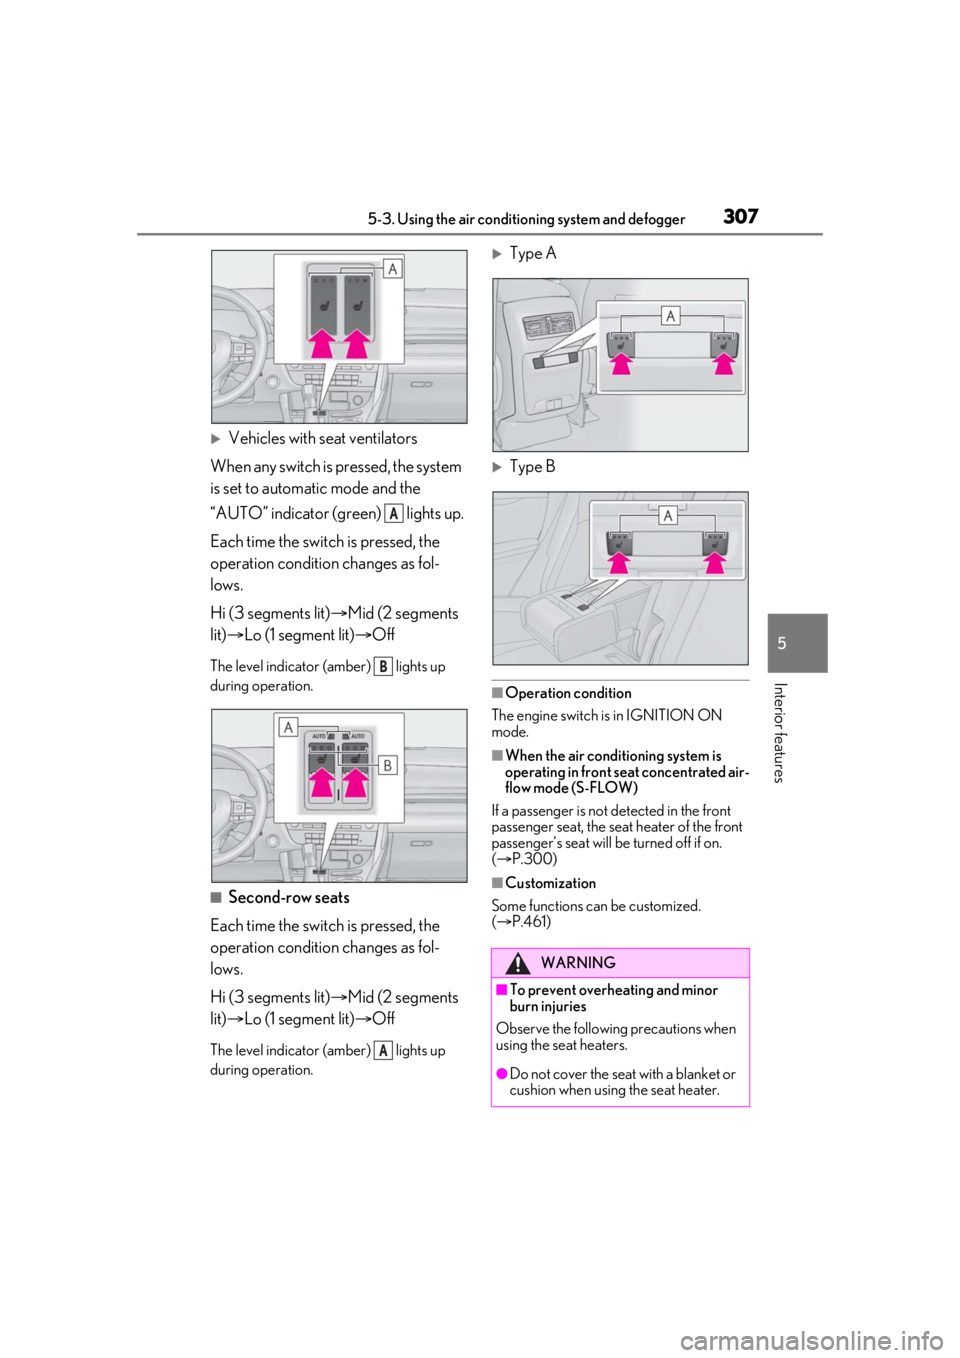
Vehicles with seat ventilators
When any switch is pressed, the system
is set to automatic mode and the
“AUTO” indicator (green) lights up.
Each time the switch is pressed, the
operation condition changes as fol-
lows.
Hi (3 segments lit) Mid (2 segments
lit) Lo (1 segment lit) Off
The level indicator (amber) lights up
during operation.
■Second-row seats
Each time the switch is pressed, the
operation condition changes as fol-
lows.
Hi (3 segments lit) Mid (2 segments
lit) Lo (1 segment lit) Off
The level indicator (amber) lights up
during operation.
Type A
Type B
■Operation condition
The engine switch is in IGNITION ON
mode.
■When the air conditioning system is
operating in front seat concentrated air-
flow mode (S-FLOW)
If a passenger is not detected in the front
passenger seat, the seat heater of the front
passenger’s seat will be turned off if on.
( P.300)
■Customization
Some functions can be customized.
( P.461)
A
B
A
WARNING
■To prevent overheating and minor
burn injuries
Observe the following precautions when
using the seat heaters.
●Do not cover the seat with a blanket or
cushion when using the seat heater.
Page 308 of 508
3085-3. Using the air conditioning system and defogger
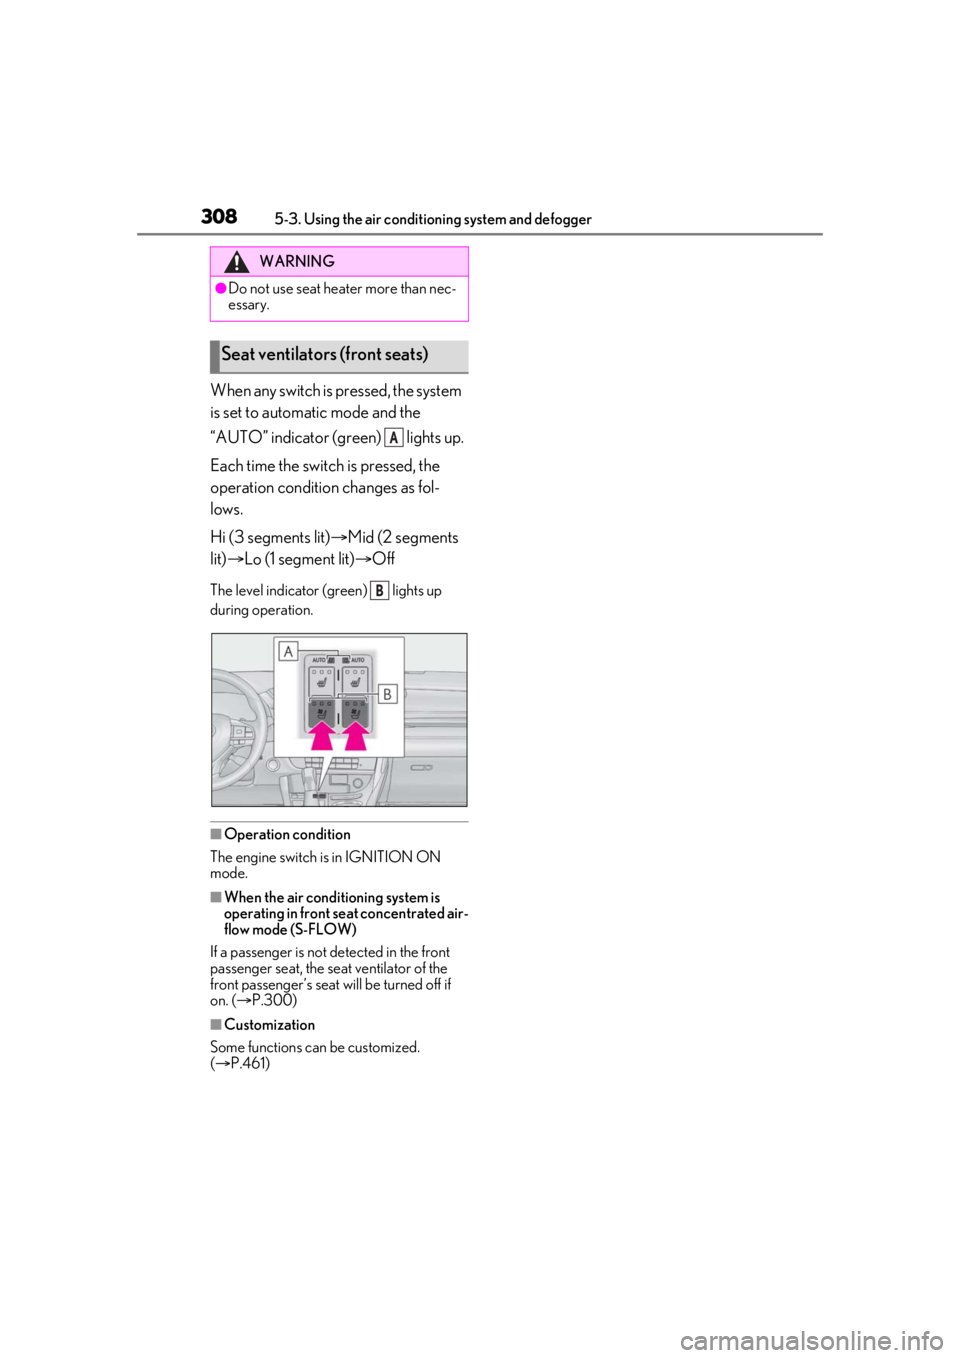
When any switch is pressed, the system
is set to automatic mode and the
“AUTO” indicator (green) lights up.
Each time the switch is pressed, the
operation condition changes as fol-
lows.
Hi (3 segments lit)Mid (2 segments
lit) Lo (1 segment lit) Off
The level indicator (g reen) lights up
during operation.
■Operation condition
The engine switch is in IGNITION ON
mode.
■When the air conditioning system is
operating in front seat concentrated air-
flow mode (S-FLOW)
If a passenger is not detected in the front
passenger seat, the seat ventilator of the
front passenger’s seat wi ll be turned off if
on. ( P.300)
■Customization
Some functions can be customized.
( P.461)
WARNING
●Do not use seat heater more than nec-
essary.
Seat ventilators (front seats)
A
B
Page 313 of 508
3135-5. Using the storage features
5
Interior features
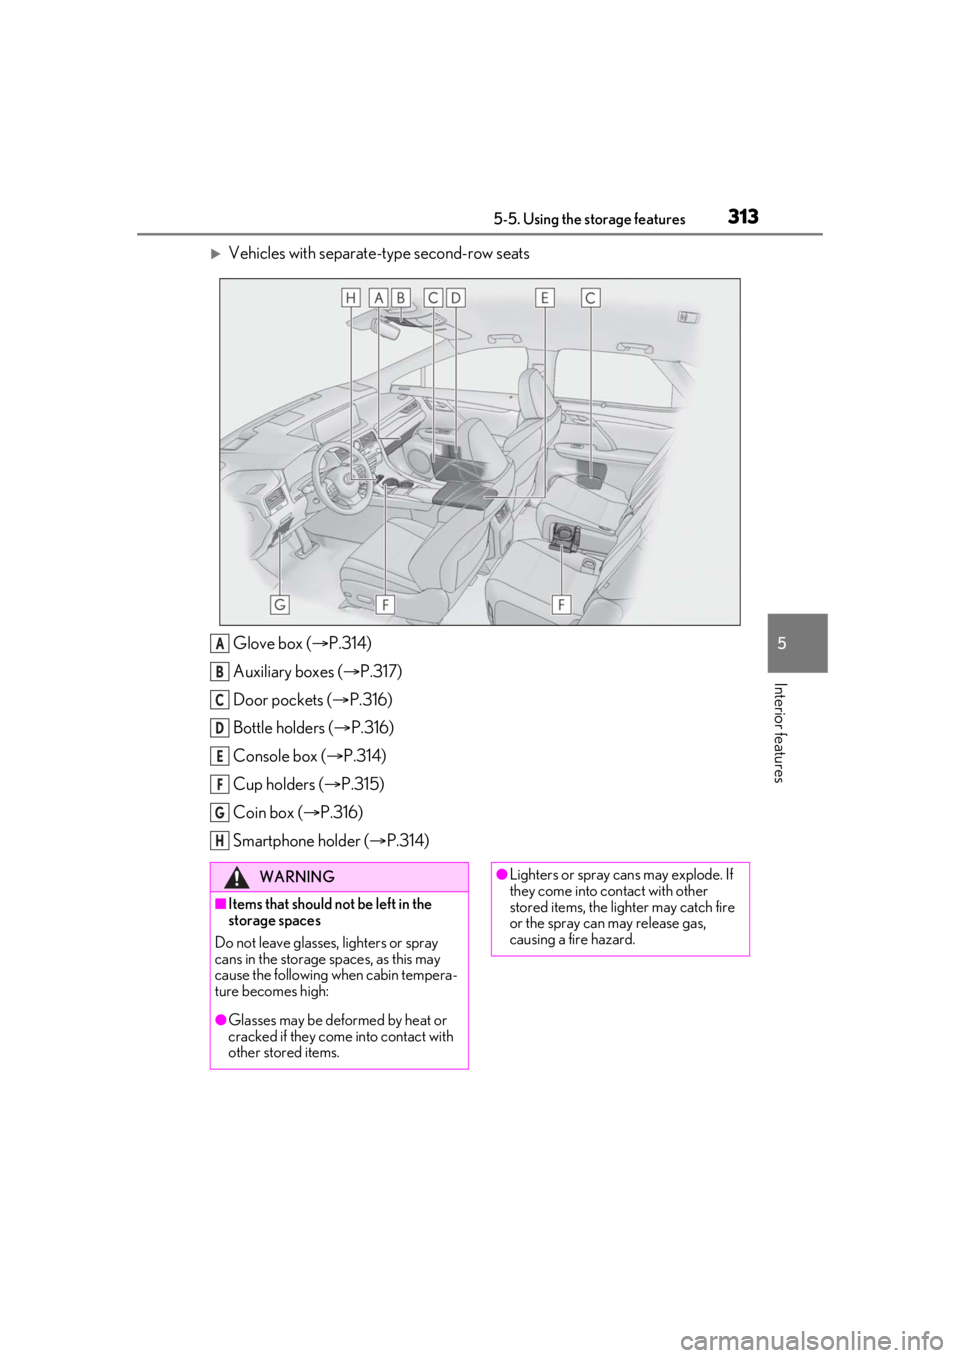
Vehicles with separate-type second-row seatsGlove box ( P.314)
Auxiliary boxes ( P.317)
Door pockets ( P.316)
Bottle holders ( P.316)
Console box ( P.314)
Cup holders ( P.315)
Coin box ( P.316)
Smartphone holder ( P.314)
A
B
C
D
E
F
G
H
WARNING
■Items that should not be left in the
storage spaces
Do not leave glasses, lighters or spray
cans in the storage spaces, as this may
cause the following when cabin tempera-
ture becomes high:
●Glasses may be deformed by heat or
cracked if they come into contact with
other stored items.
●Lighters or spray ca ns may explode. If
they come into contact with other
stored items, the lighter may catch fire
or the spray can may release gas,
causing a fire hazard.
Page 314 of 508
3145-5. Using the storage features
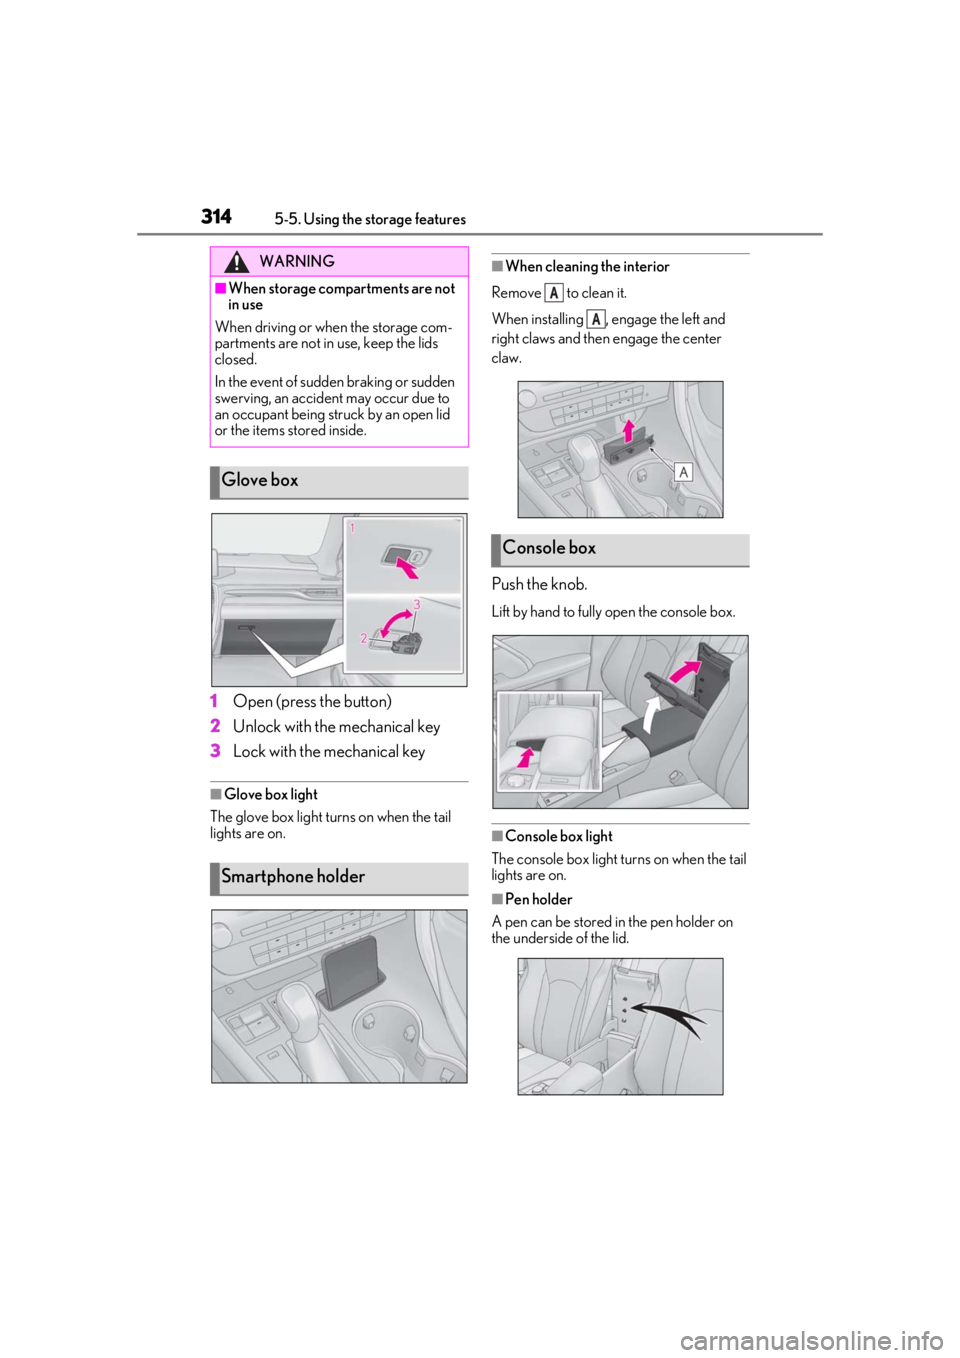
1Open (press the button)
2 Unlock with the mechanical key
3 Lock with the mechanical key
■Glove box light
The glove box light turns on when the tail
lights are on.
■When cleaning the interior
Remove to clean it.
When installing , engage the left and
right claws and then engage the center
claw.
Push the knob.
Lift by hand to fully open the console box.
■Console box light
The console box light turns on when the tail
lights are on.
■Pen holder
A pen can be stored in the pen holder on
the underside of the lid.
WARNING
■When storage compartments are not
in use
When driving or when the storage com-
partments are not in use, keep the lids
closed.
In the event of sudden braking or sudden
swerving, an accident may occur due to
an occupant being struck by an open lid
or the items stored inside.
Glove box
Smartphone holder
Console box
A
A
Page 329 of 508
3295-6. Using the other interior features
5
Interior features
WARNING
■Caution while driving
When charging a portable device while
driving, for safety reasons, the driver
should not operate the portable device.
■Caution regarding interference with
electronic devices
People with implantable cardiac pace-
makers, cardiac resy nchronization ther-
apy pacemakers or implantable
cardioverter defibrillators, as well as any
other electrical medical device, should
consult their physician about the usage of
the wireless charger.
Operations of the wireless charger may
have an affect on medical devices.
■To prevent damage or burns
Observe the following precautions.
Failure to do so may result in the possibil-
ity of fire, equipment failure or damage,
or burns due to heat.
●Do not put any metallic objects
between the charging area and the
portable device while charging.
●Do not attach metallic objects, such as
aluminum stickers, to the charging
area.
●Do not cover the wireless charger with
a cloth or other obje ct while charging.
●Do not attempt to charge portable
devices which are not compatible with
the Qi wireless charging standard.
●Do not disassemble, modify or remove
the wireless charger.
●Do not apply force or impact to the
wireless charger.
NOTICE
■Conditions in which the wireless
charger may not operate correctly
In the following situations, the wireless
charger may not operate correctly:
●When a portable device is fully
charged
●When there is a foreign object
between the charging area and porta-
ble device
●When a portable device becomes hot
while charging
●When a portable device is placed on
the wireless area with its charging sur-
face facing up
●When a portable device is not cen-
tered on the charging area
●When the vehicle is near a TV tower,
electric power plant, gas station, radio
station, large display, airport or other
facility that generates strong radio
waves or electrical noise
●When the portable device is in contact
with, or is covered by any of the follow-
ing metallic objects:
• Cards to which aluminum foil is attached
• Cigarette boxes that have aluminum foil inside
• Metallic wallets or bags
•Coins
•Metal hand warmers
• Media such as CDs and DVDs
●When wireless keys (that emit radio
waves) other than those of your vehicle
are being used nearby.
If in situations other than above the wire-
less charger does not operate properly
or the operation indicator light is blink-
ing, the wireless charger may be mal-
functioning. Contact your Lexus dealer.
Page 333 of 508
3335-6. Using the other interior features
5
Interior features
3To use the side extender, place the
visor in the side position, then slide
it backward.
Slide the cover to open.
The light turns on when the cover is
opened.
■To prevent battery discharge
If the vanity lights remain on when the
engine switch is turned off, the lights will go
off automatically after 20 minutes.
Use the front passenger footwell hooks
to help support and prevent objects
placed on the floor, such as a grocery
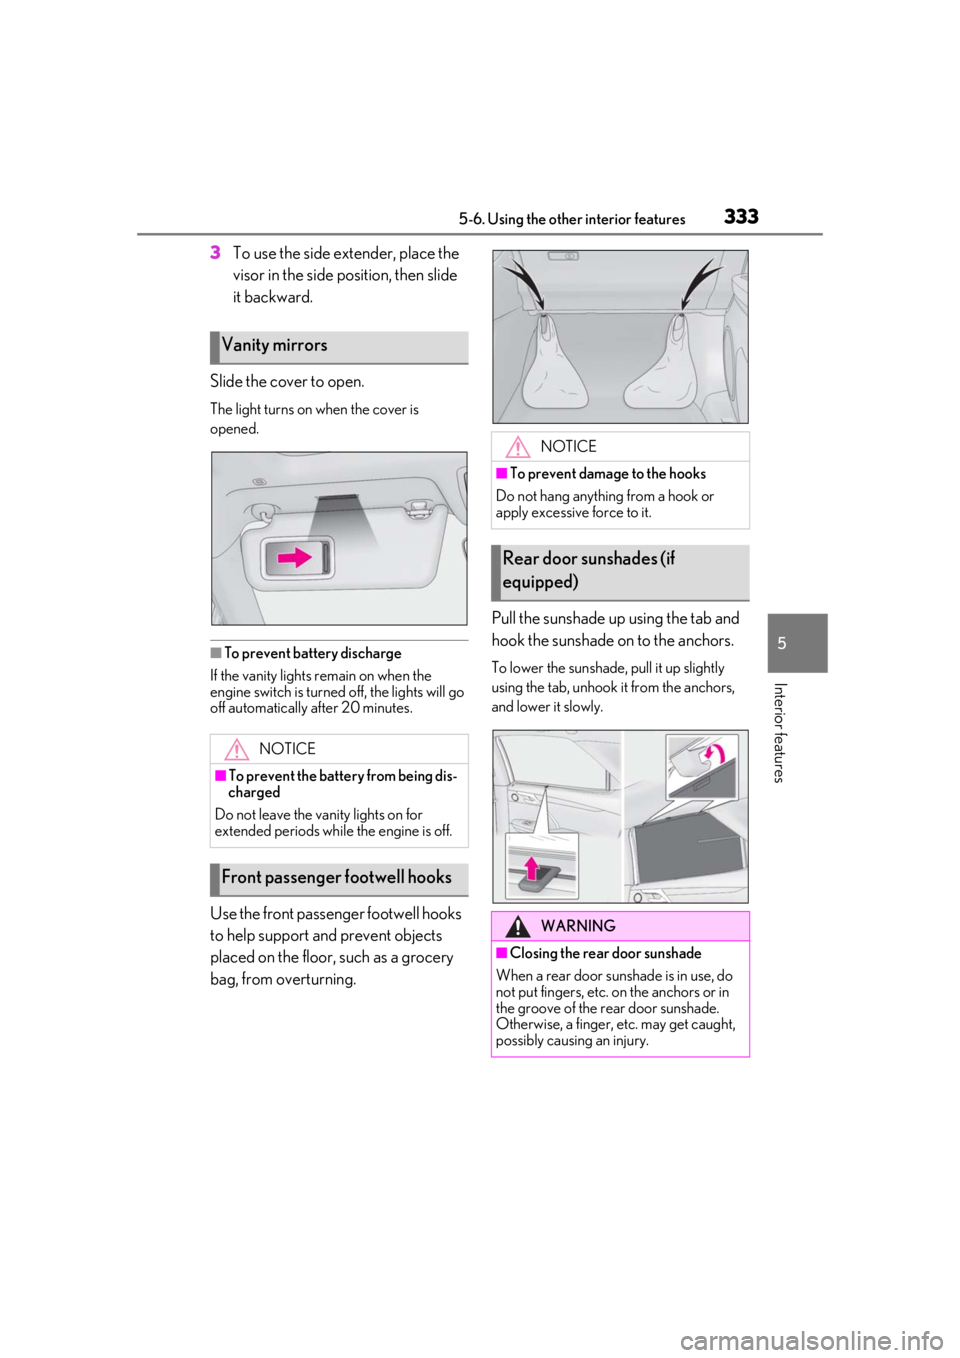
bag, from overturning. Pull the sunshade up using the tab and
hook the sunshade on to the anchors.
To lower the sunshade, pull it up slightly
using the tab, unhook it from the anchors,
and lower it slowly.
Vanity mirrors
NOTICE
■To prevent the battery from being dis-
charged
Do not leave the vanity lights on for
extended periods while the engine is off.
Front passenger footwell hooks
NOTICE
■To prevent damage to the hooks
Do not hang anything from a hook or
apply excessive force to it.
Rear door sunshades (if
equipped)
WARNING
■Closing the rear door sunshade
When a rear door sunshade is in use, do
not put fingers, etc. on the anchors or in
the groove of the rear door sunshade.
Otherwise, a finger, etc. may get caught,
possibly causing an injury.
Page 336 of 508
3365-6. Using the other interior features
■Before programming HomeLink®
During programming, it is possible
that garage doors, gates, or other
devices may operate. For this rea-
son, make sure that people and
objects are clear of the garage door
or other devices to prevent injury or
other potential harm.
It is recommended that a new bat-
tery be placed in the remote control
transmitter for more accurate pro-
gramming.
Garage door opener motors manu-
factured after 1995 may be
equipped with rolling code protec-
tion. If this is the case, you may need
a stepladder or other sturdy, safe
device to reach the “Learn” or
“Smart” button on the garage door
opener motor.
■Programming HomeLink®
Steps 1 through 3 must be performed
within 60 seconds, otherwise the indi-
cator light will stop flashing and pro-
gramming will not be able to be
completed.
1 Press and release the HomeLink
®
button you want to program and check that the HomeLink
® indica-
tor light flashes (orange).
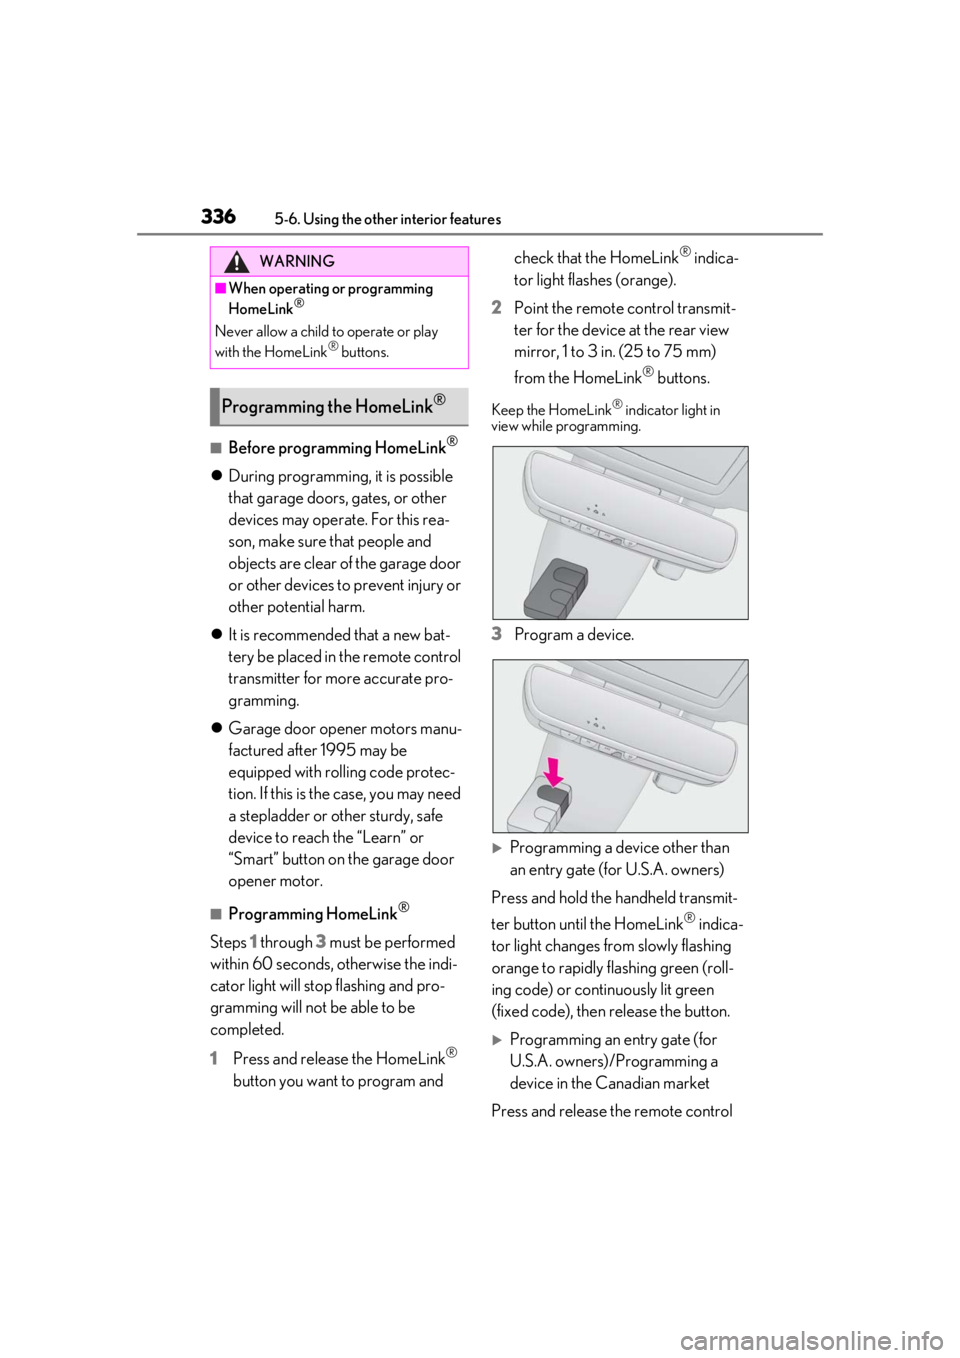
2 Point the remote control transmit-
ter for the device at the rear view
mirror, 1 to 3 in. (25 to 75 mm)
from the HomeLink
® buttons.
Keep the HomeLink® indicator light in
view while programming.
3 Program a device.
Programming a device other than
an entry gate (for U.S.A. owners)
Press and hold the handheld transmit-
ter button until the HomeLink
® indica-
tor light changes from slowly flashing
orange to rapidly flashing green (roll-
ing code) or continuously lit green
(fixed code), then release the button.
Programming an entry gate (for
U.S.A. owners)/Programming a
device in the Canadian market
Press and release the remote control
WARNING
■When operating or programming
HomeLink®
Never allow a child to operate or play
with the HomeLink® buttons.
Programming the HomeLink®