fuse box LEXUS RX450h 2015 User Guide
[x] Cancel search | Manufacturer: LEXUS, Model Year: 2015, Model line: RX450h, Model: LEXUS RX450h 2015Pages: 878, PDF Size: 11.62 MB
Page 704 of 878

7044-3. Do-it-yourself maintenance
■
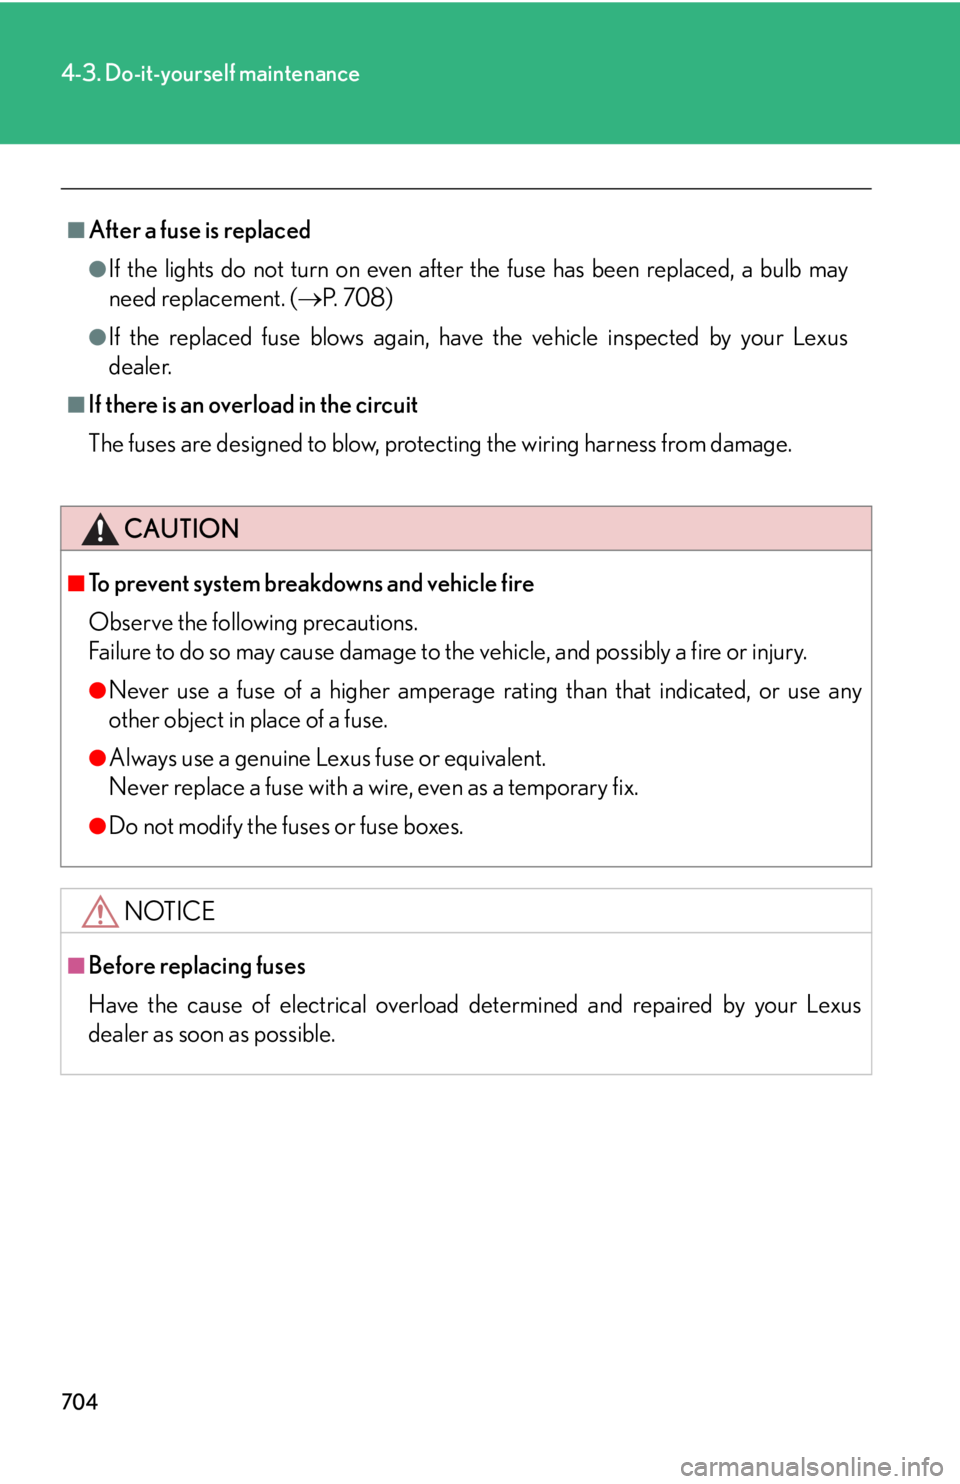
After a fuse is replaced ●
If the lights do not turn on even afte r the fuse has been replaced, a bulb may
need replacement. ( P. 7 0 8 )●
If the replaced fuse blows again, have the vehicle inspected by your Lexus
dealer.■
If there is an overload in the circuit
The fuses are designed to blow, protecting the wiring harness from damage.
CAUTION■
To prevent system breakdowns and vehicle fire
Observe the following precautions.
Failure to do so may cause damage to the vehicle, and possibly a fire or injury. ●
Never use a fuse of a higher amperage rating than that in dicated, or use any
other object in place of a fuse.●
Always use a genuine Lexus fuse or equivalent.
Never replace a fuse with a wire, even as a temporary fix. ●
Do not modify the fuses or fuse boxes.
NOTICE■
Before replacing fuses
Have the cause of electrical overload determined and repaired by your Lexus
dealer as soon as possible.
Page 715 of 878

7154-3. Do-it-yourself maintenance
4
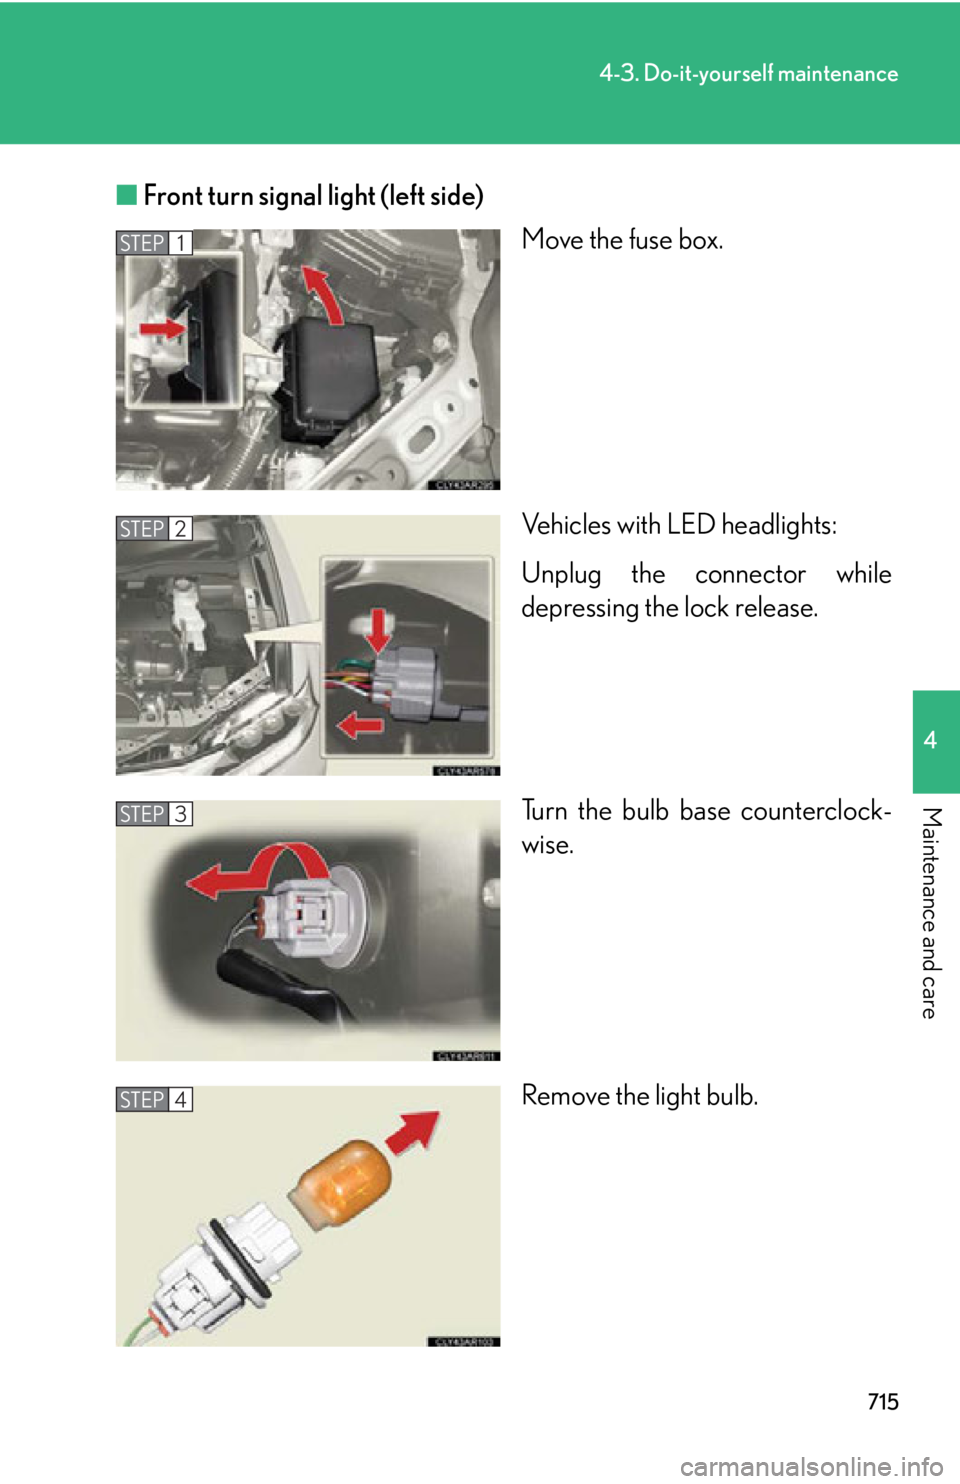
Maintenance and care ■ Front turn signal light (left side)
Move the fuse box.
Vehicles with LED headlights:
Unplug the connector while
depressing the lock release.
Turn the bulb base counterclock-
wise.
Remove the light bulb.STEP 1
STEP 2
STEP 3
STEP 4
Page 785 of 878

7845-2. Steps to take in an emergency
If the vehicle 12-volt battery is discharged The following procedures may be used to start the hybrid system if the vehi-
cle’s 12-volt battery is discharged.
You can also call your Lexus dealer or a qualified repair shop.
If you have a set of jumper (or booster) cables and a second vehicle
with a 12-volt battery, you can jump start your vehicle by following the
steps below.
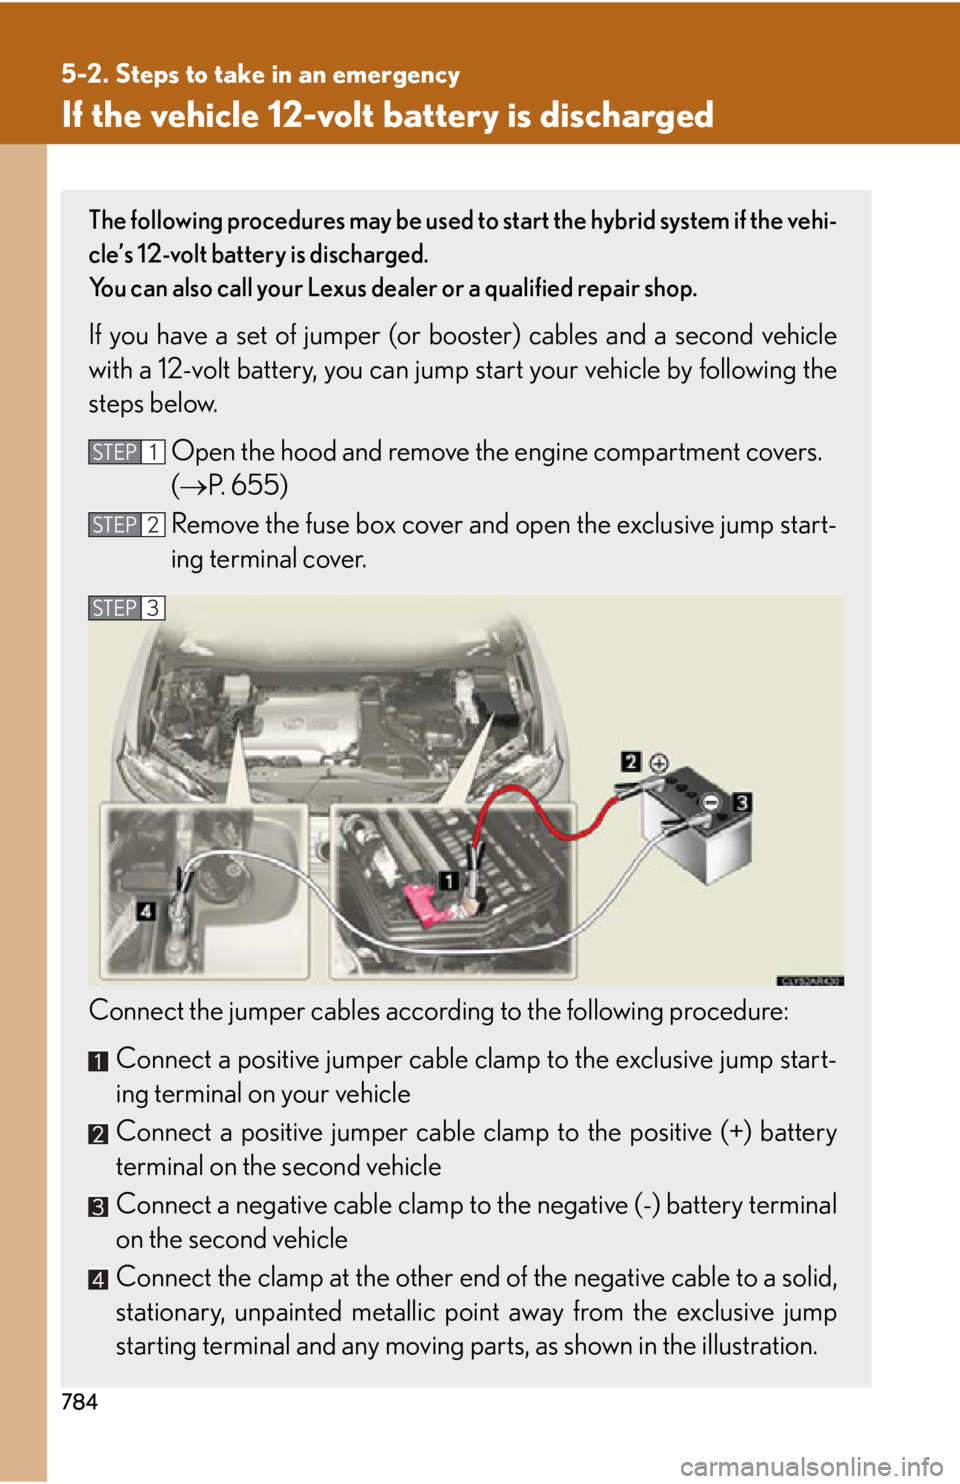
Open the hood and remove the engine compartment covers.
( P. 655)
Remove the fuse box cover and open the exclusive jump start-
ing terminal cover.
Connect the jumper cables according to the following procedure:
Connect a positive jumper cable clam p to the exclusive jump start-
ing terminal on your vehicle
Connect a positive jumper cable cl amp to the positive (+) battery
terminal on the second vehicle
Connect a negative cable clamp to the negative (-) battery terminal
on the second vehicle
Connect the clamp at the other end of the negative cable to a solid,
stationary, unpainted metallic point away from the exclusive jump
starting terminal and any moving part s, as shown in the illustration.STEP 1
STEP 2
STEP 3
Page 867 of 878

865Alphabetical index
Fuel
Capacity................................................ 800
Fuel gauge .............................................. 197
Information............................................. 810
Refueling ....................................................119
Type........................................................... 810
Fuel consumption.....................................45
Fuel door..................................................... 119
Fuel filler door........................................... 119
Fuses.......................................................... 689
Garage door opener............................ 616
Gauges....................................................... 197
Glove box ............................................... 586
Hands-free system for
mobile phone* ........................ 429, 547
Hazard lights
Switch ......................................................724
Head restraints
Adjustment ..............................................97
Headlight aim .........................................706
Headlight cleaner .................................. 231
Headlights
Discharge headlight
precautions ........................................ 722
Replacing light bulbs ....................... 708
Switch ........................................................ 217
Wattage ................................................ 809
Head-up display
Display contrast adjustment
switch ..................................................... 212
Display position adjustment
switch ..................................................... 212
Head-up display main switch ....... 212 Heaters
Seat heaters ......................................... 605
Side mirrors* ....................................... 358
Steering wheel.................................... 604
Hill-start assist control ........................ 276
Hood ........................................................... 651
Hooks
Cargo ........................................................612
Coat......................................................... 608
Horn ............................................................ 196
HUD
Display contrast adjustment
switch...................................................... 212
Display position adjustment
switch...................................................... 212
Head-up display main switch ........212
Hybrid system
Emergency shut off system.............. 35
Energy monitor/consumption
screen...................................................... 39
High voltage components ............... 34
Hybrid system indicator .................. 201
“POWER” switch................................. 177
Vehicle Proximity Notification
System.......................................................31
Hybrid transmission
Hybrid transmission........................... 186
If the shift lever cannot be
shifted from P ................................... 779
S mode ..................................................... 190G
H
*: For vehicles with a navigation system, refer to the “Navigation System Owner’s Manual”.