set LEXUS RX450H 2016 Service Manual
[x] Cancel search | Manufacturer: LEXUS, Model Year: 2016, Model line: RX450H, Model: LEXUS RX450H 2016Pages: 660, PDF Size: 14.85 MB
Page 160 of 660
1603-2. Opening, closing and locking the doors
RX450h_U_OM0E013U
■Electronic Key battery-Saving Function
When battery-saving mode is set, battery depletion is minimized by stopping the elec-
tronic key from re ceiving radio waves.
■Conditions affecting operation
The smart access system with push-button st art, wireless remote control and immobilizer
system use weak radio waves. In the following situations, the communication between the
electronic key and the vehicle may be affect ed, preventing the smart access system with
push-button start, wireless remote control an d immobilizer system from operating prop-
erly. (Ways of coping: P. 564)
●When the electronic key battery is depleted
●Near a TV tower, electric power plant, gas st ation, radio station, large display, airport or
other facility that generates strong radio wave s or electrical noise
●When the electronic key is in contact with, or is covered by the following metallic
objects
• Cards to which aluminum foil is attached
• Cigarette boxes that have aluminum foil inside
• Metallic wallets or bags
•Coins
• Hand warmers made of metal
• Media such as CDs and DVDs
●When other wireless keys (that emit radio waves) are being used nearby
●When carrying the electronic key together with the following devices that emit radio
waves
• Portable radio, cellular phone, cordle ss phone or other wireless communication
devices
• Another vehicle’s electronic key, another electronic key of your vehicle, or a wireless
key that emits radio waves
• Personal computers or person al digital assistants (PDAs)
• Digital audio players
• Portable game systems
●If window tint with a metallic content or me tallic objects are attached to the rear win-
dow
●When the electronic key is placed near a battery charger or electronic devices
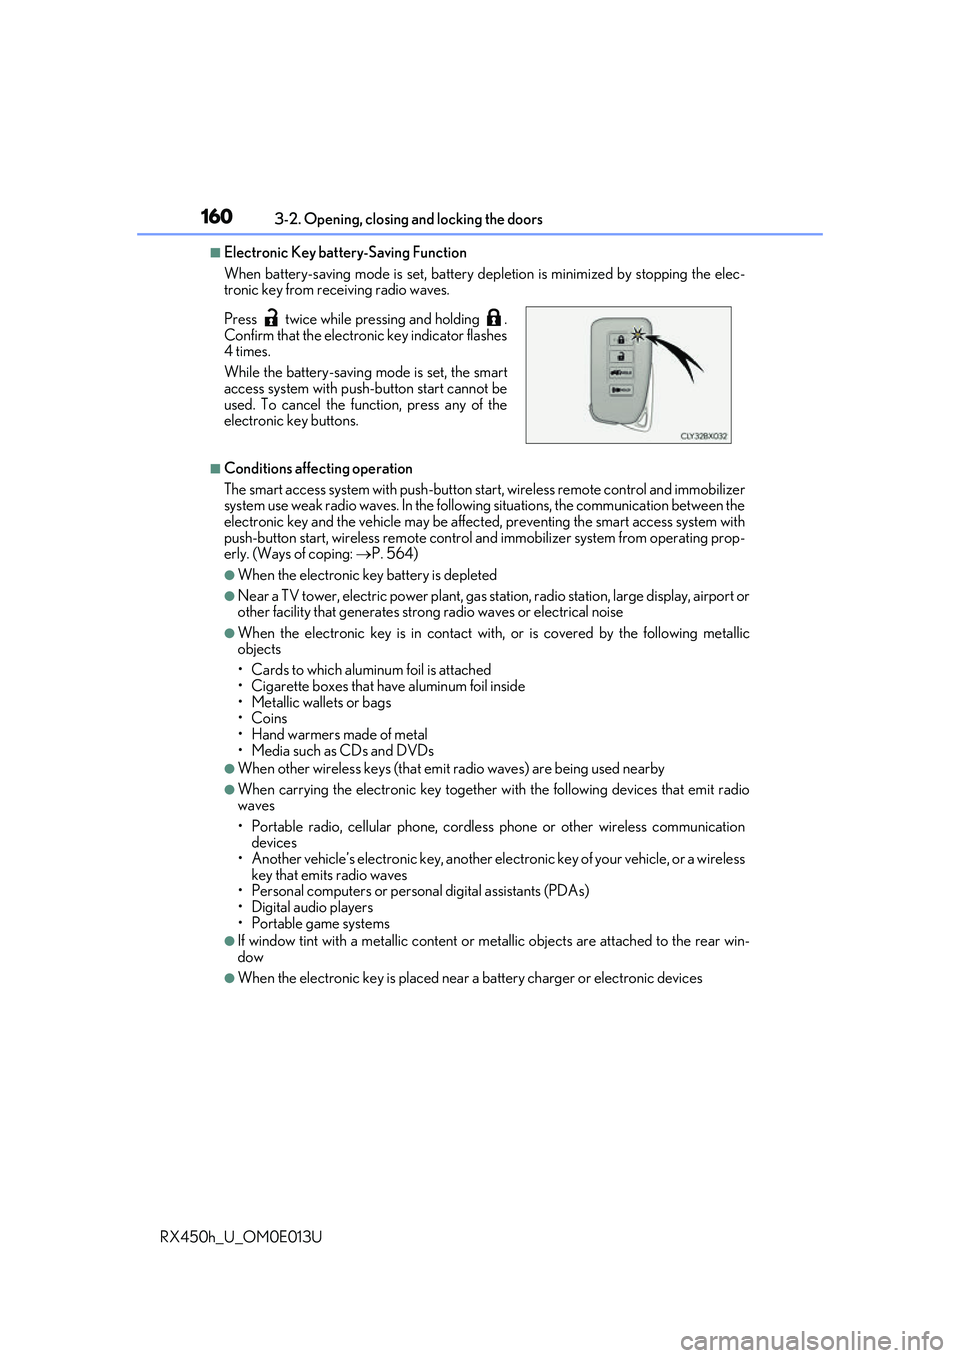
Press twice while pressing and holding .
Confirm that the electronic key indicator flashes
4 times.
While the battery-saving mode is set, the smart
access system with push
-button start cannot be
used. To cancel the function, press any of the
electronic key buttons.
Page 161 of 660
1613-2. Opening, closing and locking the doors
3
Operation of each component
RX450h_U_OM0E013U
■Note for the entry function
●Even when the electronic key is within the effective range (detection areas), the system
may not operate properly in the following cases:
• The electronic key is too close to the window or outside door handle, near the ground, or in a high place when the doors are locked or unlocked.
• The electronic key is near the ground or in a high place, or too close to the rear
bumper center when the back door is opened.
• The electronic key is on th e instrument panel, luggage co mpartment, floor, or in the
door pockets or glove box when the hybrid system is started or power switch modes
are changed.
●Do not leave the electronic key on top of th e instrument panel or near the door pockets
when exiting the vehicle. Depending on the radio wave reception conditions, it may be
detected by the antenna outs ide the cabin and the door will become lockable from the
outside, possibly trapping the electronic key inside the vehicle.
●As long as the electronic key is within th e effective range, the doors may be locked or
unlocked by anyone.
●Even if the electronic key is not inside the vehicle, it may be possible to start the hybrid
system if the electronic key is near the window.
●The doors may unlock if a large amount of wa ter splashes on the door handle, such as in
the rain or in a car wash when the electronic key is within the effective range. (The door
will automatically be locked after approx imately 60 seconds if the doors are not
opened and closed.)
●If the wireless remote control is used to lo ck the doors when the electronic key is near
the vehicle, there is a possibility that the d oor may not be unlocked by the entry func-
tion. (Use the wireless remote control to unlock the doors.)
●Touching the door lock sensor while wearin g gloves may delay or prevent lock opera-
tion. Remove the gloves and touch the lock sensor again.
●When the lock operation is performed using the lock sensor, recognition signals will be
shown up to two consecutive times. After this, no recognition signals will be given.*
●If the door handle becomes wet while the el ectronic key is within the effective range,
the door may lock and unlock repeatedly. In that case, follow the following correction
procedures to wash the vehicle:
• Place the electronic key in a location 6 ft. (2 m) or more away from the vehicle. (Take care to ensure that the key is not stolen.)
• Set the electronic key to battery-saving mode to disable the smart access system with push-button start. ( P. 160)
●If the electronic key is inside the vehicle and a door handle becomes wet during a car
wash, a message may be shown on the mult i-information display and a buzzer will
sound outside the vehicle. To turn off the alarm, lock all the doors.
●The lock sensor may not work properly if it comes into contact with ice, snow, mud, etc.
Clean the lock sensor and attempt to operate it again.
●A sudden approach to the effective range or door handle may prevent the doors from
being unlocked. In this case, return the door handle to the original position and check
that the doors unlock before pulling the door handle again.
●If there is another electronic key in the de tection area, it may take slightly longer to
unlock the doors after the door handle is gripped.
Page 162 of 660
1623-2. Opening, closing and locking the doors
RX450h_U_OM0E013U
●Fingernails may scrape against the door duri ng operation of the door handle. Be care-
ful not to injure fingernails or damage the surface of the door.
*: This setting can be customiz ed at your Lexus dealer.
■When the vehicle is not driven for extended periods
●To prevent theft of the vehicle, do not leave the electronic key within 6 ft. (2 m) of the
vehicle.
●The smart access system with push-button start can be deactivated in advance.
( P. 607)
■To operate the system properly
Make sure to carry the electronic key when operating the system. Do not get the elec-
tronic key too close to the vehicle when operating the system from the outside of the
vehicle.
Depending on the position and holding condition of the electronic key, the key may not
be detected correctly and the system may not operate properly. (The alarm may go off
accidentally, or the door lock prevention may not operate.)
■If the smart access system with push-button start does not operate properly
●Locking and unlocking the doors: Use the mechanical key. (P. 564)
●Starting the hybrid system: P. 566
■Customization
Some functions can be customized. ( P. 607)
■If the smart access system with push-button start has been deactivated in a customized
setting
●Locking and unlocking the doors:
Use the wireless remote cont rol or mechanical key. (P. 136, 142, 564)
●Starting the hybrid system and changing power switch modes: P. 566
●Stopping the hybrid system: P. 233
Page 171 of 660
1713-3. Adjusting the seats
3
Operation of each component
RX450h_U_OM0E013U
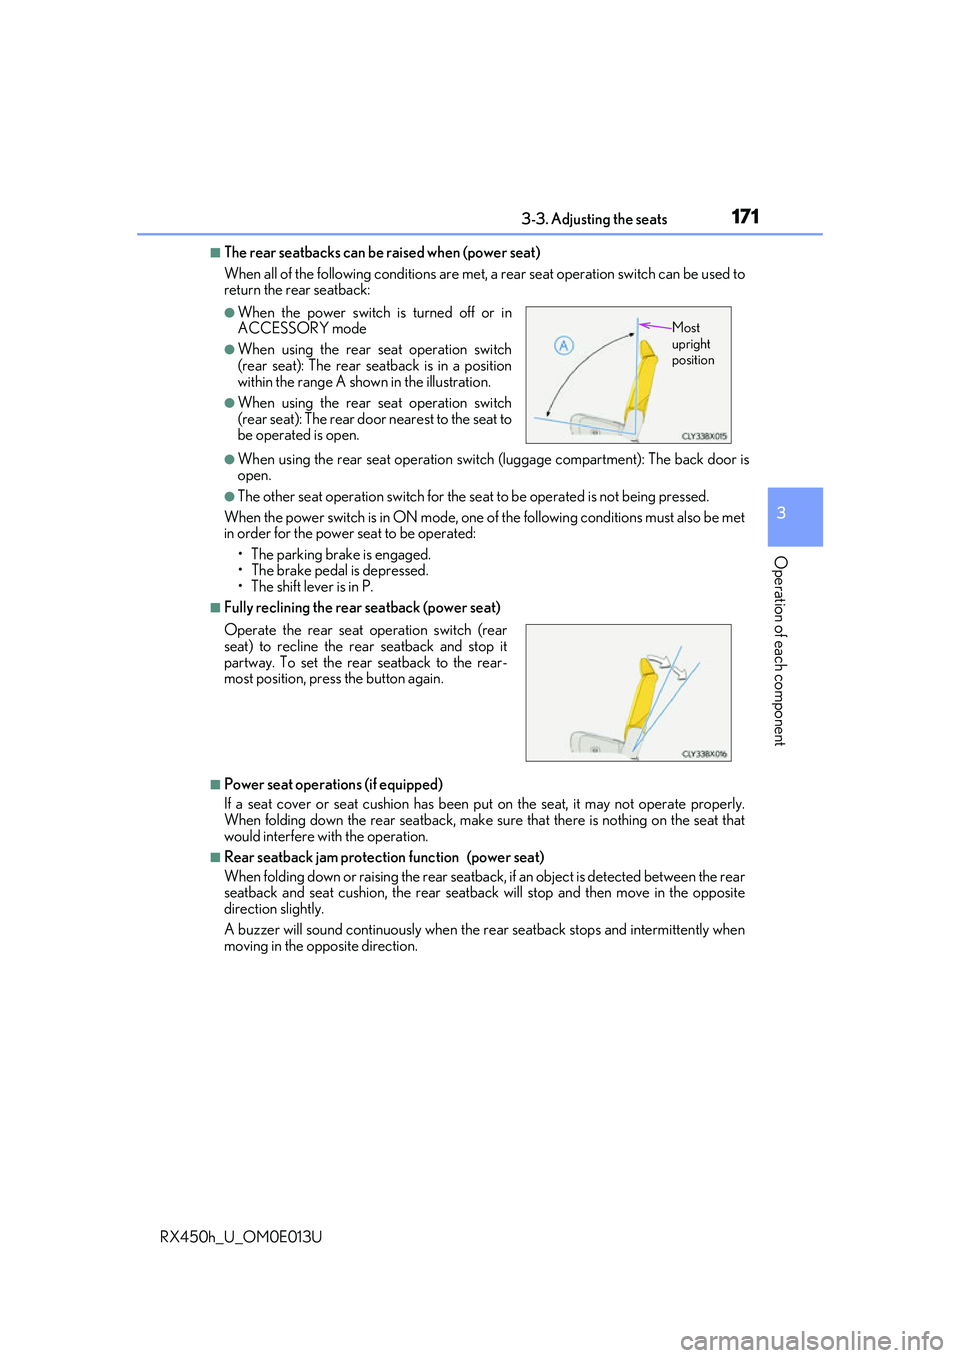
■The rear seatbacks can be raised when (power seat)
When all of the following conditions are met, a rear seat operation switch can be used to
return the rear seatback:
●When using the rear seat operation switch (luggage compartment): The back door is
open.
●The other seat operation switch for the se at to be operated is not being pressed.
When the power switch is in ON mode, one of the following conditions must also be met
in order for the power seat to be operated:
• The parking brake is engaged.
• The brake pedal is depressed.
• The shift lever is in P.
■Fully reclining the rear seatback (power seat)
■Power seat operations (if equipped)
If a seat cover or seat cushion has been pu t on the seat, it may not operate properly.
When folding down the rear seatback, make sure that there is nothing on the seat that
would interfere with the operation.
■Rear seatback jam protection function (power seat)
When folding down or raising th e rear seatback, if an object is detected between the rear
seatback and seat cushion, th e rear seatback will stop and then move in the opposite
direction slightly.
A buzzer will sound continuously when the re ar seatback stops and intermittently when
moving in the opposite direction.
●When the power switch is turned off or in
ACCESSORY mode
●When using the rear seat operation switch
(rear seat): The rear seatback is in a position
within the range A shown in the illustration.
●When using the rear seat operation switch
(rear seat): The rear door nearest to the seat to
be operated is open.
Operate the rear seat operation switch (rear
seat) to recline the rear seatback and stop it
partway. To set the rear seatback to the rear-
most position, press the button again.
Most
upright
position
Page 175 of 660
1753-3. Adjusting the seats
3
Operation of each component
RX450h_U_OM0E013U
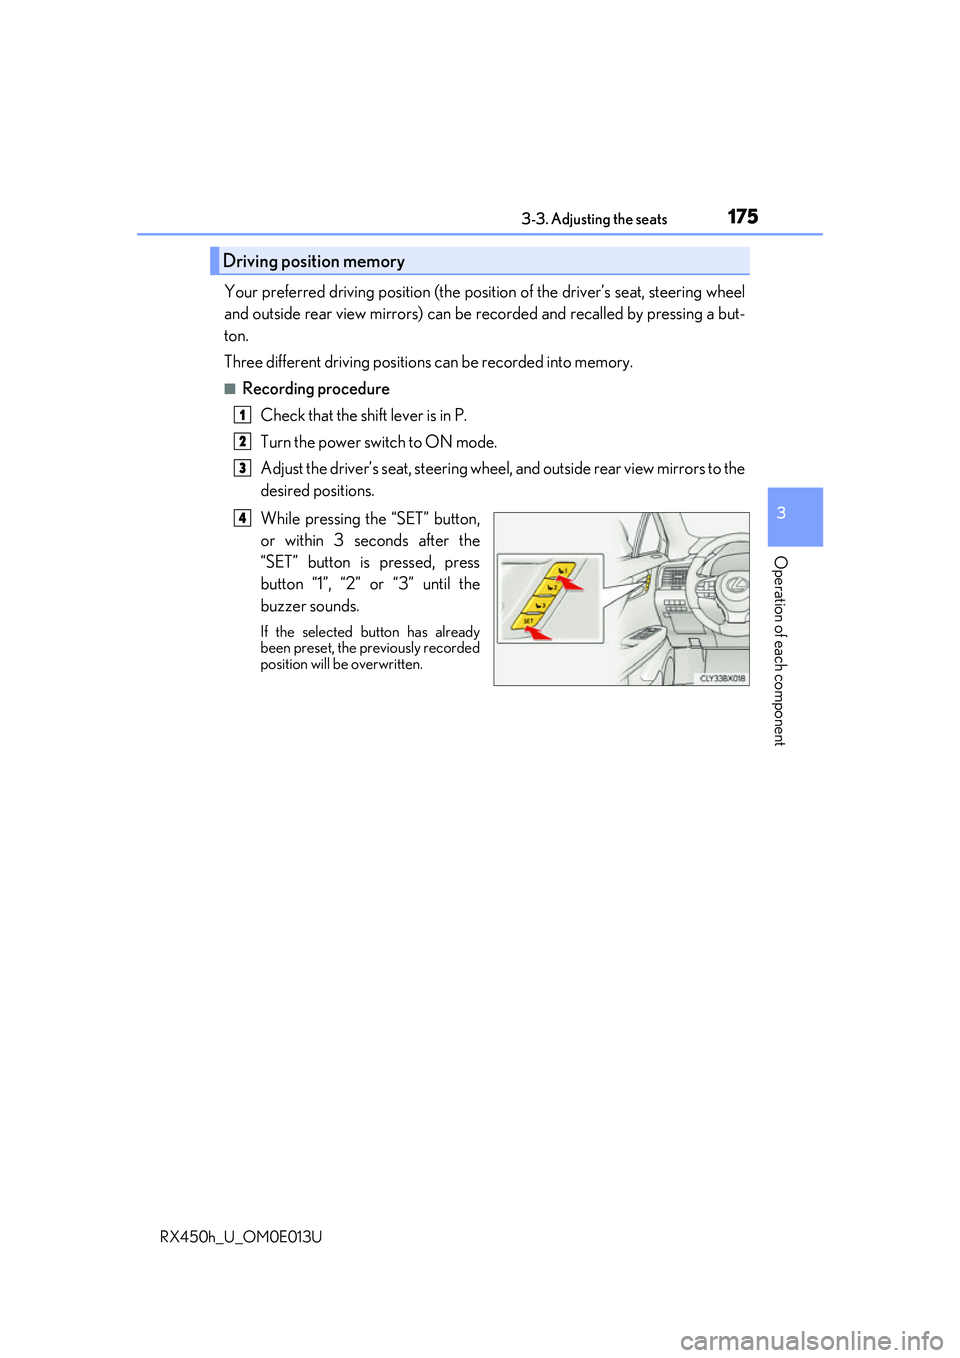
Your preferred driving position (the position of the driver’s seat, steering wheel
and outside rear view mirrors) can be recorded and recalled by pressing a but-
ton.
Three different driving positions can be recorded into memory.
■Recording procedure
Check that the shift lever is in P.
Turn the power switch to ON mode.
Adjust the driver’s seat, steering wheel, and outside rear view mirrors to the
desired positions.
While pressing the “SET” button,
or within 3 seconds after the
“SET” button is pressed, press
button “1”, “2” or “3” until the
buzzer sounds.
If the selected button has already
been preset, the previously recorded
position will be overwritten.
Driving position memory
1
2
3
4
Page 176 of 660
1763-3. Adjusting the seats
RX450h_U_OM0E013U
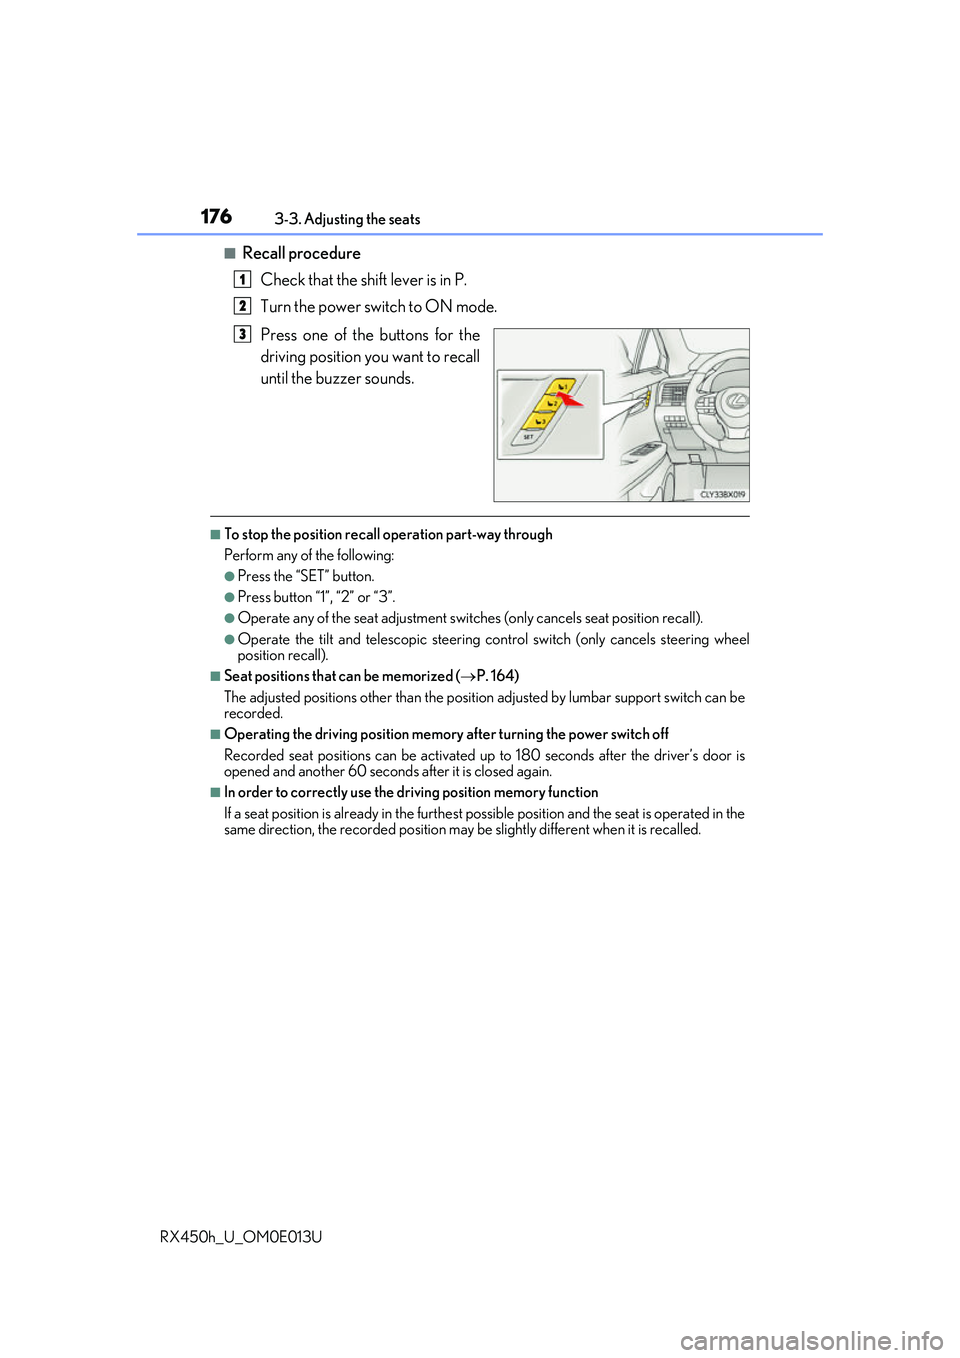
■Recall procedure Check that the shift lever is in P.
Turn the power switch to ON mode.
Press one of the buttons for the
driving position you want to recall
until the buzzer sounds.
■To stop the position recall operation part-way through
Perform any of the following:
●Press the “SET” button.
●Press button “1”, “2” or “3”.
●Operate any of the seat adjustment switches (only cancels seat position recall).
●Operate the tilt and telescopic steering control switch (only cancels steering wheel
position recall).
■Seat positions that can be memorized ( P. 164)
The adjusted positions other than the position adjusted by lumbar support switch can be
recorded.
■Operating the driving position memory after turning the power switch off
Recorded seat positions can be activated up to 180 seconds after the driver’s door is
opened and another 60 seconds after it is closed again.
■In order to correctly use the driving position memory function
If a seat position is already in the furthest po ssible position and the seat is operated in the
same direction, the recorded position may be slightly different when it is recalled.
1
2
3
Page 178 of 660
1783-3. Adjusting the seats
RX450h_U_OM0E013U
■Cancelation procedure
Carry only the key you want to cance l and then close the driver’s door.
If 2 or more keys are in the vehicle, the driving position cannot be canceled
properly.
Turn the power switch to ON mode.
While pressing the “SET” button, press and hold the door lock switch
(either lock or unlock) un til the buzzer sounds twice.
If it button could not be canceled, the buzzer sounds continuously for approxi-
mately 3 seconds.
■Recalling the driving position using the memory recall function
●Different driving positions can be registered for each electronic key. Therefore, the
driving position that is recalled may be di fferent depending on the key being carried.
●If a door other than the driver’s door is unlocked with the smart access system with
push-button start, the driving position cannot be recalled. In this case, press the driving
position button which has been set.
■Customization
Some functions can be customized. ( P. 607)
WARNING
■Seat adjustment caution
Take care during seat adjustment so that the seat does not strike the rear passenger or
squeeze your body against the steering wheel.
1
2
Page 183 of 660
1833-4. Adjusting the steering wheel and mirrors
3
Operation of each component
RX450h_U_OM0E013U
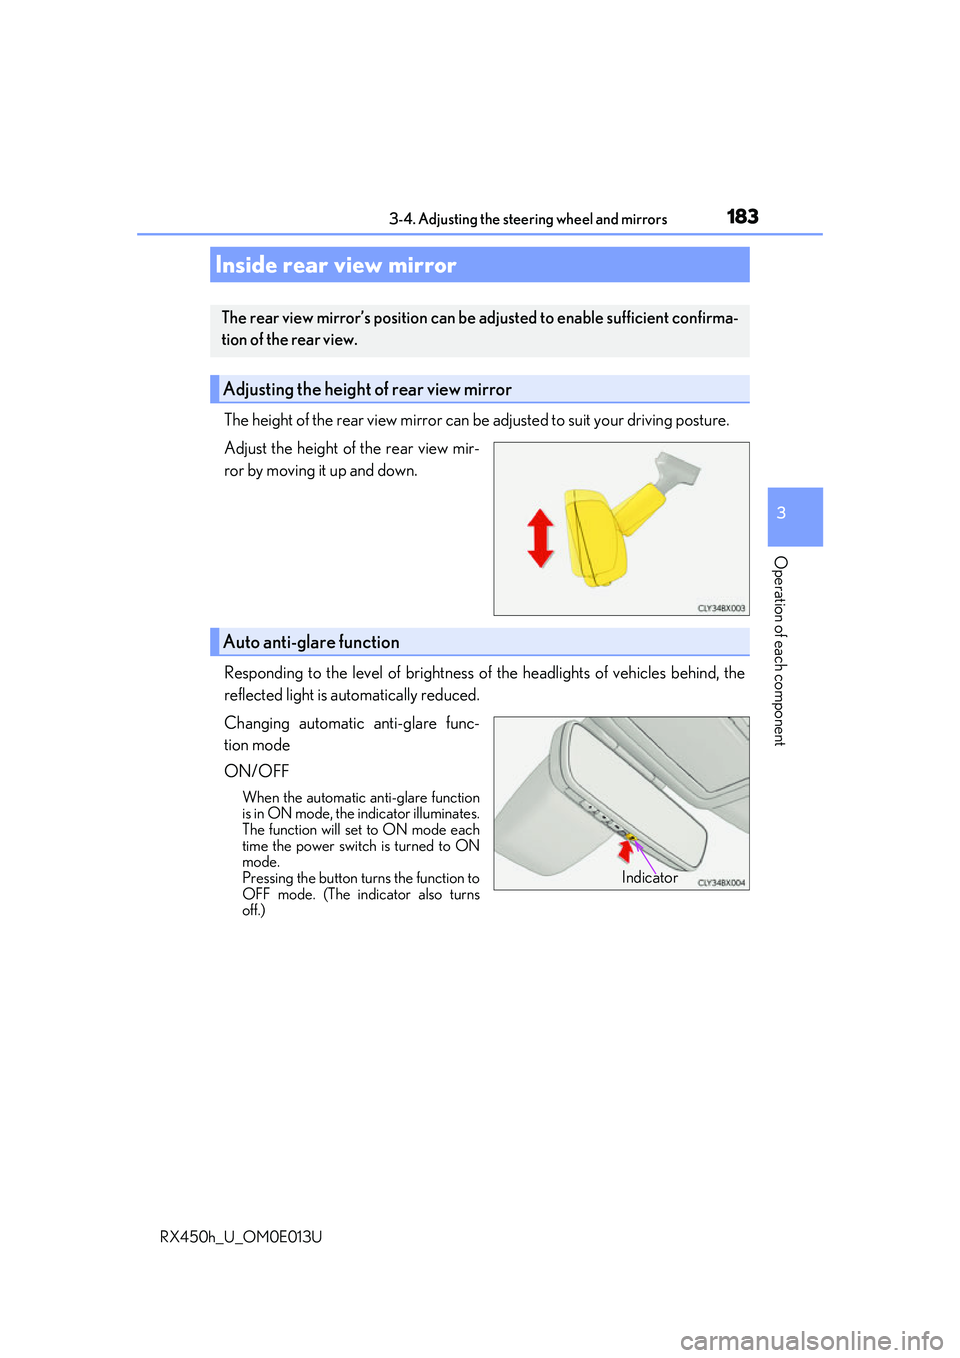
The height of the rear view mirror can be adjusted to suit your driving posture.
Adjust the height of the rear view mir-
ror by moving it up and down.
Responding to the level of brightness of the headlights of vehicles behind, the
reflected light is automatically reduced.
Changing automatic anti-glare func-
tion mode
ON/OFF
When the automatic anti-glare function
is in ON mode, the indicator illuminates.
The function will set to ON mode each
time the power switch is turned to ON
mode.
Pressing the button turns the function to
OFF mode. (The indicator also turns
off.)
Inside rear view mirror
The rear view mirror’s position can be adjusted to enable sufficient confirma-
tion of the rear view.
Adjusting the height of rear view mirror
Auto anti-glare function
Indicator
Page 186 of 660
1863-4. Adjusting the steering wheel and mirrors
RX450h_U_OM0E013U
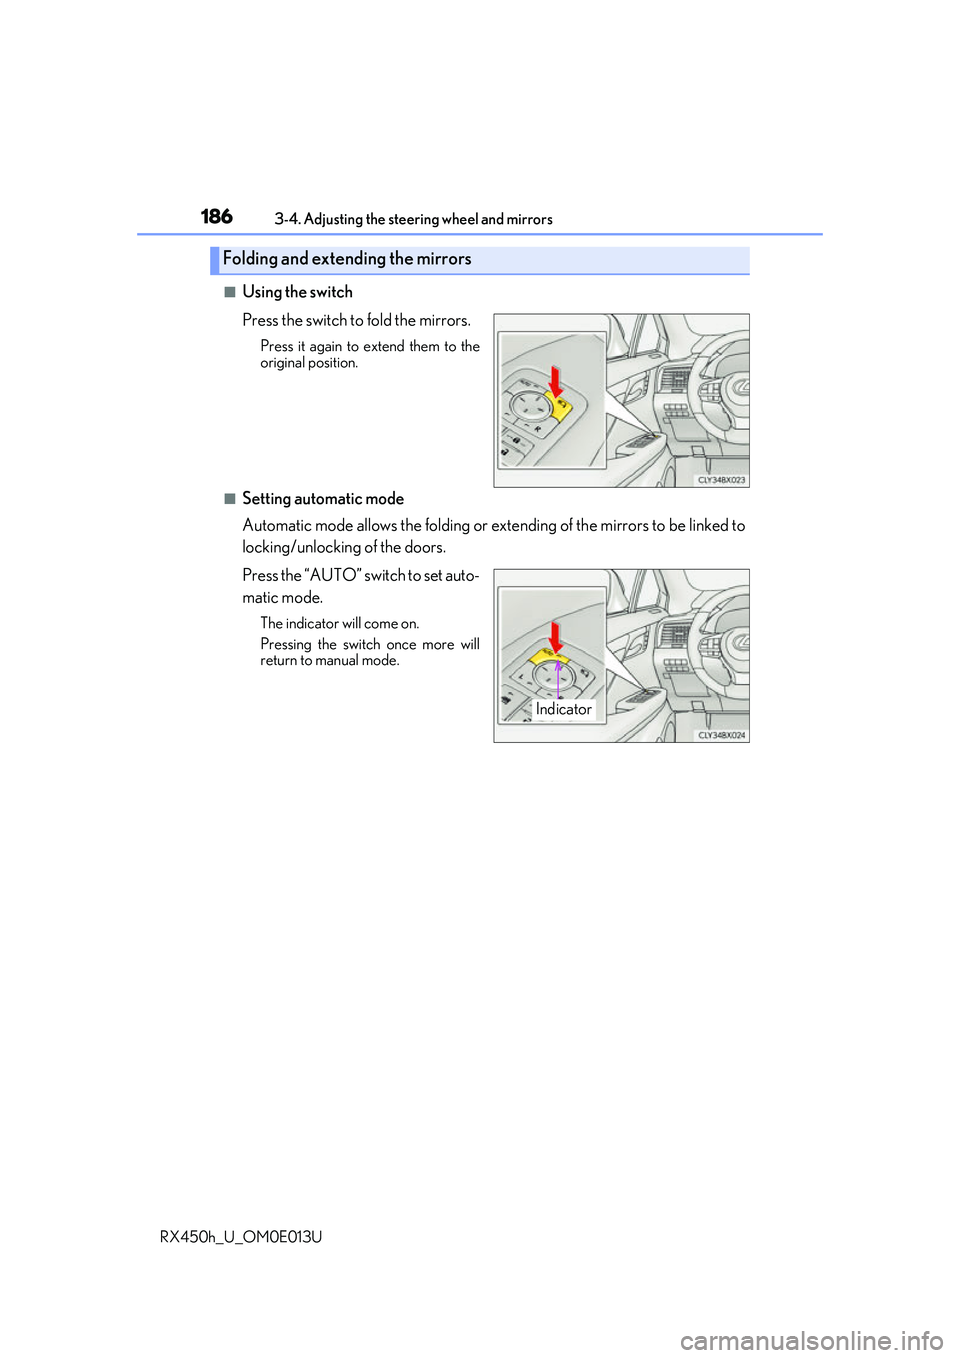
■Using the switch
Press the switch to fold the mirrors.
Press it again to extend them to the
original position.
■Setting automatic mode
Automatic mode allows the folding or ex tending of the mirrors to be linked to
locking/unlocking of the doors.
Press the “AUTO” switch to set auto-
matic mode.
The indicator will come on.
Pressing the switch once more will
return to manual mode.
Folding and extending the mirrors
Indicator
Page 187 of 660
1873-4. Adjusting the steering wheel and mirrors
3
Operation of each component
RX450h_U_OM0E013U
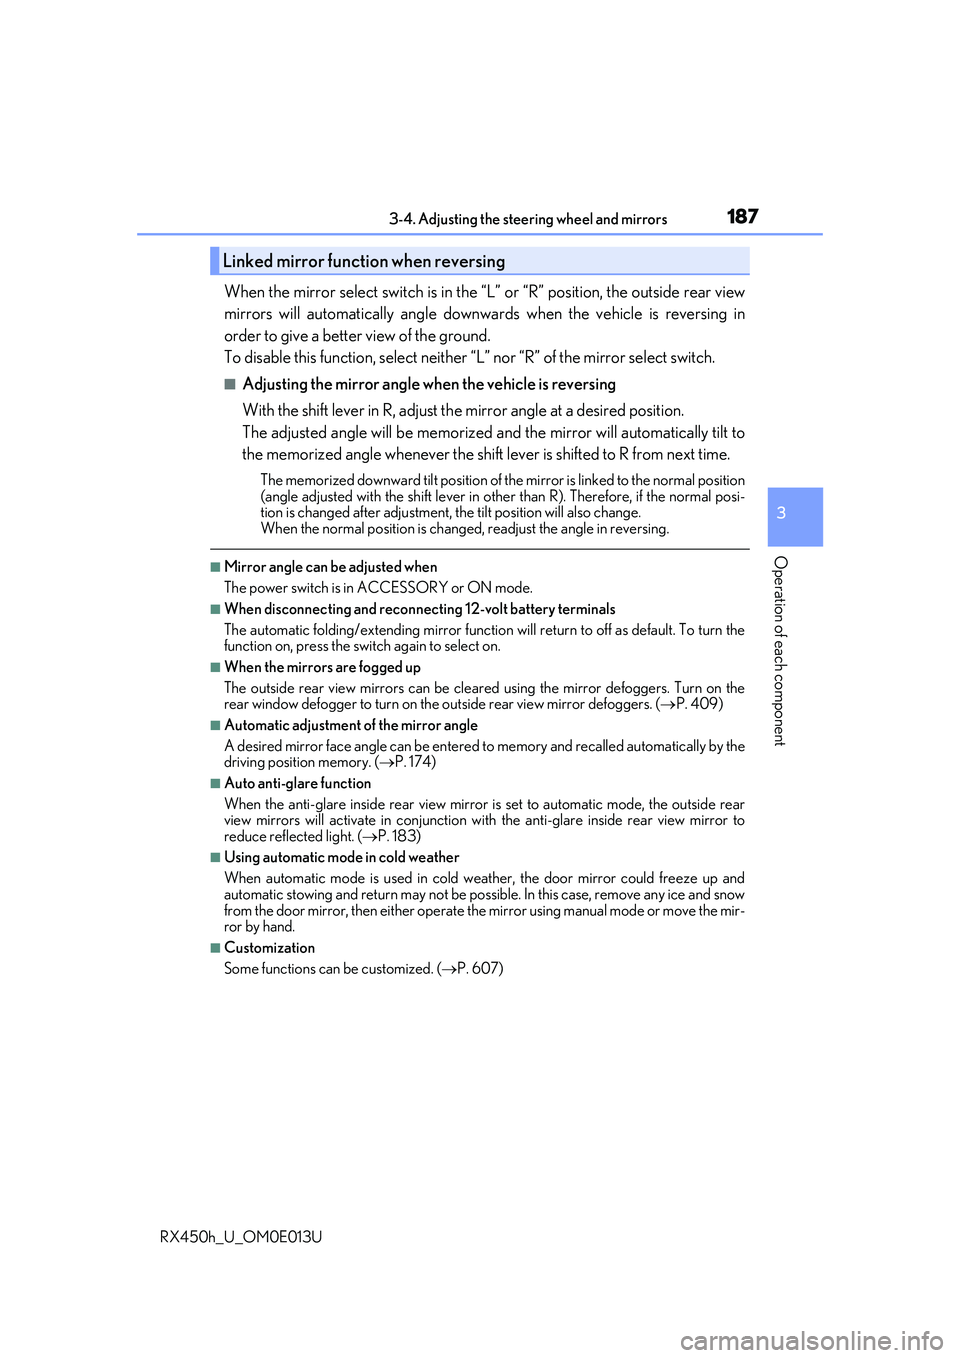
When the mirror select switch is in the “L” or “R” position, the outside rear view
mirrors will automatically angle downwa rds when the vehicle is reversing in
order to give a better view of the ground.
To disable this function, select neither “L” nor “R” of the mirror select switch.
■Adjusting the mirror angle when the vehicle is reversing
With the shift lever in R, adjust the mirror angle at a desired position.
The adjusted angle will be memorized and the mirror will automatically tilt to
the memorized angle whenever the shift lever is shifted to R from next t\
ime.
The memorized downward tilt position of th e mirror is linked to the normal position
(angle adjusted with the shif t lever in other than R). Ther efore, if the normal posi-
tion is changed after adjustment, the tilt position will also change.
When the normal position is chang ed, readjust the angle in reversing.
■Mirror angle can be adjusted when
The power switch is in ACCESSORY or ON mode.
■When disconnecting and reconnect ing 12-volt battery terminals
The automatic folding/extending mirror function will return to off as default. To turn the
function on, press the switch again to select on.
■When the mirrors are fogged up
The outside rear view mirrors can be cleare d using the mirror defoggers. Turn on the
rear window defogger to turn on the outside rear view mirror defoggers. ( P. 409)
■Automatic adjustment of the mirror angle
A desired mirror face angle can be entered to memory and recalled automatically by the
driving position memory. ( P. 174)
■Auto anti-glare function
When the anti-glare inside re ar view mirror is set to automatic mode, the outside rear
view mirrors will activate in conjunction with the anti-glare inside rear view mirror to
reduce reflected light. ( P. 183)
■Using automatic mode in cold weather
When automatic mode is used in cold weather, the door mirror could freeze up and
automatic stowing and return may not be possible. In this case, remove any ice and snow
from the door mirror, then either operate th e mirror using manual mode or move the mir-
ror by hand.
■Customization
Some functions can be customized. ( P. 607)
Linked mirror function when reversing