display LINCOLN AVIATOR 2003 User Guide
[x] Cancel search | Manufacturer: LINCOLN, Model Year: 2003, Model line: AVIATOR, Model: LINCOLN AVIATOR 2003Pages: 288, PDF Size: 3.32 MB
Page 33 of 288
When in rewind mode, your audio system will automatically lower the
volume level of the playing media.
Fast forward
The fast forward control works in
CD modes.
Press and hold the FF control until
the desired selection is reached. If the end of the disc is reached, the CD
will return to the first track. Release the control to disengage fast
forward mode.
When in fast forward mode, your audio system will automatically lower
the volume level of the playing media.
Shuffle feature
Press the SHUF control until the
desired shuffle mode is displayed.
The audio system will then engage
the desired shuffle mode.
When engaged, the shuffle feature has two different modes: SHUFFLE
DISC and SHUFFLE TRK.
SHUFFLE DISC randomly plays tracks from all the discs presently in the
audio system.
SHUFFLE TRK plays all the tracks on the current disc in random order.
Compression feature
The compression feature operates in
CD mode and brings soft and loud
CD passages together for a more
consistent listening level.
Press the MENU control until compression status is displayed. Press the
SEL control to enable the compression feature when COMPRESS OFF is
displayed. Press the SEL control again to disable the feature when
COMPRESS ON is displayed.
REW FF
SEL+MENU
Entertainment Systems
33
Page 35 of 288
While in FM mode, two menus are available.If RDS is turned OFF, you
can access :
•RDS OFF — Refer toRadio data system feature.
If RDS is turned ON, you can access the following:
•TRAFFIC ON/OFF-Refer toTraffic announcements.
•FIND type-Refer toProgram type.
•SHOW (NAME, TYPE, NONE)- Refer toRadio data system feature.
•RDS ON— Refer toRadio data system feature.
You can also access COMP ON/OFF.
TRAFFIC ON/OFF— Traffic announcements can be programmed as local
or distant. Refer toTraffic announcements.
RDS ON/OFF— This feature allows your audio system to receive text
information from RDS-equipped FM radio stations. Refer toRadio Data
System feature.
FIND type — Allows you to select your desired FM program type and
search for that selection.
SHOW — Allows you to select from NAME (displays the name of the
radio station), TYPE (displays the RDS program type: rock, jazz, etc.), or
NONE (deactivates the RDS display).
Traffic announcements
This feature allows you to hear
traffic announcements. When in this
mode, traffic announcements will
interrupt radio and CD play.
When in FM mode and RDS is
activated, press the MENU until TRAFFIC OFF displays. Press the SEL
control to engage the feature. The display will read TRAFFIC ON.
This feature also allows you to control the volume of traffic
announcements. With the display reading TRAFFIC ON, adjust the
volume using the volume control to the desired level. The volume level
will show at the bottom of the display. Interrupting traffic
announcements will be at the selected volume level.
To disengage the feature, press the MENU control until TRAFFIC ON
displays. Press the SEL control. The display will read TRAFFIC OFF.
RDS traffic seek feature
When in traffic mode, you can use the SEEK feature to seek upor down
the listenable traffic capable frequencies.
SEL+MENU
Entertainment Systems
35
Page 36 of 288
With the RDS activated, press MENU until TRAFFIC ON is displayed.
Press and hold the SEEK control until the desired selection is reached.
The feature disengages when the control is released.
RDS traffic scan feature
When in traffic mode, you can use the SCAN feature to scan upthe
frequency band for listenable traffic capable frequencies.
With the RDS activated, press the MENU control until TRAFFIC ON is
displayed. Press the SCAN control. SCAN TRAFFIC will display. The
audio system will scan to all traffic capable frequencies. If no valid
stations are found after one pass, the scan function is cancelled and NOT
FOUND displays.
Trafficannouncements are not available in most U.S. markets.
Radio data system (RDS) feature
This feature allows your audio
system to receive text information
from RDS-equipped FM radio
stations.
To activate RDS:
•When in FM mode, press the MENU control until RDS OFF displays.
•Press the SEL control to engage this feature (RDS ON).
RDS features:
Once the RDS feature is on, press the MENU control to scroll through
the following selections:
Traffic announcements
This feature allows you to hear traffic announcements while in CD mode.
These announcements are broadcast by traffic capable RDS stations.
When in this mode, traffic announcements will interrupt radio and CD
play.
•Press the MENU control until TRAFFIC is displayed.
•Press the SEL control to engage the feature. The display will read
TRAFFIC ON.
This feature also allows you to control the volume of traffic
announcements. With the display reading TRAFFIC ON, adjust the
volume using the volume control to the desired level. The volume level
will show at the bottom of the display. Interrupting traffic
announcements will be at the selected volume level.
SEL+MENU
Entertainment Systems
36
Page 37 of 288
To disengage the feature, press the MENU control until TRAFFIC ON
displays. Press the SEL control. The display will read TRAFFIC OFF.
Trafficannouncements are not available in most U.S. markets.
Program type
This feature allows you to search for RDS stations selectively by their
program type.
Press the MENU control until FIND
program type is displayed.
Use the SEL control to select the
program type. With the feature on,
use the SEEK or SCAN control to
find the desired program type from the following selections:
•Classic
•Country
•Info
•Jazz
•Oldies•R&B
•Religious
•Rock
•Soft
•To p4 0
Show
This feature allows you to select the
type of RDS broadcast information
the radio will regularly show in the
display.
With RDS activated, press the
MENU control until SHOW is
displayed.
Use the SEL control to select TYPE
(displays the RDS program type:
rock, jazz, etc), NAME (displays the name of the radio station) or NONE
(deactivates the RDS display).
Mute mode
Press the control to mute the
playing media. Press the control
again to return to the playing media.
SEL+MENU
SEL
+MENU
SEL
+MENU
Entertainment Systems
37
Page 38 of 288
Soft mute
When the vehicle is in reverse, and an obstacle is detected by Rear Park
Assist, the radio volume is reduced to a level that allows the warning to
be heard. After the obstacle warning is gone, the radio will return to the
previously set volume level.
Setting the clock
Your vehicle is equipped with a separate instrument panel mounted
clock. Please refer toClockin theDriver controls chapterfor
instructions on setting the clock.
Digital signal processing
The digital signal processing (DSP) feature allows you to change the
signal mode to suit your listening tastes.
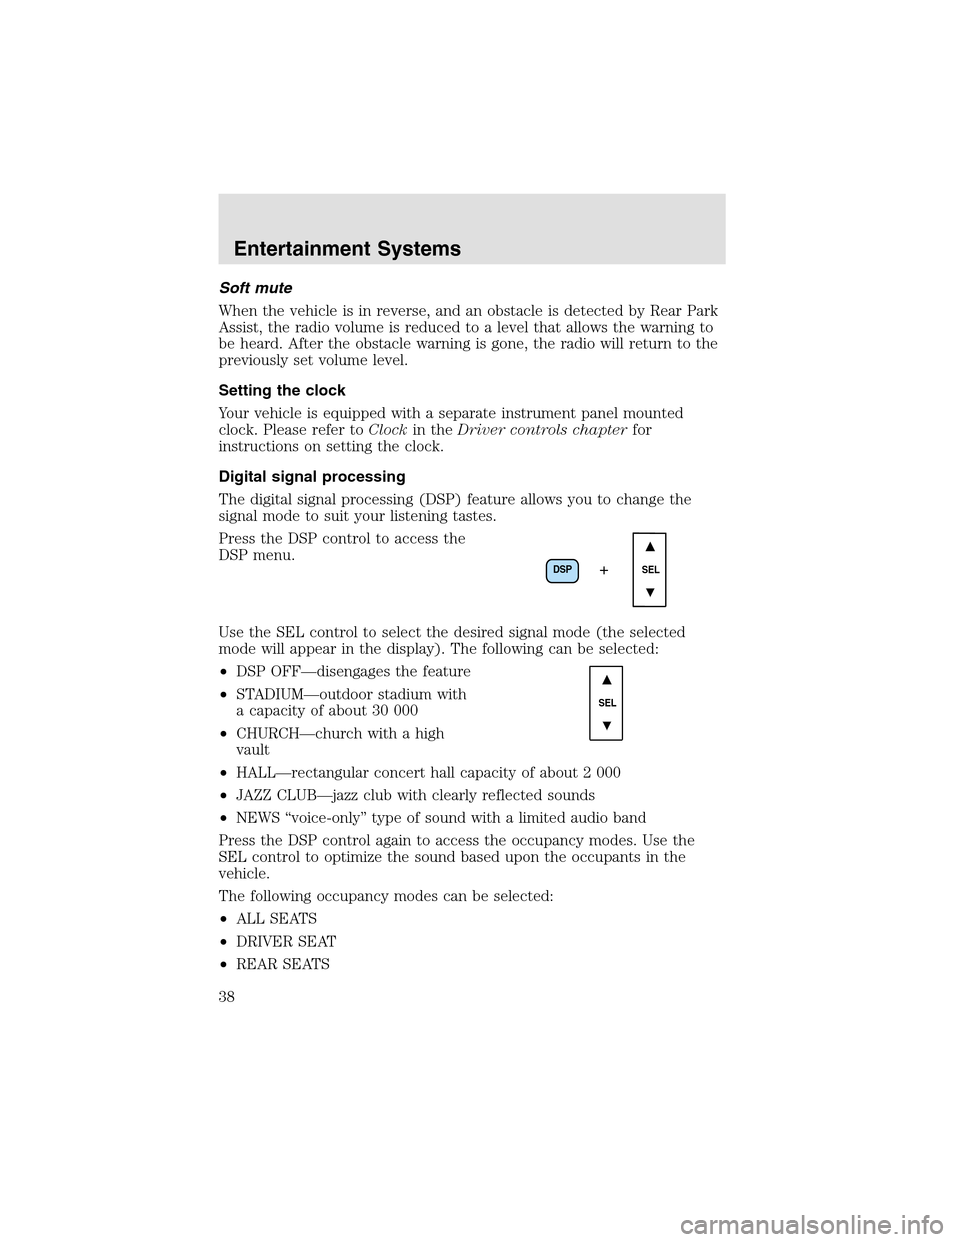
Press the DSP control to access the
DSP menu.
Use the SEL control to select the desired signal mode (the selected
mode will appear in the display). The following can be selected:
•DSP OFF—disengages the feature
•STADIUM—outdoor stadium with
a capacity of about 30 000
•CHURCH—church with a high
vault
•HALL—rectangular concert hall capacity of about 2 000
•JAZZ CLUB—jazz club with clearly reflected sounds
•NEWS “voice-only” type of sound with a limited audio band
Press the DSP control again to access the occupancy modes. Use the
SEL control to optimize the sound based upon the occupants in the
vehicle.
The following occupancy modes can be selected:
•ALL SEATS
•DRIVER SEAT
•REAR SEATS
DSP
SEL+
SEL
Entertainment Systems
38
Page 40 of 288
•Terrain.Hills, mountains and tall buildings between your vehicle’s
antenna and the radio station signal can cause FM reception problems.
Static can be caused on AM stations by power lines, electric fences,
traffic lights and thunderstorms. Moving away from an interfering
structure (out of its “shadow”) returns your reception to normal.
•Station overload.Weak signals are sometimes captured by stronger
signals when you pass a broadcast tower. A stronger signal may
temporarily overtake a weaker signal and play while the weak station
frequency is displayed.
The audio system automatically switches to single channel reception if it
will improve the reception of a station normally received in stereo.
AUDIO SYSTEM WARRANTIES AND SERVICE
Refer to theWarranty Guidefor audio system warranty information.
If service is necessary, see your dealer or a qualified technician.
Entertainment Systems
40
Page 41 of 288
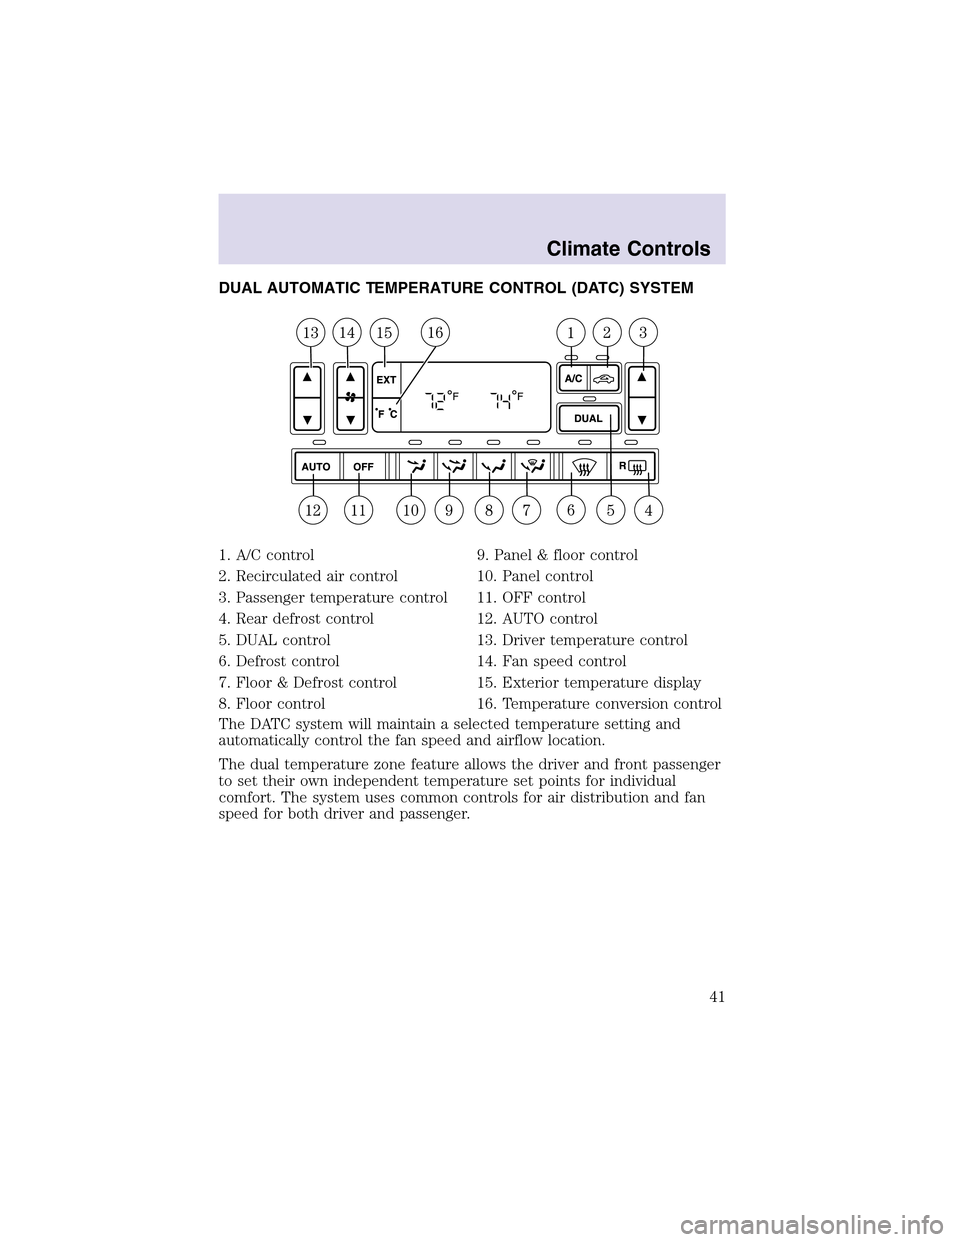
DUAL AUTOMATIC TEMPERATURE CONTROL (DATC) SYSTEM
1. A/C control
2. Recirculated air control
3. Passenger temperature control
4. Rear defrost control
5. DUAL control
6. Defrost control
7. Floor & Defrost control
8. Floor control9. Panel & floor control
10. Panel control
11. OFF control
12. AUTO control
13. Driver temperature control
14. Fan speed control
15. Exterior temperature display
16. Temperature conversion control
The DATC system will maintain a selected temperature setting and
automatically control the fan speed and airflow location.
The dual temperature zone feature allows the driver and front passenger
to set their own independent temperature set points for individual
comfort. The system uses common controls for air distribution and fan
speed for both driver and passenger.
Climate Controls
41
Page 42 of 288
Automatic operation
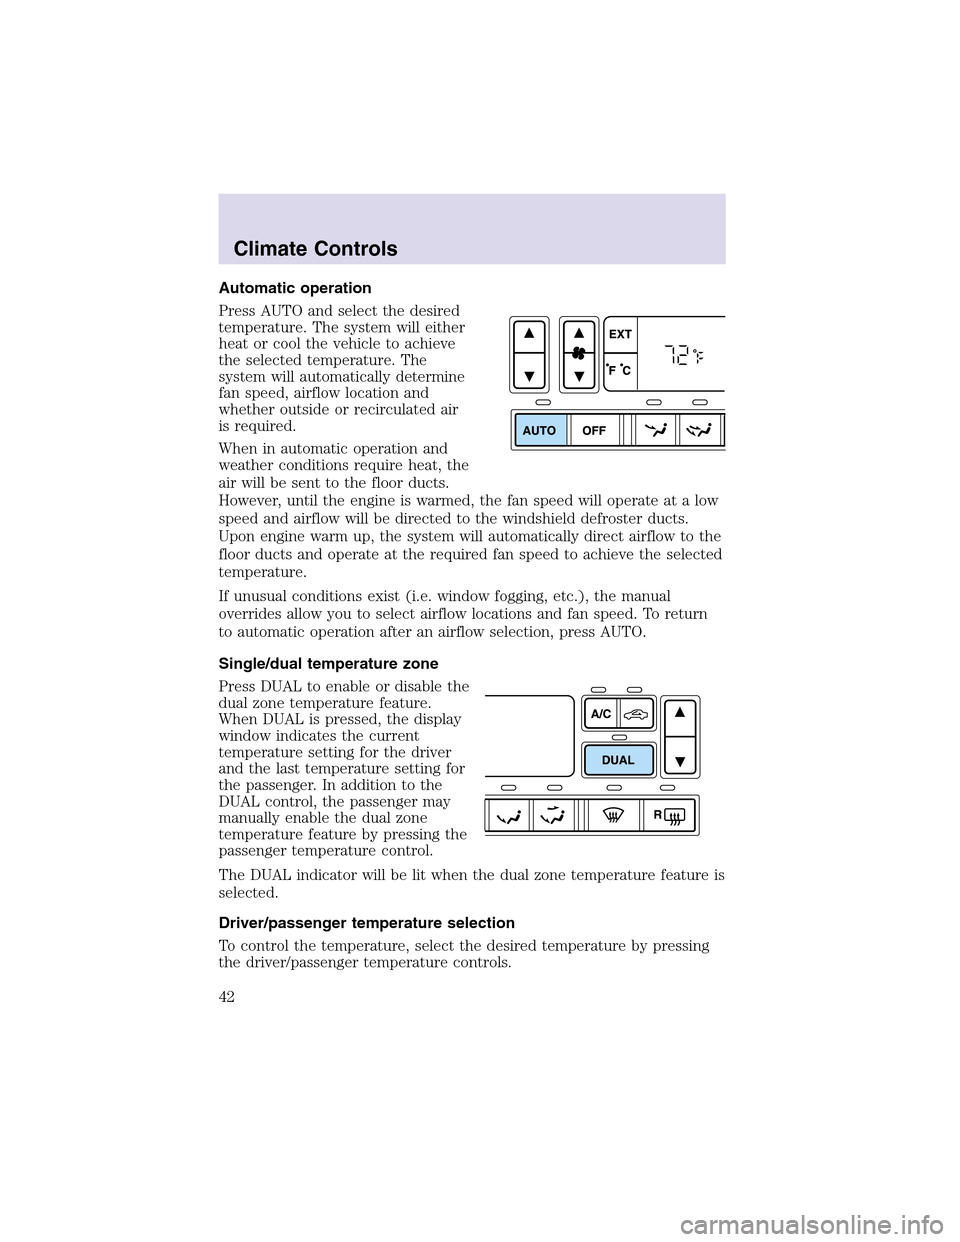
Press AUTO and select the desired
temperature. The system will either
heat or cool the vehicle to achieve
the selected temperature. The
system will automatically determine
fan speed, airflow location and
whether outside or recirculated air
is required.
When in automatic operation and
weather conditions require heat, the
air will be sent to the floor ducts.
However, until the engine is warmed, the fan speed will operate at a low
speed and airflow will be directed to the windshield defroster ducts.
Upon engine warm up, the system will automatically direct airflow to the
floor ducts and operate at the required fan speed to achieve the selected
temperature.
If unusual conditions exist (i.e. window fogging, etc.), the manual
overrides allow you to select airflow locations and fan speed. To return
to automatic operation after an airflow selection, press AUTO.
Single/dual temperature zone
Press DUAL to enable or disable the
dual zone temperature feature.
When DUAL is pressed, the display
window indicates the current
temperature setting for the driver
and the last temperature setting for
the passenger. In addition to the
DUAL control, the passenger may
manually enable the dual zone
temperature feature by pressing the
passenger temperature control.
The DUAL indicator will be lit when the dual zone temperature feature is
selected.
Driver/passenger temperature selection
To control the temperature, select the desired temperature by pressing
the driver/passenger temperature controls.
Climate Controls
42
Page 43 of 288
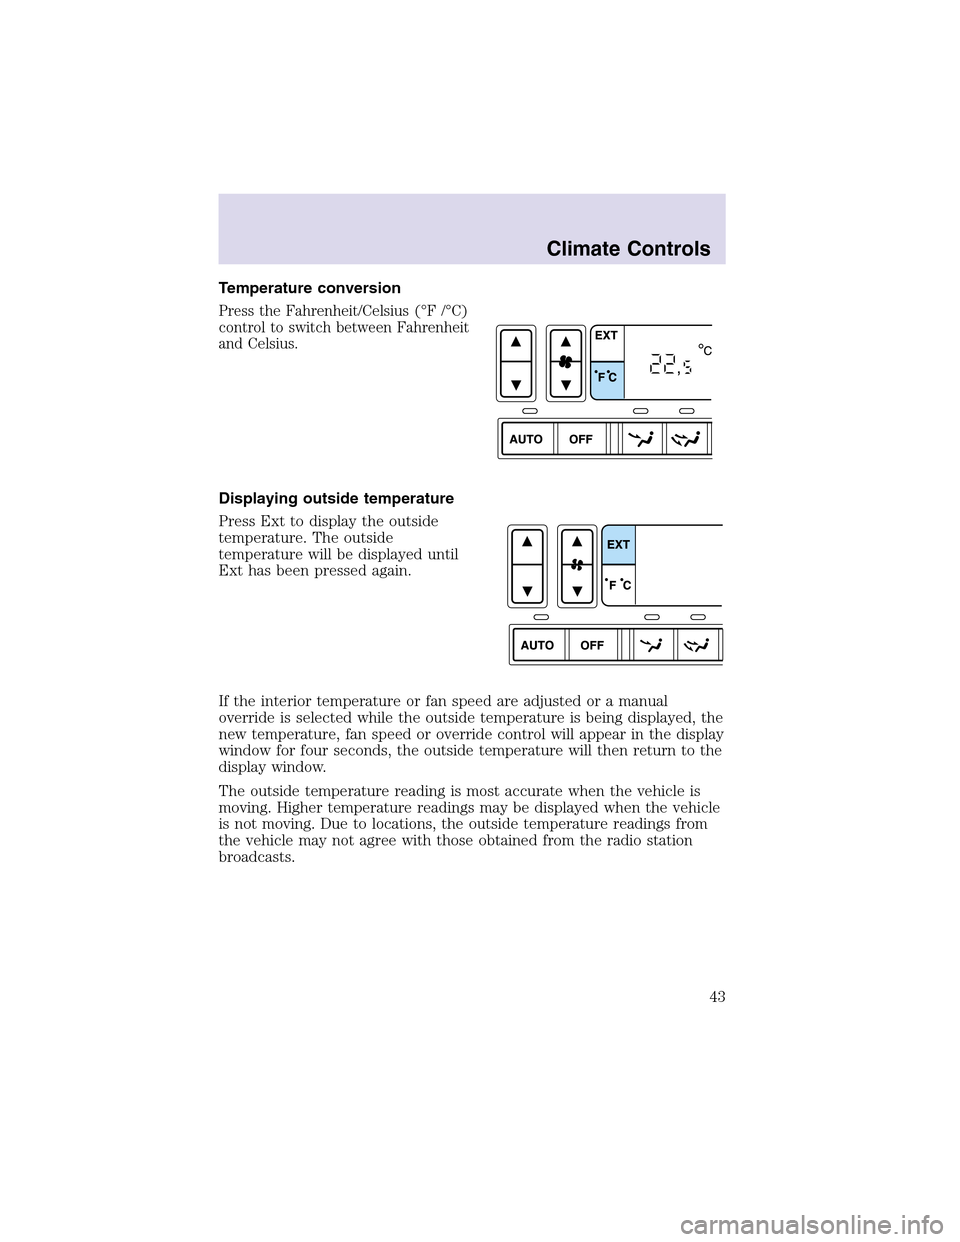
Temperature conversion
Press the Fahrenheit/Celsius (°F /°C)
control to switch between Fahrenheit
and Celsius.
Displaying outside temperature
Press Ext to display the outside
temperature. The outside
temperature will be displayed until
Ext has been pressed again.
If the interior temperature or fan speed are adjusted or a manual
override is selected while the outside temperature is being displayed, the
new temperature, fan speed or override control will appear in the display
window for four seconds, the outside temperature will then return to the
display window.
The outside temperature reading is most accurate when the vehicle is
moving. Higher temperature readings may be displayed when the vehicle
is not moving. Due to locations, the outside temperature readings from
the vehicle may not agree with those obtained from the radio station
broadcasts.
Climate Controls
43
Page 51 of 288
Autolamp exit time delay, manual sequence
This option allows you to change the length of the autolamp exit delay.
To program the auto lamp exit time delay:
1. Start with the ignition in OFF and the autolamps selected.
2. Deselect the auto lamps.
3. Put the ignition on RUN.
4. Put the ignition in OFF.
5. Select the autolamps.
•NOTE:Steps 2 through 5 must be performed within a 10 second
period.
•At this point, the headlamps and park lamps will turn on.
6. Deselect the auto lamps after the desired auto lamp delay time
(maximum of 3 minutes).
•At this point, the headlamps and park lamps will turn off.
The default for autolampexit delay time is 20 seconds. Following a
vehicle battery disconnect/reconnect auto lampdelay exit time will be
retained.
Autolamp exit time delay, message center sequence
This option allows you to change the length of time of the autolamp exit
delay using the message center. You will have the ability to change the
autolampexit delay time of the autolampON time when the instrument
cluster (IC) message center is enabled (ignition in run or accessory
position).
There are 8 distinct and separate set points or values for auto lamp delay
exit time in seconds. The following are predefined set points or auto
lampexit delay time values: 0, 10, 20, 30, 60, 90, 120, 180, seconds (i.e.
0 to 3 minutes).
The following steps are used to program the autolamp exit time delay
using the message center:
1. The message center will display the last autolamp exit delay time in
seconds.
2. You can respond to this message by 1 of 4 methods:
•No Response- The message center then times out after 4 seconds
and displays it’s normal text information.
•Press the info button- The message center then displays its normal
text information.
Lights
51