air suspension LINCOLN AVIATOR 2020 Owners Manual
[x] Cancel search | Manufacturer: LINCOLN, Model Year: 2020, Model line: AVIATOR, Model: LINCOLN AVIATOR 2020Pages: 609, PDF Size: 5.4 MB
Page 9 of 609
Selecting a Drive Mode
.............................306
Drive Modes .................................................
306
Load Carrying
Rear Under Floor Storage .........................
308
Luggage Covers ..........................................
308
Roof Racks and Load Carriers .................
309
Load Limit .......................................................
310
Air Suspension ..............................................
314
Towing
Towing a Trailer .............................................
316
Trailer Sway Control .....................................
317
Recommended Towing Weights ...............
317
Essential Towing Checks ...........................
319
Towing the Vehicle on Four Wheels .......
321
Driving Hints
Reduced Engine Performance .................
323
Economical Driving .....................................
323
Cold Weather Precautions ........................
324
Breaking-In ....................................................
324
Driving Through Water ..............................
324Floor Mats
.....................................................
325
Roadside Emergencies
Roadside Assistance ..................................
327
Hazard Flashers ...........................................
328
Fuel Shutoff ..................................................
328
Jump Starting the Vehicle .........................
329
Post-Crash Alert System .............................
331
Transporting the Vehicle ...........................
332
Customer Assistance
Getting the Services You Need ...............
333
In California (U.S. Only) ..............................
334
The Better Business Bureau (BBB) Auto Line Program (U.S. Only) .......................
335
Utilizing the Mediation/Arbitration Program (Canada Only) ..........................................
336
Getting Assistance Outside the U.S. and Canada .......................................................
337
Ordering Additional Owner's Literature ......................................................................
339
Reporting Safety Defects (U.S. Only) ......
340
Reporting Safety Defects (Canada Only) ......................................................................
340 Fuses
Fuse Specification Chart
...........................
342
Changing a Fuse .........................................
355
Maintenance
General Information ....................................
358
Opening and Closing the Hood ..............
358
Under Hood Overview ..............................
360
Engine Oil Dipstick ......................................
361
Engine Oil Check .........................................
361
Oil Change Indicator Reset ......................
362
Changing the Engine Air Filter ................
363
Engine Coolant Check ...............................
364
Automatic Transmission Fluid Check ......
369
Brake Fluid Check ......................................
369
Power Steering Fluid Check .....................
370
Changing the 12V Battery ..........................
371
Adjusting the Headlamps ..........................
373
Washer Fluid Check ....................................
375
Fuel Filter .......................................................
375
Checking the Wiper Blades ......................
375
6
Aviator (CTV) Canada/United States of America, enUSA, Edition date: 201902, Third-Printing- Table of Contents
Page 301 of 609
SPEED SIGN RECOGNITION (IF
EQUIPPED)
Principle of Operation WARNING:
You are responsible for
controlling your vehicle at all times. The
system is designed to be an aid and does
not relieve you of your responsibility to
drive with due care and attention. Failure
to follow this instruction could result in the
loss of control of your vehicle, personal
injury or death. WARNING: You must remain in your
vehicle when the system turns on. At all
times, you are responsible for controlling
your vehicle, supervising the system and
intervening, if required. Failure to take care
may result in the loss of control of your
vehicle, serious personal injury or death. WARNING:
The system may not
function if the sensor is blocked. The system detects recognizable traffic
signs, for example:
•
Speed limit signs.
• No overtaking signs.
• Speed limit cancellation signs.
• No overtaking cancellation signs.
It continuously monitors road signs to inform
you of the current maximum speed limit and
overtaking regulations. The sensor is behind
the interior rear view mirror.
Note: In cold and severe weather conditions
the system may not function. Rain, snow,
spray and large contrasts in lighting can all
prevent the sensor from functioning correctly.
Note: Do not carry out windshield repairs in
the immediate area surrounding the sensor.
Note: If your vehicle has a suspension kit
not approved by us, the system may not
correctly function.
Note: Always use original parts when
replacing headlamp bulbs. Other bulbs may
reduce system performance.
Note: The system may not detect all traffic
signs and may incorrectly read signs. Note:
Keep the windshield free from
obstructions, for example, bird droppings,
insects and snow or ice.
Note: If the system has navigation, traffic
sign data provided by the navigation system
contains information integrated to the data
carrier release.
Using Traffic Sign Recognition
Setting the System Speed Warning
The system has a number of speed warning
levels that you can set using the information
display. See General Information (page
130).
System Display
The system can display two traffic signs in
parallel.
You can view the status at any time using
the information display.
298
Aviator (CTV) Canada/United States of America, enUSA, Edition date: 201902, Third-Printing- Driving Aids
Page 309 of 609
WHAT IS DRIVE MODE CONTROL
The system delivers a driving experience
through a suite of sophisticated electronic
vehicle systems. These systems optimize
steering, handling and powertrain response.
This provides a single location to control
multiple systems performance settings.
Changing the drive mode automatically
changes the functionality of the following
systems:
•
Electronically power-assisted steering
system adjusts steering effort and feel
based on the mode you select. See
Steering (page 299).
• Electronic stability control and traction
control maintains your vehicle control in
adverse conditions or high performance
driving. See
Stability Control (page 246).
• Electronic throttle control enhances the
powertrain response to your driving
inputs.
• Transmission controls optimize with shift
schedules tuned to each mode.
• AWD settings become optimized and
tuned to each mode. The system automatically tailors your vehicle
configuration for each mode you select.
Note:
Not all settings, or modes, may be
available.
Note: The system has diagnostic checks that
continuously monitor the system for proper
operation. If a mode is unavailable due to a
system fault, the mode defaults to Normal.
SELECTING A DRIVE MODE
Note: Drive mode changes may not be
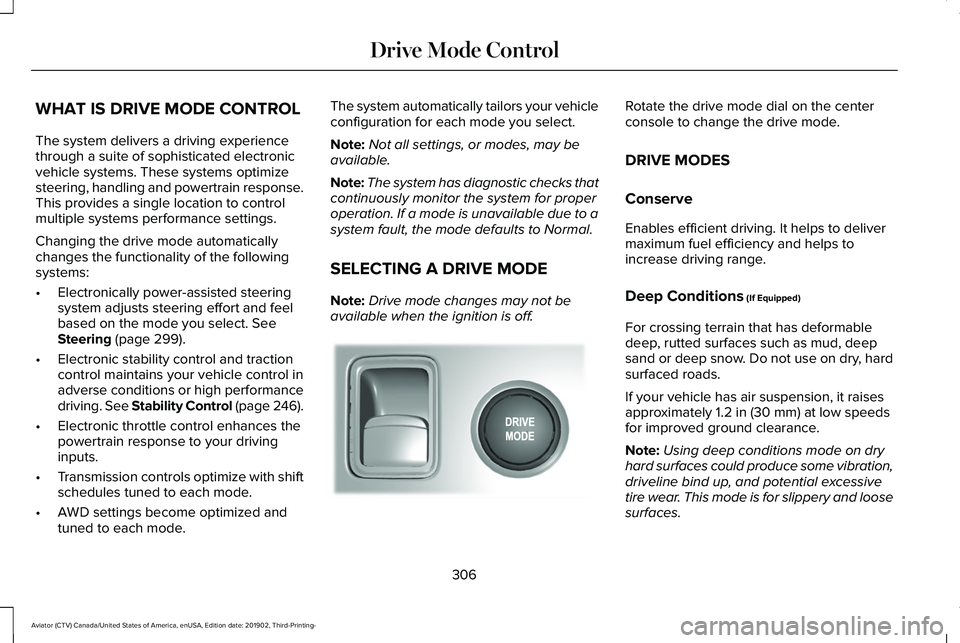
available when the ignition is off. Rotate the drive mode dial on the center
console to change the drive mode.
DRIVE MODES
Conserve
Enables efficient driving. It helps to deliver
maximum fuel efficiency and helps to
increase driving range.
Deep Conditions
(If Equipped)
For crossing terrain that has deformable
deep, rutted surfaces such as mud, deep
sand or deep snow. Do not use on dry, hard
surfaced roads.
If your vehicle has air suspension, it raises
approximately
1.2 in (30 mm) at low speeds
for improved ground clearance.
Note: Using deep conditions mode on dry
hard surfaces could produce some vibration,
driveline bind up, and potential excessive
tire wear. This mode is for slippery and loose
surfaces.
306
Aviator (CTV) Canada/United States of America, enUSA, Edition date: 201902, Third-Printing- Drive Mode ControlE297680
Page 310 of 609
Deep Sand (If Equipped)
For crossing deep soft and dry sand.
Note: Using deep sand mode on dry hard
surfaces could produce some vibration,
driveline bind up, and potential excessive
tire wear. This mode is for slippery and loose
surfaces.
Excite
For sporty on-road driving. This mode
increases throttle response, provides a more
dynamic powertrain sound and steering feel,
along with quicker shifting. If your vehicle
has excite, the suspension stiffens, with an
emphasis on handling and control. The
transmission also holds gears longer, helping
your vehicle accelerate faster when shifting
gears.
If your vehicle has air suspension, it lowers
approximately
0.6 in (15 mm) to improve
aerodynamics. Normal
For everyday driving. This mode is a perfect
balance of excitement, comfort and
convenience. This is the default mode after
each ignition cycle.
Slippery
For less than ideal road conditions, such as
snow or ice covered roads. Slippery mode
inspires confidence without taking away from
driving pleasure. Slippery mode lowers
throttle response and optimizes shifting for
slippery surfaces.
Note:
Using slippery mode on dry hard
surfaces could produce some vibration,
driveline bind up, and potential excessive
tire wear as the intent of this mode is for
slippery and loose surfaces.
307
Aviator (CTV) Canada/United States of America, enUSA, Edition date: 201902, Third-Printing- Drive Mode Control
Page 317 of 609
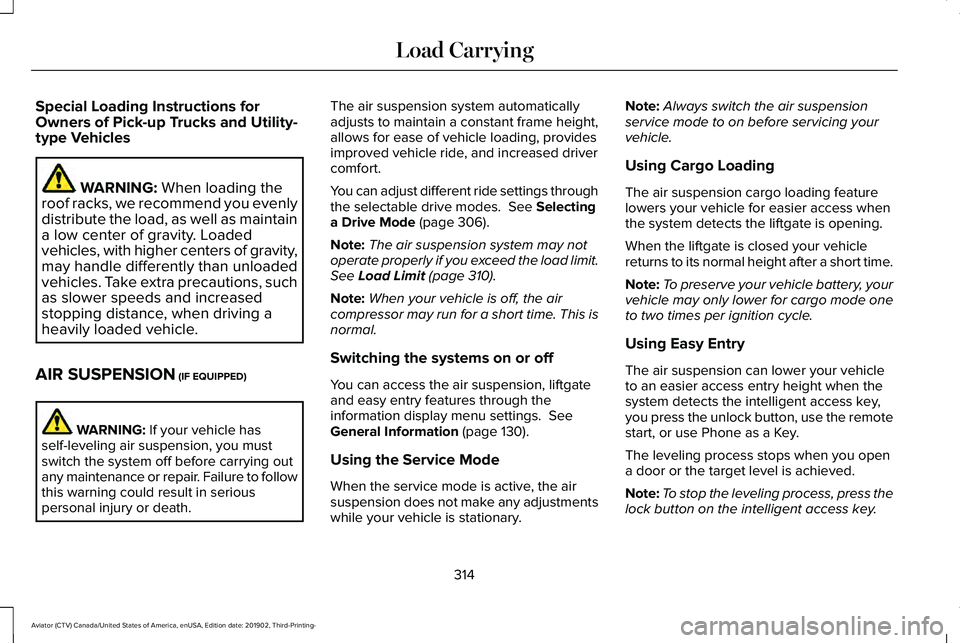
Special Loading Instructions for
Owners of Pick-up Trucks and Utility-
type Vehicles
WARNING: When loading the
roof racks, we recommend you evenly
distribute the load, as well as maintain
a low center of gravity. Loaded
vehicles, with higher centers of gravity,
may handle differently than unloaded
vehicles. Take extra precautions, such
as slower speeds and increased
stopping distance, when driving a
heavily loaded vehicle.
AIR SUSPENSION
(IF EQUIPPED) WARNING:
If your vehicle has
self-leveling air suspension, you must
switch the system off before carrying out
any maintenance or repair. Failure to follow
this warning could result in serious
personal injury or death. The air suspension system automatically
adjusts to maintain a constant frame height,
allows for ease of vehicle loading, provides
improved vehicle ride, and increased driver
comfort.
You can adjust different ride settings through
the selectable drive modes.
See Selecting
a Drive Mode (page 306).
Note: The air suspension system may not
operate properly if you exceed the load limit.
See
Load Limit (page 310).
Note: When your vehicle is off, the air
compressor may run for a short time. This is
normal.
Switching the systems on or off
You can access the air suspension, liftgate
and easy entry features through the
information display menu settings.
See
General Information (page 130).
Using the Service Mode
When the service mode is active, the air
suspension does not make any adjustments
while your vehicle is stationary. Note:
Always switch the air suspension
service mode to on before servicing your
vehicle.
Using Cargo Loading
The air suspension cargo loading feature
lowers your vehicle for easier access when
the system detects the liftgate is opening.
When the liftgate is closed your vehicle
returns to its normal height after a short time.
Note: To preserve your vehicle battery, your
vehicle may only lower for cargo mode one
to two times per ignition cycle.
Using Easy Entry
The air suspension can lower your vehicle
to an easier access entry height when the
system detects the intelligent access key,
you press the unlock button, use the remote
start, or use Phone as a Key.
The leveling process stops when you open
a door or the target level is achieved.
Note: To stop the leveling process, press the
lock button on the intelligent access key.
314
Aviator (CTV) Canada/United States of America, enUSA, Edition date: 201902, Third-Printing- Load Carrying
Page 350 of 609
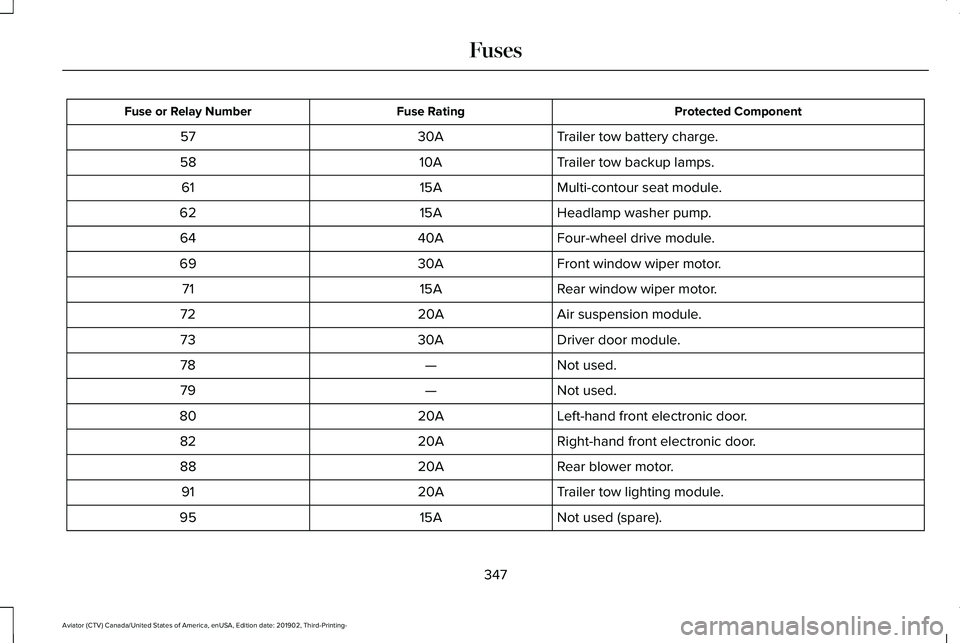
Protected Component
Fuse Rating
Fuse or Relay Number
Trailer tow battery charge.
30A
57
Trailer tow backup lamps.
10A
58
Multi-contour seat module.
15A
61
Headlamp washer pump.
15A
62
Four-wheel drive module.
40A
64
Front window wiper motor.
30A
69
Rear window wiper motor.
15A
71
Air suspension module.
20A
72
Driver door module.
30A
73
Not used.
—
78
Not used.
—
79
Left-hand front electronic door.
20A
80
Right-hand front electronic door.
20A
82
Rear blower motor.
20A
88
Trailer tow lighting module.
20A
91
Not used (spare).
15A
95
347
Aviator (CTV) Canada/United States of America, enUSA, Edition date: 201902, Third-Printing- Fuses
Page 351 of 609
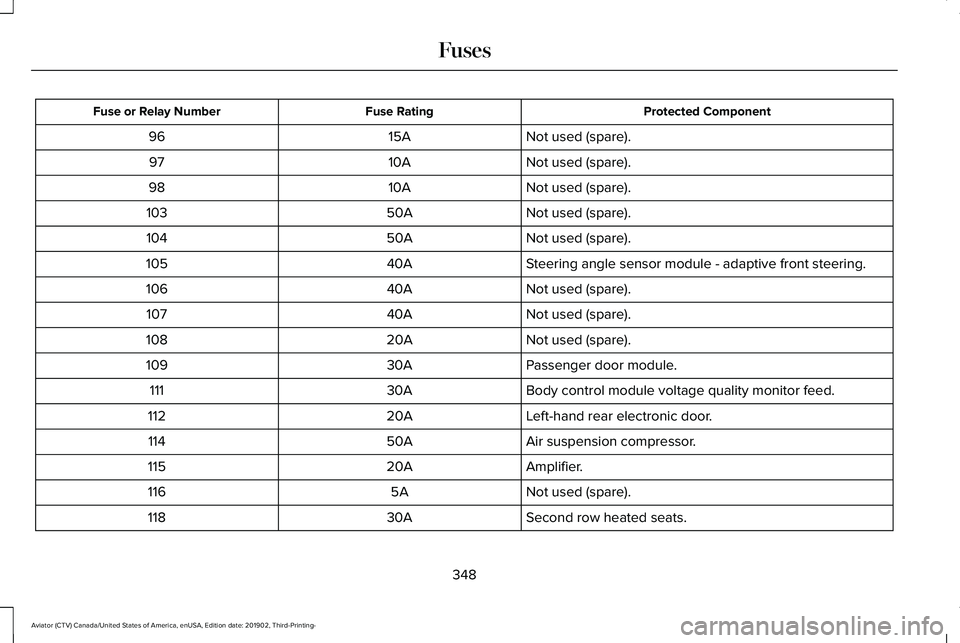
Protected Component
Fuse Rating
Fuse or Relay Number
Not used (spare).
15A
96
Not used (spare).
10A
97
Not used (spare).
10A
98
Not used (spare).
50A
103
Not used (spare).
50A
104
Steering angle sensor module - adaptive front steering.
40A
105
Not used (spare).
40A
106
Not used (spare).
40A
107
Not used (spare).
20A
108
Passenger door module.
30A
109
Body control module voltage quality monitor feed.
30A
111
Left-hand rear electronic door.
20A
112
Air suspension compressor.
50A
114
Amplifier.
20A
115
Not used (spare).
5A
116
Second row heated seats.
30A
118
348
Aviator (CTV) Canada/United States of America, enUSA, Edition date: 201902, Third-Printing- Fuses
Page 403 of 609
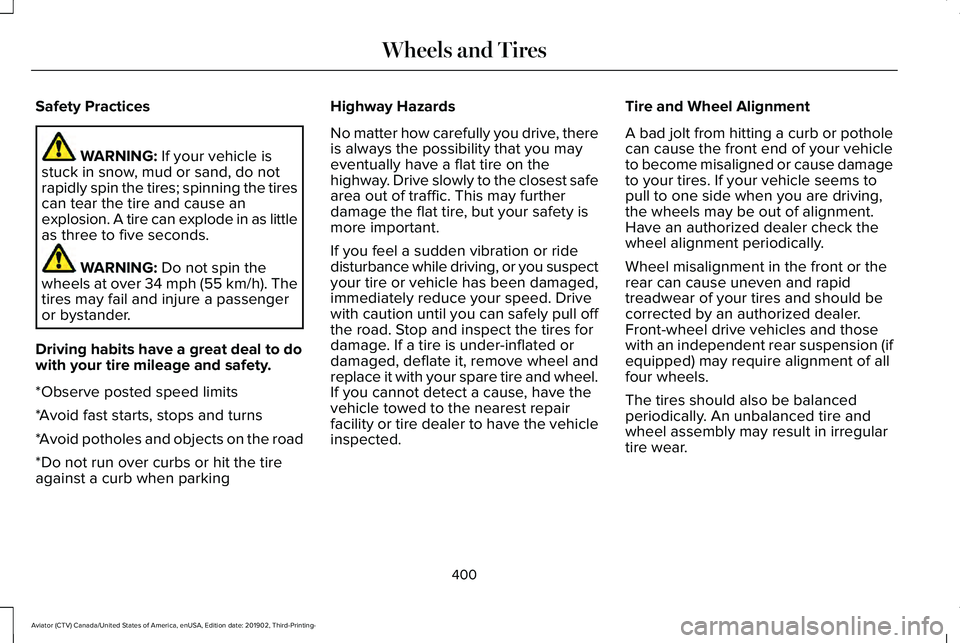
Safety Practices
WARNING: If your vehicle is
stuck in snow, mud or sand, do not
rapidly spin the tires; spinning the tires
can tear the tire and cause an
explosion. A tire can explode in as little
as three to five seconds. WARNING:
Do not spin the
wheels at over 34 mph (55 km/h). The
tires may fail and injure a passenger
or bystander.
Driving habits have a great deal to do
with your tire mileage and safety.
*Observe posted speed limits
*Avoid fast starts, stops and turns
*Avoid potholes and objects on the road
*Do not run over curbs or hit the tire
against a curb when parking Highway Hazards
No matter how carefully you drive, there
is always the possibility that you may
eventually have a flat tire on the
highway. Drive slowly to the closest safe
area out of traffic. This may further
damage the flat tire, but your safety is
more important.
If you feel a sudden vibration or ride
disturbance while driving, or you suspect
your tire or vehicle has been damaged,
immediately reduce your speed. Drive
with caution until you can safely pull off
the road. Stop and inspect the tires for
damage. If a tire is under-inflated or
damaged, deflate it, remove wheel and
replace it with your spare tire and wheel.
If you cannot detect a cause, have the
vehicle towed to the nearest repair
facility or tire dealer to have the vehicle
inspected.
Tire and Wheel Alignment
A bad jolt from hitting a curb or pothole
can cause the front end of your vehicle
to become misaligned or cause damage
to your tires. If your vehicle seems to
pull to one side when you are driving,
the wheels may be out of alignment.
Have an authorized dealer check the
wheel alignment periodically.
Wheel misalignment in the front or the
rear can cause uneven and rapid
treadwear of your tires and should be
corrected by an authorized dealer.
Front-wheel drive vehicles and those
with an independent rear suspension (if
equipped) may require alignment of all
four wheels.
The tires should also be balanced
periodically. An unbalanced tire and
wheel assembly may result in irregular
tire wear.
400
Aviator (CTV) Canada/United States of America, enUSA, Edition date: 201902, Third-Printing- Wheels and Tires
Page 405 of 609
conditions. Like any tire, summer tire
performance is affected by tire wear and
environmental conditions. If you must drive
in those conditions, we recommend using
Mud and Snow (M+S, M/S), All-season or
Snow tires.
Always store your summer tires indoors at
temperatures above 19°F (-7°C). The rubber
compounds used in these tires lose flexibility
and may develop surface cracks in the tread
area at temperatures below
19°F (-7°C). If the
tires have been subjected to 19°F (-7°C) or
less, warm them in a heated space to at least
41°F (5°C)
for at least 24 hours before
installing them on a vehicle, or moving the
vehicle with the tires installed, or checking
tire inflation. Do not place tires near heaters
or heating devices used to warm the room
where the tires are stored. Do not apply heat
or blow heated air directly on the tires.
Always inspect the tires after storage periods
and before use. USING SNOW CHAINS WARNING:
Do not exceed 30 mph
(50 km/h). Failure to follow this instruction
could result in the loss of control of your
vehicle, personal injury or death. WARNING:
Do not use snow chains
on snow-free roads. WARNING:
Only fit snow chains to
specified tires. WARNING:
If your vehicle is fitted
with wheel trims, remove them before
fitting snow chains. WARNING:
Snow tires must be the
same size, load index and speed rating as
those originally provided by Ford. Use of
any tire or wheel not recommended by
Ford can affect the safety and performance
of your vehicle, which could result in an
increased risk of loss of control, vehicle
rollover, personal injury and death.
Additionally, the use of non-recommended tires and wheels can cause steering,
suspension, axle, transfer case or power
transfer unit failure. Follow the Ford
recommended tire inflation pressure found
on the Safety Compliance Certification
Label (on the door hinge pillar, door latch
post or the door edge that meets the door
latch post, next to the driver seat), or Tire
Label on the B-Pillar or the edge of the
driver door. Failure to follow the tire
pressure recommendations can cause
uneven treadwear patterns and adversely
affect the way your vehicle handles.
Only use snow chains on rear wheels. Install
snow chains in pairs. Do not use
self-tensioning snow chains.
Only use snow chains on the following
specified tire sizes:
• 255/60R19
•Only install chains that are 10 mm or
less.
• 255/55R20
•Only install chains that are 10 mm or
less.
402
Aviator (CTV) Canada/United States of America, enUSA, Edition date: 201902, Third-Printing- Wheels and Tires
Page 417 of 609
WARNING: Always use the jack
provided as original equipment with your
vehicle. If using a jack other than the one
provided, make sure the jack capacity is
adequate for the vehicle weight, including
any vehicle cargo or modifications. If you
are unsure if the jack capacity is adequate,
contact the authorized dealer. WARNING:
Failure to follow these
guidelines could result in an increased risk
of loss of vehicle control, injury or death. WARNING:
Use only the specified
jacking points. If you use other positions,
you may damage the body, steering,
suspension, engine, braking system or the
fuel lines. WARNING:
Do not work on your
vehicle when the jack is the only support.
If the vehicle slips off the jack, you or
someone else could be seriously injured. WARNING:
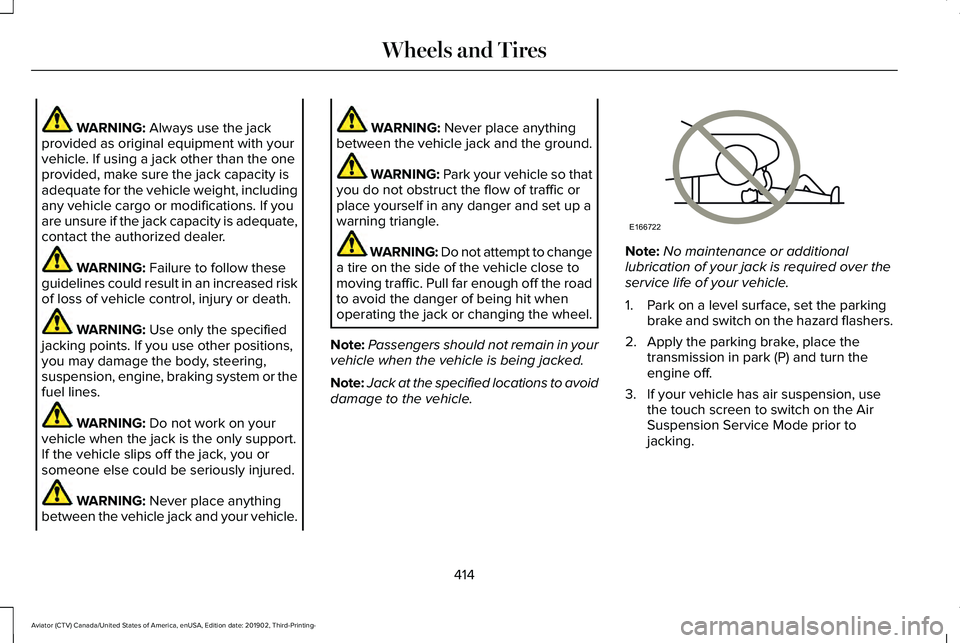
Never place anything
between the vehicle jack and your vehicle. WARNING:
Never place anything
between the vehicle jack and the ground. WARNING:
Park your vehicle so that
you do not obstruct the flow of traffic or
place yourself in any danger and set up a
warning triangle. WARNING: Do not attempt to change
a tire on the side of the vehicle close to
moving traffic. Pull far enough off the road
to avoid the danger of being hit when
operating the jack or changing the wheel.
Note: Passengers should not remain in your
vehicle when the vehicle is being jacked.
Note: Jack at the specified locations to avoid
damage to the vehicle. Note:
No maintenance or additional
lubrication of your jack is required over the
service life of your vehicle.
1. Park on a level surface, set the parking brake and switch on the hazard flashers.
2. Apply the parking brake, place the transmission in park (P) and turn the
engine off.
3. If your vehicle has air suspension, use the touch screen to switch on the Air
Suspension Service Mode prior to
jacking.
414
Aviator (CTV) Canada/United States of America, enUSA, Edition date: 201902, Third-Printing- Wheels and TiresE166722